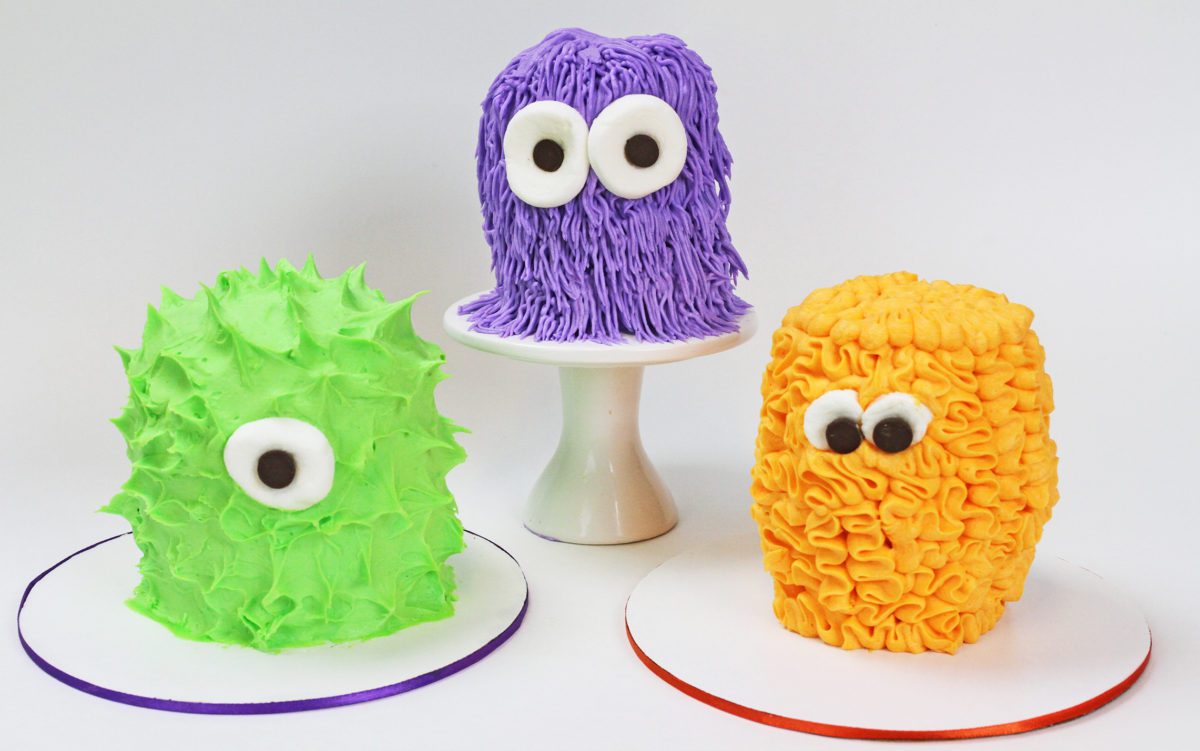
In this tutorial I’ll show you how to make these adorable little monster cakes in less than 10 minutes with just 4 ingredients! You don’t need any cake decorating experience for these, or any special tools – I’ll show you two techniques with a piping bag and one without. If you prefer to watch a video of this tutorial, scroll to the bottom of the page.
You’ll need 2 cupcakes for each cake. Peel the wrappers off the cupcakes and you can use the cupcakes as they are or if you want more layers inside your cake, cut them in half horizontally with a serrated knife like a bread knife. That way you’ll have 4 layers.

You can assemble your cake on a cake board like this little cardboard disc, or on a plate. (You definitely don’t need a turntable for this!) Pipe or spread a little bit of buttercream onto the board or plate and press your first cupcake down onto it.

This attaches it and holds the cake in place. Check that it’s in the middle of the board and spread or pipe some buttercream on top, or any other filling you want to use.

Press the next cupcake down onto the filling, checking it from all sides to make sure it’s lined up straight on top of the previous layer so that the cake isn’t leaning to one side.

To assemble your cake on a plate or cake stand or cupcake pedestal, follow the same steps: secure the first cupcake with a dot of buttercream, center it, pipe filling on top and press the next cupcake layer onto it.

If you choose to cut your cupcakes in half to create more layers, continue layering cupcake and filling to assemble your cake. I’m only using 3 of the 4 cupcake halves for this monster because it’s tall enough like this. Spin the cake around and adjust it so it’s straight, and this is really important if you don’t want your cake to topple over later!

I really recommend putting your cake in the fridge or freezer for 30 minutes to chill this before continuing, and I’ll show you why in a minute. Meanwhile, make the eyes. All you’ll need is 1 marshmallow and 2 chocolate chips and a pair of scissors.

Cut off both ends of the marshmallow, thin enough so the eyes won’t bulge out of the monster but thick enough so that you can lift it up and work with it.

Use the end of a scissor blade or you can use a sharp knife to poke a hole in the middle of the marshmallow circles, or wherever you want the eyeball to be. Then poke the tip of a chocolate chip into the hole so that the flat base of the chocolate chip becomes the eyeball.

The chocolate chips will stick out now because they has nothing to grip onto but when you attach the eyes to the cake later, you’ll press the chocolate chips into the frosting and they’ll stick to it and the eyeballs will flatten against the marshmallows.

If you want the eyes to be smaller you can use mini marshmallows or use the end of a piping tip like a cookie cutter, cutting a smaller circle out. Poke a hole in each marshmallow and press a chocolate chip into it.

Colour some frosting, about a cup for each monster, and I use gel food colours to get really bright colours because they’re much more concentrated than liquid colours so they won’t make your frosting too runny.

Once your cake layers are cold, cover the cake in a thin layer of frosting. This is called a crumb coat and its purpose is to trap any crumbs that come off the cake, so that they stay in this layer of frosting and don’t get into the final layer of frosting.

The other purpose is to lock the moisture into the cake, so you need to completely cover the cake up with this layer of frosting, all the way down to the very bottom of the cake. This is especially important if you’re piping on your final layer of frosting, which we’re going to do for two of these these monsters.

That’s because piped frosting doesn’t completely cover up the cake so if you don’t do a crumb coat, the cake cake will be exposed and it will dry out. Smooth the frosting as much as you like – we’re going to frost over it so it doesn’t need to be very neat.

If you don’t chill your cake before you frost it, when you spread frosting onto the cake it will wobble from side to side and you’ll have to hold it in place so it doesn’t fall over. Cakes are much softer at room temperature than when they’re cold, so the pressure from the spatula pushes the cake sideways.

Also, the dot of buttercream at the bottom of the cake and the filling in between the layers is at room temperature for this cake, which means it’s soft and slippery. If you chill the cake, the buttercream sets and holds the cake layers still, so they won’t slide around.

When you finish frosting the cake, wipe and smudges of frosting off the cake board or plate or cake stand, using a paper towel wrapped around your finger. I like to put my cake in the fridge or freezer while I prepare my piping bag, to set the crumb coat to make frosting over it easier and neater.

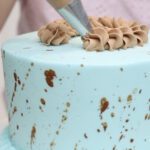
I’m going to decorate two of these monsters with piping bags and one without. I’ll be using this #102 petal tip for my orange monster.

Drop the piping tip into a piping bag and drop the piping bag into a glass, folding it over the rim of the glass before you fill it with buttercream. This keeps the top fo the piping bag clean so you won’t get frosting all over your hands.

Spoon the frosting into the bag and then unfold the bag from the glass and push the frosting down to the end of the bag. There’s a wide end and a narrow end on this tip and you need to keep the wider end pressed against the cake as you pipe.

Start at the bottom of the cake and apply pressure to the piping bag to squeeze out the frosting, and wiggle the bag from side to side or up and down to pipe random ruffles of frosting. Work your way up the cake, piping a section at a time and then pulling the piping bag away to re-position it.

It doesn’t matter whether you pipe in rings around the cake or sections going up the sides but what’s important is that you always start at the bottom of the cake. If you pipe from the top to the bottom, when you get to the bottom it will be really difficult to angle the piping bag to pipe ruffles over the bottom section of the cake because the cake board or plate will be in the way.

You might see the crumb coat through the piping in places and because of that, it’s best to use the same colour of frosting for your crumb coat as you use for this piped frosting. You can use any kind of frosting for this – whipped cream, a meringue buttercream, ganache, or my 4 Minute Buttercream, which is what I’m using.

Continue onto the top of the cake, piping from one side of the top to the other. Don’t pipe all around the edge and work your way in because it will be difficult to pipe over the middle section of the cupcake without damaging the ruffles you’ve already piped around the edges.

When you’ve piped ruffles all over the cake, press the eyes into the side of the cake, pushing firmly to wedge the chocolate chips into the frosting on the cake so that they don’t poke out of the marshmallow.

For the next little monster I’m using a grass tip to make fur. Before you start piping, twist the end of the bag and that will stop the frosting oozing out of the top of the bag and it will save your wrist because you’ll need a lot less pressure to squeeze the buttercream out, than if you’re squeezing a squishy bag and pushing the buttercream back out of the top of the bag as well as down towards the piping tip.

Do a quick test to make sure the buttercream comes out of all of the holes in the tip and if it doesn’t, your frosting is either too stiff or it has lumps in it. I have a tutorial troubleshooting 25 questions about buttercream like lumps and consistency.

Start just above at the bottom of the cake, squeezing the frosting out and after it attaches to the cake, flick your wrist downwards to pull the strings of buttercream down and release your pressure on the back as you pull it away from the cake to leave neat ends to the strings.

It’s okay if the top part of each section is wiggly and messy because we’re going to cover that up with more piping. When you’ve gone all around the cake, move your piping bag up to start the next row just above the top of the previous row. You should cover up the top of the previous row, overlapping the frosting to make it look like shaggy fur.

If the top of the piping sticks out a lot from the cake, or if you’re worried about it sliding down the cake because it’s hot outside, it’s a good idea to press it gently into the cake, using the back of a spoon or an offset spatula, swiping upwards to smooth the top of the piping out and also press it against the cake so it’s more secure and stable.

I love both of the piping techniques for these monsters because you can’t mess it up – the styles are whimsical and messy so you can have fun with them instead of concentrating on lining things up perfectly or replicating a precise motion.

Pipe all the way up the sides of the cake and continue onto the top of the cake, piping all the way to the center of the top. Press the eyes into the frosting straight away, while the frosting is still soft so the eyes will stick to it.

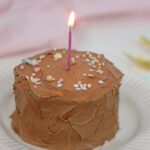
And there they are! Cute little monster cakes using only 4 ingredients: cupcakes, frosting, a marshmallow and chocolate chips. Fun sidenote – I made these monsters for my son’s first birthday… Monster Max!

I like to keep my cakes in the fridge so that the frosting and decorations hold their shape. I take these tiny cakes out about an hour before serving them, which is enough time for the cake and frosting to come to room temperature and get nice and soft and delicious, but it’s not so much time that the frosting will start to droop or melt if it’s hot.

Here’s the video version of this tutorial: