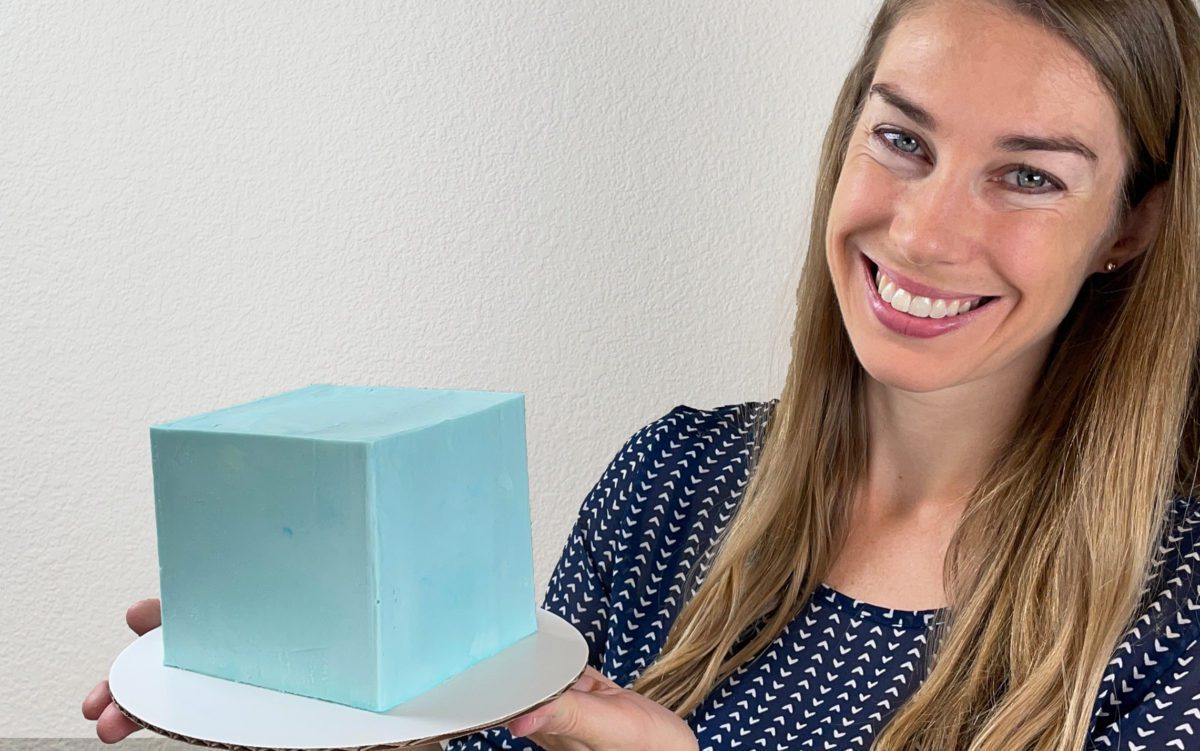
Square cakes are so time consuming to frost that I hardly ever used to make them, but with this simple technique using any cardboard box you can frost square cakes quickly and neatly, with super sharp edges and corners, with no special tools! If you prefer to watch a video of this tutorial, scroll to the bottom of the page.
1. Bake your cake
Bake your cake layers in square pans or if you don’t have those you can use a sheet pan and cut the rectangular cake into squares, like this. I used an 8″ x 12″ pan and divided the cake in half down the short side and in 3 along the long side.
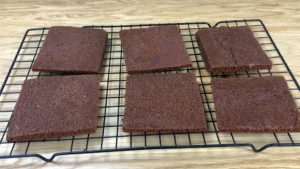
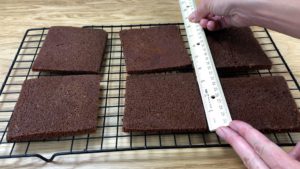
The square cake layers don’t have to be exactly the same size – a difference of a few millimeters is fine because it will be filled in with frosting later. Measure the squares of cake, choosing the largest one if there’s a bit of a variation. Mine are 4 inches by 4 inches.
2. Choose a box
Any box will work for this as long as it’s made of cardboard so it doesn’t bend or droop because it needs to stay flat. Stickers or writing or packing tape on the box are fine because we’re going to wrap it up so it’s safe to use next to food.
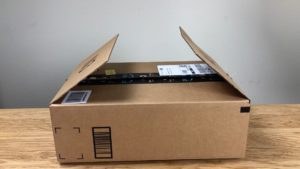
You can use any part of the box but I like to side flaps because you have to do a minimal amount cutting. You’ll need to cut out three squares from the box and I’ll show you next how to measure them.
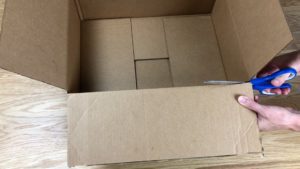
3. Measure and wrap your cardboard box squares
You’ll need to measure and cut three squares out of your cardboard box. Position a ruler so that the base is pressed against any straight edge of the box, which is any edge you haven’t yet cut. This will make sure the ruler is at right angles to that edge. Draw along the ruler to mark out the first edge of your square.
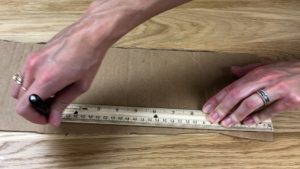
Now draw a line in the opposite direction for the next edge. If you have one of those triangular rulers to measure right angles, that will help you draw out a perfect square but if you don’t have one, a regular ruler is fine. The ridges along this cardboard are a helpful guide to make sure this line is at right angles to the first line.
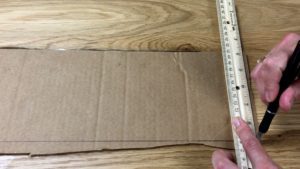
Measure from one line the exact width of the cake layer (so 4” for this cake) and mark a little line on the cardboard. Move the ruler a bit further up and do the same again, and this will make sure the next line is at rightangles to make a perfect square. Draw a line connecting the two little lines.
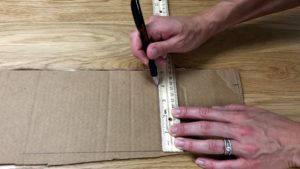
For the last line, measure the same distance, drawing another two lines, and connect those to finish the square. Cut the square out carefully, making sure the sides are smooth and the corners are sharp, not rounded.
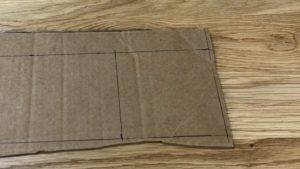
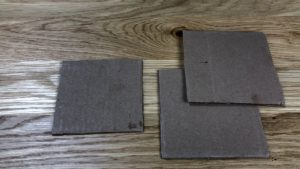
Follow the same steps to draw two more squares, and these both need to be the same size, which can be whatever you choose as long as it’s between 1/2 an inch and an inch bigger than the width of your cake. I recommend 3/4 of an inch and I’ll show you why when I frost the cake.
To make these cardboard box squares food safe and to give them even smoother edges we’re going to wrap them very tightly with parchment paper. Fold two opposite sides over the square and tape them down, pulling the parchment as tightly as you can so the snuggest fit so there are no wrinkles and that will give you the straightest sides and sharpest corners on your cake.
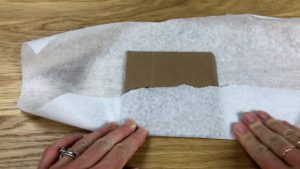
Trim the ends off the parchment if they’re really long, like mine are.
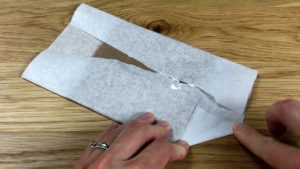
and then wrap up the square the same way as you’d wrap a present in a box, folding triangles at each side and then flipping the end section over the square, making sure the corners line up to make a sharp point, and tape them down. Now you’ll have a perfect square, wrapped up neatly so it’s clean and smooth.
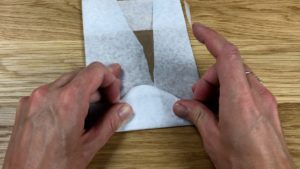
Wrap all three cardboard box squares up like this, so you’ll have a square the same size as the cake, which the cake will sit on, and two slightly bigger squares which will be your guides around the edge of the cake of how much frosting you need, and will also guide your frosting smoother to get smooth sides on the frosting. The gap in between the cardboard box squares in the this photo is where the cake will go.
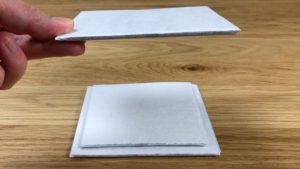
If you hold a cake layer up against one of the larger cardboard box squares, there should be at least 1/2 an inch of board visible all around the edge of the cake or ideally 3/4 of an inch. This will be filling in with frosting after you assemble your cake.
4. Assemble your cake
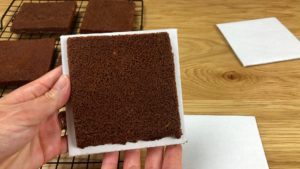
Starting with just the small square, spread or pipe a little bit of buttercream onto the square and press your first layer of cake onto it. The dot of buttercream on the cake board at the bottom of the cake is really important because it holds the entire cake in place while you frost it.
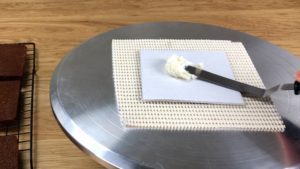
Spread or pipe buttercream (or whatever filling you’re using) on top of the first layer of cake and then continue layering cake and filling to assemble your cake. Line your cake layers up directly over each other so that the cake is straight and not leaning over sideways.
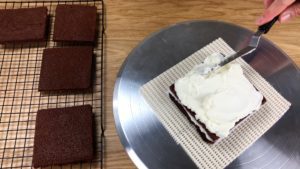
5. Frost your cake with a crumb coat
Chill the cake in the fridge for about an hour so that the cake firms up and is less crumbly, and then spread frosting all over it. This layer of frosting is called a crumb coat and it’s going to cover the cake completely to trap any crumbs that come off the cake now, so that they don’t get into the final coat of frosting.
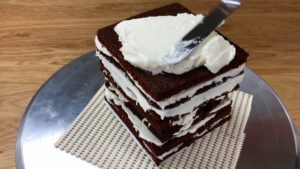
I like to frost the cake on a larger cake board and I use a ring of tape or a non-slip mat to attach the cake on it’s smaller cake board to this larger cake board.
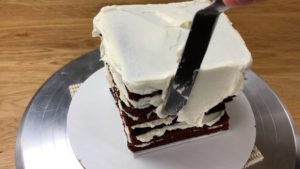
The frosting doesn’t need to be neat but it does need to cover the top of the cake and the sides all the way from the top down to the bottom where the cake is sitting on the cake board. There should be no exposed cake because that will allow crumbs to get into the final coat of frosting.
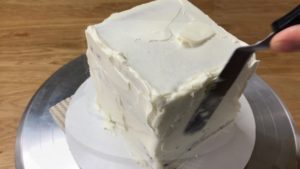
Smooth the crumb coat of frosting, scraping with your frosting smoother from one side to the middle and then from the other side to the middle, because if you scrape all the way across a side your frosting smoother can pull off the frosting off the second edge with it.
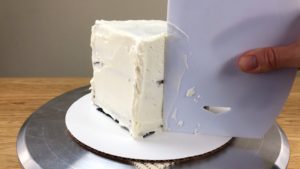
The crumb coat needs to be quite thin and without any lumps of frosting sticking out, because those might poke through the final coat of frosting later. Let the crumb coat set for 30 minutes in the fridge before you apply your final coat of frosting.
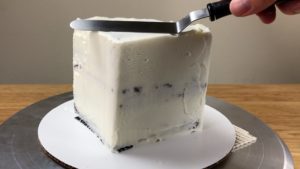
When the cake is cold and the frosting has set, take the cake out of the fridge and slide an offset spatula underneath the cake to separate it from the large cake board. Twist the spatula to raise the cake board and lift the cake up, still on the little cardboard box square.
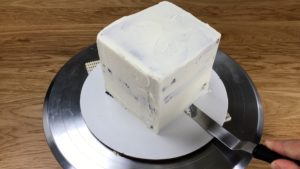
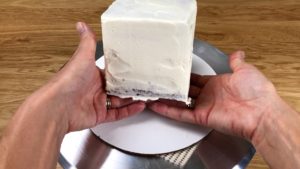
You’ll be able to touch the frosting on the cake because it will be firm, so if you need to you can press a finger or thumb against the side of the cake to balance it as you lift it up. Set the cake aside for a moment.
6. Attach cardboard box squares to the cake
Put one of the large squares down on the turntable, on top of a larger cake board to catch any frosting that you spread over the edges of the cardboard box square. You can attach the large cake board to the turntable and then cardboard box square to the large cake board with rings of masking tape or small pieces of a non-slip mat. Place a ring of tap on top of the cardboard box square, too.
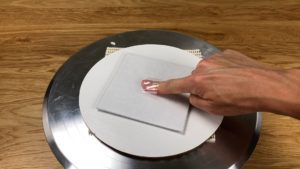
Press the cake on its small square down onto the large cardboard box square at it will stick to the tape you placed there. Center the cake in the middle of the larger cardboard box square. If you’re going to use a different colour for the final coat of frosting, mix that now.
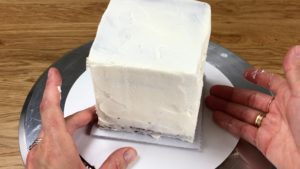
To frost the cake, start with the top and spread on a generous amount of frosting, making sure it goes all the way over the edges of the cake to prevent air bubbles later. Add some extra frosting to the corners since those are the areas where the frosting typically droops.
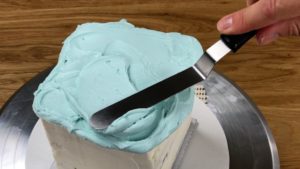
Don’t worry about getting this frosting smooth. Place your other large square on top of the frosting, lining it up as well as you can over the bottom square so that each corner of the cardboard box square on top of the cake is directly on top of the corner of the cardboard box square below the cake.
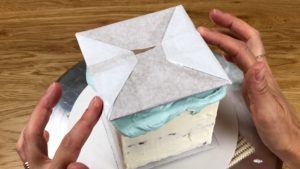
Use your frosting smoother to make sure the cardboard box squares are lined up by resting the base of the frosting smoother down on the cake board and then pushing it gently towards the cake so that it touches the edges of both the top and bottom square. Adjust the top square by pushing it slightly if necessary.
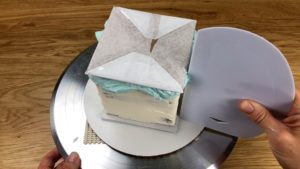
When you’re happy with the position of the square, push down firmly to secure the square to the frosting on the cake. There will probably be gaps of air around the corners and that’s fine for now.
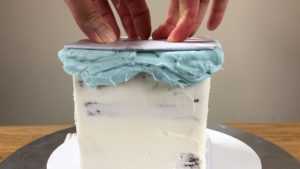

Use the edge of your frosting smoother to press against the sides of the cardboard box square to check it’s still lined up over the bottom square.


Then do a double check that it is by scraping once around the cake. What you’re checking for here is that when your frosting smoother glides around the cake pressed against the edges of the cardboard squares, it isn’t knocking against the crumb coat of the cake, it’s only touching the cardboard squares. Adjust the top square if you need to.
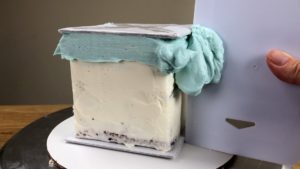

7. Frost your cake
Now cover the sides of the cake with frosting. Be generous with the frosting – you want it to fill in the gap all the way from the sides the cake to the outer edge of the cardboard box squares.
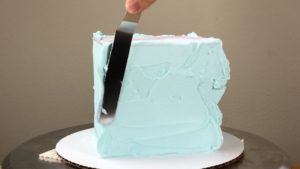

Start smoothing the frosting the same way you did for the crumb coat, scraping from one edge of the cake towards the middle and then swiping your frosting smoother away instead of going all the way to the other edge of the cake. Scrape back in the opposite direction from the other edge, back into the middle.
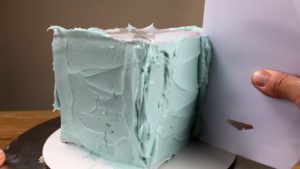

We’re going to do a second round of frosting so this doesn’t need to be perfect but you don’t want any lumps of frosting sticking out. We’re going to chill this first round of frosting and those lumps will get hard and if they stick out beyond the cardboard box squares, your frosting smoother will bump against them and you’ll get bulges in your final coat of frosting.
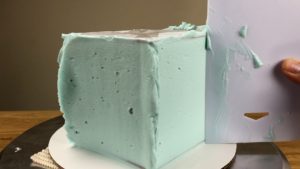

You can see the white crumb coat through the blue frosting here and that means I haven’t spread enough blue frosting onto the cake. It’s fine for now because we’re going to add more frosting next, after chilling the cake for about 30 minutes.
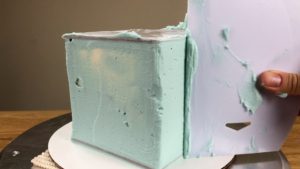

Chilling the cake sets the frosting that’s on the cake, so when you spread more frosting on it will build on top of what’s already there, instead of weighing down on the existing frosting and dragging it down. This is especially important for large cakes, where the amount of frosting on the sides of the cake is quite heavy.
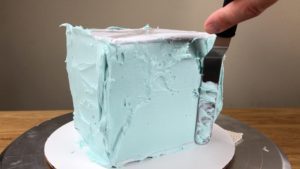

When you’ve already got a smoothish base of frosting on the cake, this final round is much easier to apply thickly enough and to get really smooth. Completely cover up the sides of the cake and then smooth with your frosting smoother, going from one edge to the middle and then the other edge to the middle.
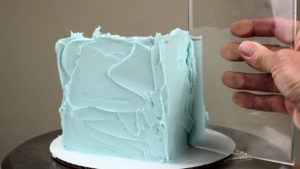

I’m using my acrylic smoother for this final coat because it gives a smoother finish to buttercream than my thin, plastic smoother. Always go from one edge to the middle and then back the other way, never all the way over because if you go past the second edge, your frosting smoother might pull frosting off that corner.
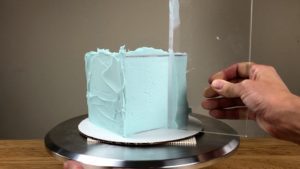

The squares of the cardboard box that I’m using for this cake are 4 1/2 inches wide and the cake layers are 4 inches, so the cardboard is 1/2 inch bigger than the cake. I recommend cutting your squares 3/4 inch bigger than the cake because any less than that, if your cake layers aren’t exactly the same size and perfectly lined up the crumb coat might show through the frosting in areas. If you cut the squares much bigger, like a full inch bigger than the cake, you’ll have a LOT of frosting on your cake.


As you smooth, if you see any air pockets or bubbles in the frosting or you expose the crumb coat anywhere, just spread on some more frosting and smooth over that side again. Do as many touch ups as you need, spreading more frosting over any imperfections and scraping over them again until you’re happy with the sides. Pay special attention to the corners because I think sharp corners are what make square cakes look so impressive.
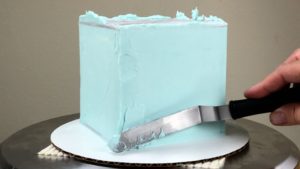

8. Remove cardboard box squares
When you’re happy with the sides, don’t lift the top square off yet! The frosting needs to be really cold and hard before you do, otherwise the square will pull up any soft frosting with it and ruin the smoothness. Put the cake back in the fridge one more time for about 30 minutes and then use a sharp knife to separate the top cardboard box square.
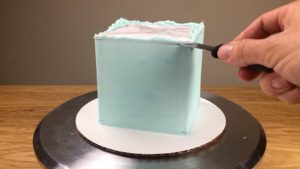

Push the tip of the knife just under the square and work your way around the whole cake to slice it free. Lift it up and the frosting won’t be perfect yet, but it will be very smooth except for maybe a few air pockets and some extra buttercream sticking up over the top edge.
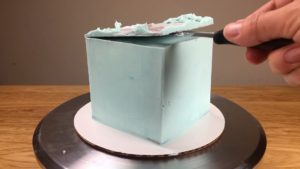

You can trim any uneven buttercream sticking up with your knife and smooth over the top edges with your frosting smoother or offset spatula. I have some air pockets in the top of the cake and I’ll show you how to fix those in a minute.
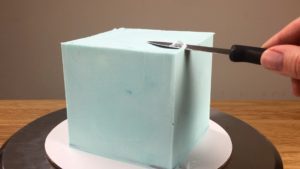

You can see the cardboard box square at the bottom of the cake, because its purpose is to be a guide for your frosting smoother so you scrape the frosting off right up to it and that leaves it visible. If you’re going to cover the bottom part cake with decorations, like a border piped with buttercream or pressing sprinkles into the frosting, you can leave the cake on the bottom square.
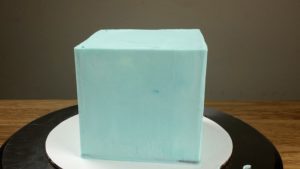

But if you’re not going to cover it up, you can take it off the same way you took off the square on top of the cake. Slide a knife under the visible square and cut all the way around the cake. Your knife will be in between the big square and the little square, which the cake is sitting on and because of that dot of buttercream you spread on right at the beginning, the cake is still attached to that little square.
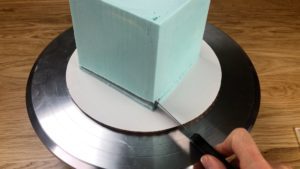

Angle your knife sideways to lift the cake up so that you can reach underneath it and pull off the piece of tape that was sticking the small square to the large square. Then use your knife (or an offset spatula is easier) to raise the cake up on its small square.
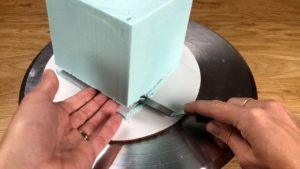

Slip your other hand underneath to cake to lift the cake off the cake board. Place a ring of tape on your final cake board that the cake is going to be served on, and lower the cake down onto that. The frosting will still be cold and hard from the fridge so it’s okay if you touch the sides of the cake while you’re doing this.
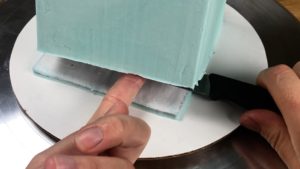

Tidy up the bottom edge by smoothing over it with your offset spatula or frosting smoother to smooth any rugged buttercream where you cut around the cake.
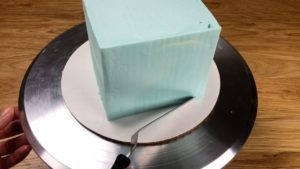

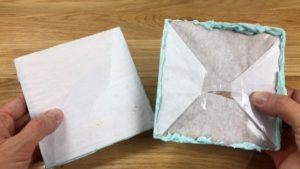
You can save the cardboard box squares to use for another cake – just unwrap them and re-wrap them with clean parchment.

9. Tidy up any imperfections
If there are any air pockets in the frosting on top or your cake, probably near the corners, spread on a bit more frosting to fill the holes it and smooth over it with your offset spatula or frosting smoother. You might need to go around the sides again too, if the frosting you spread on now goes over the edges of the cake and sticks out over the sides.
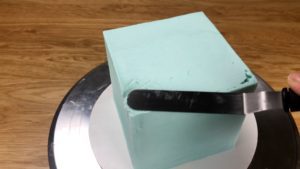

Now I’ll point out a few imperfections on this cake and how you can avoid or fix them. First of all, this little dot of dark blue here is gel food colour that I didn’t mix properly into the frosting.
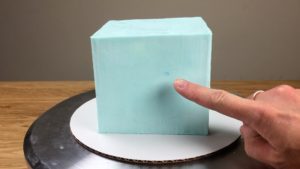

Here there’s a dent in the frosting on the top right, an air pocket, where the frosting on the cake wasn’t as thick as it was over the rest of the cake. There are some little air bubbles on the bottom left, too. You can spread some more frosting over these parts and smooth over just that section again.
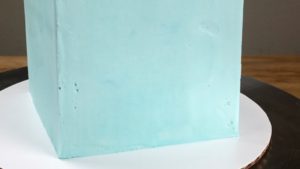

This white part here is where the crumb coat is showing through, so I probably could have used slightly bigger squares than I did. And the ridges you see in the frosting on this side, the faint lines, are caused by ridges in the cardboard cake board because it’s corrugated under the top lining, and to avoid this you can frost a cake on a smoother surface like an acrylic disc.
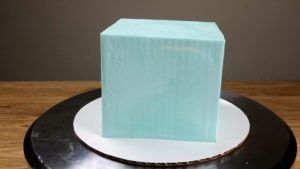

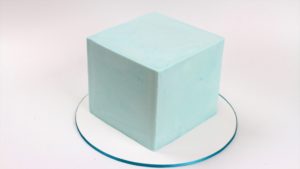
So you can avoid or fix all of these imperfection but even with them, I think this square cake looks stunning and I love the smooth sides and the sharpness of the angles at the edges and corners. Once you add decorations you won’t notice these little details and no one will know you use something as simple as a cardboard box to frost your cake!

I hope you’ve found this tutorial useful! I’d love to hear what you think in the comments below. If you want to try frosting a square cake without cardboard box squares, click here to watch how to do that!
Here’s the video version of this tutorial:


Thank you! This is one of the best step by step guides I have ever read. I’m making a square cake and this is so helpful! Thank you
So nice to hear it's useful! Thanks for your lovely comment!