Up next in 10


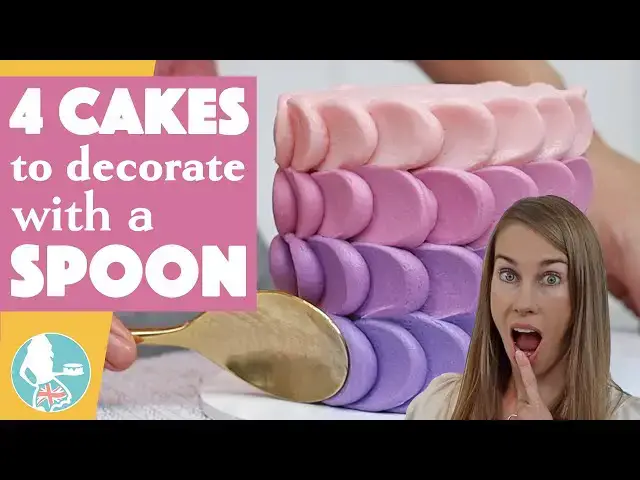
No special tools required! Decorate a cake with four gorgeous textures using a simple spoon. In this cake decorating tutorial I'll show you step by step how to decorate these 4 cakes:
0:08 Vertical "swooshes"
1:26 Rustic horizontal grooves
3:15 Curved texture
4:31 Scalloped texture
*Start your FREE 7 day trial on my cake school
https://britishgirlbakes.teachable.com/p/all-you-can-cake/
*LEARN The Basics of Cake and The Basics of Buttercream in my most popular online courses!
https://britishgirlbakes.teachable.com/
*My 4 Minute Buttercream recipe
https://www.britishgirlbakes.com/recipes/buttercream-frosting/
*My tutorial on 5 Easy Cake Toppers
https://youtu.be/3kBDaolTkAY
*READ a written version of this tutorial (with photos!)
https://www.britishgirlbakes.com/cake-decorating-with-a-spoon/
Show More Show Less View Video Transcript
0:00
Using a simple spoon, let's decorate cakes four ways with beautifully textured frosting
0:08
This first technique is great if you struggle with getting your frosting super smooth
0:13
Spread frosting onto your cake as normal and smooth it with a cake comb, but don't worry about indents or air pockets or imperfections. Just focus on pressing your cake comb down
0:22
on the cake to line it up straight against the cake, so that the sides of the cake are straight
0:27
tidy up the top edge but again don't worry about getting it perfect because we're going to add texture now with a spoon
0:33
watch how the spoon covers up this seam in the frosting and it'll cover up the air pocket next to it in a moment
0:39
hold the spoon with the back against the frosting and press lightly against the cake as you drag the spoon up the side
0:46
it will smooth the frosting as the curve of the spoon adds texture with these swishes and the spoon will also pull the frosting into a peak up above the top edge so that's why it doesn't matter if the top
0:57
top edge of your cake is perfectly straight and level because now you have this gorgeous texture creating a new top edge
1:03
Here's a secret for all of these techniques. Heat your spoon. If you dip the spoon into a glass of hot water every minute or so, it will keep the spoon hot and that will help smooth the frosting and prevent air bubbles in the frosting
1:16
Dry the spoon after dipping it in the water so it doesn't drip onto the frosting
1:21
With a hot spoon you can create neat texture and perfect the frosting at the same time. Here's a
1:27
another way to create texture with a spoon after frosting your cake. Just like with the last technique, don't worry about getting perfectly smooth frosting or sharp edges around the top of the cake
1:37
because this texture is going to cover all of that up. Use a cake comb a few times to get straight sides on the cake and scrape over the top edge of the cake
1:45
just to get rid of the excess frosting rather than taking the time to get a neat edge
1:49
Rest your spoon on the cakeboard but hold it sideways instead of vertically and press it lightly against the frosting as you spin the cake
1:57
Now that you know the hot spoon trick, this won't be a surprise, but look at the difference if you don't heat the spoon
2:03
For these first grooves around the bottom of the cake you can see that the spoon sticks to the frosting and pulls it And that creates little tears or air bubbles or air pockets in the frosting
2:14
Now, after dipping the spoon into a glass of hot water, the spoon is hot and it glides over the frosting instead of sticking to it
2:21
So it doesn't pull and tear the frosting. The textured frosting is much neater now
2:27
You can use the widest part of the back of the spoon to create wider and deeper grooves
2:31
or use the tip of the spoon for these narrower and more shallow grooves. And by spinning the cake continuously as you gradually pull the spoon higher up the sides of the cake
2:40
you're overlapping the texture and creating this pretty rustic effect. When you get to the top of the cake, you'll create a lip or a wall of frosting
2:49
as it bulges up around the top of the cake, and you can leave it like this, or you can tidy it up now with an offset spatula
2:55
swiping sideways to push the lip over onto the top of the cake and then lift it off on your offset spatula
3:01
and that creates a neat straight edge around the top of the cake. Remember to wipe your offset spatchel on a towel or paper towel after each time you swipe
3:10
so that you don't drag dregs of frosting back onto your neat edge. So pretty
3:15
I love the variety of textures you can create with just a simple spoon
3:19
Here's another one to try after frosting your cake. And same as for the previous two techniques
3:25
you don't need to have smooth frosting for this to look amazing. Press your spoon gently against the cake and twist it in a curve to leave a C shape
3:34
or a U or an N, depending on the direction you choose. Using a hot spoon will smooth out the frosting within that shape
3:42
making this look much neater than if you use a spoon straight out of the drawer
3:46
I think overlapping the texture looks best, because it makes the entire frosting textured
3:50
rather than having a few random shapes spread out around the frosting, which can look a bit strange
3:55
And you can stop before you get to the top of the cake, to leave the top edge as it is, or you can keep going right up to the top so that the texture covers the entire cake
4:05
You can do this on the top of the cake too, using the same curving motion all over the surface of the cake
4:10
but around the edges of the top it best to curve the spoon inwards curving from the outer edge towards the middle of the cake so that you dragging the frosting around the edge inwards rather than pushing it out which will cause lots of bulges around the top edge of the cake This is a quick way
4:25
to cover a cake completely with texture, without needing a fancy textured cake comb. This final
4:31
technique using a spoon is my favourite. After covering your cake with a crumb coat, frost the top
4:36
of the cake and smooth that frosting, and then scrape around the sides of the cake to take off any of that
4:41
frosting that's sticking out over the top of the cake so that the sides of the cake are straight
4:46
with no frosting bulges. Just like for the others, a glass of hot water will give you the best
4:52
results for this technique. You'll need a piping bag, ideally with a round piping tip. If you don't
4:58
have a piping tip, you can just cut the ends of your piping bags so that the holes are all the same
5:02
size, and then you can use the piping bags with no piping tips. Squeeze a dot of frosting onto the
5:07
cake, starting at the top or the bottom. Press the back of your hot spoon
5:11
into the dot and drag sideways to create what looks like a tail on the dot
5:16
You'll get used to the pressure you need after the first dot or two. You need enough pressure to flatten the dot and to pull some of the frosting across the cake
5:24
but you don't want to push so hard that you expose the crumb coat underneath the dot
5:29
Continue around the cake, squeezing each dot of frosting over the top of the tail of the previous
5:34
dot, so that they overlap. If you want to, you can pipe a dot and then use a toothpick or your
5:40
offset's bachelor to score a line along the cake like this so that you know where to pipe the dots
5:45
in the rows below. But it's pretty obvious looking at the first row you've piped where you should
5:49
pipe each dot in the following rows so that they all line up on top of each other. I love the look of
5:54
this scallop-shaped texture. The final dot of each row is tricky because you can't drag it sideways
6:00
with your spoon since the next dot is in the way. I'll talk about options for this in a minute
6:05
You can use the same color of frosting for this texture all over the cake or change every
6:10
row. I started with pale pink and now I'm adding some more gel to make a darker pinky purple and that
6:16
way I can use the leftover frosting from the first row of scallops and I do the same for each row so I always using up the leftovers by turning them into my next colour You can leave the final dot as a dot rather than a scallop and I would display this cake on a dessert table so that the final dots in the design are at the back of the cake so they
6:34
won't be visible. Or you can press a sprinkle into each one which I'm doing with these big
6:39
gold sprinkles and I love the way they look. If you're using more than one color
6:43
couplers make this technique much quicker. If you don't use couplers you have to squeeze the
6:48
leftover frosting out of the piping bag, to then push the tip out through the top of the bag to use with the next colour
6:54
With a coupler, you attach the piping tip to the outside of the bag
6:58
so after using it with one colour of frosting, you just unscrew the piping tip
7:02
and move it onto another bag with another colour of frosting, like this
7:06
Squeeze the bag so that the last little bit of the previous colour comes through the piping tip
7:11
and it's ready to go. The trickiest part of this texture is spacing it out properly
7:16
so that it covers the cake from top to bottom without having to squish in the final round
7:20
or squeeze the last row of dots bigger so that you can fill the remaining space on the cake
7:25
which I'm doing here. For this reason, I suggest starting at the bottom of the cake and working your way up
7:30
because you have a bit more leeway around the top of the cake than the bottom, since the cake board provides a very definite endpoint to the cake at the bottom
7:38
but at the top, it's not really noticeable if the scallops finish just above or just below
7:43
that layer of frosting you spread onto the top of the cake at the beginning. It's best to keep your spoon hot for the smoothest frosting on the sky
7:50
scallops. Also, it's important to wipe the back of the spoon off on a towel or paper towel so that it
7:55
stays clean, because after pressing the spoon against a few dots, you'll notice frosting start
8:00
to build up on the back of the spoon, and if you then press the spoon onto another dot, you'll drag that
8:05
built-up frosting across the dot, and you'll see that sitting on the surface of the scallop
8:10
Is this cake your favourite too? I hope you enjoyed these techniques. Visit my cake school on
8:15
British Girlbakes.com to learn hundreds of cake decorating techniques and designs, and join
8:20
my Club Plus for access to every mini-course, master course, live workshop and five-minute
8:24
Fridays. Thanks for watching
#Cooking & Recipes
#Desserts
#Hobbies & Leisure
#Ceramics & Pottery