videocam_off
This livestream is currently offline
Check back later when the stream goes live
Up next in 10


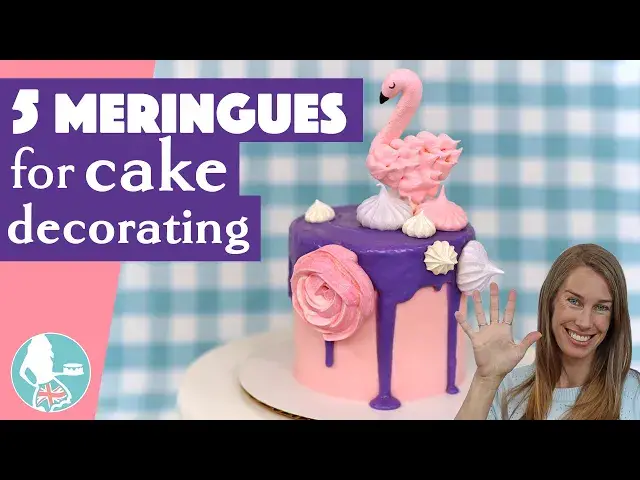
In this tutorial I’ll show you how to mix and bake meringues that are crispy on the outside but soft on the inside, how to make different shapes with them, how to use them to decorate cakes, and how to store them so they don’t get sticky or soggy. Skip ahead to the part you're interested in:
0:23 How to make meringues
1:43 How to flavour and colour meringues
2:12 How to pipe meringues
2:48 Meringue rosettes
3:53 Striped meringue kisses
4:32 Meringue pops
4:53 Meringue animals
6:45 Meringue roses
7:38 How to bake meringues
8:05 How to attach meringues to a cake
8:57 How to store meringues
*Take my FREE course on 10 Frosting Techniques on my ONLINE CAKE SCHOOL
https://www.britishgirlbakes.com/free-course/
*LEARN The Basics of Cake and The Basics of Buttercream in my most popular online courses!
https://britishgirlbakes.teachable.com/
*READ a written version of this tutorial (with photos!)
Show More Show Less View Video Transcript
0:00
Morangs are beautiful and delicious and they're so easy to make
0:04
In this tutorial, I'll show you how to mix and bake marangs that are crispy on the outside but soft on the inside
0:11
And how to make different shapes for them like flamingos and roses, how to use them to decorate cakes
0:16
and how to store them so they don't get sticky or soggy. To make marangs, you'll need a whisk, salt, sugar and egg whites
0:27
Start by cracking the eggs and pass the yolk back and forth between the shell, letting the egg whites fall down into a bowl and dropping the yolk into a separate bowl, or a Tupperware, which you can use for lemon curd or custard or another dessert
0:42
Bring about two inches of water to a boil in a saucepan. Pour the egg whites, sugar and salt into the bowl of your mixer if it's metal, or any other metal bowl
0:52
And lower the bowl onto the pan of water and the bottom of the bowl shouldn't touch the surface of the water
0:57
Turn the heat off and whisk the mixture together for two minutes
1:01
It will get frothy and after two minutes pinch a little bit between your fingers and if it's smooth, it's ready
1:07
Or if not, whisk it for another 30 seconds. Take the bowl off the heat and now you'll need a whisk or the whisk attachment for your mixer
1:15
Whisk the egg white mixture for nine minutes on high speed. And you'll notice the egg whites go from yellow and frothy to bright white
1:22
and they'll expand with all of the air you're incorporating into them so they'll look silky and shiny and fluffy
1:27
You'll see lots of texture left behind by the whisk, and when you lift up the whisk
1:31
the meringue on it will hold its shape. These are called stiff peaks. The meringue left behind in the
1:37
bowl will form a peak as you lift the whisk, but it might droop slightly as you pull away
1:42
and that's fine. Add whatever flavour you like to the meringue, like vanilla or almond or lemon
1:47
extract, and mix just enough to incorporate that. Now divide the meringue into separate bowls if you
1:52
want to tint it to different colours, or you can add colour to the mixer if you want to tint the entire
1:57
batch the same colour. Gels are more concentrated than liquids so I recommend using those to tint
2:03
meringue so that you don't water it down and make it runny. Fold the colour in mixing as little as
2:08
possible so you don't knock the air out of the meringue. Drop a piping tip into a piping bag
2:14
put it down to the end score a line around the midpoint of the tip put it up out of the way and then cut along the line you scored Push the tip back down and it will be snugly inside the piping bag ready to use Morang is sticky but the least messy way to fill piping bags is to fold the bag over a glass to hold it open
2:34
And then spoon the meringue into it so that when you unfold the bag and pipe with it, you won't get any of that meringue on your hands
2:43
Line a baking tray or a baking sheet with parchment paper or a silicon mat
2:48
and now let's pipe some marangs. I'm starting with a large open star tip called an 8B to pipe some rosettes
2:56
Hold the tip so that it's slightly above the tray, squeeze the piping bag to make the meringue bulge out
3:02
and then stop squeezing at the same time as lifting the bag, and that will leave a neat peek on the rosette
3:08
If you want to use the same piping tip with another colour of meringue, you'll need to squeeze the first colour out of the bag to get the tip out
3:15
wash and dry it, and then use it in another bag. that you fill with the second colour
3:20
If you have couplers, they're a much easier and quicker method to use the same colour of meringue, but switch between different piping tips
3:27
and you won't have nearly as much to clean up at the end. Drop the coupler into a piping bag and place a piping tip on it on the outside of the bag
3:35
and then screw the coupler ring on to hold the piping tip in place. This is a small open star tip, a number 32
3:42
Fill the piping bag with meringue and pipe with this colour and this tip. These are just like the rosettes I piped with a pink and purple meringue
3:49
except the piping tip is much smaller, so the rosettes are much smaller. To make really bright marangs, instead of mixing gels into the meringue
3:58
put the gels straight into the piping bag. You only need a tiny amount because gels are so concentrated
4:04
and a paintbrush is the easiest way to get the colour into the bag. Then fill the piping bag with meringue and pipe whatever shapes you like
4:12
These roughly rosettes are piped with a 1M start-tip, and for dollops like these you can use any round tip
4:18
This is a 1A. The colours are much more vivid than if you mix them into the meringue
4:23
For example, compare the bright orange on these meringue to the pale orange you can make by mixing the meringue with the gel
4:30
And the result is this very light orange. Another way to use a 1M tip is to pipe these swells, spiraling outwards
4:37
You can place these straight onto a cake or pipe a tiny bit of meringue onto the tray and press a paper straw into it and then pipe over the top of the straw and after baking these you can use the straw to push the meringue into the cake as a cake topper I show you that in a minute
4:53
To pipe animals or any other designs, draw or trace or print an outline or design and put it underneath
5:00
parchment paper or a clear silicon mat and then trace it with meringue. This is a medium round tip
5:06
and number 12 and this is going to be a flamingo. Use a toothpick to smooth out any textured markings
5:11
I don't recommend using just a round tip for shapes, because with stiff meringue, it's difficult to get a neat smooth surface
5:18
But you can create loads of amazing textures using different piping tips
5:23
Just squeeze the leftover meringue into another piping bag with a different tip, like this leaf tip in number 352
5:30
which I'm going to use to pipe feathers onto this version of a flamingo. If you're piping a shape for the first time, it's a good idea to make more than one
5:38
and to try different techniques, so you have different options to choose between
5:41
because it only adds a few seconds of time now, compared to having to start all over again
5:46
after baking one that you don't end up liking. To make black meringue use black gel
5:53
which I'm going to use for the beaks of these flamingos. For tiny details like this
5:58
a sandwich bag works really well. Push the meringue down to one of the bottom corners of the bag
6:04
cut a tiny piece off the corner of the bag, and squeeze the bag to pipe the meringue
6:09
Again, I'm making two flamingos so I can choose my favourite after they bake
6:13
Use the toothpick to manipulate the meringue to make the shape you want and to smooth the texture in the piped meringue
6:20
To draw lines, like for the eye, you can dip a toothpick into meringue and draw with that
6:25
Or the other way to do it, after baking the meringue, skipping ahead for a minute
6:30
is to use an edible marker to draw the line. I find this way to be a bit neater than the toothpick method
6:36
If you want to use meringue designs as cake toppers, pipe them onto a straw or poke a straw in carefully after piping but before baking
6:45
You can pipe flowers with meringue just like you would with buttercream. You'll need a petal-shaped piping tip with this teardrop shape and a little square of parchment paper and a flower nail
6:56
Squeeze some meringue onto the head of the nail to act as glue and press the parchment onto that to attach it
7:01
Pipe a blob of meringue onto the middle of the parchment and then hold the narrow end of the petal tip pointing upwards and squeeze the bag to pipe a spiral of meringue that wraps around the blob you just piped Then pipe petals around the rosebud overlapping each one and angling the top
7:17
of the tip inwards to keep the petals tight. Continue wrapping the petals around the flower
7:23
gradually angling the top of the tip further out so that the petals start to fan out. When you've made
7:29
the rose as big as you want it, pinch the parchment and slide it off the flower nail, balancing
7:33
it on your fingers underneath the parchment. and then lower it onto the baking tray
7:38
Bake marangs at 200 degrees Fahrenheit or 95 degrees Celsius for 85 minutes
7:44
Then turn the oven off but leave the tray in for an hour before you take it out
7:48
And the gradual heating and cooling will prevent the colors from yellowing
7:52
and also prevent cracking of the marangs. These marangs are crispy on the outside, but when you bite into them
7:58
the centres are soft and slightly chewy. In a second I'll show you how to store them to keep them like this
8:03
To decorate a cake with marangs, you can push them into a drip while the drip is still sticky
8:09
before it sets and they'll attach easily. If you baked a meringue on a paper straw, you can push the straw into the cake to make the meringue stand up on top of the cake
8:19
leaving the straw visible or covering it up with more marangs, or you can push it all the way down so that the entire straw is inside the cake
8:27
Using scissors or tweezers will make it easy to grip onto the straw and push it down
8:31
because if you push down on the meringue itself, it will probably crack. To attach marangs to a cake after the frosting has set
8:38
pipe or spread a tiny bit of fresh frosting onto the bottom of each meringue or straight onto the cake where you want the meringue to go
8:45
Then push the meringue gently into the frosting to attach it. This works on the top of the cake but also on the sides
8:53
When the frosting dots sets, it will keep the meringue securely in place
8:57
You can make marangs ahead of time and store them at room temperature or in the fridge or freezer
9:02
They should be separated by wax paper or parchment paper so that they don't stick to each other
9:07
And they need to be in an airtight container, like a Tupperware, which keeps them crispy and this way they won't get soggy or sticky
9:14
I can't wait for you to try these marangs. Get the recipe and lots more free recipes and tutorials on Britishgirlbakes.com
9:21
and visit my cake school for courses to learn hundreds of cake decorating techniques and designs
9:27
Thanks for watching. You know, You know
#Cooking & Recipes
#Desserts
#Baked Goods
#Bakeries