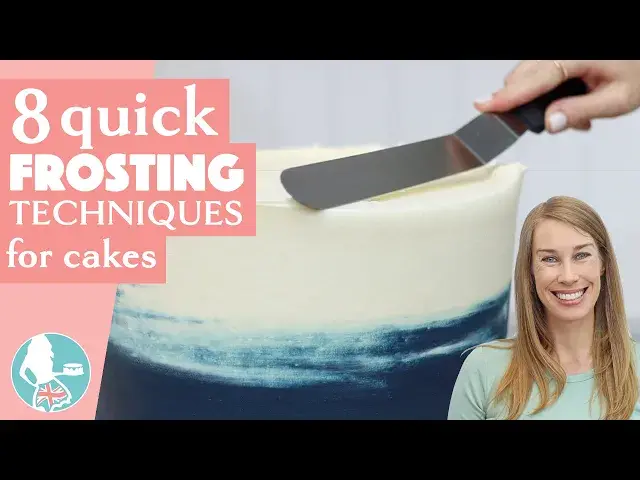
0:00
Don't have all day to make a cake? Try these quick frosting techniques for effortlessly stunning cakes
0:10
Add colour and texture in less than a minute with these diagonal swooshes
0:14
Spread a thin strip of coloured frosting around the bottom of a cake, wipe your spatula clean
0:19
and press the tip into the bottom of the frosting and drag it diagonally upwards to leave swooshes
0:24
in the coloured frosting. When frosting starts to build up on your spatula, scrape it off into
0:29
a bowl. Overlap each swoosh and try to keep the pressure the same each time. You can do this around
0:36
the bottom of the cake or the top or both. Here's an even more rustic look before we move on to some
0:43
more polished, elegant looking techniques. Smooth the frosting on your cake and then press the tip
0:49
of your offset spatula into the frosting and spin the cake to create a groove around the bottom of
0:54
the cake. Pull the spatula slowly upwards as you spin to continue the grooves all the way up the
1:00
sides of the cake. This is a fun technique to do because you're not aiming for precision, just a
1:05
pretty textured effect that adds some detail to your frosting. Now for super quick two-tone frosting
1:12
Frost the top of your cake as normal and the top of the sides and then switch colours to cover up
1:18
the rest of the sides of the cake. Don't worry if smudges of this colour get onto the top half
1:24
because those smudges will help with the blending effect next. Scrape around the cake with a frosting
1:29
smoother or cake comb and do any touch-ups to fill in gaps or indents until the frosting is smooth
1:36
This two-tone frosting is dramatic but so quick and easy to achieve! Naked cakes aren't covered
1:42
with frosting so any naked design is a big time saver. Frosting kisses are a quick way to apply
1:49
the filling and to decorate the top of the cake and if you want to add sprinkles you can do that
1:54
straight after piping while the frosting is still soft so that the sprinkles stick. Check out my
2:00
tutorial on lunchbox cakes for more ideas on making these adorable treats! If you're enjoying
2:07
these ideas visit my Cake School for hundreds of cake designs and techniques and join my Club Plus
2:11
for access to every Mastercourse, Mini Course and Live Workshop. The link is in the top of the screen
2:16
or go to britishgirlbakes.com. As well as the frosting kisses in the previous technique, you can
2:21
get much more elaborate with piped filling on naked cakes but it doesn't need to take any longer to do
2:27
1M piping tips are star-shaped and they're very versatile with loads of options for piped designs
2:34
For the neatest results, start at the outer edge of each cake layer and work your way in
2:39
so that the outer ring of frosting lines up perfectly with the outer edge of the cake
2:44
because that's the most important piping since that's the part that will be visible once you've
2:48
layered your cake. For the top of the cake I like to start in the middle instead since the whole top
2:54
of the cake will be visible. Colourful piped filling looks gorgeous between naked cake layers
2:59
Turn a plain frosted cake into an eye-catching centrepiece in seconds with this next technique
3:05
Arrange berries or chocolates or place cookies standing up around a cake then use a piping bag
3:11
fitted with a 1M or 2D tip to pipe spiral swirls or these ruffles, moving the bag from side to side
3:19
and using your berries as a guide so that each ruffle goes right up to the edge and also up to
3:24
the same height as those berries. This frosted cake doesn't look so plain anymore! For a very quick
3:31
loaded cake effect, don't tidy up the top edge of the cake when you frost it. Leave the frosting
3:36
sticking up around the top which will form a wall to hold in any toppings you put on the cake
3:42
After it sets you'll need to spread a thin layer of frosting on top to act as glue to attach your
3:47
toppings so that they stay in place. Fresh berries are perfect in summer or use chocolates, candies
3:54
flowers, so many options! To make a neat sprinkle border around your cake, wrap the cake in parchment
4:01
paper but leave an inch or two of frosting sticking out at the bottom. Pour sprinkles around
4:06
the cake onto the cake board but I definitely recommend putting your cake on a tray or a rimmed
4:11
baking sheet for this because it will catch any sprinkles that roll off the board and lots of
4:16
sprinkles will do just that! Push the sprinkles into the frosted cake with an offset spatula or
4:22
a spoon or your fingers. The frosting on the cake needs to have set before you do this so that the
4:27
parchment paper doesn't damage it and that means that the frosting will be very firm so you'll need
4:32
to use a bit of pressure to push the sprinkles in to attach them. Peel the parchment off and voila
4:38
Then just lift the tray up and pour the sprinkles back into the jar for super quick cleanup. Thanks
4:43
for watching! Visit my cake school at britishgirlbakes.com and join my club plus for access to every
4:48
master course, mini course and live workshop