videocam_off
This livestream is currently offline
Check back later when the stream goes live
Up next in 10


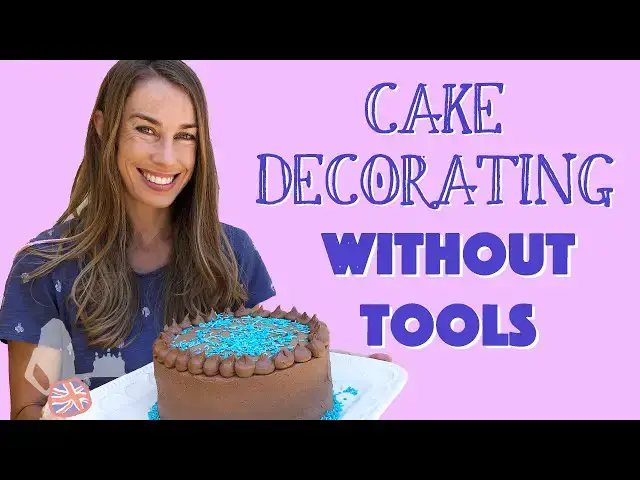
If you don't have cake decorating tools or you're away from home, don't let that stop you from making a pretty cake! In this tutorial I share how to decorate a cake with no special tools and a hack to create a makeshift turntable!
For my Perfect Chocolate Cake recipe click here: https://www.britishgirlbakes.com/recipes/perfect-chocolate-cake/
For my Best Chocolate Buttercream recipe click here: https://www.britishgirlbakes.com/recipes/best-chocolate-buttercream/
For my online cake decorating school click here: https://britishgirlbakes.teachable.com/courses
To read a transcribed version of this tutorial (with photos!) click here: http://www.britishgirlbakes.com/cake-decorating-without-tools-and-a-turntable-hack
SUBSCRIBE to my channel for new cake decorating tutorials every week!
Show More Show Less View Video Transcript
0:00
Hi! In this tutorial I'm going to show you how to decorate a cake with no special tools
0:05
just a plate and a spoon and any sort of spatula, like this, using a very simple hack to make your own turn table
0:14
Divide your cake batter evenly between your pans and I'll be using my perfect chocolate cake for this video
0:20
After baking and cooling the cake layers, chill them before you assemble your cake by putting them in the fridge for an hour
0:26
or you can wrap them in cling film or saran wrap so that they don't dry out
0:29
and then leave them in the fridge overnight or freeze them for 30 minutes if you're in a rush
0:34
Cold cake layers are much easier to work with because they're firmer and less crumbly
0:39
If you're travelling somewhere with your cake layers to assemble and frost the cake there
0:42
check out my tutorial on how to travel with a cake in your suitcase. Make your frosting and I'm using my best chocolate buttercream for this cake
0:52
Take your cake layers out of the fridge or freezer and attach the first one to a plate or platter
0:57
using a dollop of buttercream. This will act as a glue to secure the cake so it doesn't
1:02
slide around when you frost it. Spoon some buttercream onto the first layer and spread it around
1:07
to cover the cake, using the back of your spoon. You can use whatever filling you like, but if it's
1:12
something more liquid than buttercream, like custard or caramel, or a fruit puree, it's best
1:18
to pipe a ring of butter cream around the edge of the cake to act as a dam, and then fill the
1:23
middle with your filling so that the filling doesn't leak out. I cover this in lots of details
1:27
on my online course on the basics of cake, which covers how to mix, bake, assemble, frost
1:32
decorate, store, transport and server cake, and I've put the link for my online cake
1:37
school in the video description. Continue layering your cake and filling and spread
1:42
buttercream onto the top layer as well, which will be the frosting on the top of
1:46
the cake. Spread the frosting all the way to the edges of the cake and a little bit
1:51
beyond so that it sticks out over the sides of the cake and this will give you
1:55
nice sharp edges on your cake instead of a domed top that droops down onto the sides of the cake Move on to the sides next and this is a bit trickier because of the angle and also because the sides of the cake tend to have more crumbs than the top Scoop up buttercream
2:10
using the back of your spoon and then use that to spread it onto the cake. By gliding your spoon
2:15
from side to side like this, you'll spread the frosting over the cake without pulling crumbs off
2:20
When you need to use your spoon to scoop up more buttercream, swipe the spoon off sideways
2:26
instead of lifting it straight off the cake, which would pull crumbs off with it
2:31
It's really important that the cake layers have been refrigerated so that they're cold
2:35
because at room temperature cakes are much more crumbly. The more butter cream you use here, the better for two reasons
2:43
The first is that it's easier to spread thick buttercream around on the cake
2:47
and you can easily take some off with your spoon later. If you spread the buttercream on thinly, it's more likely to pull crumbs off the cake
2:54
which will get stuck in your frosting. The second reason for spreading the buttercream on thickly is that if you want to smooth the frosting, which I'll show you how to do next, it's much easier if the frosting starts out thick
3:06
With the back of your spoon, spread the buttercream all the way down to the plate, not worrying about making a mess on the plate with buttercream smudges because we'll tidy that up later
3:15
Spread the butter cream all the way up to the top of the cake as well, beyond the top edge, to prevent air pockets and to make nice sharp edges later
3:24
When you've spread frosting all around the cake, spin it around one more time to check for any areas where the frosting is much thinner, or if there are any parts where you can see cake crumbs, and spread some more buttercream over those
3:36
This textured frosting looks pretty as it is, so you can stop at this point if you like and tidy up the plate by wrapping a paper towel around your finger and then wiping around the base of the cake to take off any smudges of buttercream
3:49
Or you can add texture to the top of the cake, like these waves or random swirl
3:54
or scatter on some sprinkles Or you can smooth the frosting on the cake and now I show you how to do that with no cake decorating tools and with an easy hack for a turntable You can use any flat object to smooth the frosting like a spatula but the thinner the edges the better Press the spatula against the side of the cake and pull it sideways using the end of the spatula to scrape the frosting
4:18
Don't worry about these strands of buttercream coming through the gaps in the spatula, because they'll come off later in the smoothing process
4:25
A spatula without these gaps would be even better to use, but you've got to work with what you have
4:30
To spin the cake more easily as you smooth the frosting, here's an easy hack
4:34
if you don't have a turntable. Take the ring out of a microwave and place it on a non-slip
4:38
mat or draw liner so that it doesn't slide around. Place your cake plate or platter on top
4:45
and although it won't spin around effortlessly like it would on a cake decorating turntable
4:50
it will move much further and less shakily than if you tried to spin it on a bare table
4:54
If you're enjoying this tutorial please click the thumbs up button and subscribe to my
4:59
YouTube channel for a new cake decorating tutorial every week. Scrape around the
5:04
the cake a few times with your spatula or whatever tool you're using, and if the cake is taller
5:09
than your tool, you'll have to go around the bottom section once, and then lift the tool an inch
5:14
or two higher and go around again to smooth the top section. Wipe your tool off on a towel
5:19
or paper towel after each scrape so that you don't drag buttercream back onto your smooth
5:24
frosting. You can definitely do this without the turntable hack, but using the microwave wheel
5:29
makes the process quicker, and the smoother the turning motion of the cake, the smoother
5:33
the frosting on the sides of the cake will be. If your tool doesn't glide around the cake
5:37
in a smooth motion, and instead it jerks or jumps, or stops and starts along the scrape
5:42
you'll get dense in the frosting at those points, and you'll have to scrape over that section
5:46
again to get it smooth. As you go, check to see if the cake is showing through the frosting
5:52
anywhere, and spread a bit more buttercream over those areas, and then scrape again and again
5:56
until you're happy with the sides of the cake. For the top of the cake
6:00
lower your spatula down onto the cake, starting just outside the cake
6:04
and pull it towards the middle of the cake. Press down slightly on the frosting to create a 90 degree angle like a corner going over from the top of the cake down to the side If you spread buttercream up over the sides of the cake earlier
6:18
then as you scrape over the top edge now, you won't have any air pockets
6:22
If you do see any air pockets, like this one here, if they're shallow, you can scrape over it again with your spatula to get rid of it
6:29
But if it's deep and stubborn and won't disappear after a few scrapes
6:33
you can spread more buttercream over the air pocket to fill it in and then scrape over it again
6:37
over it again. When you finish smoothing the frosting, wrap a finger in a paper towel to wipe any
6:43
buttercream smudges off the plate. Try not to touch the frosting on the sides of the cake, but if you do
6:49
don't worry because we're going to cover up the bottom inch or so of the frosting. After cleaning
6:53
the plate, pour sprinkles around the cake and use your hand or the back of your spoon to press the
6:58
sprinkles into the frosting. This makes a colourful border around the bottom of the cake
7:03
Because you've just frosted the cake, the buttercream will still be soft and sticky
7:08
so the sprinkles will stick to the frosting easily. If you have extra sprinkles left on the plate, you can leave them there
7:14
or wait for the buttercream to set and then brush or tip the sprinkles off the plate
7:19
To add some detail to the top of the cake, put some leftover buttercream in a Ziplock bag and cut a corner off so that the line you cut
7:26
is about as wide as your thumb. Hold the cut corner just above the cake
7:31
slightly in from the edge of the cake and squeeze the buttercream out of the bag
7:37
It will bulge out to form a blob and then as you lift the bag up and away from the cake
7:42
release your pressure on the bag so that the buttercream makes a neat point. These dollops of buttercream would be neater and more symmetrical if you used a piping bag and a round piping tip
7:51
but this way works and you'll hardly notice any imperfections when the cake is finished
7:56
Add a few sprinkles to make the cake more festive and there it is! a pretty cake that you can whip up wherever you are in just a few minutes with no special tools
8:05
When you serve the cake, wipe your knife clean after each cut for the neatest slices
8:10
I love cake! Thanks for watching! Remember to click the thumbs up button and subscribe to my channel for a new cake decorating tutorial every week
#Cooking & Recipes
#Food
#Baked Goods