Up next in 10


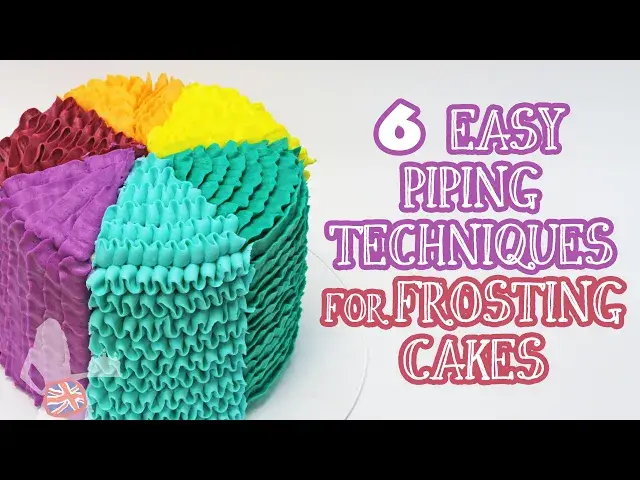
In this cake decorating tutorial I’m going to show you 6 piping techniques to frost a cake with gorgeous texture and you don’t need a turntable for any of these - all you need is a piping bag and a single piping tip!
I used my 4 Minute Buttercream for this cake and you can find the recipe here: https://www.britishgirlbakes.com/recipes/buttercream-frosting/
For my online cake decorating school click here: https://www.britishgirlbakes.com/online-courses
To read a written version of this tutorial (with photos!) click here: http://www.britishgirlbakes.com/6-easy-piping-techniques-for-frosting-cakes-with-no-turntable
SUBSCRIBE to my channel for new cake decorating tutorials every week!
Show More Show Less View Video Transcript
0:00
I'm going to show you six piping techniques to frost a cake with gorgeous texture and you don't need a turntable for any of these
0:06
All you need is a piping bag and a single piping tip
0:10
I'll be using a petal tip for all of these techniques and I'll show you how to use piping bags and piping tips and color your frosting at the end of this video
0:17
You'll need a crumb coated cake and if you're going to use several textures on the cake, score guidelines into the cake to divide it into sections for each texture
0:26
Don't forget the top of the cake. This first technique creates rows of ribbons going up the cake
0:32
Your petal tip will have a narrow end and a wide end. Hold it with the narrow end pointing away from the cake
0:37
and the wide end pressed against the cake, and rest it down on the cake board
0:42
Squeeze the bag to push the frosting out and slowly wiggle the bag upwards and downwards
0:47
as you pull it gradually away from where you started, around the side of the cake
0:51
If you like, you can score some horizontal lines in the cake to use as guidelines
0:55
You don't have to pipe all the way up to them, but if you can pull it up to them, up to them but it's helpful to have a line to focus on as you pipe so that you can make each ribbon the
1:02
same distance away from that line. Try to make each ribbon the same height as the previous one
1:07
and hold your bag steady for a split second at the top and bottom of each ribbon to give it time
1:12
to curve over before you wiggle back down or up. Press the tip right against the crumb coat so that
1:17
this frosting has something to cling onto otherwise it will fall down. If that happens you can
1:22
scoop it off with a frosting smoother or offset spatula and pipe over that section again
1:27
You can use this texture all over the cake, or any of the textures I'm about to show you
1:32
or use several of the textures I'm going to show you and only pipe up to the edge of a section of the frosting, like I'm doing here
1:39
It's fine if the line where you start the piping isn't perfectly straight going up the cake, we'll fix that in a moment
1:46
It's much easier to make the second edge neat, where you finish each piped ribbon
1:51
For the starting edge, use an offset spatula or frosting smoother to scrape off any piping that goes outside of the section
1:57
you've marked off. For the next section I'm changing colours but using the same petal piping
2:02
tip, again with the wide end pressed against the cake and the narrow end pointing outwards
2:07
wiggling all over this section of the cake in random directions to cover the entire surface
2:12
It's easiest to start at the bottom, on one side, and work your way across and up the cake
2:18
so that you have the most room to manoeuvre the hand that holding the piping back pipe squiggles going sideways diagonally up and down keeping the piping close together so that you can see the crumb coat of frosting through the piping I using my four minute better cream for this cake and you can find the recipe on british girlbakes and the link is in the top of the screen and in the video description but you can use any frosting you like
2:40
make sure you go all the way up to the top of the cake and I'll show you how to do the very top in a moment
2:46
now we're going to pipe ribbons going up the cake these ribbons weigh a lot so they really really
2:51
need to stick to the frosting on the side of the cake for support, otherwise they'll fall down
2:56
So if your cram coat has set, like mine has, spread some more frosting onto your cake
3:01
just before you pipe these, which will be soft and sticky and act like a glue to attach
3:05
the piping to the cake. Guidelines are very useful for this technique, and you can score them with an offset spatula
3:11
or your frosting smoother or a toothpick. Hold the piping bag down, with the wide end of the tip pressed against the cake, and wiggle
3:19
the bag back and forth just like you did for the first technique, except going up the cake instead
3:24
of around it. Pause for a tiny moment at each side of the ribbon before going back in the opposite direction
3:31
and that allows the ribbon to fold over itself. You can make these ribbons as loose or tight as you like
3:37
The more slowly you lift your piping back upwards, the closer the ribbon will be packed down
3:42
But the quicker you move the piping back upwards, the more space there will be in between the folds
3:47
of the ribbon. Keep the ribbons within the guidelines you scored into the cake so that they're
3:52
all the same width, so that they go straight up the cake without leaning to one side. It looks
3:56
neatest if all of the ribbons finished with the end of the ribbon pointing in the same
4:00
direction. This next technique is one of my favorites. Hold the piping bag with the narrow end of
4:06
the tip pointing upwards and sticking above the top of the cake. Squeeze the frosting out and pull
4:11
the bag slowly across the cake to pipe a ruffle of frosting. Pipe the next ruffle so that it over
4:17
overlaps the first ruffle so that the frosting completely covers up the crumb coat and you
4:21
can't see any of it between the ruffles. The more slowly you pipe and the harder you squeeze
4:27
the piping bag to push the frosting out, the more wavy the top edge of your ruffle will be
4:32
You can wiggle your wrist to give the ruffles even more movement. Here I'm piping the ruffles
4:37
horizontally so that they go across or around the cake, but you can do these in any
4:41
direction and I'll show you other options in a minute. Rest the piping tip down on the cakeboard for the
4:46
final ruffle to make sure it goes all the way down to the bottom of the cake to cover up the crumb coat Remember the top of your cake and you can replicate any technique onto the top So for the yellow squiggles I doing exactly the same random movements to cover up the top section of the cake
5:01
and the only difference on the top of the cake, if you're piping sections of different textures
5:06
is that you're piping onto a pie-shaped area instead of a rectangular section on the side of the cake
5:11
So you'll have to make your piping very narrow as you get towards the middle of the cake
5:16
These ruffles are really easy to pipe onto the top of the cake, curving each ruffle around to mimic the shape of the outer edge of the cake
5:23
and overlapping the ruffles to cover up the crumb coat. If you're enjoying this tutorial please click the thumbs up button to like it
5:29
and subscribe to my channel for a new cake decorating tutorial every week
5:34
Repeat each piping texture onto the top of the cake, starting with the very outer edge of the cake to make sure the texture covers up the entire crumb coat
5:42
so that you don't see it sticking out around the top edge of the cake
5:46
If you smudge any of your piping, you can use a toothpick to tidy it up, or just scrape
5:50
that section of piping off the cake and pipe over that area again
5:55
If the crumb coat has set before you pipe, it's very easy to scrape off any messy
5:59
piping because you won't damage the crumb coat as you scrape, because the crumb coat
6:03
will be firm and it will hold its shape. Adjust the texture to fit within the pie-shaped sections
6:11
For example, for these ribbons I'm making each one narrower as I get closer to the middle
6:15
of the cake and I'm only piping three raffles on top of the cake instead of four on
6:19
the side of the cake where there's more space. You can go away and do something else and
6:24
come back to this if you don't have enough time to do all of the piping at once. It's fine
6:28
to do it in stages. For this texture, hold the wide side of the piping tip against the cake
6:34
and the narrow side should point outwards and that's always how you should pipe with a petal
6:37
tip, because the frosting comes out easily through the wide end to form a thick line which
6:42
provides a large surface to stick to the cake, and then it struggles to squeeze through the
6:47
narrow end of the piping tip, and as it squeezes through, the pressure causes it to wiggle and
6:51
wave, and that's what creates this nice movement in the ruffles. You can exaggerate it by moving
6:57
the piping bag, wiggling it slightly back and forth, which happens naturally if you have shaky hands
7:01
like I do. These ruffles are sticking straight out, so it's important to pipe them close together
7:07
if you don't want to see the crumb coat in between them. To pipe these onto the top of the cake
7:11
it easier to pipe from the middle of the cake towards the outer edge of the cake so you have more room to swipe the piping bag away at the end of each ruffle I left this blooper in the video as a reminder not to cut the holes in your piping bags too big Otherwise the pressure on the frosting as you squeeze the piping bag can push the piping tip right out
7:30
I'll share more piping tips at the end of this video. If this happens, scrape that section of piping off the cake and start again
7:37
I ended up scraping off this entire section of piping because I forgot to start recording
7:42
so it's a good example of how to redo an entire section. an entire section. If maybe you don't like the way the texture turns out. This is the third
7:50
way to pipe these ruffles. You can do them horizontally like I did with the teal frosting
7:55
or going straight up the cake like I did with the orange frosting, or pipe them like this
8:00
up the cake but flat against the cake, overlapping the previous ruffle. If you can see the crumb coat
8:07
through any ruffles, you can go back and pipe another ruffle in between to cover it up
8:12
And there they are. beautiful textures, all piped with a piping bag and a petal tip with no turntable required
8:20
I used a petal tip for all of these textures and a petal tip looks like a teardrop, with a narrow
8:24
and a wide end. They come in lots of different sizes. I used a number 104 for this 6 inch cake, but for an 8 inch cake I would use a number 125
8:34
To use it, drop it into a piping bag, score a line around the middle, cut along the line
8:39
to snip off the end of the piping bag, and then push the piping tip back down
8:44
Fold over the top of the piping bag and spoon your frosting into it, and this keeps
8:50
the top of the piping bag clean, so you won't get frosting on your hands when you pipe
8:55
To colour your frosting I recommend using gels which are more concentrated than liquid
8:58
colours, so you can make really bright and bold colours with just a few drops of colour
9:04
If you are using several colours of frosting, you can prepare them all now if you have several
9:08
piping tips, or clean the piping tip after each colour and reuse it with the next colour
9:13
If you have couplers, you can switch the piping tip between different piping bags, and I cover
9:17
that in lots of detail in the module on piping bag basics in my online course on 50 easy cake decorating
9:23
techniques for any skill level. And the link for that course on my cake school is in the top of the screen and in the video description
9:30
If you're looking for inspiration, join my Club Plus for access to all of my online classes
9:34
and courses as well as live online classes and Q&A sessions for members only
9:39
Thanks for watching! Thank you
#Cooking & Recipes
#Desserts