Up next in 10


Not sure how to write on cakes? It can be tricky to make messages look good so here are different techniques and materials you can use for 4 ways to write on cakes, step by step!
*Take my FREE course on 10 Frosting Techniques on my ONLINE CAKE SCHOOL
https://www.britishgirlbakes.com/online-courses
*LEARN 50 Easy Cake Decorating Techniques in my new online course
https://britishgirlbakes.teachable.com/p/50-easy-cake-decorating-techniques-for-any-skill-level/
*Sweet Stamp letter sets - use BGB10 for a discount!
https://www.sweetstamp.online/collections/lettering-sets
*My 4 Minute Buttercream recipe
https://www.britishgirlbakes.com/recipes/buttercream-frosting/
*READ a written version of this tutorial (with photos!)
https://www.britishgirlbakes.com/4-ways-to-write-on-cakes
*SUBSCRIBE to my channel for a new cake decorating tutorial every week!
*SAY HI!
Show More Show Less View Video Transcript
0:00
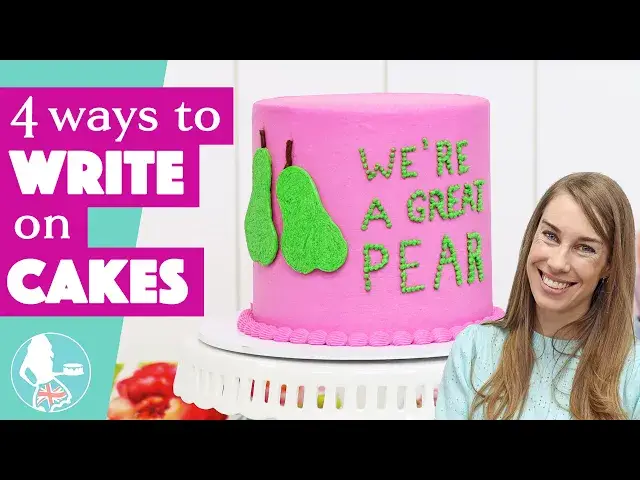
In this video I'm going to show you four ways to write on cakes to personalize them with messages
0:04
and I'm going to use some fun Valentine's Day puns for these examples
0:08
For the first two techniques, I'll use buttercream and a piping bag
0:12
You can use any kind of frosting for this, like whipped cream or ganache or meringue buttercream
0:17
I use gel colors to tint butter cream because they're very concentrated
0:21
so they're great for bright and bold colors. Any small round piping tip will work for this first technique
0:27
This is the number eight by Wilton. You can freehand your letters onto your cake, but I like to find a font I like, to mimic
0:34
which you can do on Google Images and save it to your phone to refer to, or search for a font generator and type in your word or sentence and then choose a font
0:43
You can save it on your phone or print it, whatever's easiest for you. Before I write on a cake, I write my word on paper
0:49
so I can see what the size and spacing looks like on the cake. This looks perfect, so now I'm going to outline the first letter onto the cake
0:57
to show me where to start, and then if I pipe the letters that size, I know they'll fit onto the cake because they did when I wrote them that size on a piece of paper
1:05
Having your cake on a turntable is really helpful for writing, because you can quickly and easily spin the cake
1:11
so that you're piping each line of each letter at the angle that's most comfortable for you
1:15
And that way your lines will be straighter and neater. If you don't like a line, you can scrape it off with an offset spatula
1:22
if the frosting on the cake has set, so it's firm and won't get damaged by the pressure of your offset
1:27
at Spatula For that reason I like to chill my cakes in the fridge for at least an hour before I write on them You can use a toothpick to adjust the shape of a line if you want it to be longer or shorter or straighter like this
1:40
For the rest of the words, I'm referring to the sentence I typed out in a cursive font earlier
1:45
simplifying it because my cursive is terrible. You don't have to have neat handwriting on paper to be able to write neatly on cakes
1:52
They're totally different skills, and practicing on cakes will make your cake writing neat
1:56
even if your normal handwriting is sloppy. I should mention that writing like this on the top of a cake is much easier than writing on the side of a cake
2:05
My writing is aligned to the right of the cake because I'm going to add a decoration on the left
2:10
and voila! A neat, legible message that's quick to write and delicious to eat
2:15
If you're not confident about writing letters, try this next technique instead
2:20
Start by outlining your letters, and capital letters will be the most legible for this
2:25
You don't have to outline the entire letter, just the first line of each letter will help guide you as you pipe
2:31
and these lines will help you keep each letter the same height and also make sure the words are straight on the cake
2:36
Now use a piping bag with a small round tip, like this number three, to squeeze out dots all along the lines of the letters
2:43
free-handing the lines that you didn't outline with the toothpick. The closer together you pipe the dots, the neater the letters will be
2:50
Try to hold your piping bag at the same angle as you pipe, so that the tips of the dots are
2:55
all point in the same direction. If you have a long message like this, you'll need to squeeze
3:00
and release the piping bag hundreds of times as you pipe the dots and it will get tiring so here are three tips to make it easier First make sure your buttercream isn too stiff because you have to squeeze the bag much harder than if the buttercream is a bit runnier which you can do by adding a bit more milk to it
3:16
Second, twist the top of the piping bag to push the buttercream down into the bottom of the bag
3:21
and that way you won't need to push as hard to pipe it through the tip. Third, take breaks when you get tired. It's fine for some of the dots to set before you pipe the rest
3:30
You don't have to pipe the whole message at once. This is a great technique if you have quite a lot of space for your message
3:37
so you can pipe large capital letters, which are the easiest to read. For this next technique, you'll need a letter set
3:43
and this is made by Sweet Stamp, and I've put a discount code in the video description. Wrap your finger in tape with the sticky side facing outwards
3:50
and press it into the letters you want to pick up. Press each letter into your cake
3:54
and the best time to do this with buttercream is after chilling the cake for a few hours in the fridge
3:59
so the frosting is very firm, and then leave the cake at room temperature for an hour
4:02
so that the frosting is still firm, but not cold, and that will give you the neatest outline of the letters
4:09
Use edible paint to colour the letters, or you can mix luster dust with vodka or any other clear alcohol or flavour extract
4:16
to make your own edible paint. Use the thinnest paintbrush you have for the neatest painting
4:21
and if you accidentally paint outside the lines of a letter, you can use a clean paintbrush dipped in water or vodka to brush over that smudge
4:29
You'll probably need to paint on two layers to get a really bold metallic colour
4:33
This technique is the easiest way to get perfect fonts on the top or sides of a cake For a cheaper option than buying letter sets melt chocolate chips or colourful candy melts and drizzle the melted chocolate into a letter mould
4:47
making sure you fill in all of the letters you need for your message. Nudge the chocolate into the letters with a spoon
4:52
to make sure the chocolate goes all the way down to the bottom of the letters to prevent air pockets
4:57
Scrap off the excess chocolate with an offset spatula so that there isn't any extra chocolate stuck to the outline of the letters
5:04
Put the mould in the freezer for 10 minutes or the fridge for 30 minutes
5:08
and then push the letters out by pulling the mould away from each side of a letter
5:11
and pushing up with your fingers from underneath the mould. Your hands will get covered in chocolate, so if you want to keep some clean, wear gloves for this
5:20
I suggest placing the letters on a piece of parchment paper so that they don't stick to the table or wherever you put them
5:26
Straight after frosting your cake, while the frosting is still soft and sticky
5:30
pick up the chocolate letters and push them into the frosting and they'll attach easily
5:33
If you miss a letter, just remelt the chocolate, spoon it into the mould, chill it and pop that letter out
5:41
This is a cheap and delicious way to write in whatever font you choose
5:45
So, which is your favourite? Tell me in the comments. This is one of the things I teach in my online course on 50 easy cake decorating techniques
5:53
and you'll get access to that course and every other mini course and master course on my cake school
5:58
if you join my club plus. I'll put the link for my cake school up in the top of the screen and also in the video description
6:04
or you can go to British Girlbakes.com. Thank you for watching
#Cooking & Recipes
#Desserts
#Food & Grocery Retailers
#Bakeries