0:00
Whatever your cake struggles are, from
0:02
smooth frosting to bulges, piping
0:04
disasters or dull colors, good news. All
0:06
of these are fixable. Use these 10
0:08
practical ways to improve your cake
0:10
decorating skills in 2026. First,
0:13
although piping onto cakes can add
0:14
height and texture, it can also push
0:17
down and cause bulges. Either the
0:19
filling bulging out between the cake
0:20
layers or on this cake when I spin it,
0:22
you'll see the frosting bulging out
0:24
around the top under the weight of this
0:26
piping. To avoid this, chill the cake in
0:28
the fridge for 30 minutes before piping
0:30
so that the frosting firms up and holds
0:32
its shape when you add the weight of
0:33
piping on top. This keeps the sides of
0:36
the cake straight and smooth. If piping
0:38
is a challenge for you, instead of
0:40
piping straight onto the cake and then
0:42
needing to scrape it off, trace around
0:44
your cake pan onto parchment or wax
0:46
paper and pipe into that ring instead.
0:48
And then put your piping in the freezer
0:50
for 10 minutes to chill and set. Now you
0:52
can lift up your favorite piping and
0:54
press it onto your cake and choose only
0:56
your favorite pipe details to use and
0:57
you'll have no regrets about the
0:59
results. Number three, try some new
1:01
flavors. I love my chocolate and vanilla
1:03
cakes, but try chocolate chip cookie
1:05
dough or coconut milk cake or just add a
1:07
different ingredient to flavor your
1:08
buttercream like lemon curd,
1:10
freeze-dried strawberries, caramel,
1:12
crushed Oreo cookies. You'll find all of
1:14
these recipes on britishgirlbakes.com.
1:17
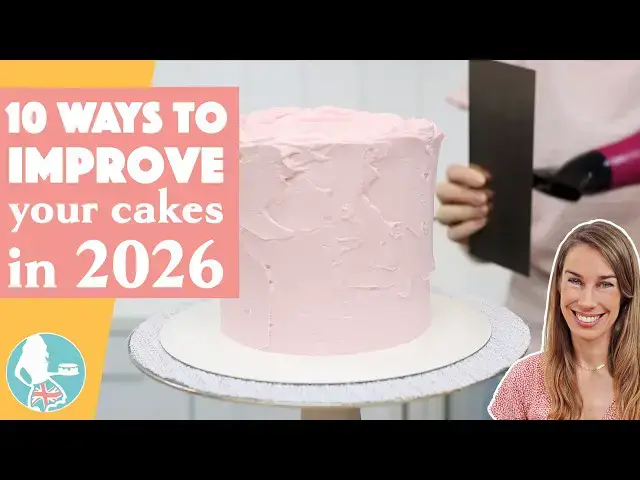
Smooth frosting is one of the most
1:18
common cake struggles people ask me
1:20
about. Get rid of air bubbles and make
1:22
your frosting insanely smooth using a
1:24
hair dryer, a blowtorrch, or hot water
1:26
on your cake scraper. Or perfect the
1:28
consistency of your buttercream with a
1:30
microwave. And improve your technique by
1:32
switching the angle you're holding your
1:34
cake comb or the material of your cake
1:36
comb or how high you spread the frosting
1:38
onto your cakes. Join my YouTube cake
1:40
studio membership to get exclusive
1:42
access to my perfectly smooth frosting
1:44
course for all of my tips and tricks.
1:46
For neat messages on your cakes, outline
1:48
the letters with a toothpick first to
1:50
make sure that the message is centered
1:52
and that it fits on your cake. And chill
1:54
your cake before piping so that you can
1:56
touch up any mistakes with a toothpick
1:58
without damaging the frosting
1:59
underneath. If you find yourself running
2:01
out of time to bake and frost and
2:03
decorate cakes, great news, you can
2:05
freeze them in between steps so that you
2:07
can spread out the work between
2:08
different days or even weeks. After
2:10
baking cakes and letting them cool, wrap
2:12
them twice in cling film or saran wrap
2:14
and then move them to the freezer. Or
2:16
you can assemble and even frost cakes
2:18
before freezing. Put them into the
2:20
freezer uncovered first for about an
2:22
hour to set the frosting and then wrap
2:24
in two layers of plastic wrap and put
2:25
the cake back into the freezer for up to
2:27
2 months. Move it to the fridge the
2:30
night before you'll be ready to work on
2:31
it so that it thaws gradually. And then
2:33
you can spend all of your time
2:34
decorating without rushing. And I can
2:36
assure you, I've done taste tests, and
2:38
previously frozen cake and buttercream
2:40
will taste just as good as when they
2:42
were freshly made, as long as you've
2:44
wrapped and thawed them properly. Always
2:46
let cakes come to room temperature
2:47
before serving for the best texture and
2:49
flavor. Now, let's talk about coloring
2:51
buttercream. If you're trying to get a
2:53
deep, vibrant color like red or navy,
2:56
you don't need to use a whole bottle of
2:58
food coloring. Start by tinting your
2:59
buttercream lighter than the color you
3:01
want, and then microwave it. 5 seconds
3:03
for a small bowl or 10 seconds for a
3:05
larger one. Melting the butter in the
3:07
buttercream deepens the color instantly,
3:09
but of course, melted buttercream is not
3:11
great for frosting or piping. So, pop it
3:13
into the freezer for 5 minutes, and the
3:15
cold will bring it back to the right
3:16
consistency and make the color even
3:18
darker. If you rest it for an hour or
3:20
two, you'll see it develop even more.
3:22
This is a great way to get bold colors
3:24
without the nasty taste of too much food
3:26
coloring. Look how much brighter this
3:28
red buttercream has become. It's
3:29
perfect. For any cake decorating skills
3:32
that use a piping bag, dotted designs,
3:34
piped borders, messages, flowers, if
3:37
your piping starts out neat but starts
3:39
to lose its shape and look blobby, the
3:41
warmth of your hands is melting your
3:43
buttercream. Put the piping bag in the
3:45
freezer, set a timer for 1 minute, and
3:47
then continue, and your colder
3:49
buttercream will be stiffer and hold its
3:50
shape much better as you pipe. Lots of
3:53
cake decorating techniques need
3:55
buttercream frosting to be cold and
3:57
firm, like stenciling, for example. And
3:59
I recommend chilling cakes before
4:01
piping, too. For these techniques, work
4:03
in a cold room to prevent condensation.
4:06
Condensation droplets can cause colors
4:08
to run and stain the cake's frosting.
4:10
Condensation happens with a big
4:12
difference in temperature. For example,
4:13
when you move a cake from the fridge to
4:15
a warm room. The presentation of your
4:18
cakes is usually the first impression,
4:20
so make it a good one. You can buy boxes
4:22
in packets of 10 really affordably. I
4:25
get mine on Amazon. And for taller
4:27
cakes, use the same boxes, but make them
4:29
taller using this hack. Cut two diagonal
4:31
slits into the side of the lid. The
4:33
shorter the better. And do the same on
4:35
the opposite side. Now, push the middle
4:37
flap inside the box and leave the rest
4:39
on the outside of the box on both sides.
4:41
And this will raise the lid up high
4:43
enough to fit over your tall cakes and
4:45
tear cakes. These 10 simple hacks will
4:48
improve your cake decorating skills and
4:49
help you avoid some of the most common
4:51
mistakes. To dive deeper and learn
4:53
hundreds of cake decorating tips and
4:55
techniques, visit my cake school on
4:57
britishgirlbakes.com. I'll see you