Up next in 10


Here are three ways to make a heart cake without a heart pan! This tutorial will show how to bake, assemble, frost and decorate a heart cake.
*Start your FREE 7 day trial on my cake school
https://britishgirlbakes.teachable.com/p/all-you-can-cake/
*LEARN The Basics of Cake and The Basics of Buttercream in my most popular online courses!
https://britishgirlbakes.teachable.com/
*My 4 Minute Buttercream recipe
https://www.britishgirlbakes.com/recipes/buttercream-frosting/
*READ a written version of this tutorial (with photos!)
https://www.britishgirlbakes.com/how-to-make-a-heart-cake-without-a-heart-pan/
*SUBSCRIBE to my channel for a new cake decorating tutorial every week!
*SAY HI!
Website: https://www.britishgirlbakes.com
Instagram: https://www.instagram.com/britishgirlbakes
Show More Show Less View Video Transcript
0:00
I'm going to show you three ways to make a heart-shaped cake without a heart pan
0:08
The first method is to cut a round cake into a heart
0:12
Trace around your cake layers onto a piece of paper or trace around the cake pan you used to bake the layers
0:19
Fold the paper in half and draw half of a heart and this way when you cut the heart out it will be perfectly symmetrical
0:25
You'll use this heart as a guide to cut your cake layers into hearts and
0:29
for the neatest results, you should chill your cake in the fridge for 30 minutes or the freezer
0:34
for 15 minutes, so that they're less crumbly. Trim around the heart with a serrated knife
0:39
like a bread knife, and when you pull the cutoffs away, you'll leave a heart-shaped cake behind
0:44
The next method to make a heart cake is to use a square pan or rectangular pan and two round
0:50
pans. Fill them with cake batter so that the round pans are twice as full as the square or
0:56
rectangular pan, because you need those cakes to be twice as tall. This is my perfect chocolate
1:01
cake batter, the 6-inch cake recipe. This is a 9 by 13-inch pan, and I'm eventually going to cut
1:08
four layers out of this by measuring halfway along the short side and cutting across the cake
1:13
there and then measuring that same amount along the long side twice and cutting at those points This makes four cake layers plus some leftovers but if you have a square cake pan you won have any extra cake These are four inch spring form pans and I levelling the cakes so that they flat
1:30
and then dividing the cakes in half horizontally to make two layers out of each
1:35
This way I'll have the same number of layers for the round parts and the square parts of the cake
1:40
Cut each of your round cakes in half to make eight semicircles. Now to make a heart, use a bit of buttercream or whatever frosting you're using
1:48
to attach the first square to a cake board, leaving at least an inch of cakeboard
1:53
sticking out beyond the bottom tip of the heart. Then pipe or spread frosting along the top two sides
2:01
Add a dot on the board on each side too and attach two semicircles of cake
2:07
The frosting will act as glue to make the cakes stick together and to the cake board below
2:12
Don't worry about imperfections because the filling and frosting will even everything out
2:16
to make a neat shape by the end. Add your filling and repeat with the next square and two more semicircles
2:23
and continue with the rest of your cake layers to make a four layer cake in the shape of a heart
2:28
I'll show you how to frost this in a minute. The simplest way to make a heart cake with no waste is to bake just a round cake
2:36
Cut two sides off to make the bottom edges of the heart and then use frosting to attach those to the top of the cake to make the bulges of the heart You have to kind of curve them around They won sort together perfectly like puzzle pieces like the semicircles did with the previous method
2:53
But the benefit of this method is that you only have to bake a round cake, or a few round
2:58
cakes if you want to make several layers. Okay, let's frost a heart cake. There are four
3:04
tricks to this. First, make sure your buttercream is a nice, loose consistency so it's easy to
3:10
spread and smooth. I like the microwave hack, where you put a third of the buttercream in the
3:15
microwave for 10 seconds and then stir it into the rest of the batch to make it silky smooth
3:19
and to get rid of air bubbles too. The second trick is to chill the cake before you frost it
3:25
so that the layers are firm and less crumbly. Look at the difference between this cake
3:29
which has been chilled in the freezer for 15 minutes, so the frosting is gliding smoothly and
3:34
easily over it. And the cake on the right, which hasn't been in the fridge yet, so the room
3:39
temperature cakes are very crumbly and as I spread buttercream over it, it's pulling off lots and lots
3:44
of crumbs. If you chill your cake, it will warm back up to room temperature by the time you serve it
3:50
and be just as soft as it was before putting it into the fridge or freezer. Okay, the third trick for
3:56
frosting a heart-shaped cake is to apply a crumb coat, which is this thin layer of frosting to trap
4:01
any crumbs so that they don't get into the final layer of frosting. It doesn't have to be neat
4:06
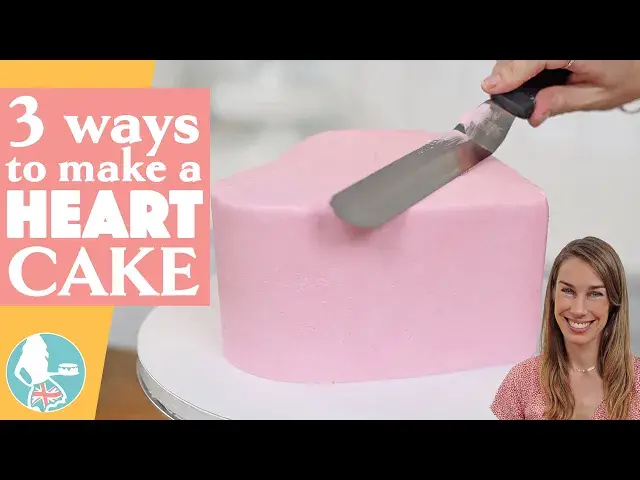
but it does have to cover the whole cake so that there are no naked areas of cake which will let crumbs escape later And the fourth trick for the final layer of frosting is to spread the frosting over the
4:18
top edge and the pointed tip of the heart so that it sticks out, and then scrape away from
4:24
the tip of the heart and away from the dip in the heart up here
4:28
And by scraping in that direction you'll leave a sharp point to make these parts of the
4:32
heart really angular and that makes the shape of the heart easily recognizable
4:36
Tidy up the top edge by swiping sideways with your offset spatula and you have a frosted heart cake
4:42
You can leave this plane or decorate it so many ways. The trendiest way at the moment is to add vintage style over-the-top piping in different colours
4:51
using piping tips like a petal tip for these roughly ribbons down here and these swags up here
4:57
A leaf tip will work for these instead and add even more ruffles to the piping
5:02
An open star tip is great for textured beaded borders, which you can layer on top of the piping you already have on the cake
5:08
and also use for writing messages. The almost excessive piping really makes these vintage designs pop
5:15
I hope this tutorial has been useful. Ask me any questions in the comments. Subscribe to my channel for a new cake decorating tutorial every week
5:22
and visit my cake school on Britishgirlbakes.com for online cake decorating courses and memberships
5:28
Thanks for watching. Thank you
#Cooking & Recipes
#Desserts