0:00
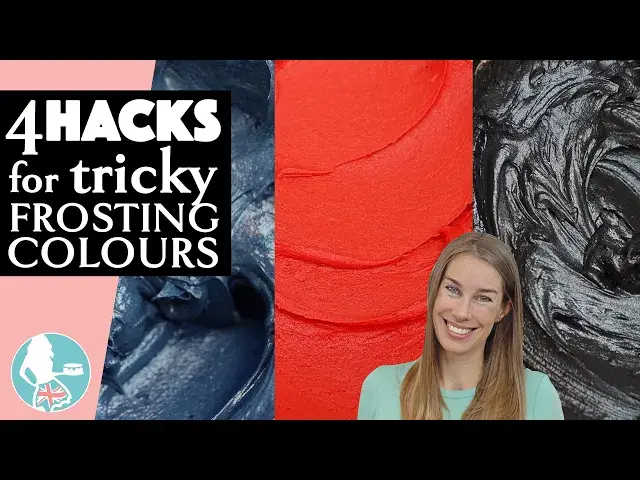
I'm going to share my most useful hacks for tinting frosting for tricky colours like black, red and navy
0:09
Black frosting is the most common struggle so let's start with that
0:13
There are two secret ingredients here, chocolate chips and cocoa powder. Put the chocolate chips
0:18
in the microwave for 30 seconds at 70% power so they don't overheat and seize and then stir the
0:24
chocolate until it's smooth with no lumps. Leave it to cool to room temperature. Meanwhile add hot
0:30
water to the cocoa powder a little bit at a time until it makes a thin paste with no lumps
0:35
I use about two tablespoons of cocoa powder and one tablespoon of water for every cup of
0:40
buttercream. When the chocolate and cocoa mixture are at room temperature, add them to your frosting
0:46
I like to do this before adding the milk or cream in my 4 Minute Buttercream recipe so that the
0:52
buttercream is much stiffer than it would normally be because the liquid cocoa powder and melted
0:57
chocolate will thin out the buttercream a lot, making it silky smooth and easy to spread or pipe
1:03
If you've already added milk or cream then the chocolate and cocoa powder might make the
1:06
buttercream too runny. Now add black food colouring and I definitely recommend gel colours over liquid
1:12
colours because they're much more concentrated. I buy little bottles of coloured gels but for black
1:18
I use bigger bottles since you need so much more gel. You'll need a generous squirt of gel but not
1:24
nearly as much as you'd need if you were using liquid colours. Stir it in and you're aiming for a
1:29
colour that's darker than grey but not yet a true jet black. Cover the bowl with plastic wrap and
1:35
leave it for an hour for the colour to develop and darken and ta-da! A true black buttercream frosting
1:42
These first two hacks will work for any dark colour of buttercream like navy blue. Start by
1:47
adding chocolate to your frosting, ideally melted chocolate and cocoa powder but you can use one or
1:52
the other if you don't have both. The darker the brown you start with, the less colour you'll need
1:57
to add later. Adding just blue to brown will make a fairly dark blue but to make navy, add some black
2:04
as well. Go back and forth between blue and black, adding a bit at a time until the colour is almost
2:10
as dark as you want it to be. Cover the bowl with plastic wrap, leave it for an hour and voila
2:16
A beautiful deep navy buttercream! If you're struggling to achieve the colour shown on a
2:22
bottle of gel it's probably because you're not using enough gel. Gels are concentrated but you
2:28
do need to use a generous amount for really bright and bold colours. Covering the bowl and letting the
2:34
frosting rest gives any gel colour a chance to develop. Look at the difference just one hour
2:39
makes for this orange buttercream. Red frosting can be really tricky but just like with any other
2:47
colour, use a good amount of red gel and then you can make the red frosting brighter by covering the
2:52
bowl to let it rest for an hour. Another hack that works really well with red buttercream is to heat
2:58
it. Scoop up no more than a third of the buttercream and microwave it for just 10 seconds. It will melt
3:04
and get much darker. Add the melted buttercream to the rest of the red buttercream and mix it
3:10
together and it will look lumpy at first but leave it to come to room temperature or speed up the
3:15
process by putting it in the freezer for five minutes to make a beautiful deep red frosting
3:20
that's silky smooth. A common question is how to avoid the bitter taste caused by using lots of gel
3:28
As well as limiting the amount of gel you use by using these methods, another hack is to add more
3:33
flavour to coloured frosting. Add a bit of clear vanilla or almond extract or even other flavours
3:39
like lemon or mint, depending on the flavour of your cake of course. The flavour will disguise any
3:44
taste of the gel in the buttercream. All I taste in this bright red cake is the almond flavoured
3:50
red frosting and my deliciously moist perfect chocolate cake and yummy oreo filling. I hope
3:55
this tutorial has been useful. I share everything I know about buttercream in my online master course
4:01
The Basics of Buttercream, where you'll learn how to make buttercream, troubleshoot any issues like
4:06
graininess, air bubbles, yellow buttercream and also how to check and adjust the consistency for
4:12
piping and frosting, how to frost a cake with super smooth frosting and sharp edges, how to
4:17
store buttercream and how to use it for lots of stunning unique cake decorating techniques
4:23
To take the master course on my cake school, click the link up here in the top of the screen
4:27
or go to britishgirlbakes.com. Thank you for watching