live_tv
Livestream Starting Soon
00
Hours
:
00
Minutes
:
00
Seconds
Up next in 10


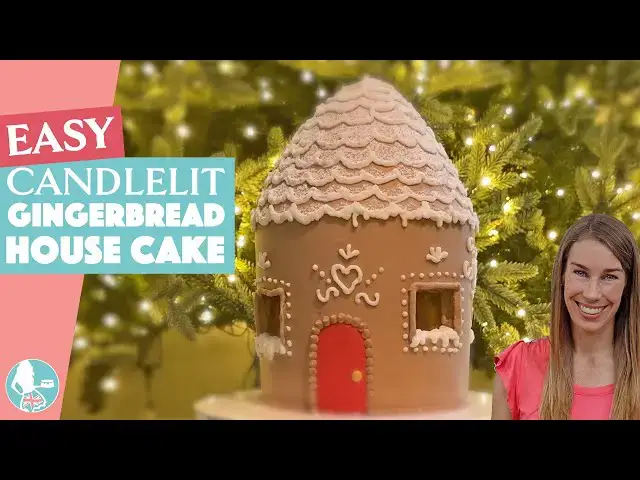
This cake gingerbread house is surprisingly simple to make, with a clever trick that makes the windows glow like real candlelight. It’s built from round cake layers that are easy to bake and frost, finished with a snowy roof and edible glass windows that look magical once the cake is assembled.
⭐Join my channel for members-only perks!
https://www.youtube.com/channel/UC1k3PDqnjUG8wMH1vY3yojA/join
🥣My Recommended Cake Decorating Tools: https://www.britishgirlbakes.com/my-recommended-tools-for-cake-decorating
💫Start your FREE 7 day trial on my cake school: https://britishgirlbakes.teachable.com/p/all-you-can-cake
🎂Take my FREE course on 10 Frosting Techniques: http://britishgirlbakes.com/free-course
👩🏼🍳My 4 Minute Buttercream recipe
https://www.britishgirlbakes.com/recipes/buttercream-frosting/
📄READ a written version of this tutorial (with photos!)
https://www.britishgirlbakes.com/mini-cake-tutorial
👍Please LIKE and SUBSCRIBE to my channel for a new cake decorating tutorial every week!
💬 SAY HI!
Website: https://www.britishgirlbakes.com
Instagram: https://www.instagram.com/britishgirlbakes
Show More Show Less View Video Transcript
0:00
This gingerbread house cake is made with
0:02
round cake layers that are easy to bake
0:04
and frost, a snowy roof with a dusting
0:06
of fresh snow, and best of all, edible
0:09
glass windows with flickering candle
0:11
light inside. For the cake layers, I'm
0:13
using my very vanilla cake recipe baked
0:15
in four 6-in pans. And once they're
0:18
cool, cut out the middle of three of
0:20
them using a 2-in cookie cutter. This
0:22
will make just enough space to put an
0:24
electric candle or tealight in the
0:26
middle eventually. To make edible glass,
0:28
pour sugar and water and corn syrup into
0:31
a stainless steel pan and heat over
0:33
medium. If you can't find corn syrup,
0:35
you can use glucose, but it will make
0:37
the glass a bit foggy. The corn syrup or
0:39
glucose will keep the glass hard so it
0:41
doesn't melt. Use a candy thermometer to
0:44
watch the temperature, and when it gets
0:45
to 310° F, plunge the pan into a pot of
0:49
iced water to stop the cooking process.
0:51
Then, pour the mixture into a square
0:53
silicon mold. This is an ice cube tray
0:55
for those big square ice cubes that are
0:57
so trendy in cocktails, and they're the
0:59
perfect size for the windows on this
1:00
cake. Make four squares, or five to have
1:03
an extra just in case. When these cool
1:05
after about 30 minutes, you can pop them
1:07
out of the mold, and they'll be about
1:09
the same height as each of your cake
1:10
layers, which makes making the windows
1:12
really easy later. Make chocolate
1:15
buttercream by melting chocolate chips.
1:16
And then after they cool, add them to
1:18
butter, powdered sugar, or icing sugar,
1:21
salt, and vanilla. Set aside about a cup
1:23
of white buttercream first for
1:25
decorations on the gingerbread house
1:26
later. Trace around your cookie cutter
1:28
onto the middle of a 6-in cake board and
1:30
cut out that little circle. Spread some
1:33
buttercream onto the cakeboard and press
1:34
your first cake layer down onto it, one
1:36
of the ones with a hole in the middle.
1:38
Put this onto a bigger cake board. This
1:40
is 10 in wide. Spread chocolate
1:42
buttercream on top of this layer and
1:44
into the hole too to cover those cut
1:46
sides, which will stop the cake from
1:47
drying out because the buttercream will
1:49
lock the moisture into the cake. Then
1:51
with the edible glass, hold one square
1:53
against the edge of another cake layer
1:55
and cut the cake on either side of the
1:56
square to make space for a window. Do
1:59
this three times, making one section of
2:01
cake bigger than the others to leave
2:02
space for a door. Also, trace around a
2:05
window onto parchment paper or wax paper
2:07
and fold that paper in half twice. And
2:09
then cut out the square to make four
2:11
square pieces of paper, which you'll use
2:13
for the windows later. Press one section
2:15
of cake down onto the chocolate
2:17
buttercream and hold a window up next to
2:18
it to measure where to place the next
2:20
piece of cake. And repeat for the other
2:22
two windows. Spread chocolate
2:24
buttercream in between the sections of
2:26
cake to cover where you cut the hole out
2:28
of the middle and also the side
2:30
sections, too. And then slide the
2:32
windows into the gaps you left so that
2:34
they're just within the cake, but as
2:36
close as possible to the outside. Spread
2:38
chocolate buttercream onto the top of
2:40
this cake layer and also onto the top of
2:42
the third cake layer with a hole in the
2:44
middle. And spread it around the hole in
2:46
the middle too. And flip this over to go
2:48
on top of the cake. Wrap the cake in
2:50
cling film or saran wrap and put it into
2:52
the fridge for 30 minutes or the freezer
2:54
for 15 minutes to chill so it firms up.
2:57
And then to hold the cake in place on
2:59
its smaller cakeboard on top of the
3:01
larger cake board, use a piece of
3:02
non-slip mat or a ring of masking tape.
3:05
Next, you'll need the four pieces of
3:07
parchment paper you traced and cut out
3:09
earlier. Press one onto each window to
3:11
cover and protect the edible glass and
3:13
keep it shiny. And then spread a layer
3:15
of buttercream onto the top of the cake
3:17
and push four bobber straws or wooden
3:19
dowels into the cake. Because for the
3:21
roof, you'll need support so that it
3:23
doesn't sink down into the bottom of the
3:25
house. Cut the straws or dowels to be
3:27
the same height as the cake. If you're
3:29
enjoying this tutorial, please subscribe
3:31
to my channel and tap join to become a
3:33
member for exclusive perks like access
3:35
to my perfectly smooth frosting course.
3:38
Place a cakeboard on top, pushing it
3:40
down to stick it to the chocolate
3:41
buttercream. This should be the same
3:43
width as the cake so it will be
3:45
invisible later and it will hold up the
3:47
roof. Use more buttercream to attach the
3:50
final cake layer on top, the one without
3:52
a hole in the middle. And then arrange
3:54
the cut sections of the cake on top to
3:56
form the roof. the parts you cut out to
3:58
make space for the windows and also the
3:59
round pieces from the middle of the
4:01
other cake layers. Attach them to each
4:03
other by spreading on buttercream as
4:05
glue to make a pile on top of the cake.
4:07
Put the whole cake into the fridge for
4:09
another 30 minutes or the freezer for 15
4:11
minutes. And then use a serrated knife
4:13
to trim around the pieces of cake to
4:15
make a cone shape for the roof. Crumb
4:17
coat the outside of the cake by
4:19
spreading a thin layer of buttercream
4:21
over it to trap any crumbs that come off
4:23
the cake. It doesn't need to be neat
4:25
because it's going to be covered up
4:26
soon. Put the cake into the fridge for
4:28
30 minutes to set the frosting and then
4:30
spread another layer of frosting over
4:32
the roof and the walls of the house.
4:34
Since the roof is cone- shaped, a cake
4:36
comb isn't the best way to get it
4:38
smooth. A piece of acetate is ideal
4:40
since it can curve around easily and
4:42
leaves the surface smoother. A cake comb
4:44
is fine for the bottom of the house,
4:46
though. Don't worry too much about the
4:47
join between the walls and the roof
4:49
because it's going to be covered up
4:51
soon. To peel the parchment off the
4:53
windows, press gently with a toothpick
4:55
until you find the edge and then pry it
4:58
up and pull it off. The windows
4:59
underneath will be clean instead of
5:01
smeared and smudged with buttercream.
5:03
You can decorate the house however you
5:05
like. I put the leftover chocolate
5:07
buttercream into a piping bag with a
5:09
medium round piping tip. A number eight
5:11
to pipe a frame around each window, the
5:14
top and the sides, not the bottom edge
5:16
because I'm going to put snow down
5:17
there. I'm tinting about 2 tablespoons
5:20
of buttercream red for a door. Cut a
5:22
door shape out of parchment paper to
5:24
make a stencil and press it against the
5:26
frosted cake and spread the red
5:27
buttercream over it and then peel it
5:29
off. Piping little dots of chocolate
5:31
buttercream around the door gives it a
5:33
nice trim. This is a flat round gold
5:36
sprinkle as a doorork knob. Add some
5:38
milk to the rest of the white
5:39
buttercream so that it's soft and smooth
5:41
and easily stirable, which will make it
5:43
look more like snow. Use a small round
5:45
piping tip and pipe this buttercream
5:47
snow along the bottom edge of each
5:49
window, making drips as if it's starting
5:51
to melt. I'm using a piping tip to score
5:54
semicircles or scallops onto the roof to
5:57
give it a tiled look and then piping
5:59
snow over them using plain white
6:00
buttercream and a small round piping
6:02
tip. Wiggling the lines and piping some
6:04
drips to make it look like snow. I'm
6:06
adding a few simple details like dots
6:09
around the windows and some hearts and
6:11
curvy lines up here. And then as a
6:13
finishing touch, put a spoonful of
6:15
powdered sugar into a sie and tap it
6:17
over the cake to dust it with what looks
6:19
like snow. Put this into the fridge to
6:22
chill and set. And then it's time to add
6:24
the candle light. Slide an offset
6:26
spatula or pallet knife underneath the
6:28
cake and pick it up on its little cake
6:30
board. Put a battery operated tealight
6:33
onto the middle of the big board and
6:34
then lower the cake down over it,
6:36
attaching the boards together with some
6:38
buttercream so the cake doesn't slide
6:40
around when you carry it. I'm piping
6:42
some of the leftover chocolate
6:43
buttercream around the bottom of the
6:44
cake, too, which covers up the join of
6:46
the cake on its little cake board and
6:48
looks pretty, too. I love the flickering
6:51
candle light you can see through the
6:52
windows. And you can eat every part of
6:54
the cake, including the windows. To
6:56
serve the cake, cut down into the roof
6:58
until you feel the knife hit the
7:00
cakeboard in the middle and slice up the
7:02
roof. And then lift up the cakeboard in
7:04
the middle and slice the bottom part of
7:05
the house. Tell me in the comments if
7:07
you're going to make this and ask me any
7:09
questions there, too. and visit my cake
7:11
school on britishgirlbakes.com to learn
7:13
hundreds of cake decorating techniques
7:14
and designs with my online courses and
7:17
memberships. See you there.
#Baked Goods
#Special Occasions