Up next in 10


🥣My Recommended Cake Decorating Tools: https://www.britishgirlbakes.com/my-recommended-tools-for-cake-decorating
💫Start your FREE 7 day trial on my cake school: https://britishgirlbakes.teachable.com/p/all-you-can-cake
🎂Take my FREE course on 10 Frosting Techniques: http://britishgirlbakes.com/free-course
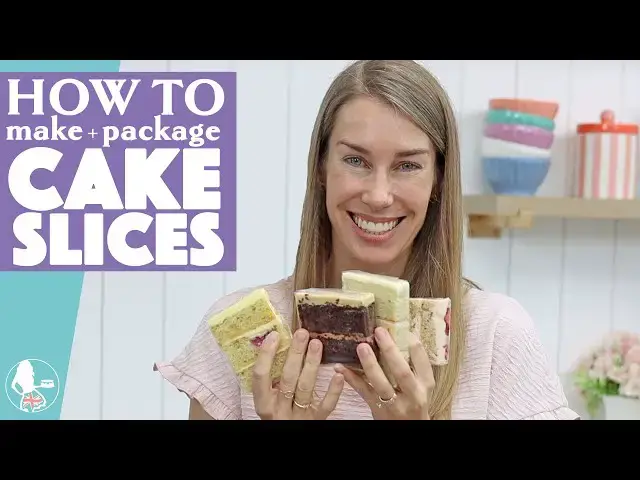
Planning ahead for a big event, bake sale, or client order? In this video tutorial you'll learn how to make and package cake slices to keep them delicious and beautiful! Not only does it save time on the day, your cake slices will look professional and irresistible.
In this tutorial I’ll walk you through everything from baking and assembling your cake, to cutting it neatly, wrapping each slice beautifully, storing them so they stay fresh, and transporting them without a single smudge. It’s all beginner-friendly, and you don’t need any fancy tools to get started!
👩🏼🍳My 4 Minute Buttercream recipe
https://www.britishgirlbakes.com/recipes/buttercream-frosting/
📄READ a written version of this tutorial (with photos!)
https://www.britishgirlbakes.com/how-to-make-and-package-cake-slices-for-events-sales-or-gifts/
👍Please LIKE and SUBSCRIBE to my channel for a new cake decorating tutorial every week!
💬 SAY HI!
Website: https://www.britishgirlbakes.com
Instagram: https://www.instagram.com/britishgirlbakes
Show More Show Less View Video Transcript
0:00
cake slices are so popular for school
0:02
events brunches bake sales your cake
0:04
business or your wedding tasting and
0:06
this tutorial will show you how to make
0:08
package store transport and serve them
0:11
all in a way that's easy and looks
0:12
absolutely gorgeous you can use this
0:14
technique with both round and
0:16
rectangular cakes and it's a great way
0:18
to prepare desserts in advance without
0:20
needing to bake everything at the last
0:22
minute let's start with I think the
0:24
easiest kind of cake to use a sheet cake
0:26
you can bake however many layers you'd
0:28
like of course the more layers you bake
0:30
the taller your cake slices will be if
0:32
your cake's quite large here's a trick
0:34
for getting it out of the pan without
0:36
cracking or breaking it place a wire
0:38
rack directly on top of the cake pan and
0:40
then flip the whole thing upside down
0:41
and lift the pan away that gives you a
0:44
sheetcake perfectly centered on your
0:45
wire rack all in one piece i'm making
0:47
this one a cookies and cream cake so I'm
0:49
mixing my 4-minute buttercream with some
0:51
crushed Oreo cookies i like to assemble
0:53
these cakes on a cutting board so place
0:55
your first cake layer on the board and
0:57
cover it with filling spreading it level
0:59
with an offset spatula or the back of a
1:01
spoon then place your next cake layer on
1:03
top i like to add buttercream on top too
1:05
for the best cake to frosting ratio
1:08
before we move on to slicing pop it into
1:10
the fridge for at least 30 minutes or
1:11
the freezer for about 15 which makes the
1:14
cake and buttercream firm up and gives
1:16
you much neater slices when you cut them
1:18
if you want to make your cakes look even
1:20
taller without baking more layers try
1:22
this divide each cake in half
1:24
horizontally before or after you
1:26
assemble the cake i'm using a wire cake
1:28
level but you could use a serrated knife
1:30
if you don't have one adjust the wire so
1:32
it's halfway up each cake layer and
1:34
gently pull it back and forth with
1:35
little sawing motions until you've
1:37
sliced through and then you can add
1:39
extra layers of filling now you've got a
1:41
four layer cake with three layers of
1:43
filling to add height and also flavor
1:45
while the cake's chilling take a moment
1:47
to clean up your workspace you don't
1:49
want any stray crumbs or smears of
1:51
buttercream getting into your packaging
1:53
later this is also the time to prep your
1:55
labels if you haven't already having the
1:57
flavor name on each slice makes
1:59
everything look more professional and is
2:01
so helpful for customers or guests
2:03
especially if there are any allergies
2:05
once your cake is fully chilled it's
2:07
time to slice you'll need your stickers
2:09
or labels or salad tape a serrated knife
2:11
and a ruler i'm making four slices along
2:14
the long side of this cake use a ruler
2:16
to mark out where you'll cut scoring the
2:19
top lightly with your knife then slice
2:21
through with a bread knife wiping it
2:23
clean after each slice for the width of
2:25
each slice I'm using the width of my
2:27
ruler this makes it super easy to divide
2:29
the cake evenly don't worry if the
2:31
slices fall over as you cut them they'll
2:33
be easy to handle since they're cold
2:35
they already look like bakery slices and
2:37
we haven't even started packaging them
2:39
yet now it's time to wrap them for
2:41
rectangular cake slices cellophane works
2:43
best if you don't have any cling film is
2:46
fine place a slice of cake onto a sheet
2:48
of cellophane and cut it wide enough so
2:49
that you can fold each side in just past
2:52
the center of the cake don't tape it yet
2:54
keeping a finger pressed down on this
2:56
part fold each end like you're wrapping
2:58
a present crease two triangle shapes on
3:00
each end and then fold them up and over
3:02
the top of the cake slice use one of
3:04
your stickers or flavor labels to seal
3:06
the wrap just like you would for a gift
3:08
make sure all your labels are going in
3:10
the same direction it makes everything
3:11
look clean and consistent when the
3:13
slices are displayed together here the
3:15
frosted top of the cake slice is on the
3:17
right and I'm placing the flavor label
3:19
so that the text flows in that direction
3:21
for each slice check that your
3:23
cellophane is wide and tall enough you
3:25
want the first two sides to overlap each
3:28
other across the middle of the cake and
3:29
also for the top and bottom after making
3:32
those triangles you need them to fold up
3:34
over onto this front surface of the cake
3:36
so you can seal everything with your
3:38
label consistency is key especially if
3:40
you're selling or presenting multiple
3:42
slices together fold the acetate or
3:44
cling film the same way each time and
3:46
place the labels in a matching position
3:48
you would use cling film the same way as
3:50
this cellophane but I will say it
3:51
doesn't look quite as neat because the
3:53
corners won't be as sharp and the
3:55
packaging won't be as shiny because of
3:56
all of the wrinkles and creases in cling
3:58
film if you're making cake slices with
4:00
different flavors the size of the
4:02
cellophane will change if the cakes are
4:04
different sizes for example these
4:06
chocolate peanut butter slices aren't
4:07
quite as tall as the Oreo ones because
4:09
they're made with two layers of cake
4:10
instead of four once you've wrapped up
4:12
your slices you'll need to store them
4:14
unless you're serving them right away
4:15
i'll share my tips for storing in a
4:17
moment but first what if you're working
4:19
with a round cake you've got two options
4:21
first you can cut the round cake into
4:23
traditional wedge slices these are big
4:26
and they look gorgeous when they're
4:27
displayed at cafes or events just like
4:29
with sheetcakes these will be the
4:31
neatest if you package them when they're
4:32
cold so cover a tray of them with cling
4:34
film or saran wrap and put them into the
4:36
freezer for 15 minutes choose one side
4:38
of the wedge to be the bottom of the
4:39
slice and let the edges of the cling
4:41
film meet there since that's the base it
4:43
won't matter that the plastic overlaps
4:45
and looks less tidy there i tried
4:47
wrapping these in cellophane but it
4:49
doesn't sit flat on the curved edge and
4:51
it's difficult to wrap tightly without
4:52
the sharp angles that the rectangular
4:54
slices have so I recommend using cling
4:57
film or saran wrap instead these big
4:59
wedge slices are ideal for bake sales
5:01
dessert tables or for portioning cakes
5:03
out in advance without them drying out
5:05
if you store these properly which I'll
5:07
cover in a minute the cling film will
5:08
keep the cake moist and when you unwrap
5:10
it and serve it it will still taste
5:12
fresh and delicious but if you prefer
5:15
rectangular slices like this one you can
5:17
make these even if you start off with a
5:19
round cake here's how cut an inch or two
5:21
in from the edge of the cake straight
5:23
across around all four sides to leave a
5:26
square of cake in the middle these
5:28
curved edge pieces won't work for neat
5:30
rectangular slices but you can use them
5:32
as samples or make cake pops with them
5:34
instead make sure you don't have any of
5:36
the frosting from the cake left on the
5:38
corners so trim a little bit more if
5:40
necessary now divide the center square
5:42
of cake into rectangular slices and just
5:45
like for the other cakes this is best to
5:47
do when the cake is cold so that the
5:48
cake and buttercream are firm now you
5:51
can wrap these the same way as the cutup
5:53
sheet cake to make neat rectangular cake
5:55
slices and yes you can absolutely make
5:58
these in advance in fact I recommend it
6:00
when I made these for teacher
6:01
appreciation week at both of my kids
6:03
schools there's no way I could have
6:05
baked assembled sliced and wrapped all
6:07
of them in one day so I did it in stages
6:09
across a few weeks and stored them in
6:11
the freezer they'll be fine for a month
6:13
as long as they're properly wrapped and
6:15
stored in an airtight container that
6:16
could be a sealed box or a big zip top
6:19
bag or you can double wrap a tray with
6:21
cling film if the wrapping isn't
6:23
airtight the cake will dry out and worse
6:25
it can absorb other flavors from the
6:27
freezer move the slices to the fridge
6:29
the day before you need them so that
6:31
they thaw and they'll be ready to go and
6:33
now it's time to transport and serve
6:35
these always transport your slices cold
6:37
straight from the fridge the buttercream
6:39
will be firm which means it's less
6:41
likely to get damaged on the way to your
6:43
event or drop off also when the
6:44
buttercream is cold you'll be able to
6:46
move them from your storage container to
6:48
your display or cake stand without the
6:50
frosting smudging and here's a final
6:52
little detail that really matters let
6:54
your slices come to room temperature
6:56
before serving buttercream tastes best
6:59
when it's soft and creamy not cold and
7:01
firm from the fridge and also cake
7:03
tastes dry when it's cold i recommend
7:05
letting the slices sit out for about an
7:07
hour before serving it makes the texture
7:10
better the flavor more pronounced and
7:11
honestly even if they've been frozen
7:13
they'll taste like they're freshly made
7:15
so that's how to make and package cake
7:17
slices whether you're selling them
7:19
gifting them or serving them at your
7:20
next event if you found this helpful
7:22
give the video a thumbs up and subscribe
7:24
for more baking and cake decorating
7:26
tutorials i've got lots more tips coming
7:28
your way thanks for watching and I hope
7:30
to see you over on my cake school on
7:31
britishgirlbakes.com
#Desserts
#Baked Goods