Up next in 10


🥣My Recommended Cake Decorating Tools: https://www.britishgirlbakes.com/my-recommended-tools-for-cake-decorating
💫Start your FREE 7 day trial on my cake school: https://britishgirlbakes.teachable.com/p/all-you-can-cake
🎂Take my FREE course on 10 Frosting Techniques: http://britishgirlbakes.com/free-course
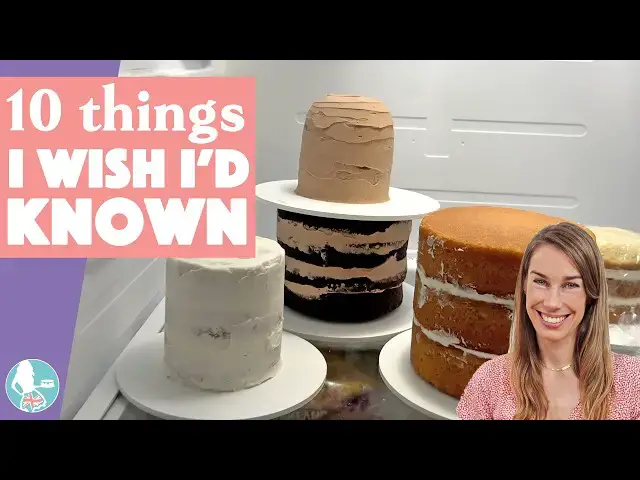
In this video I share 10 essential tips for cake decorating for beginners from choosing the right cake board to fixing buttercream issues. Avoid common mistakes and learn time-saving tricks to make your cakes look professional from the very start!
0:00 Introduction
0:28 What size cake board should I use?
0:58 Why should you put cakes in the fridge or freezer?
1:47 What is room temperature for cakes and why does it matter?
2:49 What to do if your ingredients are too cold
3:19 Do you really need fancy cake decorating tools?
3:29 How to mix buttercream colours
4:17 Using strategy to make cakes faster
4:58 How to freeze frosted and decorated cakes
5:50 How to price cakes
6:10 Why you should charge for deliveries
👩🏼🍳My 4 Minute Buttercream recipe
https://www.britishgirlbakes.com/recipes/buttercream-frosting/
Show More Show Less View Video Transcript
0:00
I've been decorating cakes for 13 years
0:02
now. And I can't tell you how many
0:03
little things I wish I'd known when I
0:05
started out. Today, I'm sharing 10 cake
0:07
decorating tips that would have saved me
0:09
so much time, money, and stress when I
0:12
was a beginner. And some of these might
0:13
really surprise you. From how to stop
0:15
your frosting from melting to saving
0:17
hours of time with strategic planning
0:18
and a few things you already have at
0:20
home to the one mistake that makes your
0:22
cake look instantly unprofessional. I'm
0:24
going to walk you through all of the
0:26
tips that will totally change the way
0:27
you make your cakes. Let's start with
0:29
how to choose a cake board. There are
0:31
lots of different materials you can
0:32
choose between, but the most important
0:34
thing is that you choose one that is at
0:35
least 2 in bigger than your cake,
0:38
meaning wider than your cake. Because by
0:40
the time you've added a crumb coat and a
0:42
final coat of frosting and your
0:43
decorations, your cake will be bigger
0:45
than when it started. And going right up
0:48
to the edge of the cakeboard looks
0:50
awful. It's almost impossible to
0:52
transfer it neatly to another cakeboard
0:54
now. So instead, if you're unsure,
0:56
always choose the bigger option. The
0:58
next cake decorating tip for beginners
1:00
is to use your freezer. If you try to
1:02
frost a cake when it's at room
1:04
temperature, you'll notice lots of
1:05
crumbs coming off in your frosting and
1:07
the cake will slip and slide all over
1:09
your cake board. Instead, use a dot of
1:11
buttercream on your cakeboard before you
1:13
place your first cake layer down onto
1:15
it. And then layer your cake and put it
1:17
into the freezer for 15 minutes. And
1:19
this will set that dot of buttercream at
1:20
the bottom. And it will firm up the cake
1:22
so it's less crumbly. Now, when you
1:24
frost your cake, your buttercream will
1:26
glide over it as long as it's the right
1:28
consistency. And if you need help with
1:29
that, click the link up here to watch my
1:31
tutorial on buttercream consistency. And
1:33
if you're wondering if freezes change
1:35
the taste of cakes, I've done blind
1:36
taste tests to check. And I honestly
1:39
can't taste the difference between a
1:41
cake that was baked that morning and a
1:43
cake that's been in the freezer for a
1:44
week, stored, and thawed properly. This
1:47
next tip is a personal one for me. I
1:49
moved to Texas about five years ago and
1:51
I had no idea how extreme the
1:53
temperatures were. It turns out room
1:55
temperature really matters when your
1:57
cake decorating. I moved here just
1:58
before a really cold winter and before
2:01
my studio was built, I was renting a
2:03
garage which I set up to be a temporary
2:05
cake studio and there was no heating, no
2:08
insulation, so it got really cold in
2:10
there. As I frosted cakes, the
2:11
buttercream would freeze onto the cake
2:13
and it would become impossible to
2:15
smooth. But then when summer came
2:17
around, I had the opposite problem. The
2:18
garage was 110° F and the cakes would
2:22
literally melt in front of me as I
2:23
frosted and decorated them. So, if you
2:25
followed a recipe and your buttercream
2:27
is too stiff even though you know you've
2:29
added enough milk or it's too runny even
2:31
though you know you've added enough
2:32
sugar, it's probably the temperature of
2:34
your room. If you're in a cold room, try
2:36
putting the bowl of buttercream into the
2:37
microwave for about 10 seconds to warm
2:39
it up just a bit to room temperature.
2:41
And if you think the room is too warm,
2:43
try putting the bowl of buttercream into
2:44
the freezer just for a minute or two to
2:46
cool it down. That way, it will be much
2:48
easier to work with. But don't wait for
2:51
ingredients to come to room temperature.
2:53
I know that recipes almost always call
2:55
for ingredients like eggs and butter to
2:57
be at room temperature, but that doesn't
2:59
mean waiting hours and hours with your
3:00
ingredients on the counter. Instead, put
3:02
butter into the microwave for 10
3:04
seconds. Flip it over and do another 10
3:06
seconds and it will be perfectly at room
3:08
temperature. For eggs, put them in a
3:11
bowl of lukewarm water, not hot, just
3:13
lukewarm, and leave them there for about
3:15
five minutes, and they will magically be
3:17
at room temperature, ready to use for
3:18
your recipe. Tip number five, you don't
3:21
need fancy tools to decorate beautiful
3:23
cakes. When I lived in Costa Rica, I had
3:25
a cake shop, and whenever I visited the
3:27
US or England, I would buy all of the
3:29
fancy cake decorating tools I could
3:30
find, believing I needed them to make
3:32
beautiful cakes. But since then, I've
3:35
realized you can use all sorts of hacks
3:36
to make most of these tools yourself for
3:38
a fraction of the cost, like parchment
3:40
stencils, to name just one. Check out my
3:42
tutorials on 12 secret cake decorating
3:44
tools you already have and cake
3:46
decorating without fancy tools for lots
3:49
of ideas. Now, here's a practical hack
3:51
that will keep piles and piles of dishes
3:53
out of your sink. There are lots of cake
3:55
decorating techniques that only need a
3:57
tiny amount of buttercream. Instead of
3:59
mixing colors in several bowls and
4:01
having a huge pile of dishes to wash
4:03
afterwards, mix your colors in a cupcake
4:05
tray. It's quick and easy to stir the
4:07
colors into the buttercream when they're
4:09
all close together like this before
4:10
scooping them into piping bags or
4:12
spreading them straight onto a cake. And
4:14
it only takes a few seconds to wash the
4:16
tray at the end. Tip number seven, be
4:18
strategic with your time. Bake, prep,
4:21
frost, and decorate in stages to be the
4:24
most productive. For example, instead of
4:26
blocking off an entire day to make a
4:28
cake, which would leave you waiting and
4:30
wasting time during baking and cooling
4:32
and any chilling periods, and really
4:34
would take all day, intentionally
4:36
schedule each part of your cake. Bake
4:39
the layers and make your buttercream and
4:40
fillings while those are in the oven. I
4:42
used to squeeze this into my baby's nap
4:44
time, like in this video here. Make any
4:46
decorations you can in advance, like
4:48
cake toppers. And then you can schedule
4:49
a much smaller window of time to
4:51
assemble and frost and decorate the
4:53
cake. So, in total, you'll spend much
4:55
less time making each cake than if you
4:57
did it all in one go. Now, here's a way
4:59
to use a freezer that has been a
5:01
complete gamecher for me. With kids at
5:04
home, busy schedules, and making cakes
5:06
for events that get rescheduled, freeze
5:08
finished cakes. After you finish
5:10
decorating a cake, put it into the
5:12
freezer unwrapped for about 30 minutes
5:14
to set the frosting and all of the
5:16
decorations. Then, wrap it in two layers
5:18
of cling film or saran wrap, double
5:20
wrapping it to make sure it's sealed
5:22
around the cake. Put it back into the
5:23
freezer for up to a month, and as long
5:26
as it's sealed, it won't absorb any
5:27
flavors or moisture from the freezer.
5:30
How to thaw this cake is just as
5:31
important as how to freeze it. Move it
5:33
from the freezer to the fridge the day
5:34
before you need it, and then take it out
5:36
of the fridge 2 hours before you serve
5:38
it and unwrap it straight away before
5:39
the buttercream decorations soften. This
5:42
can free up busy days before a big
5:43
event. And it's perfect if a party gets
5:46
canceled at the last minute because you
5:47
don't have to throw away the cake and
5:48
make it again the next week. If cake
5:51
decorating is more than a hobby and
5:53
you're selling your cakes, make sure you
5:55
charge for anything custom you're adding
5:56
to your cakes. Each decoration adds to
5:59
the time and the cost of the cake. And
6:01
if you don't increase your price to
6:02
reflect that, you'll end up losing money
6:04
on your cakes. My tutorial on how to
6:06
price a cake shows you how to calculate
6:08
your costs and set your prices to make a
6:10
profit. Following on from that, charge
6:12
for deliveries. There's the cost of your
6:14
gas or petrol for your car, the wear and
6:17
tear on your car, and the time of
6:19
planning, coordinating, and actually
6:20
delivering and driving back afterwards.
6:23
If any of these tips were useful, tell
6:24
me in the comments which one you're
6:26
going to try first, or if there's
6:27
anything you've learned the hard way
6:29
that more beginners need to know. And if
6:31
you want to keep learning, I've got
6:32
loads more tutorials on everything from
6:34
decorating without fancy tools to
6:35
freezing cakes like a pro. Subscribe to
6:38
my channel for a new cake decorating
6:39
tutorial every week. And to take your
6:41
cakes to the next level, visit my cake
6:43
school on britishgirlbakes.com.
6:45
Thanks so much for watching.
#Cooking & Recipes
#Desserts
#Food