Travel with a cake can be nerve-wracking. Will it melt? Slide around? Get ruined before it even arrives? Whether you're heading to a party, an event, or any trip with a homemade creation, these cake travel hacks will help you deliver your cake safely and stress-free.
From car trips to international flights, here are 10 clever tips for how to travel with cake so it arrives looking as good as it tastes!
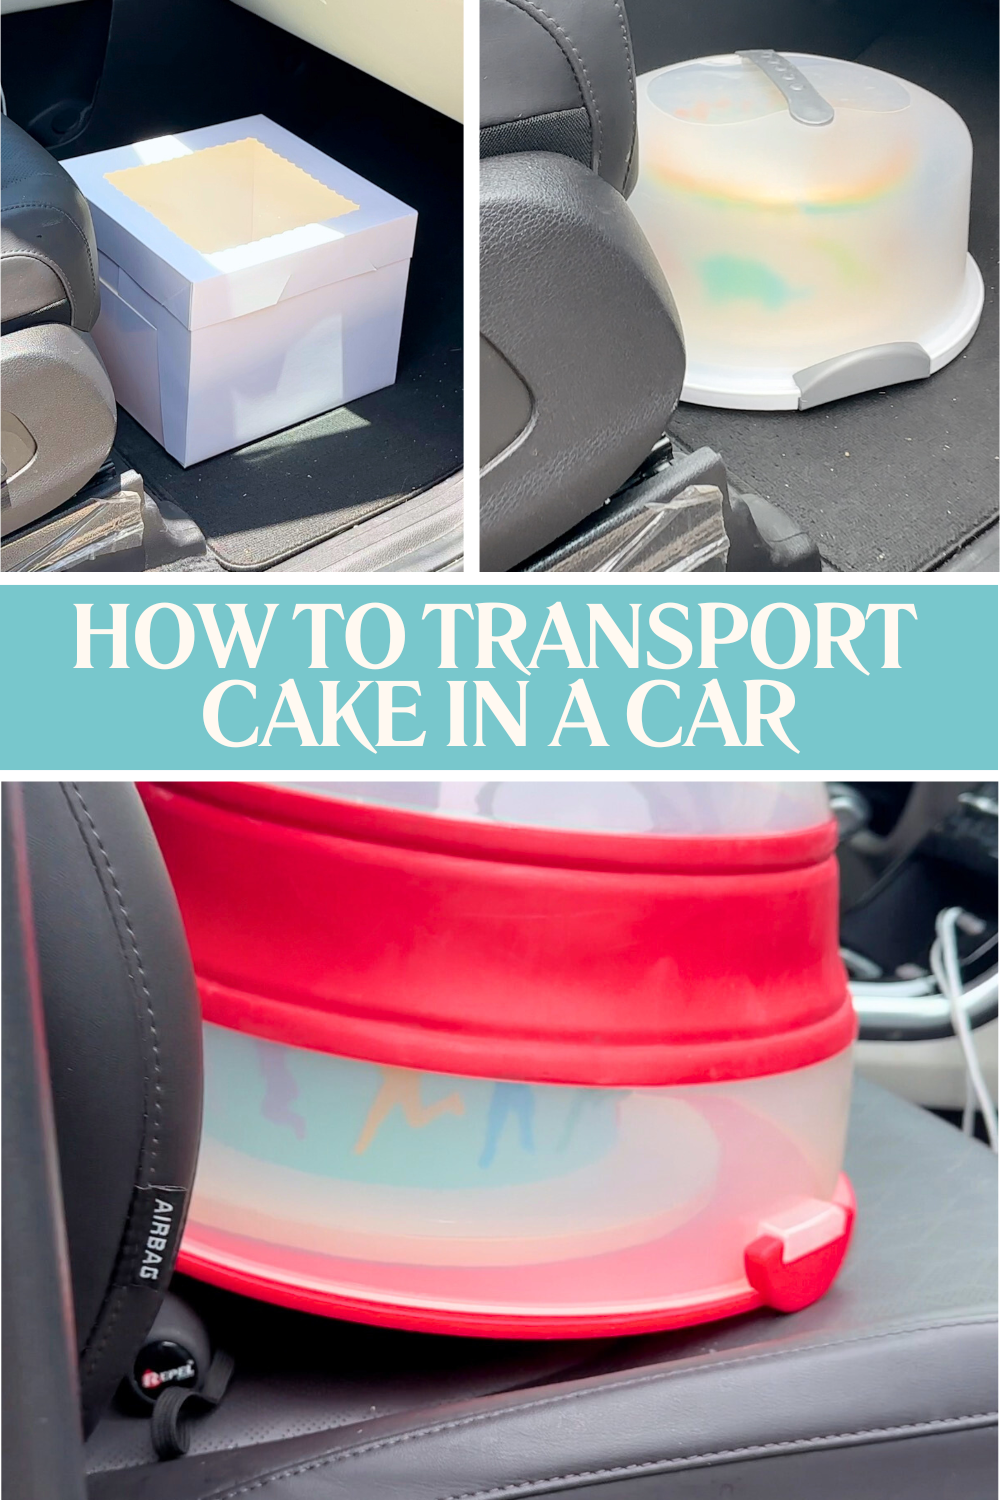
For how to travel with cake in a car, the most important thing is to keep the cake cold. Buttercream firms up in the fridge, acting like glue to hold the cake together. A cold cake is sturdier and far less likely to shift, smudge, or collapse on the journey.
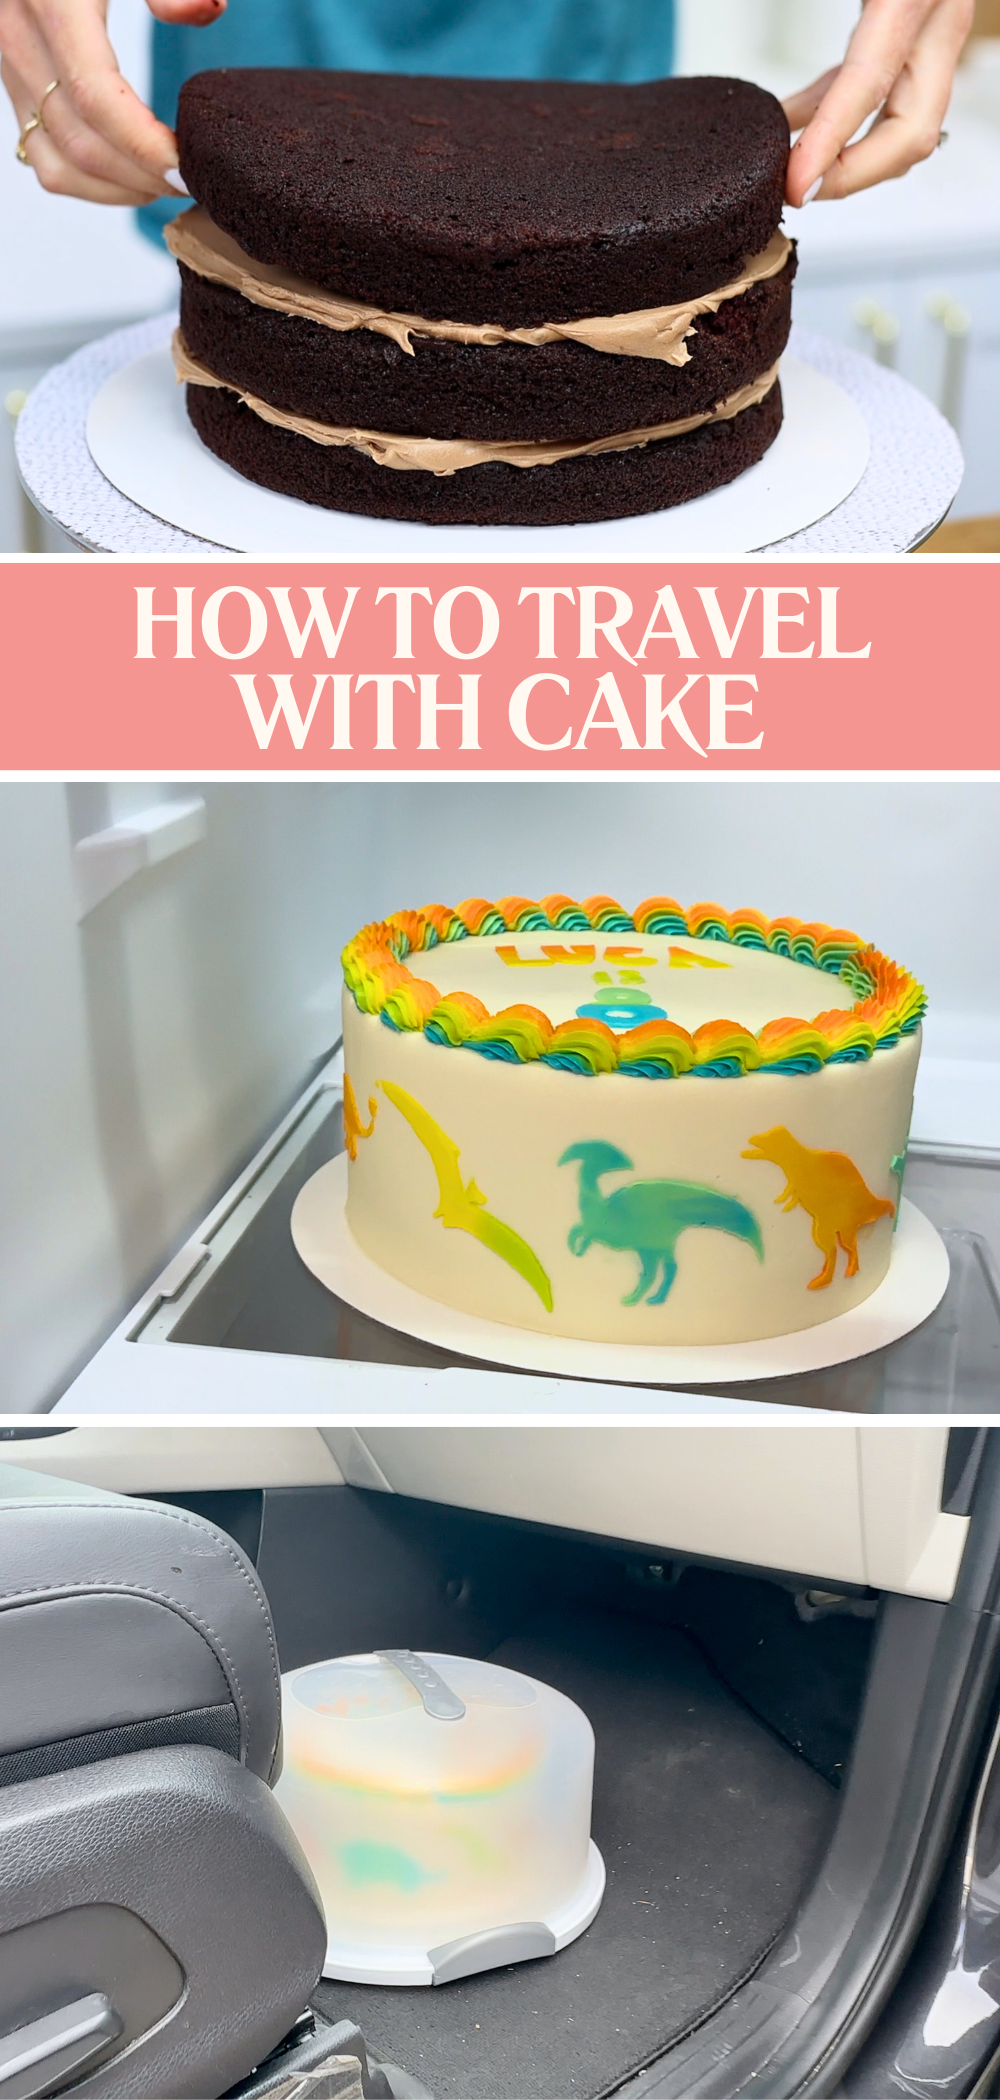
For long distances or driving in hot weather, keep your cake in the fridge for several hours or overnight before you drive. You can even place it in a cooler to keep it cold on the road. I once drove a cake 150 miles to Yosemite National Park on a scorching 110°F day and thanks to the cooler and a chilled cake, it arrived absolutely perfect!
If you don’t have a cake box, don’t panic. A Tupperware container works surprisingly well! Instead of lowering your cake into the container (and risking squashing a side or poking a finger into it), try this: turn the lid upside down and place your cake on that. Then lower the container down over the top and press it into the lid to seal it.
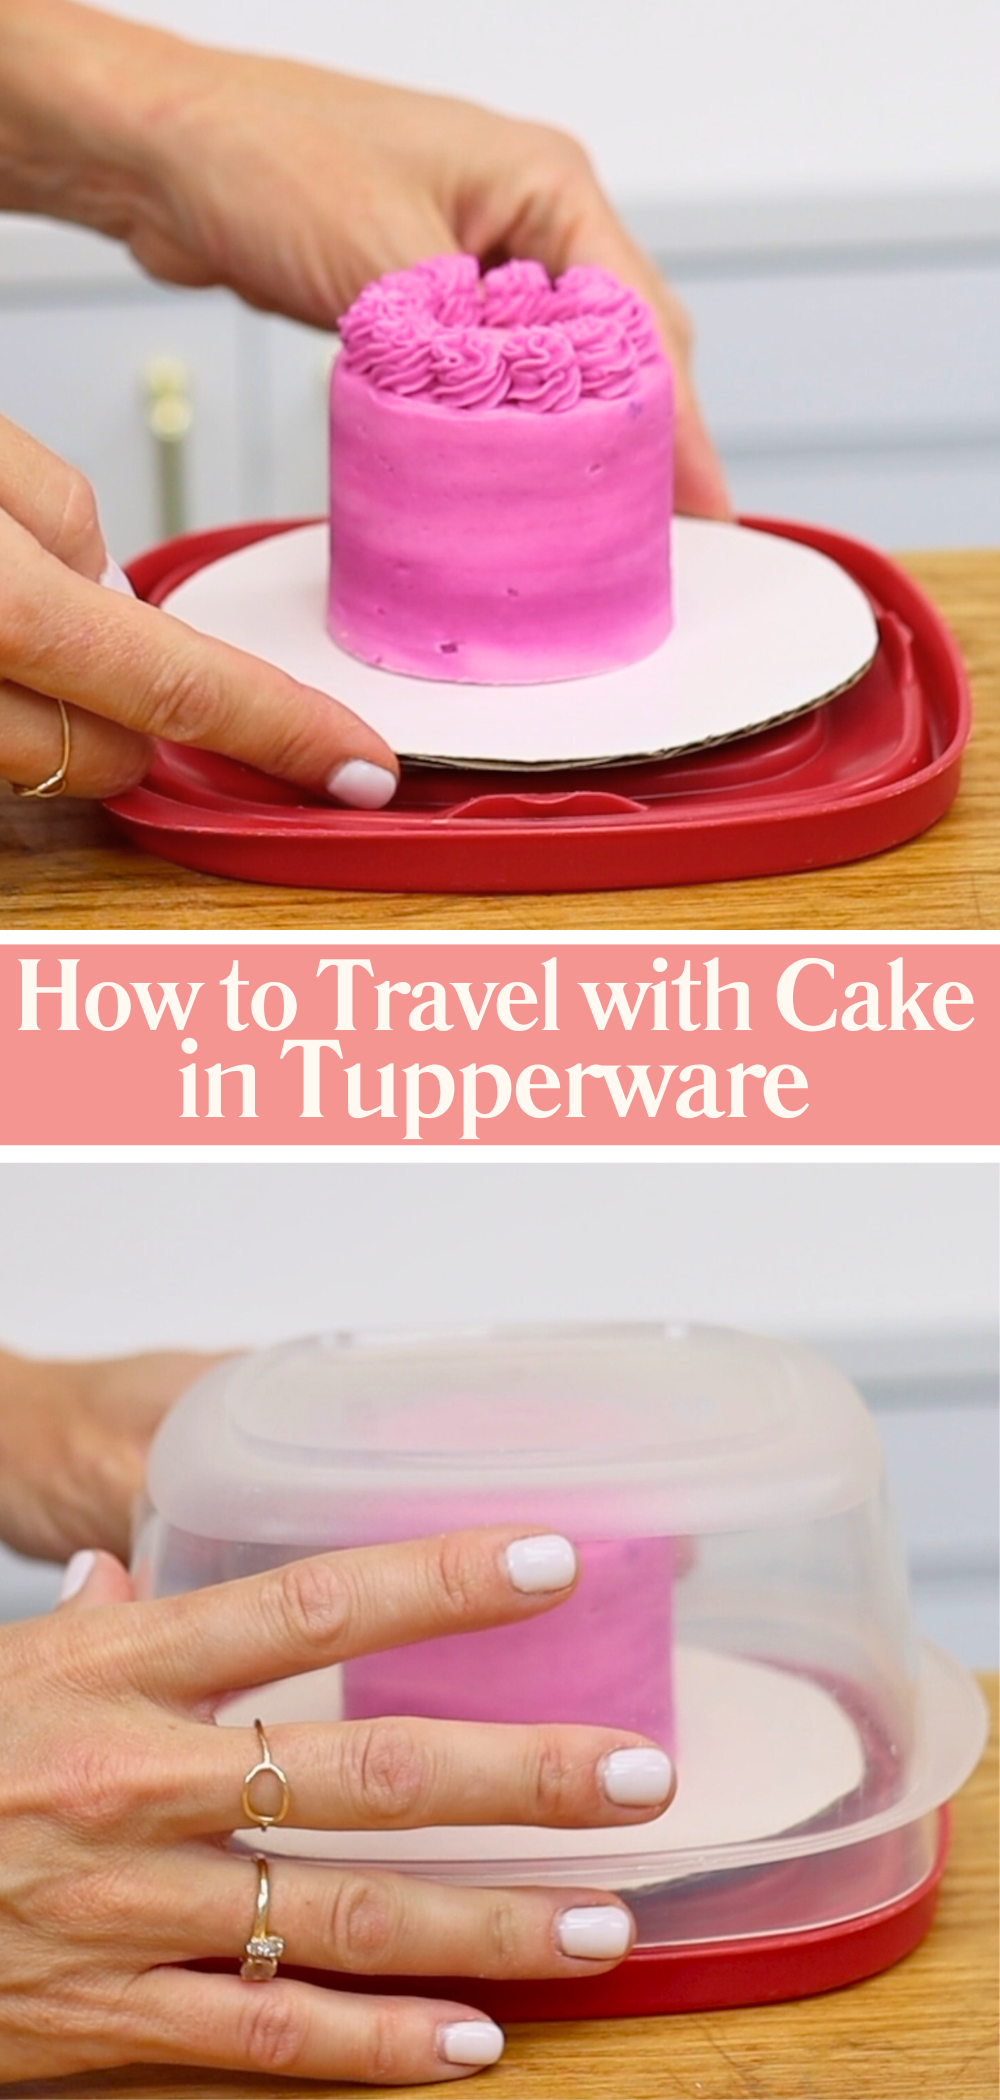
This trick keeps the cake secure and is super easy to carry. Because it’s airtight, it helps the cake stay fresh and moist during your journey. Check out this tutorial for tips on how to make min cakes.
When a cake is in a box that’s too big for the cake board, it can slide around and bash into the sides. Especially when braking or turning in the car. To stop that from happening, make sure the cake board fits the box snugly.
If your cake is on a smaller board, you can place it on a larger board and use either a piece of non-slip mat or some tape to hold it in place. That way, it won’t budge, even with sudden movements.

Have a tall cake without enough room in the box? Here's a clever hack! Cut two short diagonal slits into one side of the box lid, then repeat on the opposite side. When you put the lid on the box, push the middle section of the lid down into the box. The slits will allow the sides of the lid to lift up, raising the height just enough to fit your tall cake without squashing it.
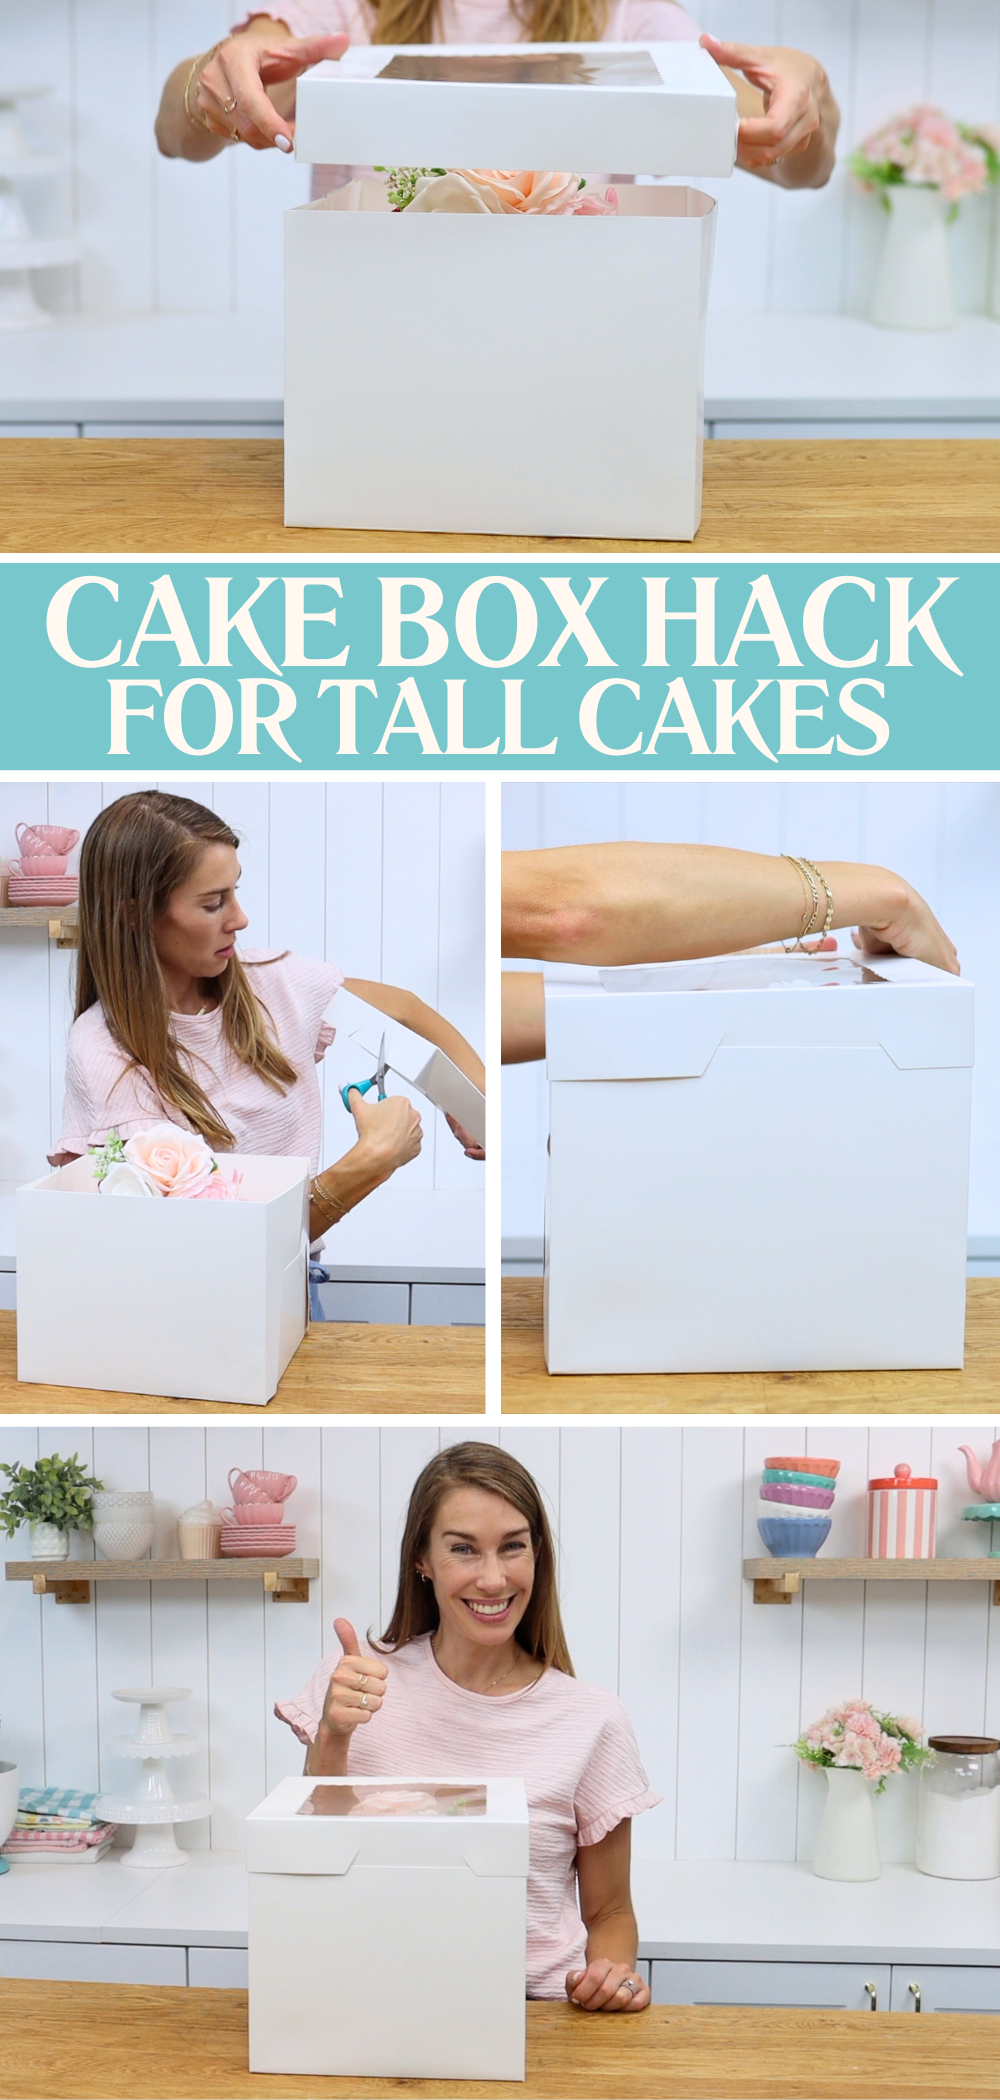
This is perfect for cakes that are just a few inches too tall for the box. The hack will allow you to use the boxes you already have, avoiding having to buy custom packaging.
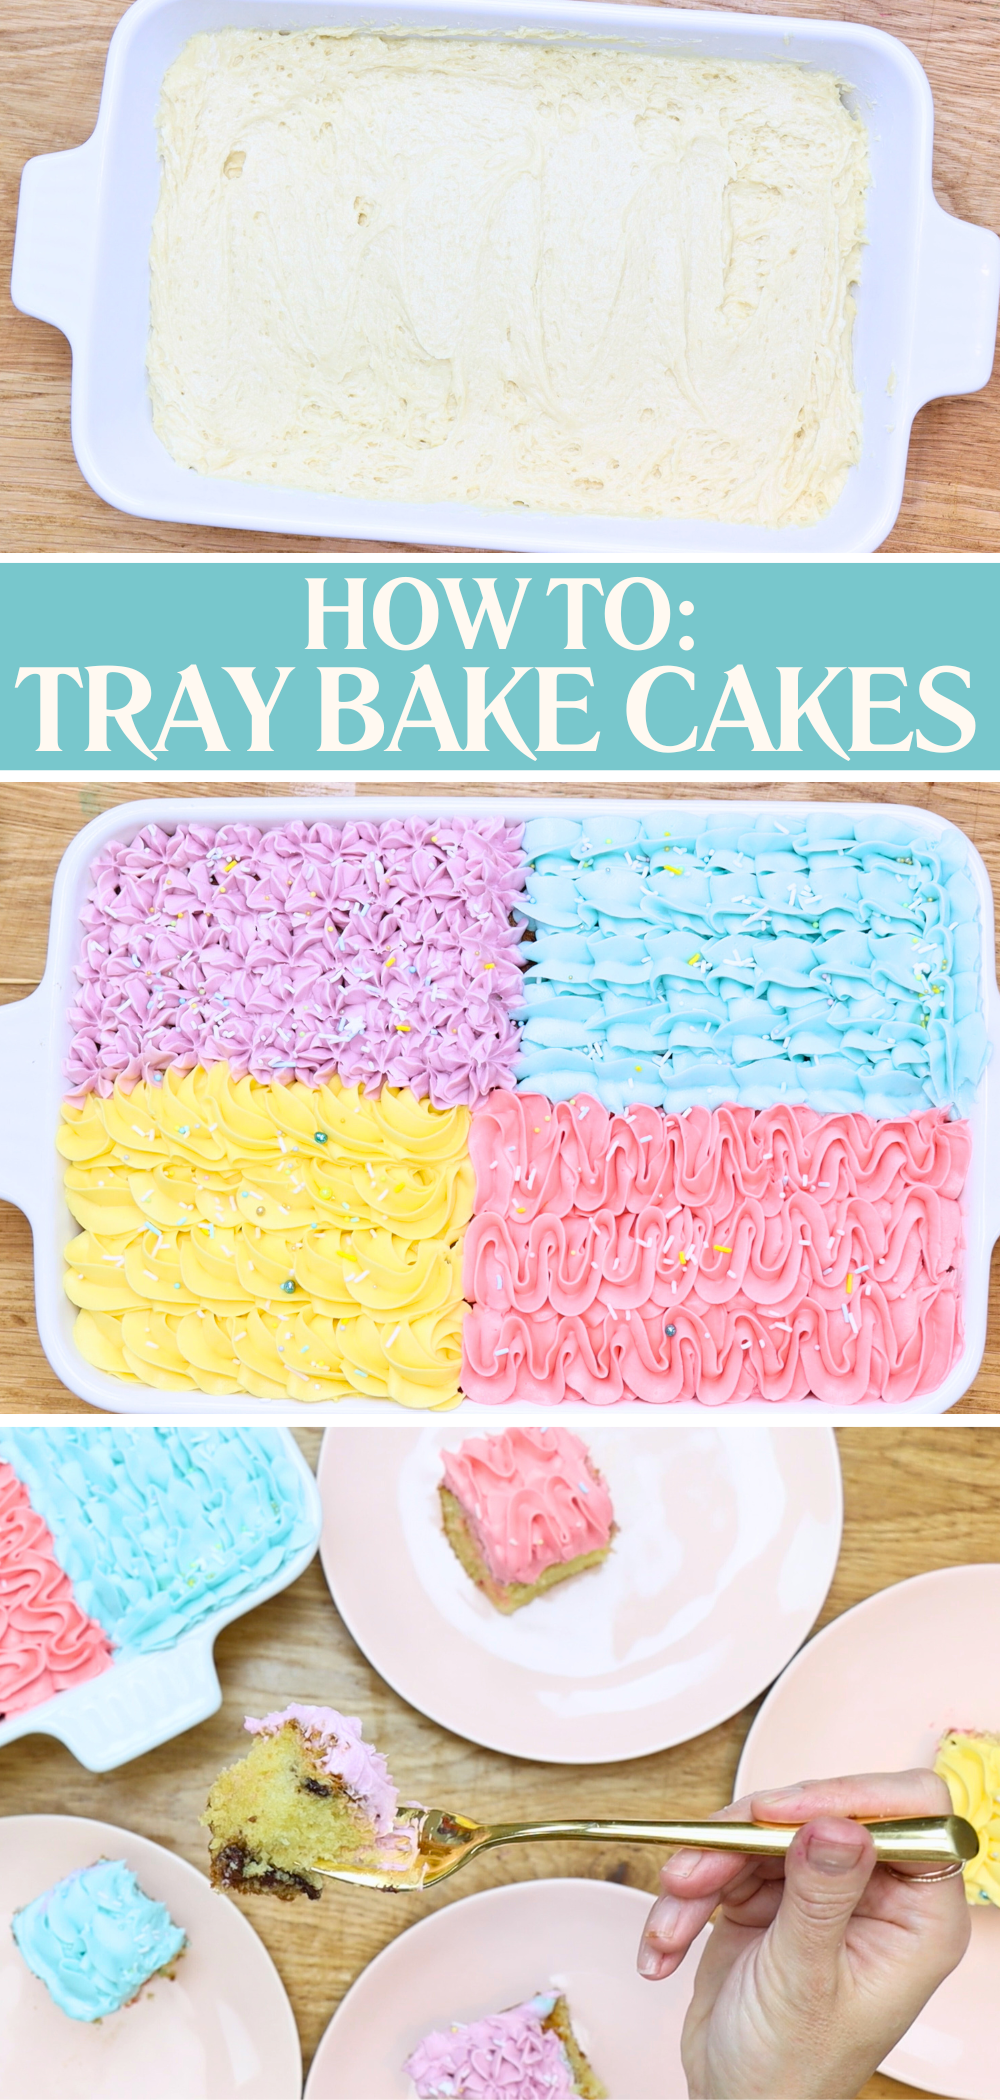
If you don’t have cake pans or a cake box, you can still travel with a cake! Just pour your cake batter into a casserole dish or any oven-safe baking dish and bake it right in that instead. It will take a little longer to bake since ceramic heats more slowly than metal.
Once it’s cooled you can decorate it directly in the dish. Spread or pipe frosting on top, add some sprinkles or decorations, and the cake is ready! You can carry it by hand to your destination and serve it straight from the dish!
When figuring out how to travel with cake in a car, where you place the cake makes a big difference. The boot (or trunk) of the car is usually the safest place because it’s flat and often lined with a non-slip surface. The passenger footwell is another great spot because it's flat and easy to access.
Avoid putting cakes on car seats, which are usually slanted. If you absolutely have to, level the seat with something like a blanket or towel so the cake doesn’t slide off the incline while you drive.
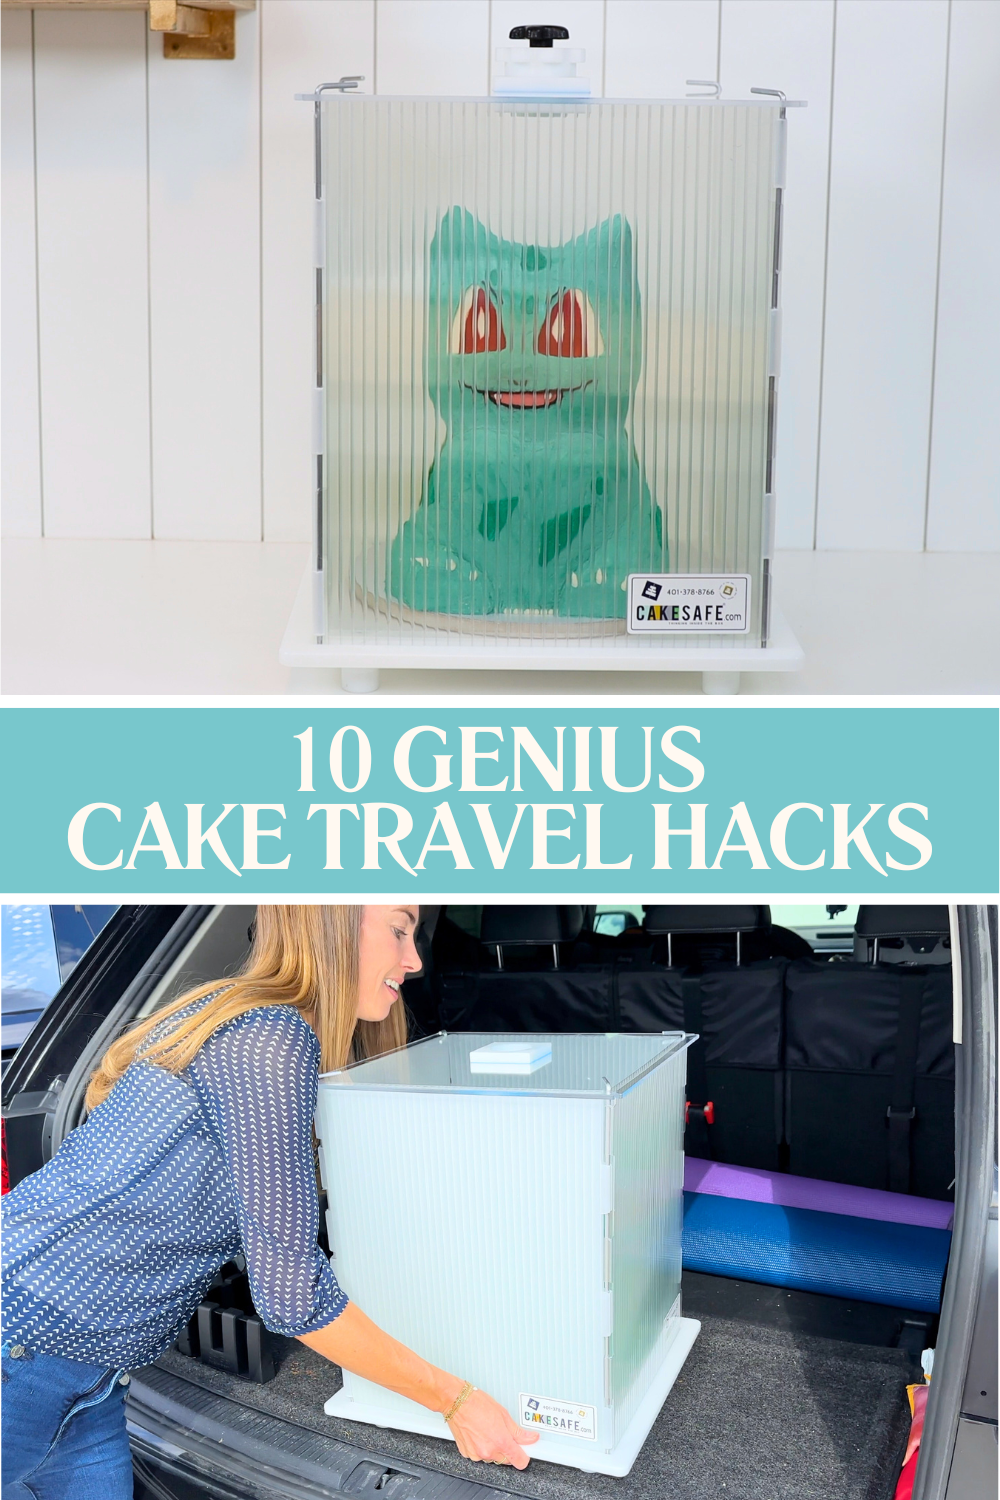
Travelling with a tall, tiered, or sculpted cake? A Cake Safe is a total game changer. It’s a sturdy box with thick walls, metal rods that lock everything in place, and a central dowel that goes through the cake to hold it steady.
The panels lock together securely so nothing shifts around and you can transport even the most fragile designs without worry. This is one of the best investments if you deliver cakes regularly. Here's my tutorial for this Pokemon Bulbasaur Cake.
Now let’s talk about flying with cakes! Whether you're packing a cake in your hand luggage or in a suitcase, these next three hacks will help you travel by plane with your cake looking and tasting perfect.
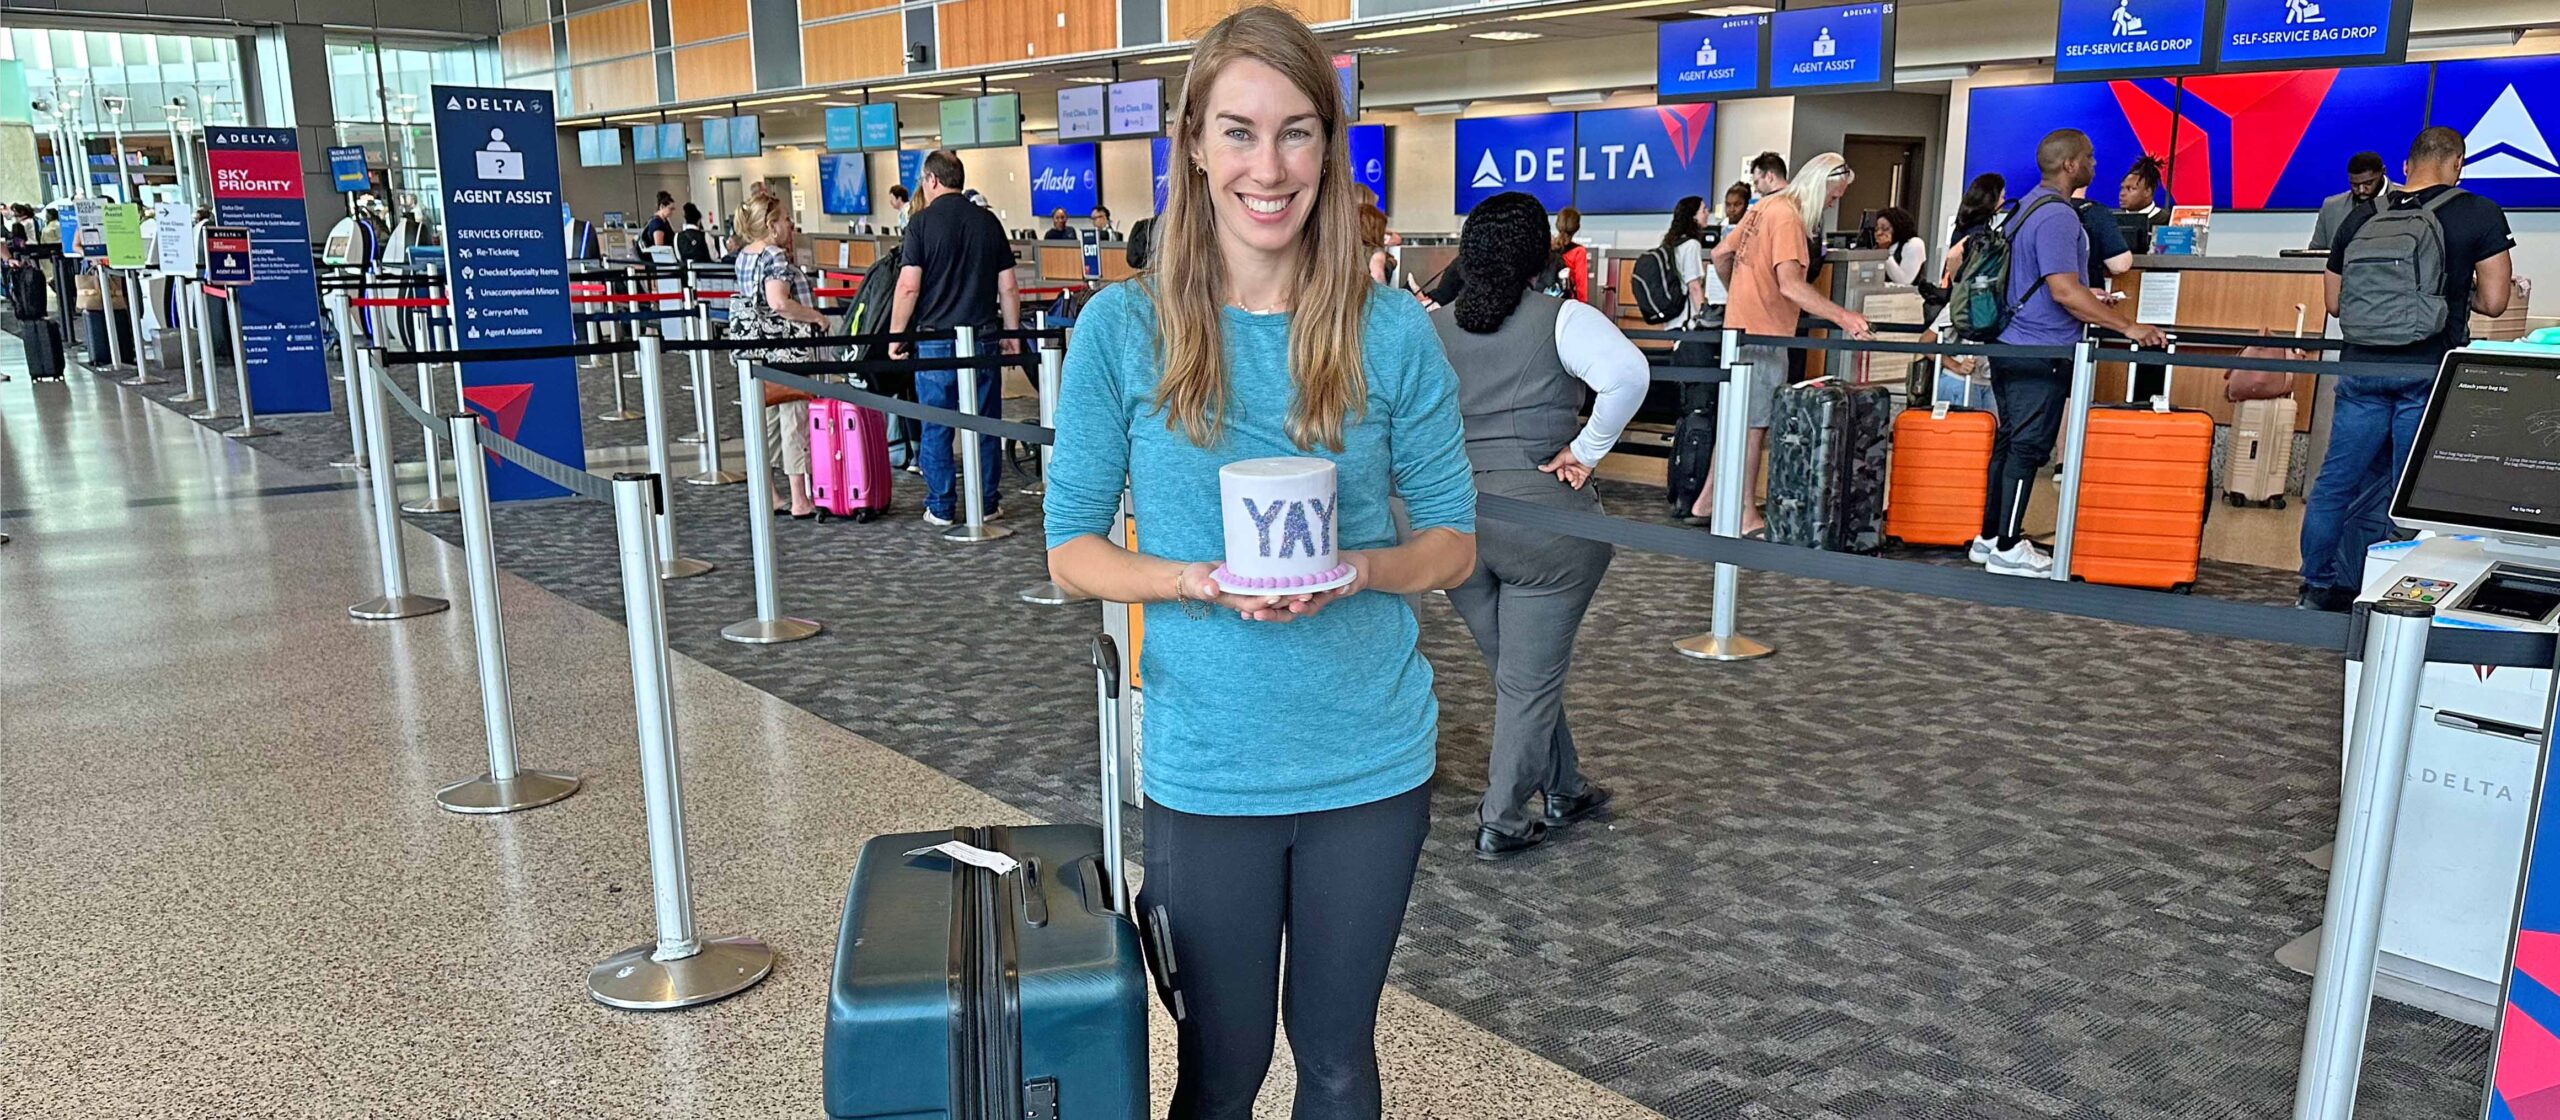
For my 10th wedding anniversary I took a chocolate cake on three flights from the US to Peru and it still tasted amazing! Here’s how I did it:
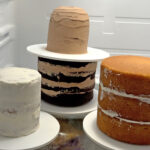
Bake two cake layers and wash the pans you used. Trim the tops flat and cut around the edges so there’s space around them for frosting. I used around cookie cutter an inch smaller than the cake. Stack and fill the cake and then frost it and put it in the freezer for an hour.
Once it’s fully chilled and firm, line one cake pan with cling film and place the cake inside. Wrap the whole cake in cling film and lower another cake pan down over the top. Now the cake is protected and won’t move around! Freeze it until you travel and carry it in a lunchbox or cooler.
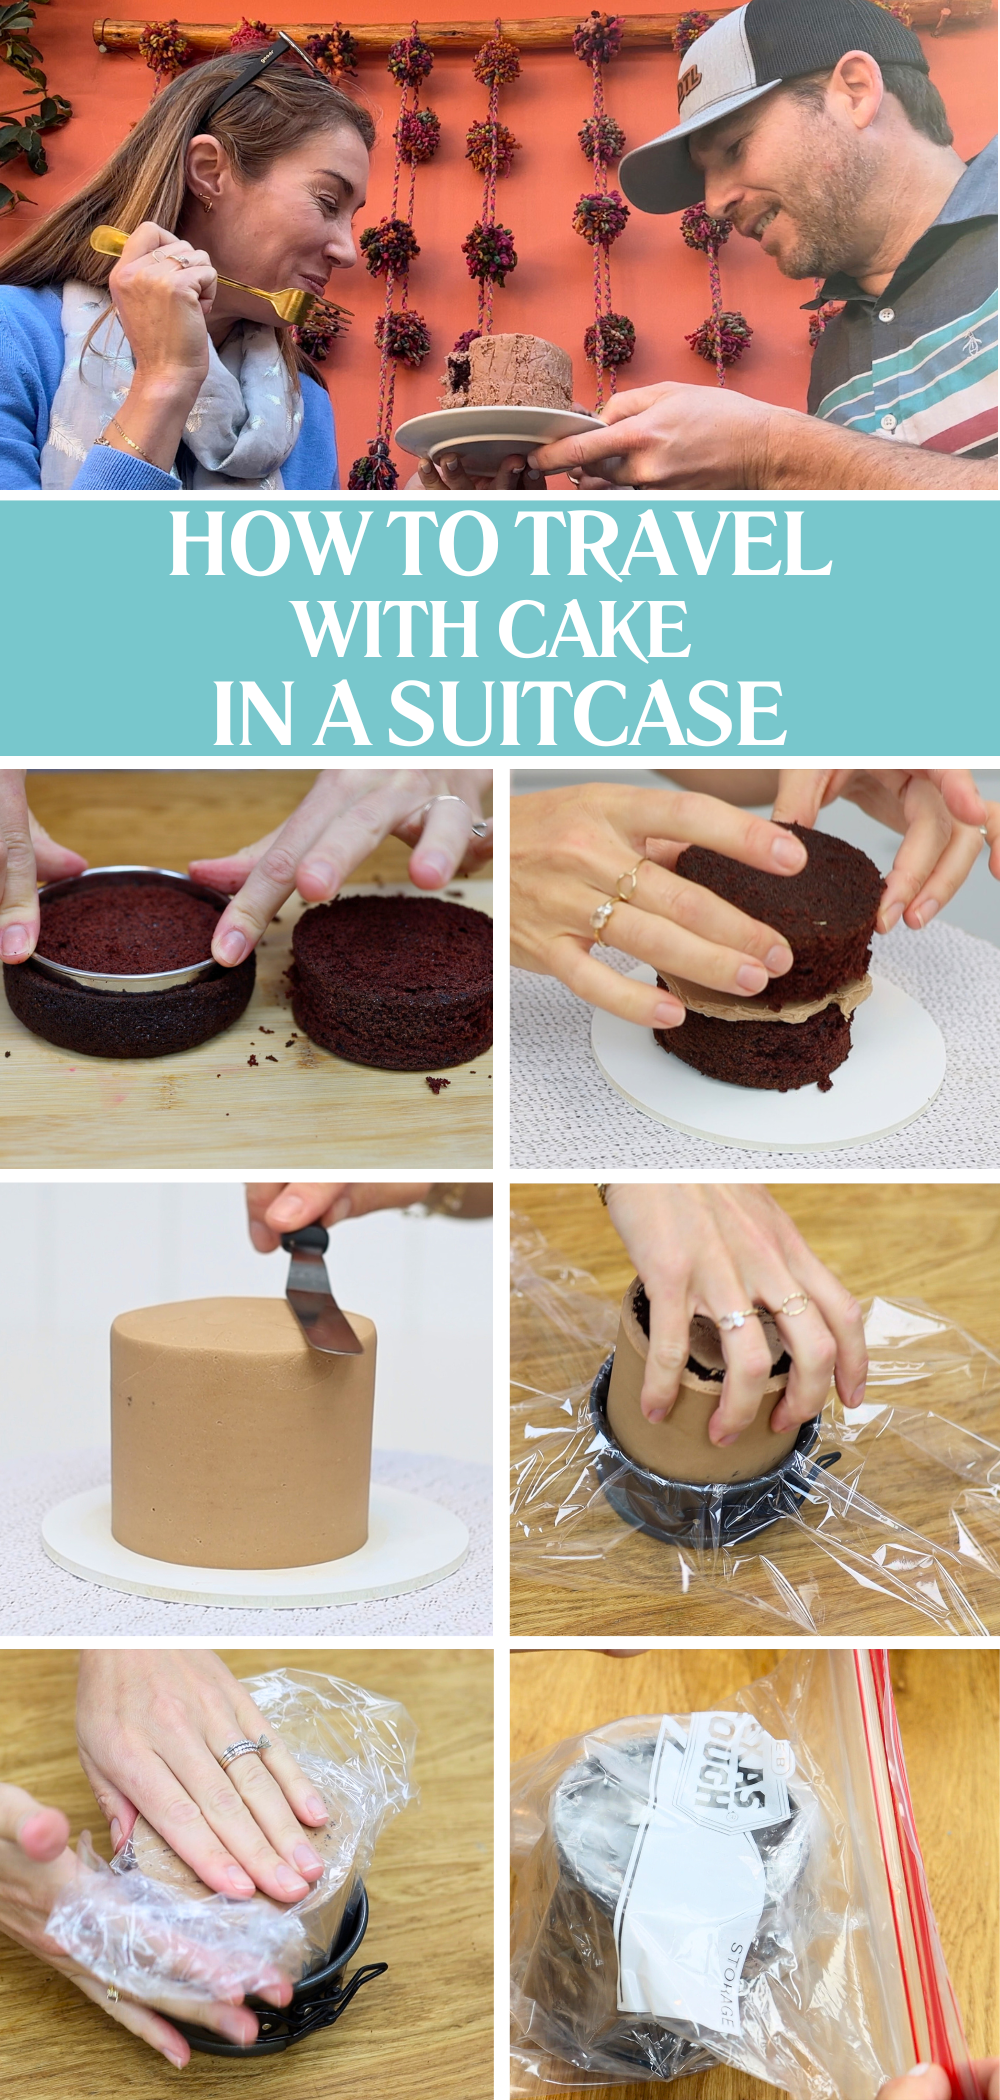
I packed my cake (within the cake pans) inside a large ziplock bag to prevent condensation. I flex with it in my checked luggage from Austin to Atlanta to Lima to Cusco - no problem!
If you want something simpler, stack and fill your cake but skip the outer frosting. Wrap the cake in cling film and place it inside a cake pan (or two, for extra protection). You can pipe decorations later if you bring buttercream in a piping bag.
Freeze the cake before your trip and pack it in a cooler with an ice pack. It will thaw gradually and be ready to decorate or serve when you arrive. This option is great if you’re short on time or packing space but still want a homemade cake at your destination.
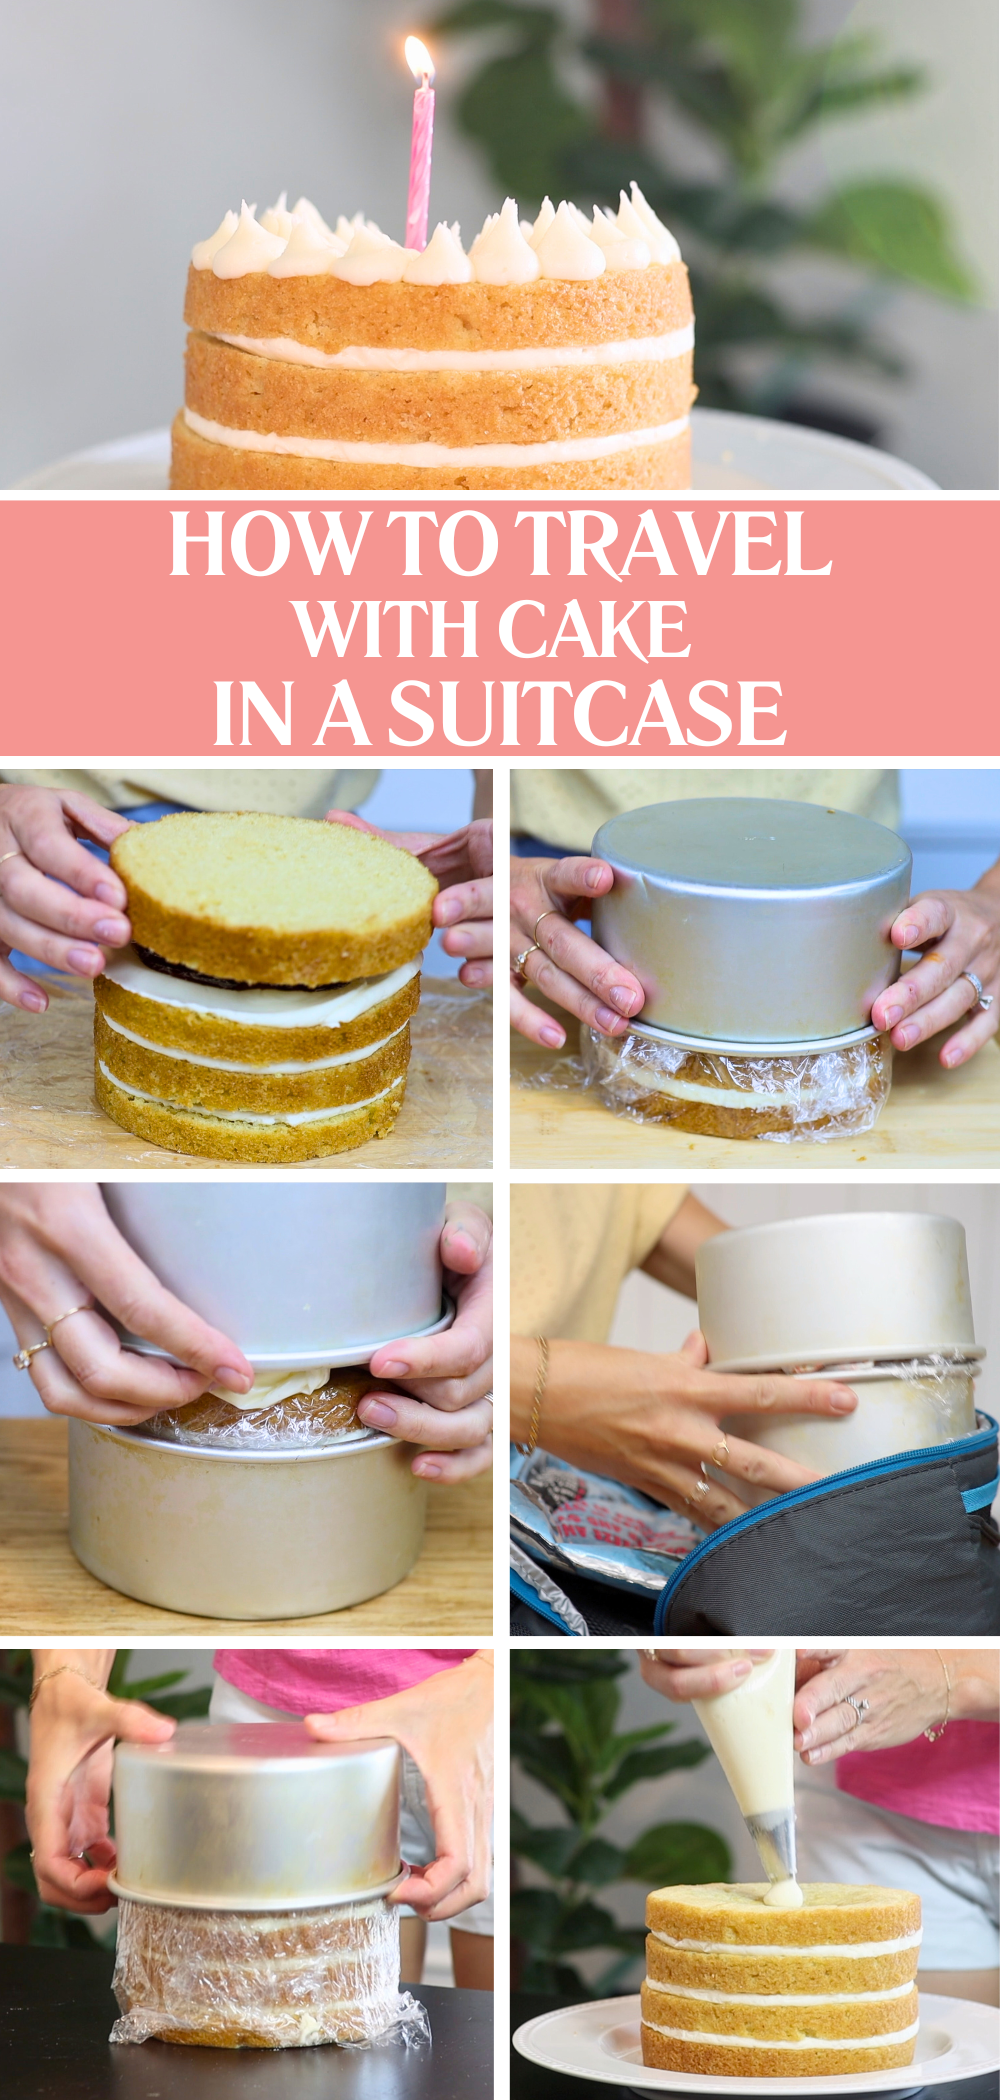
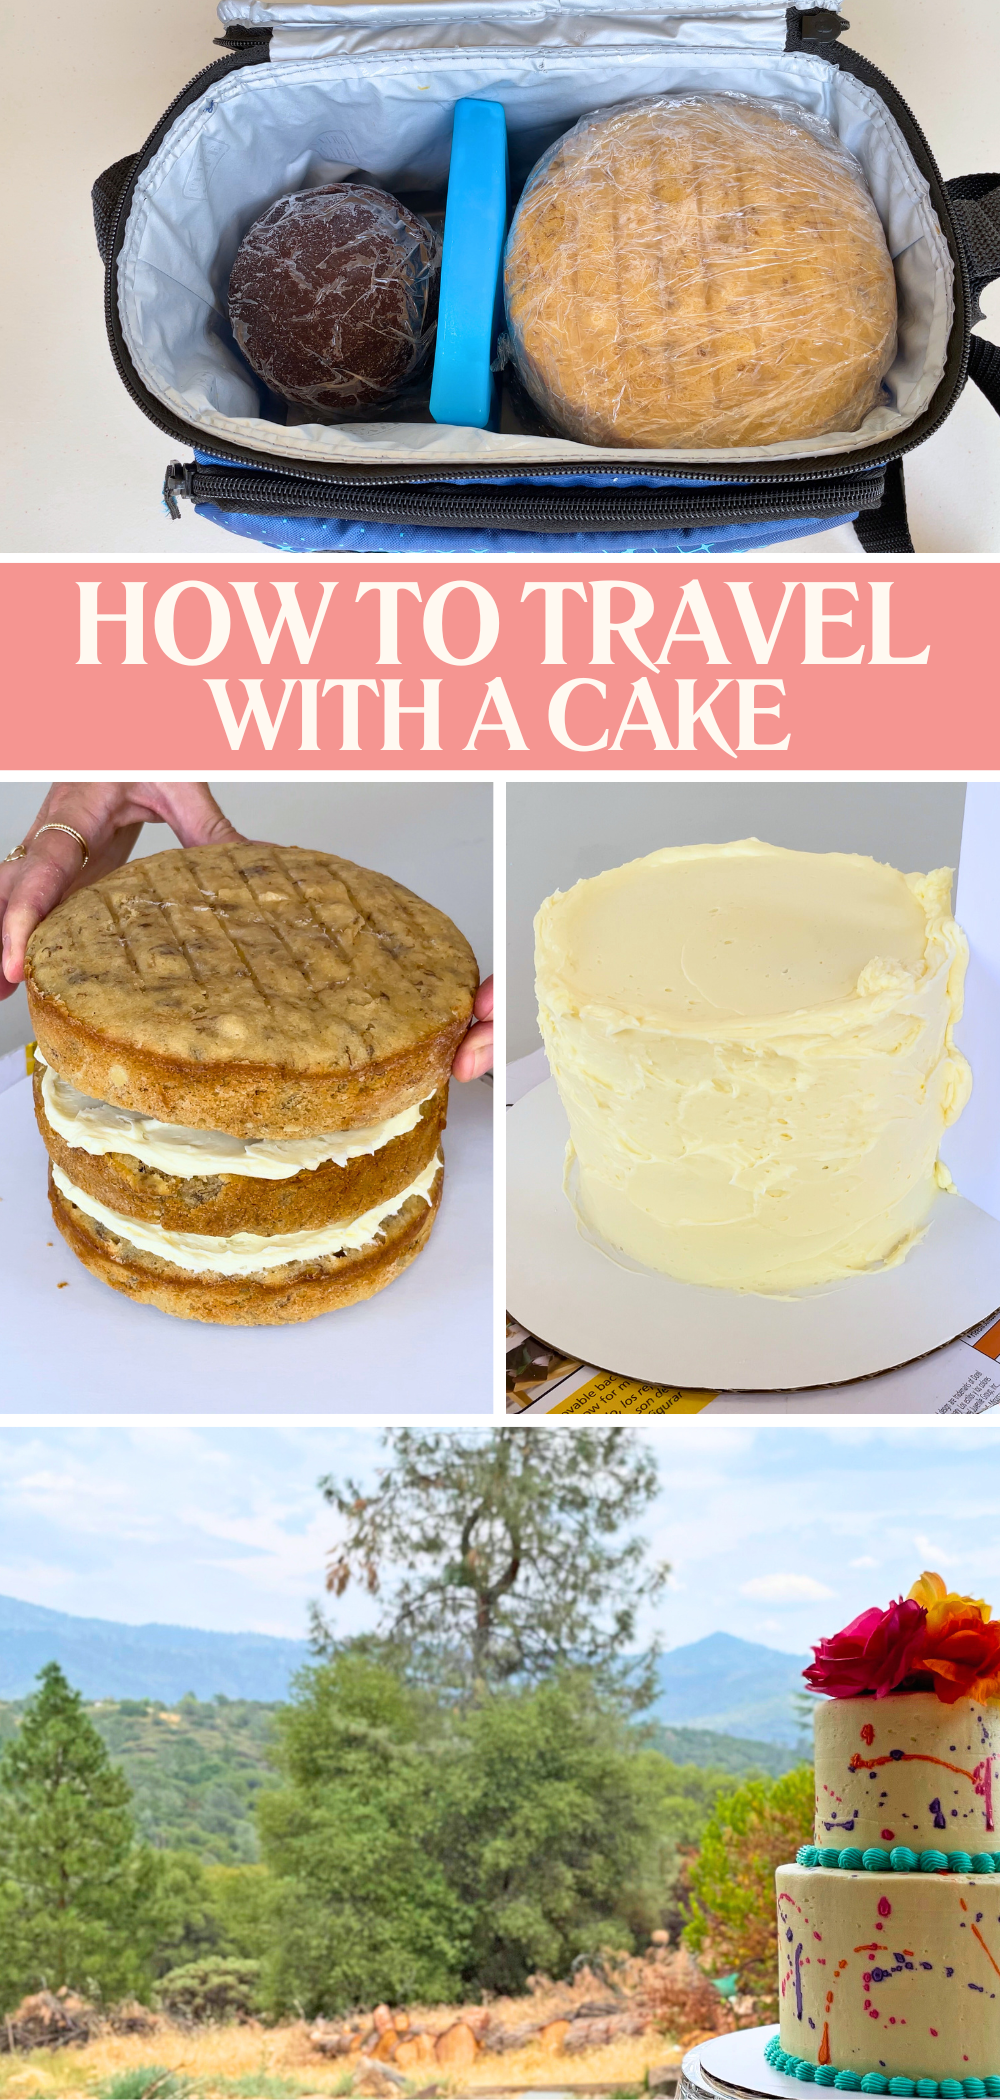
If you’ll have time to assemble the cake after you arrive, travel with the layers only. Wrap and freeze each one and pack them in a cooler in your luggage.
This saves time on your trip compared to baking the cakes layers when you get there. It lets you frost the cake however you like, without worrying about how well the decorations will travel. That’s exactly what I did for the cake I drove to Yosemite. I made the layers in advance, froze them, and then flew to my in-laws' and decorated the cake there before driving to my destination.
Those are my 10 hacks for how to travel with cake, whether by car, by plane, or even in your suitcase! I hope these tricks give you the confidence to take your cakes anywhere without stress or damage.
Which of these cake travel hacks will you try next? Let me know in the comments! And if you want to learn even more cake decorating techniques, check out the online classes and memberships on my cake school. See you there!
You can also watch a video of this tutorial on How to Travel with Cake: