Up next in 10


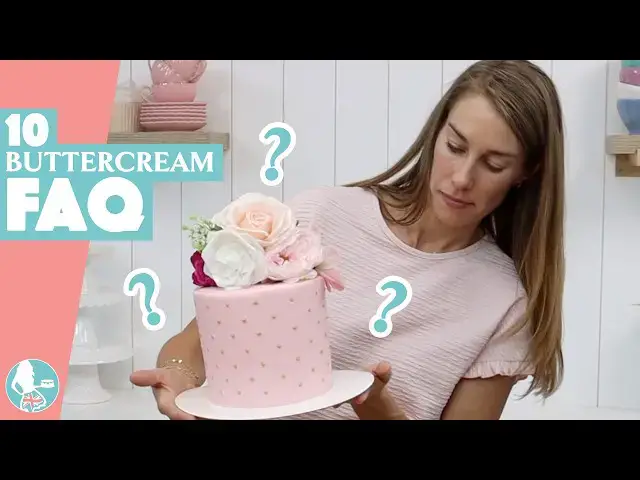
Buttercream is a dream to work with, until it isn’t. In this tutorial I'll cover 10 common buttercream problems including cracking, melting, turning yellow, and bursting out of piping bags. With my tips and tricks you'll learn how to troubleshoot every single one and how to fix it so your buttercream is smooth, stable, and perfect for frosting, piping, flavouring, or freezing.
🥣My Recommended Cake Decorating Tools: https://www.britishgirlbakes.com/my-recommended-tools-for-cake-decorating
💫Start your FREE 7 day trial on my cake school: https://britishgirlbakes.teachable.com/p/all-you-can-cake
🎂Take my FREE course on 10 Frosting Techniques: http://britishgirlbakes.com/free-course
👩🏼🍳My 4 Minute Buttercream recipe
https://www.britishgirlbakes.com/recipes/buttercream-frosting/
📄READ a written version of this tutorial (with photos!)
https://www.britishgirlbakes.com/how-to-fix-10-buttercream-problems/
👍Please LIKE and SUBSCRIBE to my channel for a new cake decorating tutorial every week!
💬 SAY HI!
Website: https://www.britishgirlbakes.com
Instagram: https://www.instagram.com/britishgirlbakes
Show More Show Less View Video Transcript
0:00
How can I make my yellow buttercream
0:02
white? Why do my piping tips burst out
0:04
of the piping bags? Why are there so
0:07
many air bubbles in my buttercream? How
0:09
do I get my frosting really smooth? I
0:11
poked my finger into my cake. How do I
0:13
fix it? In this video, I'll answer the
0:15
10 most frequently asked questions about
0:17
buttercream, sharing all of my tips and
0:19
tricks for delicious smooth buttercream
0:21
that's perfect for piping or frosting or
0:24
icing a cake. Air bubbles happen when
0:26
there's too much air in buttercream.
0:28
How? mixing on a high speed, resting for
0:30
a long time, or changing temperature,
0:32
like moving from the fridge to room
0:34
temperature. To prevent air bubbles, mix
0:36
using the lowest speed on your mixer and
0:38
with a paddle or beater attachment, not
0:40
a whisk. To fix air bubbles, stir
0:43
buttercream aggressively to knock the
0:44
buttercream against the sides of the
0:46
bowl to push the air out. You'll need to
0:48
do this after buttercream has been
0:49
sitting for a while, or after it's
0:51
chilled in the fridge or freezer and
0:53
then comes back to room temperature. My
0:54
favorite hack if you're struggling with
0:56
really stubborn air bubbles is to scoop
0:58
up a third of the buttercream and
1:00
microwave it for 10 seconds and then
1:02
stir it back into your main bowl of
1:03
buttercream, mixing the melted
1:05
buttercream into the rest to get the
1:06
perfect consistency with no air bubbles.
1:09
If your buttercream piping is starting
1:11
to droop or look shapeless, even though
1:13
it looked great a few minutes earlier,
1:15
the warmth of your hands from gripping
1:17
the piping bag has softened the
1:19
buttercream. Put the piping bag in the
1:20
freezer and set a timer for 1 minute.
1:22
Don't leave it any longer or the
1:24
buttercream will freeze hard against the
1:26
metal piping tip. After a minute, the
1:28
buttercream will be firmer and your
1:29
piping will be neat again. Okay. Yellow
1:31
buttercream. Butter is yellow, so
1:33
buttercream will also have a yellowish
1:35
color, which is not ideal if you're
1:36
trying to make a bright white cake. To
1:38
get rid of the yellow, dip a toothpick
1:40
into violet gel to get just a tiny
1:42
amount and drag it through the
1:44
buttercream, mixing it in to cancel out
1:46
the yellow and make a bright white
1:48
buttercream. Look at the difference
1:49
between before and after adding violet.
1:52
Next, after spending ages smoothing the
1:54
frosting on your cake, denting or poking
1:57
it feels like the end of the world.
1:59
Don't panic. This is easy to fix whether
2:01
the frosting has set or not. Just spread
2:03
a bit more buttercream over the damage.
2:05
And instead of smoothing it with your
2:07
spatula or cake comb, use a little piece
2:09
of acetate. This is flexible plastic
2:11
that will curve around the cake to match
2:13
the curve of the frosting. and it will
2:15
smooth this new buttercream without
2:17
damaging the frosting that's already on
2:18
the cake. Now, you'd never know there
2:20
was a finger hole in this frosting.
2:22
Next, how to fit a piping tip into a
2:24
piping bag so it doesn't burst out.
2:26
Piping bags are sealed at the end. So,
2:28
to fit a tip in a new bag properly, drop
2:30
the tip into the bag and push it all the
2:32
way to the end. Use scissors to score a
2:34
line about halfway up the tip. Then,
2:36
slide the piping tip out of the way and
2:38
cut along that line. Now, when you press
2:40
the tip back down, about half of it will
2:42
poke out of the bag, just enough to hold
2:44
it snugly in place while you pipe,
2:46
whichever piping tip you choose to use.
2:48
If your frosting just won't get smooth,
2:50
this tip always works for me. Switch to
2:53
a metal cake comb and warm it up using a
2:55
blow torch or a hair dryer or hot water
2:57
and rub it so it's dry and warm, but not
3:00
hot. Now, scrape around your cake, and
3:02
the warm metal will glide over the
3:03
buttercream and fill in any shallow
3:05
imperfections to leave the surface super
3:07
smooth. Okay, melting buttercream. Just
3:10
like butter melts in the microwave,
3:12
buttercream melts in hot weather. If you
3:14
know a cake is going to sit outside on a
3:16
hot day, one option is to substitute
3:18
half of the butter in the buttercream
3:20
recipe for shortening. Crisco, TX, there
3:22
are lots of different brands in
3:24
different countries. Shortening is much
3:25
more stable in hot weather than butter.
3:28
Using half the amount of butter will
3:29
still give you the buttery flavor. And a
3:31
hack to disguise the flavor of
3:32
shortening is to add half a teaspoon of
3:34
clear vanilla, which brings out the
3:35
butteriness of the buttercream without
3:37
that bite you can get from shortening.
3:40
You can use this exactly the same way as
3:41
buttercream made with just butter to
3:43
frost a cake, tint it any color, get
3:46
really smooth frosting, or use it for
3:47
piping. And half and half buttercream
3:49
will hold up much better in the sun.
3:51
Look at how well it holds its shape
3:53
while the all buttercream melts. Now,
3:55
let's answer why buttercream cracks.
3:58
After buttercream sets, it's hard. And
4:00
if you move it, it can crack. On a thin
4:02
cake board, the weight of the cake can
4:04
make the board bend or buckle. Look
4:06
closely and you'll see little cracks
4:08
around the bottom of this cake where the
4:09
buttercream has shifted after it's set.
4:12
To prevent cracks, if you're using a
4:13
thin cake board, support it by holding
4:15
one hand underneath in the middle to
4:17
bear the weight of the cake. Or even
4:19
better, use a thick, strong cake board
4:21
that won't bend even with a heavy cake
4:23
on top. Can you add different
4:24
ingredients to flavor buttercream?
4:26
Absolutely. It's all about balancing how
4:28
much liquid is in the buttercream. So,
4:30
if you add Nutella or lemon curd or
4:32
peanut butter or cream cheese, anything
4:35
looser than the consistency of
4:36
buttercream, add it a spoonful at a time
4:38
and check the consistency of the
4:40
buttercream to make sure you stop adding
4:42
before it gets too runny. You're looking
4:44
for a consistency that's easy to stir,
4:46
but will hold its shape when you spread
4:47
or pipe it. One way to add lots of
4:49
flavor without making buttercream too
4:51
watery is to add a dry version instead
4:53
of a liquid ingredient, like
4:55
freeze-dried pineapple instead of
4:56
pineapple juice, or freeze-dried
4:58
strawberries instead of a strawberry
5:00
puree. To learn everything about
5:01
buttercream, how to make it,
5:03
troubleshoot common issues, color it,
5:05
frost a cake perfectly smoothly. Take my
5:07
online course, The Basics of
5:08
Buttercream. The link for 25% off is in
5:11
the top of the screen and in the video
5:12
description. Finally, can you freeze
5:14
buttercream? Yes, at four different
5:16
stages. alone in an airtight container
5:18
like a ziploc bag or as the filling in
5:21
between cake layers by wrapping the cake
5:22
in cling film or saran wrap to protect
5:24
the cake and buttercream for moisture
5:26
and flavors in the freezer. You can also
5:28
freeze a cake that's frosted with
5:30
buttercream by putting the cake into the
5:32
freezer for an hour to set the
5:33
buttercream and then wrapping it in two
5:35
layers of cling film or saran wrap to
5:37
protect it. And you can freeze
5:38
buttercream decorations alone for 10
5:40
minutes so that they become hard enough
5:42
to handle to decorate a cake with. Or
5:45
freeze a cake with decorations on it by
5:47
wrapping it in two layers of plastic
5:48
wrap after about an hour in the freezer
5:50
unwrapped first so that the frosting and
5:53
decorations are firm and won't get
5:54
damaged by the plastic wrap. Move
5:56
buttercream cakes to the fridge the
5:57
night before you serve them to thaw
5:59
gradually. And take them out of the
6:01
fridge 2 hours before serving and unwrap
6:03
them straight away before the
6:04
buttercream softens so you don't damage
6:06
them. The cake will taste best at room
6:08
temperature, so don't serve it straight
6:10
away while it's still cold. I hope these
6:12
buttercream frequently asked questions
6:14
have been helpful. To learn hundreds
6:15
more cake decorating techniques and
6:17
designs, visit my cake school on
6:18
britishgirlbakes.com for online courses
6:20
and memberships. See you there.