live_tv
Livestream Starting Soon
00
Hours
:
00
Minutes
:
00
Seconds
Up next in 10


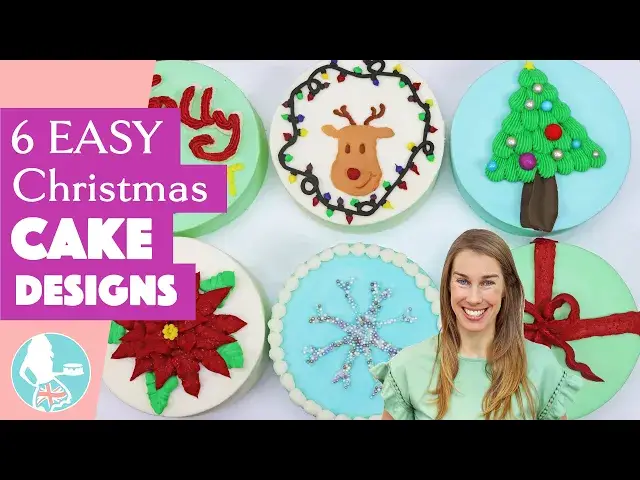
Looking for easy but pretty Christmas cake designs? Try these six Christmas cake decorating ideas, shown step by step with no fancy tools so anyone can make them!
*Start your FREE 7 day trial on my cake school
https://britishgirlbakes.teachable.com/p/all-you-can-cake/
*LEARN The Basics of Cake and The Basics of Buttercream in my most popular online courses!
https://britishgirlbakes.teachable.com/
*My tutorial on 4 reasons you need couplers
https://youtu.be/BMPhI1T_gdc
*My tutorial on everything you need to know about condensation
https://youtu.be/LutDZV1kT3E
*My 4 Minute Buttercream recipe
https://www.britishgirlbakes.com/recipes/buttercream-frosting/
*READ a written version of this tutorial (with photos!)
https://www.britishgirlbakes.com/6-christmas-cake-designs/
Show More Show Less View Video Transcript
0:00
Here are six festive cake designs to make your season jolly and bright
0:04
I'll show you step by step how to decorate each of these designs with no fancy tools
0:08
so anyone can make these. Start by frosting your cakes, and for all of these designs
0:16
I recommend letting the frosting set before decorating. I put these cakes in the freezer for 15 minutes, or you can put them in the fridge for an hour
0:25
Let's start with an easy Christmas tree. Use a star-shaped piping tip like a 1M to pipe a tree trunk with brown frosting
0:33
Outline a triangle with a toothpick to guide you for the rest of the tree
0:37
and use green frosting with an open star tip like this number 199
0:42
Start at the bottom of the tree and squeeze the piping bag to make the frosting bulge out
0:46
and then pull away as you release your pressure on the bag to make these little wave shapes
0:51
After each row, move up to pipe another row, piping in the gap between the two waves below
0:57
and overlapping them to cover up the tips. Straight away while the green frosting is still soft and sticky
1:03
push sprinkles into the tree to decorate it. Super simple, but very Christmassy
1:08
Now let's make an easy reindeer. Draw a simple outline onto parchment paper
1:12
or you can trace a picture if you prefer. Cut it out and press the remaining parchment onto a cake
1:17
after the frosting has set. I'm so sorry, this part of the video is out of focus
1:22
Spread light brown frosting on top, peel the stencil off, and voila. You can tidy up any smudges with a toothpick
1:28
Because this cake has been chilled so the frosting has set and it's firm, it won't be damaged by the pressure of the parchment paper on it
1:35
Now use darker brown frosting in a piping bag with a small round tip
1:39
like this number three, to pipe antlers and two eyes, and then red frosting to pipe the nose
1:45
Using parchment paper is a cheap and easy way to make your own stencils, like this reindeer
1:50
I teach everything about piping in my online course the basics of buttercream
1:54
So if you struggling with buttercream consistency how to use piping bags getting smooth frosting and sharp edges on cakes or how to colour and flavour buttercream check out the course on British Girl Bakes I using a toothpick to score the lines for a smiling mouth
2:10
To make this more festive, pipe a black squiggle all around the cake
2:14
looping around itself a few times, to make a string of Christmas lights
2:18
Pipe little black dots along it, which will be the base of the coloured lights
2:21
I'm using the same-sized small round tip as I did for the eyes and nose and antlers
2:28
For the lights, squeeze the piping bag while holding the tip still for a moment
2:32
and that makes a bulge at the base of the light. And then as you pull the tip away, stop squeezing the bag
2:37
and that makes a neat point at the tip of each light. Check out my tutorial on couplers to learn how to pipe quickly with lots of colours
2:44
and three other reasons to use couplers. This design is so cute and colourful
2:50
For the quickest design, turn a cake into a present in less than a minute
2:55
You'll need a petal piping tip, like a number 125, or a number 104, and just pull the tips slowly up the side of the cake and over onto the top
3:03
up to the middle. I have super shaky hands, so I find it easiest to rest the edge of the tip
3:09
on the frosting, to hold it steady. That's why I chill the cakes before decorating
3:14
so that the frosting gets firm and I don't damage it with the piping tip. You can use a toothpick
3:19
to smooth the frosting if it's uneven anywhere, as long as you do this straight away, before this
3:24
frosting sets. Use the same piping tip with the narrow part pointing upwards to make a bow
3:30
squeezing the bag and piping a loop that joins in the centre of the cake, and then another loop
3:35
to meet it. Keep the narrow part of the teardrop shape of the piping tip pointing up and pipe two
3:41
squiggly lines for the ribbons of the bow. And going back to a trusty toothpick, you can manipulate
3:46
the bow to make it a bit wider and to tidy up any messy parts. Now for a wintry design, with a sparkly
3:54
snowflake. Mark a piece of parchment paper so you know how much space you have to work with
3:59
and draw a basic snowflake within those markings You can trace a picture instead if you like but something fairly simple works best for this Cut the snowflake out to leave the rest of the parchment intact to use as a stencil You can
4:13
fold the snowflake in half before you cut it, to make it symmetrical and to speed up the process
4:19
Place the stencil on a cake after the frosting has set and spread more frosting on top, using back and
4:24
forth circular motions so that you don't pull the parchment up with your offset spatula. Scrape off the
4:30
excess frosting to flatten and smooth it and then peel the parchment off to leave a snowflake
4:34
outline behind. Pour some sprinkles into a bowl, non-Parrells work best or hundreds and thousands
4:40
as they're called in the UK. Pour a bit of water into another bowl. Dip your finger into the water
4:46
tap off the excess and then press it into the sprinkles and the sprinkles will stick to your finger
4:51
Then push your finger gently into the snowflake and the sprinkles will stick to the frosting
4:56
Although the blue frosting on the cake has set, the sprinkles may still stick to your finger
5:00
to it because if the room is warm, condensation may have formed on the blue frosting
5:05
So, after pressing the sprinkles onto the snowflake, use a toothpick or a paintbrush
5:09
or really any thin object to nudge the sprinkles onto the stenciled frosting, and you'll make a
5:14
neat, sparkly snowflake. You can add a border if you like, like I'm doing with this open star tip
5:20
using the same technique as I did for the Christmas tree, squeezing the piping bag while holding it still
5:25
to allow the frosting to bulge out, and then as you pull the bag away, stop squeezing to leave a
5:30
little tail, which you'll overlap with the next dot. If you're enjoying this tutorial, please click
5:36
the subscribe button and check out my cake school with hundreds of cake decorating techniques and
5:40
designs. Okay, next a Christmas flower, a poinsettia. You'll need a leaf tip for this
5:46
this one's a number 352, and you hold this tip so that it looks like an open packman mouth
5:51
with the two points above each other. Squeeze the piping bag and wiggle it from side to side
5:57
and up and down to make a ruffled leaf, and pipe a few of these. around the outer edge of the cake
6:02
Then switch the tip to a piping bag with red frosting to pipe the petals of the flower making a ring of them to overlap the leaves you piped The petals will look really long and skinny at this point but you going to cover up the bases in a minute pipe another ring of petals inside the first ring overlapping the first
6:19
ring of petals, and if there are any gaps in the flower, you can add more petals to fill those in
6:24
For the middle of the flower, pipe a few yellow dots using a small round tip. You can make these flowers
6:29
much smaller if you want to pipe several of them onto the cake instead of one large one, which in high
6:34
I think would have looked even prettier. Writing on cakes can be tricky, but here are two easy ways to make lettering neat
6:41
I like to outline my word with a toothpick first to check that it fits
6:46
Choose two star-shaped tips, one wider than the other. This is a number 32 on the left and a number 199 on the right
6:54
Start with your larger tip and write your word. The smaller your cake is, the smaller your piping tips will need to be
7:00
so that the letters aren't so thick and close together that they're impossible to read
7:04
Now switch to your smaller tip and a different colour and pipe over the top of these letters
7:10
Curseve is a great option for lettering because it's very forgiving. By layering the letters, you're creating more texture and colour and detail
7:19
Using an ampersand instead of writing out the letters is a quicker way to write the word and
7:23
It looks fancier too. The other easy way to write neatly on cakes is to use dots instead of lines
7:30
You can outline the letters with a toothpick first if you like. to start with the first and last letter and work my way towards the middle, which makes spacing
7:39
the letters easier because you can make the final letter, the one in the middle, as wide or narrow
7:44
as necessary to fill in the space that's left. If your hands are shaky, it's much easier to pipe
7:49
neat dots than neat lines. And there they are, six easy but pretty Christmas cake designs
7:56
Thanks for watching. Visit my cake school and join my club plus for access to all of my master
8:01
courses, mini courses, five minute Fridays and live workshops
#Desserts
#Holidays & Seasonal Events