Up next in 10


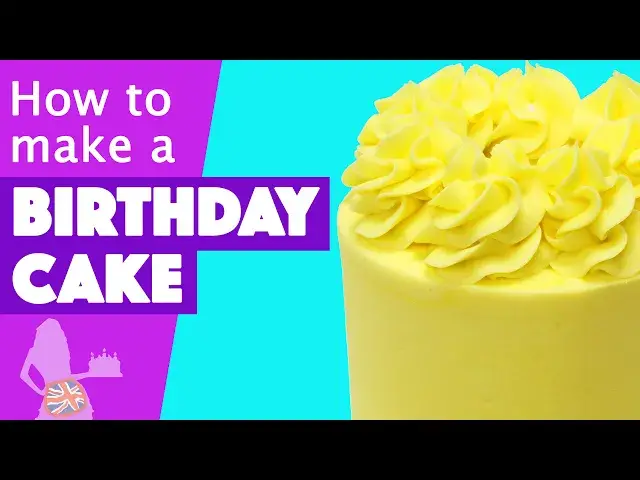
In this cake decorating tutorial I'll show you step by step how to make and decorate a birthday cake so that you can surprise someone with a beautiful and delicious cake, even if you’ve never made a cake before!
My 4 Minute Buttercream recipe: https://www.britishgirlbakes.com/recipes/buttercream-frosting/
My Perfect Chocolate Cake recipe: https://www.britishgirlbakes.com/recipes/perfect-chocolate-cake
My favourite acrylic frosting smoother (use the code BRITISHGIRLBAKES for 10% off!): https://cakesafe.ecwid.com/The-OG-Icing-Scraper-8-Inch-p51510576?aff=4
My favourite sprinkles (use the code BRITISHGIRL15 for 15% off!): www.fancysprinkles.com
For my online cake decorating school click here: https://www.britishgirlbakes.com/online-courses
To read a written version of this tutorial (with photos!) click here: https://www.britishgirlbakes.com/how-to-make-a-birthday-cake/
SUBSCRIBE to my channel for new cake decorating tutorials every week!
Show More Show Less View Video Transcript
0:00
I'm going to show you step by step how to make and decorate a birthday cake so that you can surprise someone with a beautiful and delicious cake
0:07
even if you've never made a cake before. The first step is to bake your cake. You can use any recipe you like. I'm using my perfect chocolate cake and the very detailed recipe and tutorial is on britishgirlbakes.com and I've put the link in the video description
0:21
After baking, let the cake layers cool completely and then wrap them in cling film or saran wrap and put them in the fridge for an hour or the freezer for 30 minutes, so that they first
0:29
firm up and become less crumbly. Meanwhile make your buttercream. For an 8-int cake you'll need 500 grams of butter and 1 kilogram of icing sugar
0:38
Or if you're in the US, that's 5 sticks of butter and 1 2 pound bag of powdered sugar
0:43
Mix them on the lowest speed of your mixer for 4 minutes and then add a teaspoon of vanilla and 2 to 3 tablespoons of milk
0:50
to thin the buttercream out so it's easy to stir and very smooth
0:54
I have a detailed recipe and tutorial for my 4 minute buttercream on Britishacalbakes.com and the link is in the video description
0:59
video description. Now that your cake layers are chilled, it's time to build your cake. Unwrap them
1:04
and if you have a turntable, great, but you don't need one for this. You'll need a ring
1:08
of masking tape or a non-slep mat. This is sold as a drawer liner on Amazon. And a cakeboard
1:15
This is a cardboard one by Wilton. The tape or mat will stop the board from sliding around
1:21
You'll need an offset spatula or pallet knife for this next part. Spread a little bit of
1:25
buttercream onto the middle of the cakeboard and press your first cake layer down. onto it. The buttercream will act as glue to hold the cake in place securely. Spin the
1:34
turntable to check it's lined up in the center of the cake board. Spread buttercream on top
1:38
or any other filling you want to use, going right up to the edges of the cake. Place your next
1:44
layer of cake on top, spinning the cake to check its directly on top of the previous layer
1:49
so the cake is straight, and adjust it if you need to. You can trim the tops of your cake layers
1:55
if they're domed so that they're flat, but if they're just a bit uneven like
1:59
minor, it's fine. Just make sure you spread the filling on so it's level and that will even
2:03
everything out. Continue alternating filling and cake to finish building your cake. The sides should
2:09
be fairly straight, but don't worry about any imperfections. We're going to completely cover this
2:13
cake with frosting to give it smooth straight sides. Put it in the fridge for 30 minutes or the
2:18
freezer for 15 minutes to chill that dot of buttercream on the cake board to secure the cake firmly in place And now we going to give the cake a crumb coat You need your offset spatula and a frosting smoother
2:29
Any kind is fine and I'll talk about how to choose one in a minute. Spread buttercream onto the top of the cake, using your offset spatula to spread it all the way over the edges of the cake to prevent air gaps there
2:39
And that will give you a nice flat surface on top of the cake instead of a domed top
2:44
After covering the top, hold your offset spatula at a 45 degree angle and press down slightly
2:49
as you spin the turn table to flatten out the frosting on top of the cake
2:53
Now spread buttercream onto the sides of the cake. I like to start at the top. You might notice
2:59
the cake wobbling a little bit, especially if your cake is small like this 4 inch cake
3:03
or if the cake is tall, like this one is too. But that dot of buttercream on the cake
3:08
has chilled in the fridge so it's sticking the cake to the cake board and as long as you're
3:12
fairly gentle as you spread the buttercream on, you shouldn't be able to detach the
3:16
the cake from that dot of buttercream so you won't knock the cake over. Spread the buttercream
3:20
all the way down to the very bottom of the cake, right down to the cake board so there's no
3:24
cake exposed anywhere. The point of this layer of frosting, called a crumb coat, is to trap any
3:30
crumbs that come off the cake so that they don't get into your final coat of frosting. It doesn't
3:34
need to be pretty, so the crumbs you can see stuck in this frosting are absolutely fine. Smooth
3:40
the crumb coat by scraping around it with a frosting smoother and I'll cover this in much
3:43
more detail in the next step, but just remember that the crumb coat is going to be totally
3:48
covered up by the final coat of frosting, so this really doesn't need to be neat, it just needs
3:52
to be fairly smooth. The most important thing is to cover up all of the cake to trap all of the
3:57
crumbs. Put the cake in the fridge for about 15 minutes to set the crumb coat so it's firm
4:02
and next it's frosting time. While your cake is in the fridge, tint your buttercream whatever
4:07
color you like. I recommend using gel colors because they're very concentrated so you can get bright
4:12
and bold colors with just a few drops. Take your cake out of the fridge and spoon butter cream on top
4:17
and spread it around just like you did with the crumb coat, spreading it over the edges of the
4:21
cake and smoothing it by spinning the cake while holding your offset spatula at a 45 degree
4:26
angle and pressing down slightly. Move down onto the sides of the cake, letting the frosting
4:32
stick up above the top edge of the cake, so that you can make sharp edges later
4:37
spread back and forth with your offset spatula scooping up more buttercream whenever you feel the frosting layer you spreading getting thinner You aiming for an approximately even thickness of frosting all over the cake but don worry too much about it because we going to do lots of touch to even it out and get smooth frosting When the cake is covered with frosting switch to a frosting smoother
4:57
of any material, plastic, metal or acrylic. I'll show you the difference in a moment. Hold the
5:02
turn table with one hand and rest the frosting smoother down on the cakeboard to line it up straight
5:08
and then gently press it against the side of the cake and spin the turn table, scraping around the cake with very
5:13
little pressure until you can't spin or reach any further and then swipe the frosting smoother
5:18
off away from the cake. Each time you do this reach as far as you can with your hand that's
5:23
spinning the turntable so that you get the longest scrape. Hold the frosting smoother still and
5:28
let the turn table do the work for you. After each scrape, use your offset spatula to wipe off any
5:34
buttercream on your frosting smoother and use that buttercream to fill in any air pockets in the
5:38
cake, which are indents or gaps where the frosting isn't as thick as it is on the rest of the
5:43
the cake. Spread the buttercream over the gaps and then scrape around the cake again
5:47
with your frosting smoother. Now let's look at the difference between plastic, metal and
5:51
acrylic frosting smoothers. Plastic is flexible and easy to wipe clean after each scrape
5:56
but it has the least sharp and smooth edge because plastic gets dented and damaged easily
6:01
so it won't give you perfectly smooth frosting. Metal is a bit heavier and
6:06
sturdier, so easy to line up straight against the cake by pressing it down on the cake
6:10
and the edge is sharp so you'll get nice smooth frosting with it
6:13
Acrylic is also heavy and sturdy and this beveled diagonal edge is super sharp
6:18
so you'll get a beautifully smooth finish on your frosting. This one's my favorite and I've put a discount code and a link in the video description
6:25
Plastic would be my last choice of these three options but you can still get pretty smooth frosting with it
6:31
so don't panic if that's all you have. When you're happy with the sides, use your offset spatula to tidy up the top edge
6:37
by swiping from the outer edge of the cake towards the middle and then continuing the motion to swipe off the cake
6:43
taking the excess frosting off the cake on your offset spatula. Scrape the excess buttercream into a bowl and then wipe the offset spatula clean on a paper towel
6:51
so that you're not dragging buttercream back onto your neat edges. Continue all the way around the cake and as you're tidying up this top edge
7:00
the pressure you're applying down onto the cake will create a bulge around the top of the sides of the cake
7:05
So when you finish, switch back to your front edge. frosting smoother and scrape around the cake one more time Tidy up the top edge again getting down to eye level to check that the edges level all the way around the cake
7:19
Wipe any smudges of buttercream off the cake by wrapping your finger in a paper towel and wiping around the cake
7:24
and then it's time to add some finishing touches. For a sprinkle border, place your cake on its cakeboard on a baking tray and pour sprinkles around the base of the cake onto the cakeboard
7:35
The baking tray will catch any falling sprinkles so it's a baking tray, so it's much easier to clean up afterwards
7:40
Push the sprinkles into the bottom inch or two of the frosting on the cake
7:44
using your hands or the back of a spoon or an offset spatula. It's easier to do this now, straight after frosting the cake
7:50
while the frosting is still sticky, so you don't need to use much pressure to push the sprinkles into the frosting
7:55
I have a discount code for these fancy sprinkles and I've put it in the video description
8:00
The final finishing touch for this cake is to add some frosting swells on top of the cake
8:04
You'll need a piping bag and a star-shaped tip. like this 1M tip by Wilton
8:10
Drop the tip into the piping bag and fold the end over and then scoop up all of the buttercream you scraped off the cake
8:16
while you were frosting it and spoon it into the bag. Folding the top of the bag over before doing this
8:21
means that the end of the bag will stay clean so you won't get buttercream all over your hands
8:26
Push the buttercream down to the bottom of the piping bag and then hold the piping bag over the cake
8:31
and lower the tip down to the cake. Squeeze the bag to push the buttercream out
8:35
and spiral your wrist upwards, your wrist upwards to create a swirl like you'd pipe onto a cupcake
8:41
Each spiral should get tighter to make the swell narrower as it goes up, and at the top
8:46
release your pressure on the bag as you swipe away to leave a neat peek at the top of the swirl
8:51
I like to pipe the swells opposite each other to space them out evenly on the cake, and then
8:55
fill in the gaps in between and that way there aren't any big spaces in between the swells
9:01
Tadda, a beautiful birthday cake! I like to store my cakes in the fridge until four hours
9:06
before serving them. The fridge keeps the frosting and decorations stable. And then four hours
9:12
is enough time to come to room temperature when the cake and frosting taste best. Check out my
9:17
online cake school for lots of online courses and classes on unique cake designs and techniques
9:22
with step-by-step instructions that anyone can follow. Join my club for access to every class
9:27
as well as live online demonstrations and Q&A sessions. Thank you
#Desserts
#Baked Goods