0:00
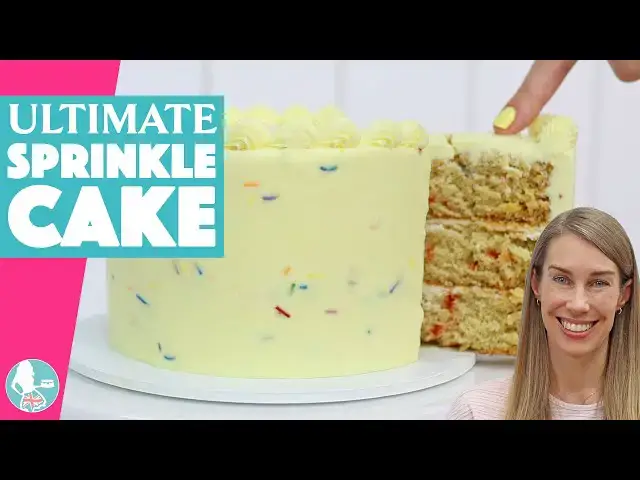
Today we're making the ultimate sprinkle
0:02
cake. It's fun, colorful, and guaranteed
0:04
to make people smile. We're going to
0:06
bake sprinkles into the cake batter and
0:08
then swirl even more sprinkles into the
0:10
buttercream for a bright and fun
0:11
confetti frosting effect. Let's start
0:14
with the cake. Once you've mixed your
0:15
cake batter, add the sprinkles right at
0:17
the end. You can fold sprinkles into any
0:20
cake batter, but the lighter the color,
0:22
the more the sprinkles will stand out.
0:24
Divide the batter between your cake pans
0:26
and bake as normal. Once they're out of
0:28
the oven, let the cakes cool in their
0:29
pans for about 10 minutes, just until
0:31
you can handle them without burning your
0:33
fingers. Then turn them out and let them
0:35
cool completely. Time for the filling
0:37
and frosting. I'm making my 4-minute
0:39
buttercream. It's creamy, fluffy, and
0:41
smooths onto cakes like a dream. To
0:43
assemble your cake, use a cake board
0:45
that's at least 2 in wider than your
0:47
cake. I'm using an 8-in board for my
0:49
6-in cake. Dab a little bit of
0:51
buttercream onto the center of the board
0:53
to anchor your bottom layer. Think of it
0:55
like edible glue. Now add your filling.
0:57
Spread it across the cake using an
0:59
offset spatula or angled pallet knife
1:01
going all the way up to the edges to
1:03
cover the cake with a thin layer.
1:04
Buttercream is sweet, so you don't need
1:06
a lot as the filling. Then spin the cake
1:08
to level the filling, holding it at a
1:10
45° angle as you spin the cake. Stack
1:12
the rest of your cake layers with your
1:14
filling in between. And then pop the
1:15
whole thing in the fridge for at least
1:17
30 minutes to firm up. This step makes
1:19
frosting it so much easier. Quick tip.
1:22
If your layers are domed, level them off
1:24
before stacking for a more stable cake.
1:27
This is another sprinkle cake I made
1:28
recently, and the layers do quite a bit.
1:30
So, I trimmed them like this. It makes
1:33
such a difference to how neat the final
1:35
slices will look. While your cake
1:37
chills, check your buttercream is the
1:39
right consistency. Adding milk a
1:40
spoonful at a time until it's easy to
1:42
stir like this. Okay, let's talk color.
1:44
Tint your buttercream any color you
1:46
like. I'm going with this soft lemony
1:48
yellow to match my nails. And once the
1:50
cake is cold and firm, we can crumb coat
1:52
it. Now that it's firmly attached to the
1:54
middle of the cake board, you'll need a
1:55
cake comb or icing smoother or frosting
1:58
scraper. I'll use this plastic one for
1:59
the crumb coat. And you'll also need a
2:01
large offset spatula or angled pallet
2:04
knife. This is 13 in long with a 9-in
2:06
blade. This is a base layer of frosting.
2:09
It catches all of the loose crumbs and
2:10
gives you a neat canvas to work on.
2:12
Start by frosting the top and then work
2:14
your way down the sides. I like to
2:16
create a little lip above the top edge
2:18
of the cake by pushing the frosting up.
2:20
And this helps you get sharp corners
2:22
later. Use a cake comb or icing smoother
2:24
or frosting scraper to scrape all the
2:26
way around the cake to smooth it. Don't
2:28
worry if it's not perfect because this
2:29
is just a crumb coat. It's going to be
2:31
covered up in a minute. Put the cake
2:32
back into the fridge for another 30
2:34
minutes so that the crumb coat can set.
2:36
It's almost time for the sprinkle
2:37
frosting. But first, take out about half
2:39
a cup of buttercream and set it aside
2:41
for piping a border later. It's really
2:43
important there are no sprinkles in
2:45
this, otherwise they'll clog your piping
2:47
tip. Now take the rest of your
2:48
buttercream and fold in your sprinkles.
2:50
Cover the cake just like you did for the
2:52
crumb coat, starting at the top and then
2:54
moving down to the sides. Use a bit more
2:56
frosting than last time so you can
2:57
smooth it out really nicely. Press the
2:59
base of your cake comb down on the
3:00
cakeboard to line it up straight and
3:02
then spin the turntable so that it
3:04
scrapes around the cake. Use really
3:06
light pressure so that it's barely
3:07
touching the cake. Fill in any little
3:10
dents or gaps with more frosting and
3:12
then scrape again until it looks nice
3:14
and even. For the top edge, use your
3:16
offset spatula or angled pallet knife to
3:18
swipe across the cake from the edge
3:20
towards the center, wiping it clean
3:22
between each swipe so that you don't
3:23
drag any buttercream back onto your neat
3:26
top edge. Then once again, back into the
3:28
fridge for 15 to 30 minutes to firm it
3:31
up before you pipe onto it. Now, let's
3:33
pipe a pretty border. Spoon that
3:35
buttercream you set aside with no
3:36
sprinkles into a piping bag fitted with
3:38
a 4B star tip or any other star- shaped
3:41
tip. With borders like this, it's really
3:43
important to start on the side of the
3:45
cake, which means you need to choose
3:46
your front, the part that you think is
3:48
the prettiest. Start piping 90° to the
3:51
left or right of that so that the start
3:53
and end of your border is tucked away on
3:55
the side. Hold the piping bag just above
3:58
the cake, squeeze, and push slightly
4:00
away from yourself before pulling back.
4:01
And that creates a lovely bead or wave
4:04
that folds over itself. Repeat all the
4:06
way around with each new bead covering
4:08
up the tail of the previous bead. Don't
4:11
worry if the last one looks a bit
4:12
awkward. Use a toothpick to tidy it up
4:14
and disguise it in amongst the rest of
4:16
the border. But that's why you started
4:18
where you did on the side of the cake
4:20
because the join is going to be the
4:21
least obvious here. If you've got extra
4:23
buttercream like this, you can pipe a
4:25
matching border around the base, too.
4:27
Totally up to you. And that's it. Your
4:29
ultimate sprinkle cake is ready to
4:30
dazzle. You can store this in the fridge
4:32
for 3 days. Just remember to take it out
4:34
a few hours before serving so that the
4:36
buttercream softens and the cake tastes
4:38
its best. Whether you call this a
4:41
sprinkle cake or a funfetti cake, it's a
4:43
showstopper for birthdays, celebrations,
4:45
or just a Tuesday when you need cake.
4:47
You'll find all of my recipes and
4:49
tutorials on britishgirlbakes.com and
4:51
also my cake school with all of my
4:52
online courses and memberships to learn
4:54
hundreds of cake decorating techniques
4:56
and designs. I hope to see you there.