Decorating a cake can be just as much fun as baking it but it can also be incredibly frustrating if things don’t go quite to plan. Whether you’re struggling with messy buttercream, lumpy frosting, or piping gone wrong, these cake decorating tips will make your life so much easier. In this tutorial I’m sharing ten of my most-used cake decorating tricks that will save you time, fix common problems, and help your cakes look more professional.
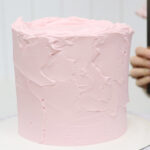
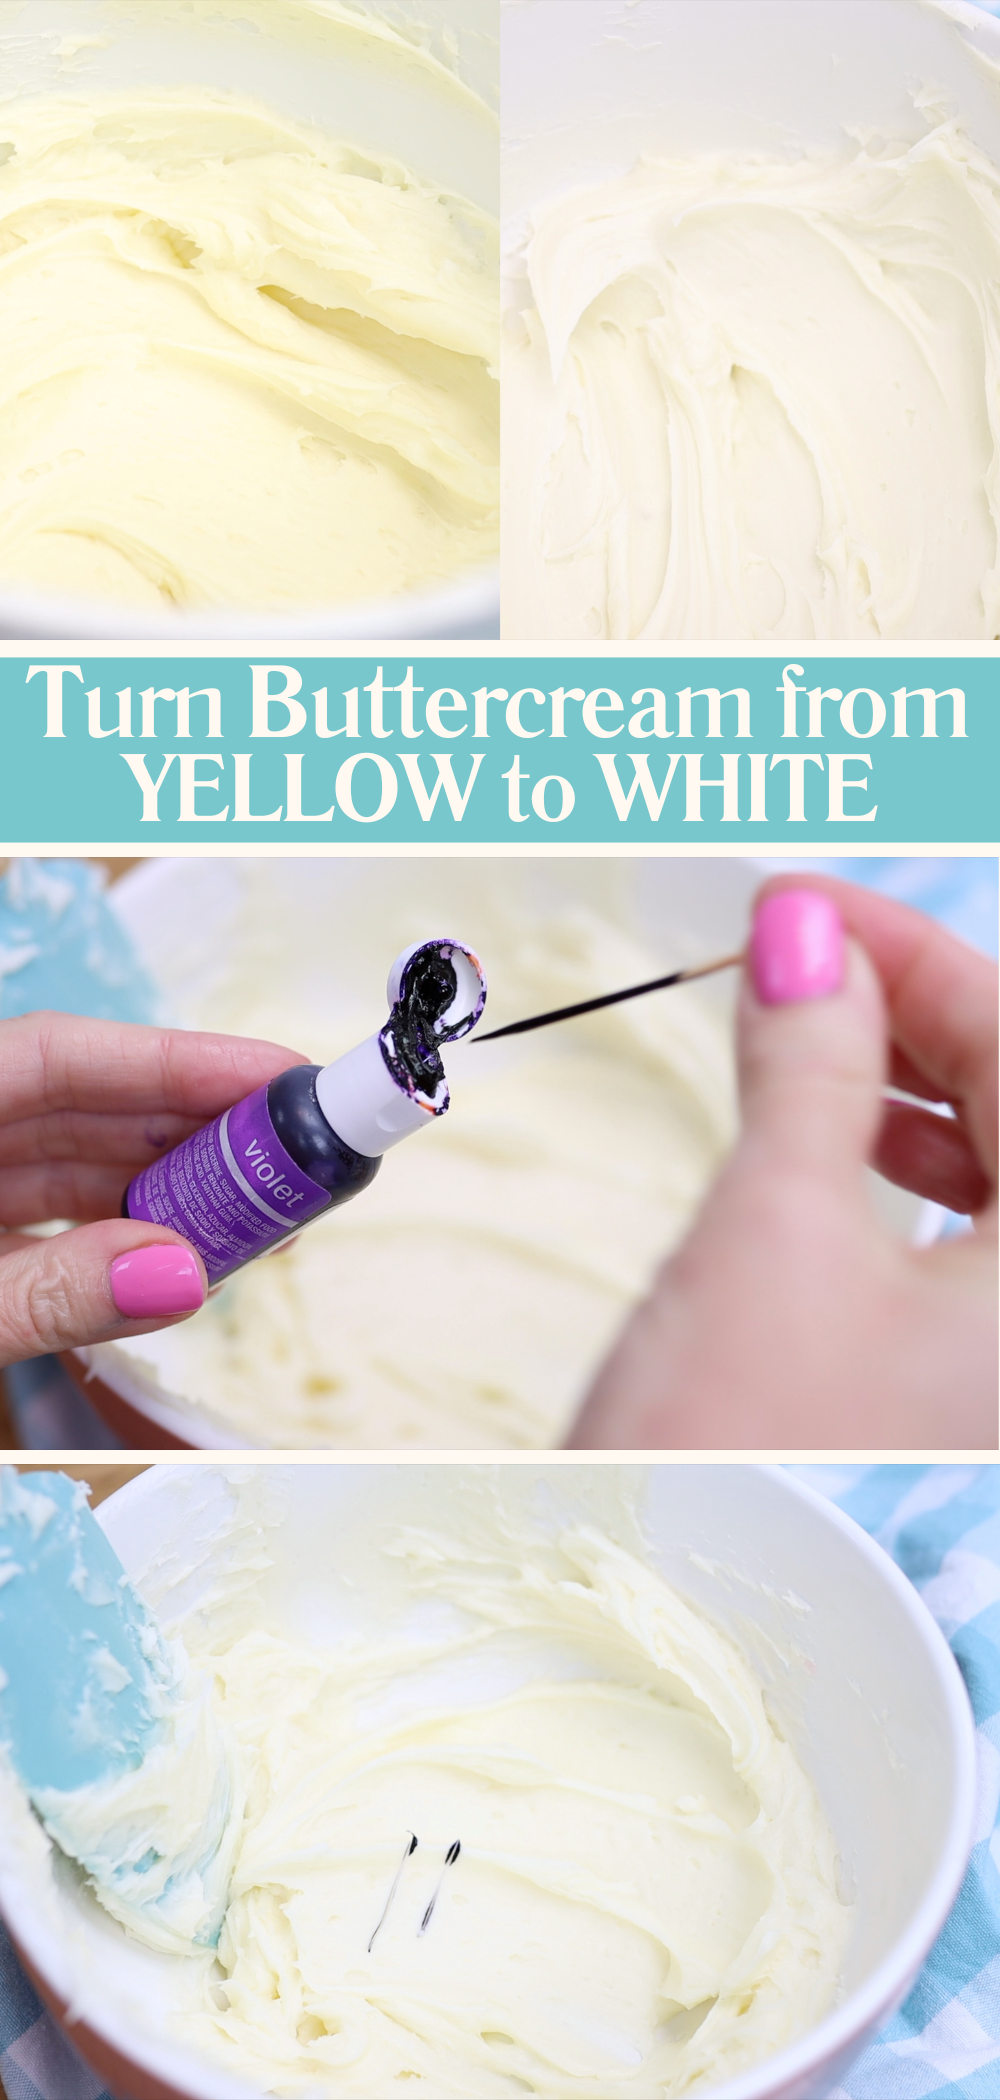
I adore my 4 Minute Buttercream but just like any butter-based frosting, it can look yellow instead of white. Here’s a trick that magically turns yellow buttercream white: use a tiny bit of violet food colouring.
Dip a toothpick into a bottle of violet gel food colour and drag that through your buttercream. Stir it in and you’ll see the yellow tinge disappear, leaving you with a much brighter white. The violet cancels out the yellow, like a colour correction filter! Just be careful because a little goes a very long way.
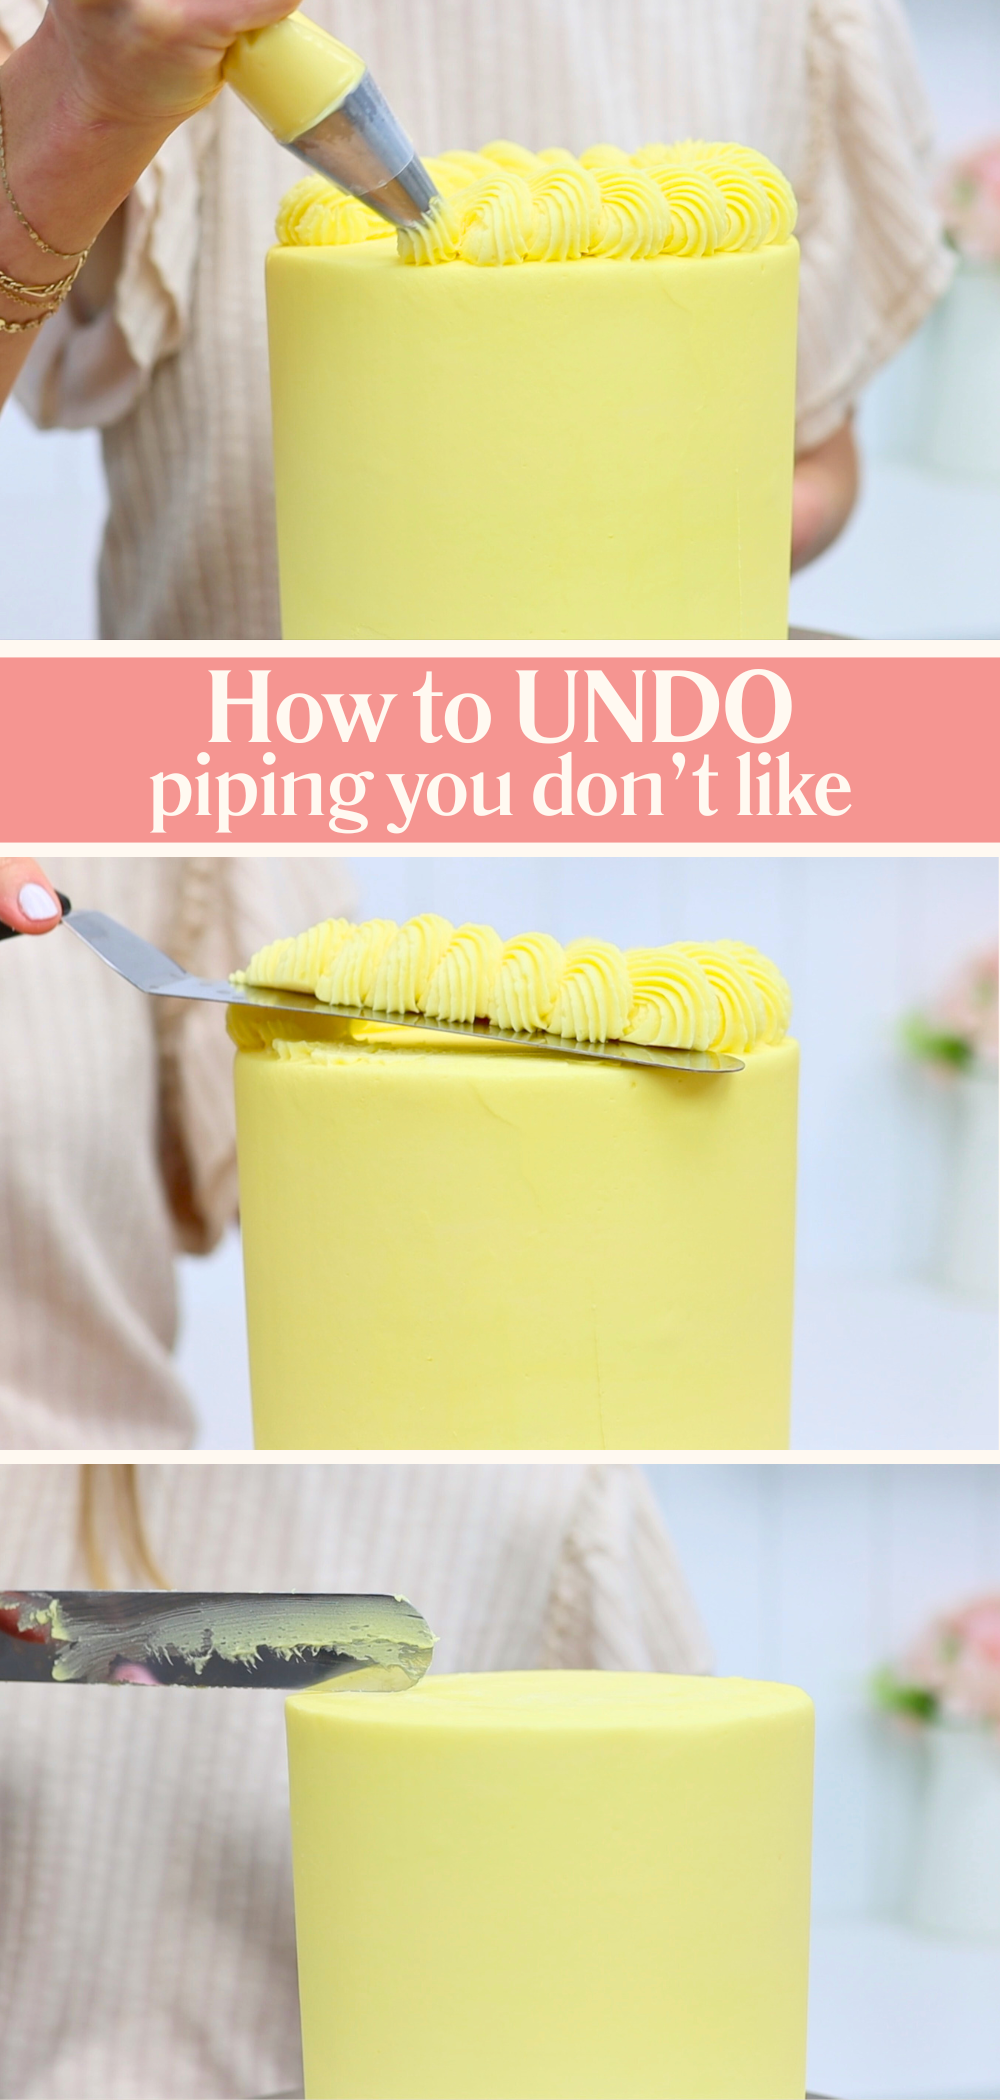
Let’s talk about borders. They can be really tricky if your buttercream is a bit too runny or too stiff, or you’re experimenting with a new piping technique. And if your hands are shaky like mine, getting a perfect border on the first attempt is tough.
The secret here is to chill the cake before you pipe. This way the frosting will be cold and firm when you pipe your border and if you don’t like how it looks, just scrape it off with an
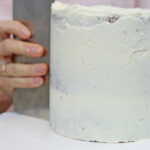
Let’s talk about the texture of your buttercream. It can really make or break your cake! If it’s too stiff or full of air bubbles, it’s a nightmare to spread or pipe. Here’s a quick and easy way to fix it.
Scoop out about a third of your buttercream into a microwave-safe bowl and microwave it for 10 seconds. This will melt it slightly. Then stir it back into the rest of the buttercream. The melted portion loosens everything up, making the whole batch much smoother and easier to work with. This trick gives you that perfect spreadable consistency every time.

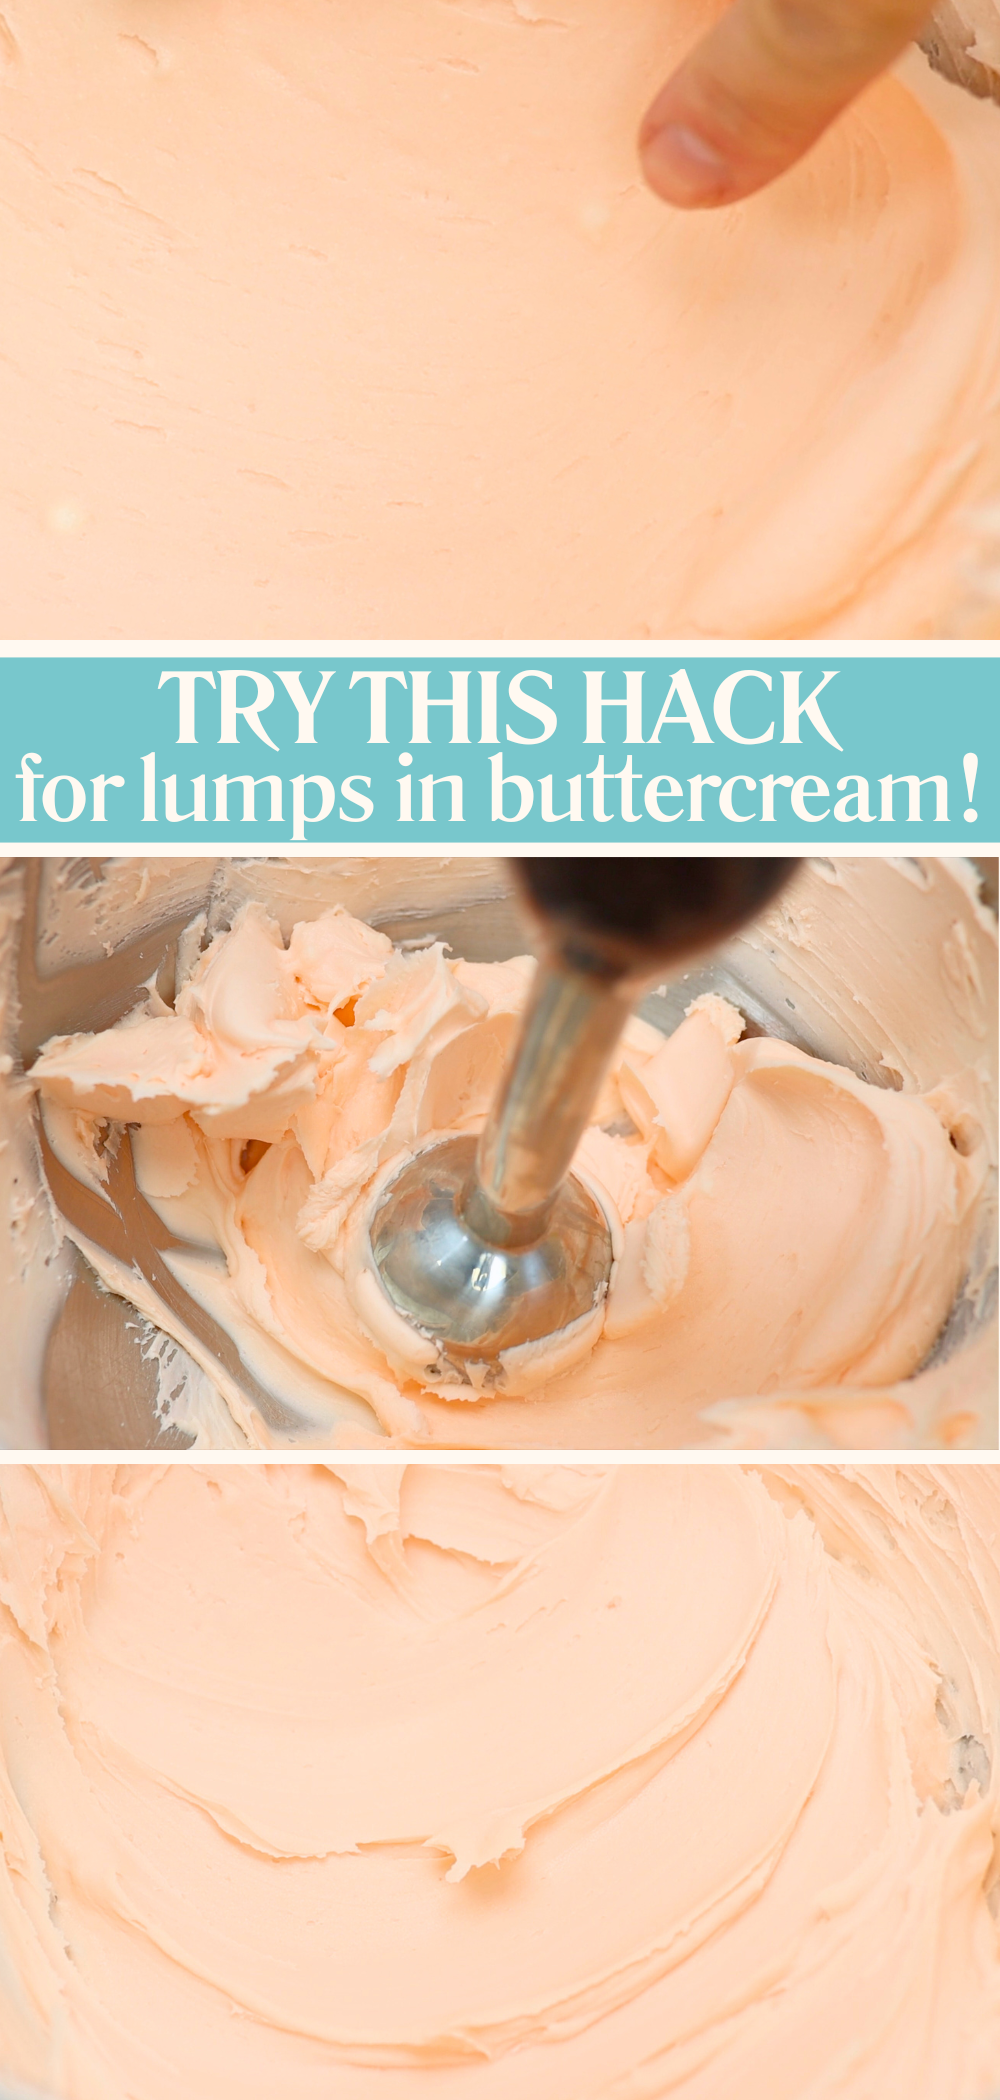
Forgot to sift your icing sugar? Don’t worry – there’s a fix. If your buttercream has annoying little lumps in it, grab an immersion blender (also known as a stick blender). Blitz the buttercream for a few seconds and the spinning blades will completely smooth it out. You’ll be left with silky, lump-free buttercream that’s perfect for frosting your cake or piping. This is a great hack if you notice lumps right before using the buttercream and don’t want to make a fresh batch.
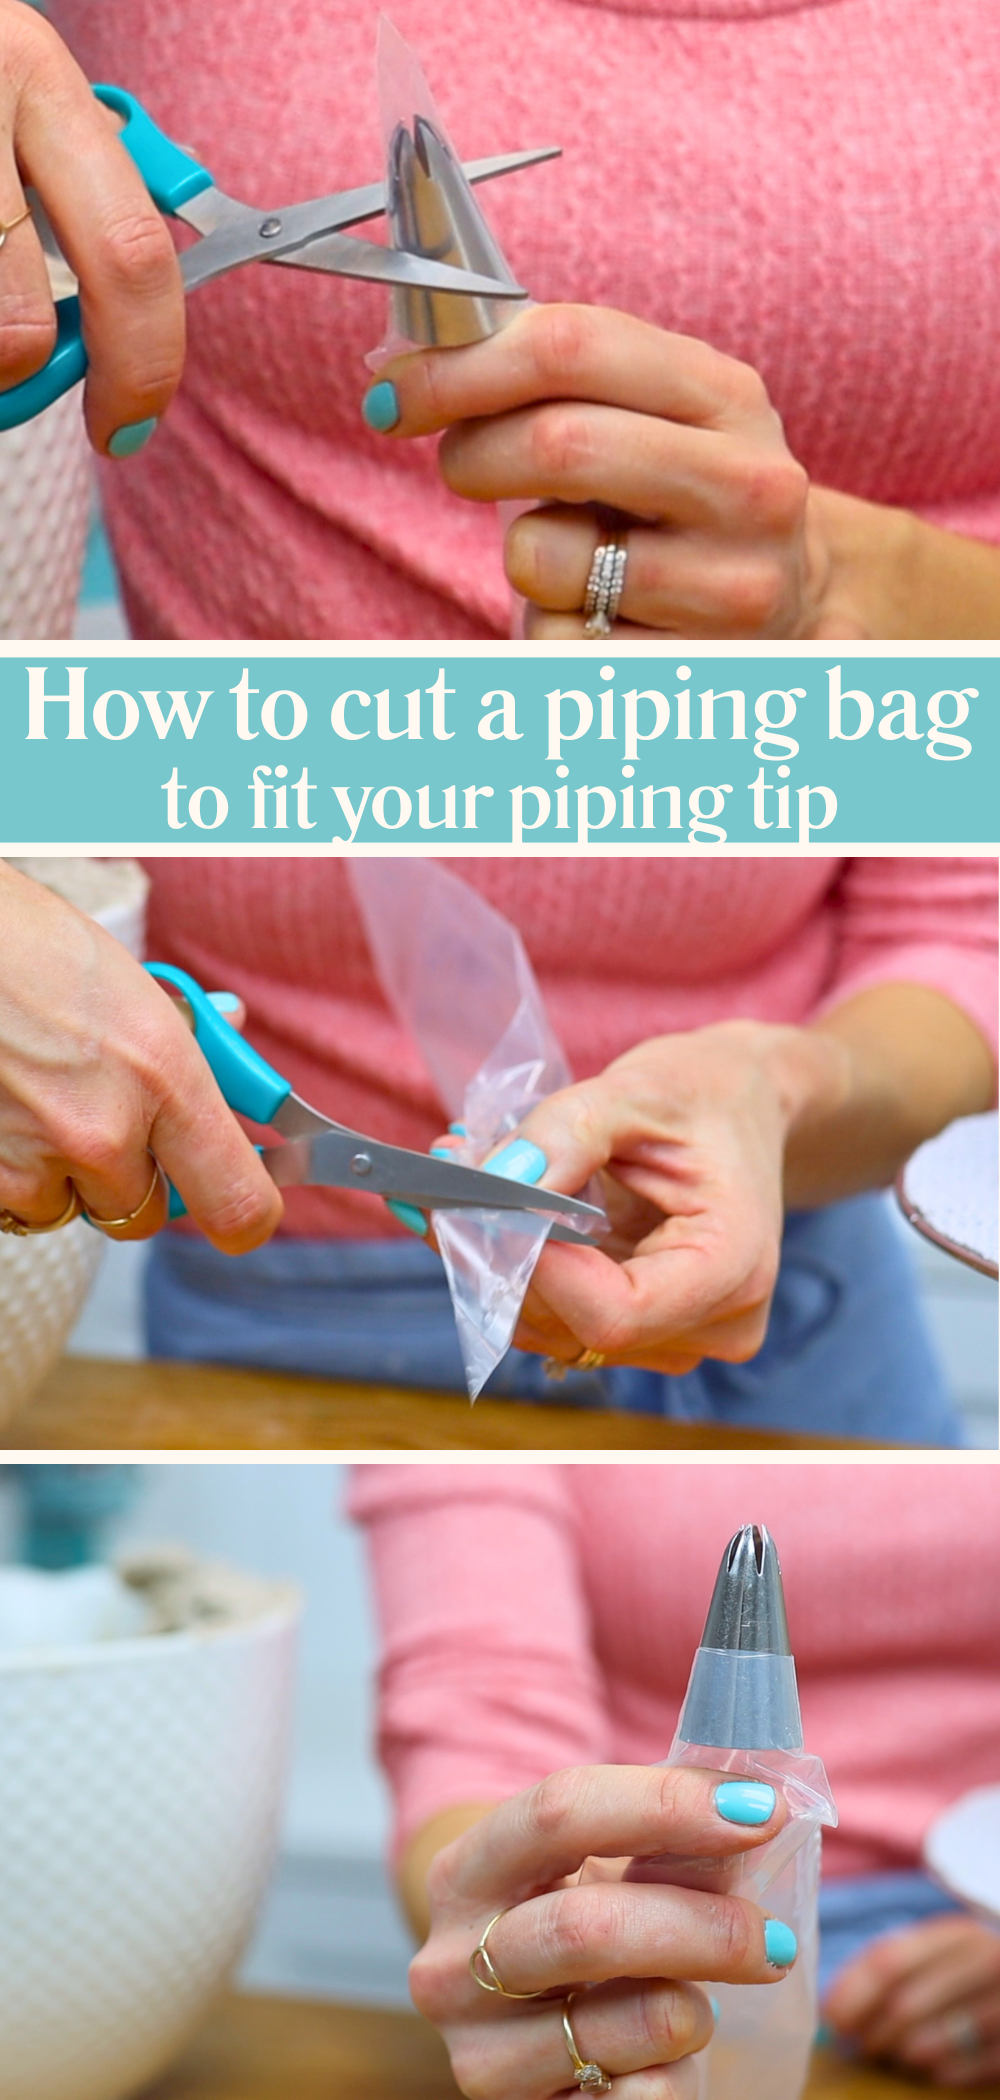
If you’ve ever had a piping tip burst out of the end of your piping bag mid-design, you’ll love this one. Here’s how to make sure your piping tip fits snugly and stays in place.
Drop the piping tip into a piping bag and push it as far down as it will go. Use scissors to score a line halfway up the tip, then push the tip out of the way and cut along that line. Now when you press the piping tip back down, about half of it should poke out through the cut in the bag. This is just enough to keep it secure while you pipe, no matter what shape or size tip you’re using.
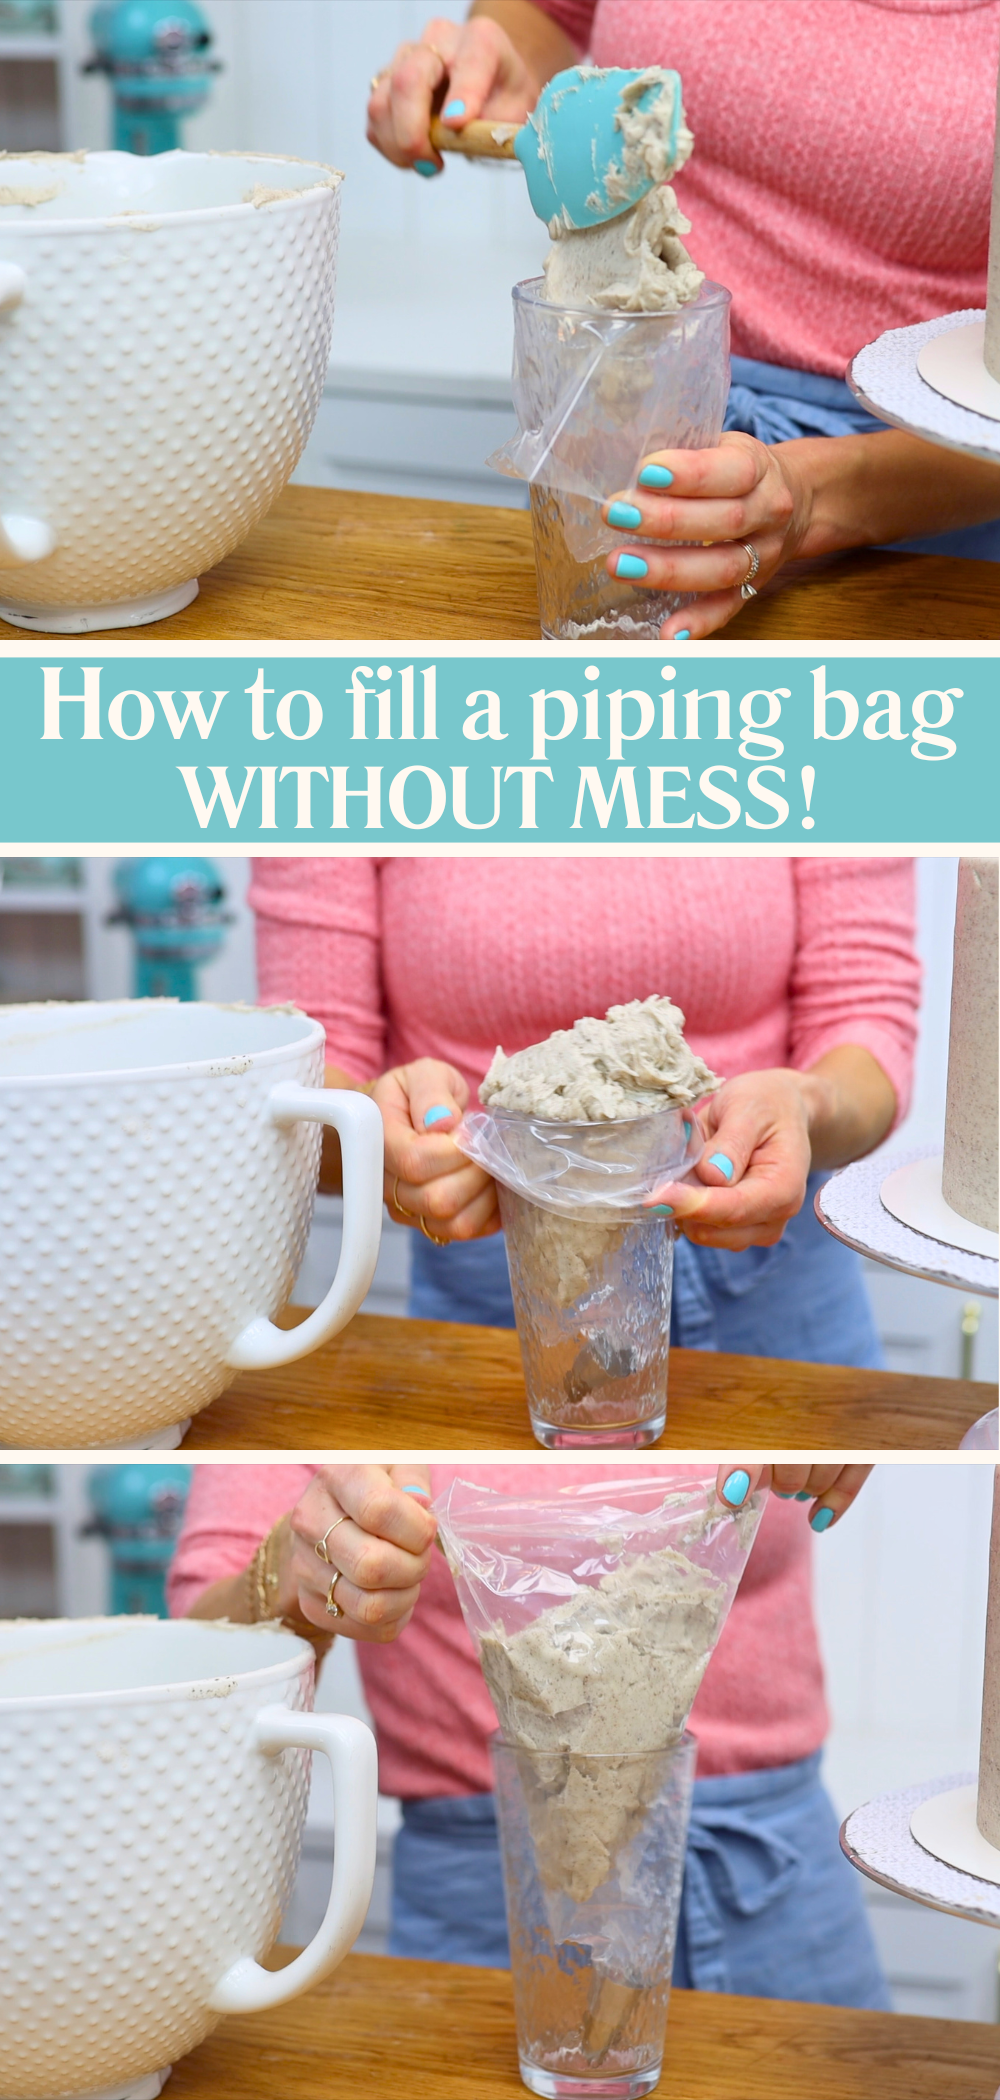
Here’s a super simple but incredibly useful trick. Stand your piping bag in a tall glass and fold the top over the rim. This holds the bag open while you spoon in your buttercream, keeping your hands clean and giving you full control.
Only fill the bag two-thirds full so there’s room to squeeze without buttercream oozing out the top. Once filled, unfold the top, lift the bag up and twist the top tightly to stop air or buttercream escaping when you’re piping.
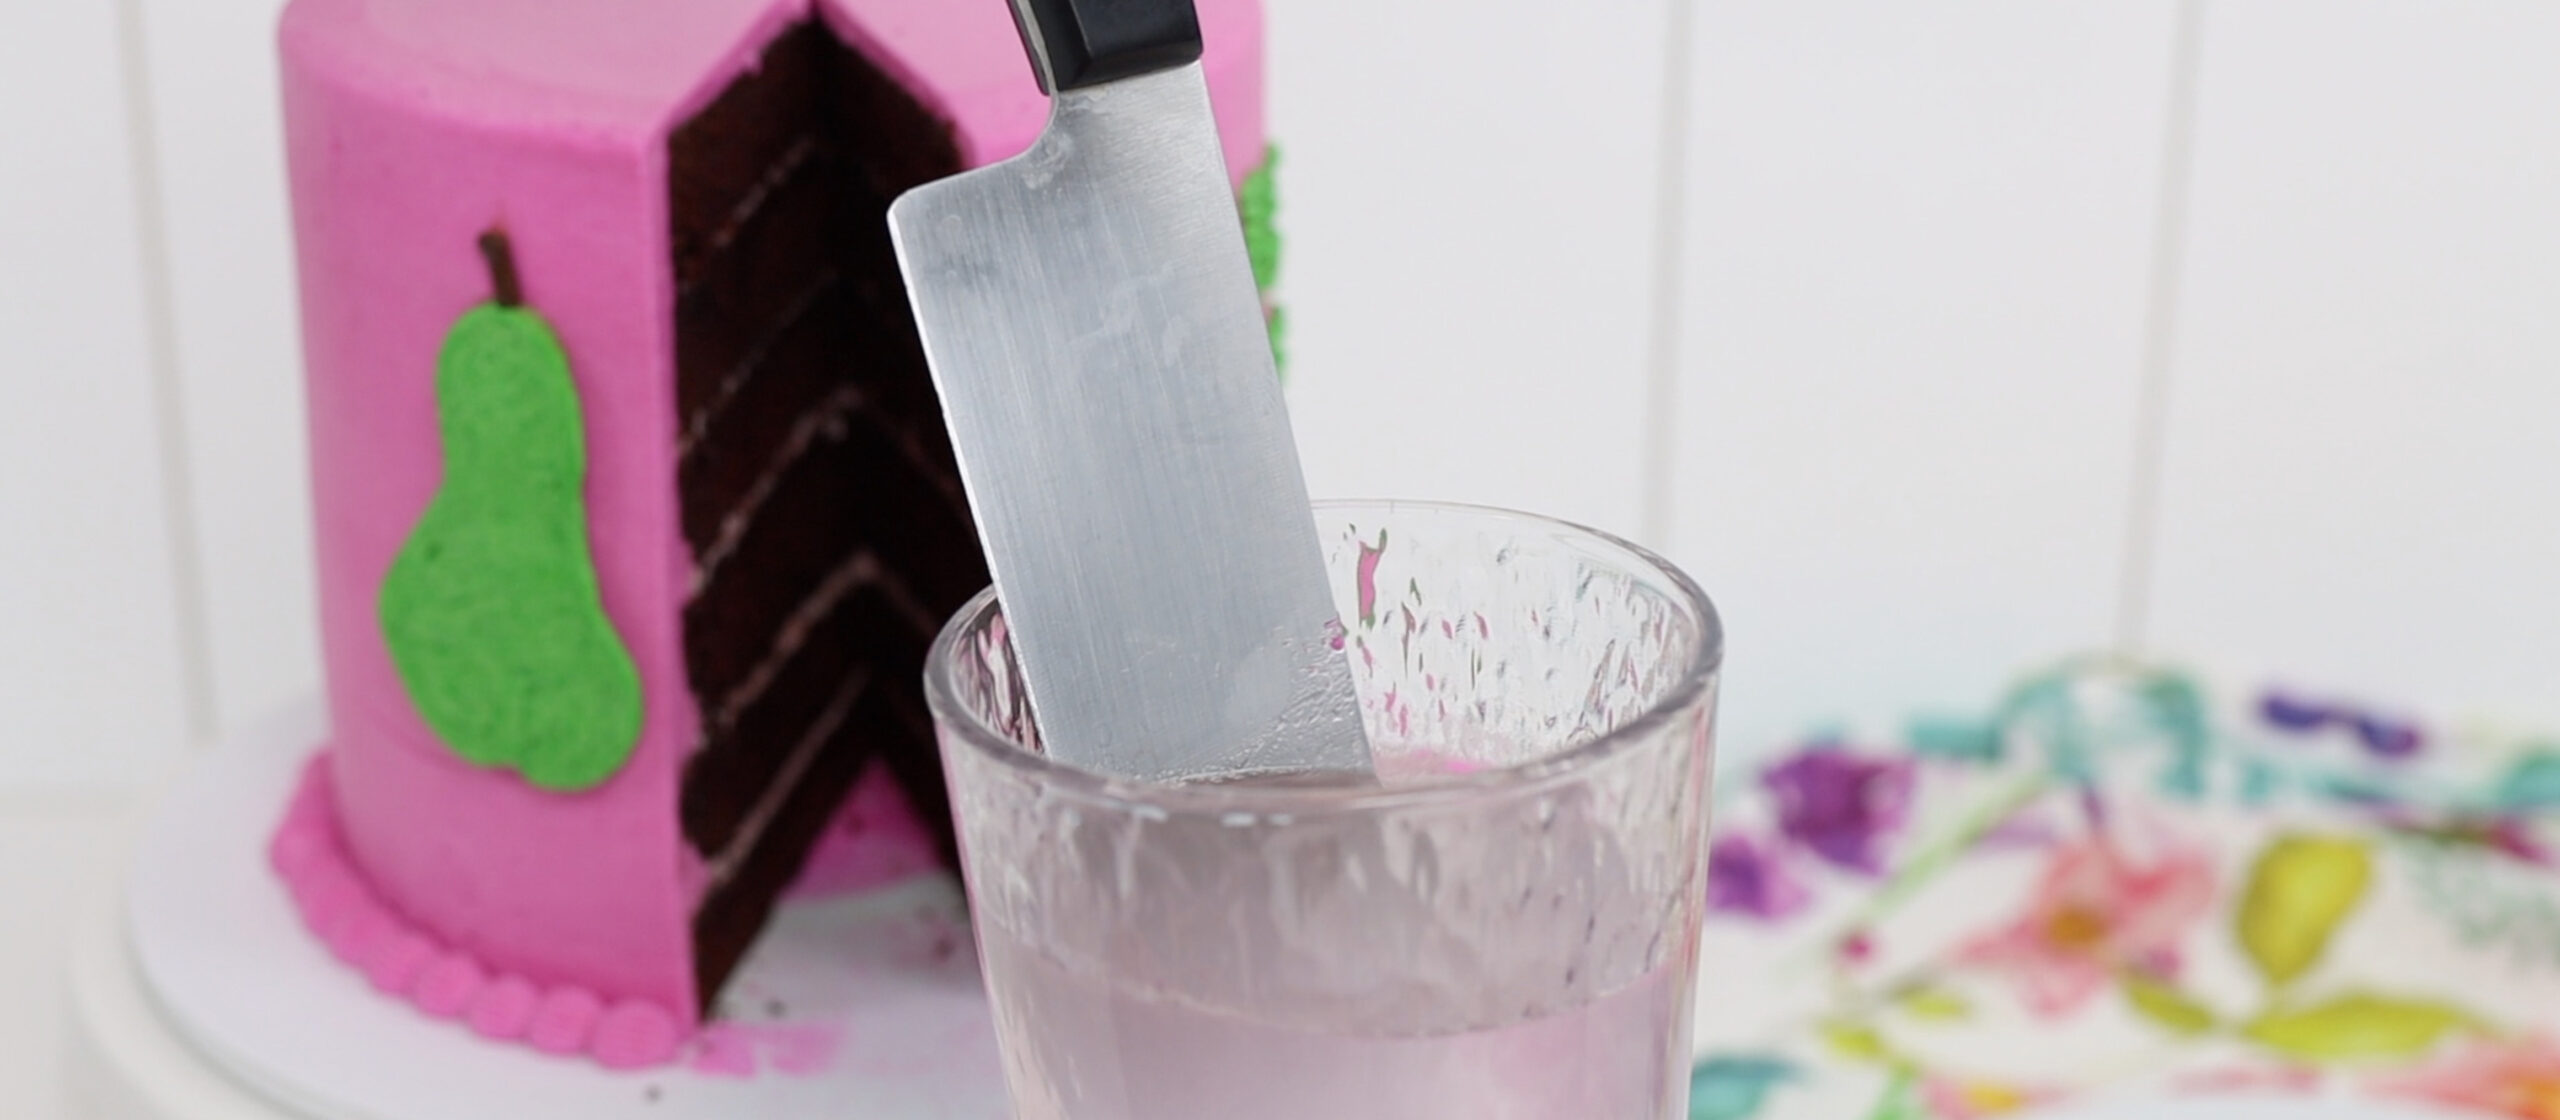
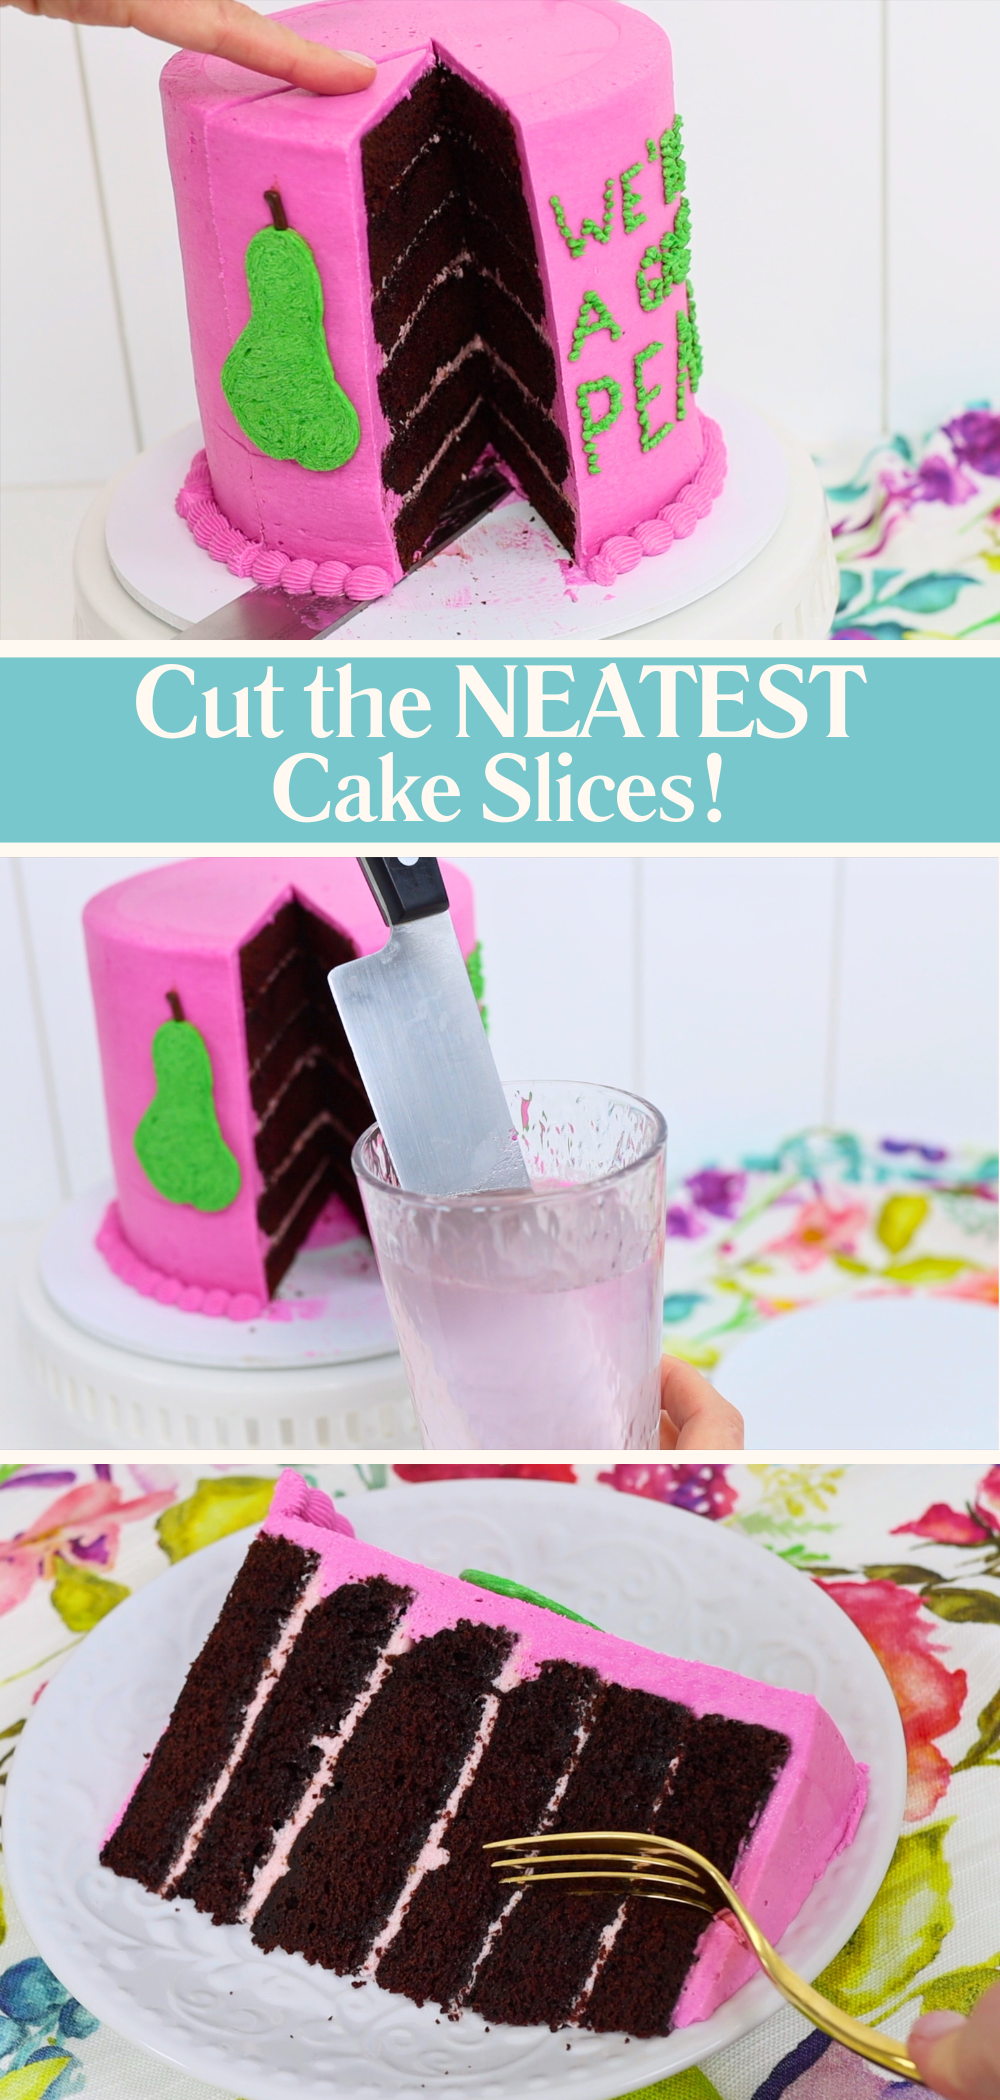
If you've ever cut into a cake straight after baking it, you probably ended up with a sticky, crumbly mess. It might be soft and delicious but it’s difficult to cut cleanly. For neat slices, try this instead.
Chill your cake for at least an hour, then leave it at room temperature for another hour. Now the buttercream will have set, so it won’t stick to your knife. The cake will have warmed up to room temperature so it will have softened again to the perfect texture for eating. Dip your knife into hot water, wipe it dry, and slice. You’ll glide through the cake cleanly without dragging crumbs along the way.
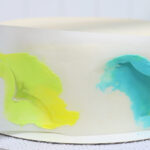
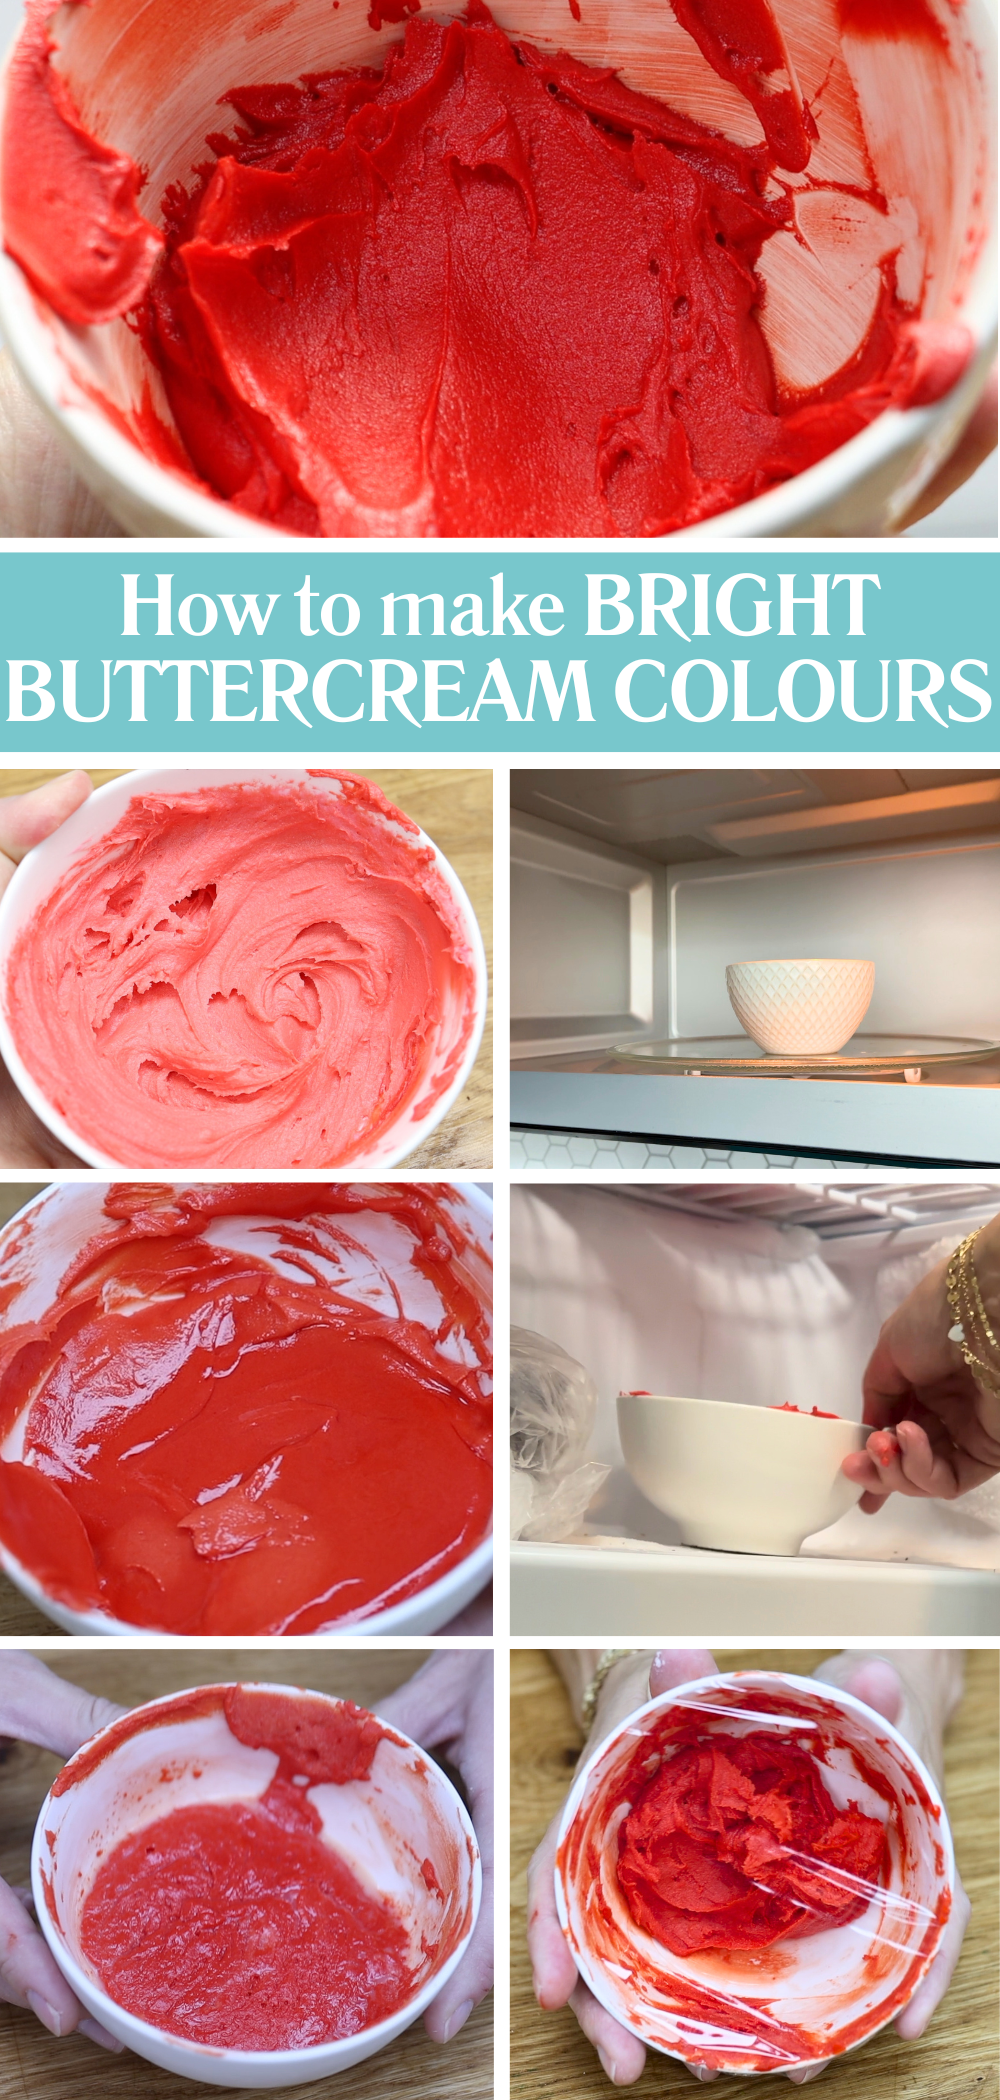
Using a lot of food colouring to make dark colours like red or navy blue can cause un unpleasant taste in buttercream. Here are three tips to avoid using so much colouring.
Tint your buttercream to be lighter than your final colour. Then microwave it for 5–10 seconds to melt the butter slightly and the heat will deepen the colour dramatically. Once melted, stir well and then pop it into the freezer for five minutes. This will bring the buttercream back to the right consistency and the cold will also intensify the colour even more. Let it rest for an hour or two, and you’ll see the colour develop even further. It’s the easiest way to get bold colours without staining everyone’s teeth!
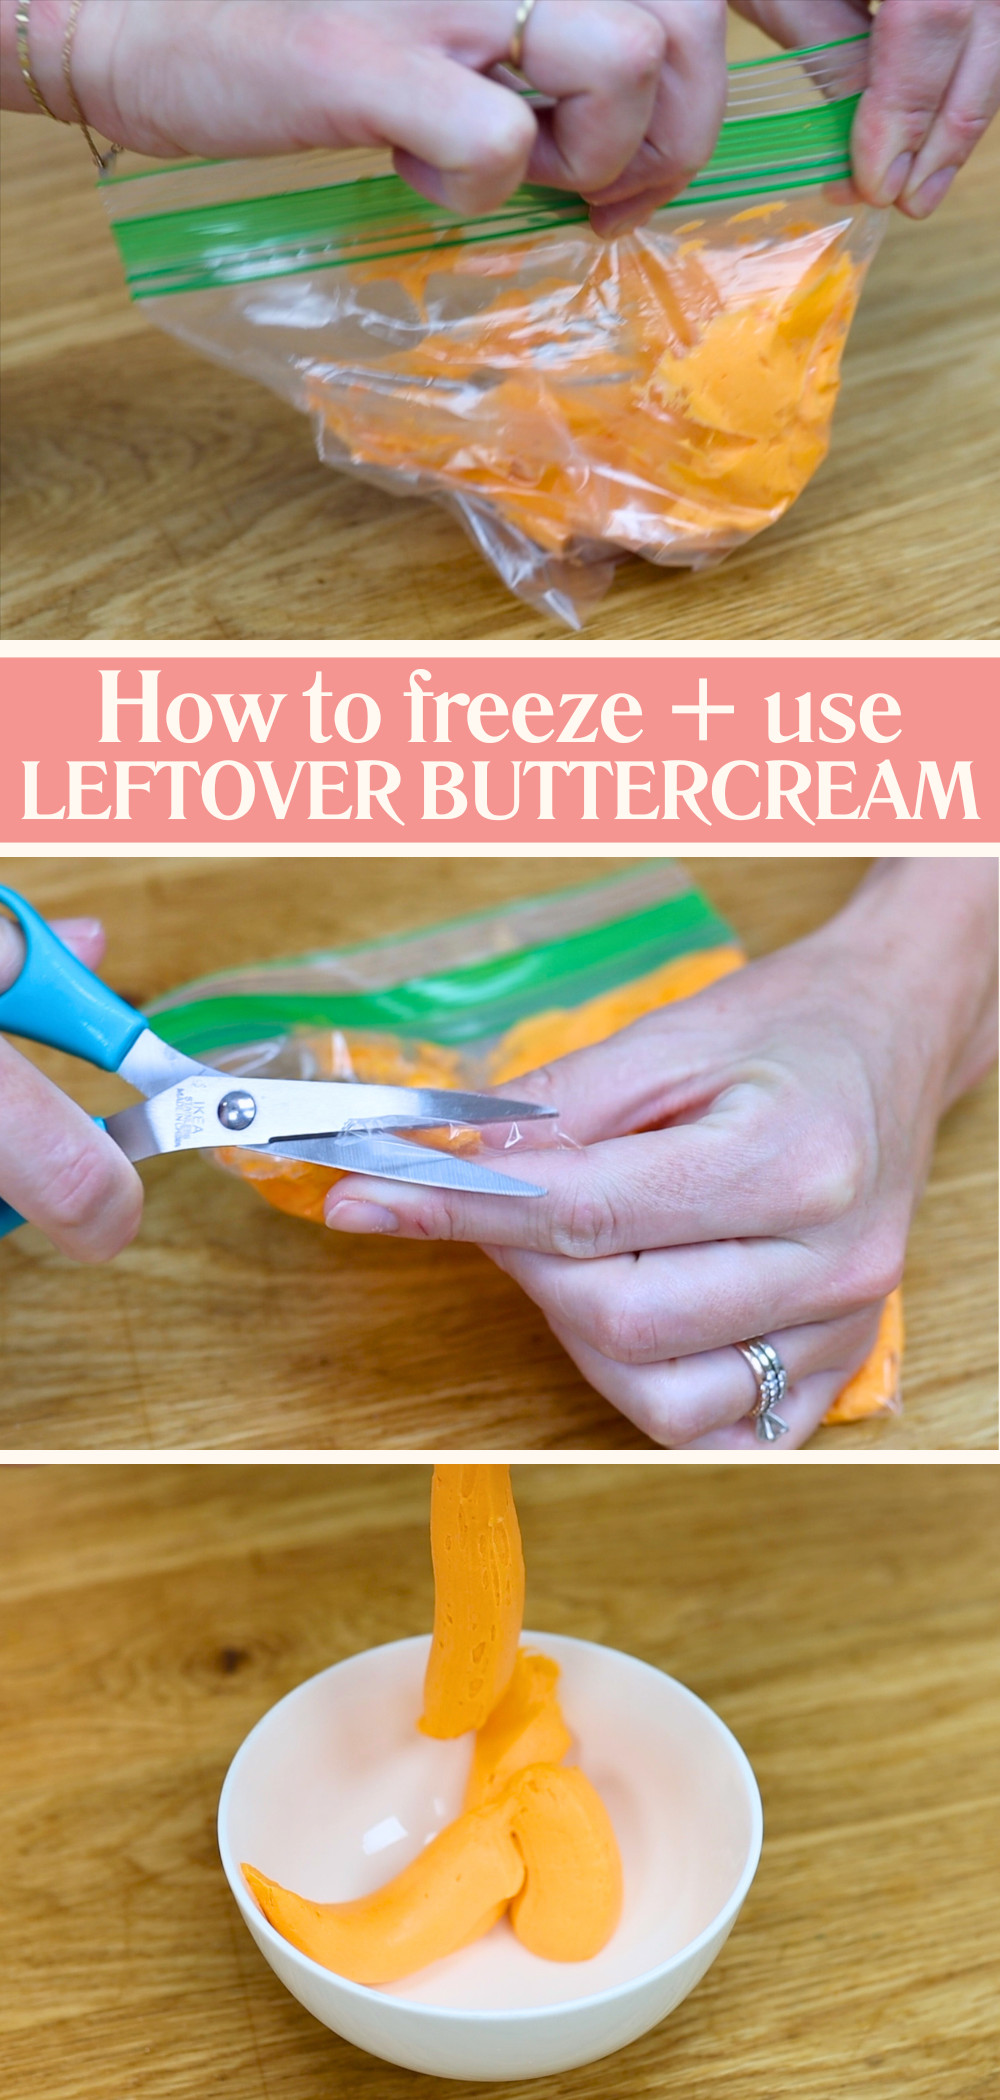
If you’ve got leftover buttercream, don’t throw it away! It can actually save you time next time you decorate a cake. Spoon your leftovers into ziplock bags or airtight containers and freeze them for up to two months. When you’re ready to use them, let them thaw at room temperature overnight. Once soft, stir them vigorously to smooth out any air bubbles, re-tint the colour if you need to, and you’re ready to decorate again.
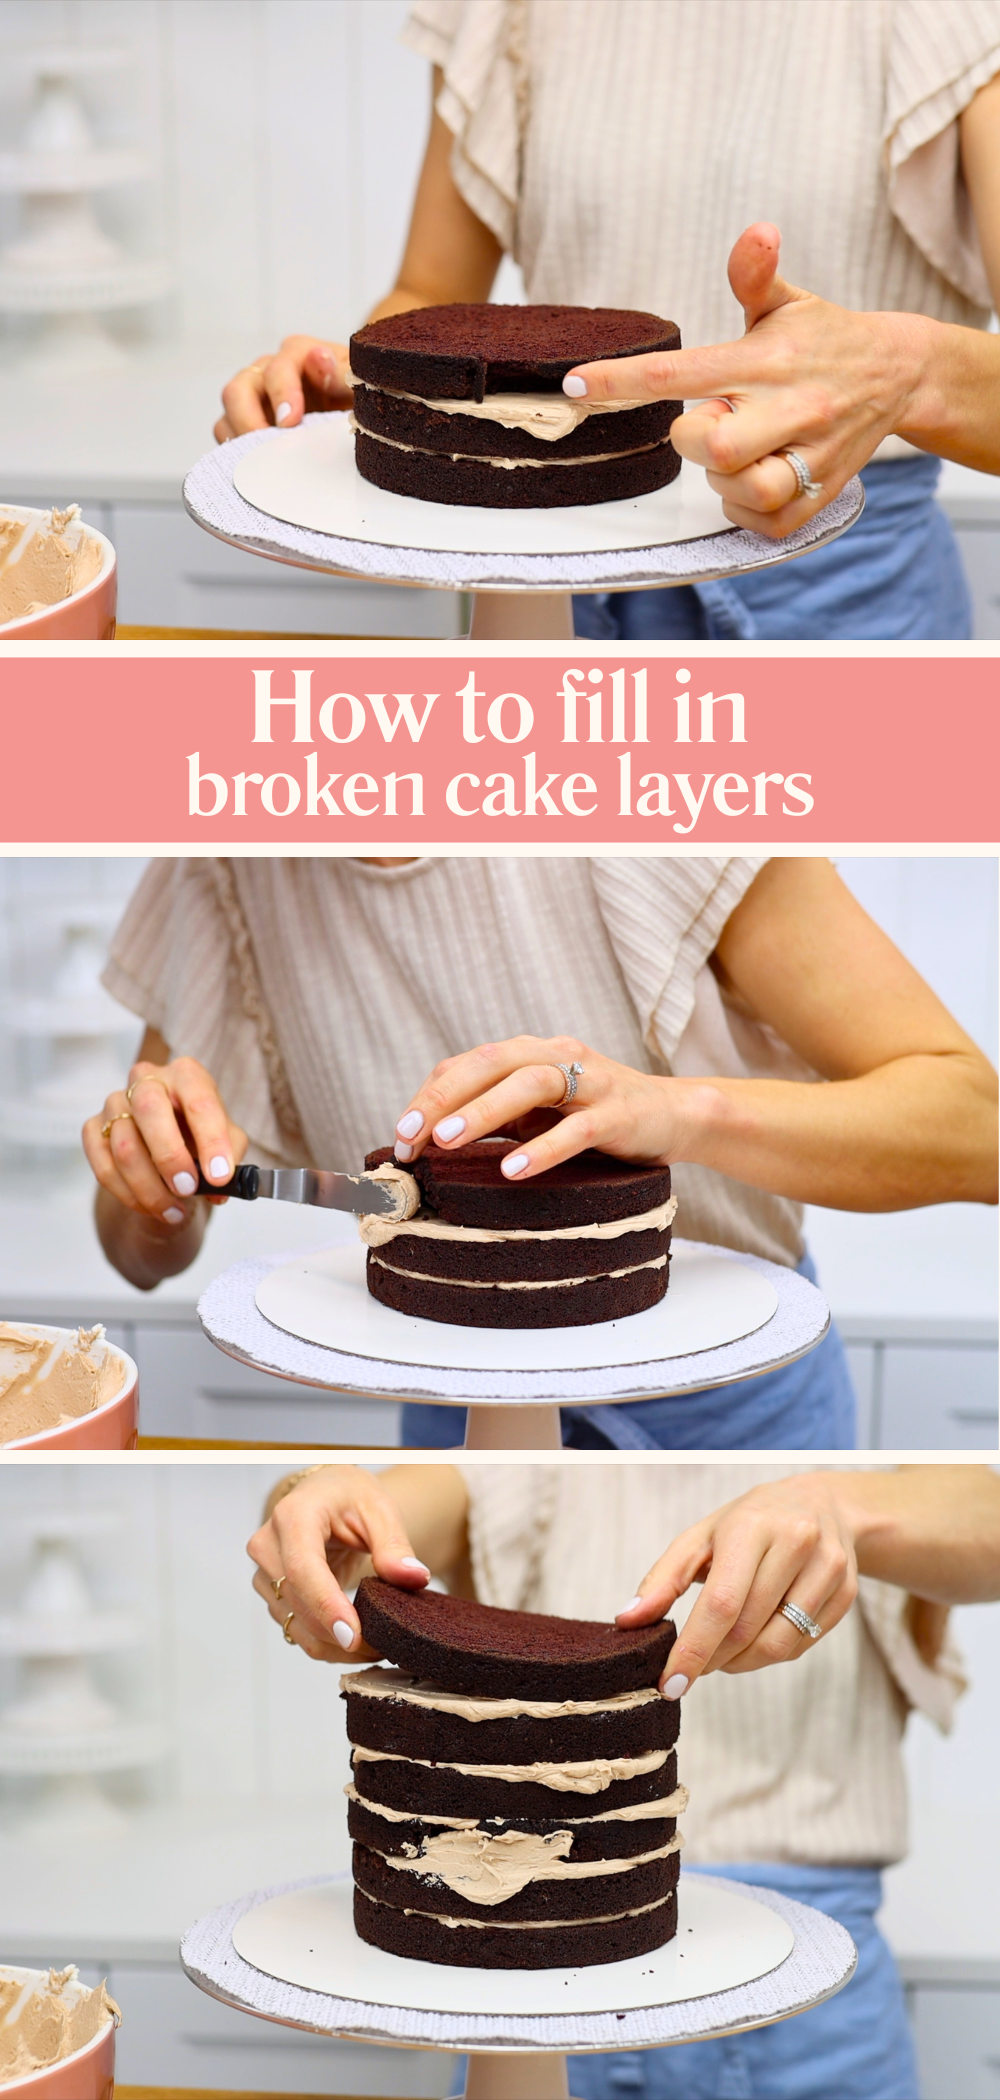
Not every cake layer comes out of the pan in one perfect piece. If you’ve got a cracked or broken layer don't throw it away! Just fill in the gaps with buttercream.
Use buttercream to glue the broken pieces back together. Then stack and fill your layers as usual and then crumb coat. Once your cake is fully frosted, no one will ever know there was a missing chunk. The frosting hides everything and you’ll end up with perfectly straight sides and a smooth finish.
I hope these cake decorating tips make your decorating life easier, neater, and much less stressful. Knowing how to fix mistakes, work smarter with buttercream, and use your tools properly makes a huge difference. With these cake decorating hacks in your toolkit, you’ll be much more confident and prepared for anything that comes your way!
You can also watch a video of this tutorial on 10 Essential Cake Decorating Tips and Tricks: