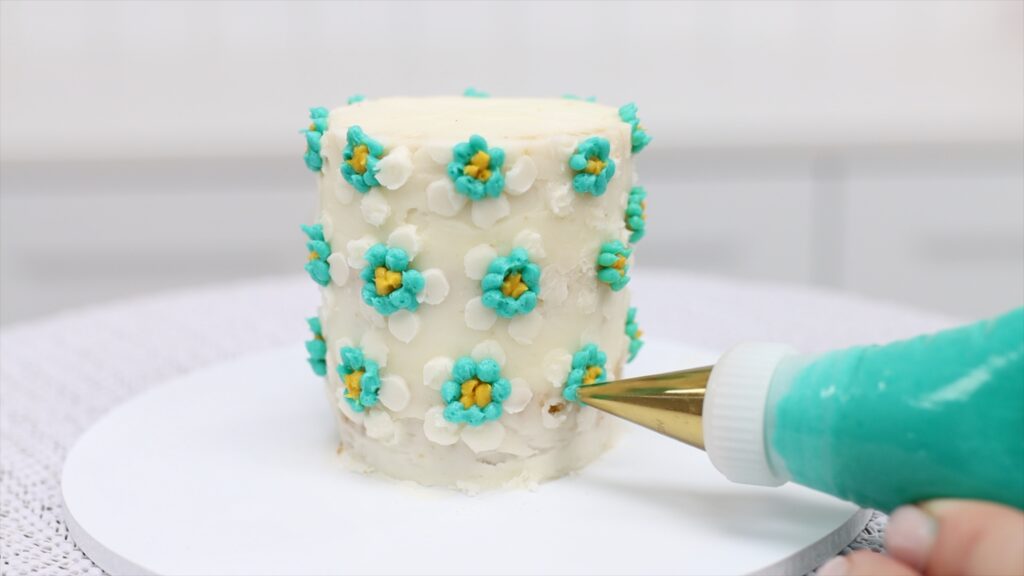
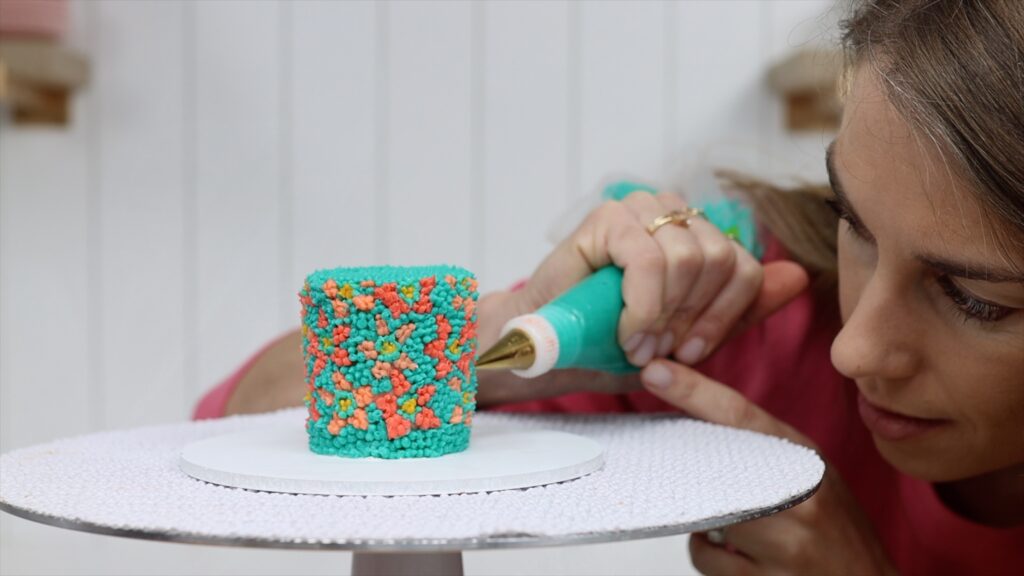
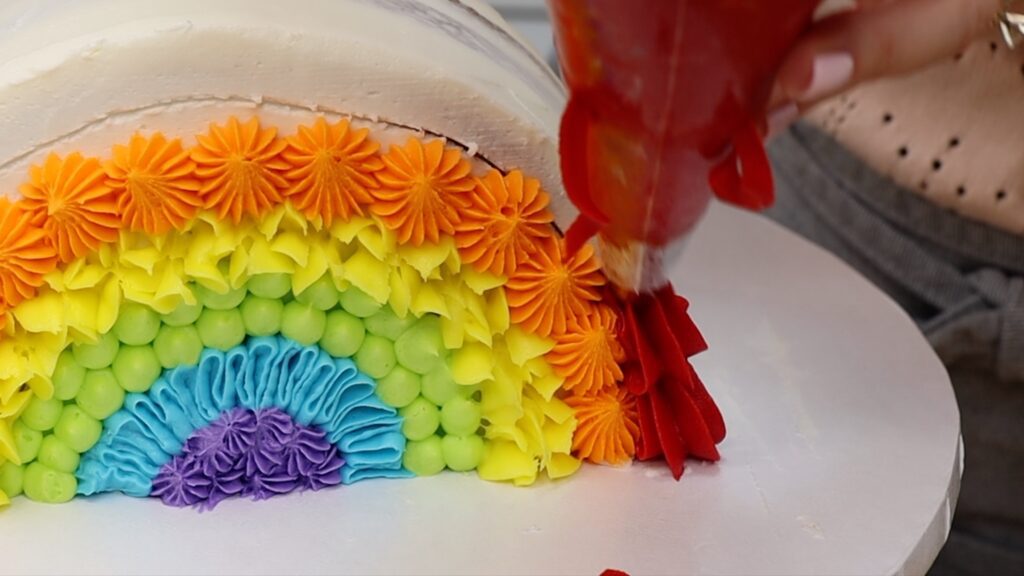
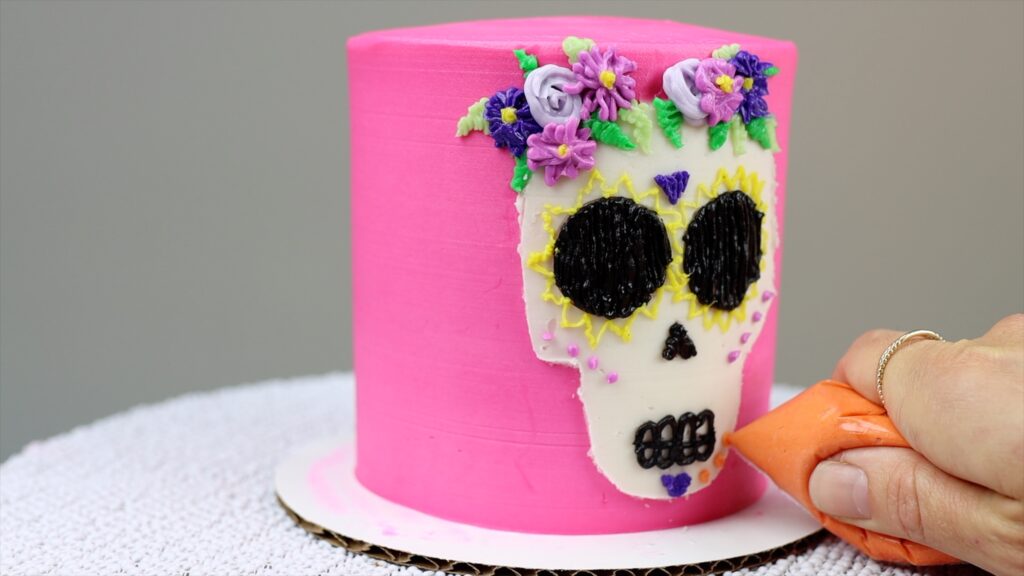
Piping onto cakes adds colour and texture and in this tutorial I’m going to share 15 piping hacks to make piping easier!
#1 How to fit a piping bag with a tip
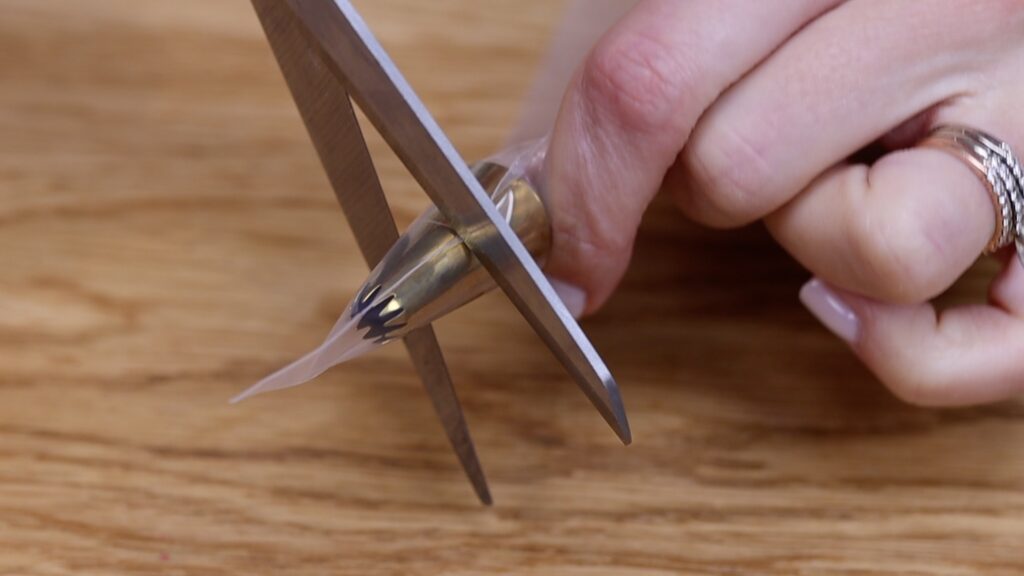
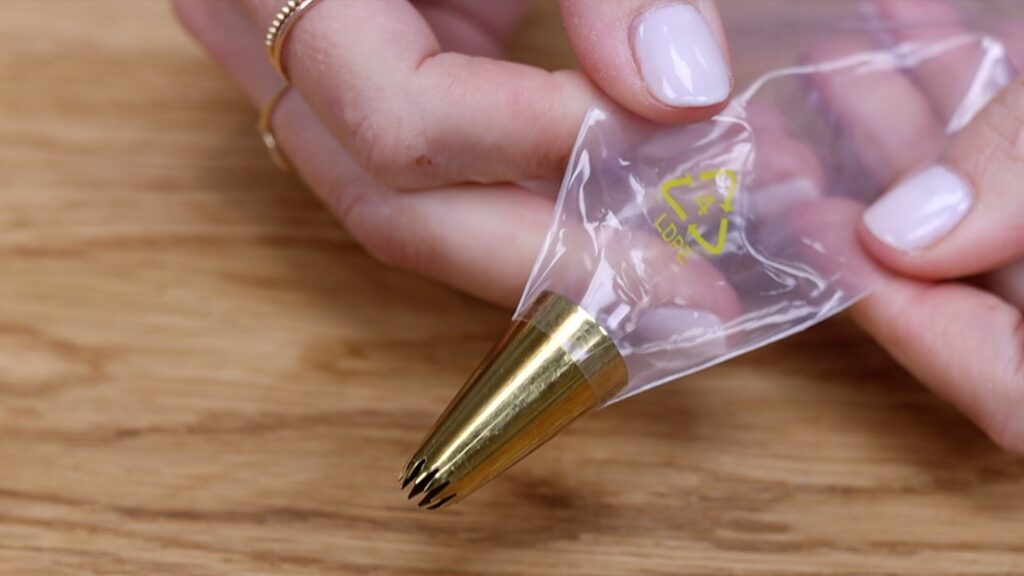
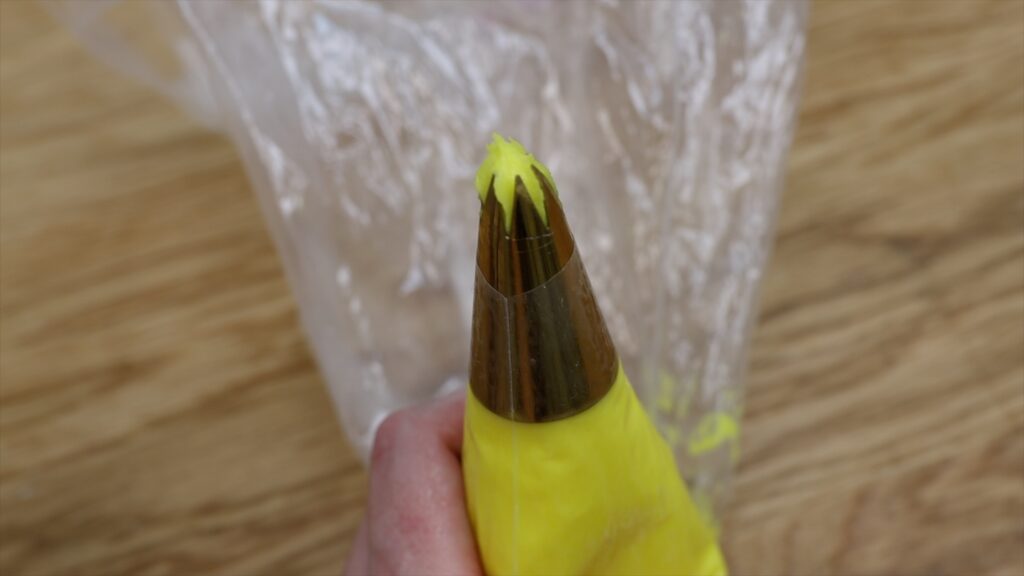
Let’s start with the basics: how to fit a piping bag with a piping tip. Drop your tip into the piping bag and push it to the end and then use scissors to score about half way up the piping tip.
Push the piping tip out of the way, cut alone the line you scored, and then when you push the tip back down it should sit snugly within the bag.
#2 Choose the right piping tip
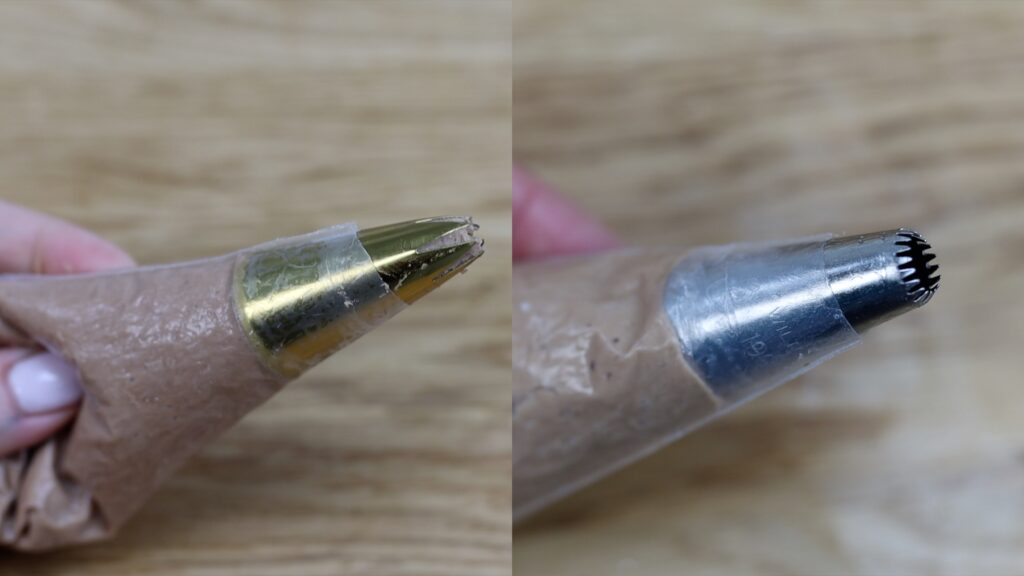
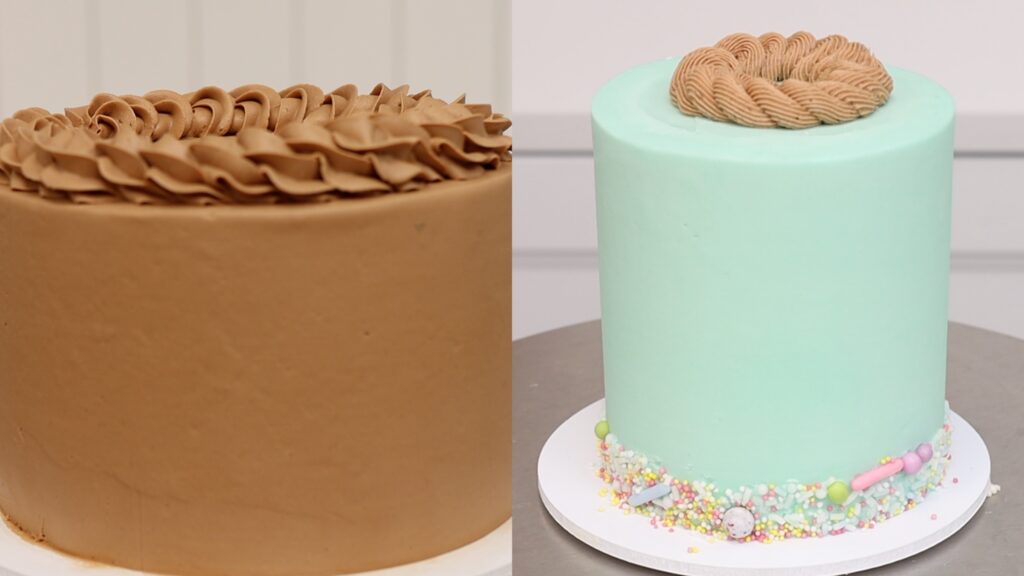
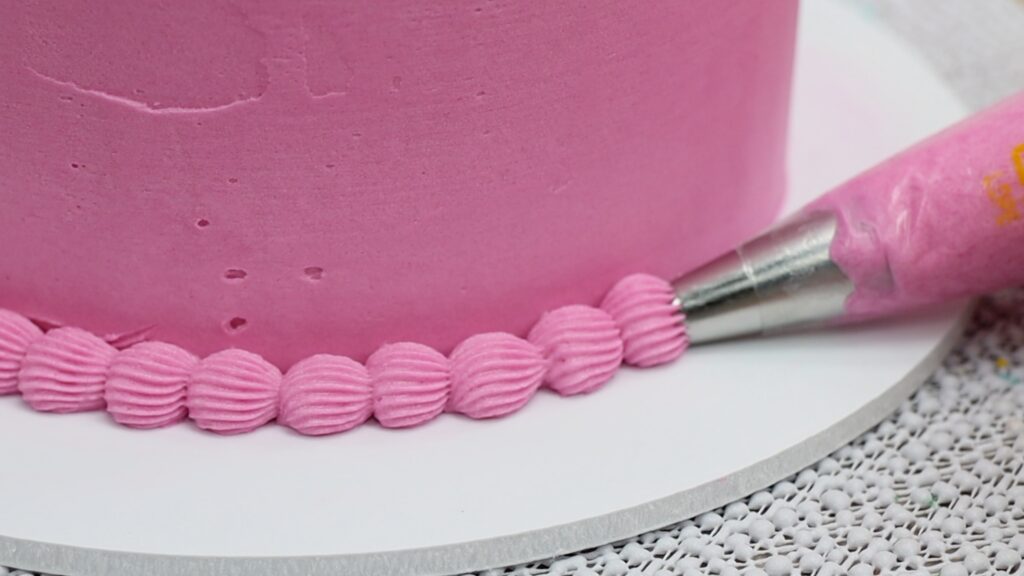
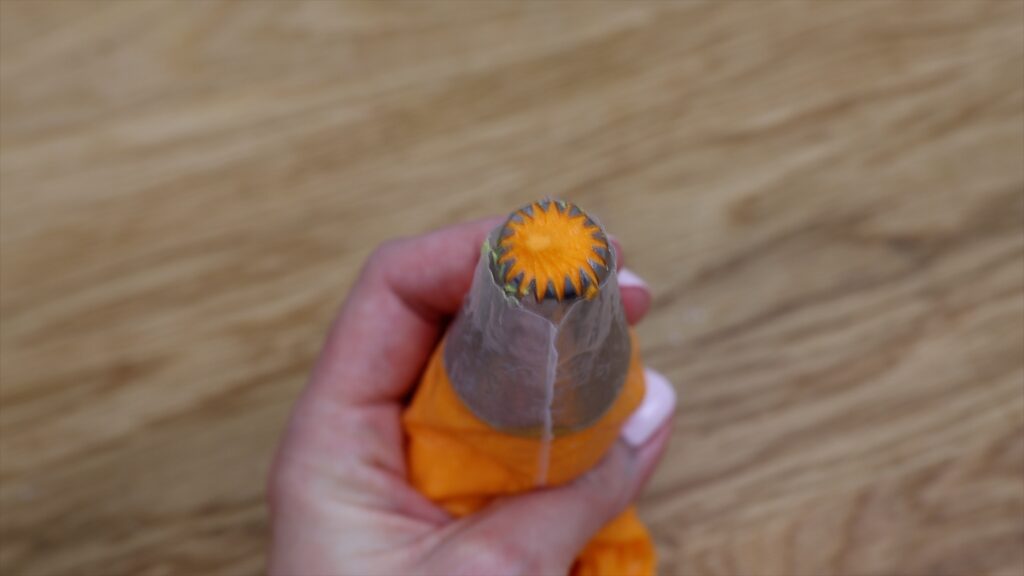
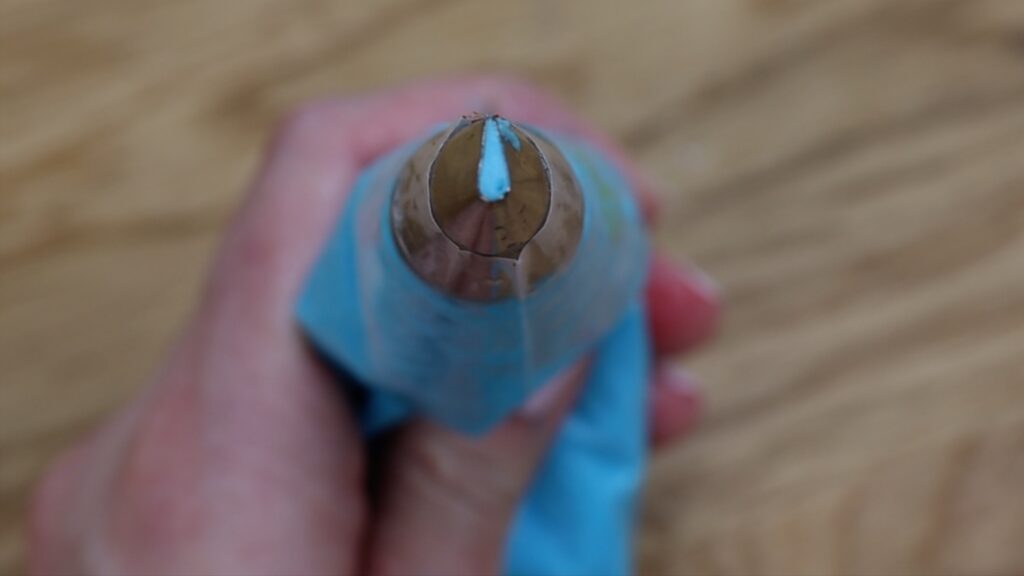
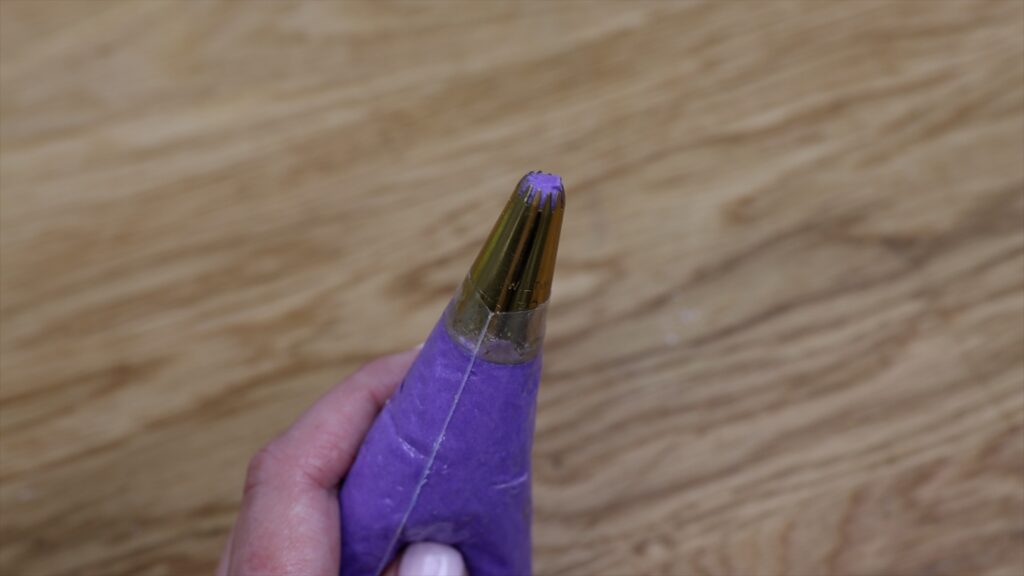
Before we go any further, let’s talk about how to choose a piping tip. They come in lots of different shapes and sizes. Keep in mind the size of your cake and the size of your decorations - for example, the 1M tip on the left is perfect for a rope border on top of an 8 inch cake but the #199 tip on the right is more suitable for a nest on top of a tiny 4” cake.
#3 How to fill a piping bag with frosting
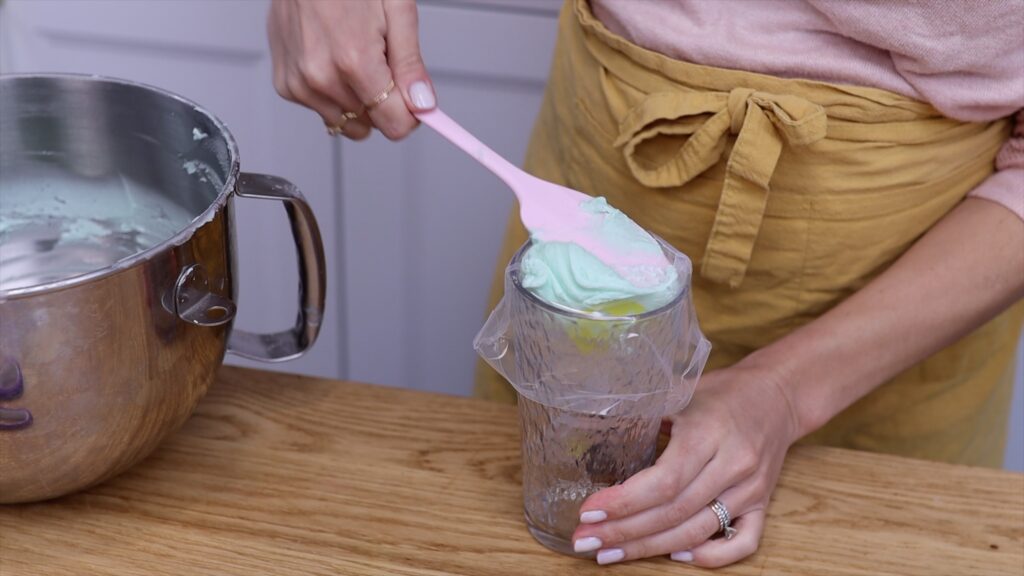
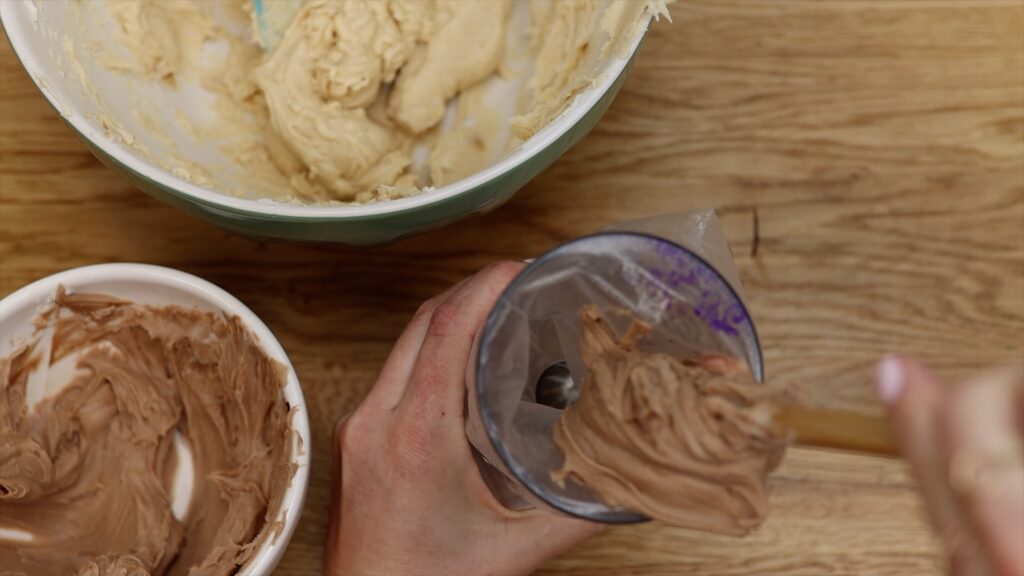
Here's another basic but useful hack: how to fill a piping bag without making a mess! You can spoon frosting straight into a piping bag but you’ll probably get frosting all over the edges of the bag and that will get all over your hands when you pipe.
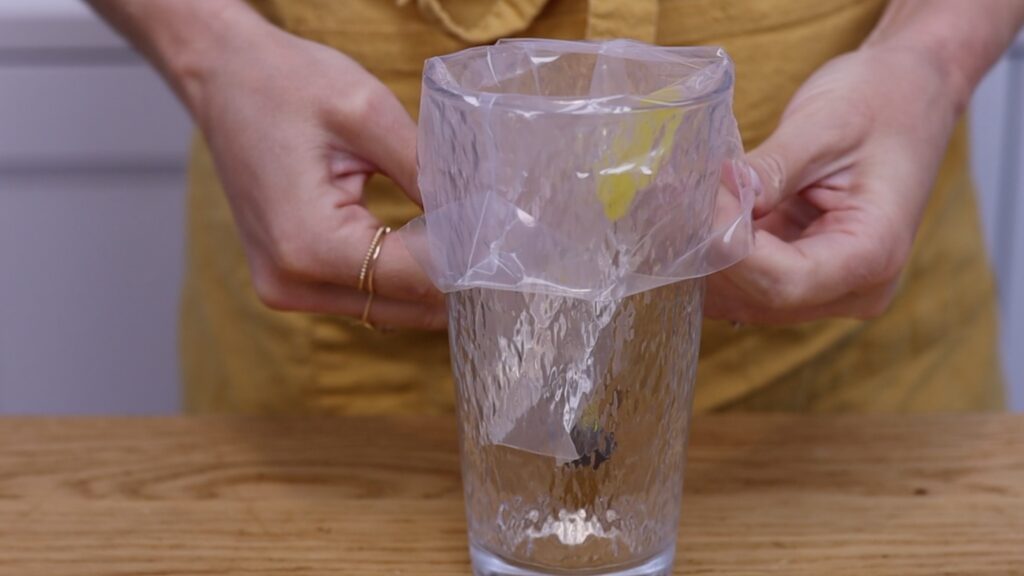
Instead, fold the top of the bag over or even better, use a glass and fold the top of the bag over the rim of the glass to hold the piping bag open while you fill it. Unfold the bag and it’ll be clean to hold as you pipe!
#4 How full should you fill a piping bag?
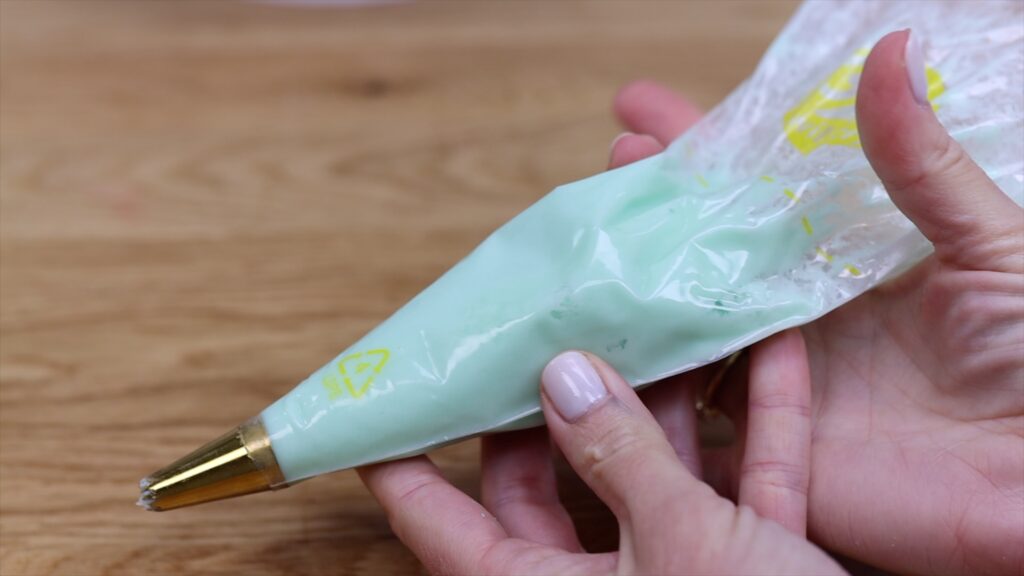
Don’t fill the bag more than 3/4 full or it will be difficult to grip onto as you pipe. Also, if the piping bag is very full the frosting will ooze out of the top of the bag as you pipe.
#5How to hold a piping bag
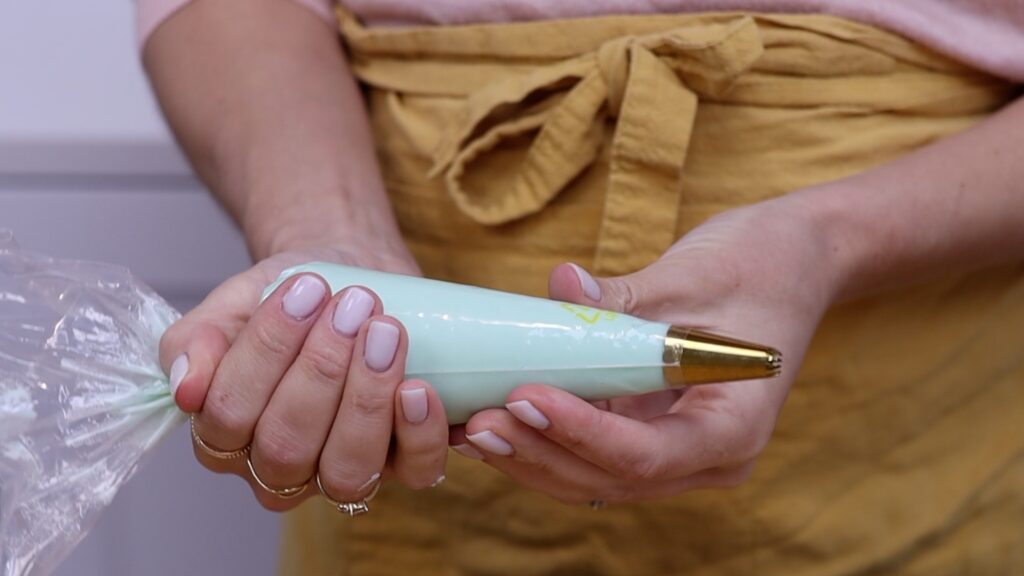
Grip the bag and push the frosting down to the piping tip. Twist the bag to apply pressure to the frosting, which makes it much easier to squeeze through the tip. This will put less strain on your wrist as you pipe so you won't get tired quickly.
#6 When to pipe onto a cake
Before you pipe onto a cake, chill it for at least an hour in the fridge to set the frosting on the cake, and that way you can rest your piping tip right up against the cake without damaging the frosting on the cake.
Also, since the frosting on the cake is cold and firm and not soft and sticky anymore, the frosting you’re piping won’t pick up the frosting from the cake so that it blends with the colour in the piping bag. And here's a third reason for chilling the cake to set the frosting before you pipe: piped frosting is heavy! Chilling the cake will make it firmer and more stable so that it can support the weight of the pipe frosting without sinking or drooping.
#7 Two-tone piping
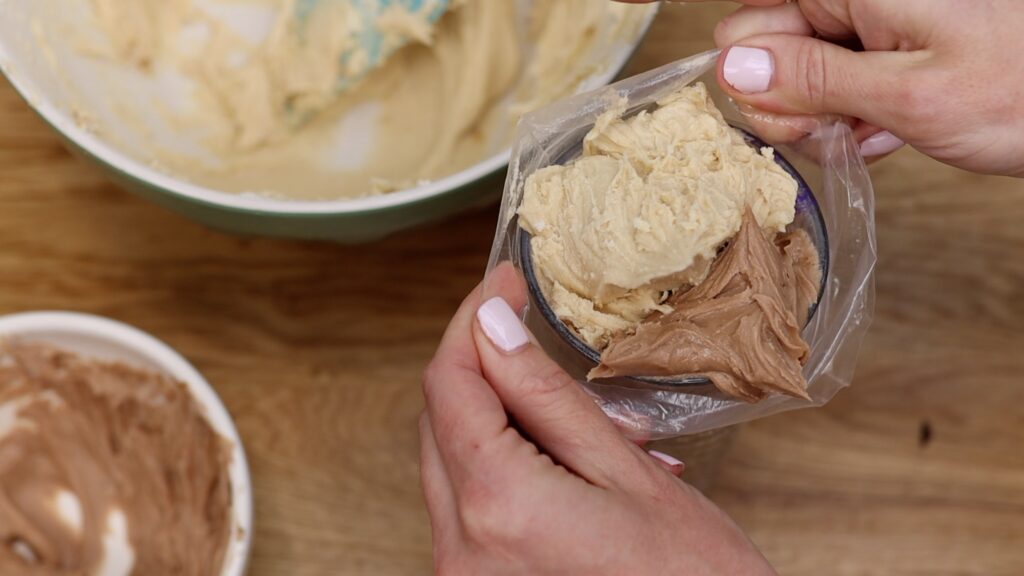
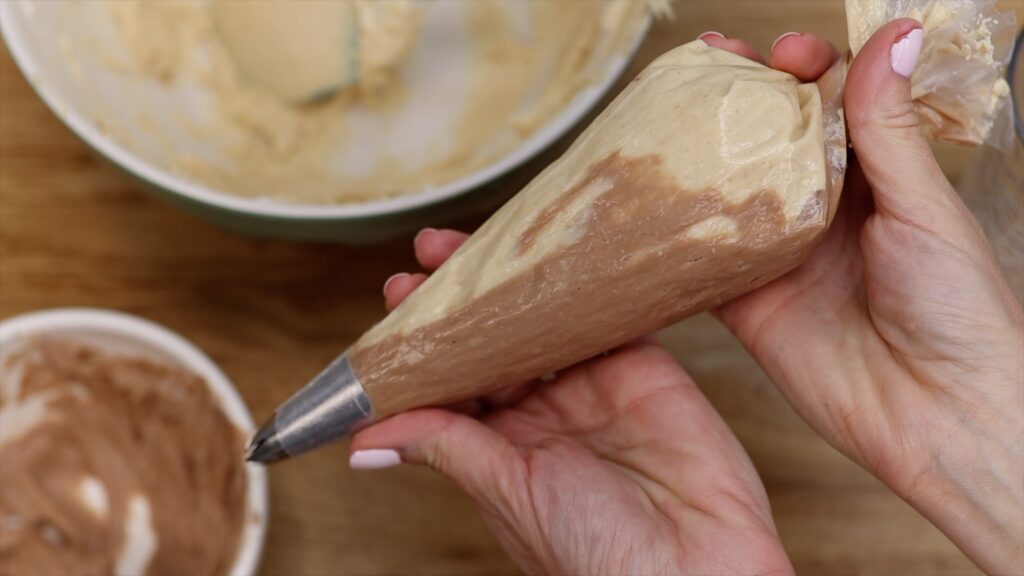
For two tone swirls, put your piping tip into a piping bag and fold it over a glass to hold it open and then spoon one colour of frosting into one half of the bag. Push it against that side of the bag and then spoon another colour into the other half. As you spoon the colours in, push them down with your spatula to lower them into the bag.
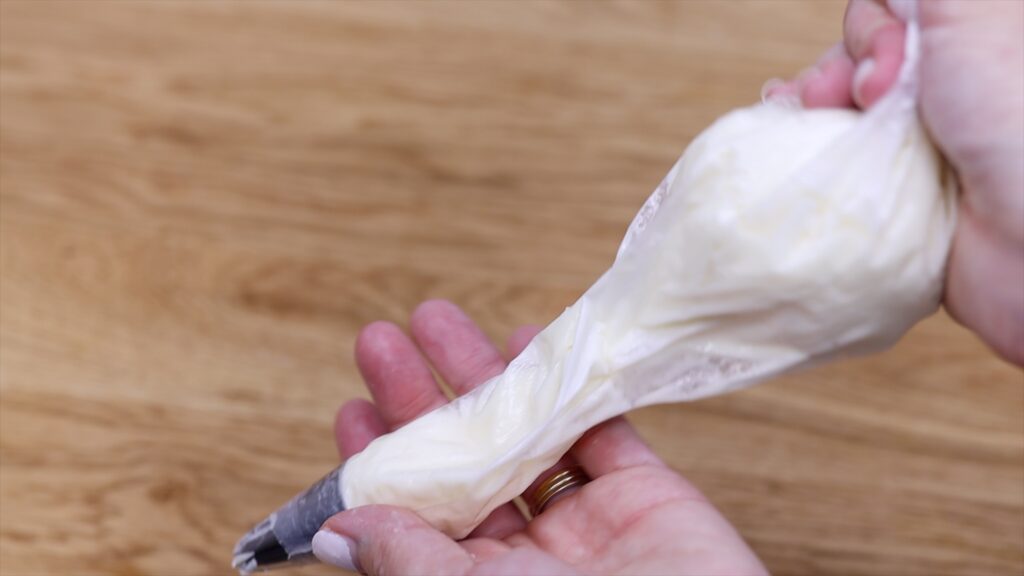
Unfold the bag from the glass and then shake the bag a few times before you twist it so that both colours go right down to the piping tip and then they’ll both come out together when you pipe.
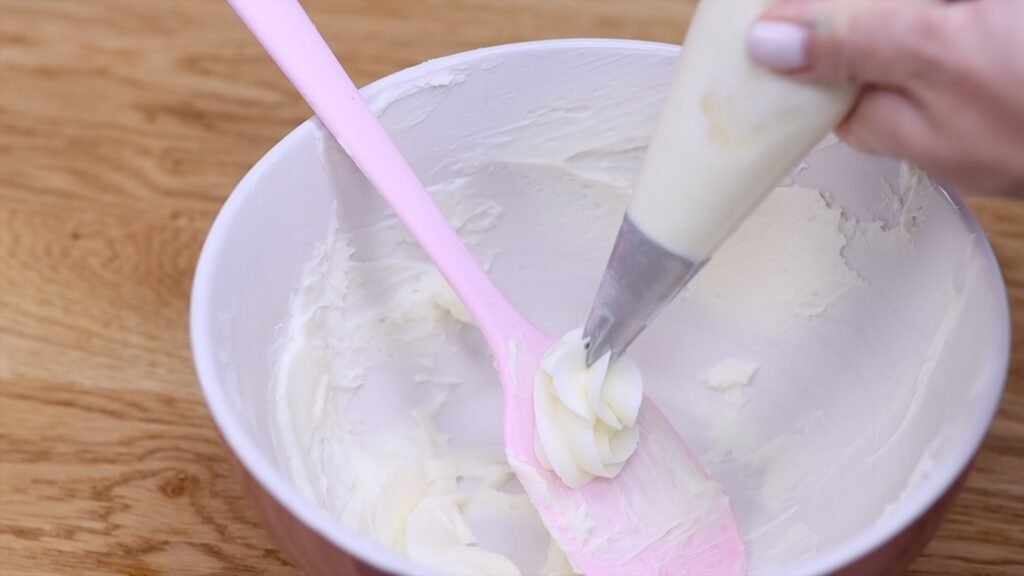
To double check you can squeeze to pipe a little bit of frosting into a bowl first, until both colours come out at the same time.
#8 Rainbow piping
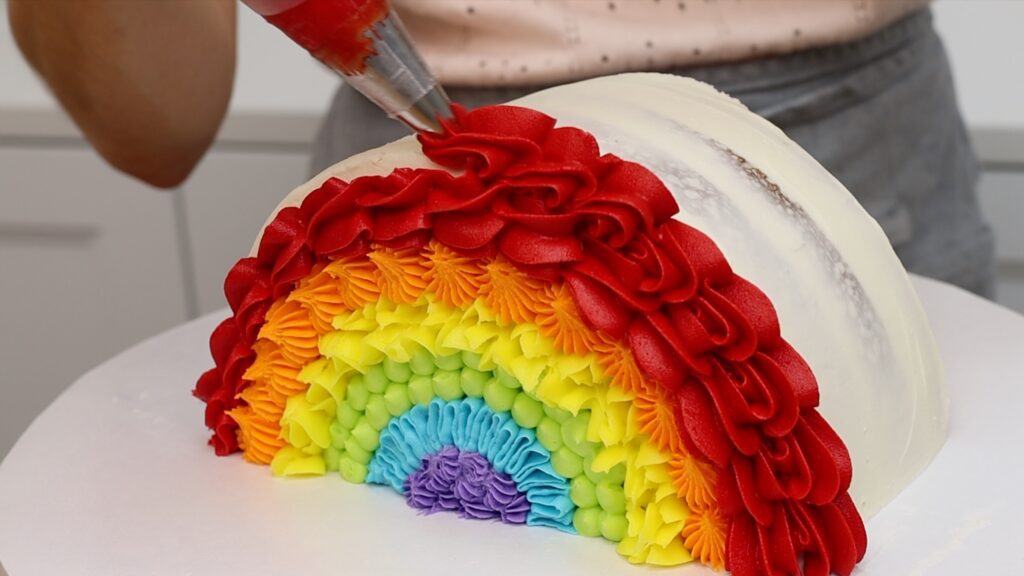
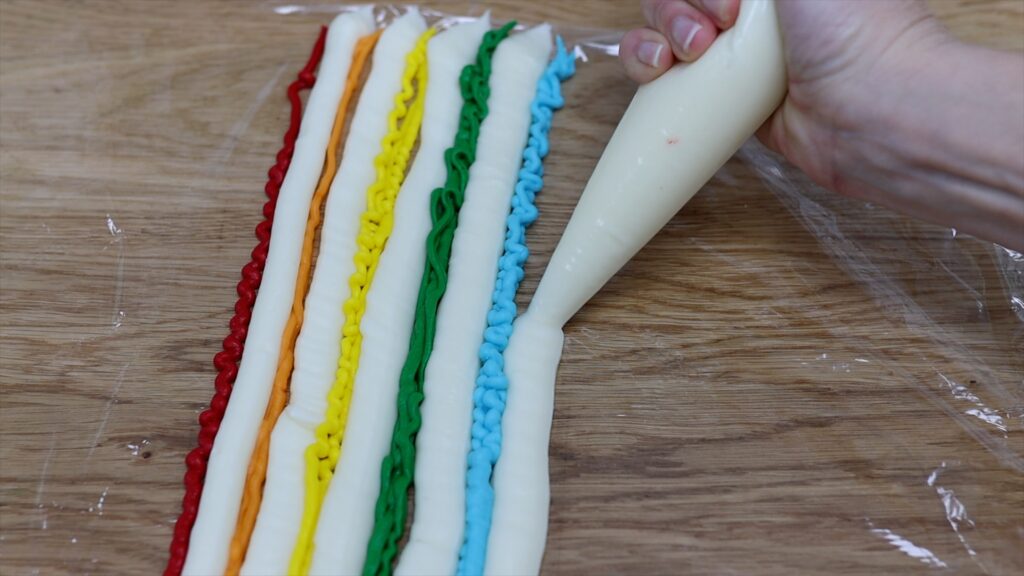
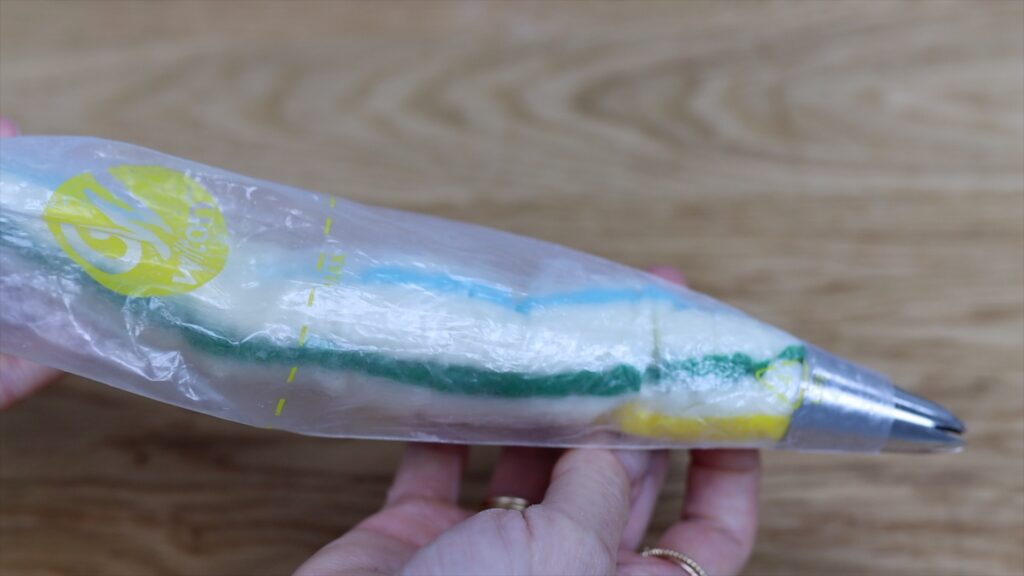
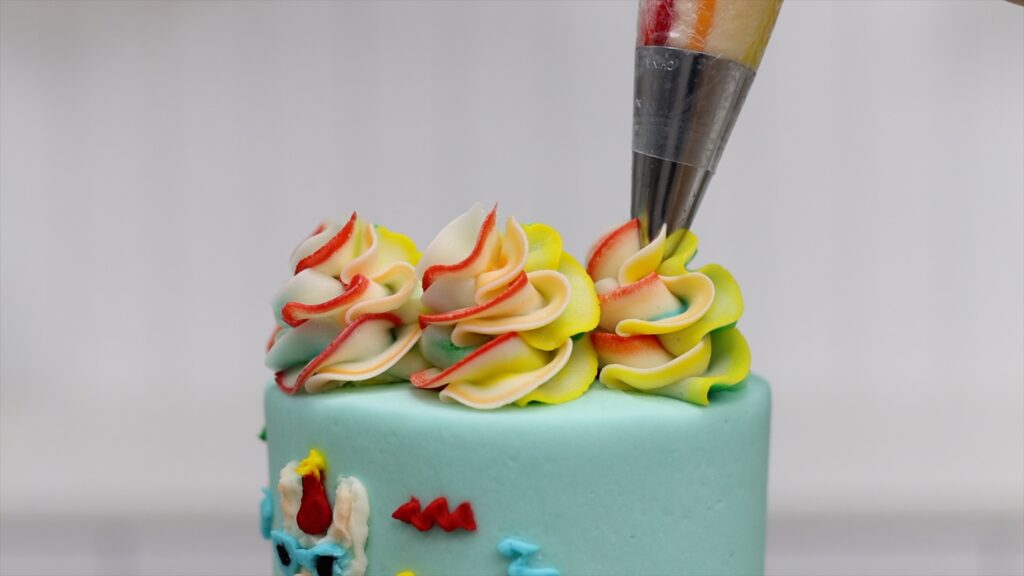
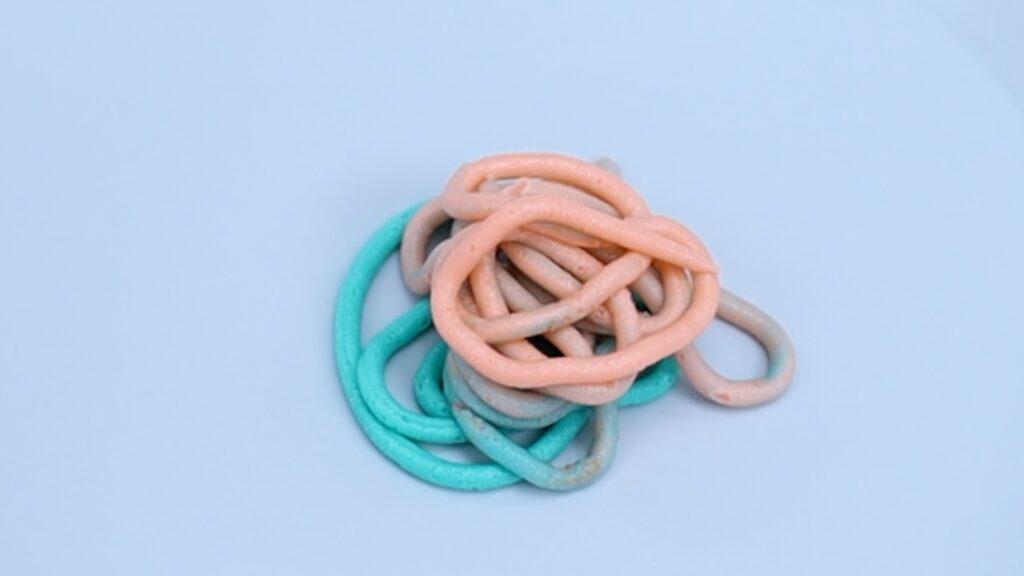
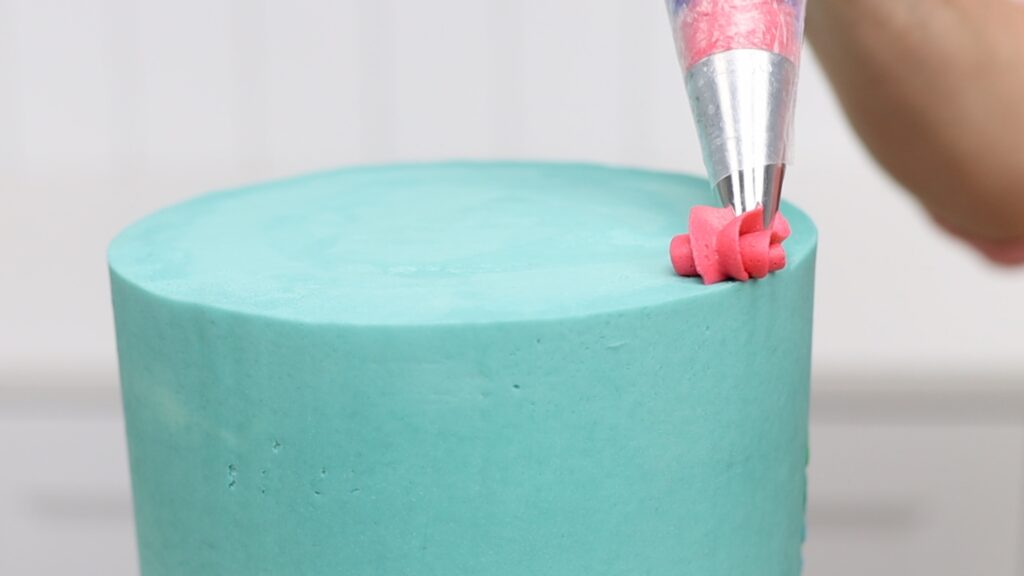
To incorporate even more colours into your piping, spread out a piece of plastic wrap like cling film or saran wrap and pipe or spread lines of coloured frosting along it. Use as many colours as you like and of course the wider and longer the area you cover with these lines, the more frosting you’ll have so the more swirls you’ll be able to pipe onto your cake.
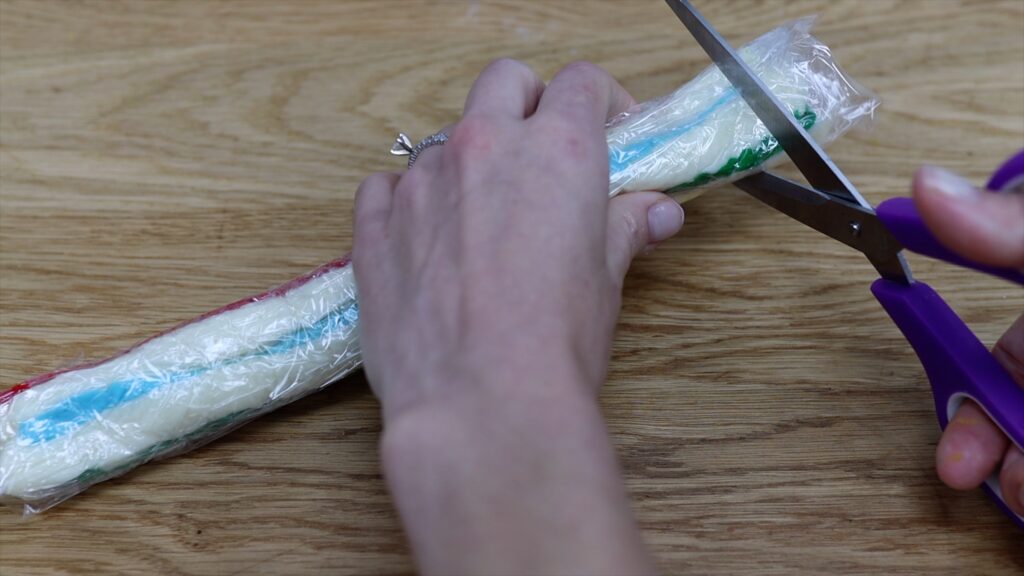
Roll it into a log and cut off one end and then push that end down into the piping bag. Cutting it means that all of the colours will come out together to pipe beautiful colourful swirls, or whatever style of piping you like!
#9 How and why to use couplers
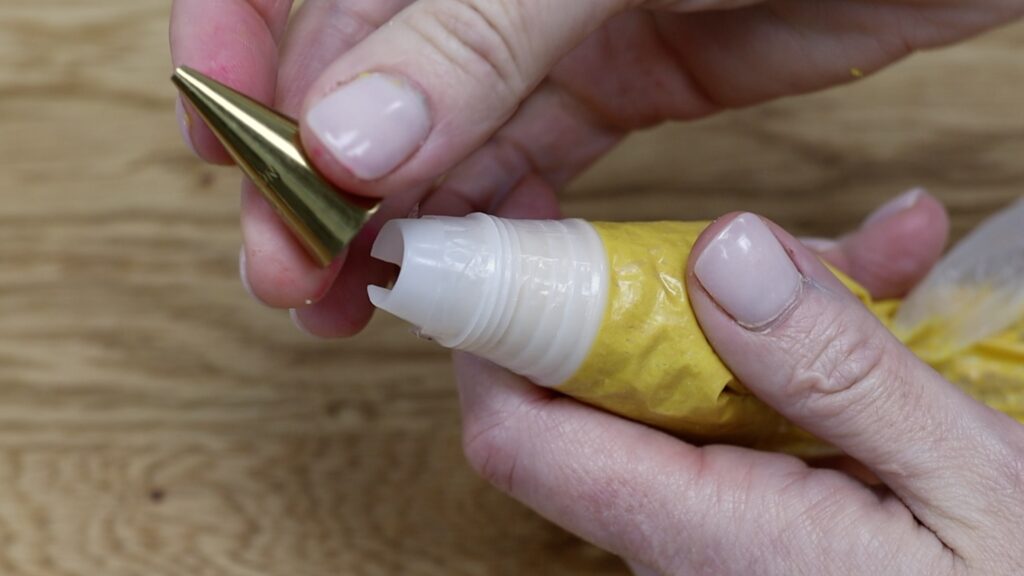
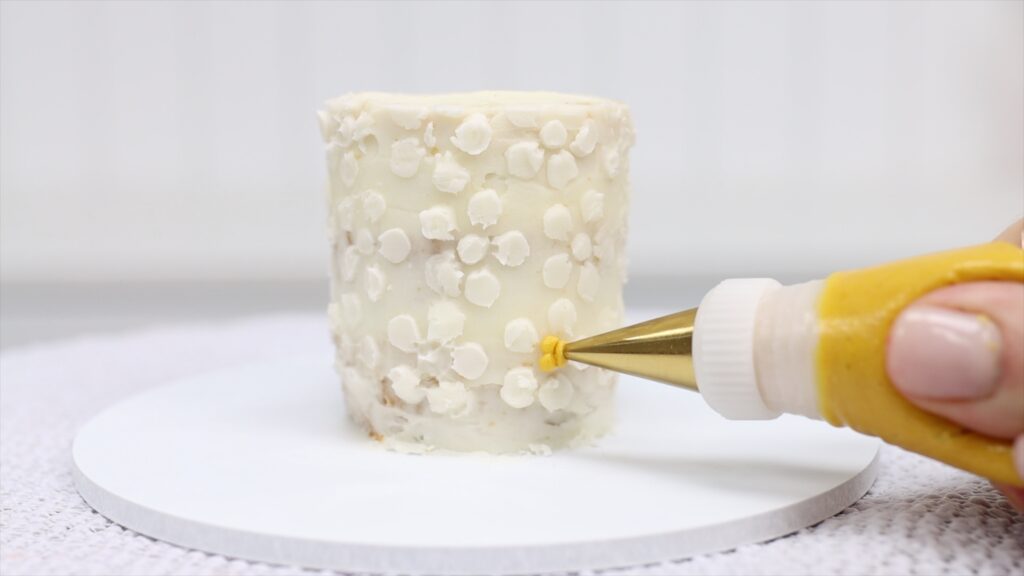
Couplers are another way to effortlessly create designs with lot of colours or textures, or both! Couplers come in two pieces. Push the bigger piece down to the end of a piping bag and then you’ll attach the piping tip over the outside of the piping bag, screwing it on with the ring that comes with the coupler and that will hold it in place as you pipe.
Use the piping bag as normal and when you want to use that piping tip with another colour, just unscrew the ring, pull the tip off, and attach it to another piping bag, also fitted with a coupler, to use that tip with another colour of frosting!
You can either wash the piping tip in between different colours or here’s a quick tip for speedy cake decorating: unscrew the tip from the first colour and move it straight onto the next bag of colour without cleaning it. Before you pipe onto the cake, squeeze the frosting out of the bag until you don’t see the cold colour coming through anymore and you’ve just cleaned the tip in two seconds!
I love using couplers because you can switch back and forth between colours as often as you like. If you don't use couplers you'll have to pipe everything of one colour first, all over the sides and top of the cake, and then squeeze the frosting out of the bag to get the piping tip out so that you can wash and dry it to use with the next colour. Couplers give you creative flexibility to pipe whatever you like, whenever you like! For 4 reasons to use couplers, check out my tutorial on how to use couplers.
#10 How to store piping bags
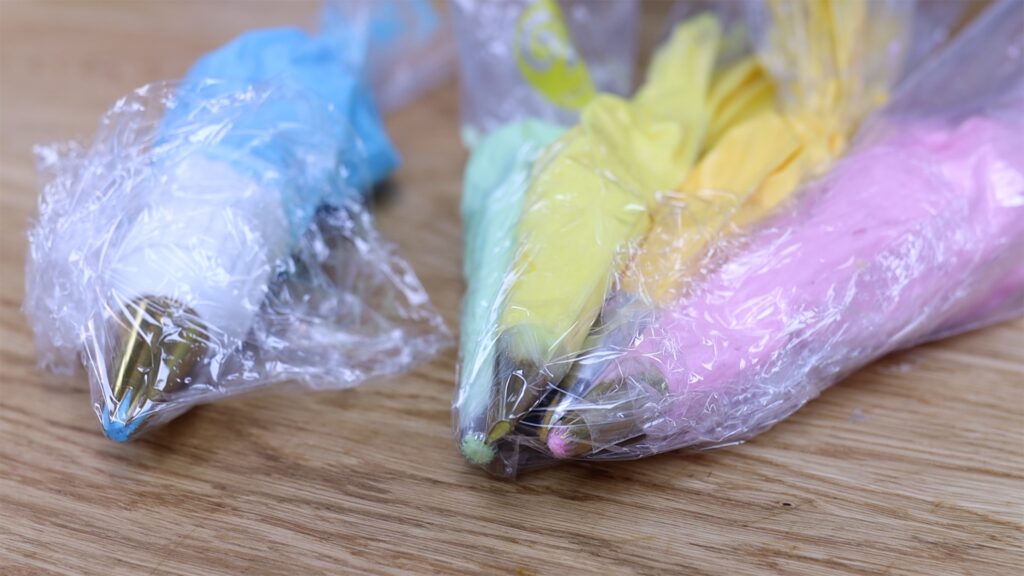
If you prepare your piping bags in advance or take a break in the middle of using them, the buttercream at the end of the piping tip will dry out and crust because it’s exposed to air. To avoid that, wrap the piping tips in cling firm or Saran Wrap to keep them airtight and that will keep the buttercream soft and sticky until you pipe with it.
#11 Make piping bags last longer
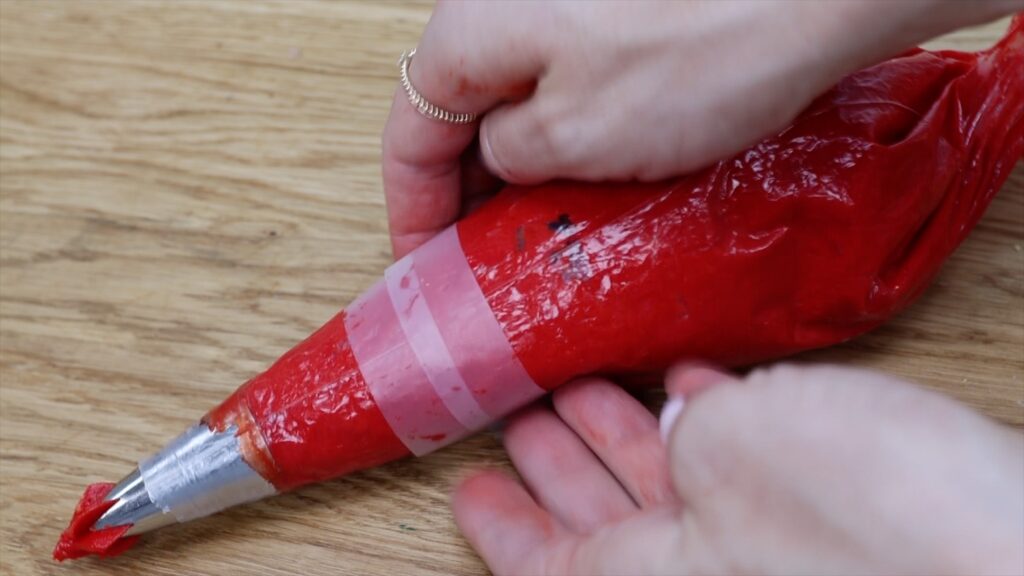
Disposable piping bags are washable so you can use them again and again and again but eventually you’ll notice holes in them and frosting will ooze out of those holes.
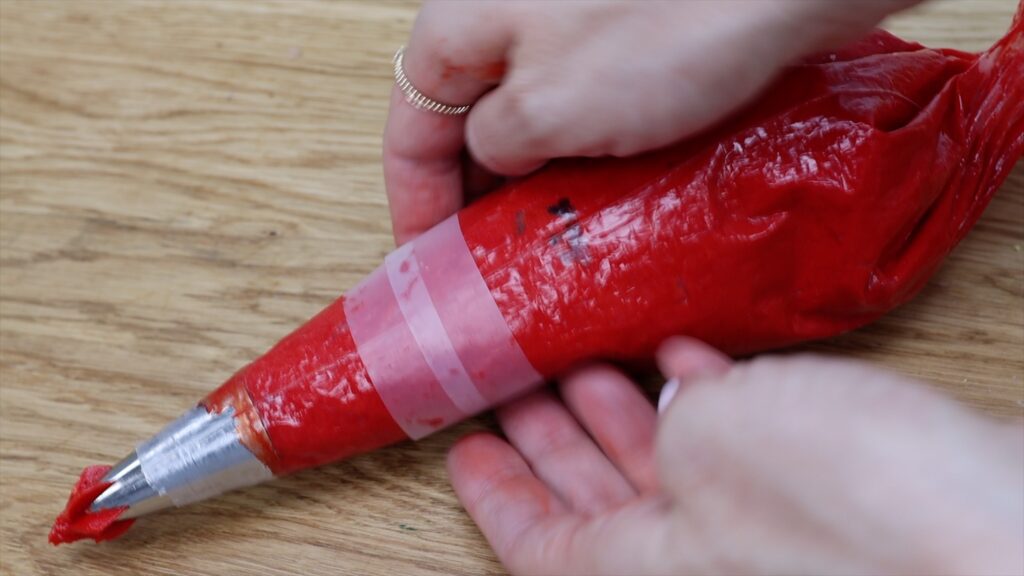
No problem - wipe the frosting off the outside of the piping bag and then cover the holes with tape so that you can use that piping bag to finish off your cake without dribbling frosting all over your design.
#12 How to refill piping bags
If you run out of frosting while you’re piping you can refill the piping bag but you’re likely to trap a pocket of air in between the old frosting and the new frosting.
Before you use the refilled bag, squeeze that last little bit of old frosting out of the bag until you hear a "burp". You’re looking for a little explosion of air and you want that to happen in a bowl, not onto the beautiful piping on your cake!
#13 How and why to pipe without piping tips
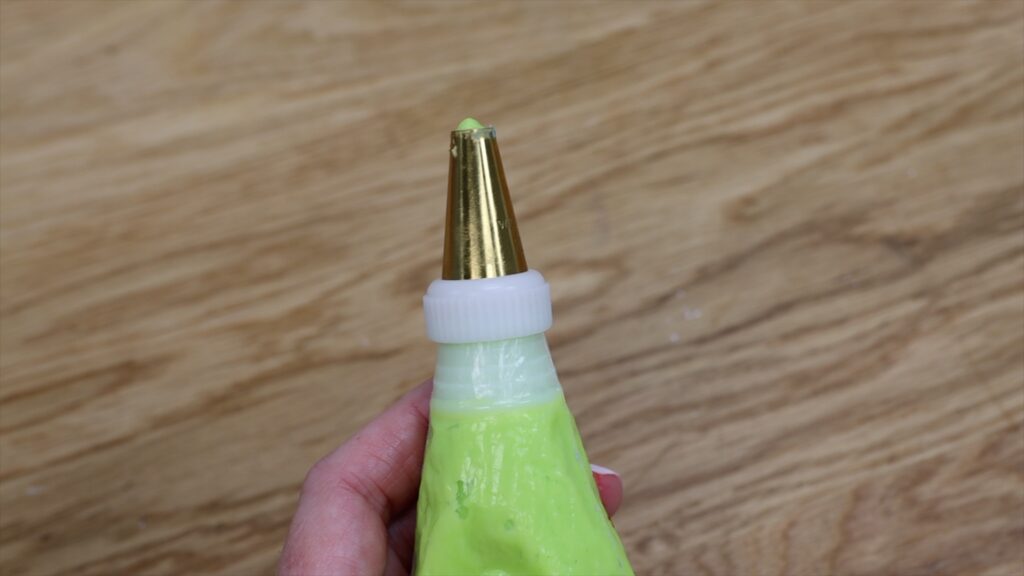
You don’t have to use piping tips for piping, which means you can save time cleaning up after cake decorating. I’ll show you two alternatives to piping tips now. The reason for using a piping bag with no piping tip is if the texture of your piping doesn’t matter, for example to apply the filling and frosting onto a cake.
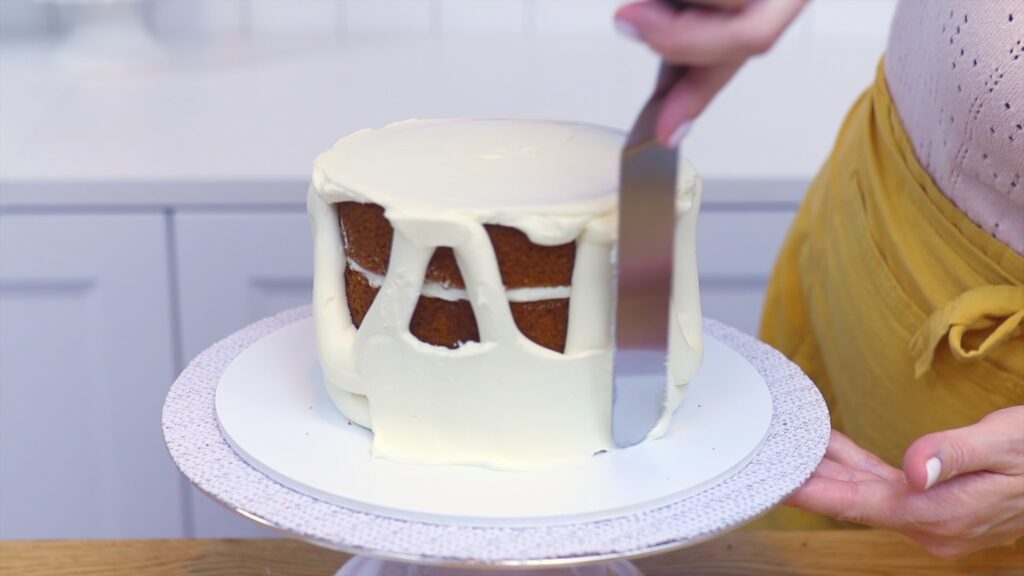
Piping frosting instead of spreading it straight onto a cake is much quicker. Also, you won’t pull crumbs off the cake if you pipe it and then spread and smooth it, so your frosting will be beautifully crumb-free!
#14 How to pipe with ziplock bags
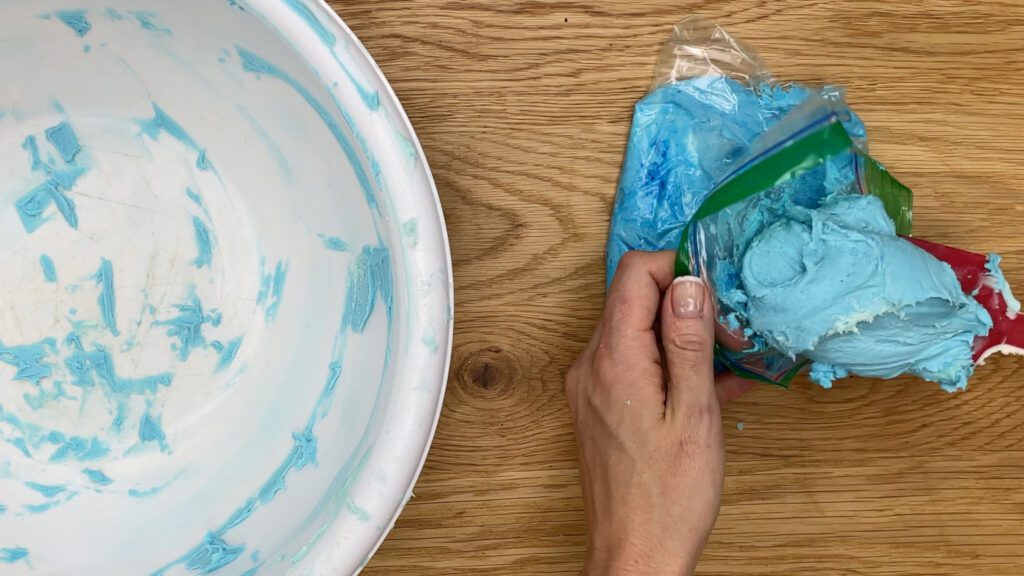
You can even pipe without a piping tip OR a piping bag, by using ziplock bags instead. Squeeze the frosting down and cut a tiny piece off the corner to pipe through.
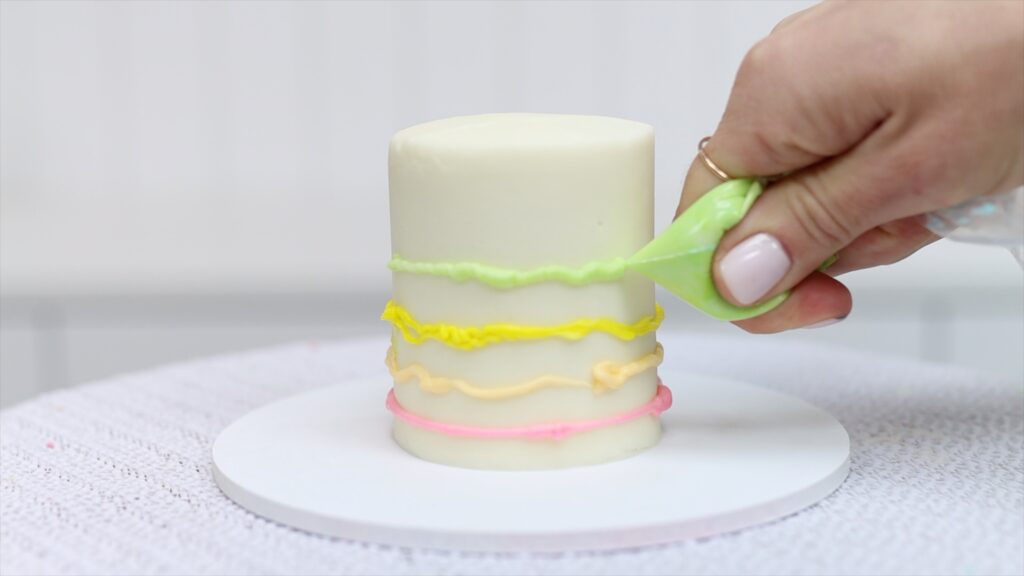
These are perfect if you want to use lots of colours but don’t have lots of piping bags. The only limitation is that you can only pipe lines or dots with them, so you won't get the texture that would come through the shapes of piping tips. But with just lines and dots you can create surprisingly intricate designs using ziplock bags!
#15 Leftovers
Let’s talk about leftovers. You’ll almost always have leftover frosting in your piping bags or ziplock bags. You can refrigerate it for 2 weeks or freeze it for 2 months before using it on another cake - just let it come to room temperature and then squeeze it into a piping bag and voila! Reusable for another cake design!
I hope these hacks are useful! Join my newsletter for more and visit my cake school for hundreds of cake designs and techniques. Join my ClubPLUS for access to EVERY MiniCourse and MasterCourse and Live Workshop on my cake school!
Tell me your favourite piping hack in the comments!
When you find a recipe you LOVE, use that same recipe for 4 different delicious desserts! These desserts will work with any cake batter but I’m using a tiny batch of my Perfect Chocolate Cake. It makes the moistest cake that’s not too sweet.
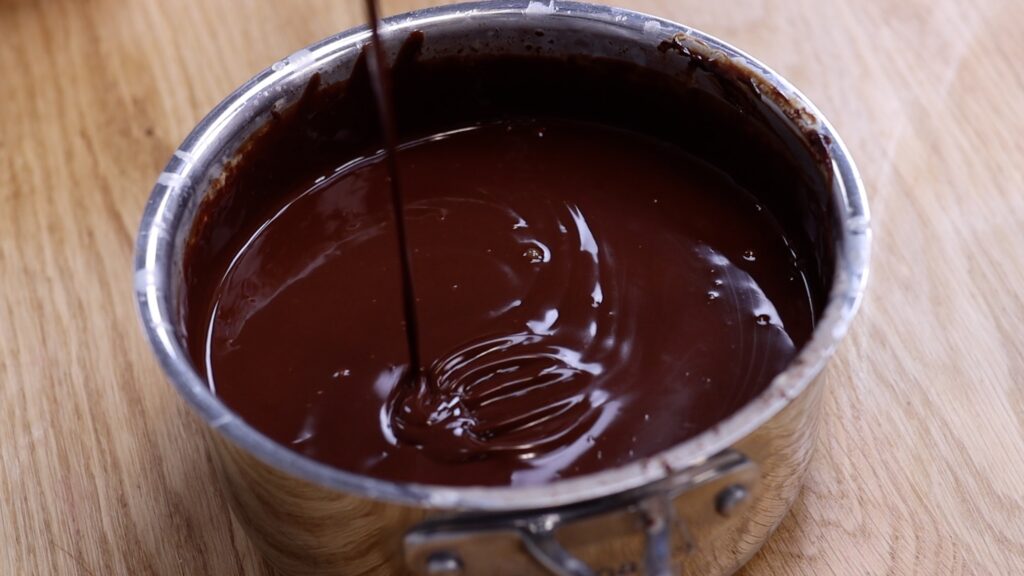
For a glaze, filling AND frosting I’m using ganache which is delicious, super easy to make and only uses two ingredients. These recipes, which can be used to make any of the four desserts below, are at the bottom of this page.
#1 Baked Donuts
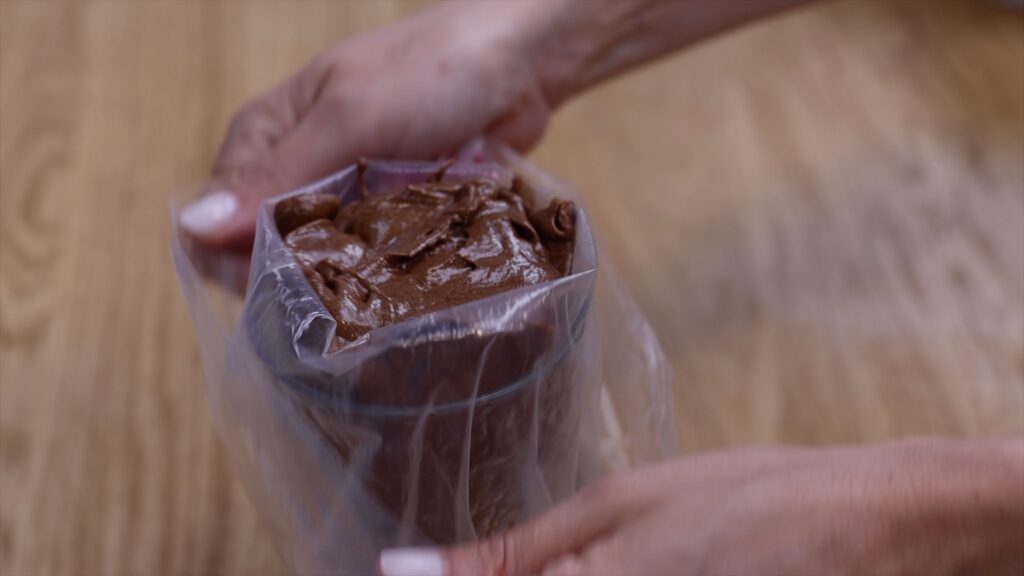
For the first dessert, spoon your cake batter into a piping bag. (t’s easiest to do this by lowering the bag into a glass and folding the top over the rim to hold it open.
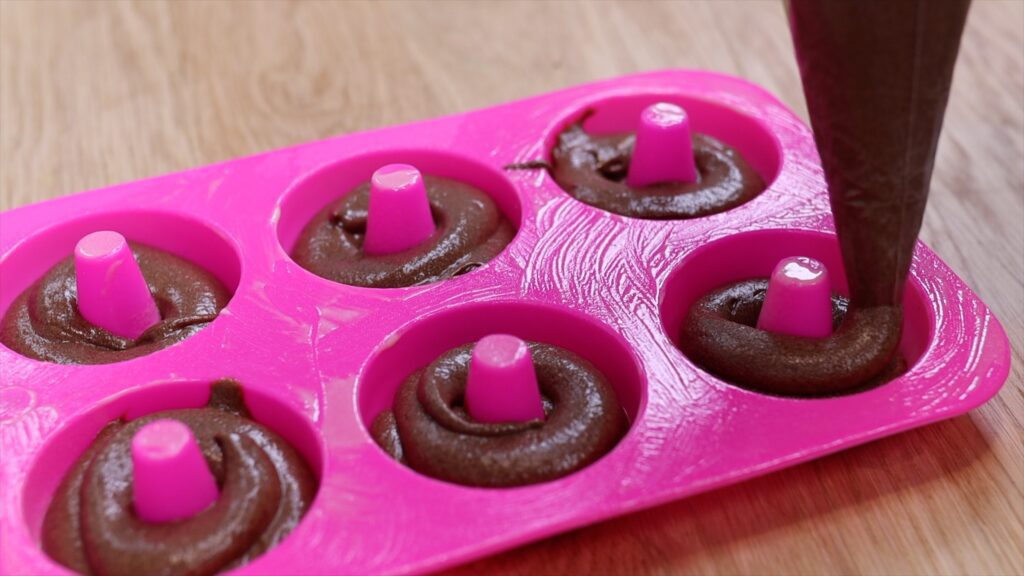
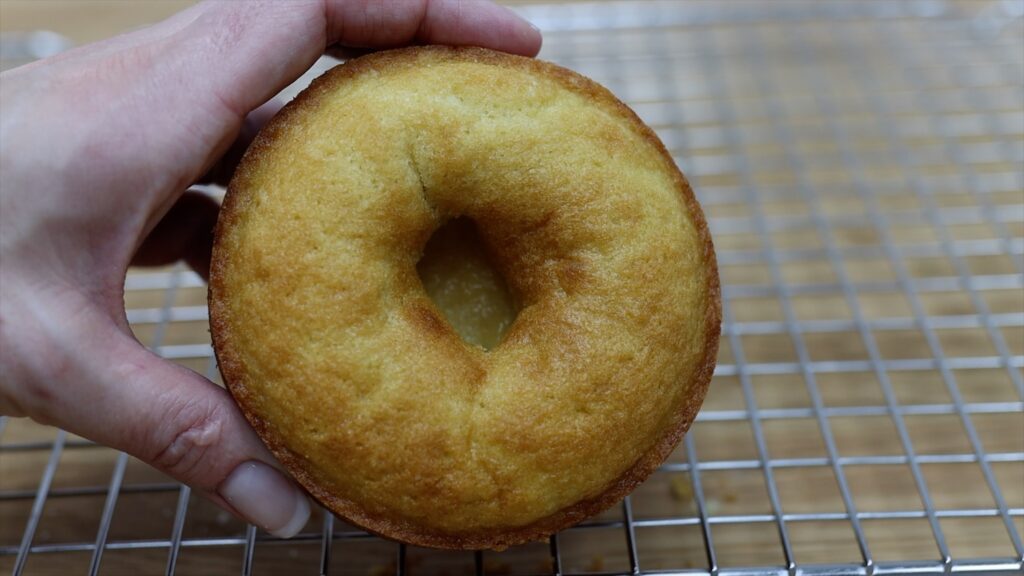
Grease a silicon donut mold with an oil spray and pipe the batter into the donut rings. Keep in mind that these will rise so don’t overfill them or they’ll cover up the signature hole in the middle as they bake.
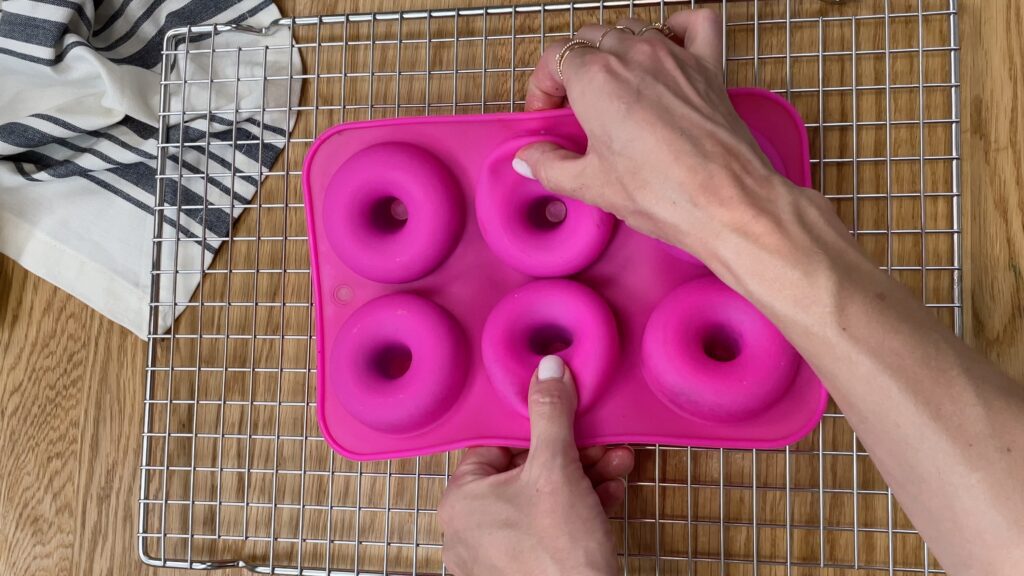
Donuts bake at 375F or 190C for 14-18 minutes depending on the batter. Let them cool until the mold has cooled slightly, enough to pick up and push through the silicon mold to get the donuts out. The donuts will definitely crumble and fall apart if you don't grease the mold so don't skip that step!
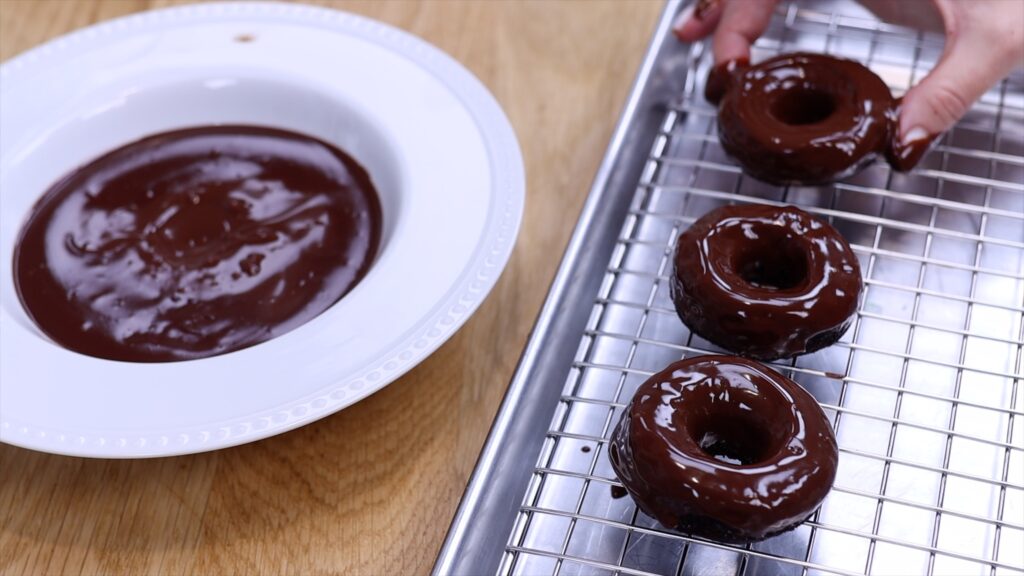
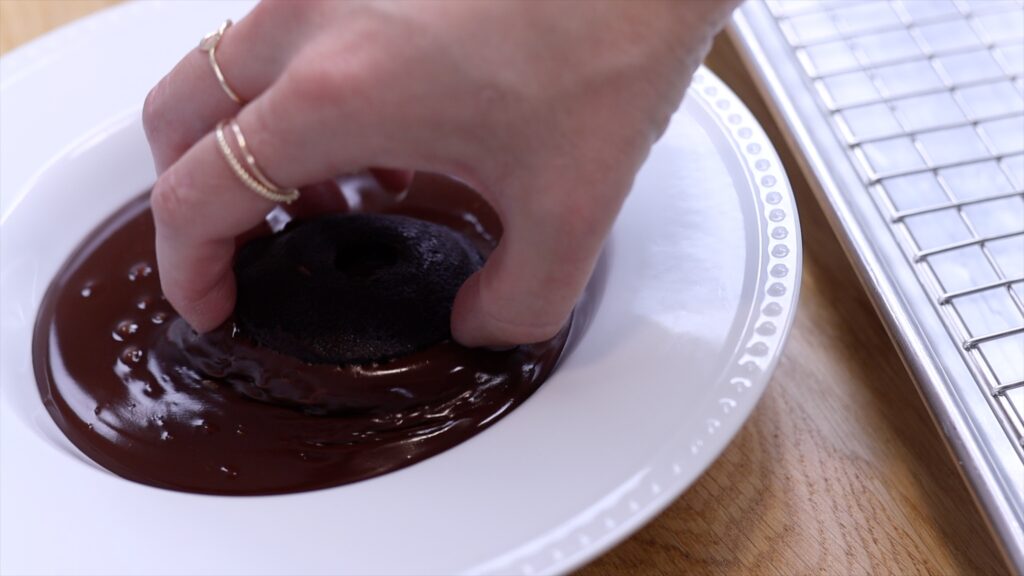
Make ganache by following the recipe below. Let it cool for a few minutes and then pour it into a wide, shallow bowl. It will be runny and this is the perfect consistency for a donut glaze.
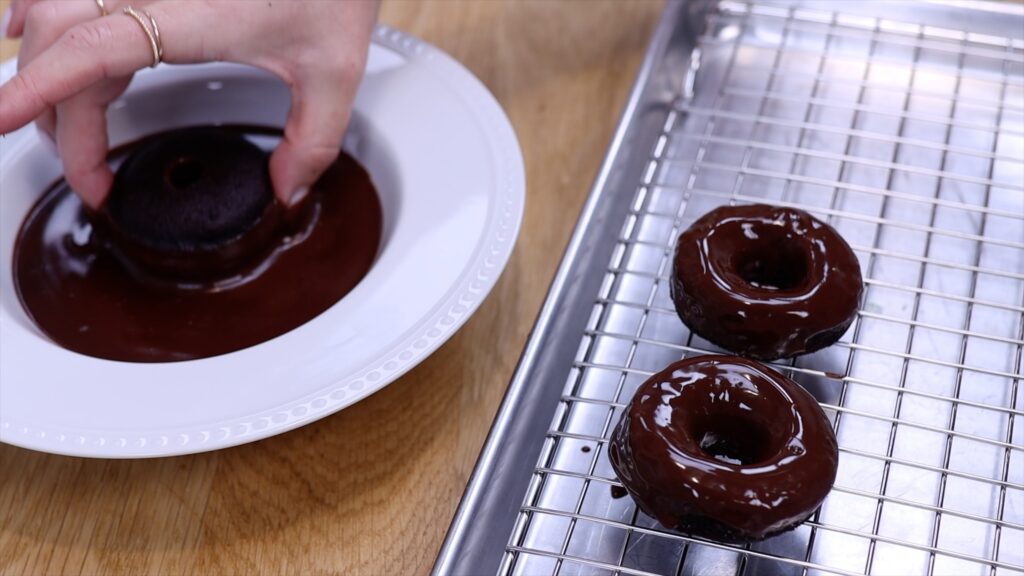
Dunk the donuts in the ganache and twist them a few times to coat the top surface. Then flip them over onto a wire rack to let the excess drip off. If you want to sprinkle them with any toppings or sprinkles, do that now while the ganache is still soft and sticky.
Quick shortcut tip: if you want to bake these in advance, freeze them in a ziplock bag for up to a month before you glaze them and they’ll stay perfectly fresh!
#2 Cupcakes
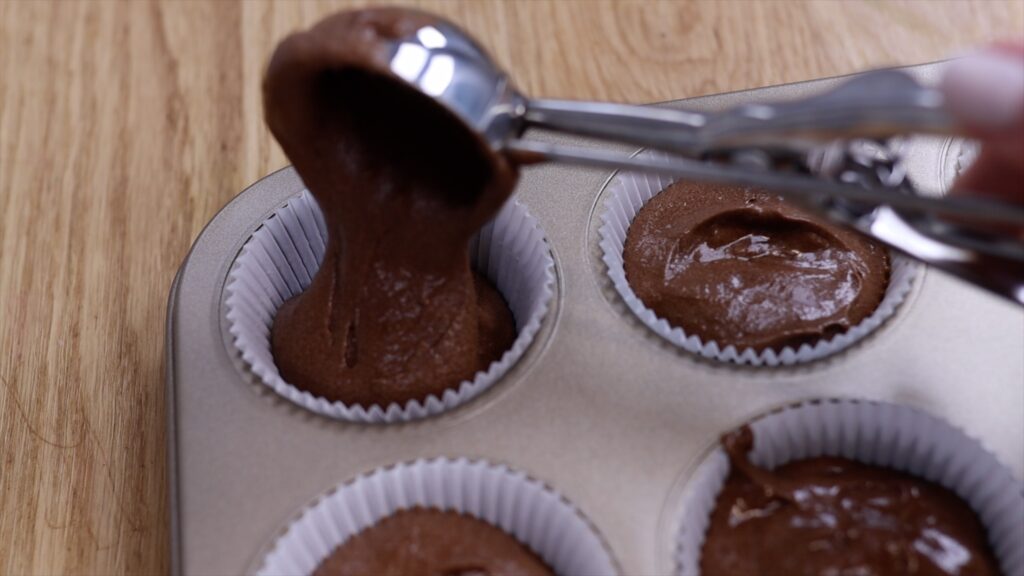
You can use the same cake batter recipe to make cupcakes instead. Use an ice cream scoop to fill cupcake wrappers without making a mess. Aim to fill them up 3/4 full so that they don’t overflow and bulge out to make big muffin tops when they bake. Cupcakes bake for between 15 and 19 minutes at 375F or 190C.
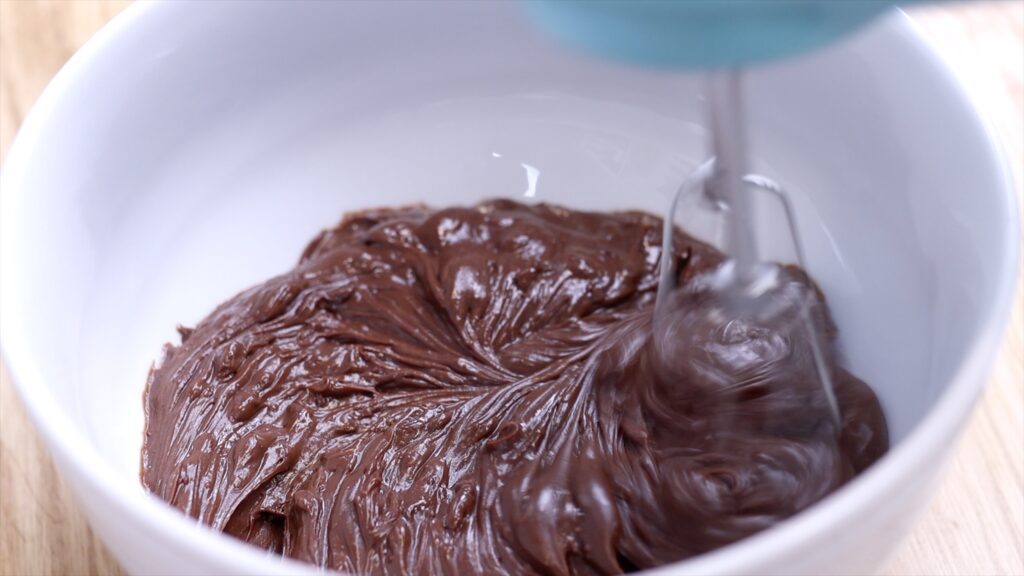
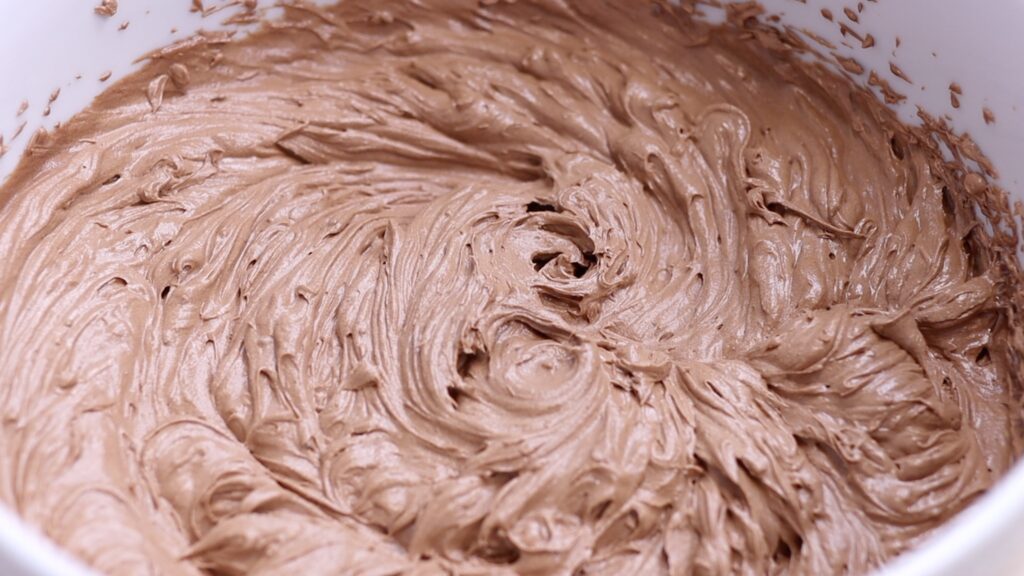
While they bake, whip the cooled ganache until your whisk or mixer leaves a trail behind as it mixes and stiff peaks form.
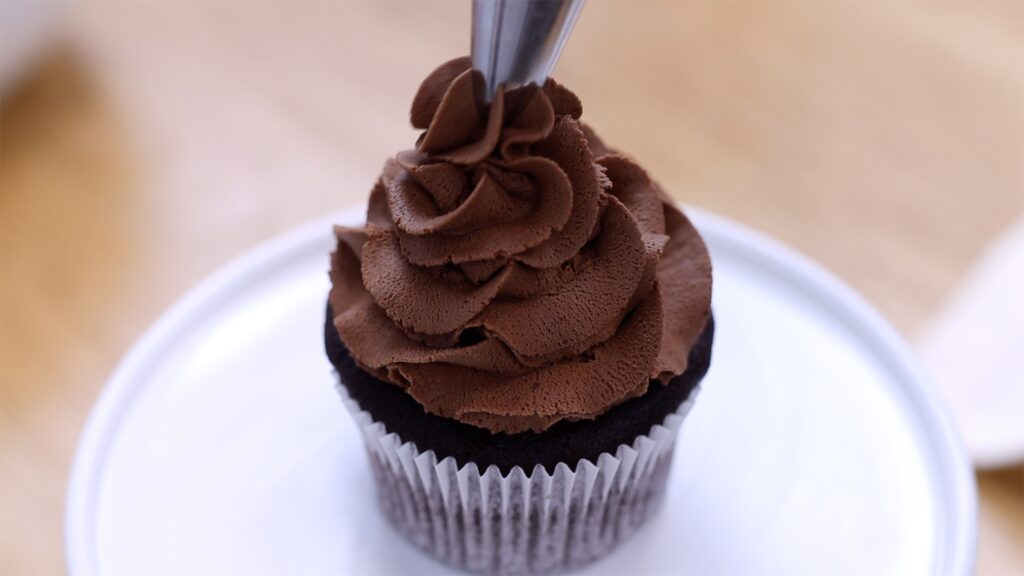
Transfer the whipped ganache into a piping bag fitted with a star shaped tip like a 1M tip. Once the cupcakes cool, pipe a swirl onto the top of each one.
#3 Mini Cake
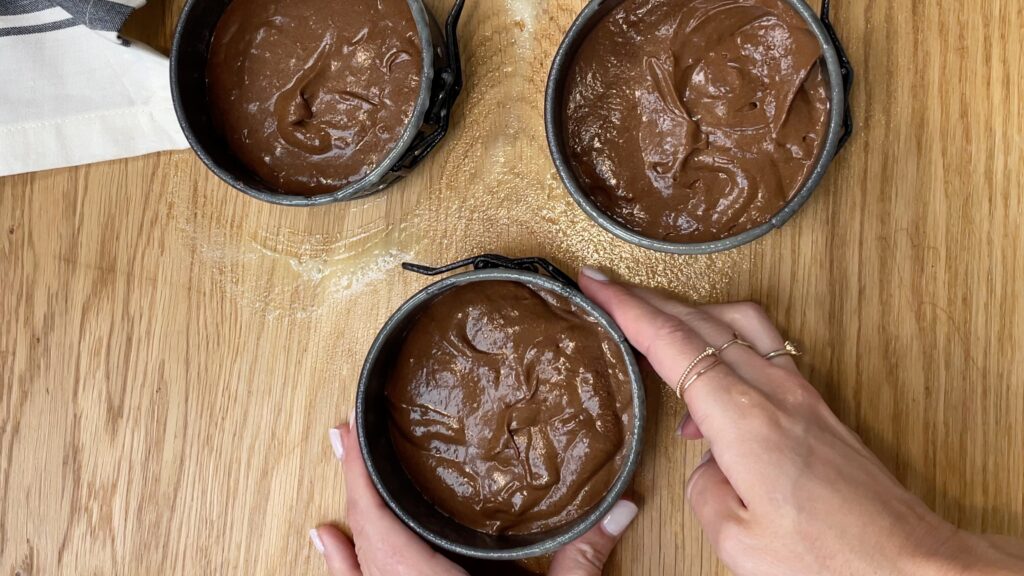
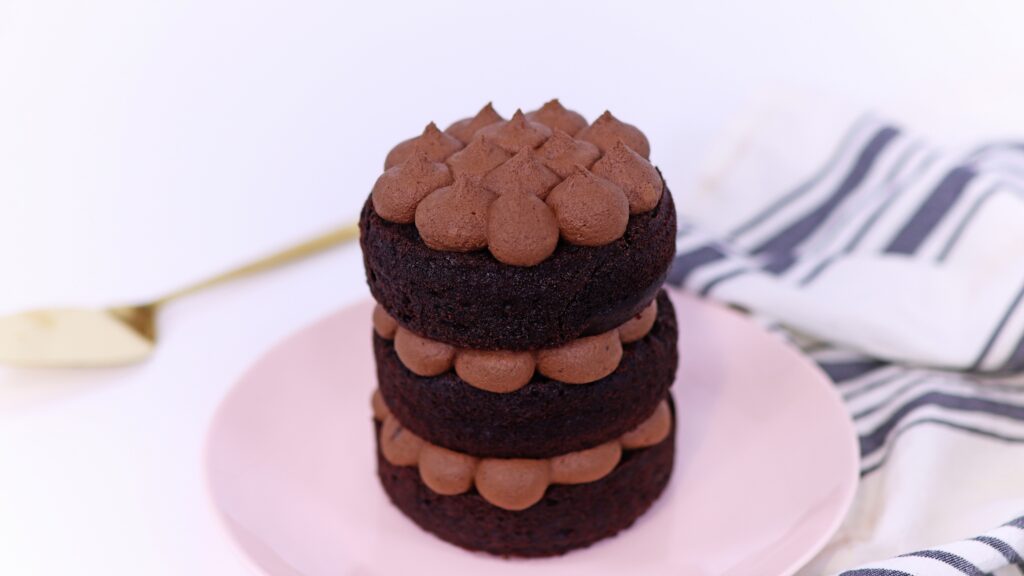
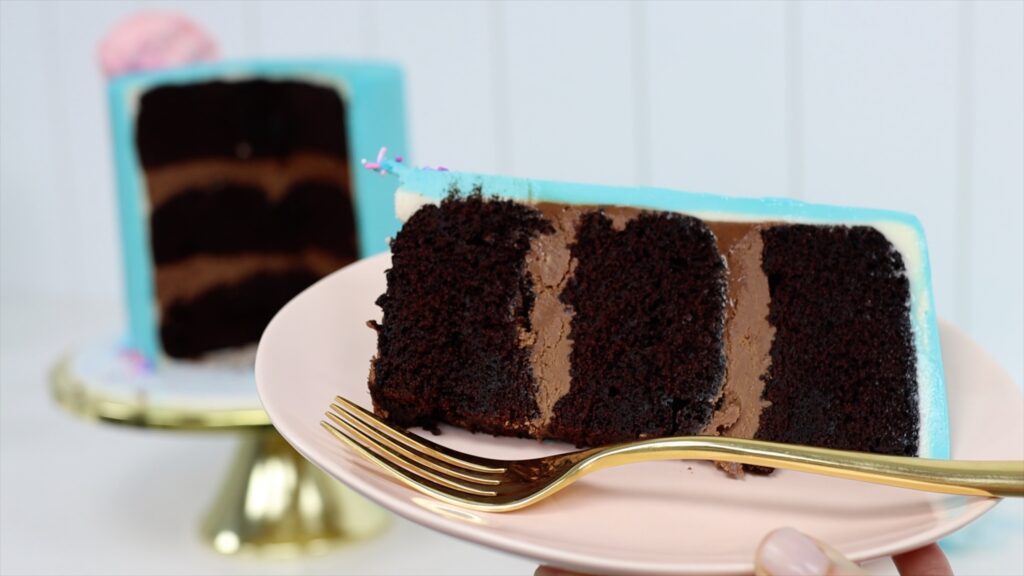
To bake a cake instead, use this recipe to make a three-layer 4" cake. Grease three 4” pans and divide the batter between them.
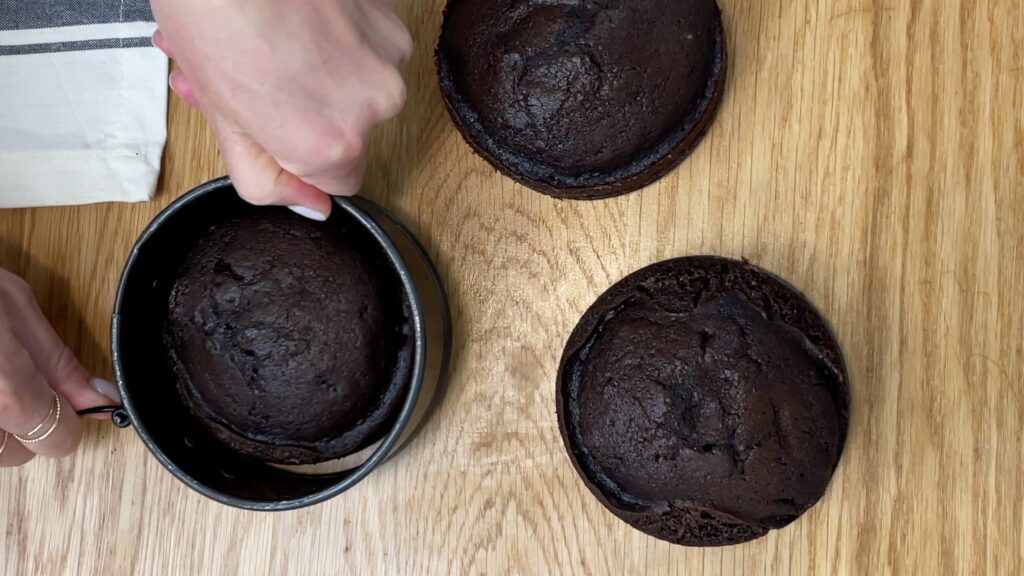
Bake for 18 minutes at 350F or 175C and notice that the baking temperature for cakes is lower than for donuts or cupcakes, so that they bake evenly. More tips on that in my Basics of Cake MasterCourse on my cake school. I like to use these springform pans for mini cakes because it's so easy to release the cakes from the pans after baking.
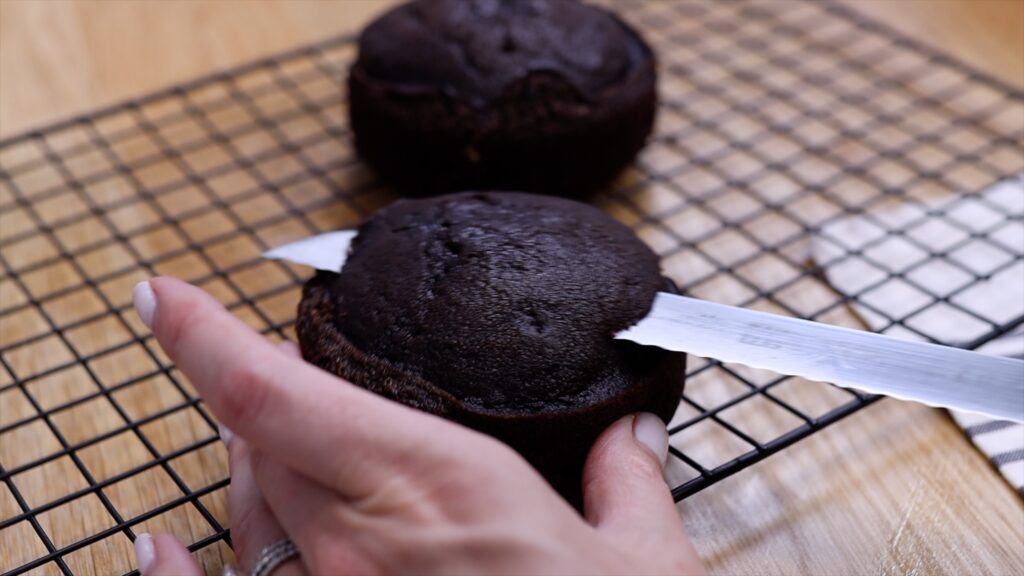
When the cakes have cooled, use a serrated knife to trim the tops to level them. This will make it easier to assemble a straight cake that doesn't lean, which will be prettier and also more stable.
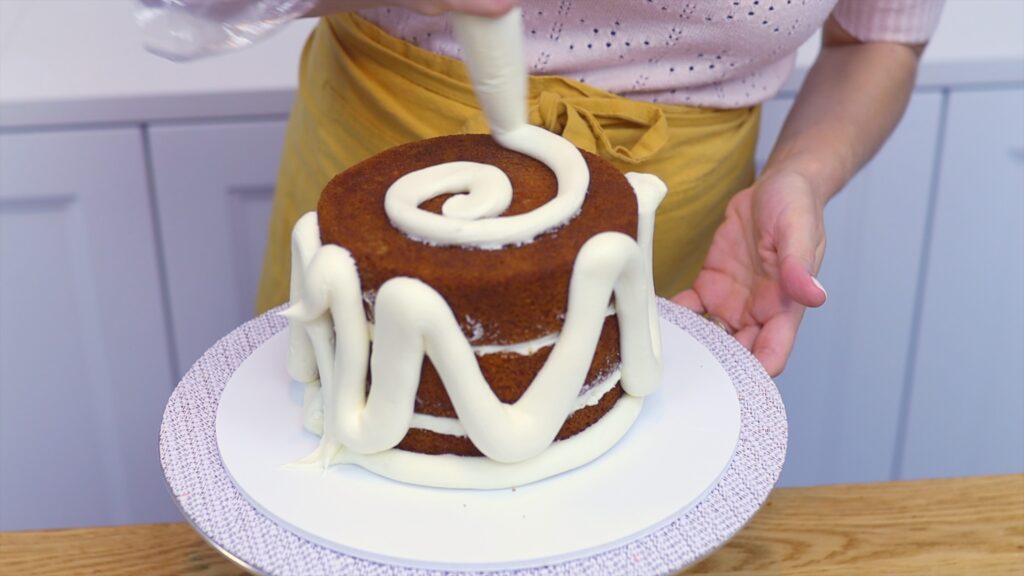
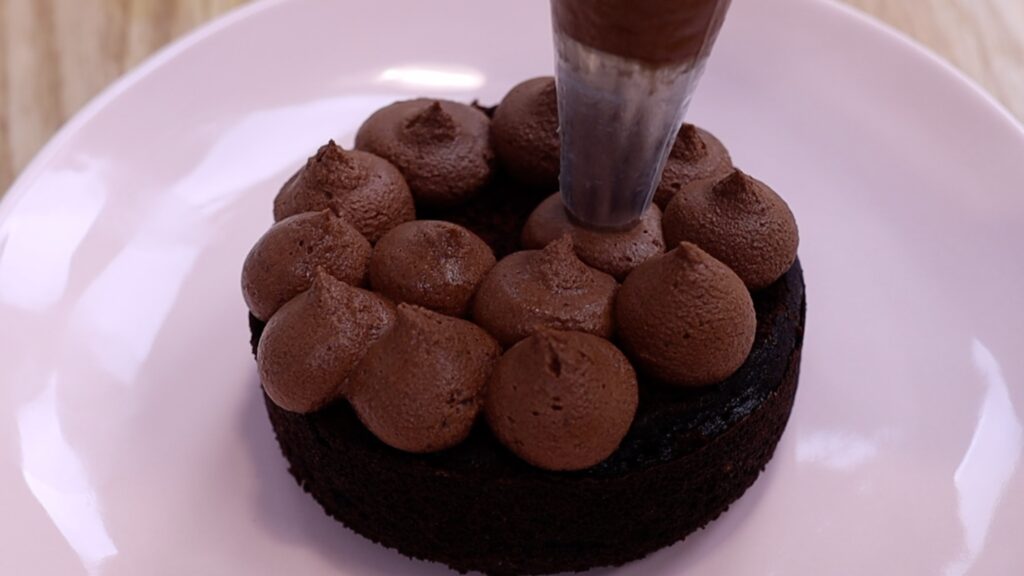
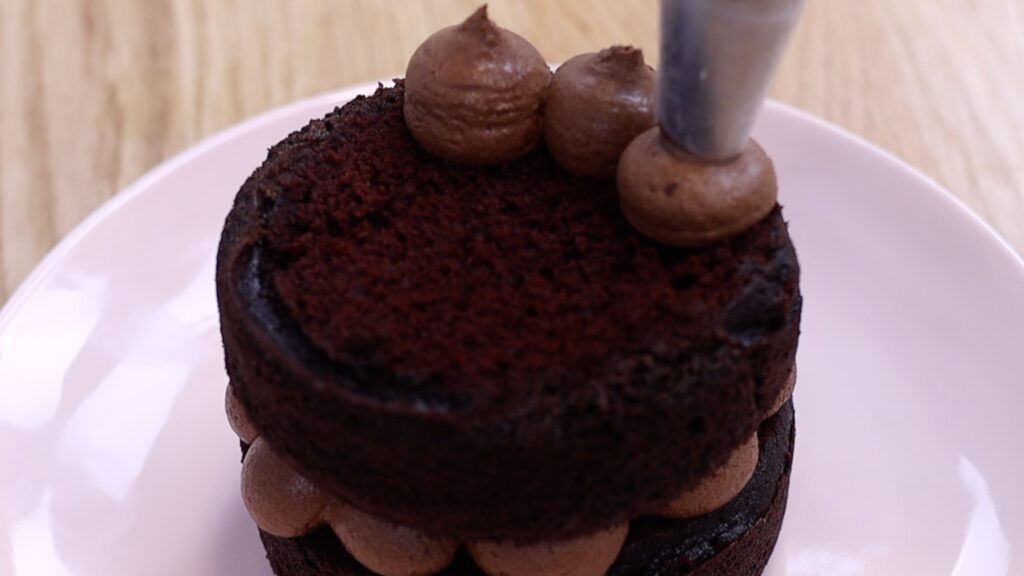
Place the first layer of cake onto a plate, attaching it with a dot of whipped ganache. Use a round tip like a Wilton 1A to pipe dots of ganache in a ring all around the cake, working your way inwards to cover it.
Place the next layer of cake onto, centering it and pressing down slightly to attach it to the ganache dots, and then pipe another round of dots on top. Lower your final layer, flipping it over so that the flattest side is on top. This is the side that was at the bottom of the cake pan when you baked it, not the top that you trimmed. By placing it this way round you’ll keep your cake moister and also give it a nice flat top.
These naked cakes are SO quick to decorate and for me, the ratio of cake to ganache is perfect because it’s not too sweet or too rich!
#4 Cake Sundae
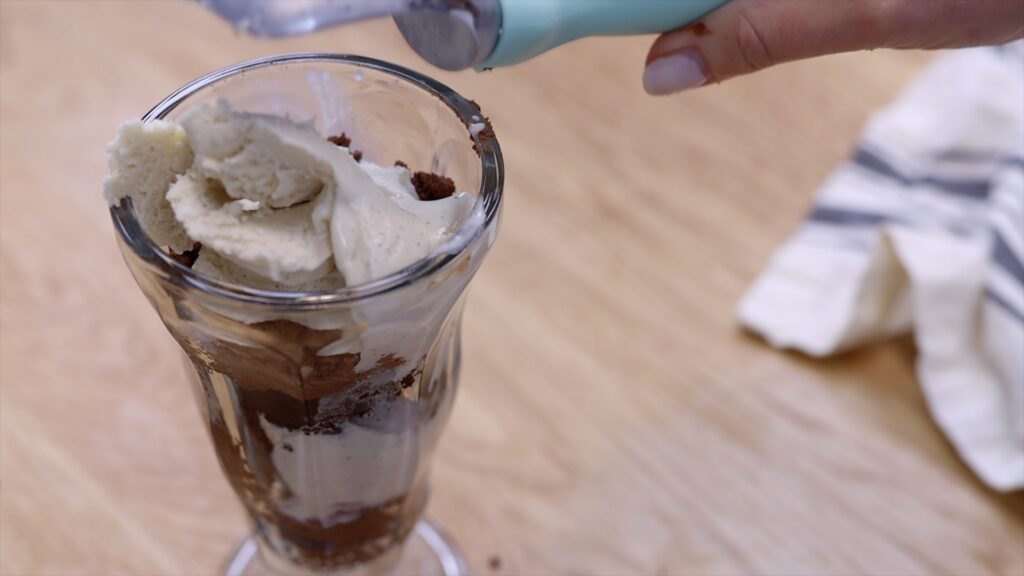
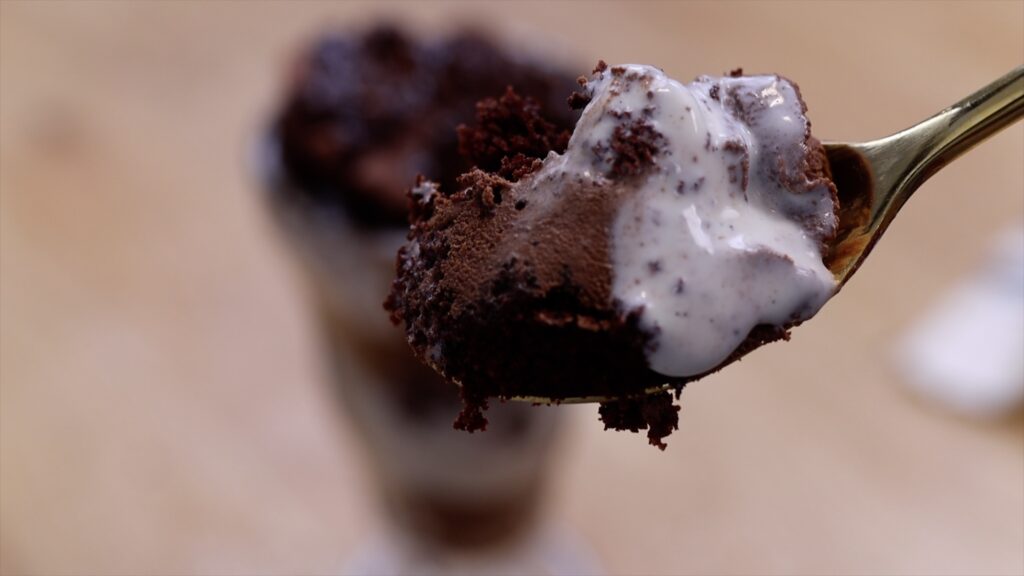
If your cupcakes bake too low or if they overflow or if your cake layers crumble, save that cake! I keep my cake scraps in a large ziploc bag in the freezer and most of them end up as cake sundaes! Spoon some whipped ganache into the bottom of a glass and optionally, add a scoop of ice cream. Press half a cupcake or some cake crumble on top and continue layering until you get to the top of the glass.
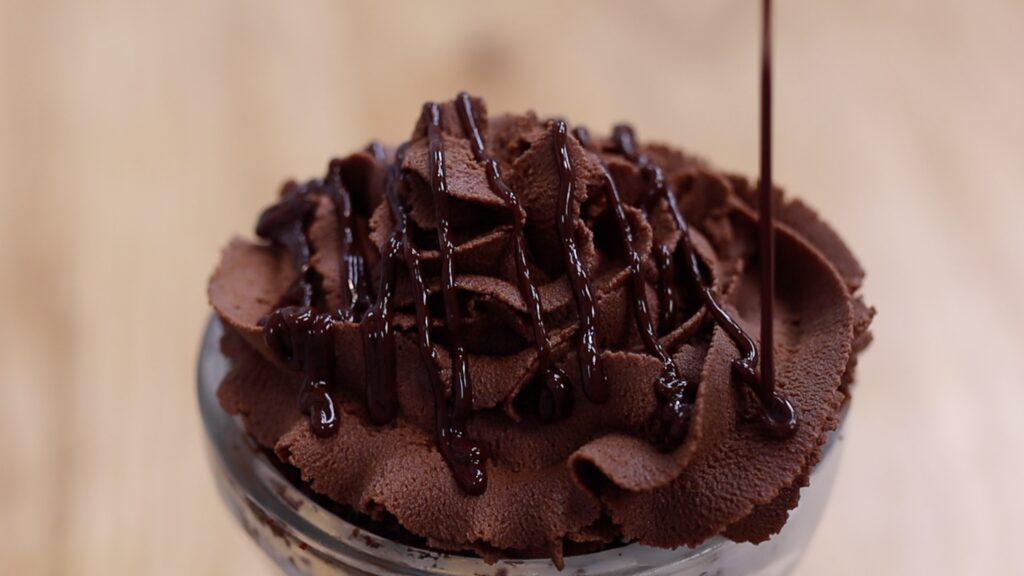
For bonus points for presentation, pipe a swirl of whipped ganache on top and drizzle it with some leftover ganache glaze - YUM!
Which of these desserts would you choose? Tell me in the comments!
How to make the cake for these 4 desserts
The recipe below makes enough cake batter for 6 donuts, 6 cupcakes, a three-layer 4" cake, or 6 cake sundaes.
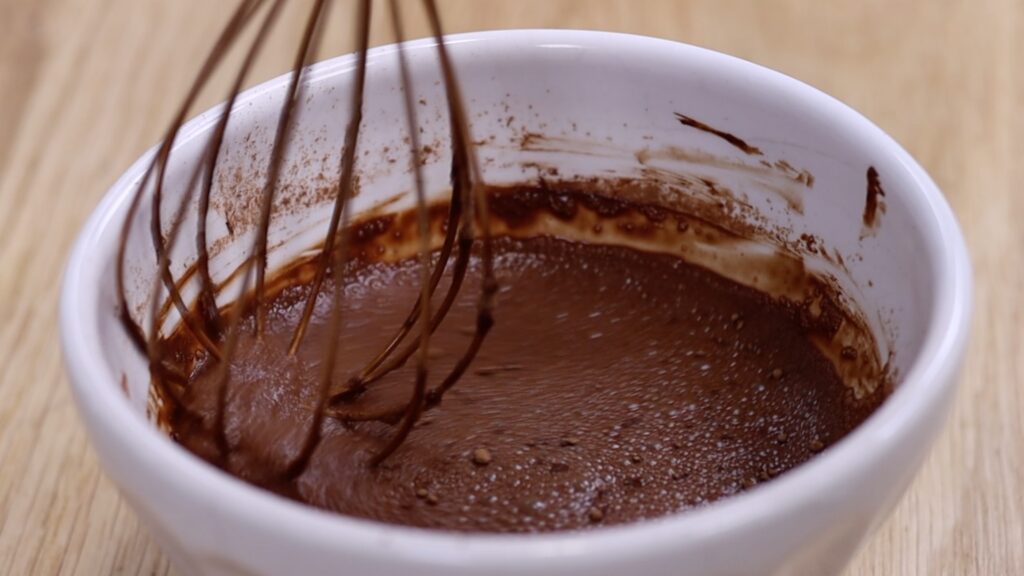
To make this chocolate batter, start by whisking cocoa powder and hot water together until the cocoa powder dissolves. Do this first so that the mixture has a chance to cool to room temperature before you add it to the batter.
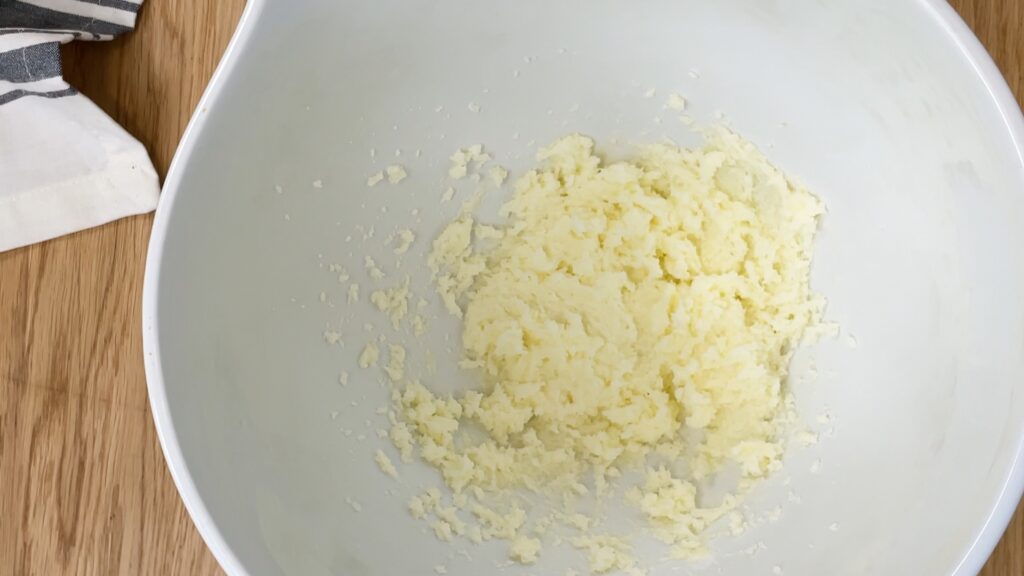
Cream the butter and sugar together until light and fluffy, which takes about 3 minutes on medium speed if your butter is already at room temperature. Since this is a very small batter, if you're using a stand mixer you'll probably need to scrape down to the bottom of the mixing bowl with a spatula to loosen any ingredients there because your mixer attachment won't be able to reach them.
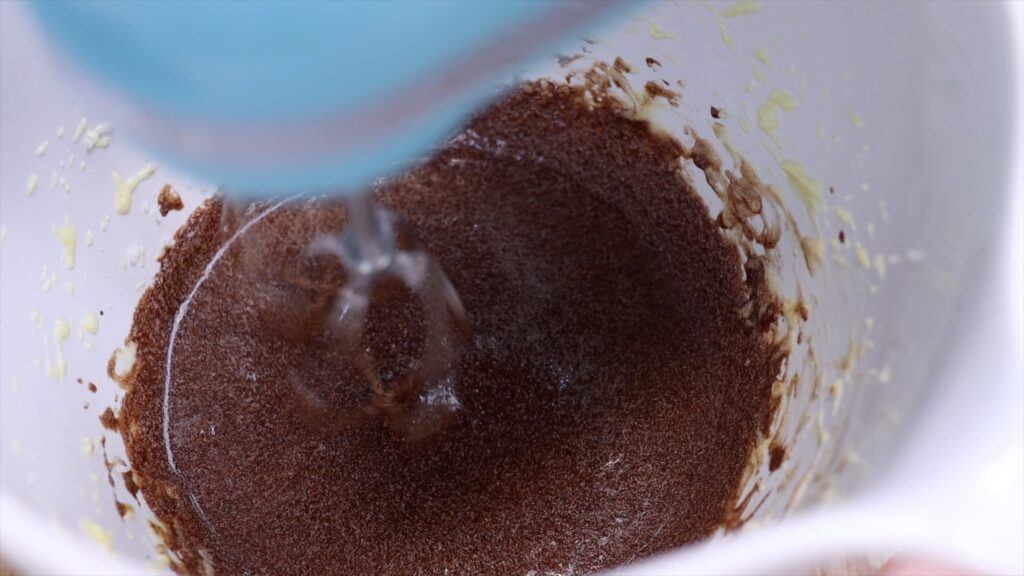
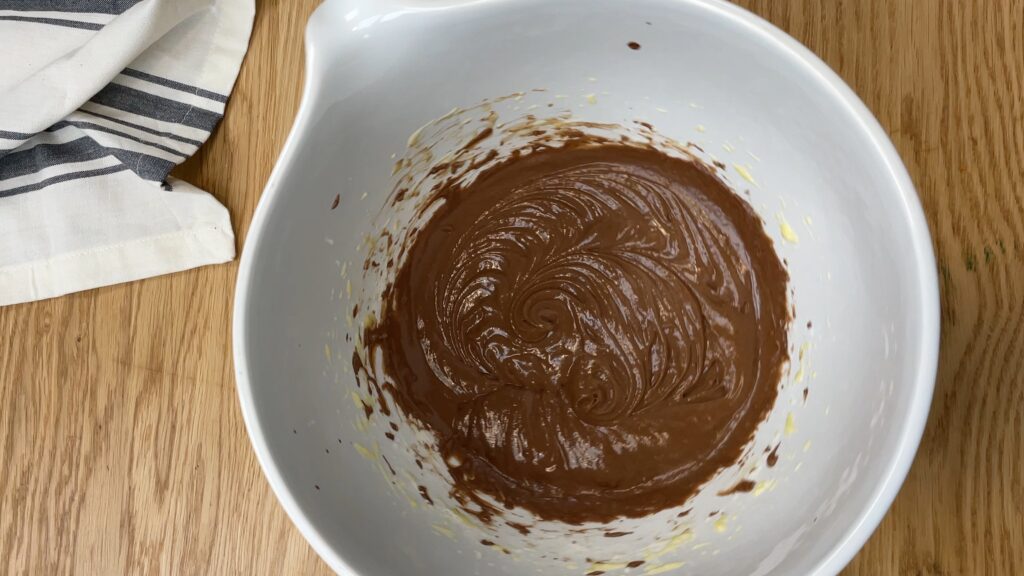
Add the egg and vanilla and mix for about 30 seconds to combine. Whisk your dry ingredients (flour and baking soda) in a small bowl and add half to the mixing bowl. Mix on the lowest speed until you don't see any flour in the batter and you might need to scrape down to the bottom of the mixing bowl again to incorporate all of the ingredients. Add the cooled cocoa powder mixture and mix on the lowest speed until the batter is all the same shade of brown. It will look a bit grainy since there is so much liquid in the batter at this point:
Add the rest of the flour mixture and mix on the lowest speed to combine until the batter is smooth.
How to turn cake batter into 4 desserts
How you bake this batter will depend on which dessert you choose to make:
For donuts, grease a silicon donut mold with oil spray and spoon the batter into a piping bag. Pipe the batter into the mold and bake for 14 minutes at 375F or 190C.
For cupcakes, line a cupcake tray with 6 wrappers and use an ice cream scoop to divide the batter between the wrappers, filling each one 3/4 full. Bake at 375F or 190C for 15 minutes.
For a mini cake, grease three 4" pans (I love these mini springform pans) and divide the batter between them. Bake at 350F or 175C for 18 minutes or until a toothpick inserted into the middle of each one comes out clean.
For cake sundaes, use broken donuts or cupcakes that baked too low or too high or cake scraps from trimming mini cakes. To bake the chocolate batter especially for cake sundaes, I suggest baking cupcakes and dividing each one in half horizontally to make two layers. I use two layers of cake for each cake sundae so if you bake six cupcakes you'll be able to make six cake sundaes.
How to make a ganache glaze or frosting for these 4 desserts
The recipe below makes enough chocolate ganache glaze for 6 donuts or enough ganache frosting ("whipped ganache") for 6 cupcakes, a three-layer 4" cake, or 6 cake sundaes.
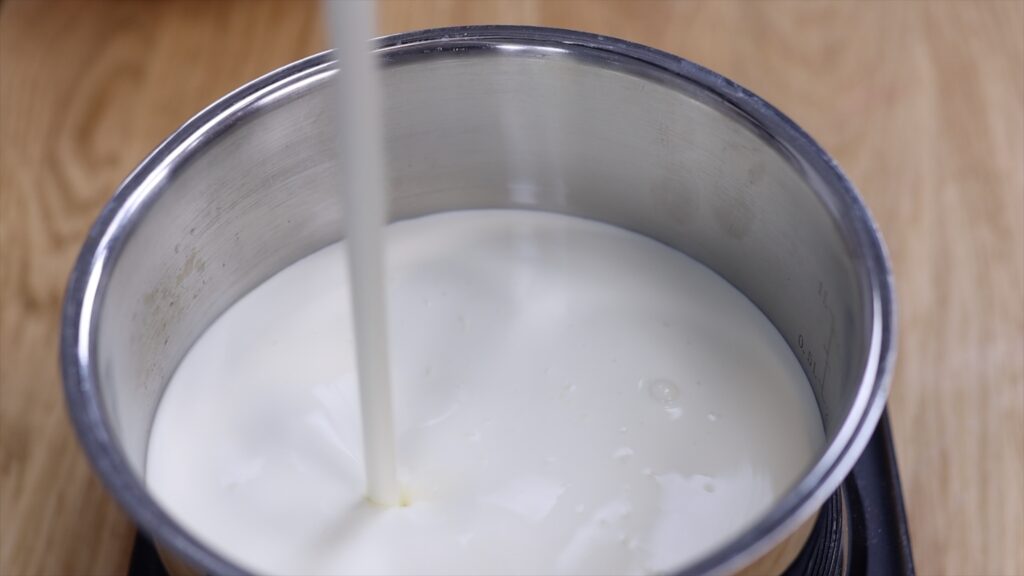
To make ganache, pour heavy whipping cream into a saucepan over medium heat.
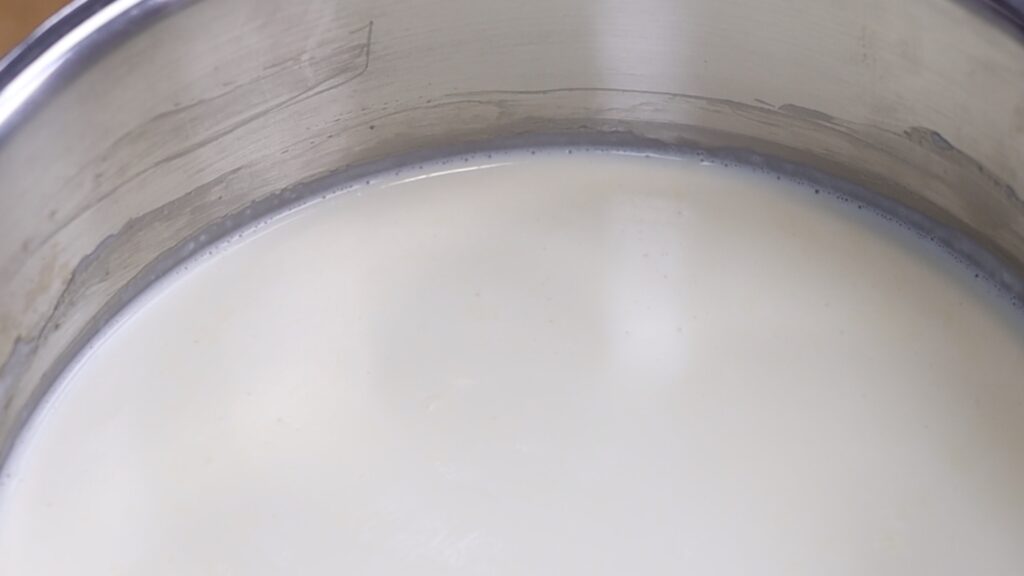
Stir as the cream warms and when you see tiny bubbles forming around the edges of the pan and the cream feels very warm to the touch, remove the pan from the heat. Don't wait for the cream to simmer or form a skin on top.
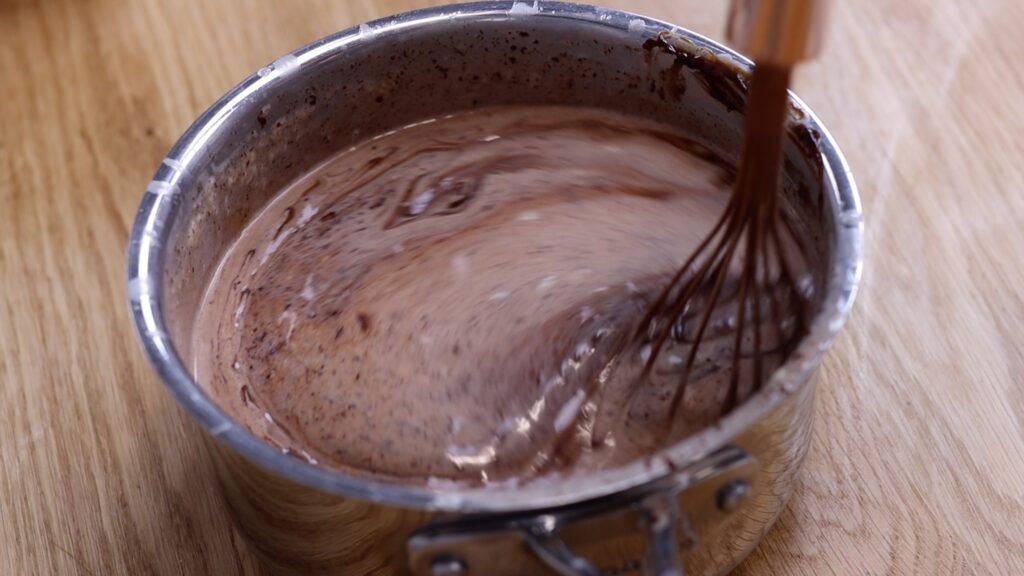
Pour your chocolate into the cream immediately and push it underneath the surface of the cream. Leave it for 5 minutes so that the chocolate melts. Then whisk the mixture and you'll notice it get darker with little brown flecks and gradually turn darker and thicker.
When the mixture is smooth you've made ganache!
How to use ganache to glaze donuts
This ganache is ready to use immediately to glaze donuts. The easiest way to cover donuts with the ganache glaze is to pour the glaze into a wide, shallow bowl.
How to make ganache frosting
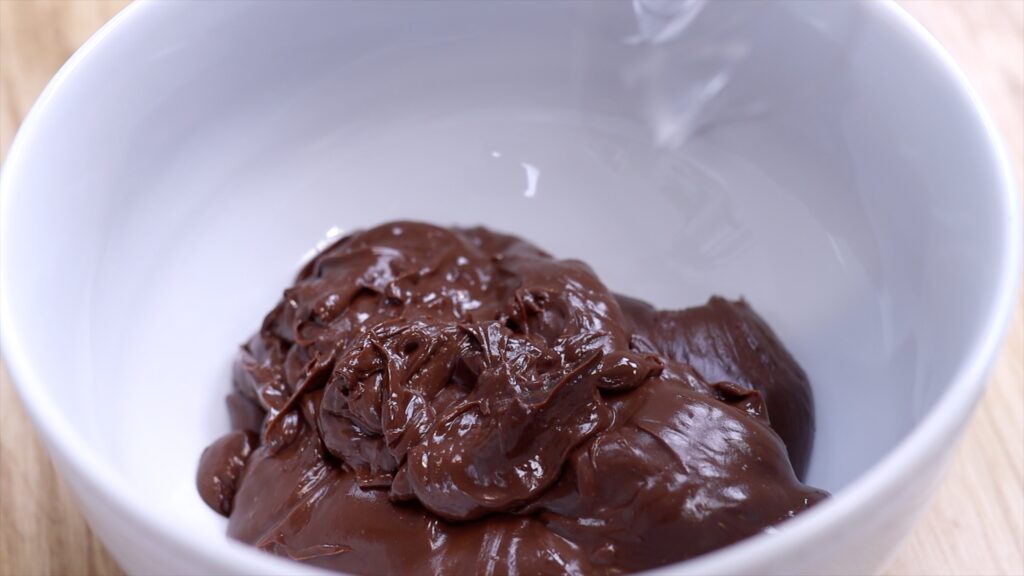
To turn it into a frosting you'll need to let it cool and then whip it. Cooling will take 2 hours at room temperature or 45 minutes in the fridge. When the ganache has cooled it will still be shiny but it will be thicker so when you transfer it to a bowl you'll notice that it holds its shape better than when it was warm.
You can whip this by hand with a whisk or use an electric mixer with whisk attachments and it will take about 3 minutes to whip to stiff peaks. The ganache will get lighter in colour as you whip it and it will also expand.
When you can lift the whisk out of the bowl and the ganache holds stiff peaks, it's ready to use as frosting.
The recipe below has the quantities to make chocolate batter and chocolate ganache 6 donuts, 6 cupcakes, a three-layer 4" cake, or 6 cake sundaes. You can switch between US and Metric measurements and you can also scale the recipe up if you want to make a larger batch.
This recipe makes enough batter for 6 donuts, 6 cupcakes, a three-layer 4" cake, or 6 cake sundaes
Ingredients
UnitsScale
For the chocolate batter:
1/2 cup hot water
1/4cupunsweetened cocoa powder1/4cupunsalted butter1/2cupwhite sugar1 egg
1/2 teaspoon vanilla extract
2/3cupall-purpose flour1/2 teaspoon baking soda
For the chocolate ganache:
4oz heavy whipping cream
4ozsemi-sweet chocolate (can be chips or a bar, chopped)
Instructions
To make the chocolate batter:
1. In a small bowl, whisk cocoa powder and hot water together until the cocoa powder dissolves. Set aside to cool.
2. In a mixer, cream butter and sugar until light and fluffy. Add vanilla and egg and mix to combine.
3. In a small bowl, whisk flour and baking soda together. Add half to the mixing bowl and mix until you can't see the flour in the batter. Add the cocoa powder mixture and mix to combine. Add the rest of the flour mixture and scrape down to the bottom of the mixing bowl with a spatula to loosen any ingredients. Mix until the batter is smooth. It will be runny!
4. Follow instructions below for donuts, cupcakes, cake or cake sundaes.
For the ganache:
1. Gently heat heavy whipping cream in a small saucepan over medium heat. As soon as you see bubbles forming around the edges, before the cream simmers, remove the pan from the heat.
2. Immediately add chocolate and push under the surface of the cream with a spatula. Leave for 5 minutes and then whisk to make a smooth chocolate glaze.
3. Follow instructions below for donuts, cupcakes, cake or cake sundaes.
For donuts:
1. Grease a silicon donut mold with oil spray. Spoon chocolate batter into a piping bag and pipe into the rings of the donut mold.
2. Bake donuts at 375F or 190C for 14-18 minutes. Leave to cool in the mold for about 5 minutes. Flip the mold over onto a wire rack and push the donuts out. Leave to cool.
3. Immediately after making the ganache, pour it into a wide, shallow bowl. Dip each donut into the bowl and twist back and forth a few times to coat the bottom of the donut in the ganache glaze. Flip over onto a wire rack. Sprinkle any toppings over the donuts now, while the glaze is still sticky.
For cupcakes:
1. Line a cupcake pan with 6 cupcake wrappers. Use an ice cream scoop or 1/4 cup measuring cup to divide the chocolate batter between the cupcake wrappers.
2. Bake at 375F or 190C for 15-19 minutes. Transfer to a wire rack to cool.
3. After making the ganache, leave to cool for 2 hours or refrigerate for 45 minutes. Using a whisk or electric mixer, whip the ganache until stiff peaks form.
4. Spoon ganache into a piping bag fitted with a star shaped piping tip like a 1M tip. Pipe a swirl onto each cupcake.
For a mini cake:
1. Grease three 4" pans and divide chocolate batter between them.
2. Bake at 350F or 175C for 18 minutes, until a toothpick inserted into the middle of each pan comes out clean.
3. Leave cakes to cool in their pans for 5 minutes and then turn out onto a wire rack to cool completely. When they cool, use a serrated knife like a brea knife to trim any domed tops off the cakes to leave them level.
4. After making the ganache, leave to cool for 2 hours or refrigerate for 45 minutes. Using a whisk or electric mixer, whip the ganache until stiff peaks form.
5. Spoon ganache into a piping bag fitted with a round or star shaped piping tip. Pipe a dot of ganache onto a plate and press the first layer of cake onto it to secure it. Pipe dots of ganache in a ring around the edge of the cake and then fill in the middle with more dots. Press the next layer of cake gently on top and repeat.
For cake sundaes:
1. After making the ganache, leave to cool for 2 hours or refrigerate for 45 minutes. Set aside 1/4 cup of ganache. Using a whisk or electric mixer, whip the rest of the ganache until stiff peaks form.
2. Spoon a layer of whipped ganache into the bottom of a tall glass and place a scoop of ice cream on top. Press cake scraps (e.g. cupcakes that baked too low or too high, the trimmed tops of cake layers, broken donuts) on top and repeat to fill the glass.
3. Pipe a swirl of ganache on top using a star shaped piping tip. Drizzle with the ganache you set aside and serve immediately.
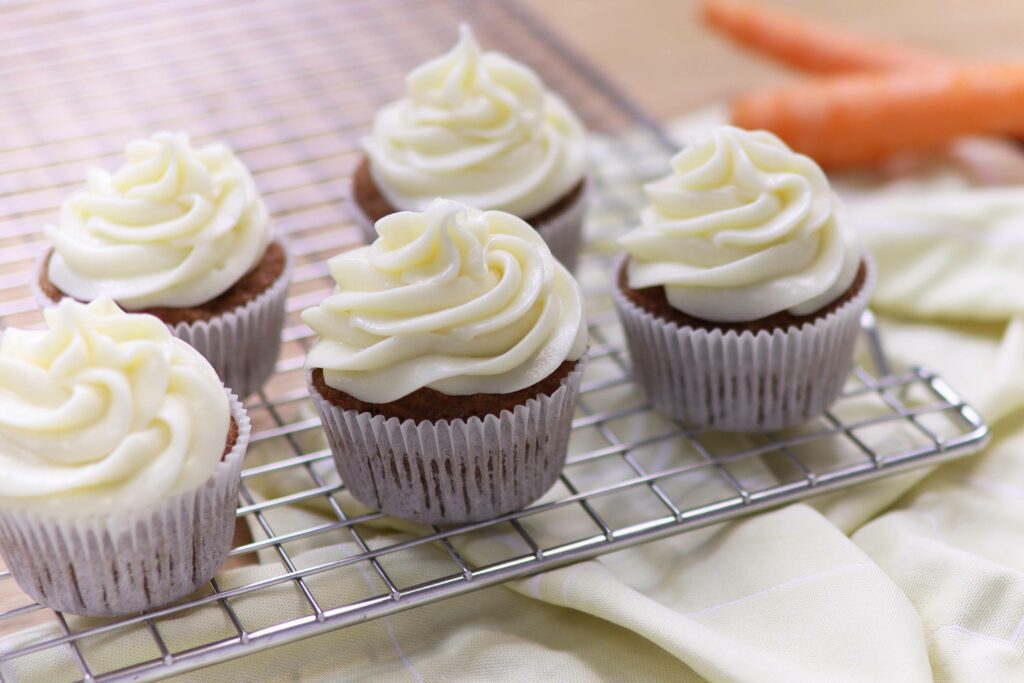
These one bowl carrot cupcakes are lightly spiced and unbelievably moist. Best of all, you can make the batter in just one bowl! The cupcakes pair perfectly with tangy cream cheese frosting.
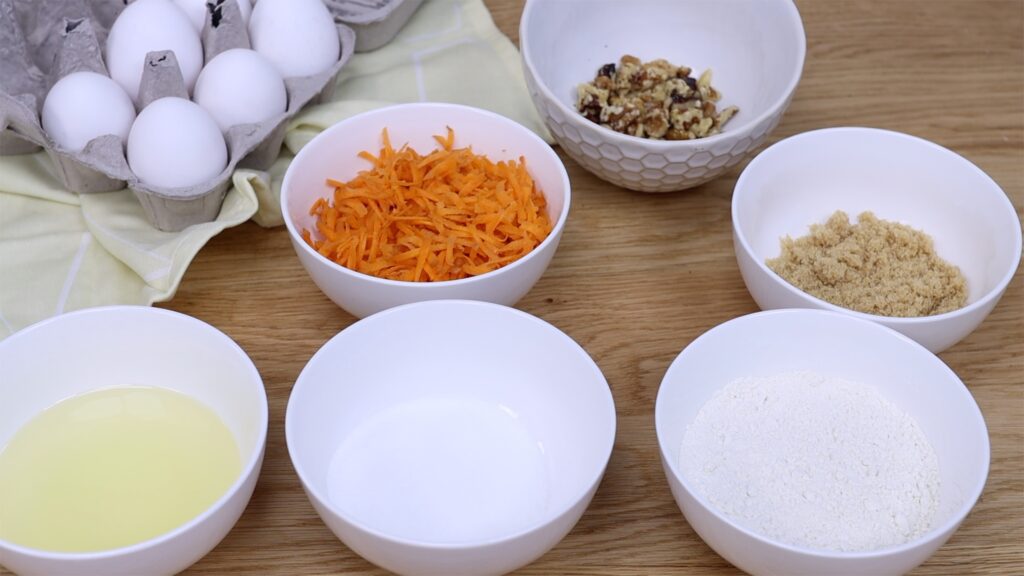
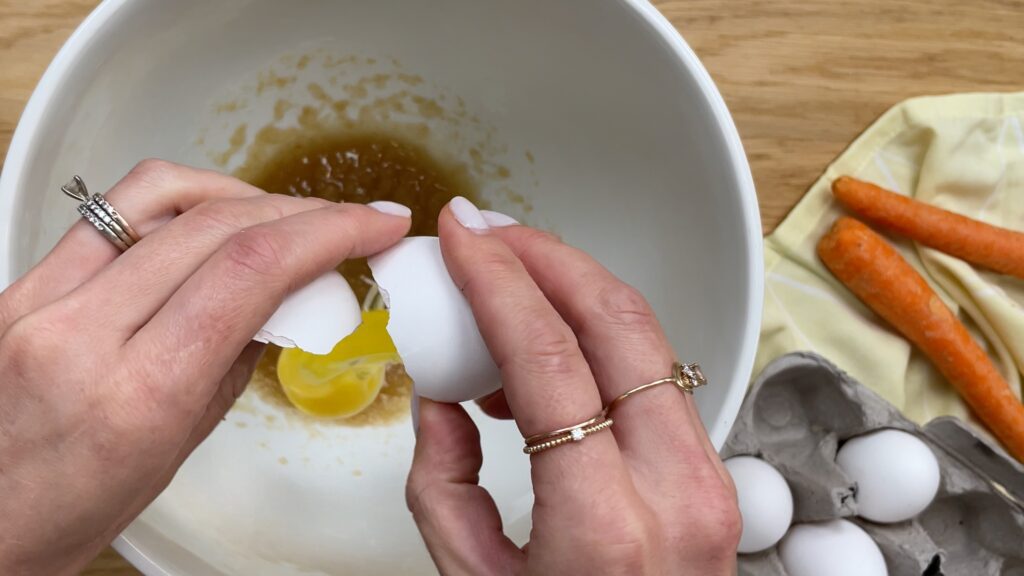
To make the carrot cupcakes you’ll need a large bowl and a spatula. You can use a handheld mixer if you like but it’s not necessary. Start by stirring the oil and sugars together and then add the egg and vanilla.
When everything is combined add the dry ingredients: flour, salt, baking soda and cinnamon. Stir as few times as possible, until you can’t see the flour in the batter anymore. Add grated carrot and chopped walnuts or choose your own add-in ingredients, for example replace the walnuts with pecans or add raisins or sultanas for more sweetness.
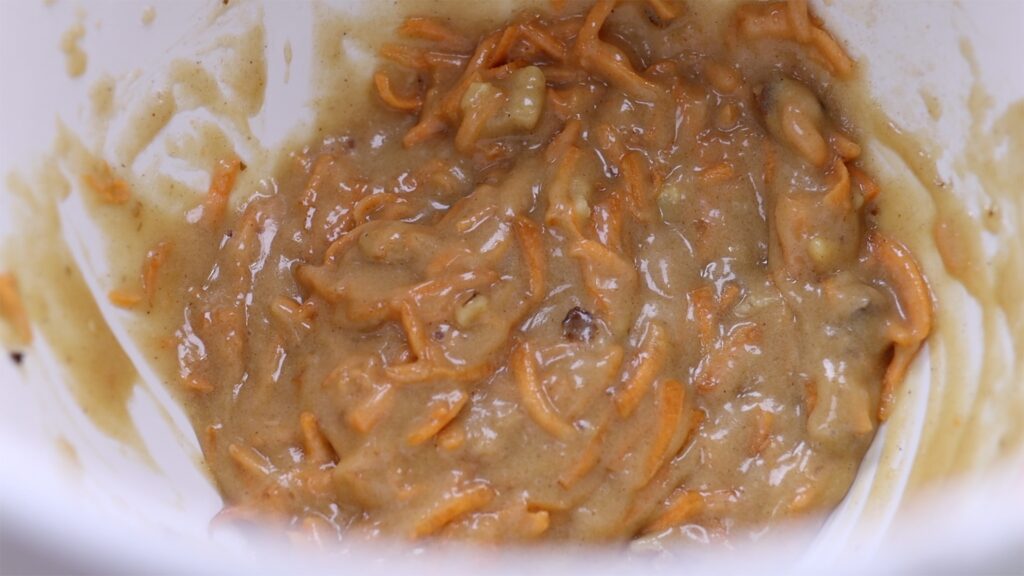
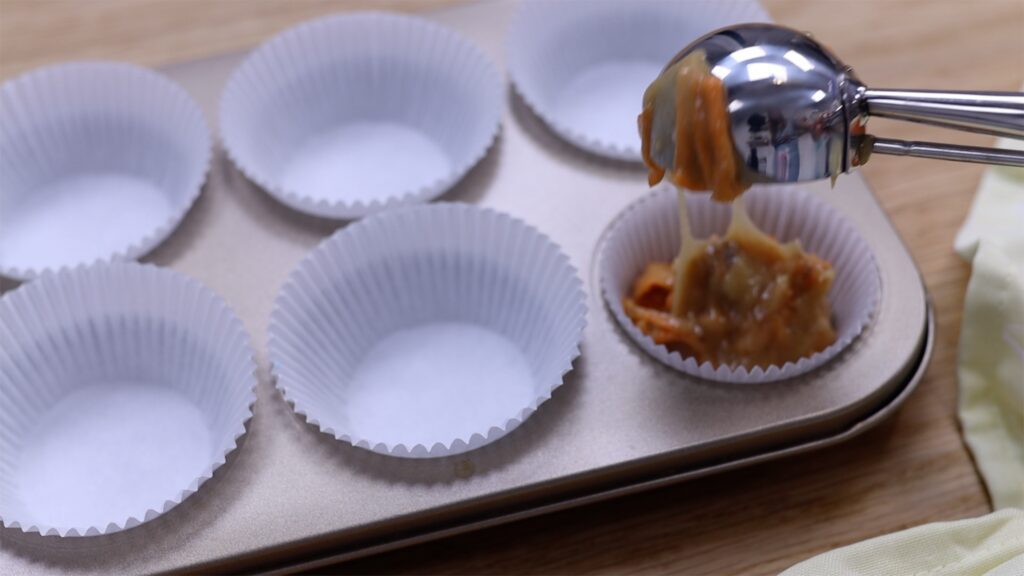
Fold these ingredients into the batter and then use an ice cream scoop to fill six cupcakes wrappers about 3/4 full.
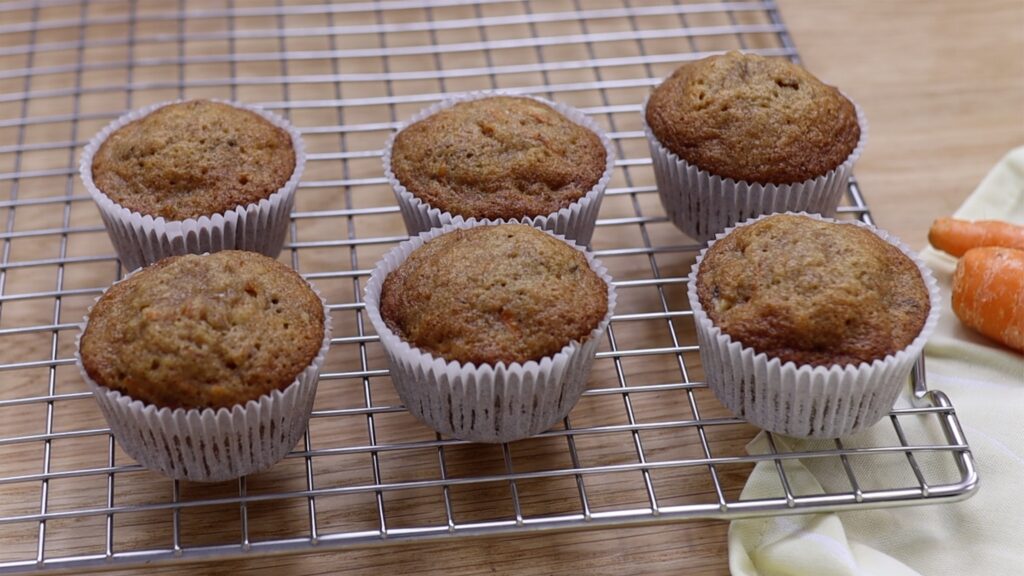
Bake at 350F or 175C for 18 minutes, until the cupcakes spring back slowly when you poke them or a toothpick poked into the middle of a cupcake comes out clean. Transfer the cupcakes onto a wire cooling rack while you make the cream cheese frosting.
Make the cream cheese frosting
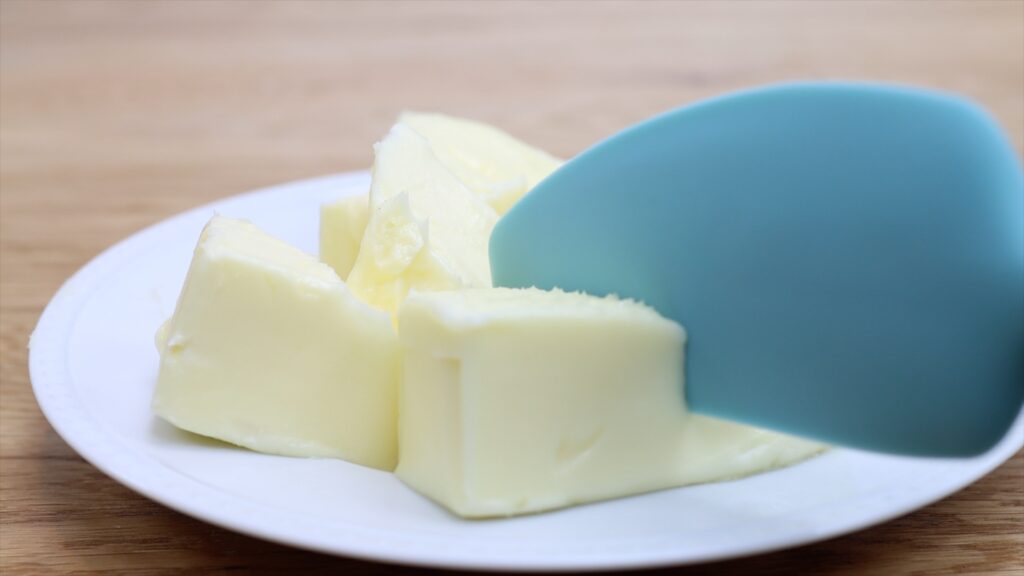
For cream cheese frosting it’s essential that the butter and cream cheese are at room temperature before you start, otherwise you’ll have lumpy frosting. Take them out of the fridge 4 hours before you start baking or if you forget you can microwave them for 10 seconds to take the chill off.
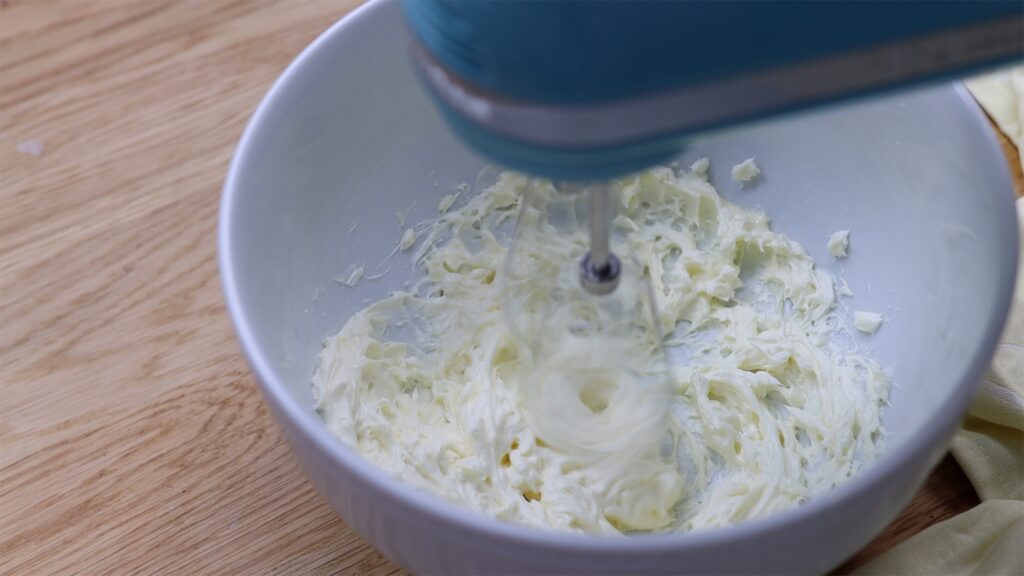
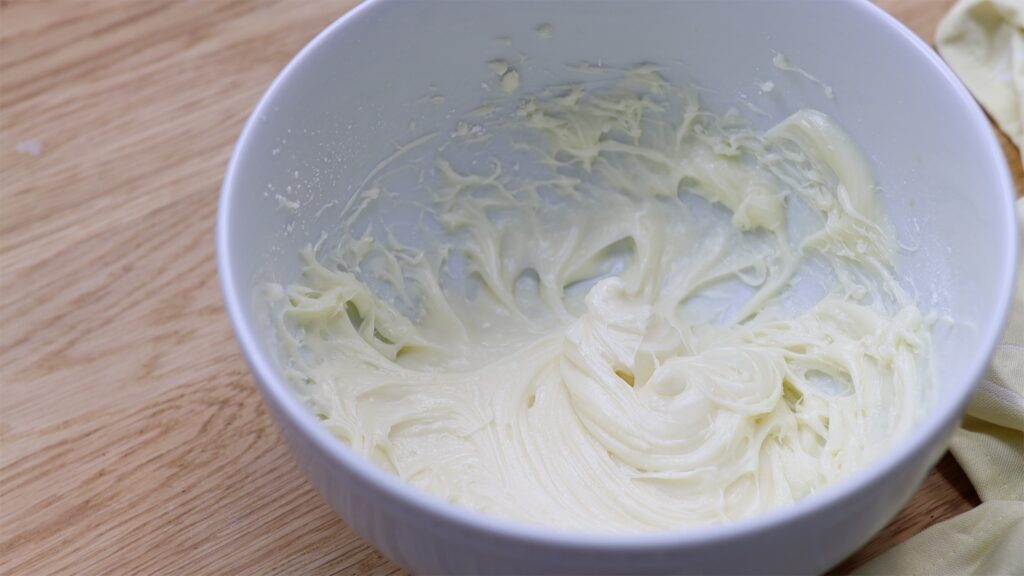
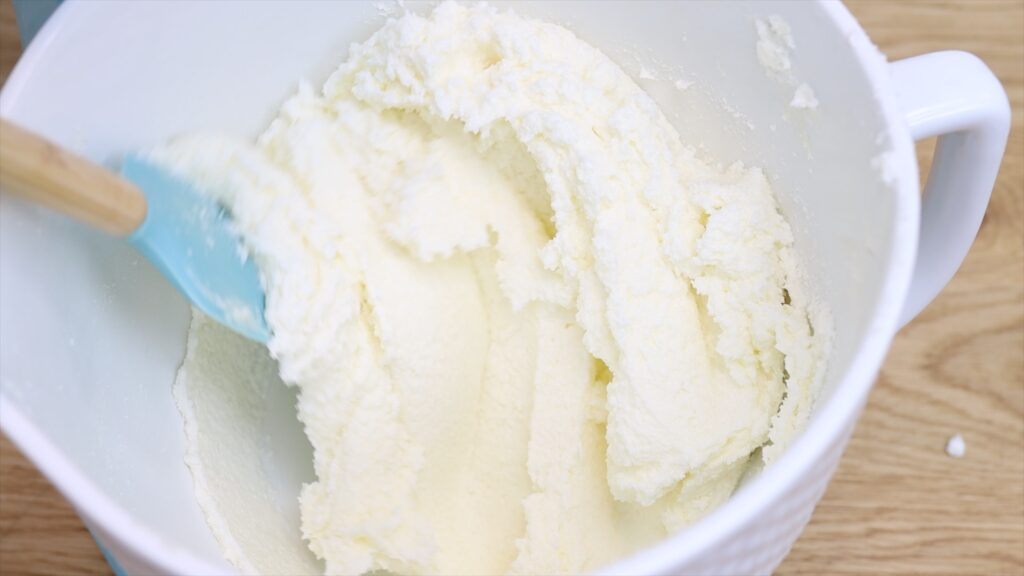
Mix the butter and cream cheese together until smooth. Add powdered sugar and stir for about a minute to combine completely. You can use a mixer if you like but it’s also possible to make this frosting without one. The powdered sugar give the cream cheese frosting its stability, meaning it will hold its shape when you pipe it.
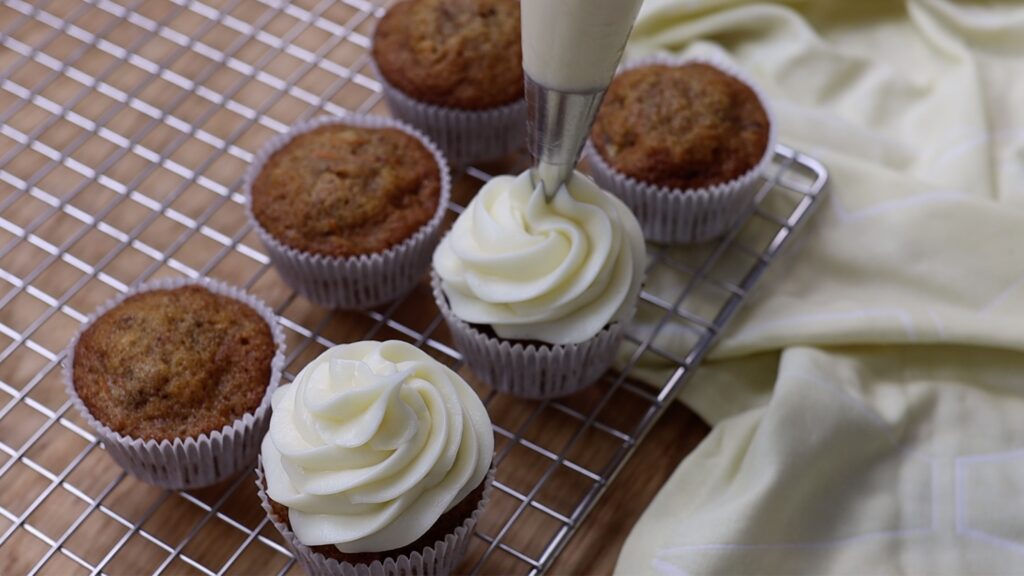
Stir in vanilla and salt and spoon into a piping bag fitted with a star shaped piping tip like a Wilton 1M. Once the cupcakes have cooled completely, pipe a swirl onto each one. You can store these in an airtight container in the fridge for 3 days but I doubt they’ll last that long!
You can adjust the recipe below by switching between US and Metric measurements and you can also scale the recipe to make larger batches of this recipe. For a cake, make my carrot cake with cream cheese frosting.
These carrot cupcakes are lightly spiced and unbelievably moist. Best of all, you can make them in just one bowl! They pair perfectly with this tangy cream cheese frosting and can easily be converted into a cake instead.
Ingredients
UnitsScale
For the carrot cupcakes:
1/3cupoil
1/4cupwhite sugar
1/4cupbrown sugar
1 egg
1/2 teaspoon vanilla
1/2cupall-purpose flour
1/4 teaspoon baking soda
1/4 teaspoon salt
1/4 teaspoon cinnamon
3/4cupcarrot, grated
1/4cupwalnuts, chopped
For the cream cheese frosting:
4ozcream cheese, softened
2ozunsalted butter, softened
1cuppowdered sugar
1/4 teaspoon salt
1/4 teaspoon vanilla
Instructions
For the cupcakes:
Stir the oil and sugars together to make a thin paste. Add the egg and vanilla and stir to combine.
Add the dry ingredients: flour, salt, baking soda and cinnamon. Stir as few times as possible, just until you can’t see the flour in the batter anymore.
Add carrot and walnuts and fold into the batter with no more than 5 strokes of your spatula.
Use an ice cream scoop or 1/4 cup measuring cup to fill six cupcakes wrappers about 3/4 full.
Bake at 350F or 175C for 18 minutes, until the cupcakes spring back slowly when you poke them or a toothpick poked into the middle of a cupcake comes out clean. Transfer cupcakes to a wire rack to cool.
For the cream cheese frosting:
Using a large spoon, spatula, or an electric mixer, mix the butter and cream cheese until smooth.
Add powdered sugar and mix to combine until there are no lumps in the frosting.
Stir in vanilla and salt and then spoon into a piping bag fitted with any star shaped piping tip. Pipe a swirl onto each cupcake.
Store cupcakes in the fridge for up to 3 days.
Notes
If you use salted butter instead of unsalted butter, skip the salt in the frosting recipe.
To soften the butter and cream cheese for the frosting, take them out of the fridge 4 hours before using or microwave them for 10 seconds on each side.
You can use this same recipe to bake a cake instead of cupcakes. Use the "2X" or "3X" buttons above this recipe to double the recipe for a two-layer 6 inch cake or triple it for a two-layer 8 inch cake.
In this tutorial I’m going to share all of my tips for making a moist and delicious vanilla cake!
#1Temperature of ingredients
First, make sure all of your ingredients are at room temperature. If they’re refrigerated like butter, eggs, or milk take them out of the fridge three hours before you start baking. When ingredients are cold they don’t mix together easily but at room temperature they’ll incorporate easily, making the cake light and also preventing over-mixing. More on that later! For this tutorial I'll be using my Very Vanilla cake recipe.
#2 Creaming
Creaming the butter and sugar together is really important because this is the base of your cake batter, and if this mixture is light and fluffy it will make your cake light and fluffy, too!
Creaming takes about two minutes of mixing on medium speed and you’ll notice the butter get lighter and also it will look like it’s expanding.
Now add the vanilla. Most cake recipes will include vanilla and using real vanilla extract will give you the richest flavour. Artificial vanilla is cheaper but doesn’t give you the same results so it’s worth spending a little bit more and buying the real stuff.
#3 One by one
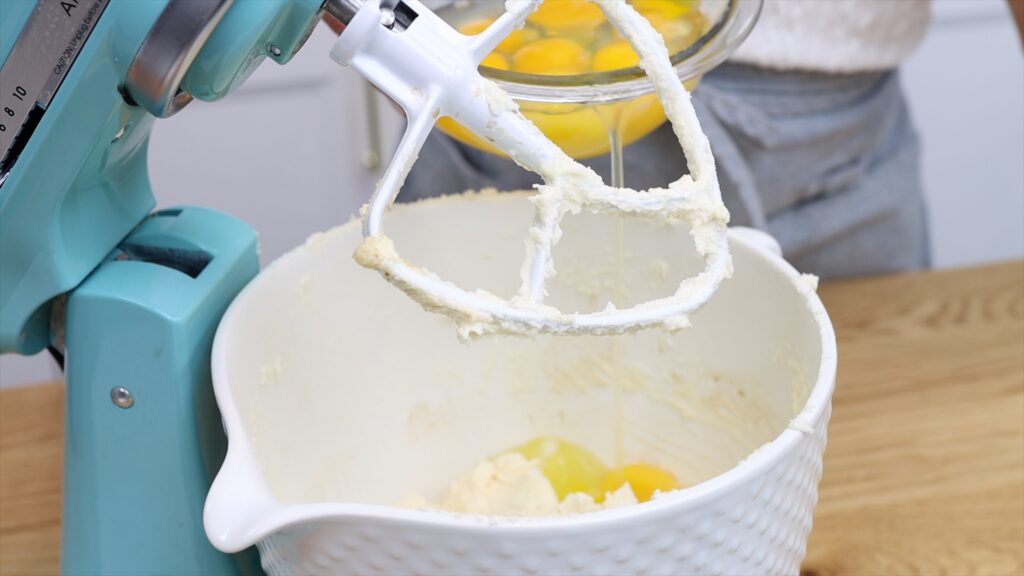
Now add the eggs but these should be added one by one, not all together. The reason for this is that you want all of the ingredients to mix together. If you dump the whole bowl of eggs into the batter, it’s more difficult for the butter and sugar to incorporate the eggs than if you add the eggs gradually, one by one. Give each egg about 30 seconds to combine into the batter.
#4 Add moisture
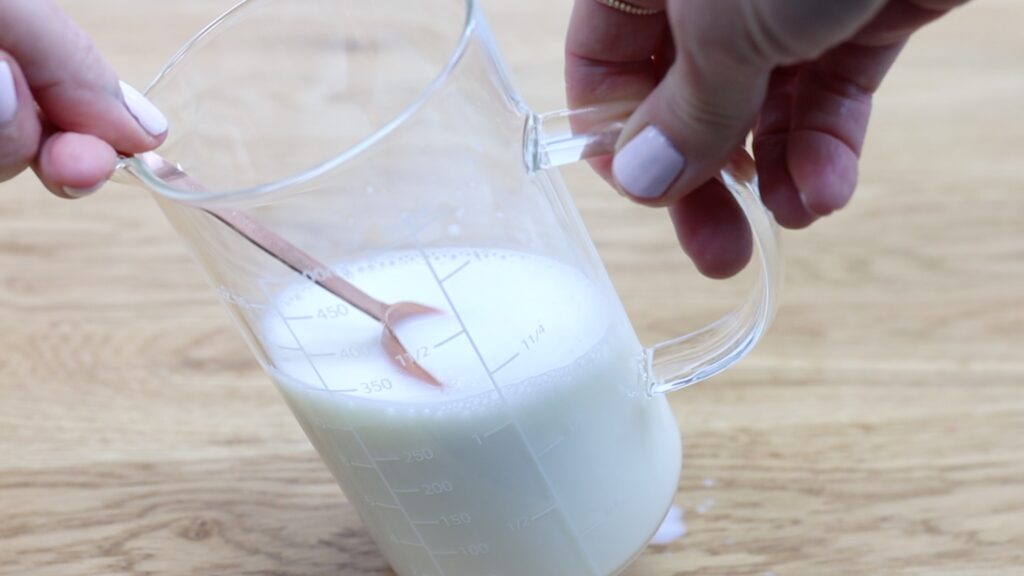
Buttermilk is a great way to add moisture to your cakes. If your recipe uses buttermilk but you don’t have any, you can make your own very quickly and easily by using milk instead. Use the same amount of milk as the buttermilk listed in the ingredients but then take out 1 tablespoon of milk for every cup and add 1 tablespoon of lemon juice or vinegar instead. Leave it for 5 minutes to curdle and then add it instead of buttermilk! My vanilla cake recipe uses oil too, to make the cake extra moist.
#5 Don't over-mix
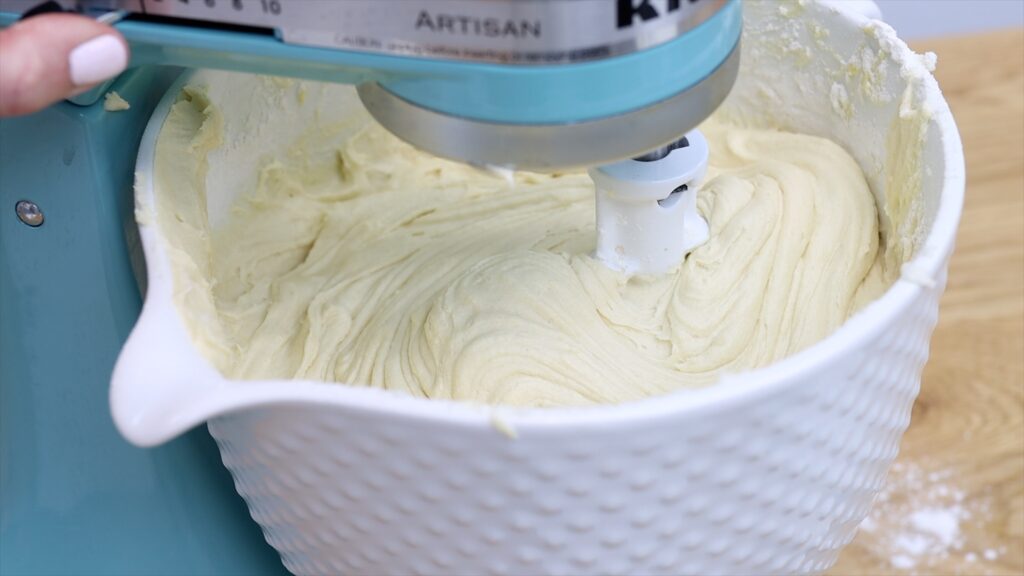
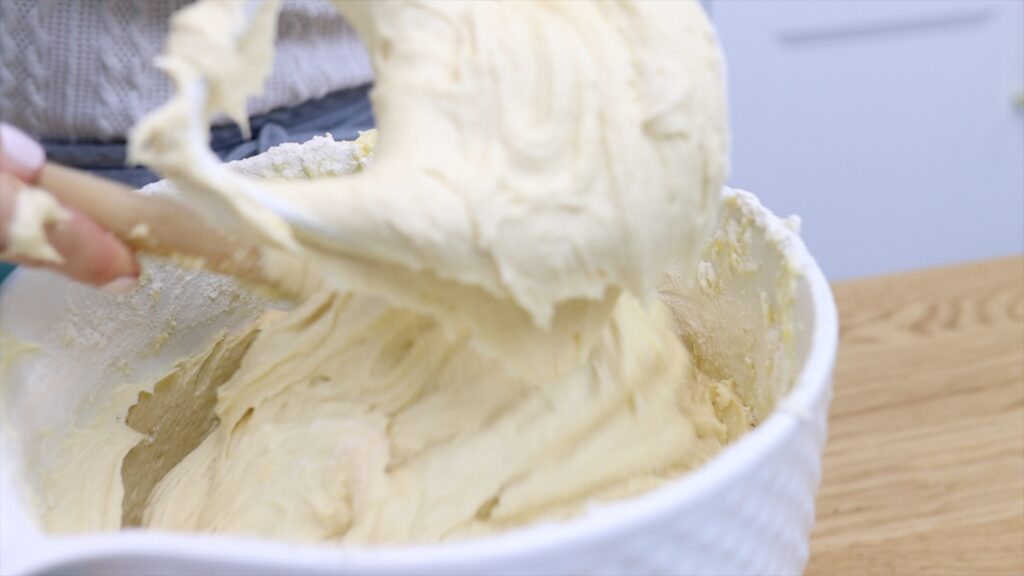
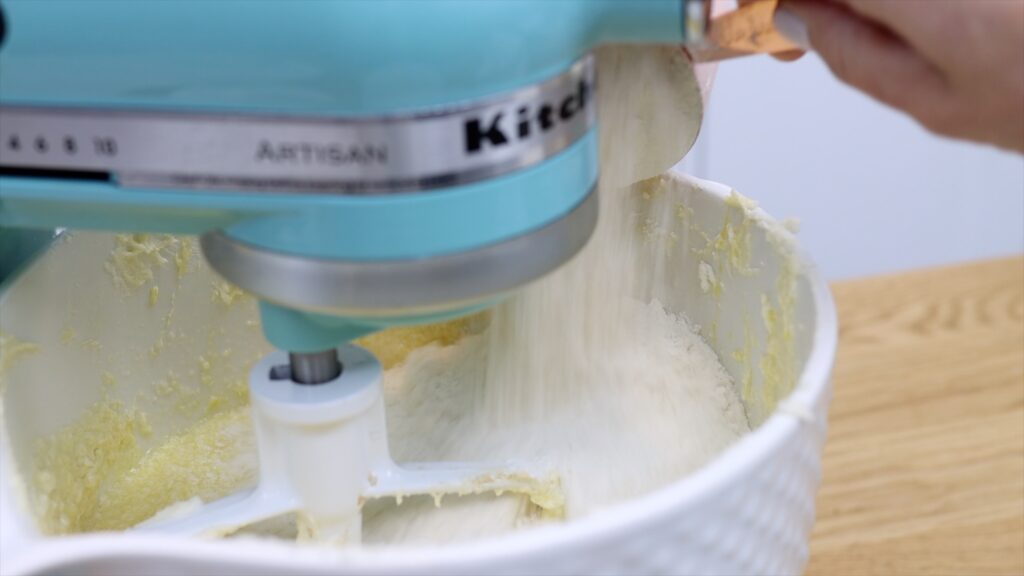
Once you start adding the dry ingredients like flour, the way you mix your batter is really important. Mix the dry ingredients together in a bowl before adding them to the mixer and that will spread the rising agents evenly through the batter and through your cake layers. When you add the flour to the batter, the gluten in the flour starts to develop and if you overman the batter, you’ll make it tough and dense. It’s super important that after you add the flour, you don’t over-mix the batter. What does this mean? Only mix the batter until you can’t see individual ingredients anymore. As soon as the flour has incorporated into the rest of the batter, turn the mixer off.
#6 Scrape down
Another quick tip for a moist cake is to scrape down to the bottom of the bowl with a spatula after mixing in each ingredient. The reason for this is that ingredients can get stuck at the bottom of the bowl, where the paddle or beater can’t reach. If you don’t scrape these up to mix into the rest of the batter, you’ll have gritty chunks of melted sugar in your cakes or little dots of clumps of flour.
Divide your batter into cake pans and spread the batter with your spatula so that the cakes are flat and level. I teach how to covert this recipe into different shapes and sizes of cakes and different quantities of cupcakes in my Basics of Cake MasterCourse.
#7 Don't over-bake!
Tap the pans a few times on the counter to knock out air bubbles and then bake them until you can poke the top gently and the cake will slowly rise back up. If you over-bake them they’ll dry out. Leave the cakes in the pans for 10 minutes before you turn them out and let them cool completely, for three hours, before you level or divide them.
I teach every step of making a cake, from mixing and baking to making fillings and frostings, leveling and diving layers, assembling cakes, frosting and decorating, storing, transporting and serving in my Basics of Cake MasterCourse on my online cake school.
Baking should be fun, not stressful, and by avoiding these 5 baking mistakes you’ll end up with a cake that looks and tastes amazing!
#1 Over-mixing
Over-mixing your batter is a guaranteed way to make a tough, dense cake. For butter-based recipes like my Perfect Chocolate Cake or my Very Vanilla Cake you need to cream the butter and sugar together for several minutes to make a light and fluffy base for your cake. But as soon as you’ve added the flour you need to slow things down and be gentle, only mixing until everything is just incorporated and no longer.
As soon as you add the flour the gluten in it will start to develop and that’s what can make a cake tough. As soon as you can’t see the separate ingredients in your batter anymore, it’s properly mixed so it’s time to stop!
#2 Old baking powder
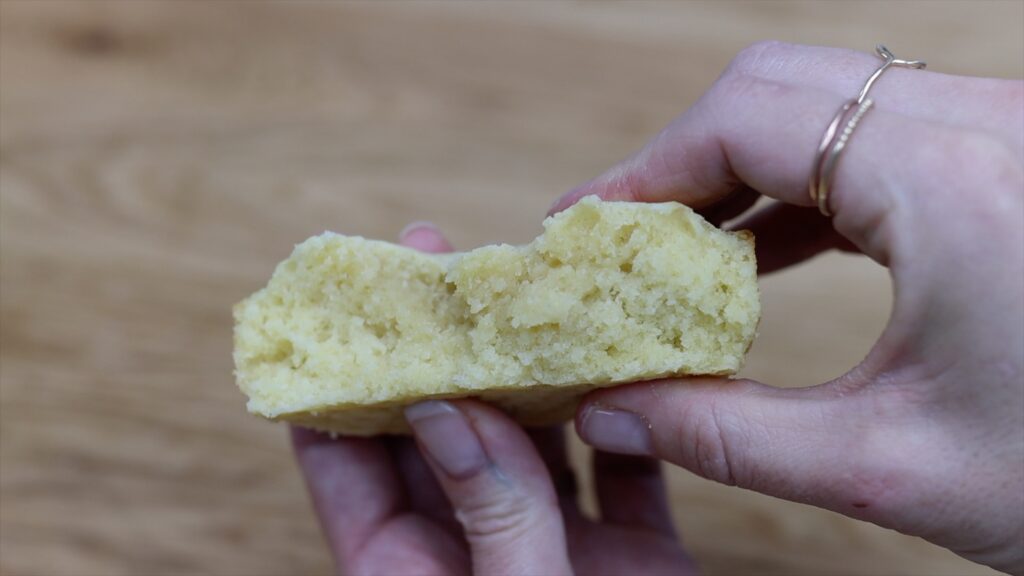
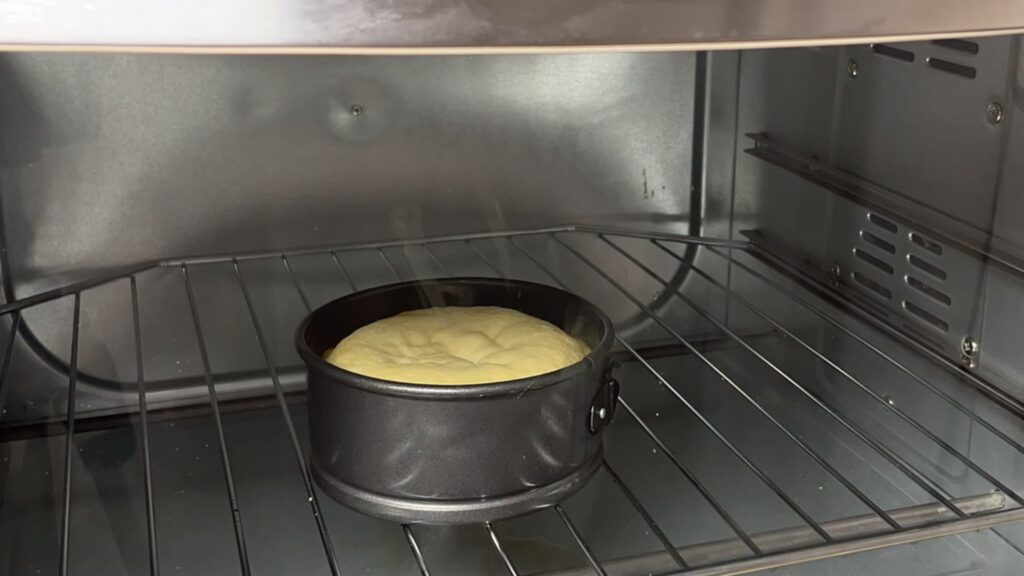
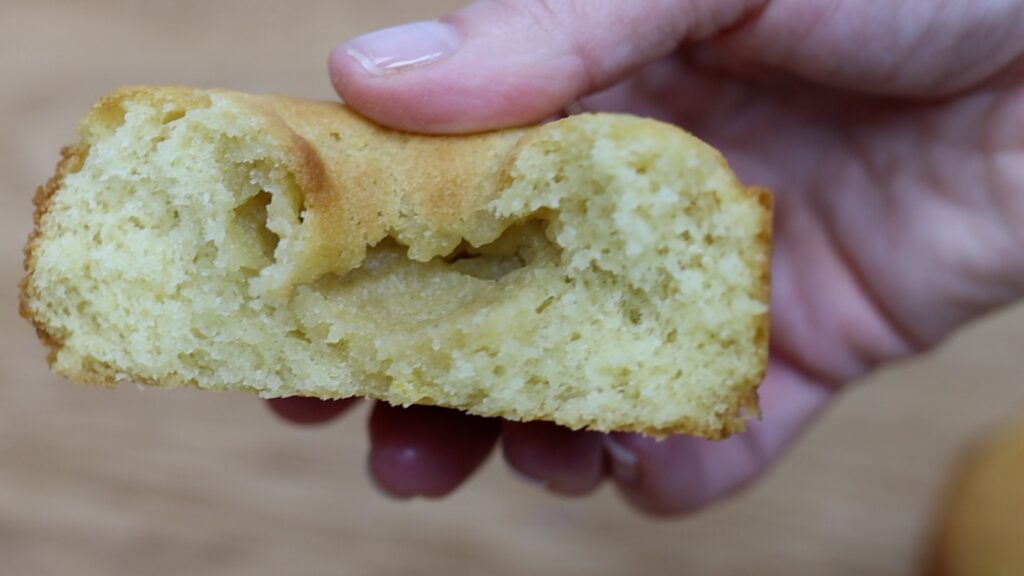
Old baking powder isn’t dangerous to eat but it won’t do its job anymore. Look at this cake that was made with expired baking powder: it stops rising before it’s finished baking. The cake is dense instead of springy and on the inside it’s doughy instead of cakey.
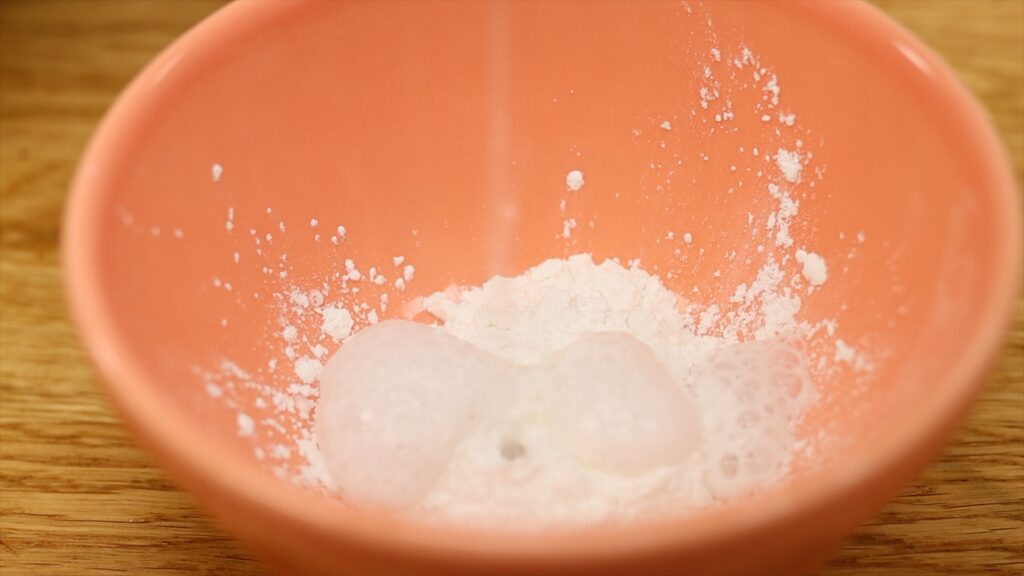
You can check if your baking powder is still active by pouring boiling water over a spoonful of it and if it bubbles, it’s fine, but if it doesn’t do anything then if you use in your baking, it won’t do anything there, either! Don’t use it past the expiration date or 6 months after you open it.
#3 Opening the oven door
You’ll be excited for your cake or cupcakes or whatever to be ready but if you open the door several times to check on it while it’s baking, you’ll let cold air rush into the oven and the temperature won’t stay constant. What happens next?
The edges of the cake will bake normally but the heat won’t go all the way through so the middle will be undercooked and it will sink. This doesn’t look or taste good and there’s no way to fix it because if you put it back in the oven, you’ll burn the edges of the cake by the time the middle cooks through.
To prevent this, use the light in the oven to see what’s happening and only check the cake 5 minutes before the time listed on the recipe. I show how to troubleshoot all sorts of baking issues like over-rising cakes, domed cakes, underbaked cakes, and what happens if you use too much or too little of ingredients like flour and sugar, in my Basics of Cake MasterCourse. You’ll learn to perfect the foundation of your cakes with modules on EVERY step of making a cake: mixing, baking, leveling and dividing cake layers, making fillings and frostings, assembling cakes, frosting, decorating, storing, transporting and serving!
#4 Turning cakes out too soon
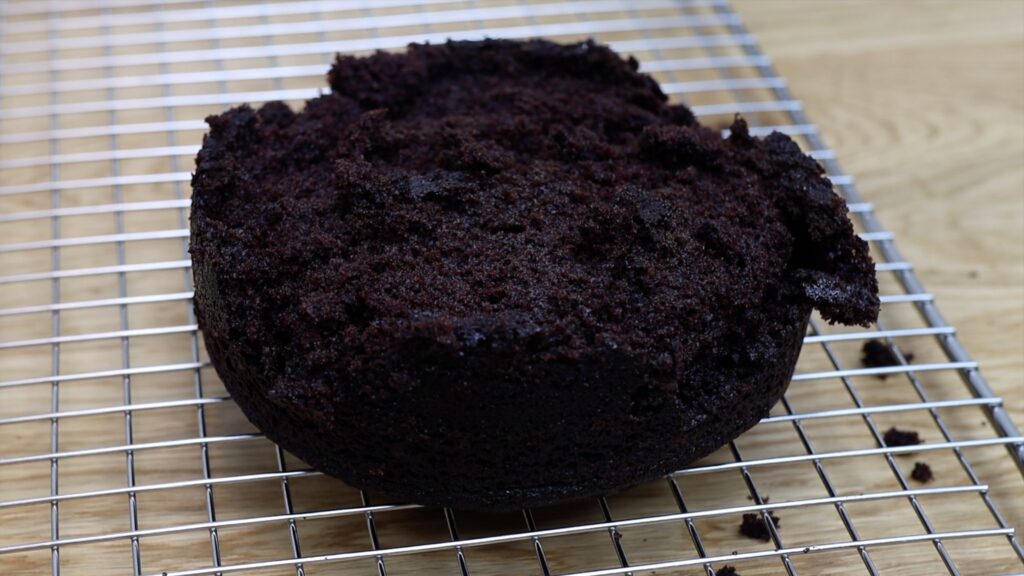
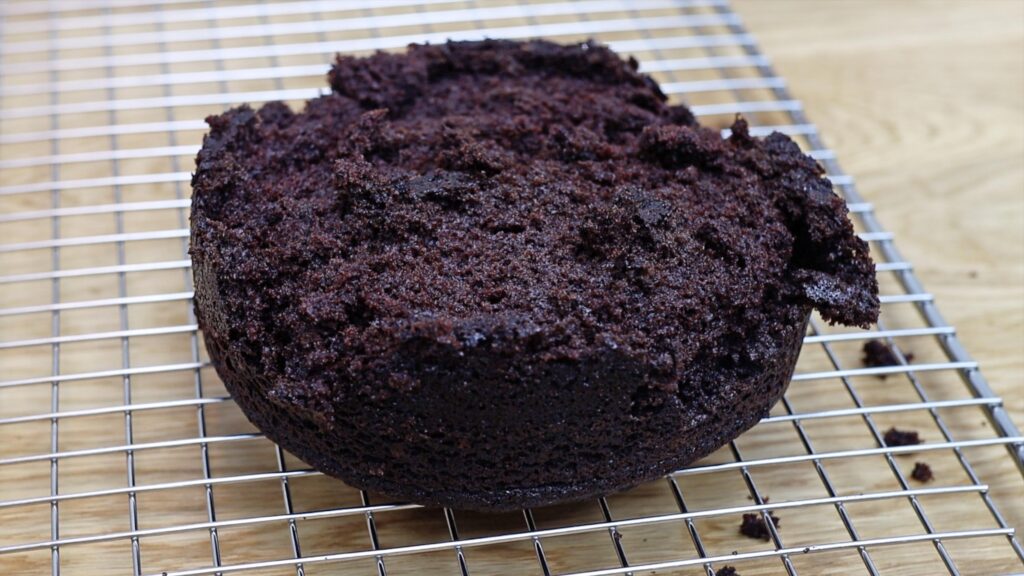
After baking your cakes it’s tempting to flip the pans over straight away but the cakes are still very fragile because the baking process continues as the cakes cool. If you turn the cakes out now, they’re likely to crack and crumble because they have’t had a chance to firm up properly.
#5 Turning cakes out too late
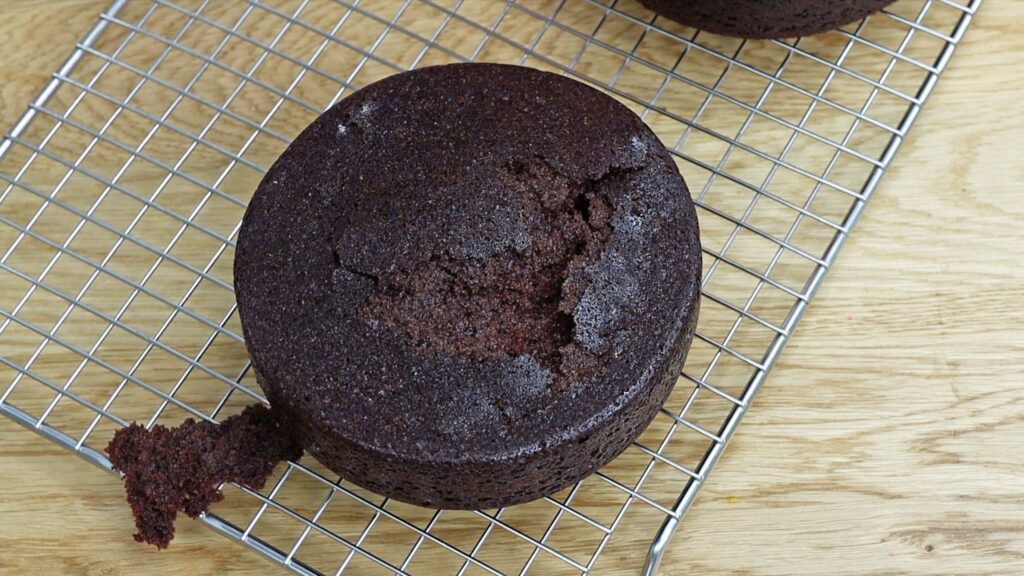
The opposite is true, too. Don’t wait too long to turn the cakes out because once they cool, they can stick to the pans. When you flip the pans over, chunks of cake will cling to the pans instead of coming out neatly with the rest of the cake.
How long should you wait after baking before turning cakes out of pans? As a guide I use this trick: wait until you can pick the pans up comfortably with your bare hands. They’ll still be very warm but not burning. At this point, the cakes have cooled enough to firm up slightly but not so much that they’ll stick to the pans.
I love the pastel colours of Easter and there are SO many cute cake designs for this season! I’m going to share four cake decorating ideas that are easy but pretty and eye-catching.
#1 Pastel frosting
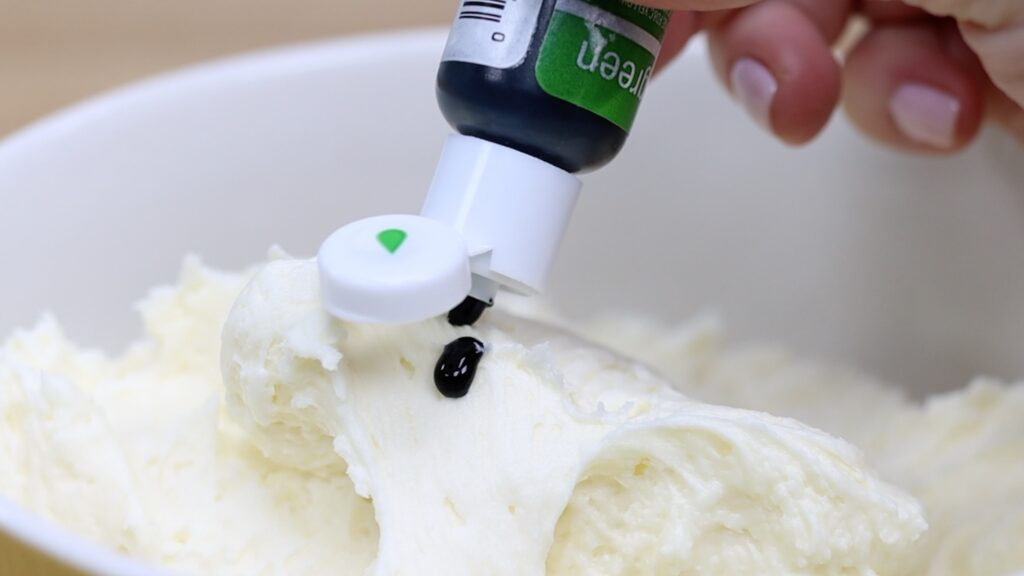
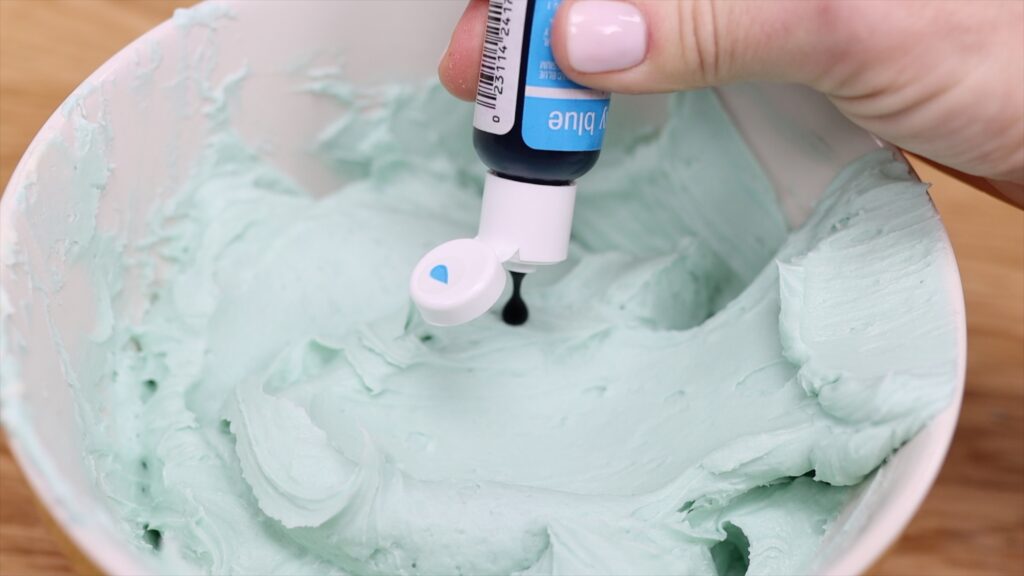
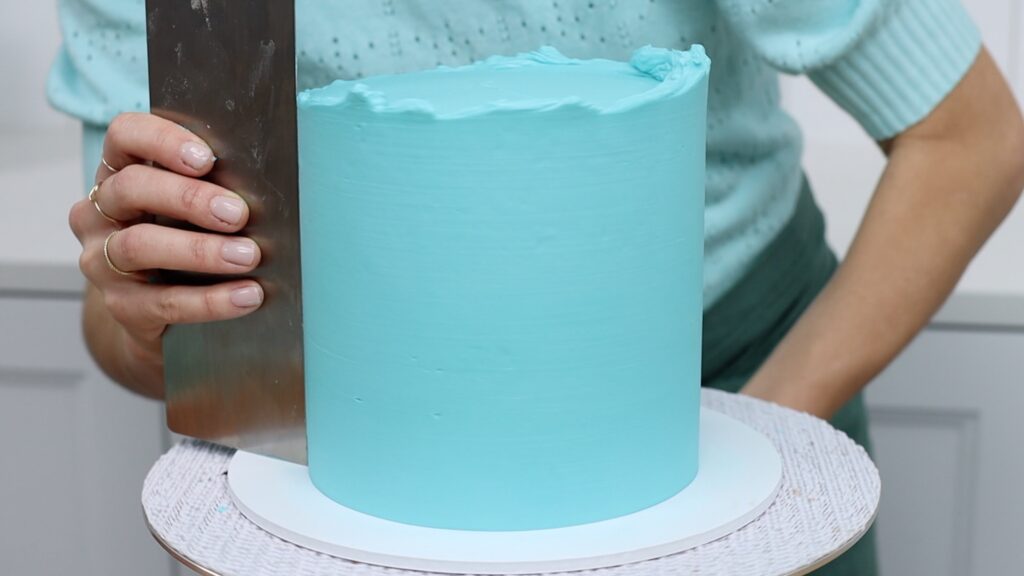
For gorgeous pastel shades of frosting add just a drop of gel colours to buttercream. I know it sounds crazy but I like adding a teeny tiny bit of black to make the colours more muted and romantic instead of super bright. Be conservative with how much gel you add because you can always add more if you want to make it darker.
Gel colours develop and darken with time so make the colour a little bit lighter than what you want. Even a plain cake looks like an Easter cake when the frosting is a pastel colour like this!
#2 Sprinkle border
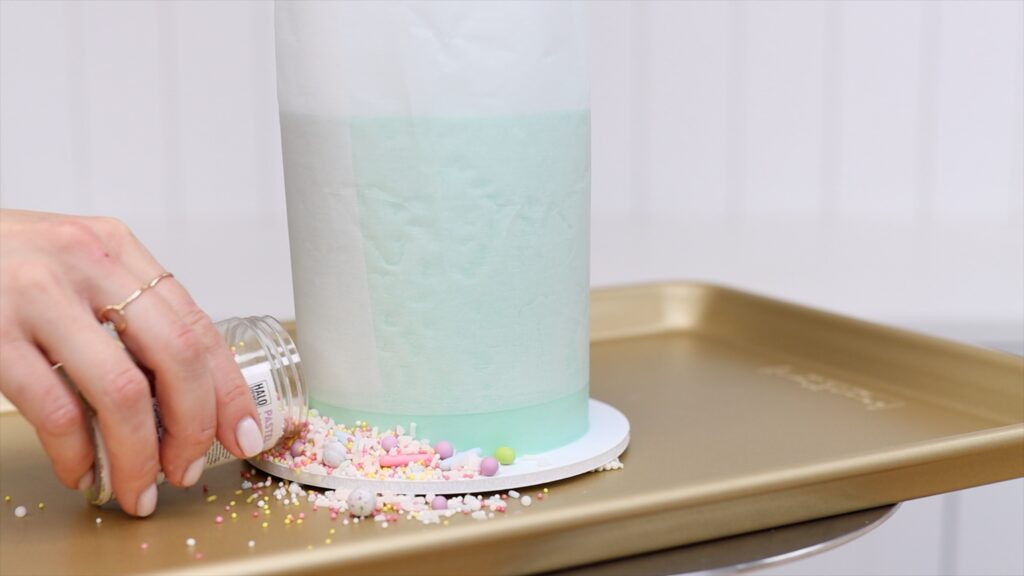
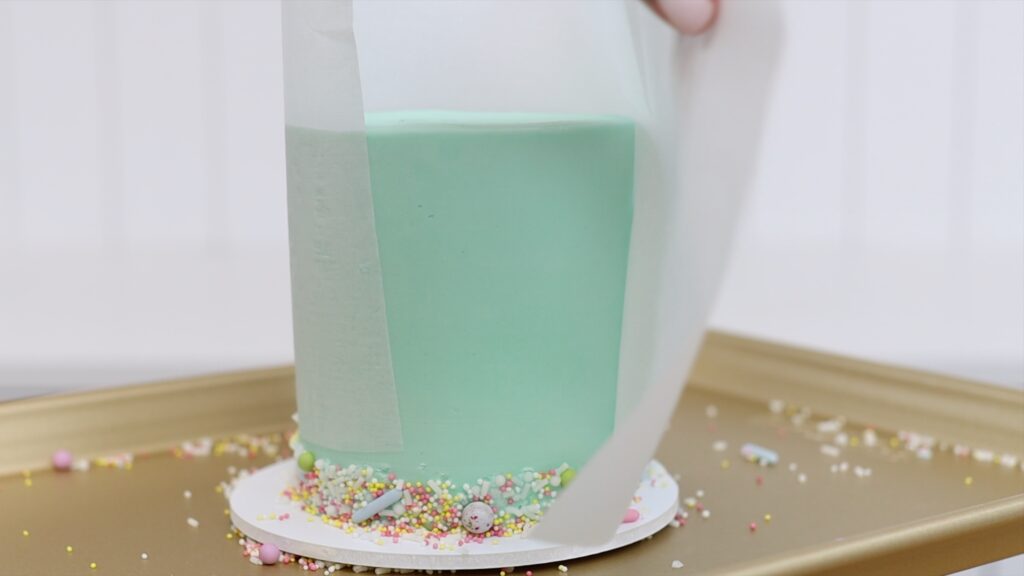
A sprinkle border is a quick way to add colour and texture and detail to a cake. If you use a crusting buttercream like my 4 Minute Buttercream you can wrap your cake in parchment, leaving only the bottom inch or so exposed and that will give you a neat, straight band of sprinkles around the cake. Place your cake on a tray or baking sheet to catch any falling sprinkles and make clean-up quick and easy!
There are lots of Easter coloured mixes out there like this one by Sweet Stamp (use my discount code BGB10)! Just pour the sprinkles out, scoop them up with an offset spatula or your hands, and push them into the frosting on the cake! If you've wrapped your cake in parchment paper, peel it off to reveal a perfectly neat, level sprinkle border!
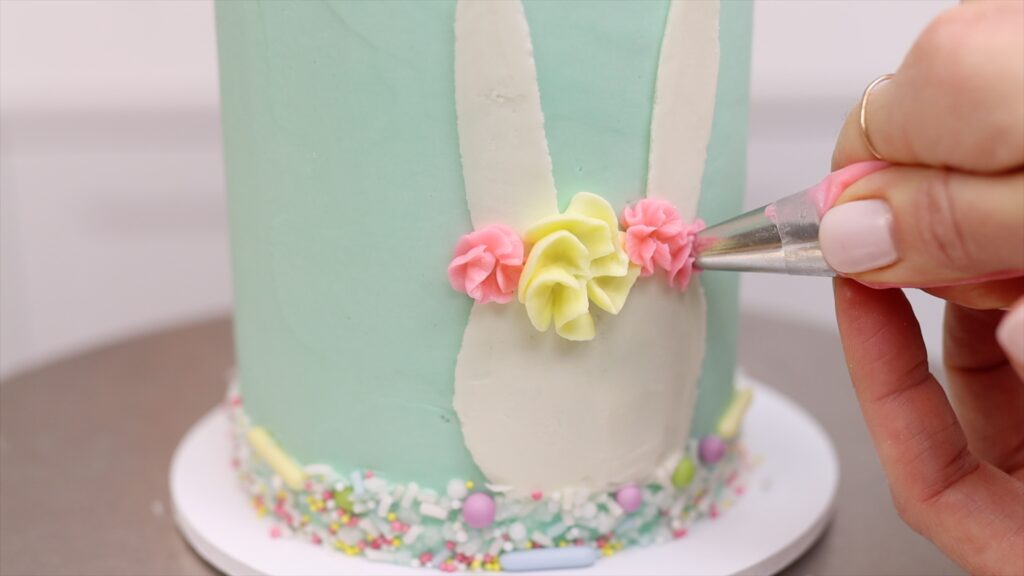
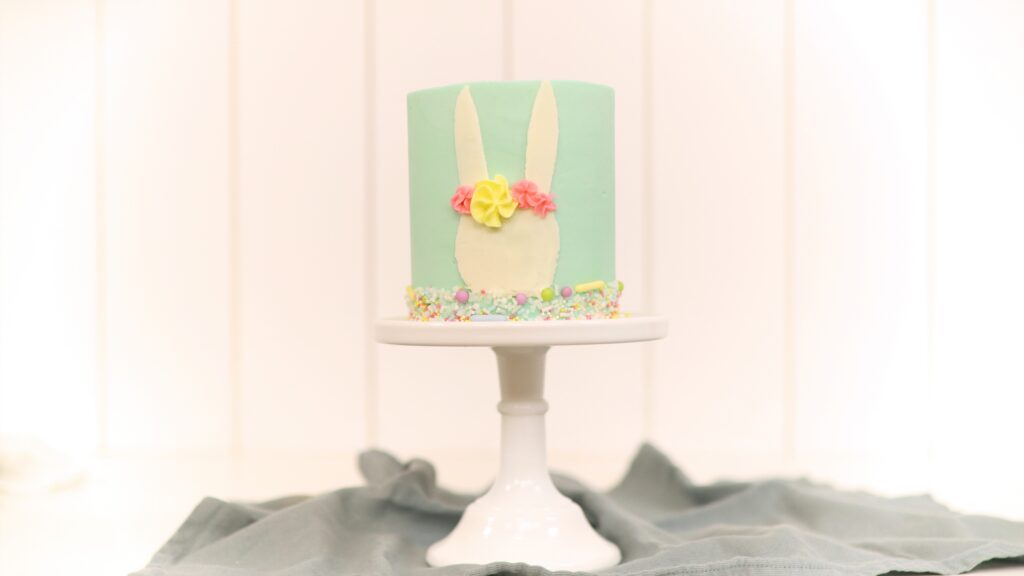
#3 Bunny design
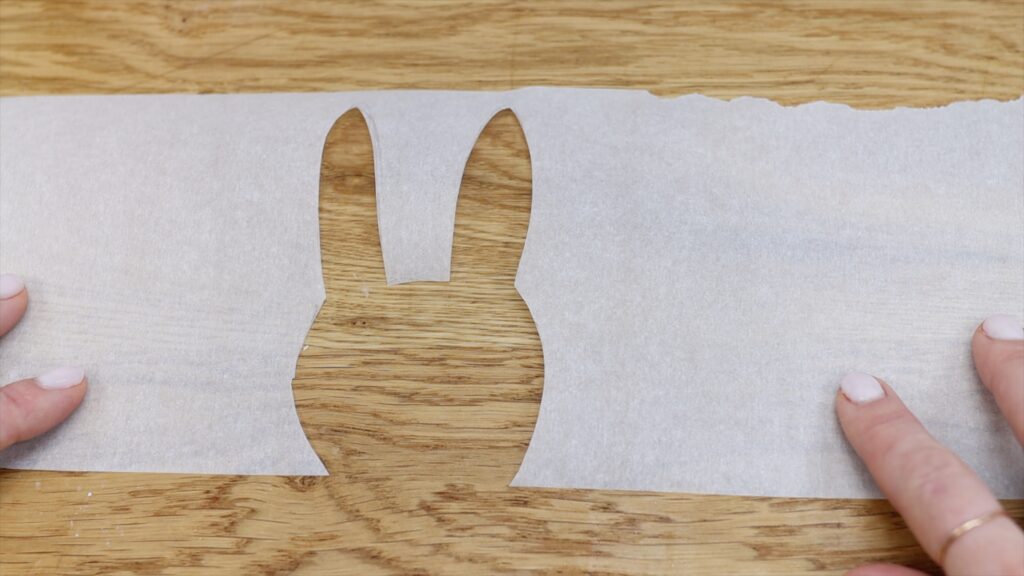
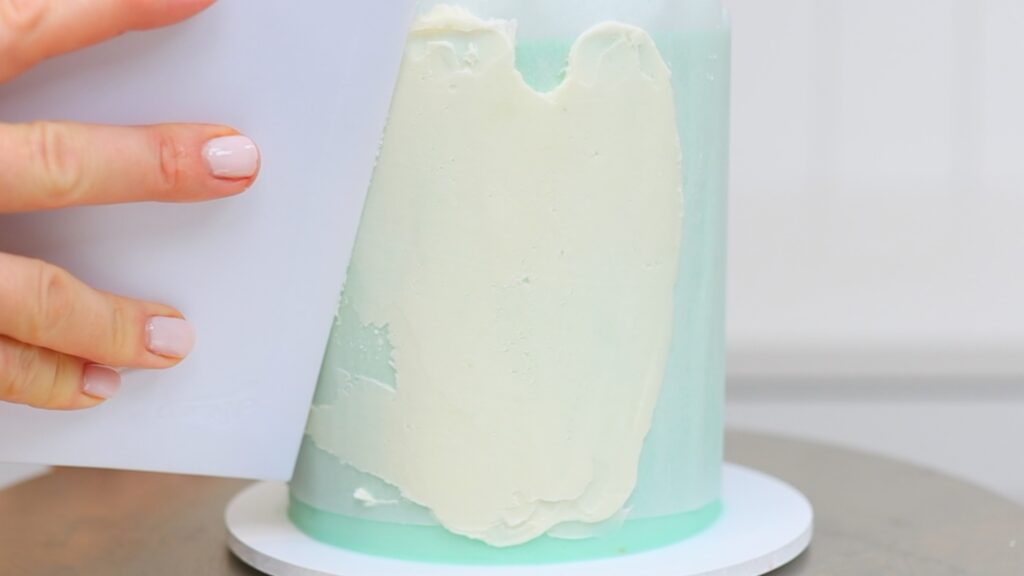
To make a cute bunny stencil, draw an outline onto a piece of parchment paper and cut it out. I like to cut the parchment long enough that I can completely wrap it around the cake and you'll see why in a second.
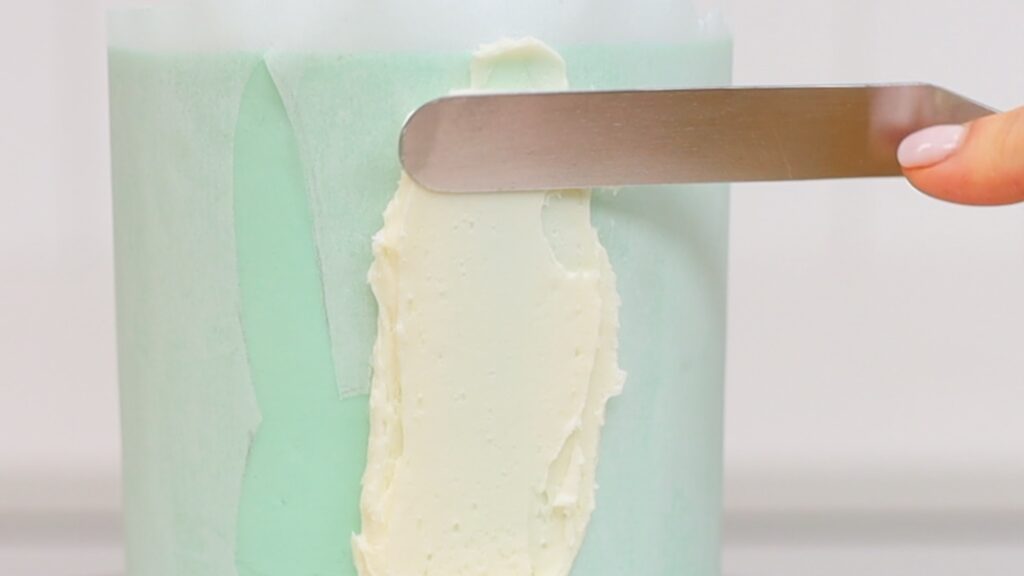
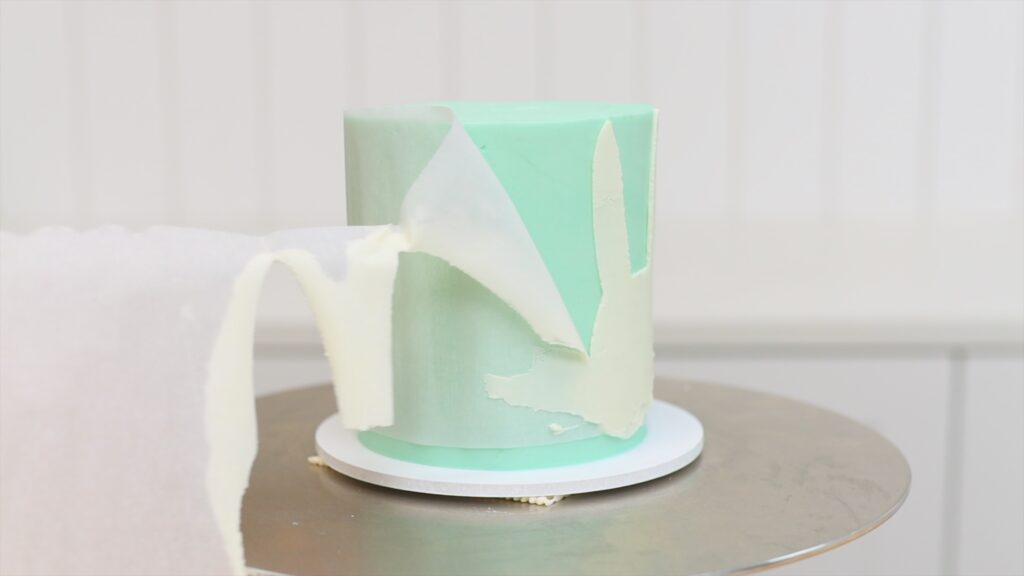
Line the stencil up so that the bunny is wherever you want it to go and then spread buttercream over it to cover up the cake that’s exposed within the stencil. If the parchment wraps all the way around the cake it will hold itself in place, or you can use tape or pins to secure it, but if you cut the parchment shorter you’ll have to press it against the frosting to hold it still and that your fingers will warm up the frosting on the cake and leave imprints on it. Check out this tutorial for more ideas of how to decorate cakes using parchment paper.
Scrape off the excess frosting with your offset spatula or a cake comb. You're aiming for a thin, smooth layers of buttercream that completely covers the cut-out design on the stencil. If the buttercream isn’t flat, spread more frosting over any uneven areas and then scrape again with your cake comb.
Peel the parchment off and voila!
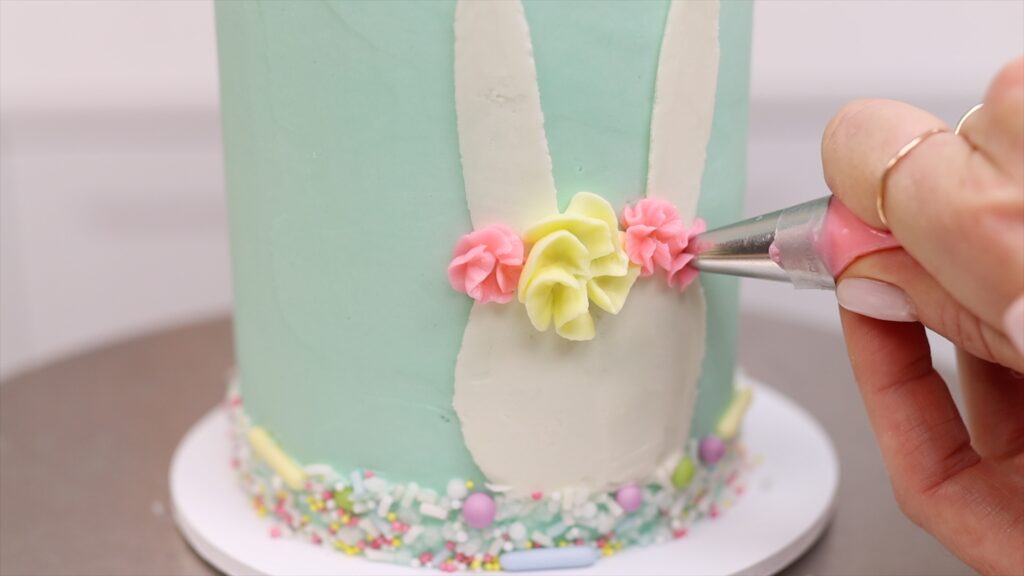
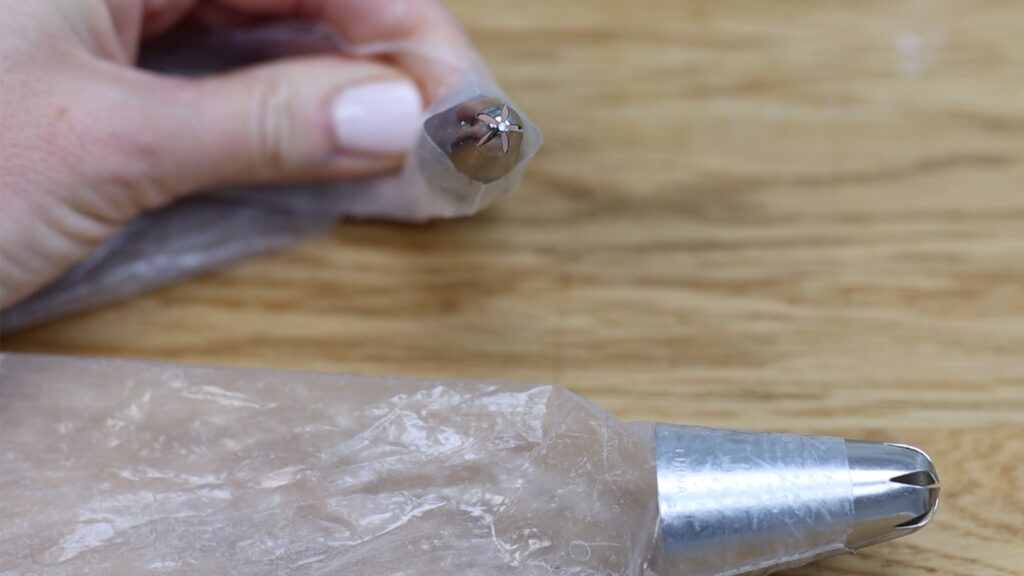
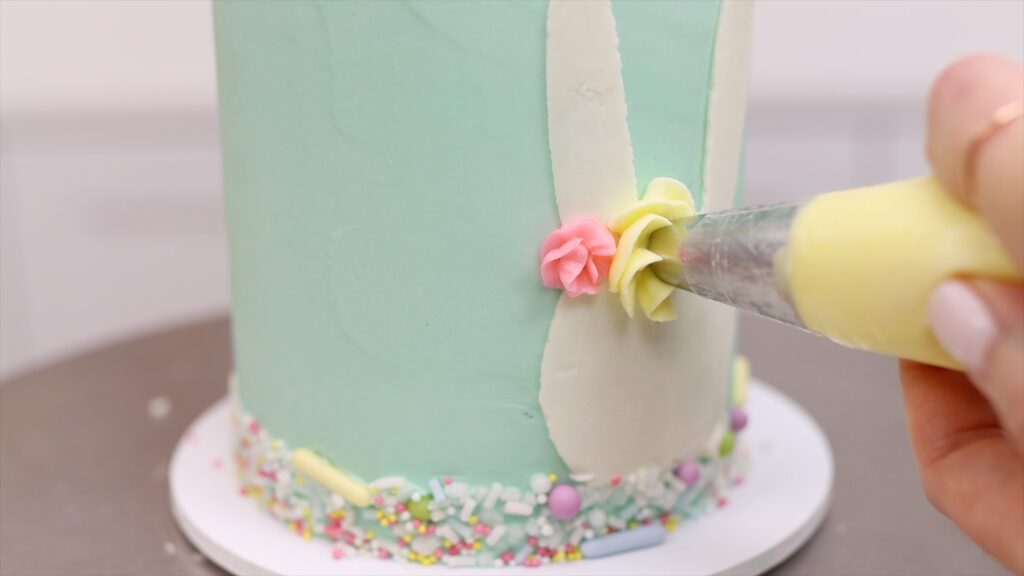
To jazz this bunny up a bit you can pipe on some flowers to make a headband. Did you know that some standard piping tips can be used to pipe multiple petals at the same time? They make piping quick and easy. My favorites are this 2D star tip and #109, which is a tiny "drop flower" tip:
Put each piping tip in a piping bag with just a few spoonfuls of buttercream. These tips both work by squeezing out the buttercream and then twisting the tip to pipe all of the petals at once. It’s slightly awkward twisting along the side of a cake but I love the way these flowers look! Simple and quick, but so pretty!
#4 Easter egg nest
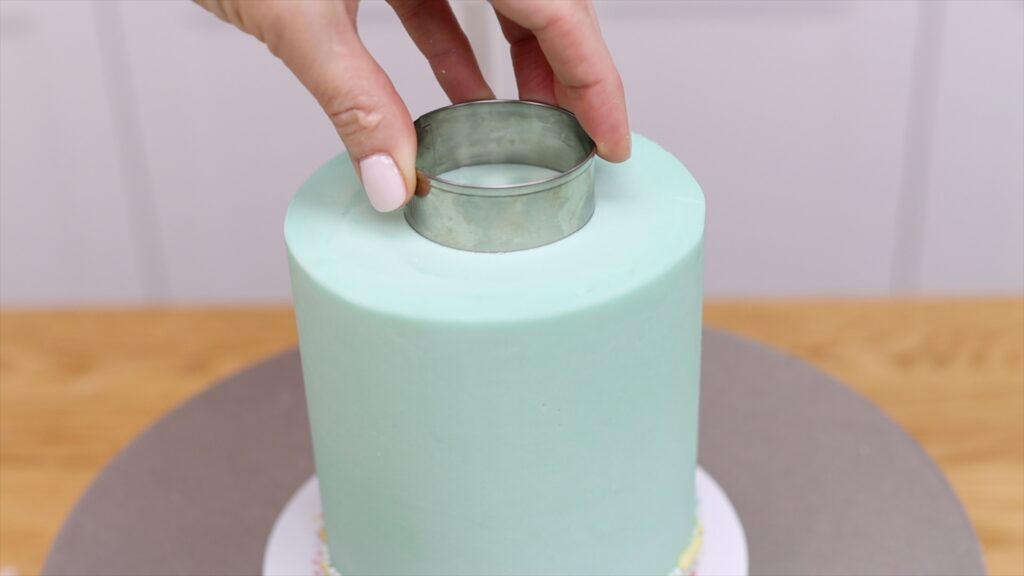
Now let’s make a chocolate Easter egg nest. Press a round cookie cutter or the rim of a glass into the top of the cake as a guide of where your nest will be.
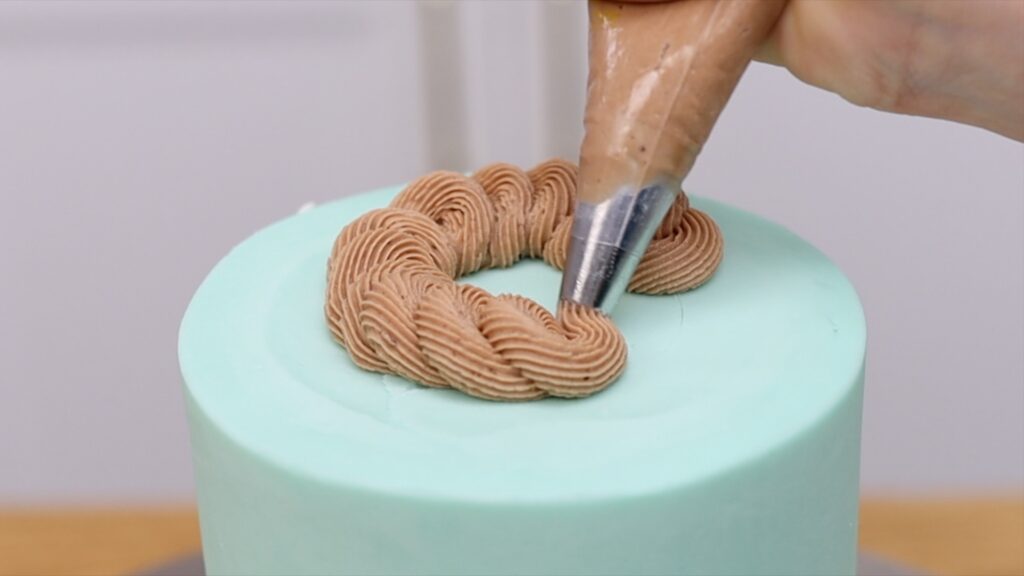
Use any star tip but choose one that fits the size of your cake. For example, a 1M tip is too big for my little 4” cake so I chose to a #199 open star tip instead. I’m using my Best ChocolateButtercream but you could use vanilla tinted with brown gel instead. Pipe a rope border by spiralling the buttercream in a circle, overlapping each circle or loop of buttercream with another one. The prongs of the star tip will create ridges or grooved texture in the piping that makes this look like a nest.
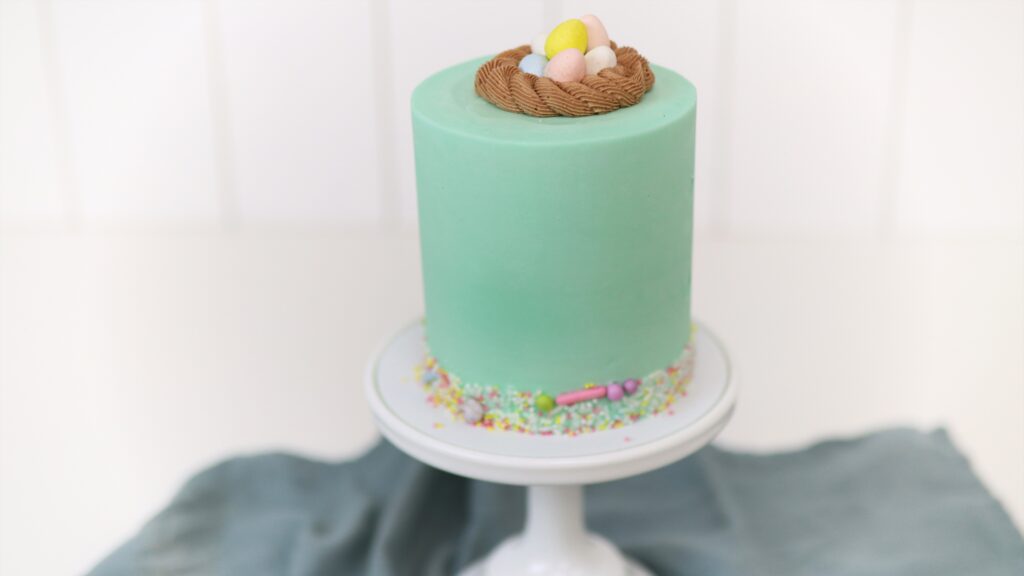
Add some Easter eggs and you’ve got a pretty, colourful Easter cake that only took seconds to decorate!
I hope you’re seen some ideas you like! Tell me in the comments which is your favourite. Happy Easter!
Would you ever guess that the cake in the photo below was made with broken cake layers? It’s so frustrating when cake layers crack or crumble but here’s an easy hack to make them usable. I'll also show you why cake layers break and how to prevent it happening.
To watch a video version of this tutorial instead, scroll to the bottom of the page.
WHY do cake layers break?
Straight out of the oven, cakes are very delicate because they firm up as they cool. If you turn the pans over straight away, the cakes can fall apart or crack or crumble as they fall out of the pans. If you wait until the cakes cool and only then turn the pans over, the cakes can stick to the pans and you’ll find chunks of cake stuck to the bottom of the pans and big holes in your cakes!
How can you prevent cakes from cracking and crumbling in the first place?
There are three ways.
First, check your pans before you use them to make sure they aren’t scratched or dented. Scratches in the non-stick surface of the pans will open up areas where the cake can stick, and dents mean that a pan is no longer perfectly round, so the cake can’t slide straight out of the pan.
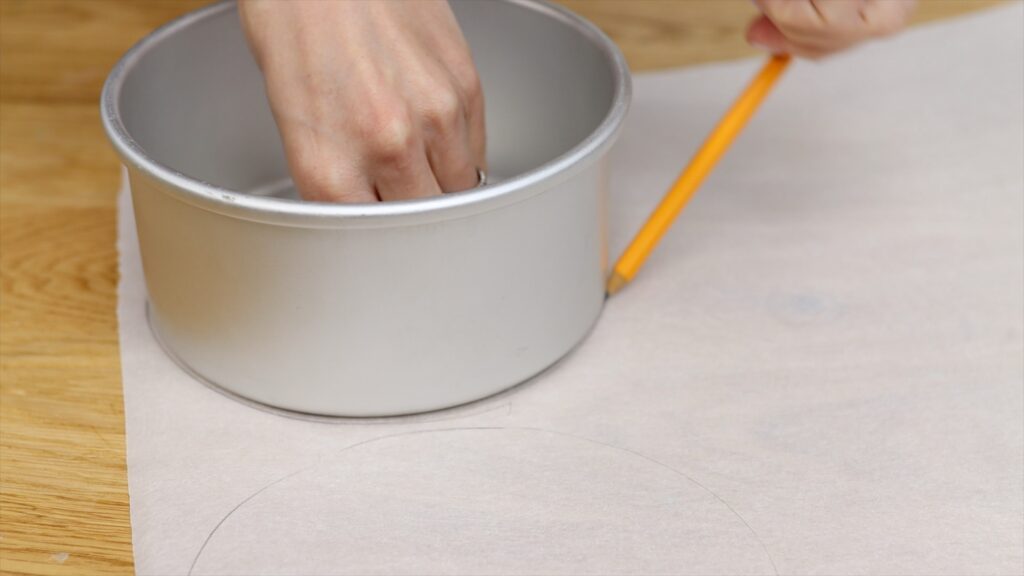
Second, always grease your pans before pouring batter into them, using butter or oil or a non-stick spray, and you can dust the pans with flour too if you like. Or to be extra safe you can line them with parchment paper, tracing around the pans onto the paper and then cutting those circles out and putting them in the bottom of the pan for the easiest, neatest turning out of cakes.
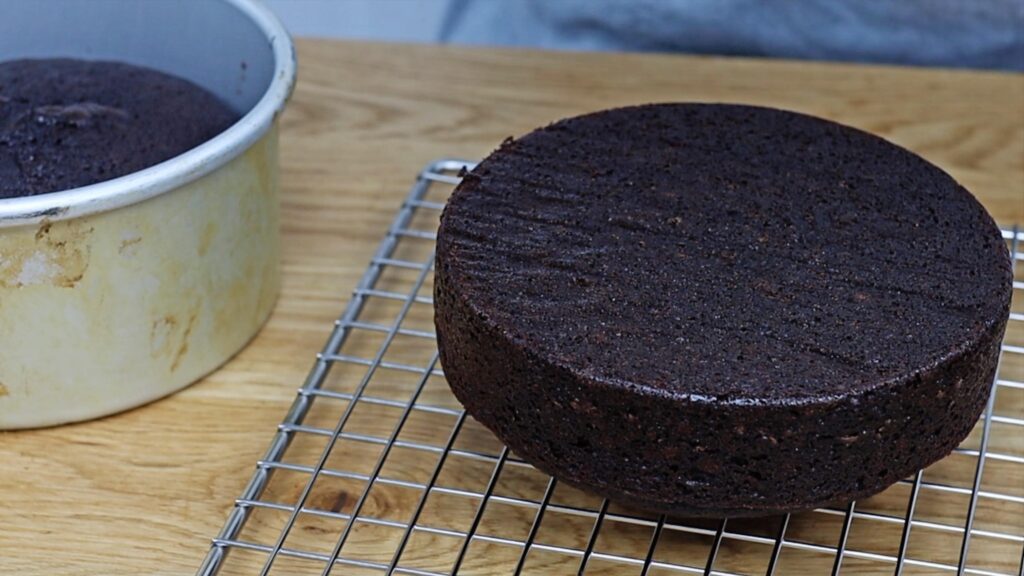
Finally, after the cakes come out of the oven, wait about 10 minutes before you turn them out. Keep poking the pans to check the temperature and as soon as you can lift the pans up with your bare hands without burning yourself, the cakes are cool enough!
How can you fix broken cake layers so you can use them for your cake?
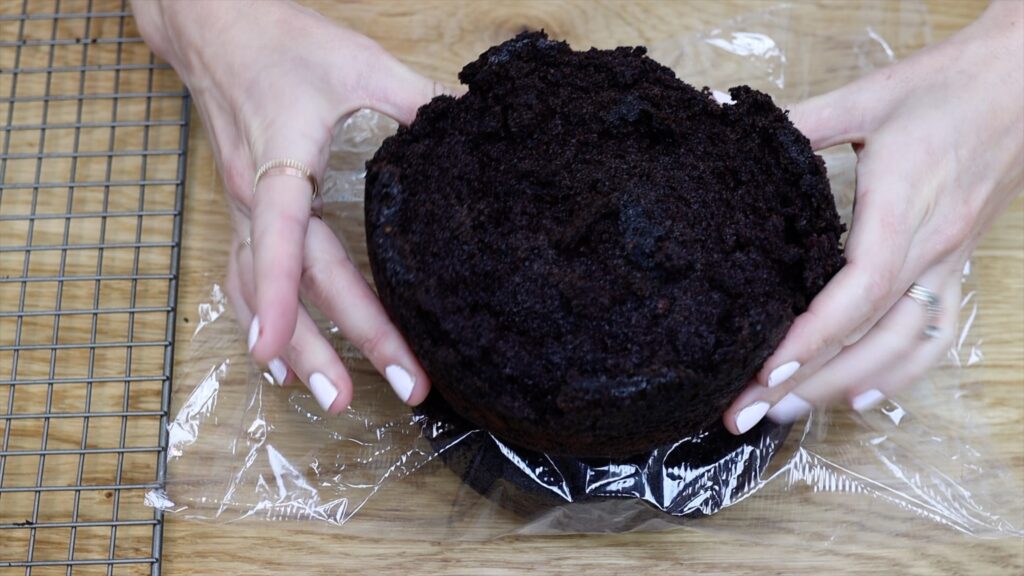
Now for the part you’ve been waiting for! After taking cakes out of the oven, let the layers cool completely and then wrap them up tightly in cling film or Saran Wrap and put them in the freezer for 2 hours or overnight. The pieces will freeze together, which makes them much easier to handle.
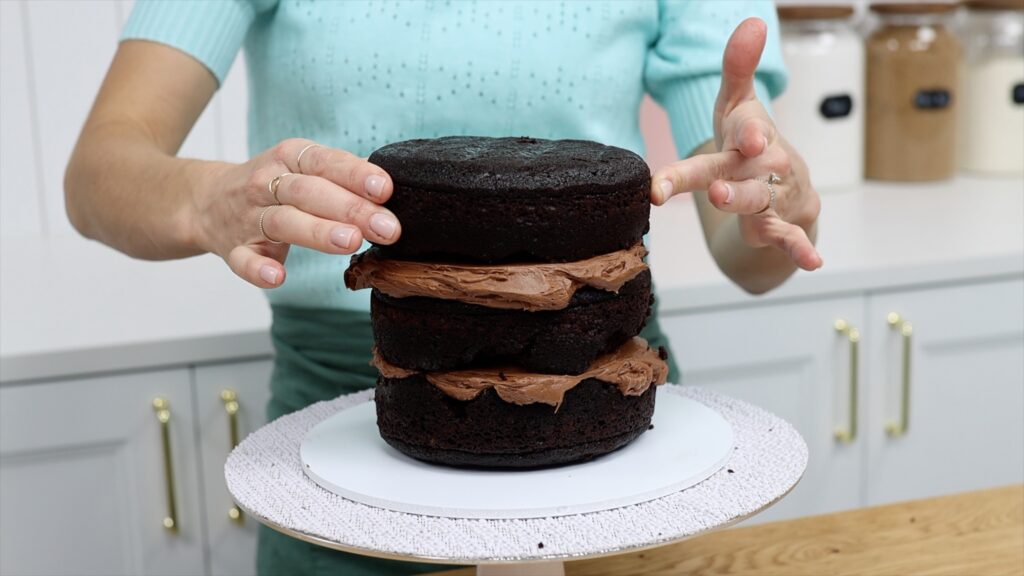
Assemble your cake with buttercream as the filling because buttercream acts as glue when it sets. Be generous with the filling because it will sink into any cracks or gaps and fill those in to make the cake level and stable. Alternate your cake layers and filling, and since the layers were frozen they’ll chill and set the buttercream filling within a few minutes, and that buttercream once it’s set will hold everything together like glue.
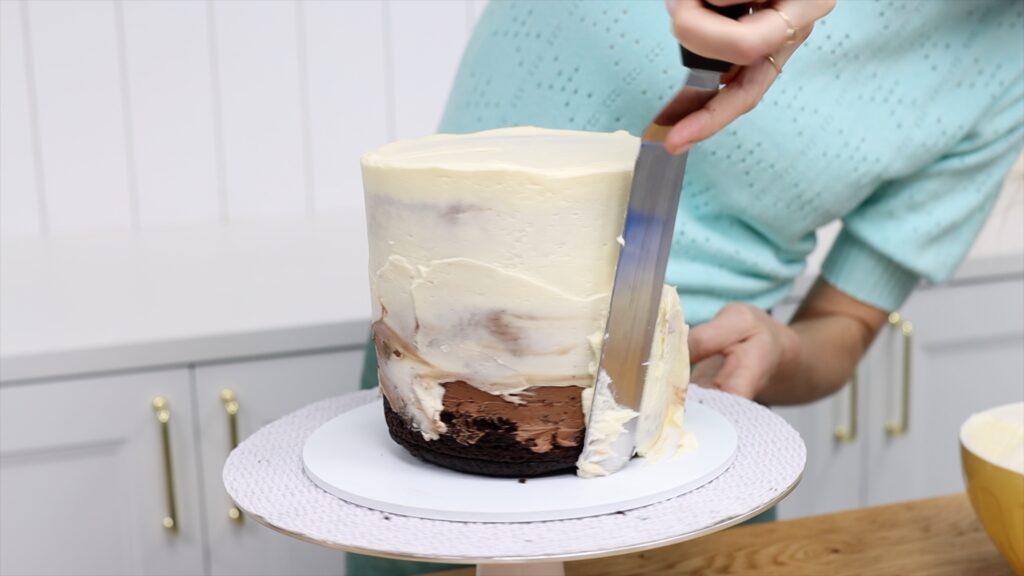
Flatten the sides of the filling if it’s bulged out, by spreading it against the sides of the cake and that will fill in any gaps there to make nice straight sides. A crumb coat is essential if your cake layers are broken because this first layer of frosting, called a crumb coat, will catch any crumbs that come off the cake and then chill the cake for 30 minutes in the fridge or 15 minutes in the freezer.
Spread on your final layer of frosting, and since the crumb coat has been chilled, this final coat will sit on top of it and none of the crumbs from the crumb coat will get through into this layer of frosting so you’ll have beautiful, crumb-free frosting and a straight, level cake and even when you cut into it, no one will ever know how ugly the cake layers were originally!
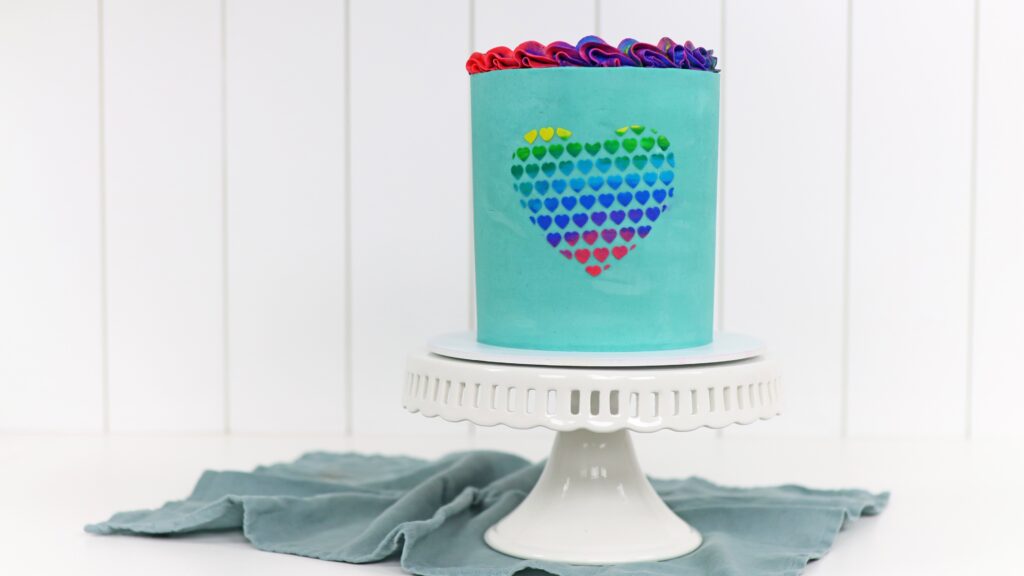
Stencils are a quick way to decorate cakes for any occasion but with this 5 minute cake decorating technique you don’t need to buy fancy stencils for every cake - you can make them yourself with what you already have and create eyecatching, unique designs.
Step 1: Prepare your colours
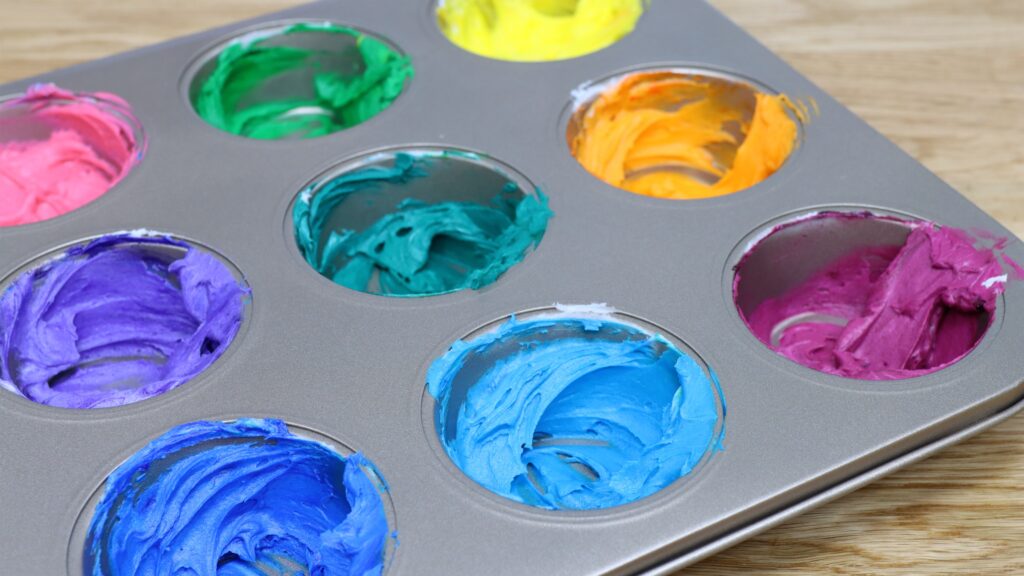
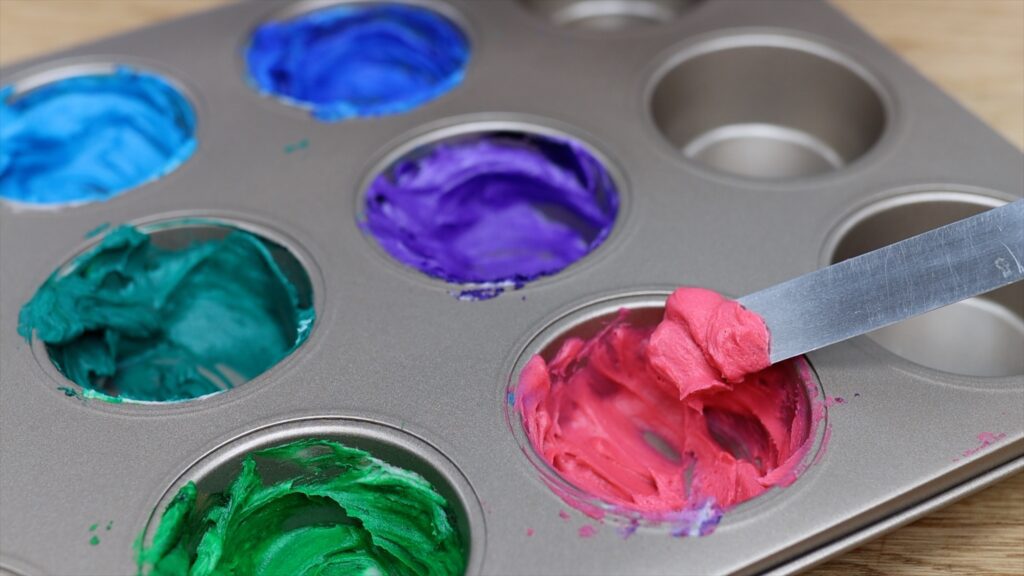
Let’s start by making a colour palette for the stencil design. This is my 4 Minute Buttercream but you can use any kind of frosting. These are gel colours, which I love because they’re so concentrated so you only need a drop to make a really bright colour. If you choose to make several colours, using a cupcake pan is a great trick to save yourself a lot of time when you clean up because it’s much quicker to wash one of these than to wash lots of little bowls.
You really don’t need a lot of buttercream for a stencil, just a few spoonfuls. If you’re not going to use this buttercream straight away, cover it with cling film or Saran Wrap so the buttercream doesn’t dry out and crust.
Step 2:Make a stencil
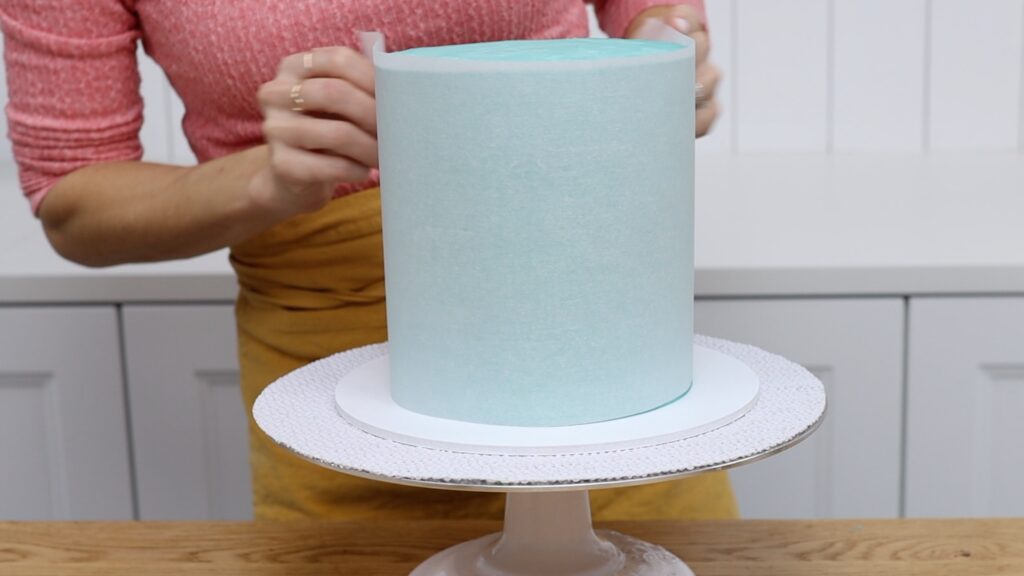
It’s useful to do this after assembling and frosting your cake so you can choose the right size of your stencil. Cut a piece or parchment or wax paper or baking paper long enough to wrap all the way around your cake and trim it so that it’s only as tall as your cake, and then mark the edges of where you want your design to be. Now put the cake back in fridge to keep the frosting chilled.
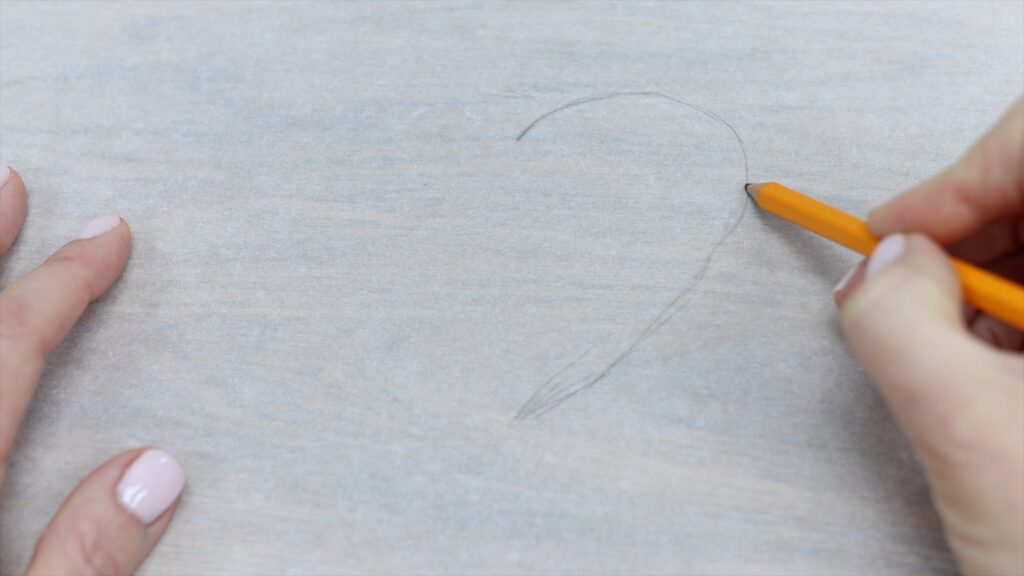
Draw a shape in the middle or you can trace an image that you’ve printed or a design you like from a notebook cover or wherever, but simple shapes are the most successful for this technique. We’re going to add more detail in a minute. Cut the shape out, keeping the area around the shape intact.
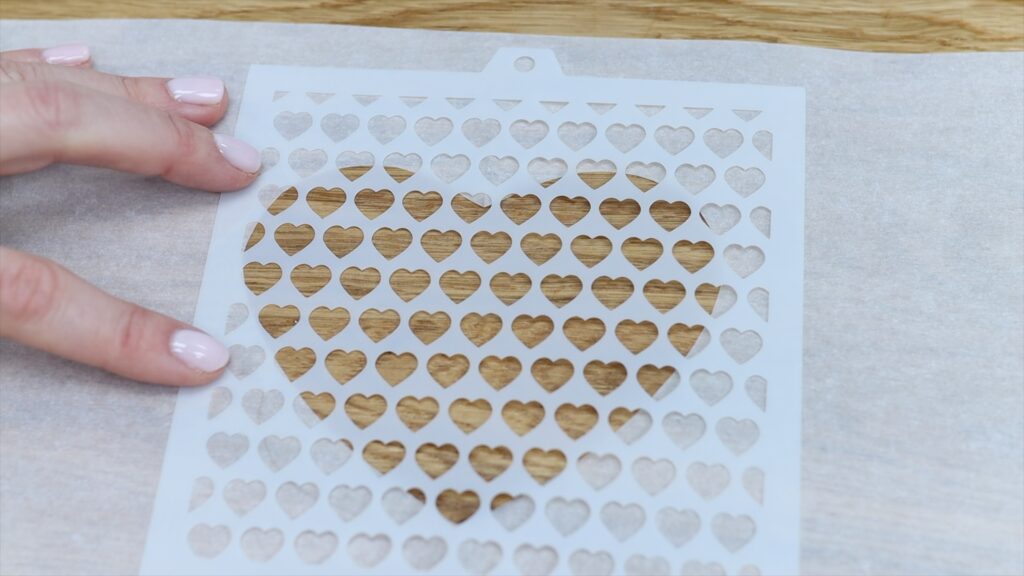
This next part is optional but if you want to add more detail to your design, choose any stencil you have and place it over the parchment stencil you just made, taping it to secure it if you like or you can do this in a moment.
This is a great way to re-use the stencils you buy, creating new designs by making parchment stencils to use with them to give them different shapes, and now none of your stencilled cakes will look the same!
Step 3: Attach the stencil to your cake
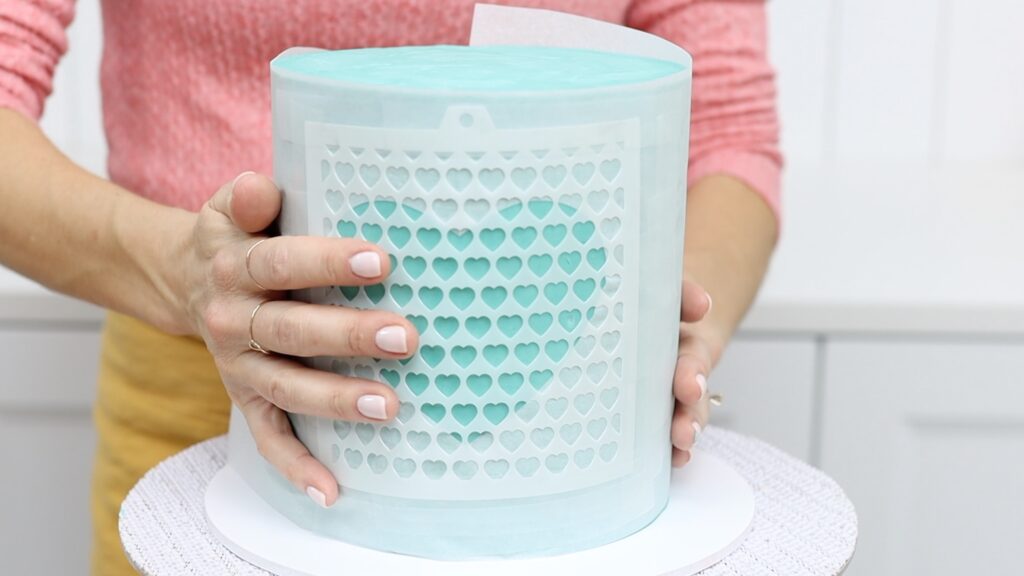
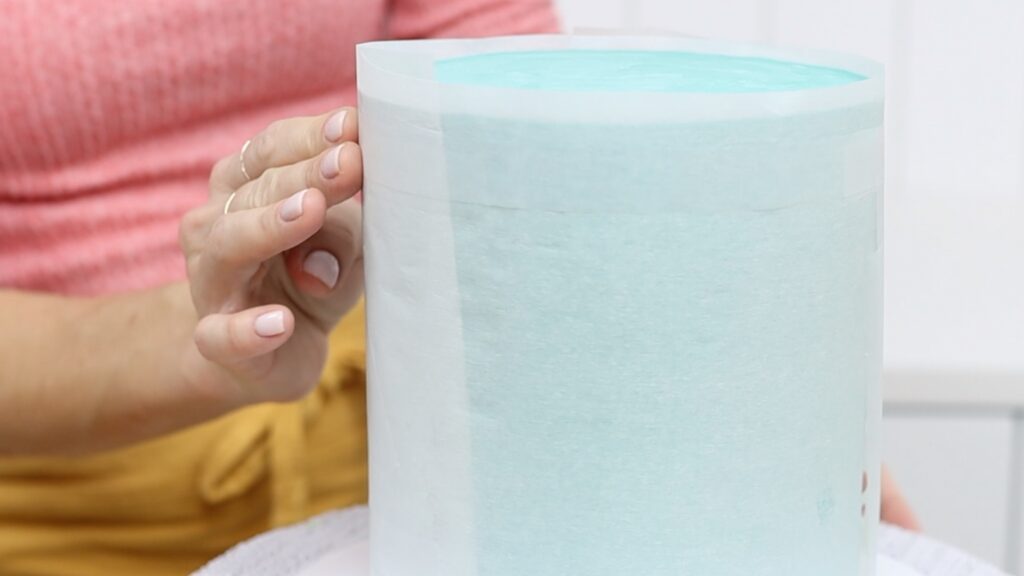
Take your cake out of the fridge and wrap the parchment around it. This paper is intended to be non-stick, so tape doesn’t work very well on it. Luckily, tape does stick to itself, so cut a long piece and wrap it all the way around the parchment so that it overlaps and sticks to itself.
Do this around the top and bottom of the parchment so that the parchment and the stencil are wrapped tightly around the cake.
Step 4: Create a stencildesign on the cake
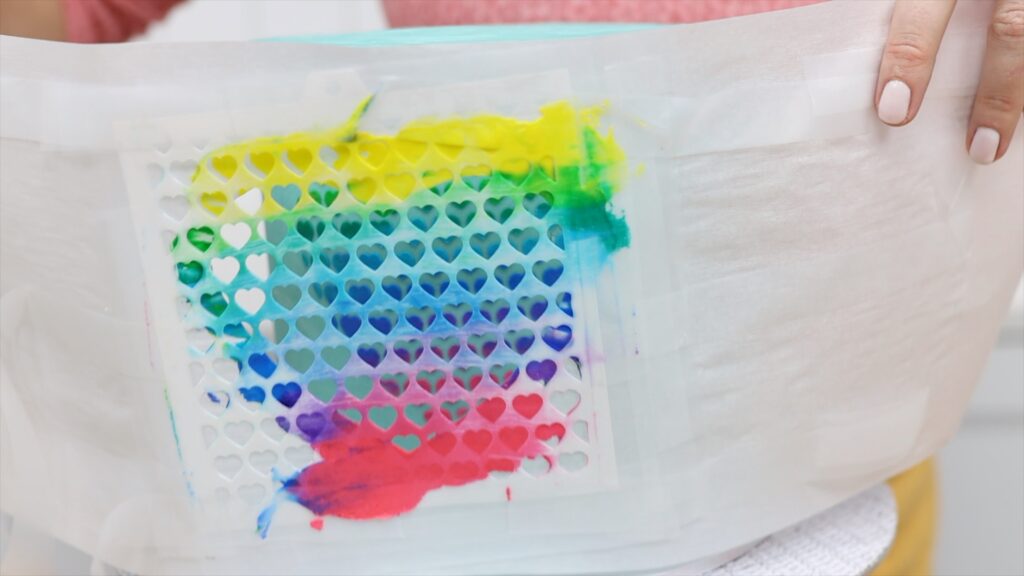
Scoop up your first colour with an offset spatula and spread it over the bottom of the stencil. I love to work my way up so I can see what I’m doing.
Spread from the outer edge of the stencil towards the middle of the shape, in both directions, so you’re pushing the buttercream into the shape and that way you won’t accidentally push it underneath the stencil, under the outline of the shape. Switch between colours until you've covered up the whole stencil.
The reason you can wrap the stencil around the cake without damaging the frosting is that buttercream crusts, which means if you chill it in the fridge for at least an hour or ideally overnight, the frosting gets really firm, so you can touch it without leaving an indent or any texture on the cake.
The rainbow buttercream on the stencil looks quite messy and to flatten it you can use your offset spatula or a cake comb to scrape from one side of the stencil to the other, taking off the excess frosting and leaving a flat, smooth layer of coloured buttercream behind. When you can see most of the plastic parts of the stencil, you’ll know you’ve scraped off most of the excess frosting and it’s ready.
Cut the tape to release the parchment and peel the stencil off straight away because if you wait for the coloured buttercream to set you’ll get jagged, uneven texture along the outline of your shape but by peeling it off now, the results will be much neater. If the stencil smudges anywhere along the outline you can tidy it up with a toothpick.
If you’re enjoying this step by step tutorial you’ll love my MiniCourses, where I teach fun and unique cake designs in easy-to-follow steps with close up video instruction and detailed but concise explanations! Join the Club for access to all of my MiniCourses or join the ClubPLUS for all of my MiniCourses and MasterCourses and Live Workshops!
Step 5: Add a rainbow border
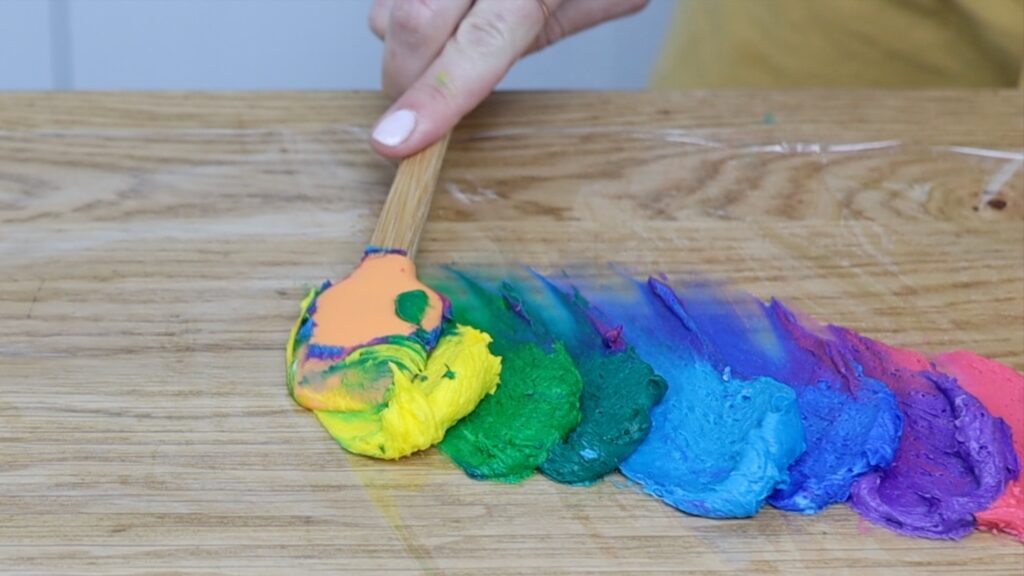
If you have leftover coloured buttercream you can use it for a border on the cake. My favourite way to use lots of colours is to lay out a piece of cling film or Saran Wrap and then spread each colour onto it in a line. This works best with rainbow colours or colours that blend nicely into each other.
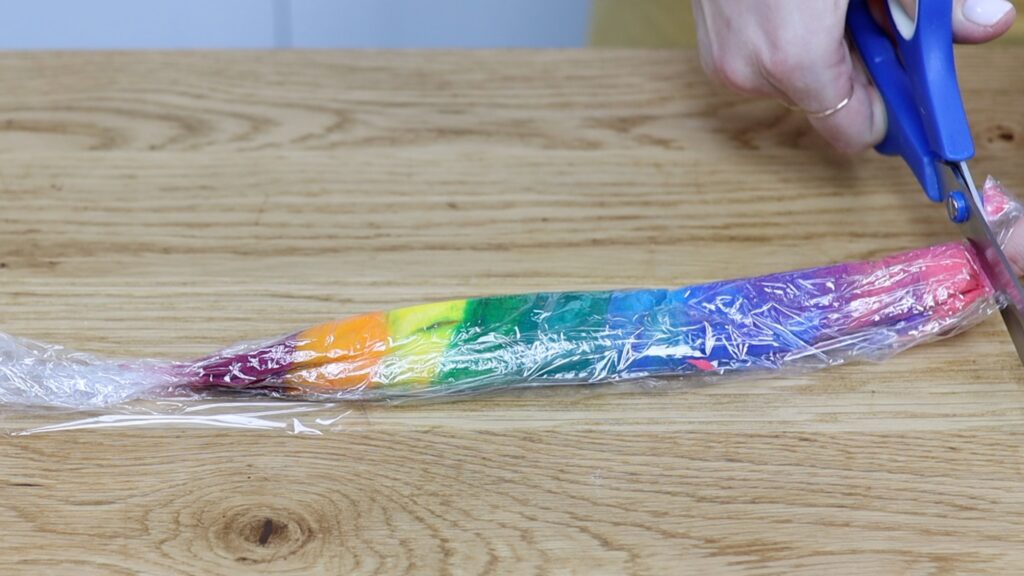
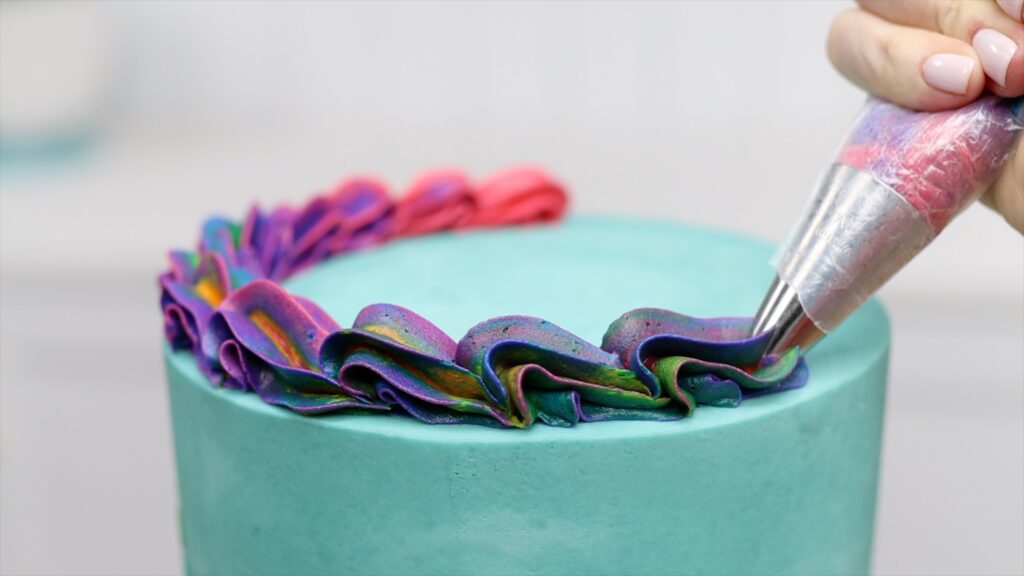
Roll the plastic wrap into a log and cut off one end. Drop the cut end down into a piping bag with a star shaped piping tip and you can pipe swirls onto the top of the cake.
If you don’t have a lot of buttercream, this is a great option: pipe these waves or shells around the cake by squeezing the bag and letting the buttercream bulge out forwards and ten slowly pull the bag away to leave a tail on the wave.
Pipe the next one so that it overlaps and and you pipe these one after the other, the colours at the end of the bag will push through the other colours closer to the piping tip and you’ll create a gradient of colours to match the colours on your stencil design!
So colourful and it’s a totally unique design since the stencil is homemade! What shape will you use on your homemade stencil? Tell me in the comments!
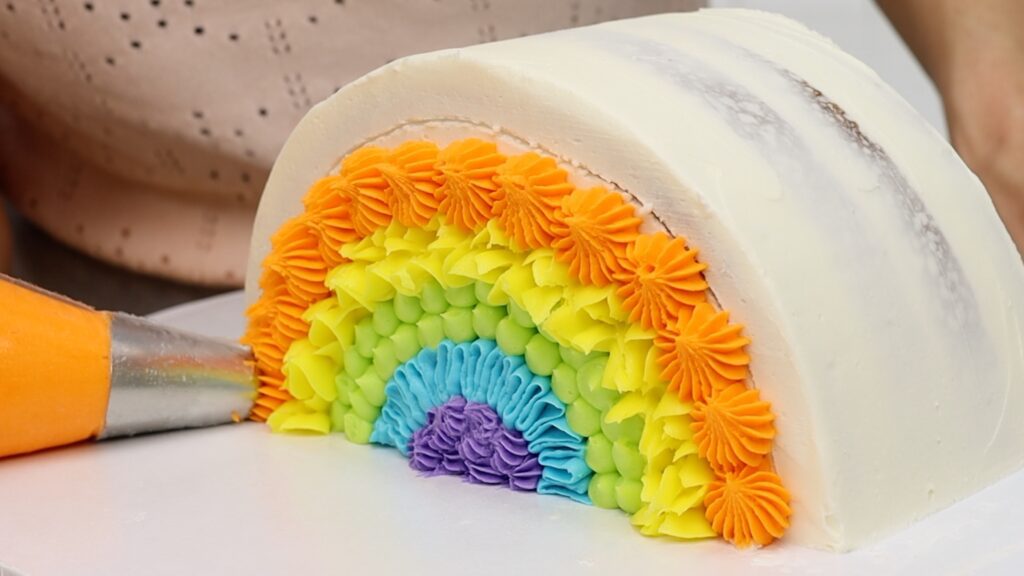
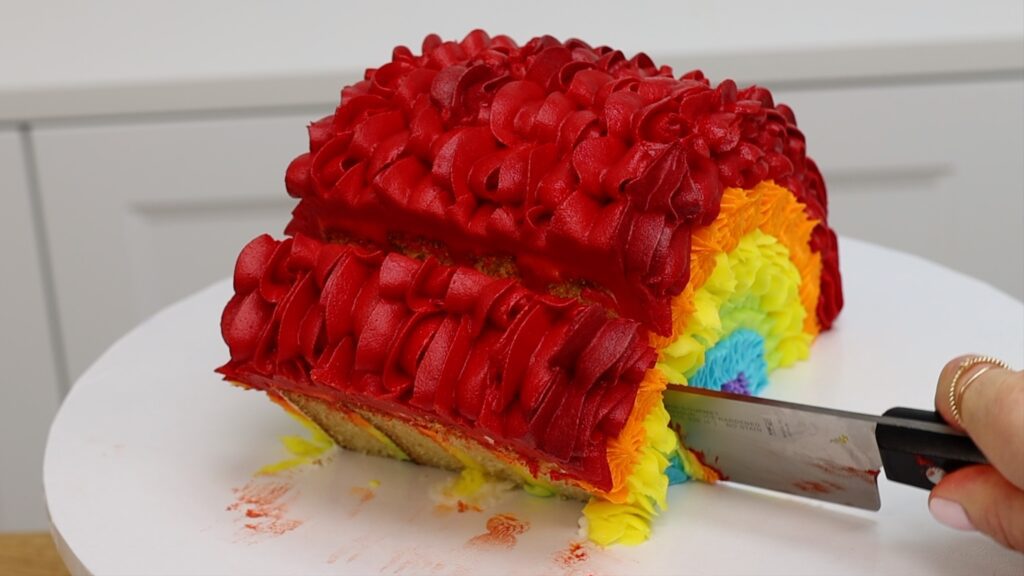
This 3D rainbow cake is rainbow coloured inside and out, with gorgeous textured details and, best of all, it’s easy to make! After baking your cake and preparing your buttercream, decorating this cake will take about an hour.
Prepare the cake layers
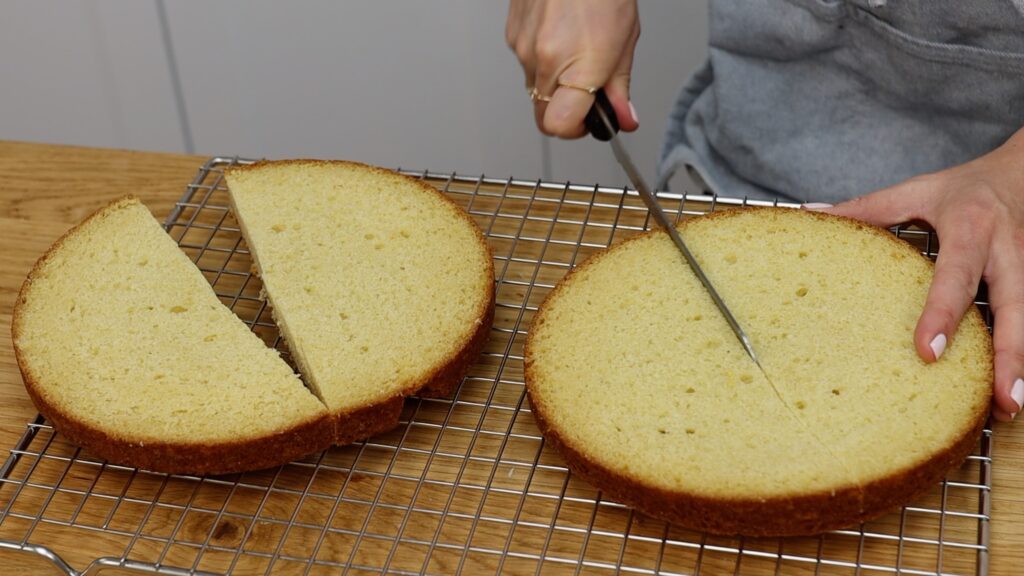
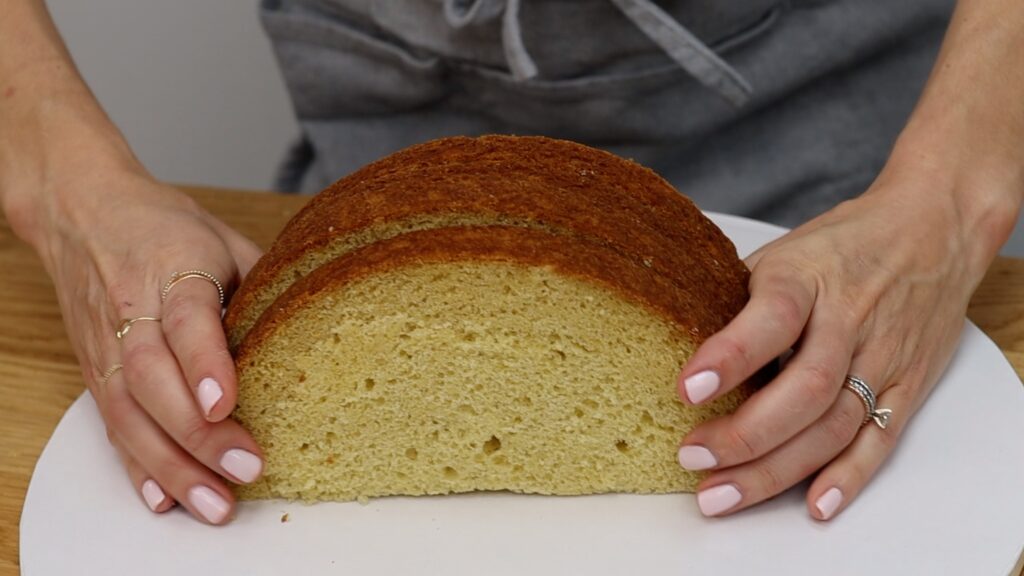
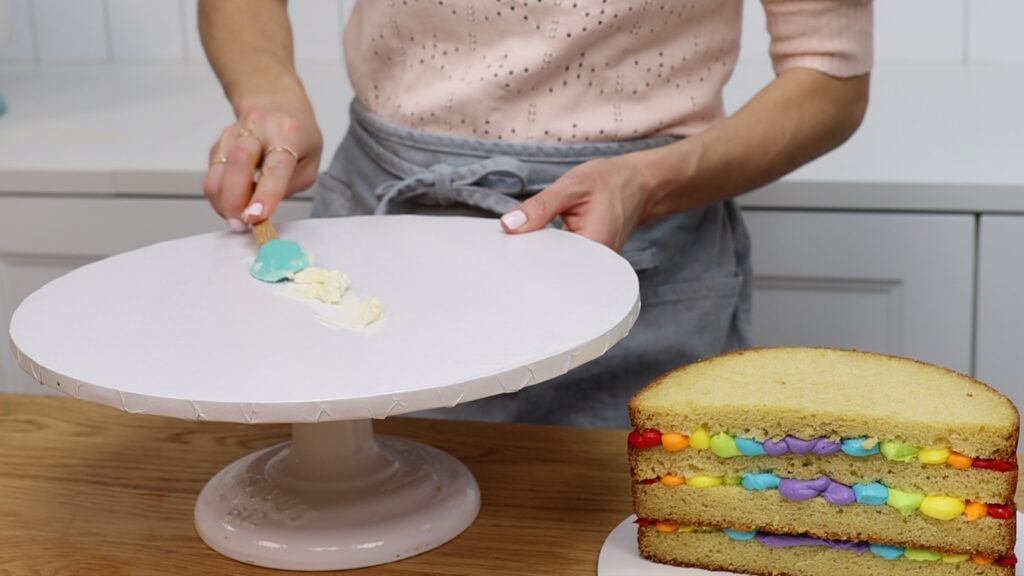
All you need is one round cake layer. Level it if it’s domed by trimming the top off with a serrated knife like a bread knife and then cut the cake layer in half horizontally, using little sawing motions as you spin the cake around and that will help you cut straight through the middle. I find it easiest to do this after chilling the cake in the fridge for about an hour or in the freezer for 30 minutes so it’s less delicate and crumbly. This is an 8 inch layer of my Vanilla Cake. Now you have two round cake layers. Cut both of these in half to make four semi-circles and these will create the rainbow shape of your cake.
Choose a cake board that’s at least 4 inches wider than your cake to leave space for the frosting, but we’re going to assemble the cake before moving it to this board.
Prepare the rainbow filling and rainbow frosting
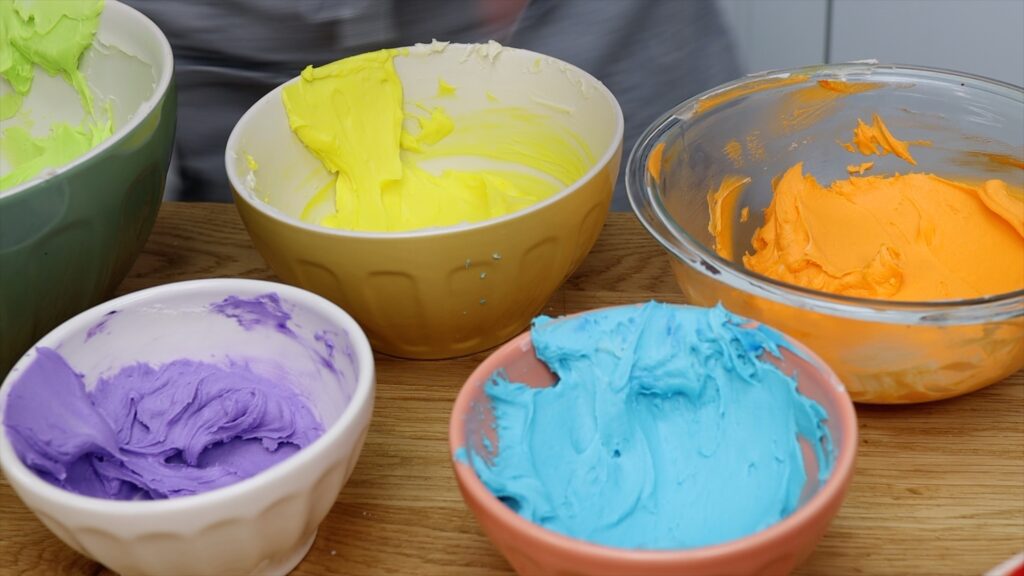
For rainbow frosting I’m using one batch of my 4 Minute Buttercream. Set aside one cup of frosting for later and divide the rest into six bowls. Add a few drops of colours to each bowl and I recommend gel colours because they’re the most concentrated so they’ll give you the brightest and boldest colours.
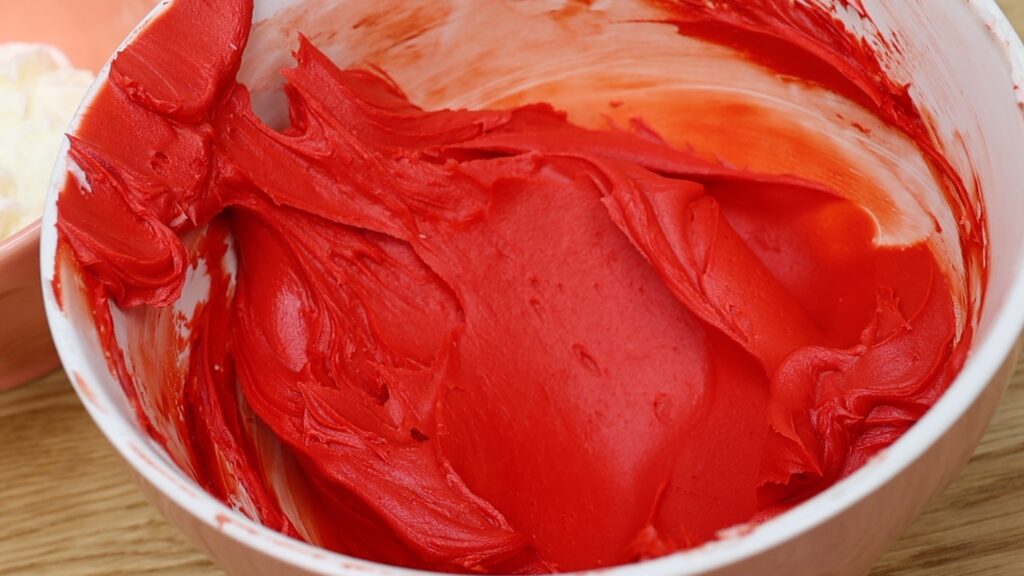
You’ll need the smallest amount of purple frosting, then blue, green, yellow, orange, and for the red frosting you’ll need about three times as much as the orange. Red frosting can be tricky but the secret is simple - use a LOT of gel! If you have time, after mixing the red frosting you can cover it and leave it to develop for an hour and it will get darker.
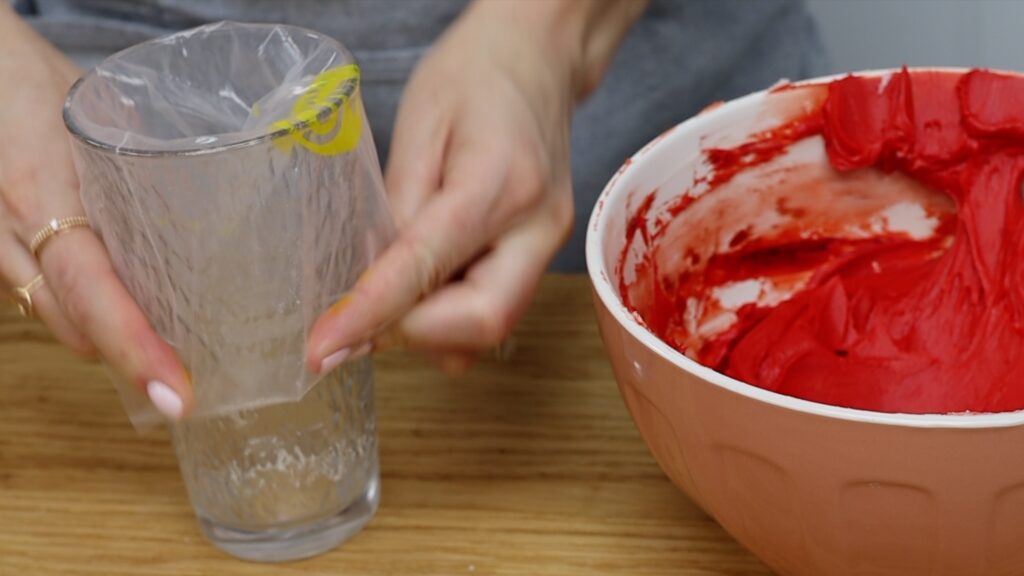
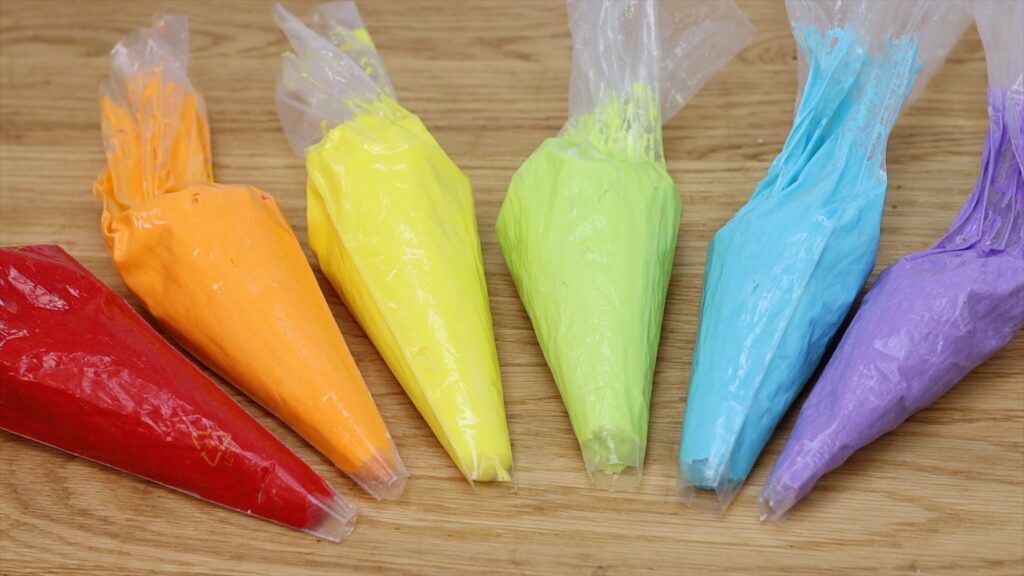
Now put each colour of frosting into a piping bag with the end of the piping bag cut off, but you don’t need any piping tips for this part. You won’t fit all of the red frosting into the bag but that’s fine - you can refill it later. I like to use glasses to hold the piping bags open, folding the top of the bag over the rim of the glass and that keeps the top of the bag clean so your hands don’t get covered in frosting when you pipe.
Assemble the rainbow cake
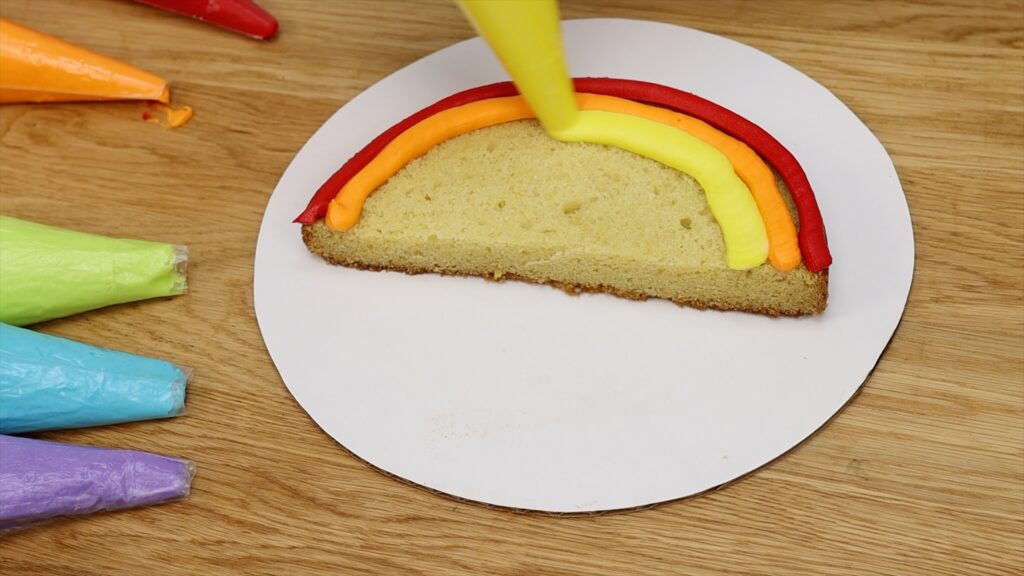
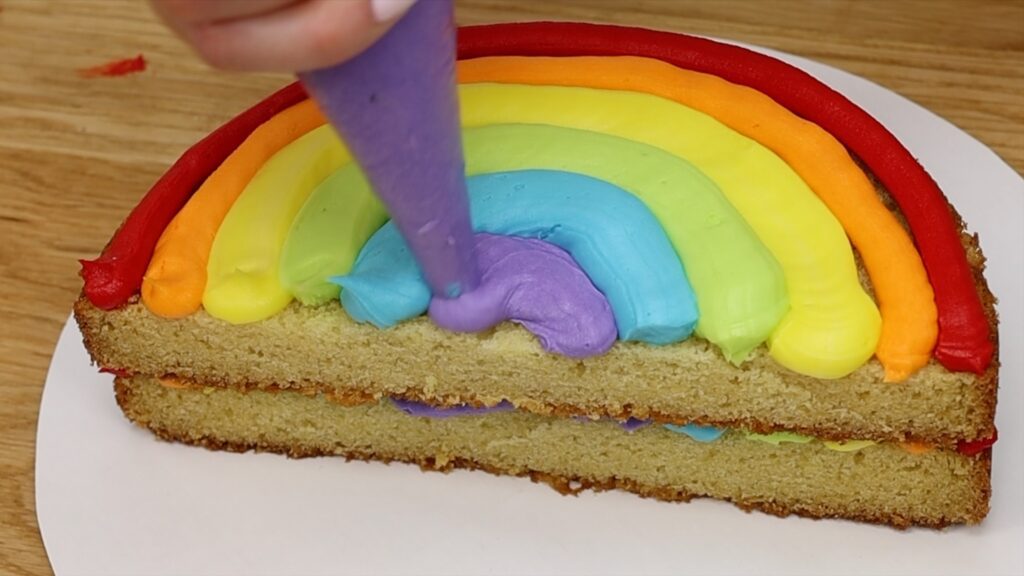
Ok, let’s make a rainbow! Pipe lines of colored buttercream, filling the curve of the semi-circle to make a rainbow. If you start on the outer edge, with red first, it will be easier to keep the curve symmetrical than if you start at the bottom, with purple.
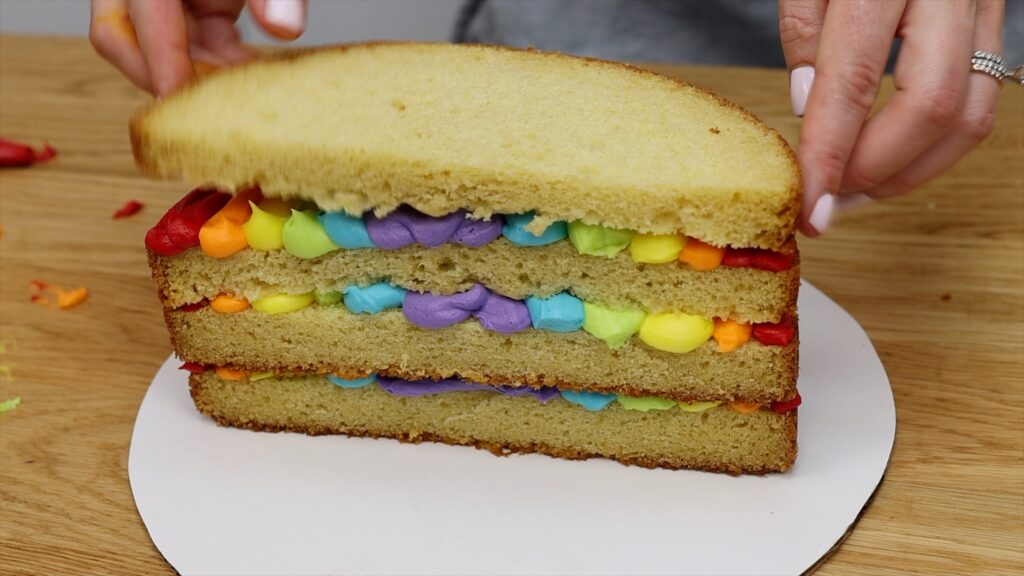
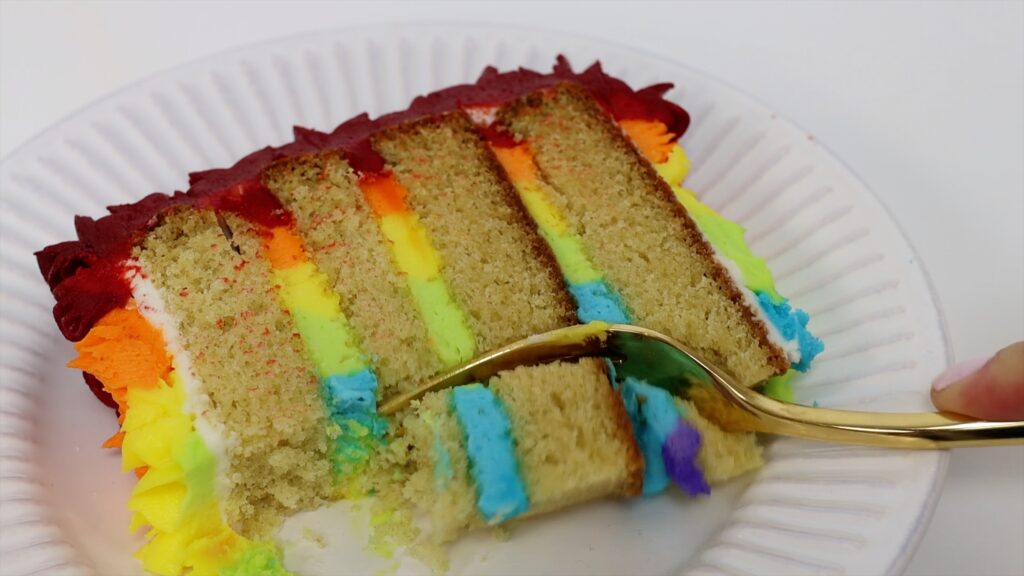
This piping will create a rainbow of filling within each slice when you cut into the cake.
After piping a rainbow of filling onto each semicircle of cake, place the next cake layer on top. Take your time to line it up so that each layer sits directly on top of the layer below, and this will create a straight, level cake.
Now grab your big cake board and spread some frosting along the middle to act as glue, and then flip the cake over so the flat side is facing down and press it into the line of frosting and it will secure the cake in place so it doesn’t slide around as you frost it. Adjust it to center it on the cake board and you should have at least two inches of space all the way around the cake for rainbow piping.
Crumb coat the rainbow cake
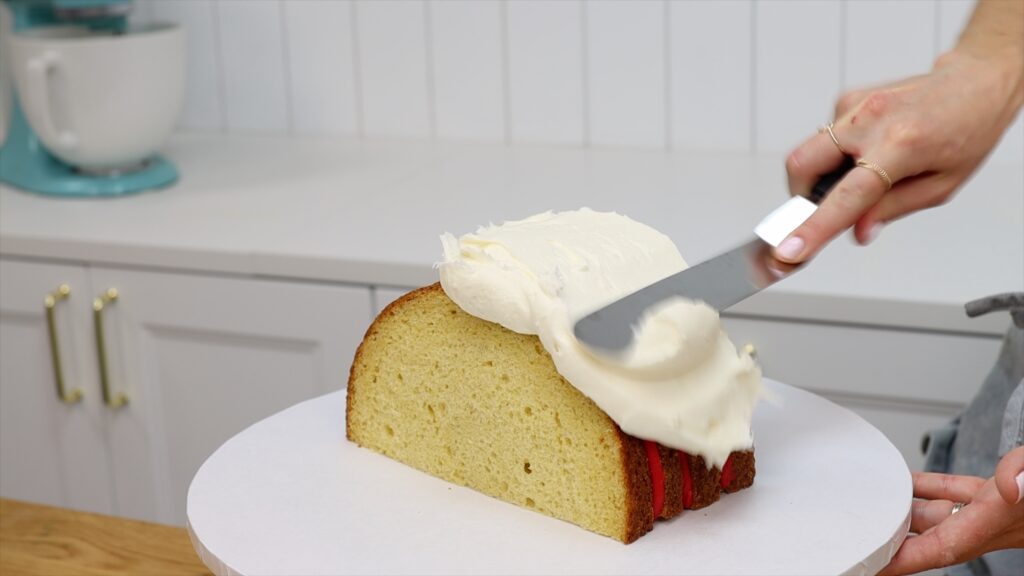
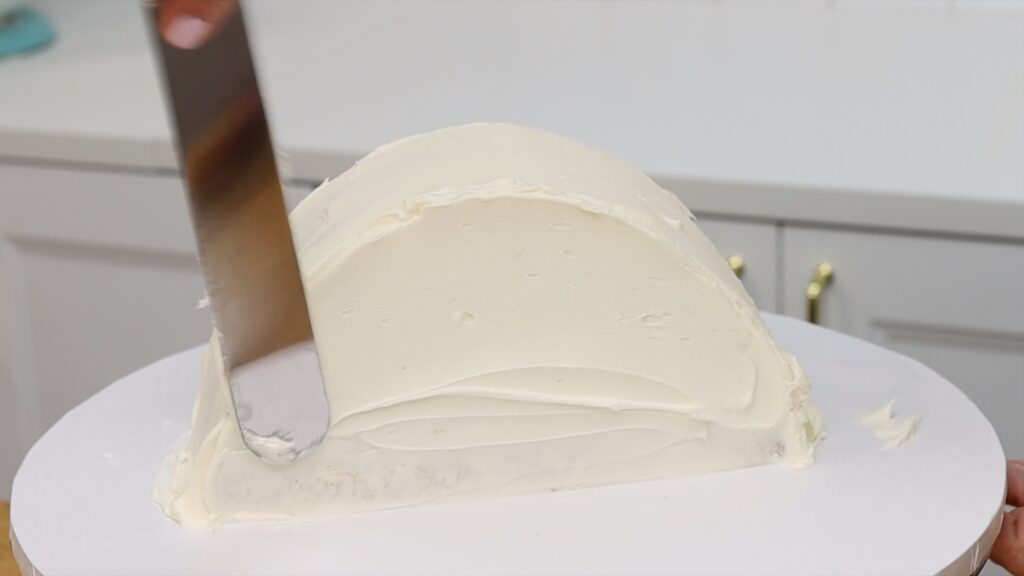
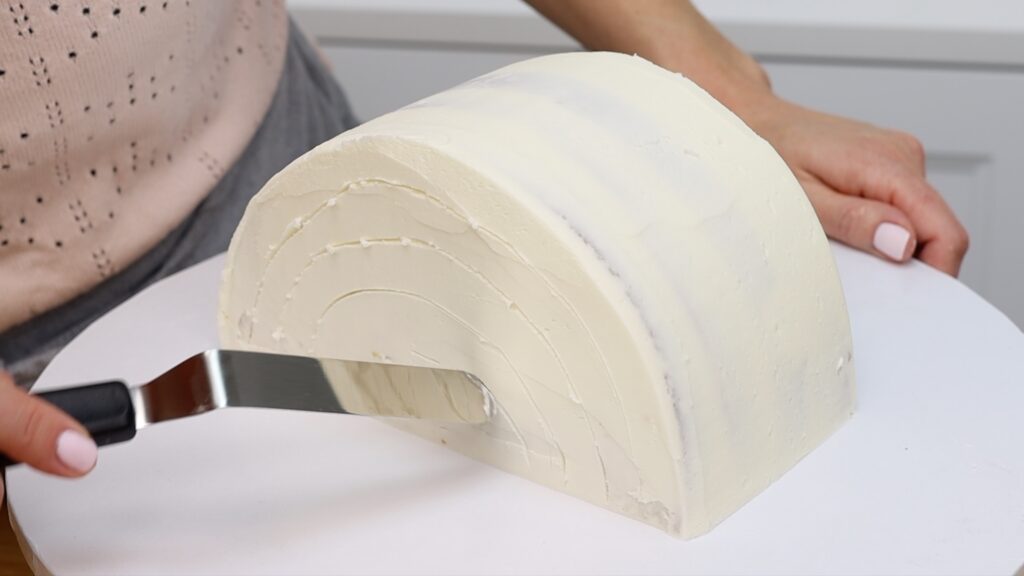
Cover the cake with plain white frosting, which is called a crumb coat because it will trap any crumbs that come off the cake so that they don’t get into the rainbow frosting next.
When you’re piping frosting onto a cake it’s really important to have another layer of frosting underneath because this layer seals the moisture into the cake, completely covering it up so even if there are any little gaps in between your piping, this crumb coat will make sure the cake doesn’t dry out.
Use an offset spatula to spread the frosting all over the cake, right down to the cake board, making sure there is no cake exposed.
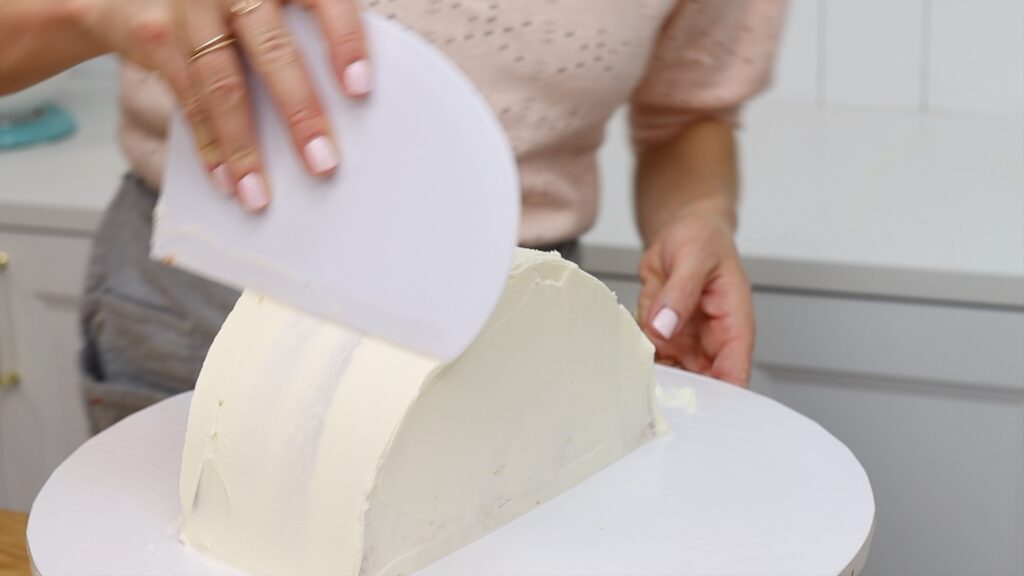
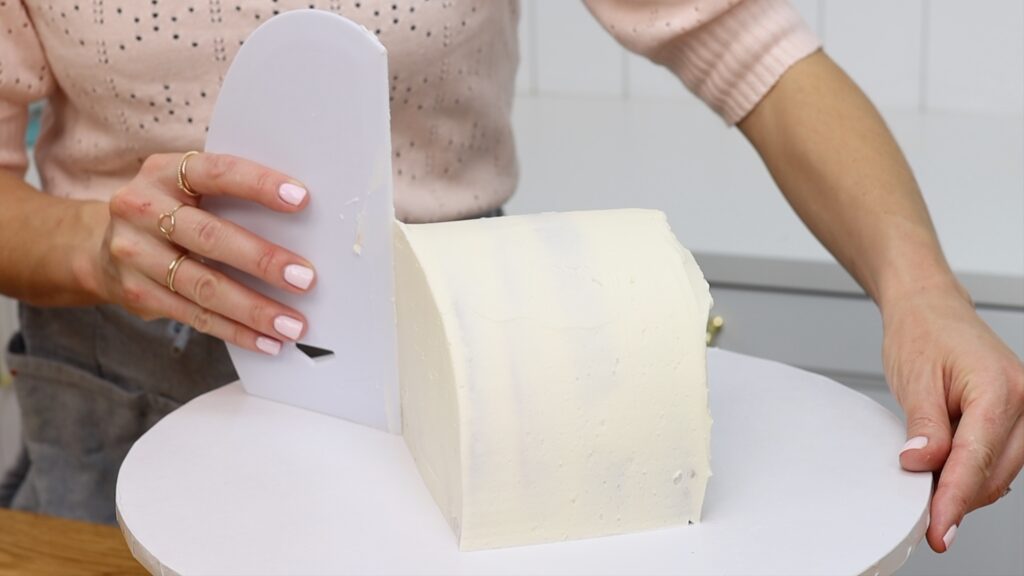
Then switch to a cake comb (also called a frosting smoother or icing scraper) to smooth the curve of the rainbow and the two flat sides. It doesn’t have to be very neat because you’re going to cover it with rainbow piping next but get it as smooth as you can because that will give the cake a neat shape to build onto.
I like to put cakes in the fridge to set the crumb coat while I’m preparing my frosting.
Prepare piping bags for rainbow frosting
Choose your piping tips for the rainbow piped frosting. Piping will be easiest if you use smaller tips for the colours at the bottom of the rainbow and larger tips for the colours at the top of the rainbow. I’m using 1M star tip for red and also for yellow, a 4B open star tip for orange, medium round tip #12 for green, small petal tip #102 for blue and open star #32 for purple.
Use an offset spatula or a toothpick or really anything sharp to outline the arcs of your rainbow. It’s easiest to space them evenly if you start with a line in the middle, and then score two lines above and two lines below it.
I’m going to pipe a rainbow on both sides of my cake so I’m scoring the same lines on the other side, too.
Frost the cake with rainbow piping
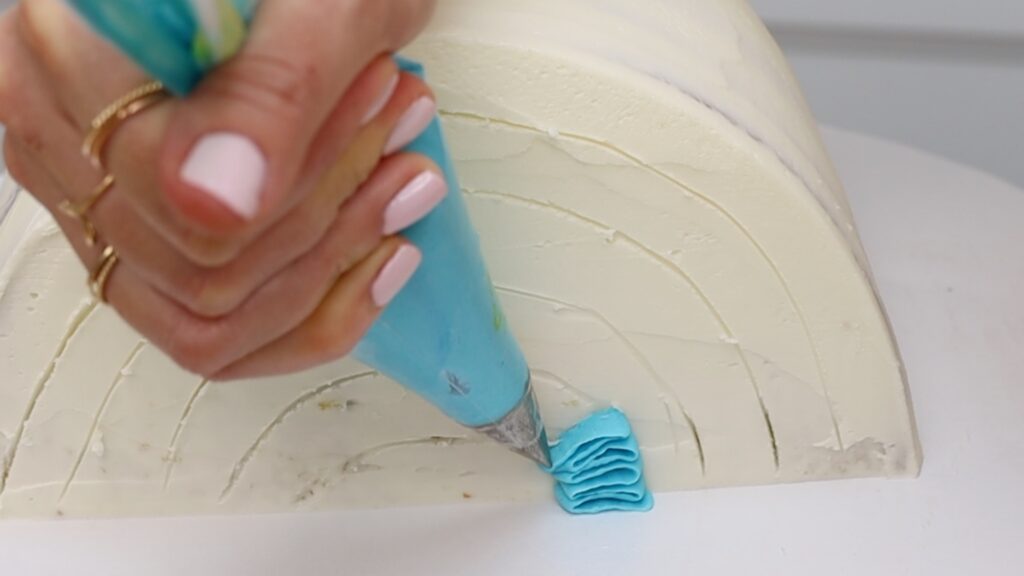
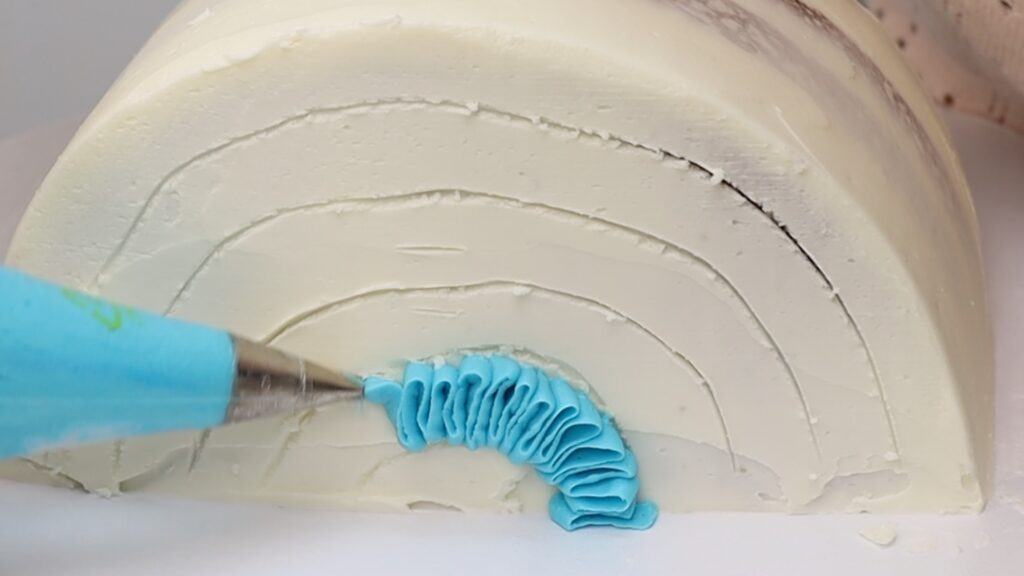
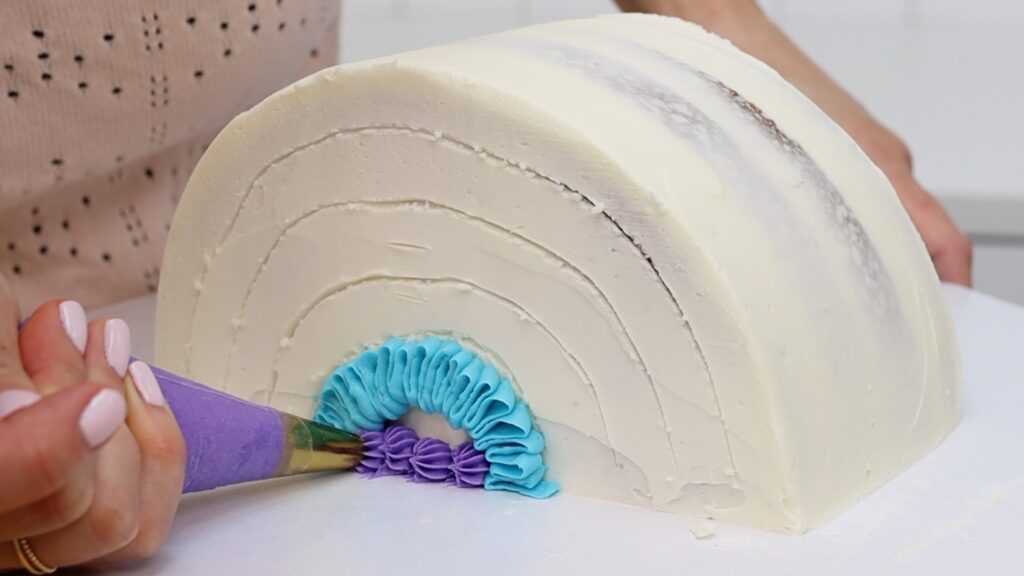
To pipe the colours, it’s usually easiest to start with the colour at the bottom and work your way up but if you’re piping ruffles like this with a petal tip, it’s easiest to do those colours first, wherever they are on your rainbow, to give you the most space to maneuver the piping bag.
A petal tip looks like a teardrop and when you’re piping with one, the narrow end of the teardrop should always be pointing outwards from the cake, with the wide end pressed against the cake. That way your piping will be more securely attached to the cake and the piping you see sticking out from the cake will be thinner and wavier because it comes through the narrow part of the piping tip.
For the purple you couldpipe an arc shape and leave the bottom section plain white but I’m piping all the way down to the bottom to add the most colour to my cake.
You might be thinking about how many piping bags I’m going to have to wash and that’s definitely the downside to rainbow cakes! If you want to minimize piping bags you could put the colored frosting straight into piping bags with these piping tips and use those to pipe on the filling between the cake layers,
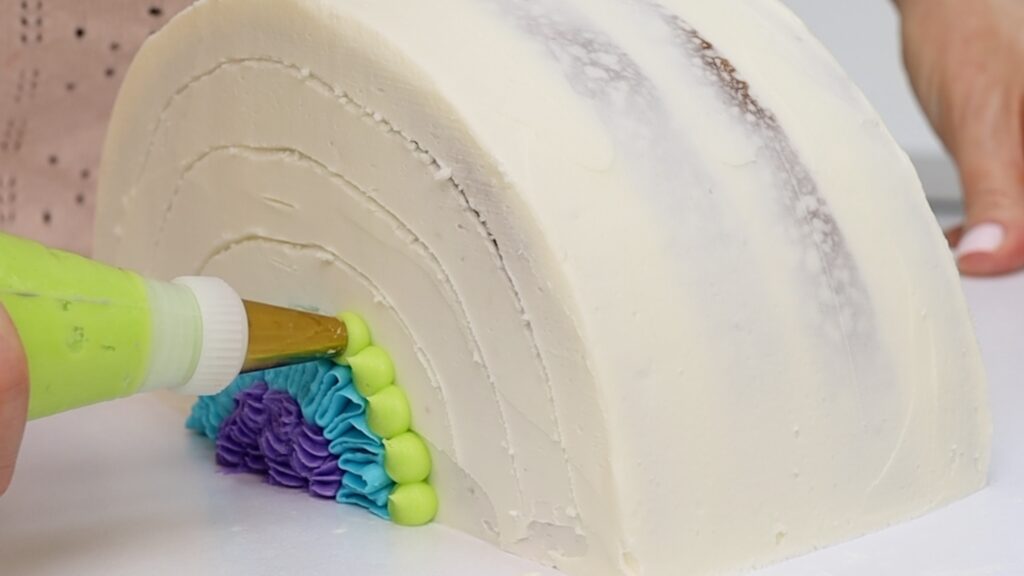
To pipe neat dots with a round tip, squeeze the piping bag and let the frosting bulge out from the bag and then and stop squeezing as you pull the bag away and that will leave a neat point on each dot.
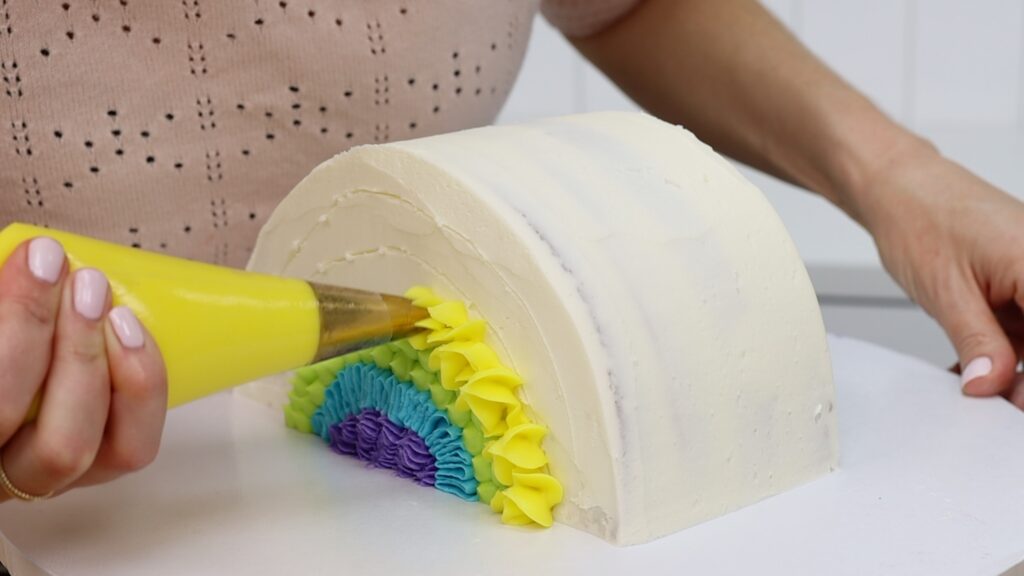
The quickest piping is to use a large star tip so you can just pipe one row to fill the entire band of colour. A 1M tip is great for this and it’s a piping tip that almost everyone has!
Open star tips like this 4B tip are also great for quickly covering large areas of cake with piping. Just like with the round dots, if you stop squeezing the piping bag at the same time as you pull the bag away from the cake, you’ll leave a neat peak on your piped rosettes.
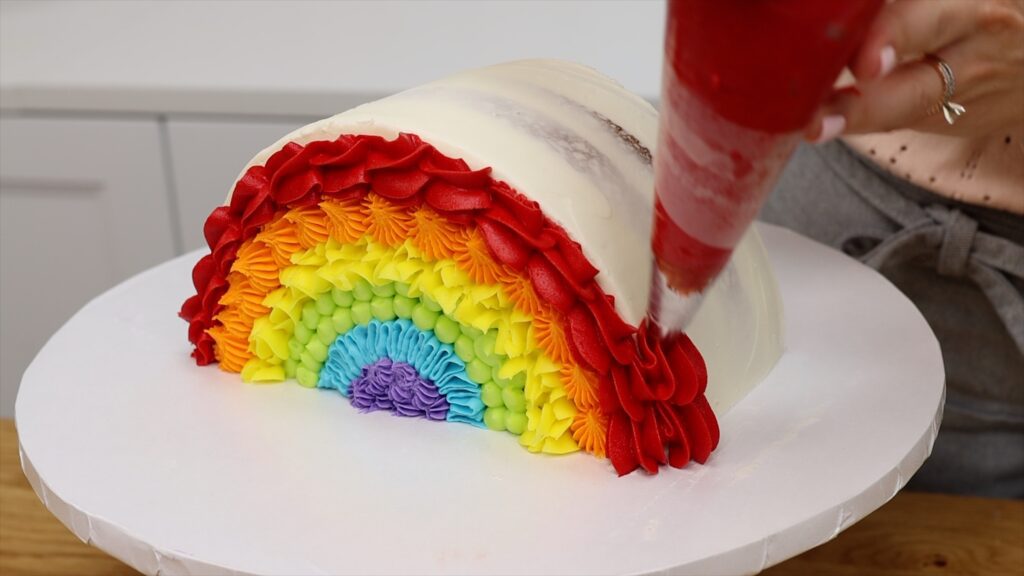
For the red I’m going to pipe waves of frosting. I’ve used this piping bag a few too many times because buttercream is oozing out through tiny holes in it. Quick tip to fix this: wipe the frosting off the outside of the bag and then use tape to cover up the holes and rejuvenate your piping bag for a few more uses!
Having your cake on a turntable makes piping much quicker than if the cake is on the table or countertop, because you can keep spinning and adjusting it so that you’re always piping at the angle that’s most comfortable for you, or in my case, the angle that’s best for the camera!!
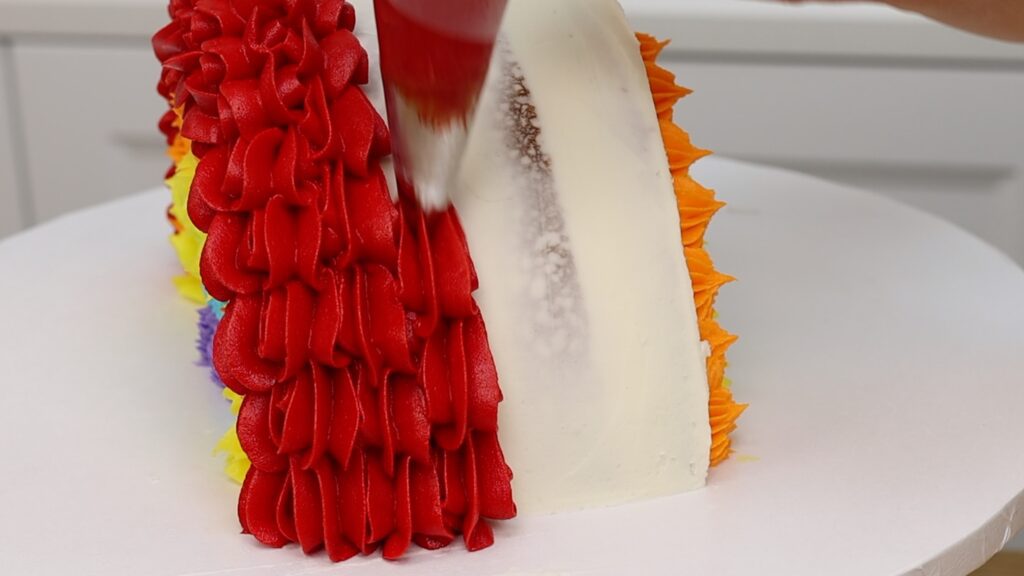
As well at the top arc of the rainbow, I’m using the red frosting to cover the top of the cake, piping the same wave texture all along the top curve.
Another benefit of using a turntable is that you can spin it to see the cake from different angles and then you’ll notice any gaps between the piping, which you can fill in with more piping now, while you still have the colored frosting in your piping bags.
Serve the rainbow cake
You can store this rainbow cake int he fridge for two days but the red frosting will darken significantly in the fridge so if you plan on refrigerating it, use less gel when colouring the red frosting. This cake tastes best at room temperature so if you do refrigerate it, take it out of the fridge at least two hours before serving so that it comes to room temperature before you eat it.
When you cut the cake, you can cut straight through it but if you cut diagonally, towards the middle of the purple frosting each time, you’ll get a nice cross section of all of the colours of filling so there will be a double rainbow on each slice: along the edge, and also through the middle.
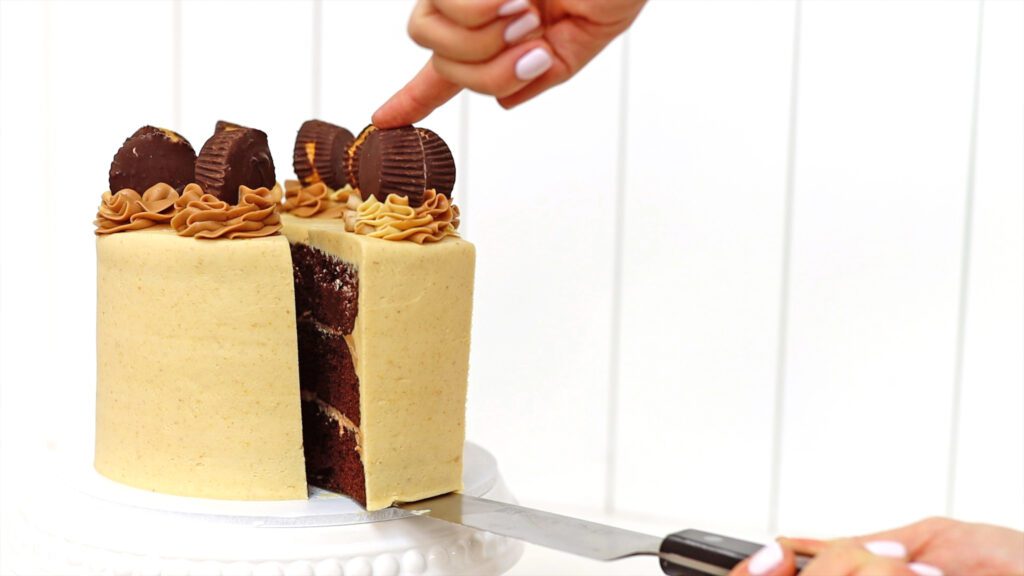
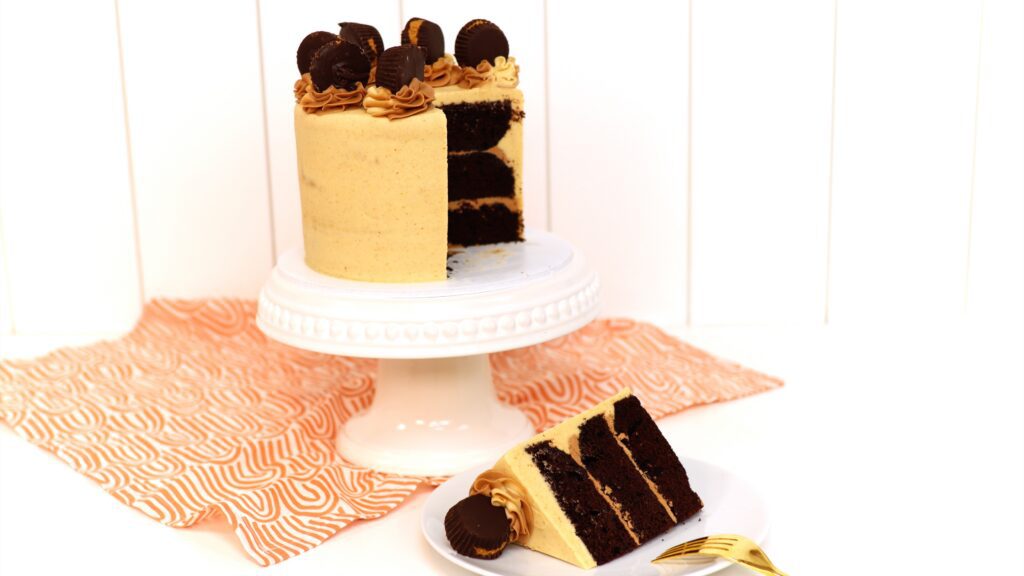
Chocolate and peanut butter are a perfect pair. If you love peanut butter cups, you'll love this cake! Rich chocolate buttercream is sandwiched between three layers of moist, not-too-sweet chocolate cake. It's covered with creamy peanut butter frosting and topped with chocolate peanut butter swirls and homemade chocolate peanut butter cups.
This recipe has several parts but if you follow this order, you won't spend all day in the kitchen!
Bake the cake
Make the peanut butter cups
Prepare the buttercream filling and frosting
Assemble, frost and decorate the cake!
First, bake the chocolate cake
This cake uses my Perfect Chocolate Cake batter, which is my absolute favourite chocolate cake! It's moist, not too sweet, and easy to make. For the best results, take the butter and eggs out of the fridge four hours before baking so that they come to room temperature. After adding the flour to the batter, only mix until the flour is just incorporated and you can no longer see any loose flour in the batter.
Divide the cake batter between three 6" cake pans or convert the recipe to a different size using the printable recipe below. Bake until the cakes don't wobble when you shake the pans. If you stick a toothpick down into the middle of the cake, it should come out clean with no streaks of cake batter.
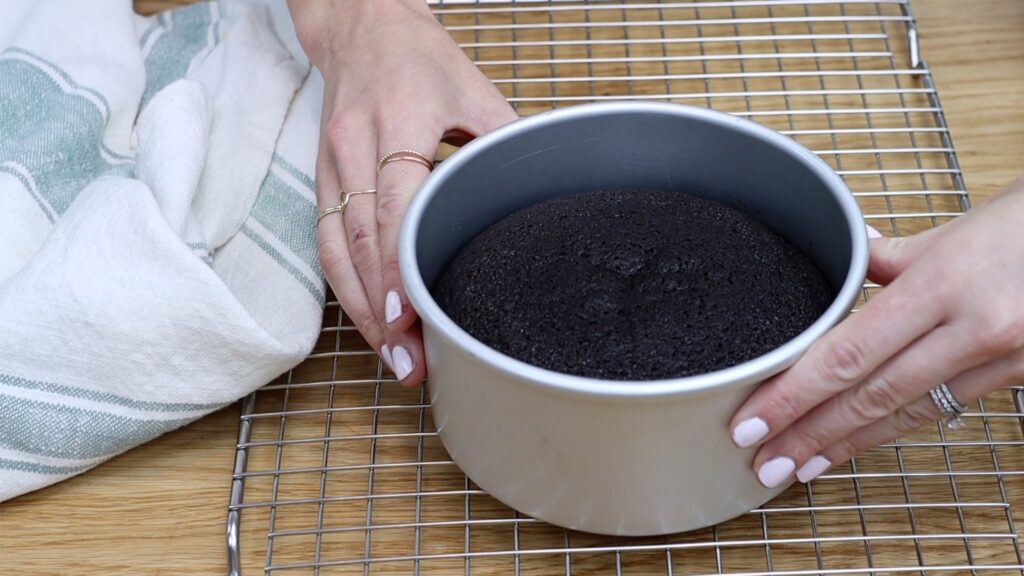
Leave the cake layers in the pans for 10 minutes to cool and firm up slightly. Then turn the cakes out onto a wire cooling rack. Let them cool completely before assembling your cake, which will take about three hours.
Make the peanut butter cups
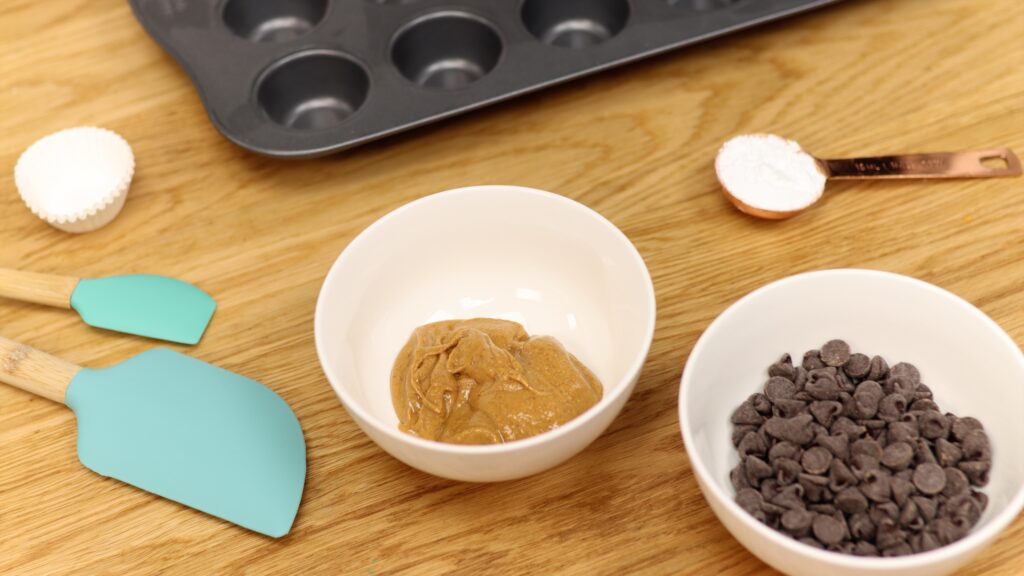
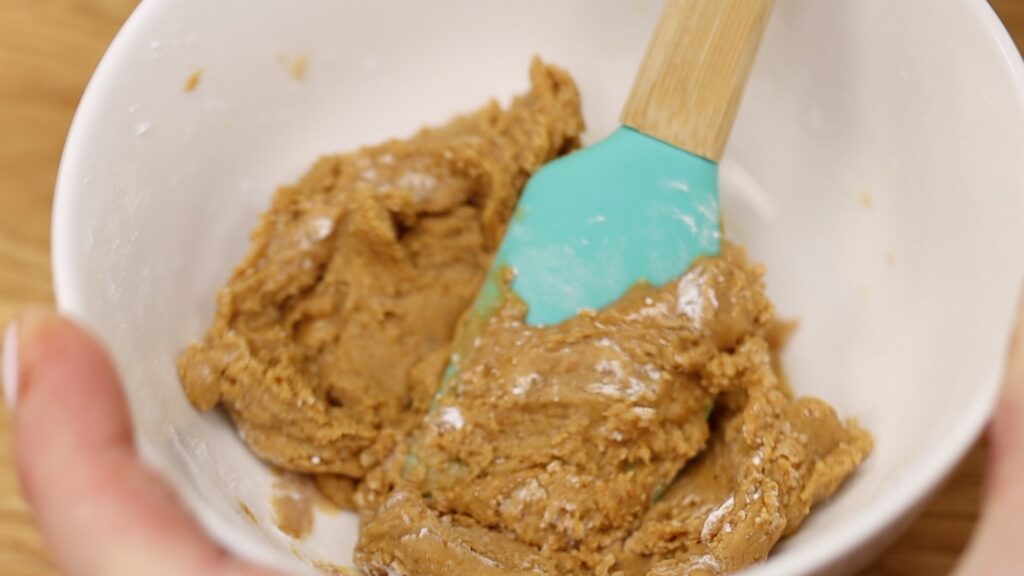
While the cake layers are cooling, make your peanut butter cups. The only ingredients for these are chocolate chips, peanut butter, and powdered sugar. You'll need a mini cupcake pan and mini cupcake wrappers, too.
To sweeten the peanut butter stir in one tablespoon of powdered sugar. You can skip this if you want your peanut butter cups to be less sweet but if you're using semi-sweet or bittersweet chocolate, the slightly sweet peanut butter filling works really well.
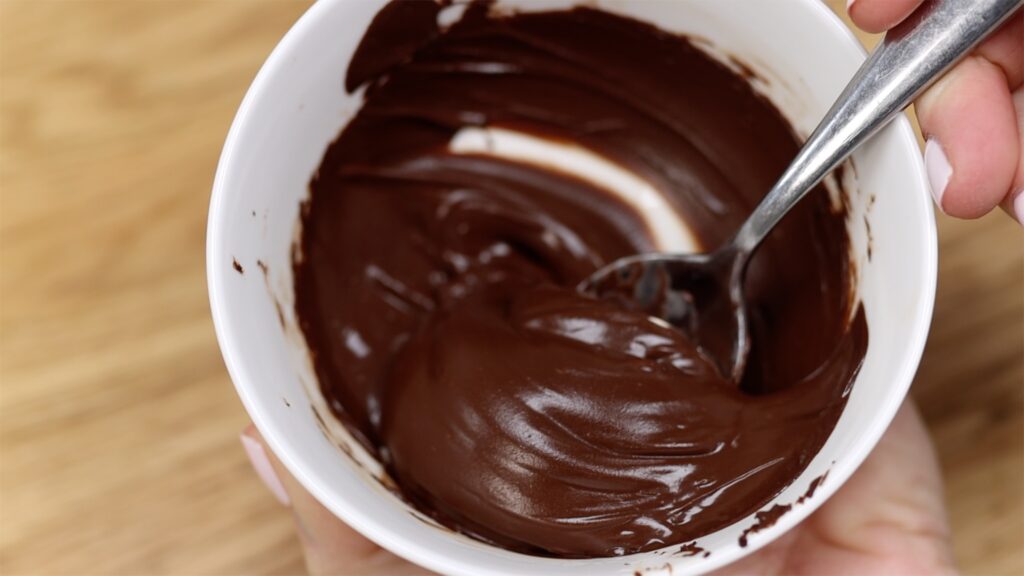
To melt the chocolate chips use short intervals of 30 seconds at a time in the microwave. Choose 70% power to prevent overheating the chocolate. Stir the chocolate and if it's still lumpy, put it back in the microwave at 70% power for another 30 seconds. Stir the chocolate until it's smooth.
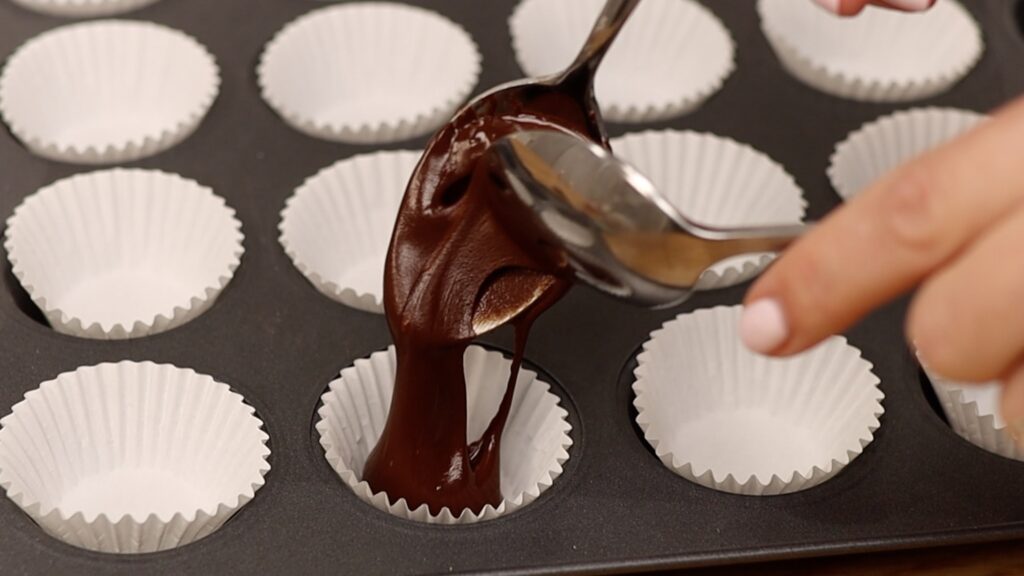
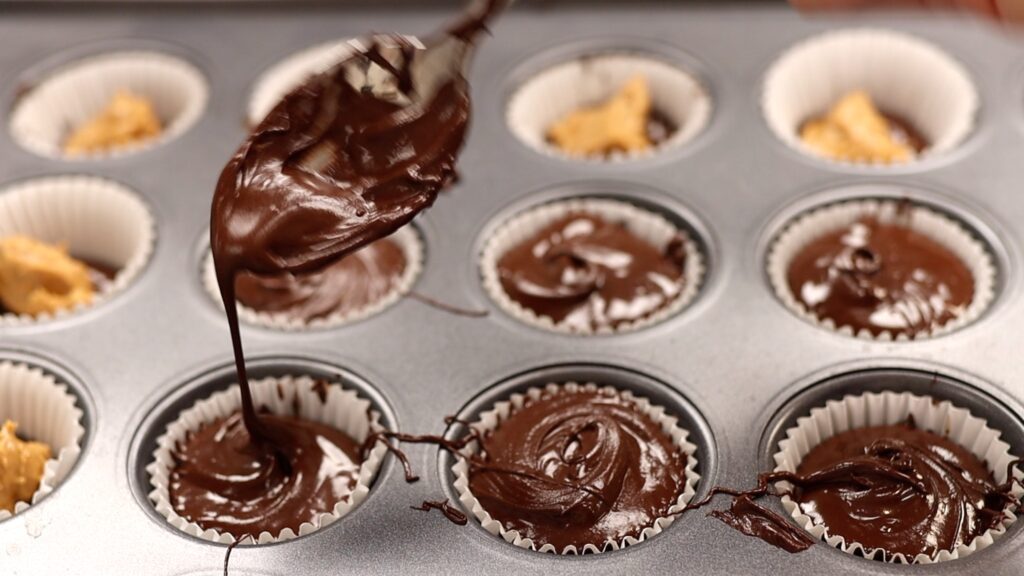
Line a mini cupcake pan with mini cupcake wrappers, which will make the peanut butter cups easiest to remove from the pan after they set. You'll probably want between 8 and 12 wrappers, depending on how many swirls you plan on piping around the cake. I like to make a few extra to snack on while I'm decorating! Use two spoons to fill the cupcake wrappers about a quarter full with melted chocolate. You want a thin layer of chocolate that covers the base of the wrappers. If the chocolate is very thick it will be difficult to bite into.
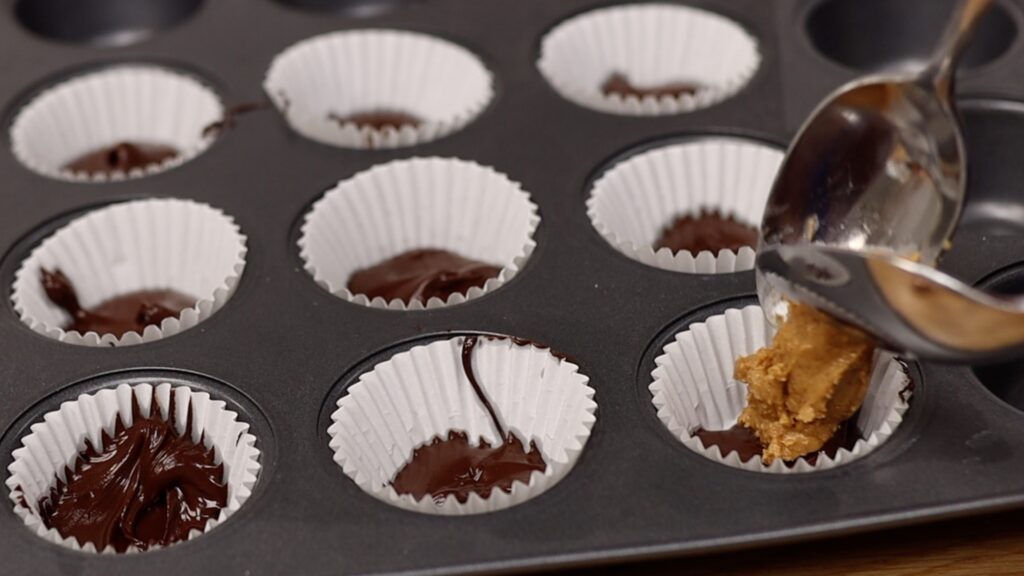
Now spoon the peanut butter mixture into each cup. Using two spoons will make this easier because peanut butter is sticky!
Cover the peanut butter with chocolate, filing each mini cupcake wrapper to approximately the same level.
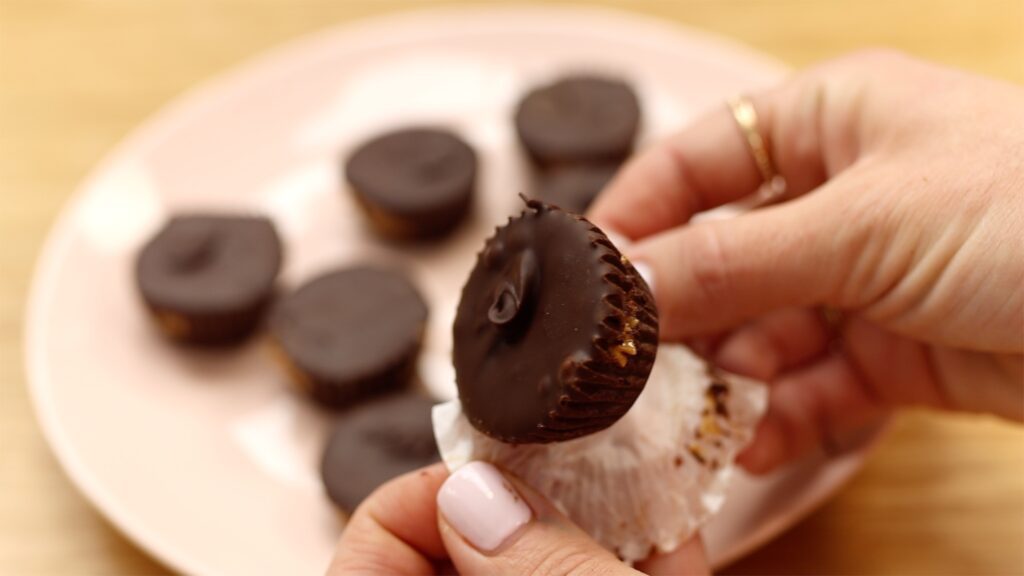
Refrigerate the pan of peanut butter cups for about 30 minutes, until the chocolate sets. Pinch the wrappers or push down on one side to pop them out of the pan. Then peel apart the wrappers to release the peanut butter cups. Set them aside until later.
Prepare the chocolate peanut butter filling and frosting
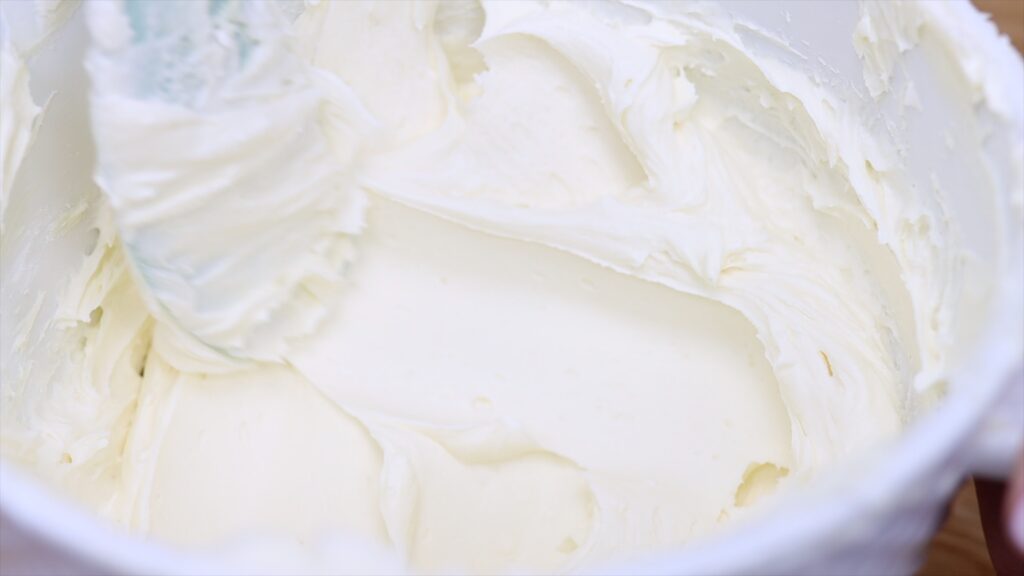
The filling and frosting for this cake starts with my 4 Minute Buttercream. To make silky smooth buttercream, make sure all of your ingredients are at room temperature by taking the butter and milk out of the fridge 4 hours before starting. Put the butter in your mixing bowl and add the sugar in four parts, mixing at the lowest speed for a minute after each addition. Scrape down to the bottom of the mixing bowl with your spatula to loosen any ingredients stuck to the bottom. Add the vanilla, salt and milk and mix to combine. The buttercream should be easy to stir and when you drag a spatula through it, it should leave a smooth trail behind. If the buttercream breaks apart from itself and the spatula leaves air bubbles behind, add another tablespoon of milk to make the consistency thinner.
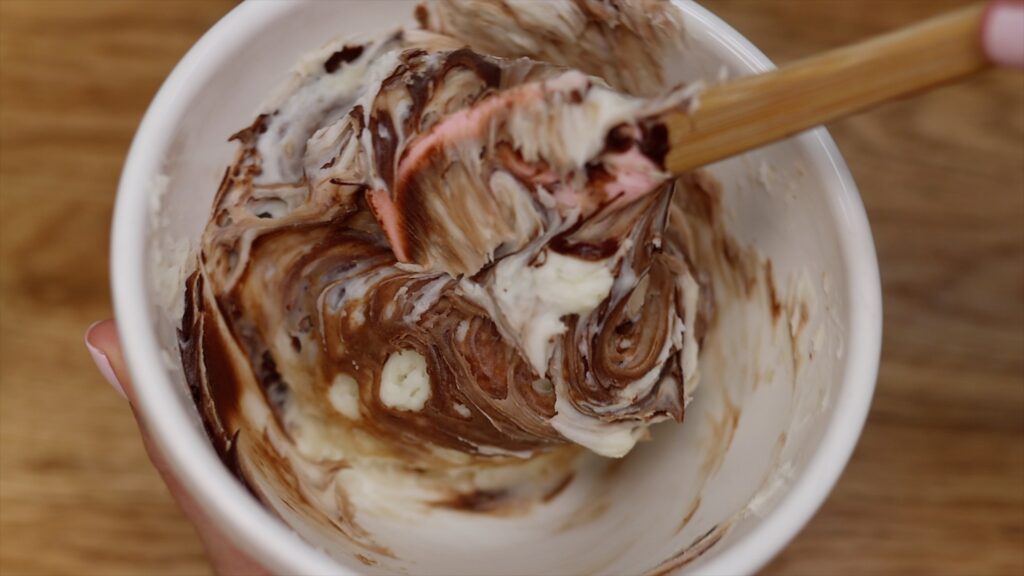
In a small bowl, melt 2 tablespoons of chocolate chips in the microwave at 70% power for 30 seconds. Stir the chocolate until it's smooth. Leave it to cool to room temperature, which takes about 10 minutes. Then scoop up one cup of buttercream from the mixing bowl and stir it into the melted chocolate in the small bowl.
Add 3/4 cup peanut butter to the buttercream in the mixing bowl. Stir it or use your mixer to mix it until you don't see any streaks of peanut butter in the buttercream.
Put it all together: assemble, frost and decorate the cake
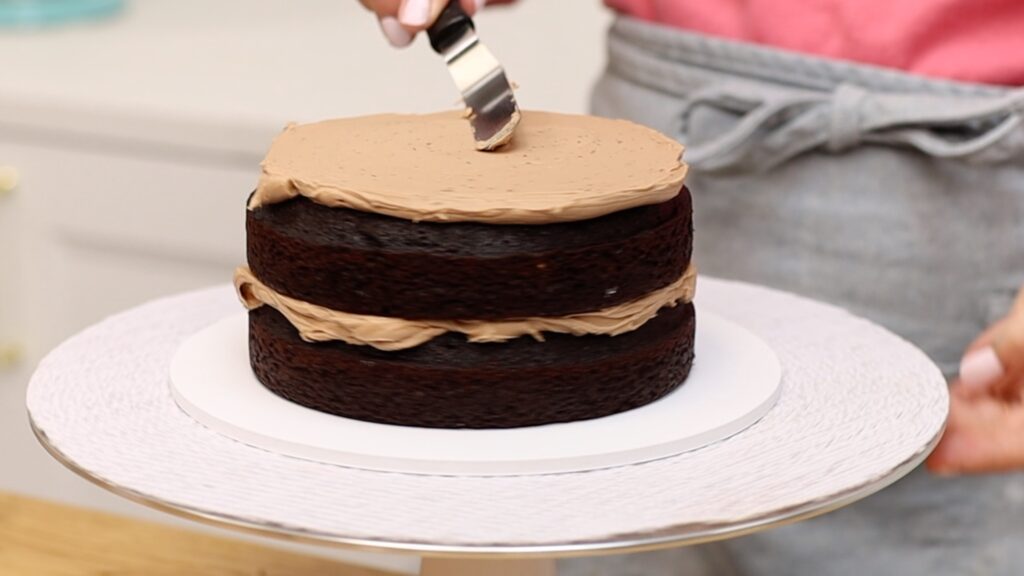
To assemble your cake, alternate cake layers and the chocolate buttercream. Use about a third of a cup of chocolate buttercream as the filling between each cake layer. Save the remaining third of a cup for later.
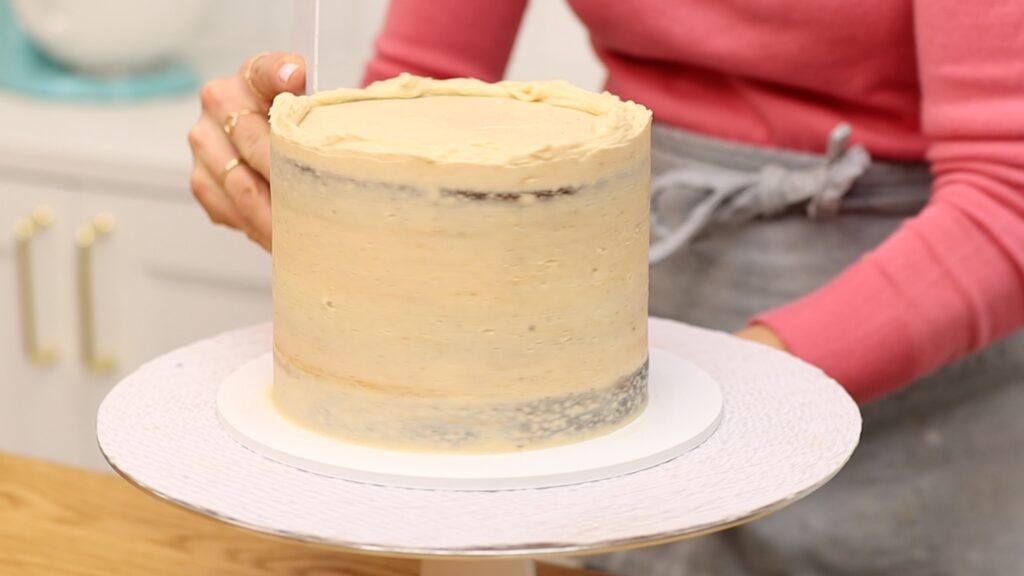
Using peanut butter buttercream, cover the cake with a crumb coat to trap any crumbs that come off the cake.
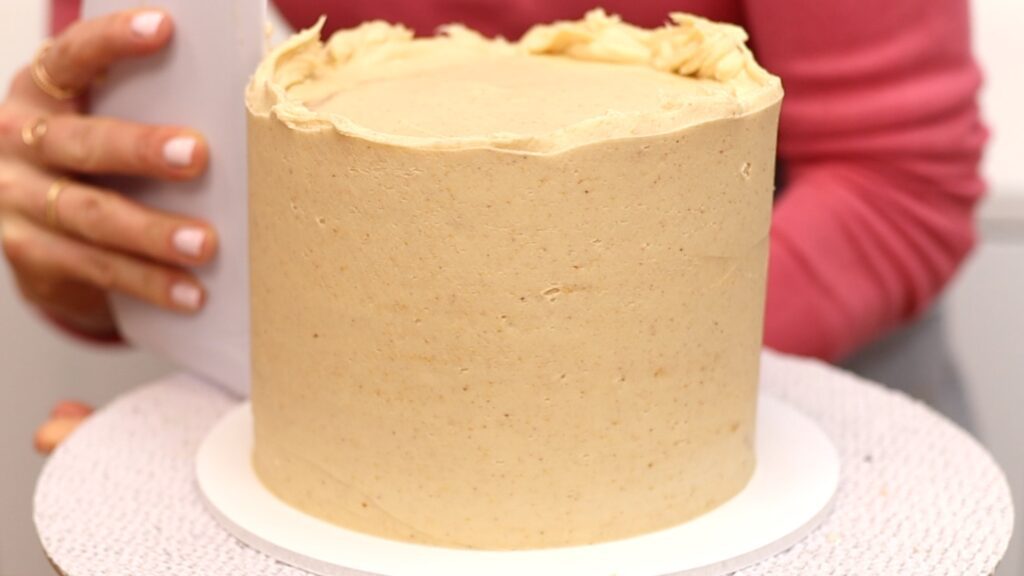
Let the crumb coat set, which takes about an hour at room temperature. Speed this up by putting the cake in the fridge for 30 minutes or in the freezer for 15 minutes. Then apply a final layer of peanut butter frosting, smoothing it with a cake comb.
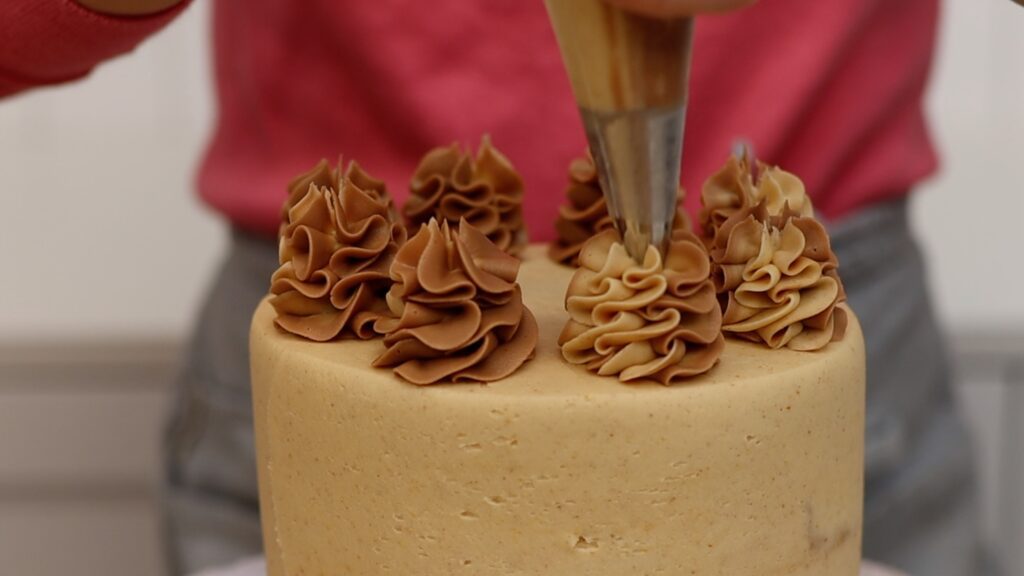
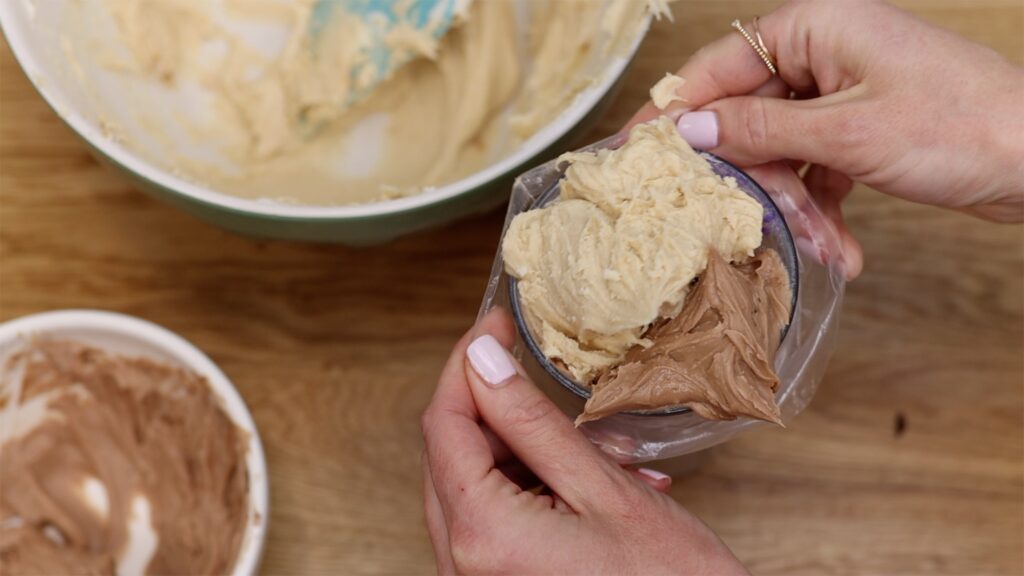
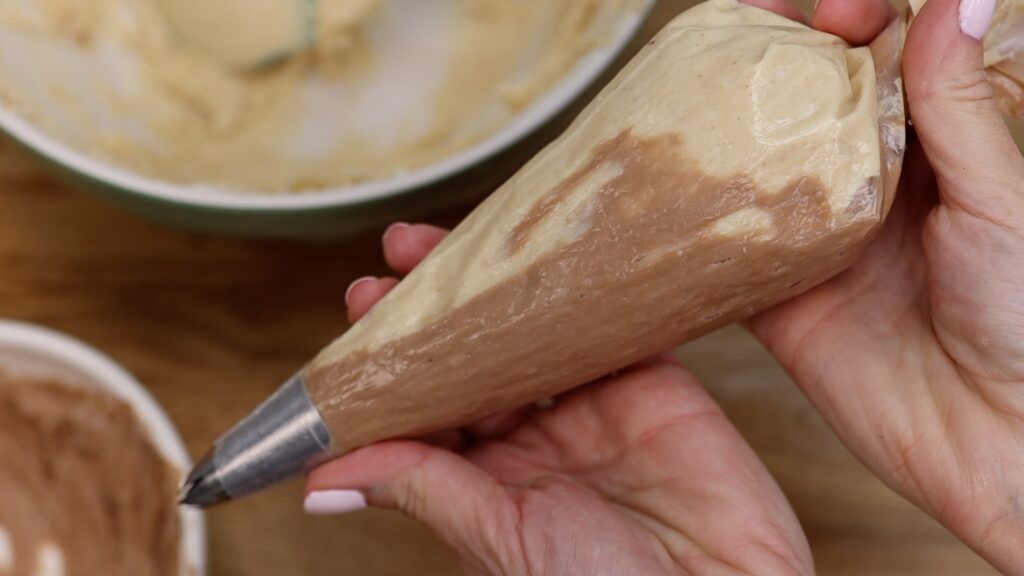
Fit a piping bag with a star shaped piping tip like a 1M tip. Spoon the remaining chocolate buttercream down one side of the piping bag. Fill the other side with peanut butter buttercream. I find it easiest to do this by dropping the piping bag (with the tip already inside) into a glass and folding the top of the bag over the rim of the glass to hold it open. After filling it, unfold the piping bag and lift it up.
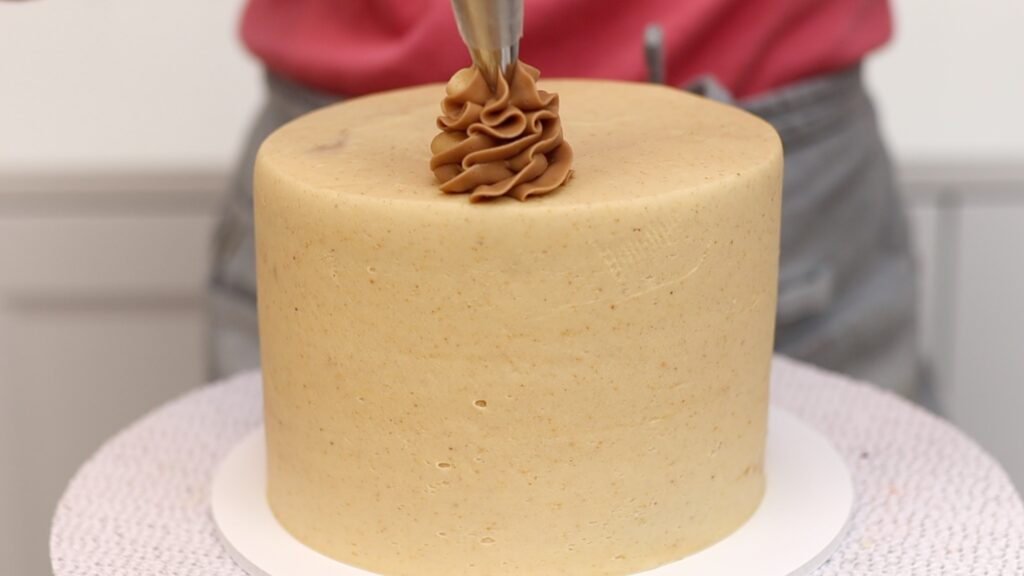
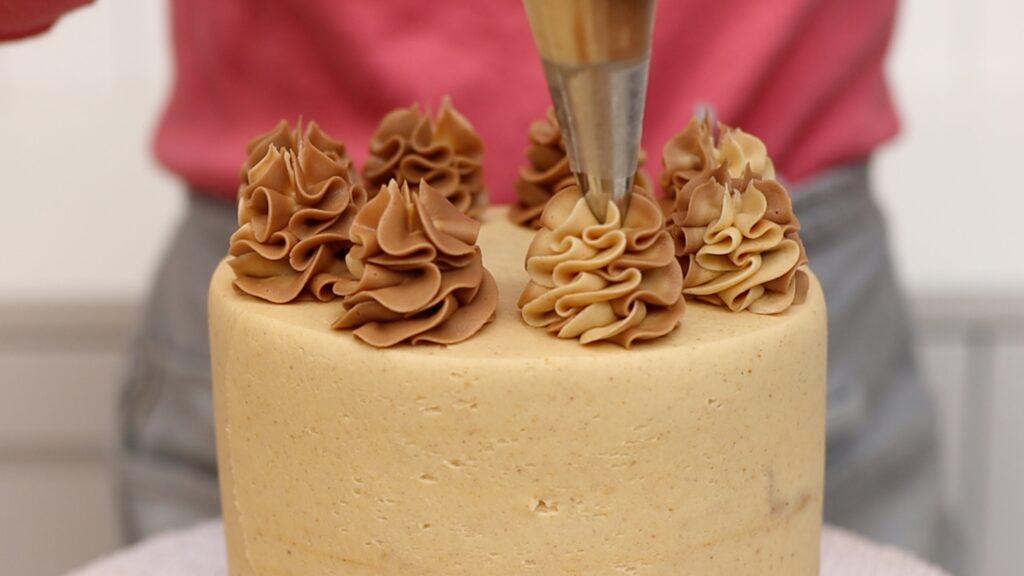
Twist the end of the piping bag and pipe swirls of frosting around the top of the cake. You'll notice that one side of each swirl will be peanut butter buttercream and the other side will be chocolate.
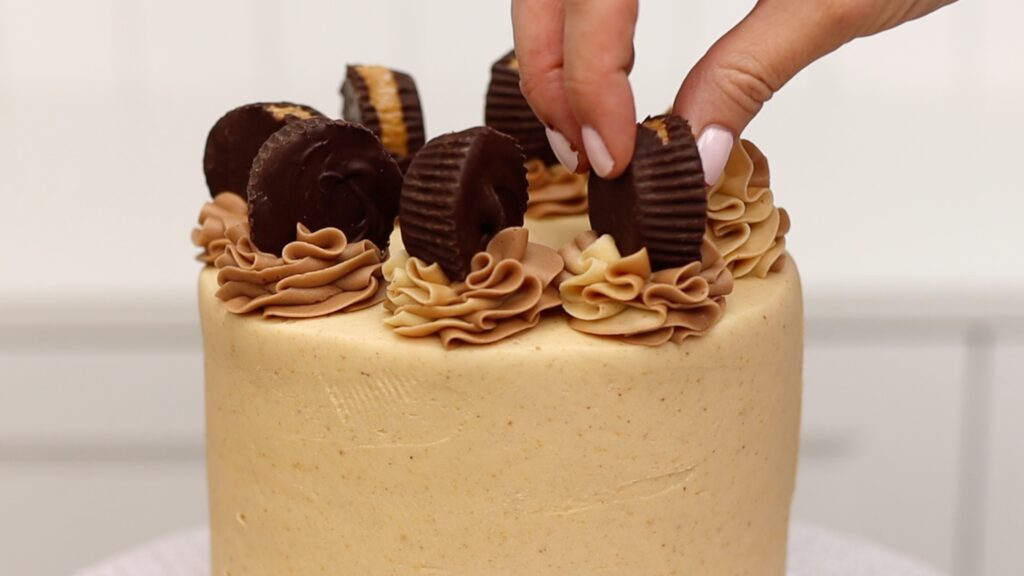
Press a peanut butter cup into each swirl. The weight of the peanut butter cups will push the swirls down but you'll still be able to see the two-tone frosting.
You can serve this cake immediately or refrigerate it for up to 2 days. This cake tastes best when it's at room temperature so if you do refrigerate it, take it out of the fridge at least 2 hours before serving it so that it isn't cold when you eat it.
How to make this Chocolate Peanut Butter Cake in advance
Every element of this cake can be made ahead of time, which is useful if you don't have much time to put it all together for an event or occasion.
You can make the peanut butter cups a week in advance and store them in an airtight container in the fridge.
The cake layers can be baked up to a month in advance and after cooling, wrap the layers in plastic wrap (like cling film or saran wrap) and freeze them. Move them to the fridge the night before assembling the cake to give them time to thaw.
The buttercream can also be made a month in advance and frozen in a sealed container or a large ziplock bag. Take it out of the freezer the night before you use it and leave it on the counter to come to room temperature. Stir it for a minute to knock out any air bubbles.
Rich chocolate buttercream is sandwiched between moist, not-too-sweet chocolate cake and covered with creamy peanut butter frosting, topped with chocolate peanut butter swirls and homemade chocolate peanut butter cups. Yum!
Ingredients
UnitsScale
For the cake:
1/2cupcocoa powder
1cup hot water
1/2cupbutter
1cupsugar
2 eggs
1 teaspoon vanilla
1 1/2cupsflour
1/2 teaspoon baking soda
1/4 teaspoon baking powder
1/4 teaspoon salt
For the peanut butter cups:
1/4cupsmooth (creamy) peanutbutter
1 tablespoon powdered sugar (icing sugar)
1 1/4cupschocolate chips
For the buttercream:
1 1/2cupsbutter
4 1/2cupspowdered sugar (icing sugar)
1 teaspoon vanilla
1/4 teaspoon salt
2 tablespoons milk or cream
2 tablespoons chocolate chips
3/4cupspeanut butter
Instructions
To make the cake:
Whisk cocoa powder and hot water together in a bowl and set aside to cool. In another bowl, whisk together the dry ingredients (flour, baking powder, baking soda, salt).
Mix room temperature butter and sugar together at medium speed until creamy, about two minutes. Add eggs one by one, beating on low speed for about 30 seconds after each addition. Add vanilla and mix to combine.
Add a third of the dry ingredients to the mixing bowl, mixing on the lowest speed until you don't see any flour in the batter.
Add half of the cocoa powder, mixing on the lowest speed to combine. Repeat with another third of the dry ingredients, then the remaining cocoa powder mixture, then the remaining dry ingredients.
Grease three 6" pans and divide the cake batter between them. Bake at 175ºC or 350ºF for 22 minutes or until a toothpick inserted into the middle comes out clean.
Leave cake layers in the pans for 10 minutes before turning out onto a wire rack to cool.
To make the peanut butter cups:
In a small bowl, melt chocolate in the microwave at 70% power for 30 seconds. Stir and microwave at 70% power for another 30 seconds. Stir until smooth.
Line a mini cupcake pan with 8-12 mini cupcake wrappers (depending on how many swirls you want to pipe onto your cake).
Spoon melted chocolate into each mini cupcake wrapper to cover the bottom. Use two spoons to add the peanut butter mixture on top and then cover with the remaining melted chocolate.
Refrigerate for at least 30 minutes to set the chocolate and then peel the wrappers off the peanut butter cups and refrigerate.
To make the buttercream filling and frosting:
In a mixer with a beater (paddle) attachment, mix room temperature butter with a quarter of the powdered sugar and salt on the lowest speed until incorporated, about one minute.
Scrape down to the bottom of the mixing bowl with a spatula to loosen any butter and sugar and add the next quarter of powdered sugar and mix for another minute on low. Repeat with the next quarter of sugar and then the final quarter.
Add the vanilla once everything is mixed together and continuing to mix until it's incorporated.
Add the milk or cream and mix for about 30 seconds until it's combined with the buttercream. Check the consistency and add more milk or cream a tablespoon at a time until the buttercream is smooth and easily stirred.
To put it all together:
Attach the first layer of cake to a cake board with a dot of buttercream. Spread 1/3 cup of chocolate buttercream on top of that layer and then place another cake layer on top. Spread another 1/3 cup of chocolate buttercream as filling and place the final cake layer on top.
Cover the cake with a thin layer of peanut butter buttercream (a "crumb coat") and then let this set, which will take one hour at room temperature or 30 minutes the fridge or 15 minutes in the freezer.
Frost the cake with peanut butter buttercream, smoothing the frosting with a cake comb.
In a piping bag fitted with a star shaped piping tip, spread the remaining 1/3 cup of chocolate buttercream in a line from the bottom of the bag to the top. Fill the rest of the bag with peanut butter buttercream. Pipe swirls of the two-tone buttercream onto the top of the cake and push a peanut butter cup into each one.
Refrigerate for up to two days. Take the cake out of the fridge at least 2 hours before serving so that it has time to come to room temperature, when it tastes best.
Notes
This recipe makes a three-layer 6" cake. Click "X2" at the top of this recipe to double it to make a three-layer 8" or 9" cake.