Gold leaf makes cakes look instantly classier and once you know how to use it, it’s easy! I’ll show you the basics of how to use gold leaf on cakes to decorate frosting, drips, piping, stencils, and several cake toppers. If you prefer to watch a video of this tutorial, scroll to the bottom of the page.
Let’s start with the basics. Gold leaf comes packaged within these protective sheets because it’s very delicate – don’t touch it or it will stick to your finger!
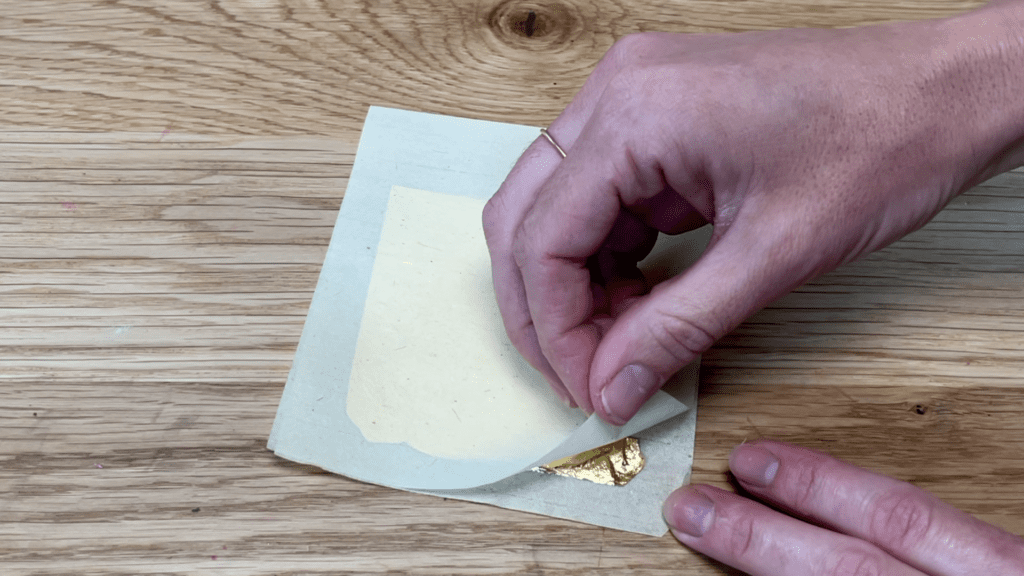
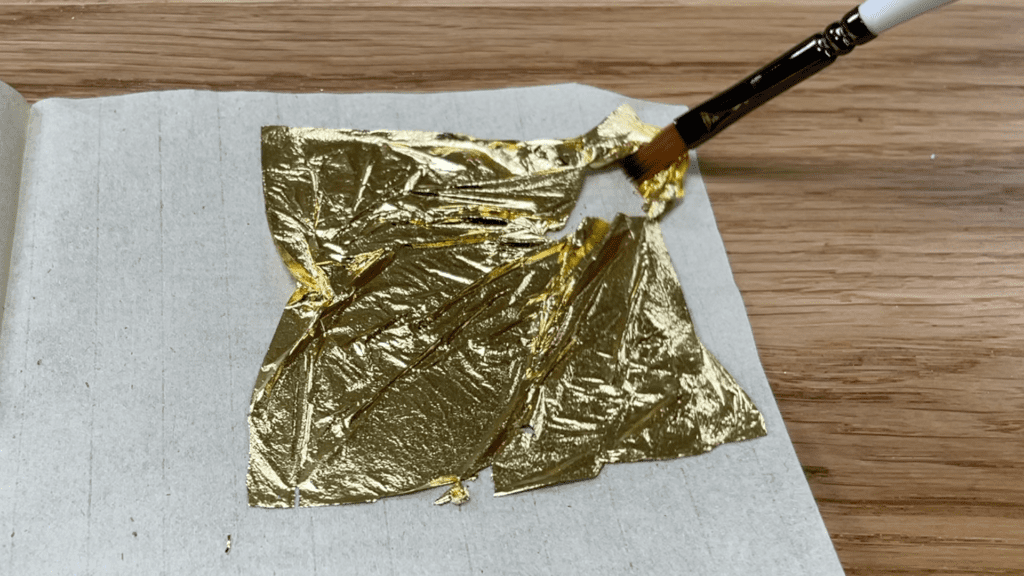
Lift gold leaf up with a paintbrush or tweezers. It will transfer easily from these surfaces but if you pick it up with your hands, the gold leaf will stick to the moisture on your fingers and it will be impossible to take off in one piece.
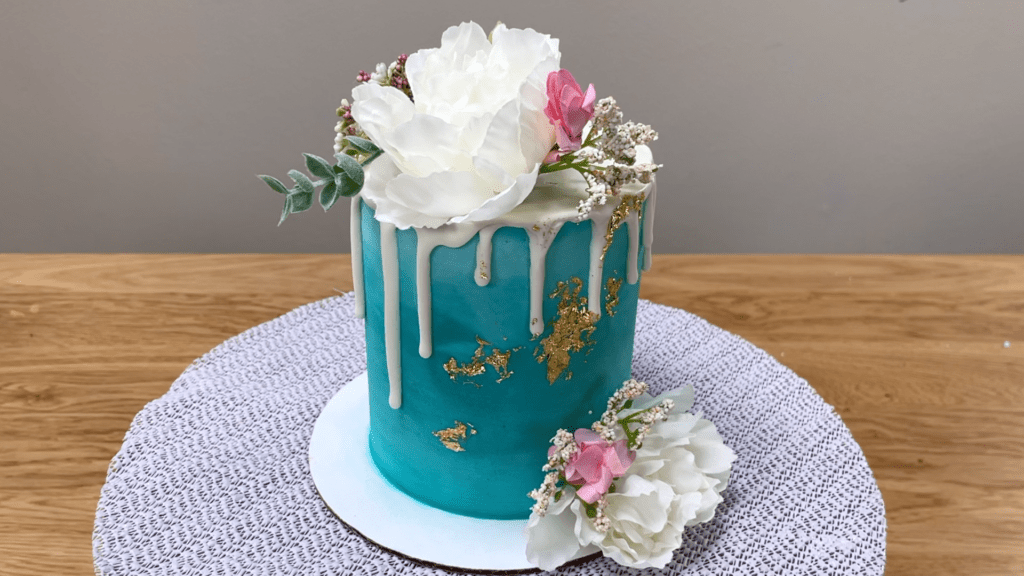
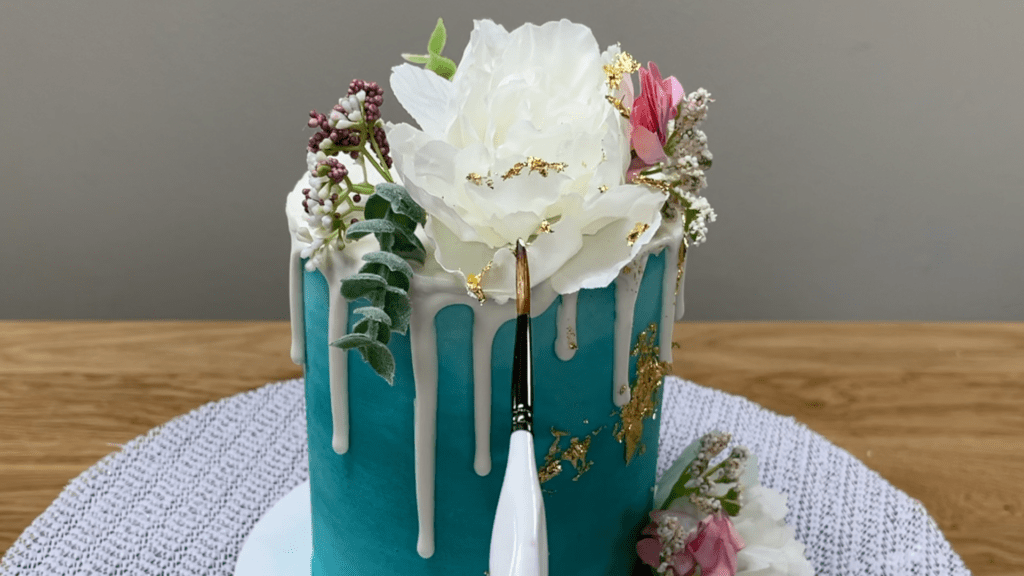
Decorate a cake with gold leaf after chilling the cake in the fridge for at least an hour to set the frosting and decorations so that they’re firm. Lift the golf leaf up and you’ll be able to press it gently against a drip that’s set, without damaging the drip.
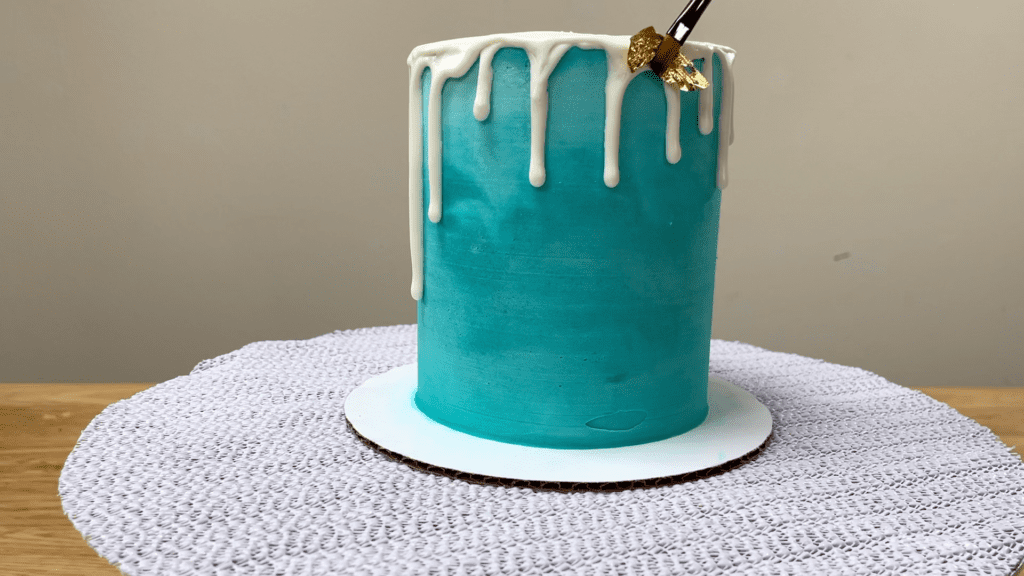
You can transfer the gold leaf onto the frosting of the cake by gently pressing it against the frosting with a paintbrush. If the frosting has set, you can push it so that lies flat and the pressure from your paintbrush won’t damage the frosting on the cake.
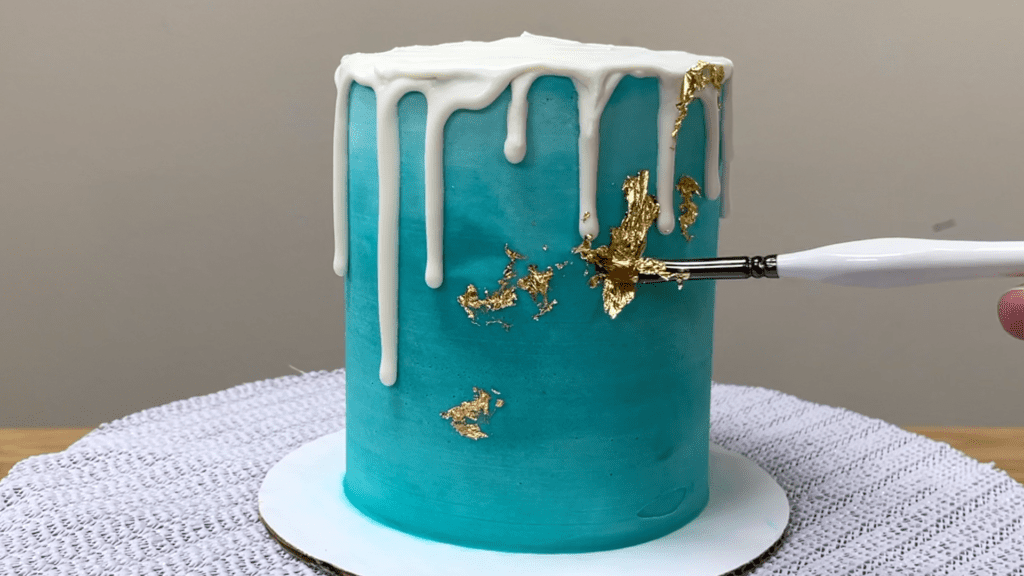
Gold leaf looks really pretty when it’s placed randomly on the cake like this, or you can be more intentional.
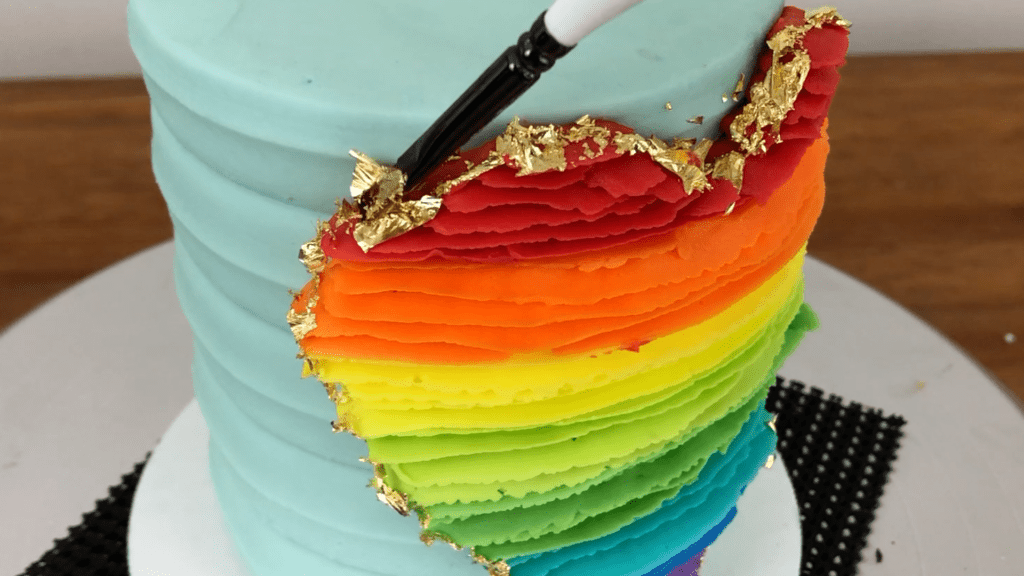
Outline piping by first letting the piping set for about an hour in the fridge so it gets hard and then press the gold leaf gently against the edge. Leave it sticking out or press it flat against the piping by dabbing it with your paintbrush.
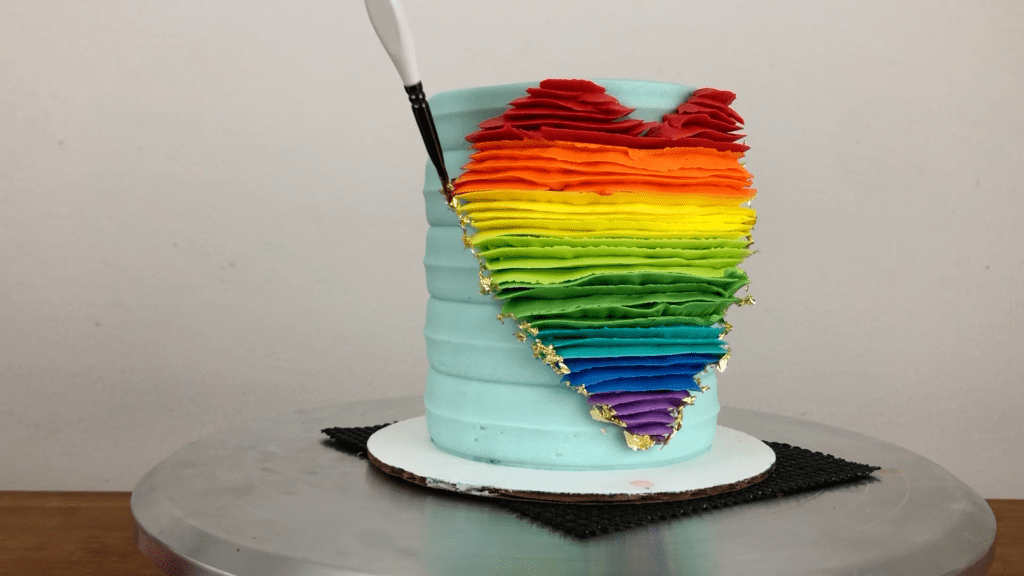
Since the piping has set, you won’t damage it as you push the gold leaf into it. Gold makes a stunning outline around the piping!
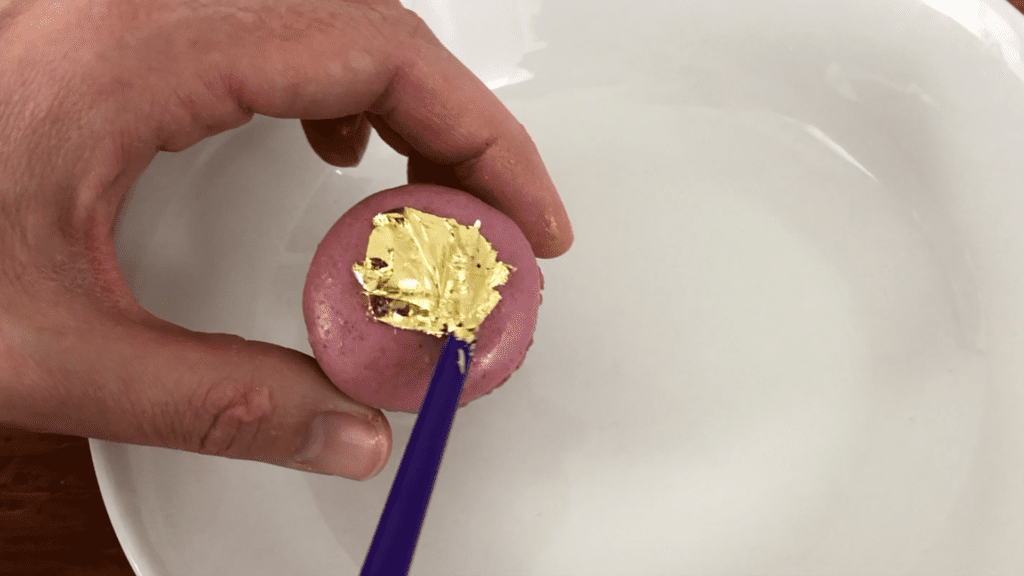
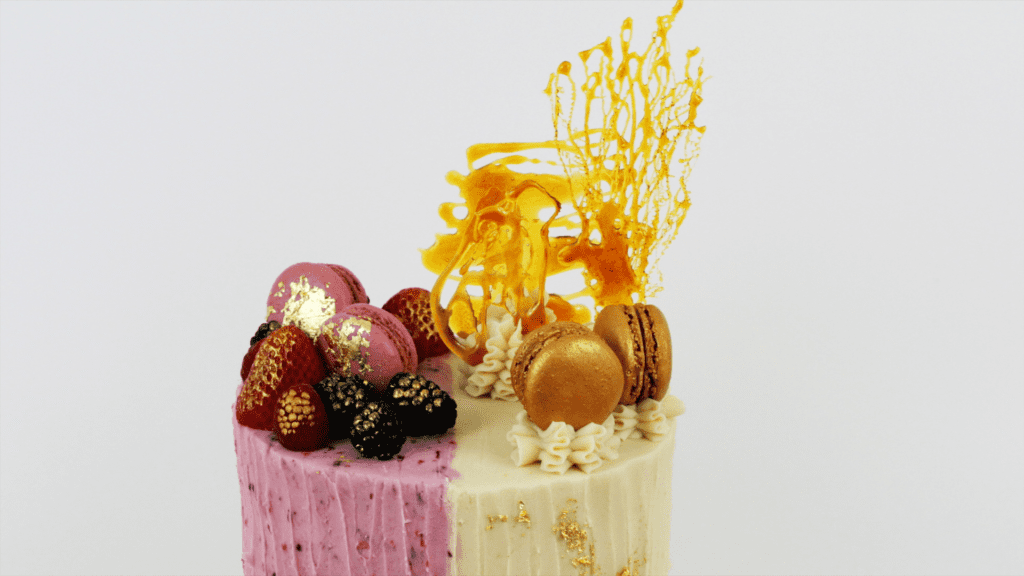
Make simple cake toppers look glamorous with gold leaf. Attach it to macarons the same way you would add it to the frosting on a cake, lifting the gold leaf up with a paintbrush and then pressing it gently onto the surface of the macaron.
Gold leaf looks beautiful on fresh fruit, too!
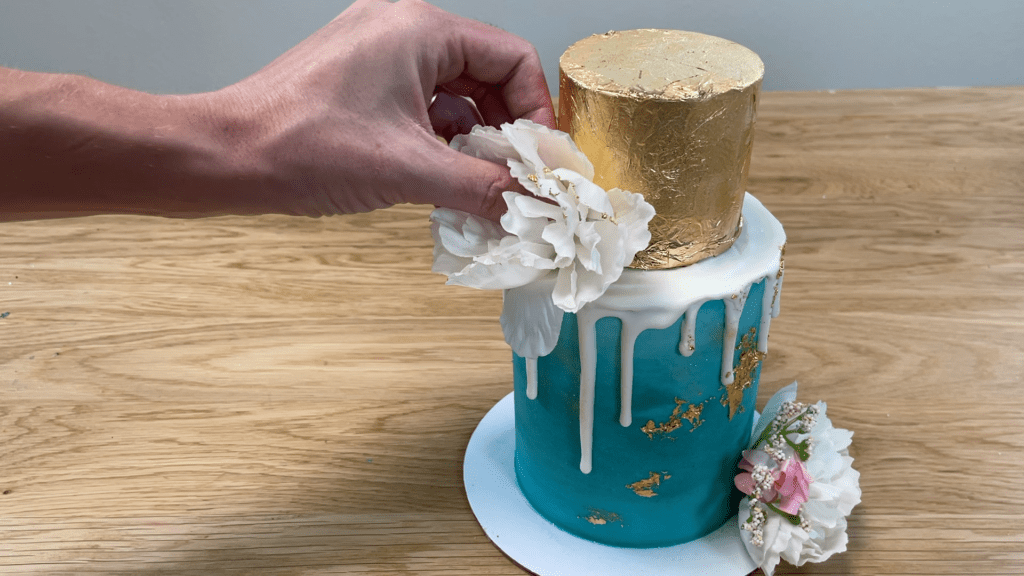
I brushed the edges of these petals with water to make them damp and the gold leaf sticks to that moisture. This makes the flowers match the gold leaf on the frosting on the cake, and makes them look fancier!
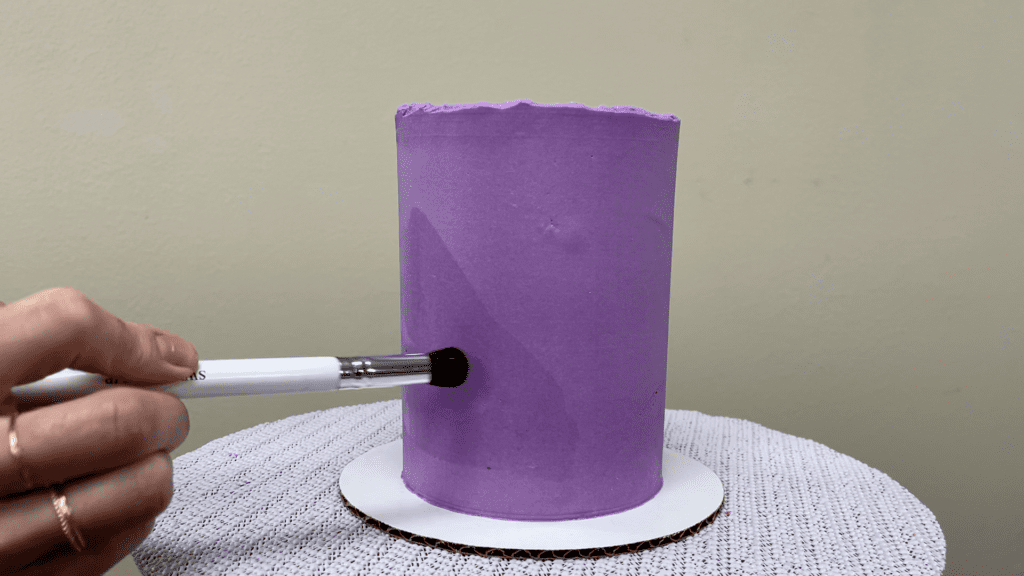
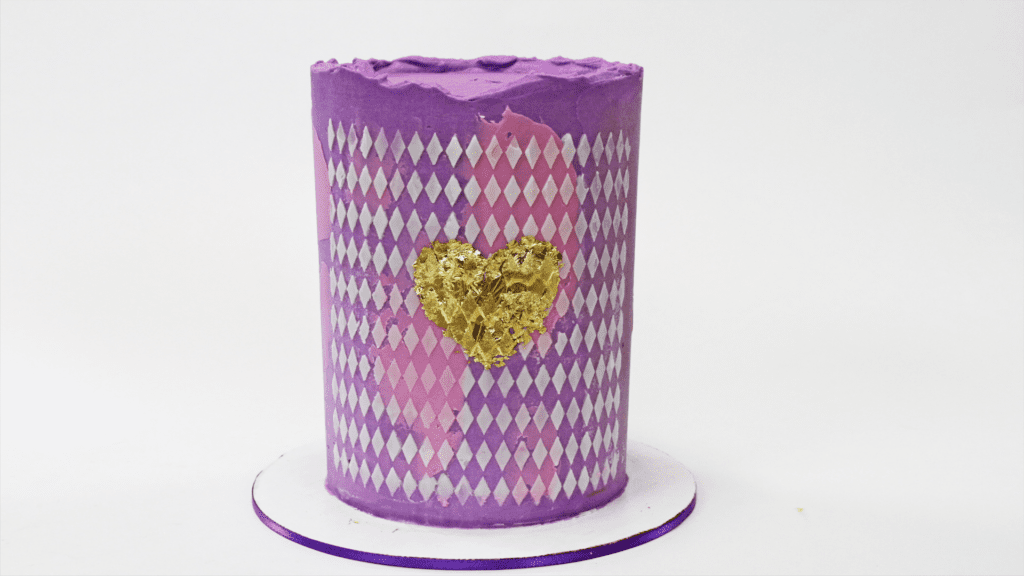
For very specific placement of gold leaf, use a stencil. After the frosting on the cake has set, brush it with a clear alcohol like vodka to make it moist so that the gold leaf will stick.
Wrap a stencil around the cake and then peel the backing paper away from a sheet of golf leaf and press the gold leaf against the stencil. It will stick to the damp frosting through the gaps in the stencil. The alcohol will evaporate and disappear within a few minutes.
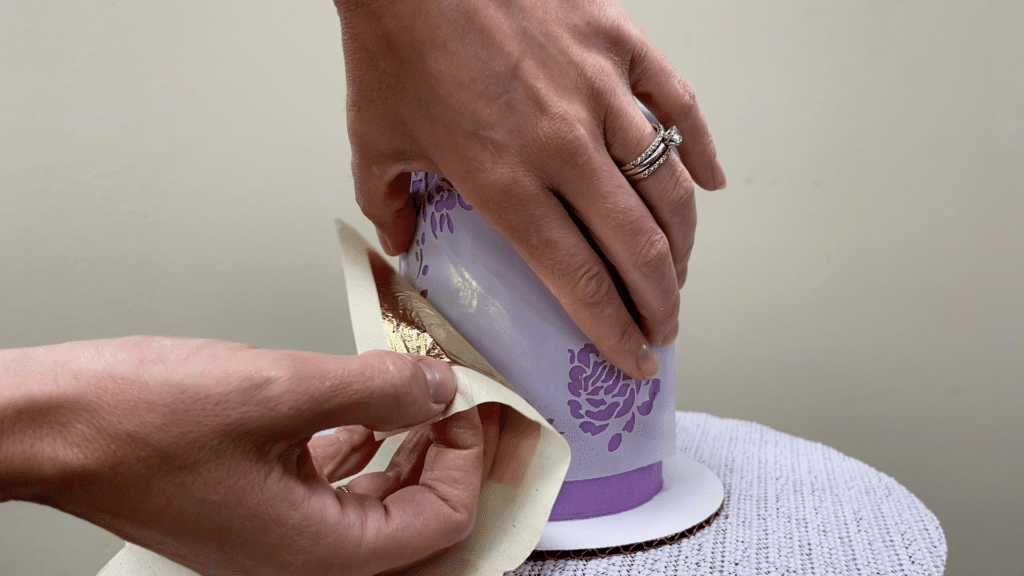
Simple shapes work best for this because details are easily lost in intricate stencils. If you don’t like the result you can brush it away with a paintbrush dipped in vodka, which will dissolve the gold leaf.
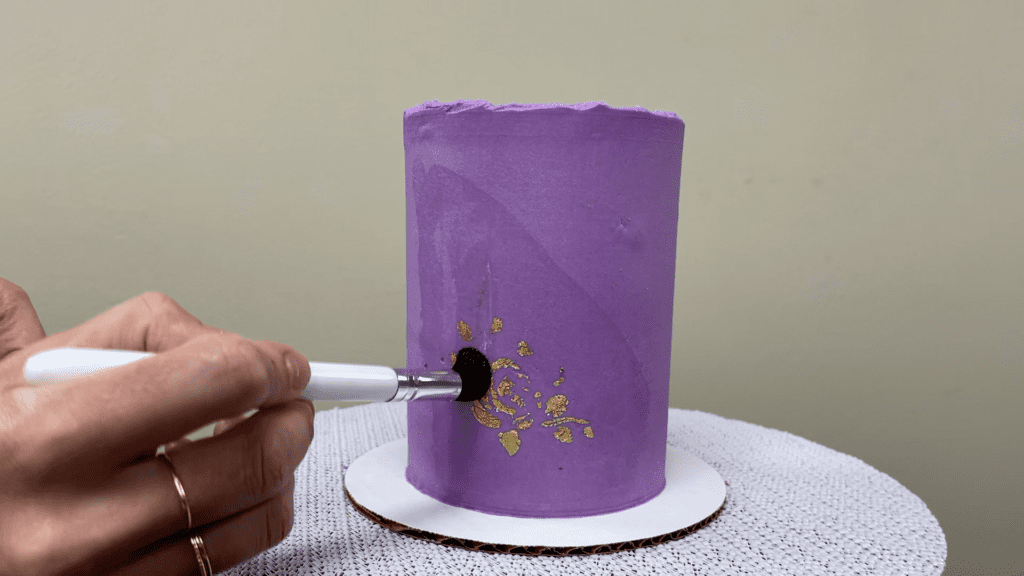
Simpler designs are more effective than very intricate designs. To make your own stencil, cut a shape out of parchment paper and leave the outline intact.
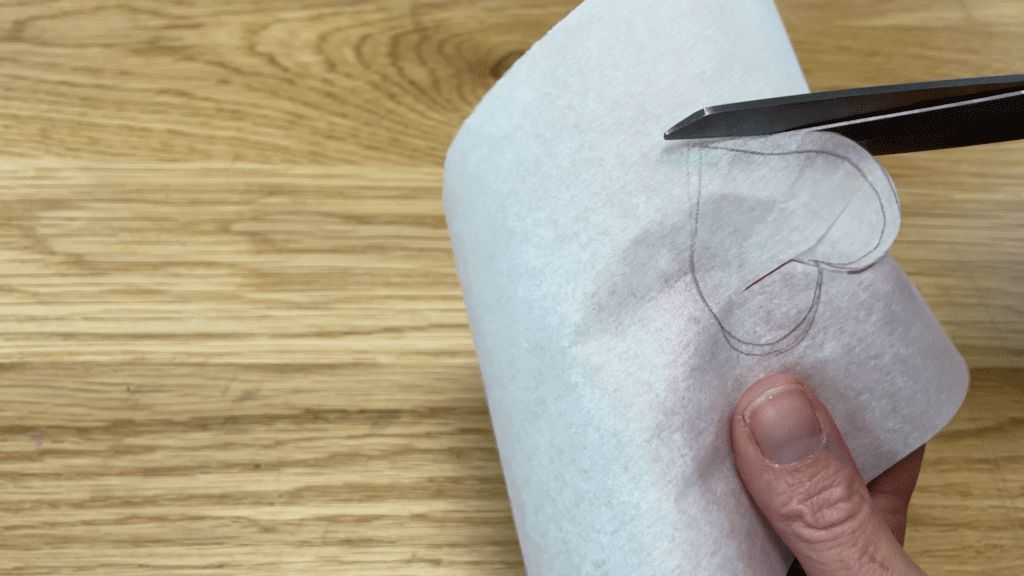
Press the outline against a cake and brush on some vodka with a paintbrush or a sponge. This will provide some moisture for the gold leaf to attach to.
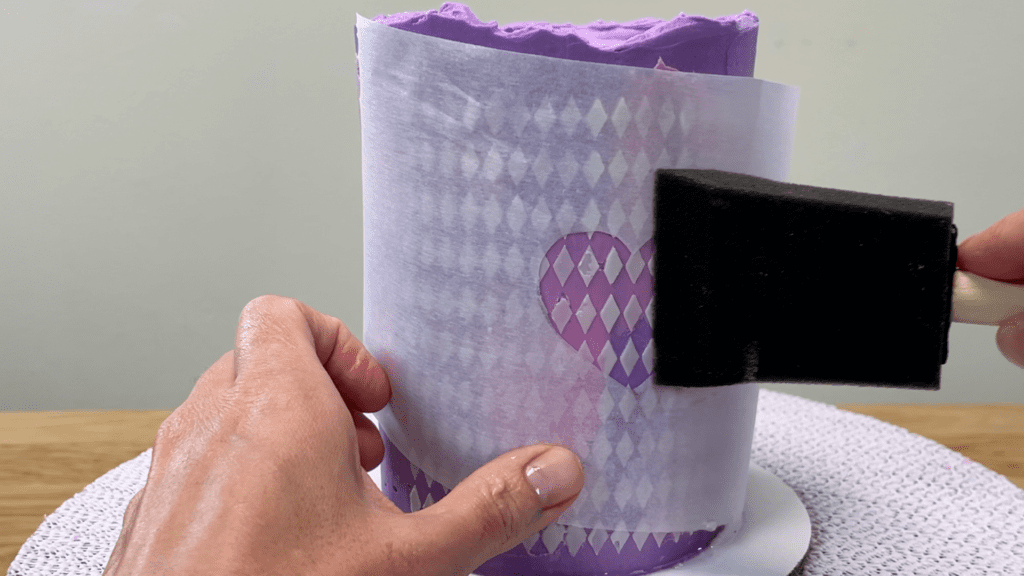
Peel one side of the backing away from a sheet of gold leaf and press the gold leaf onto the stencil, pushing through the other side of the backing so that you don’t touch the gold leaf. When you peel that side of the backing away, if there are any parts of the stencil shape that aren’t covered with gold you can try brushing gold leaf from the parchment paper surrounding it, over onto the shape, to cover it up completely.
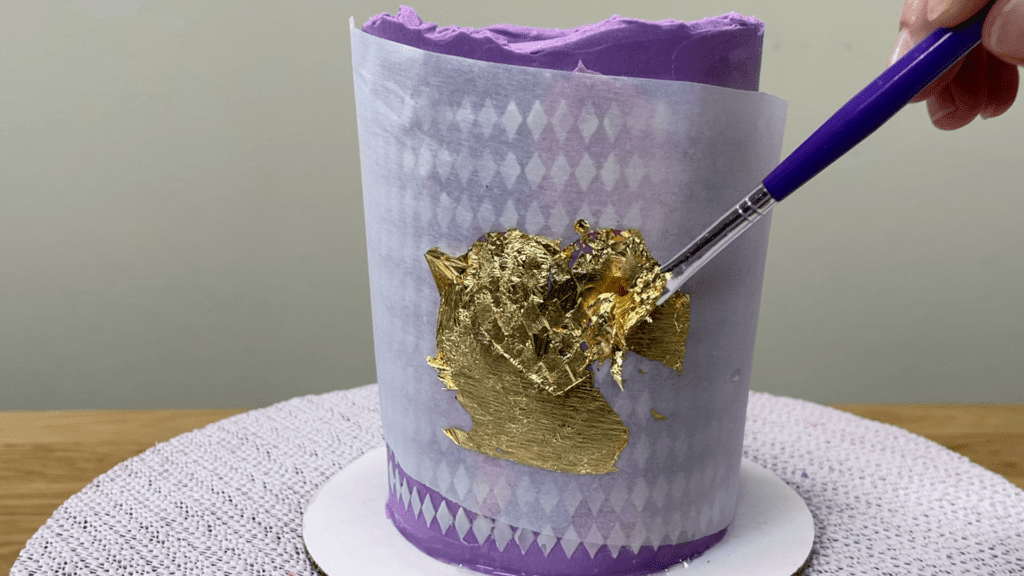
Peel the stencil off to leave your gold shape behind!
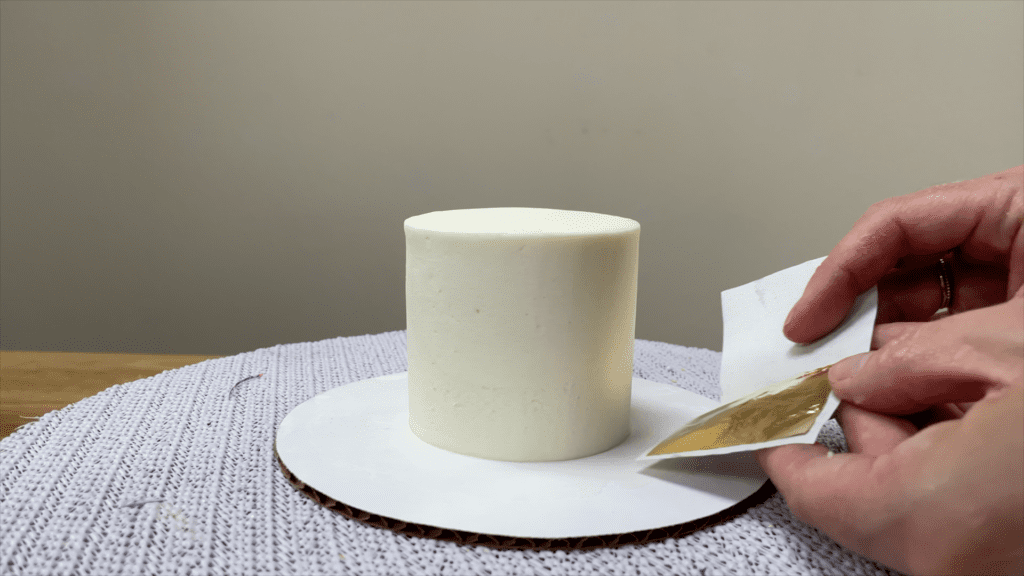
To completely cover a cake with gold leaf, let the frosting on the cake set and then peel off one side of the backing paper.
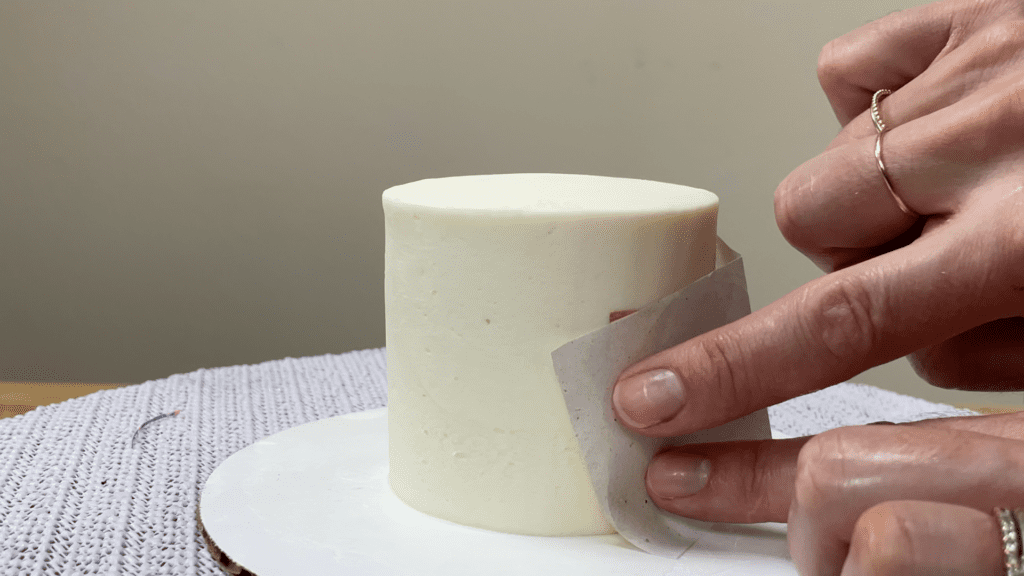
Press the gold leaf into the frosting on the cake, using the other side of the paper to press without touching the gold leaf with your hands.
When you peel the backing paper away, the gold leaf will be left on the cake.
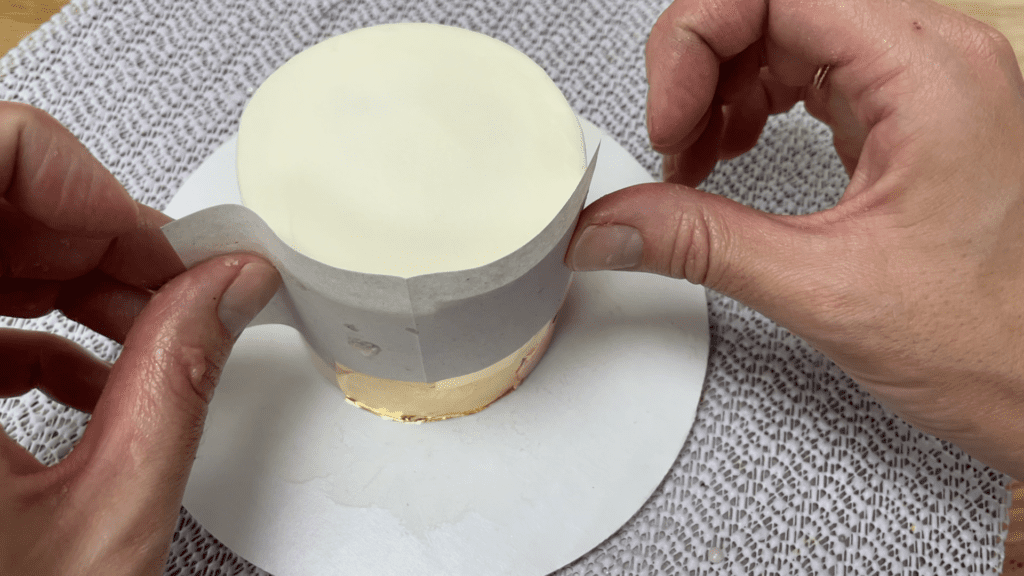
Repeat the process with several sheets of gold and they’re so thin that where they overlap they’ll blend together to form a flat layers of gold all over the cake!
I hope this tutorial has been useful! Check out my online cake school for LOTS of cake decorating courses and join my Club for access to ALL of my classes as well as live interactive demonstrations and Q&A sessions!
Here’s the video version of this tutorial:
You can create stunning cakes even if you only have 5 minutes to spare! I’ll show you 5 cake designs you can decorate in 5 minutes, sharing my tips for the most efficient techniques.
If you prefer to watch a video of this tutorial, scroll to the bottom of the page.
Create gorgeous ruffles using a petal tip. Fill the piping bag with buttercream or whatever frosting you’re using and you’ll see the tip looks like a teardrop, with a wide end and a narrow end.
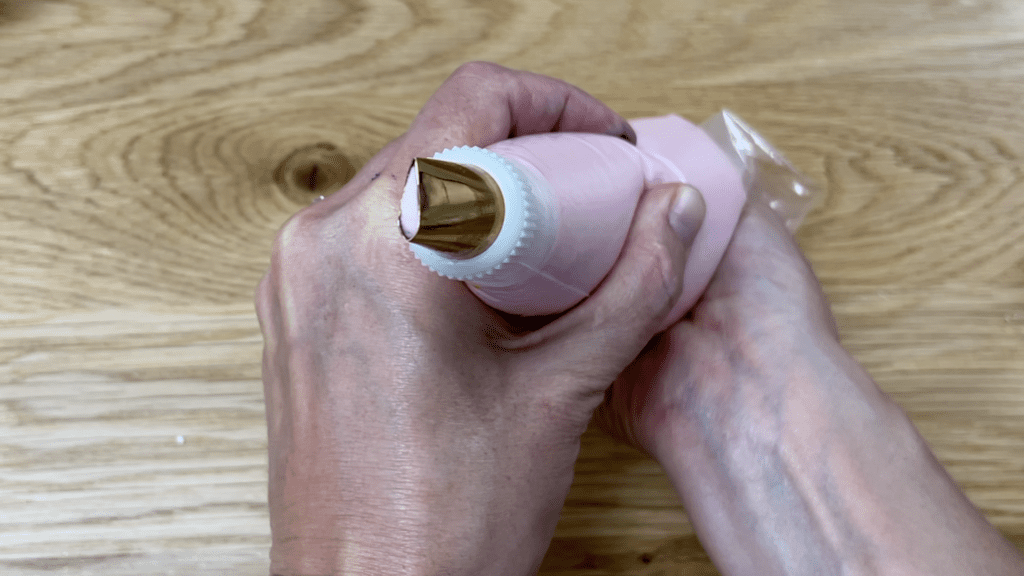
Hold the tip down, with the wide end pressed against the cake. Squeeze the bag and wiggle it back and forth slowly as you lift it up the side of the cake, keeping the tip pressed against the cake so that the ruffles you’re piping stick to the frosting on the cake.

I like to do this after the frosting on the cake has set so I put this cake in the fridge for an hour before piping these ruffles. That way, the frosting is firm so you won’t damage it by pressing the piping tip against it. Wiggle the ruffles as much or as little as you like, and pipe them as close or far apart from each other as you like.
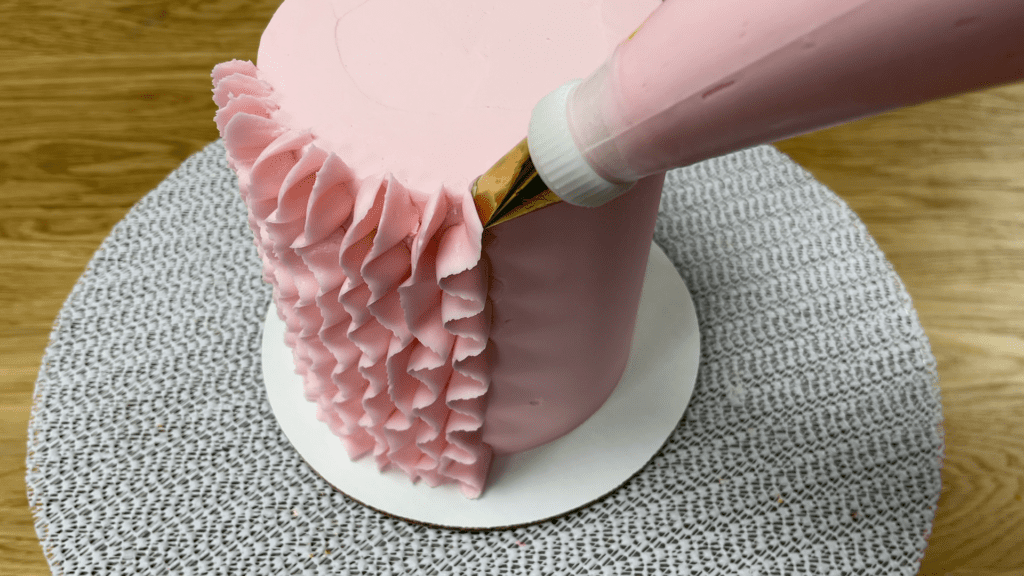
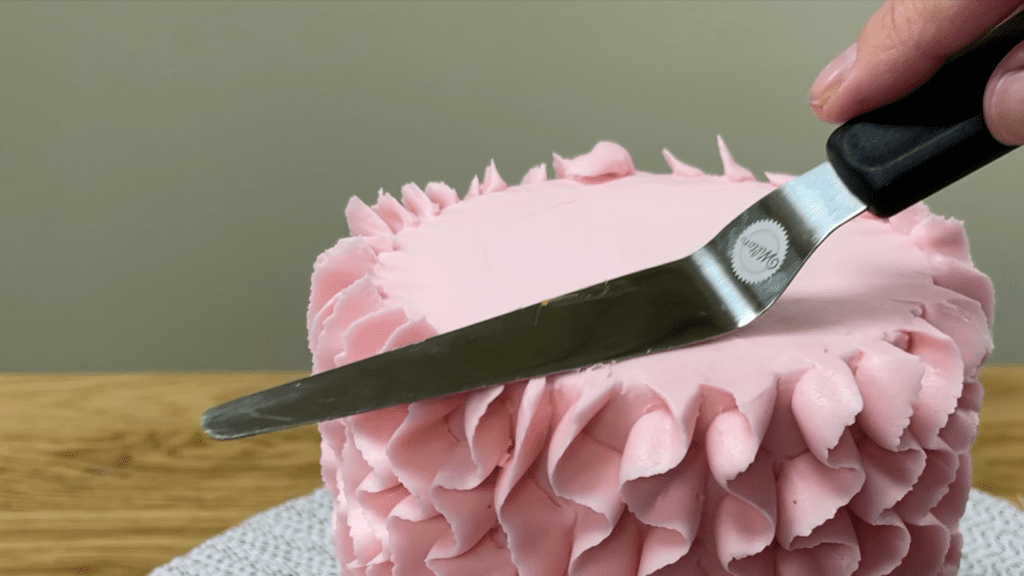
I’m using my 4 Minute Buttercream but whipped cream will work for this or meringue buttercream. Pipe the ruffles so that they stick up a bit above the top edge of the cake, and we’ll tidy that up next.
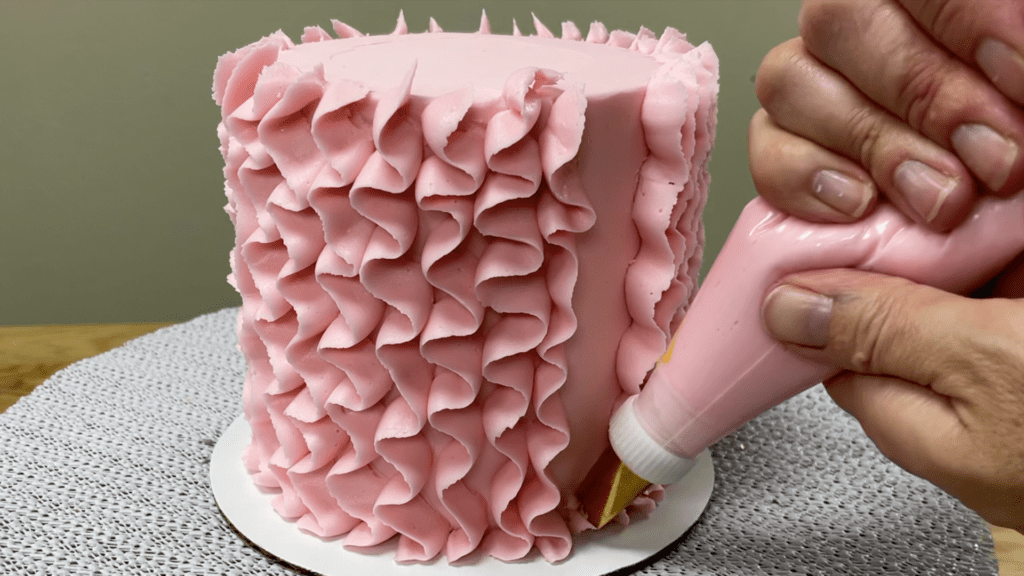
When you finish piping ruffles all the way around the cake, use an
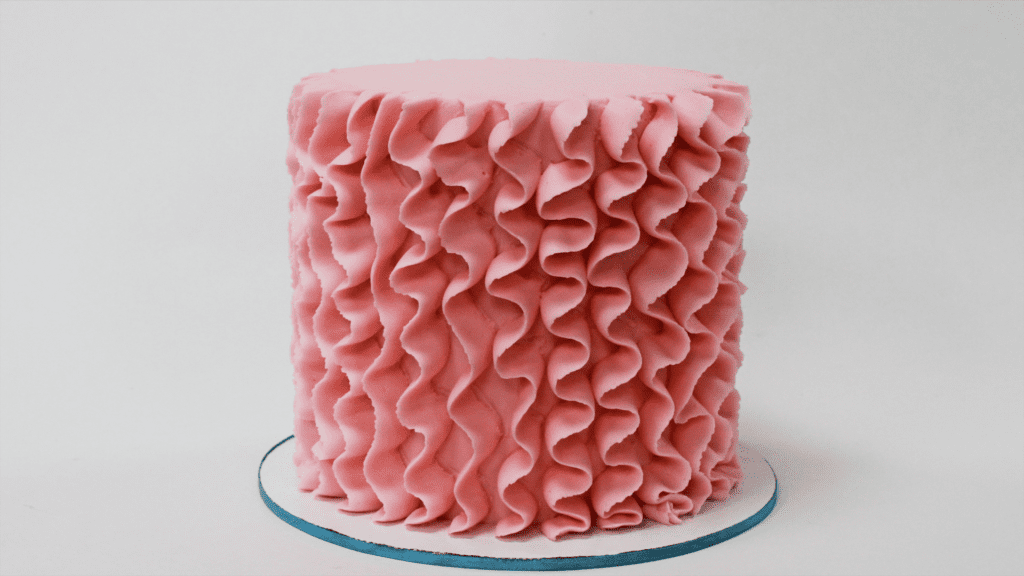
With just one piping tip and one motion all around the cake, you can create gorgeous texture in less than 5 minutes!
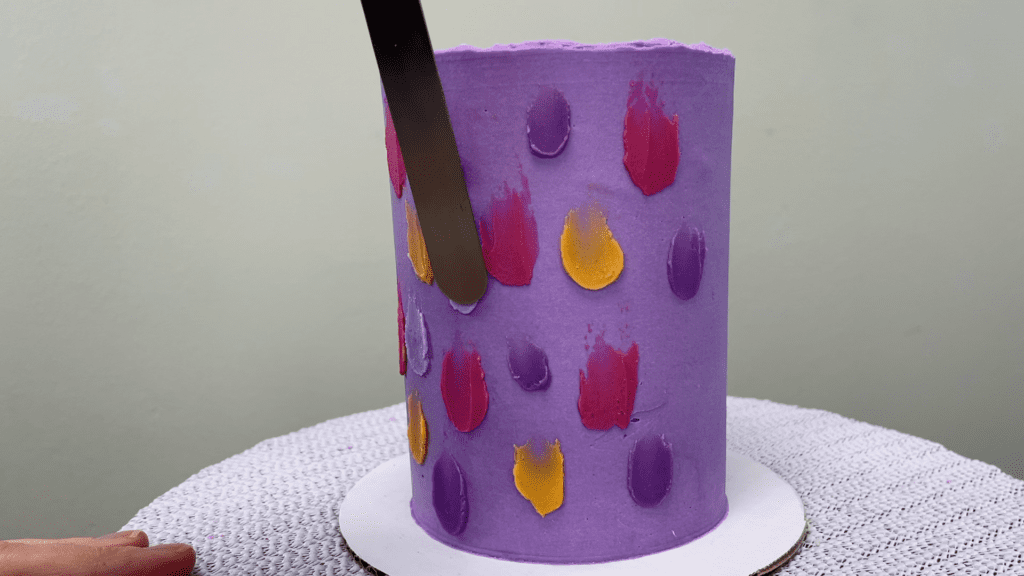
Add quick colour and texture by spreading or piping dots onto a cake and then swooshing them upwards. I have a few tips for doing this fast, and also to get the neatest results.
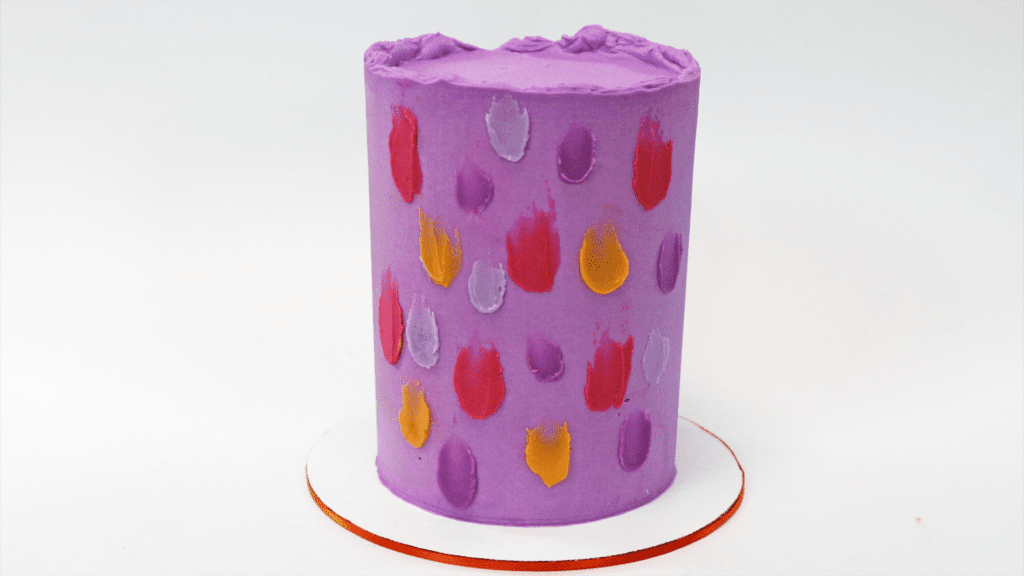
The most efficient way to do this is to store any small amount of leftover buttercream from other cakes in ziplock bags in the freezer. Pull the colours you want out the night before you do this so that they defrost and come to room temperature.
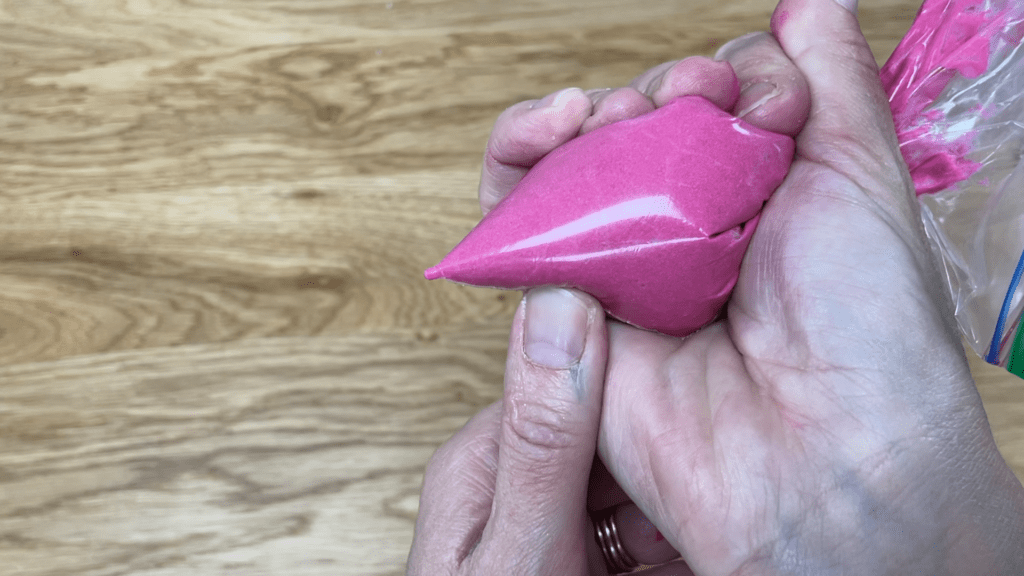
Snip off a corner of the bag and squeeze the leftover buttercream straight onto the cake. Make sure the frosting on your cake has set before you start, so that these colours sit on top of the frosting and don’t blend with the base colour, and that way the colours and texture will really stand out.
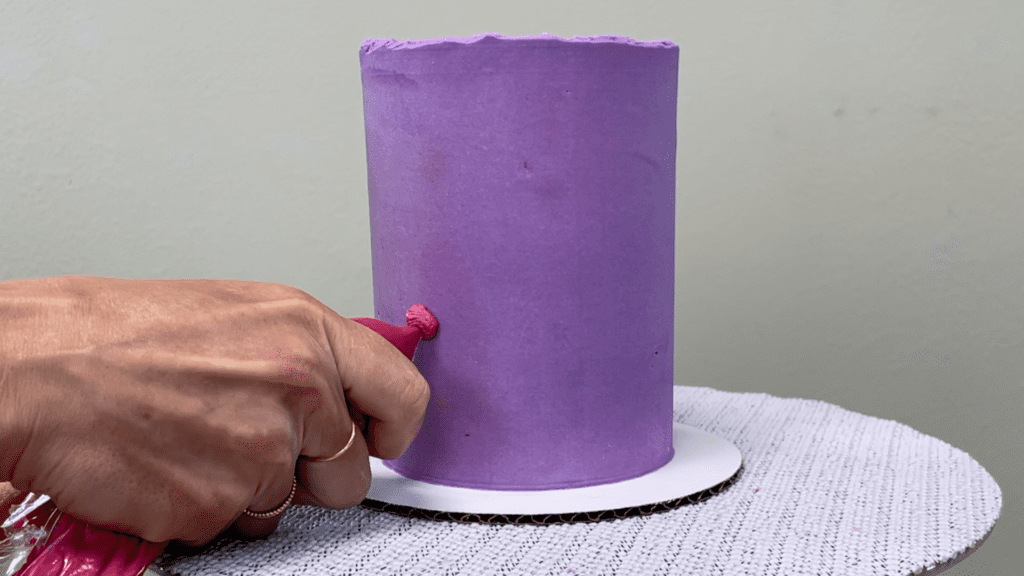
Use an
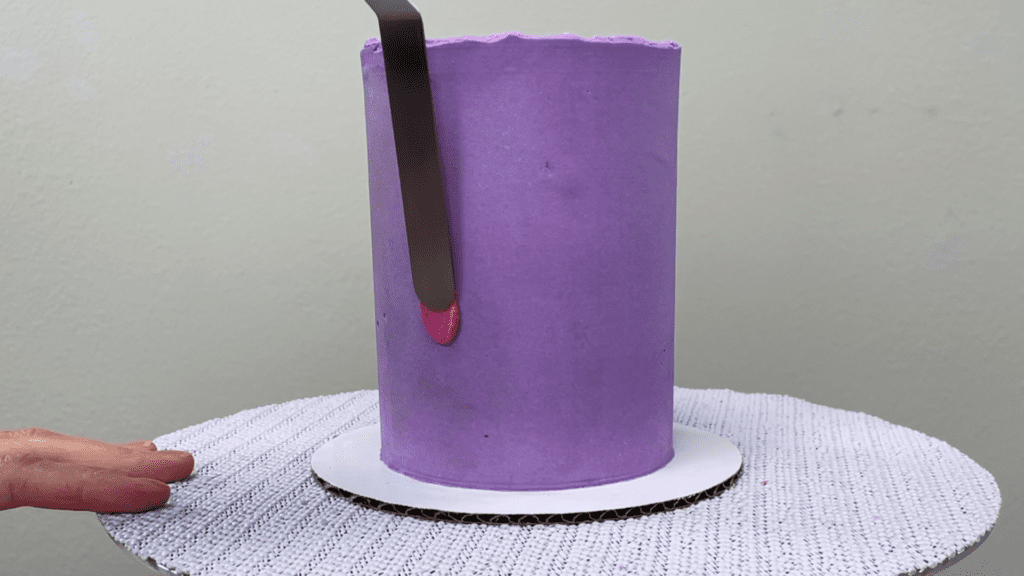
This is a really fast and simple way to add LOTS of colour to your cake in less than 5 minutes!
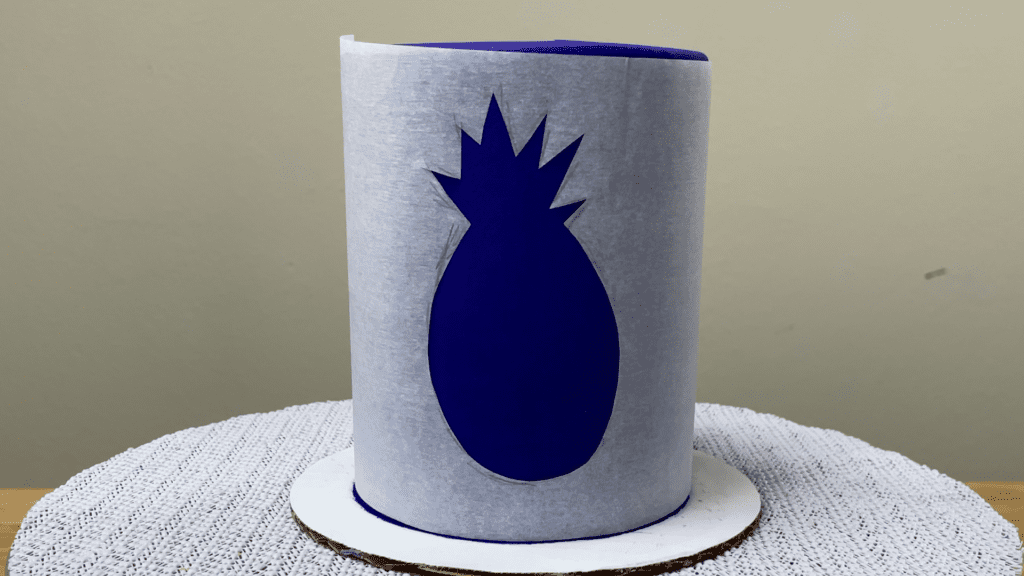
Make your own simple stencil by sketching a shape onto parchment paper and cutting it out to keep the paper outside of the shape intact. Notice that I’ve placed the shape within the curve of the parchment, so the sides curl underneath my shape. That will be important in a minute.

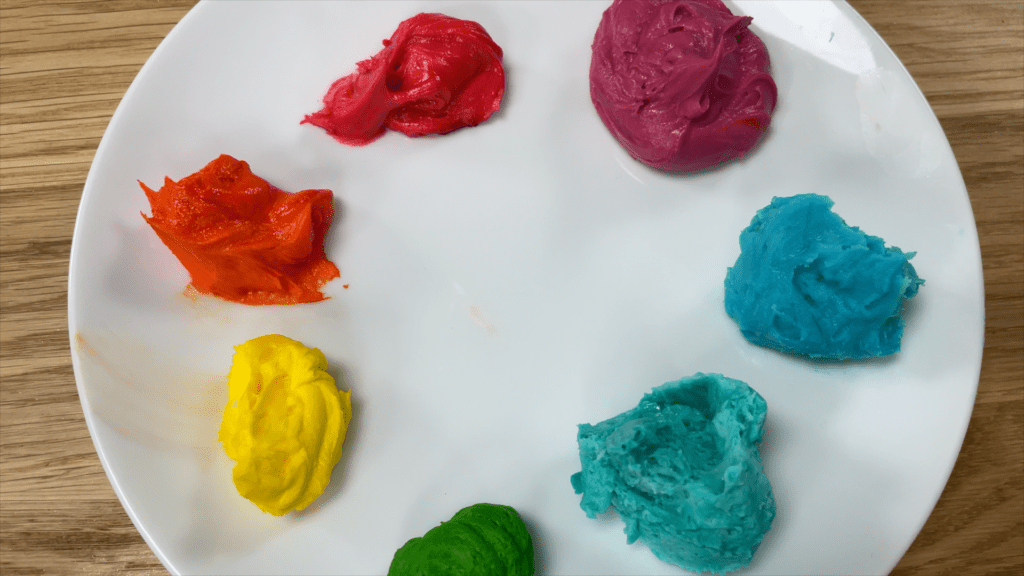
Use as many colours as you like for this – I’ve squeezed the leftovers from several piping bags onto this plate.
Wrap your stencil around a cake after the frosting sets – this cake has been in the fridge for an hour. Notice that the sides of the stencil wrap around the cake for me, holding the stencil in place, because I put the shape within the curve.
Scoop up some buttercream with an
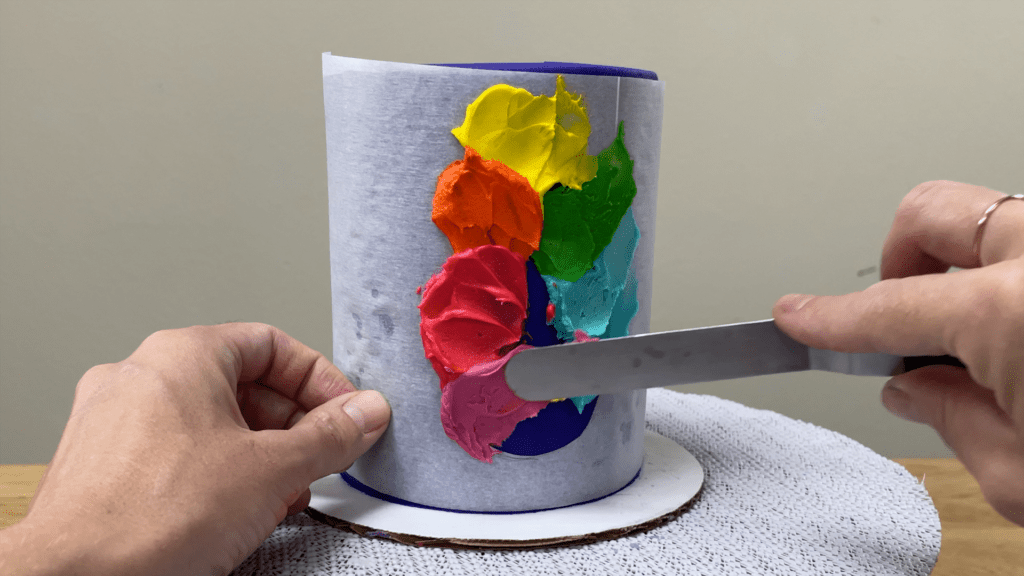
When the shape is covered up, use a frosting smoother to scrape over the stencil and that will smooth the frosting and blend the colours together slightly. You can spread on more to do any touchups and then scrape again until you’re happy with how smooth the colours are.
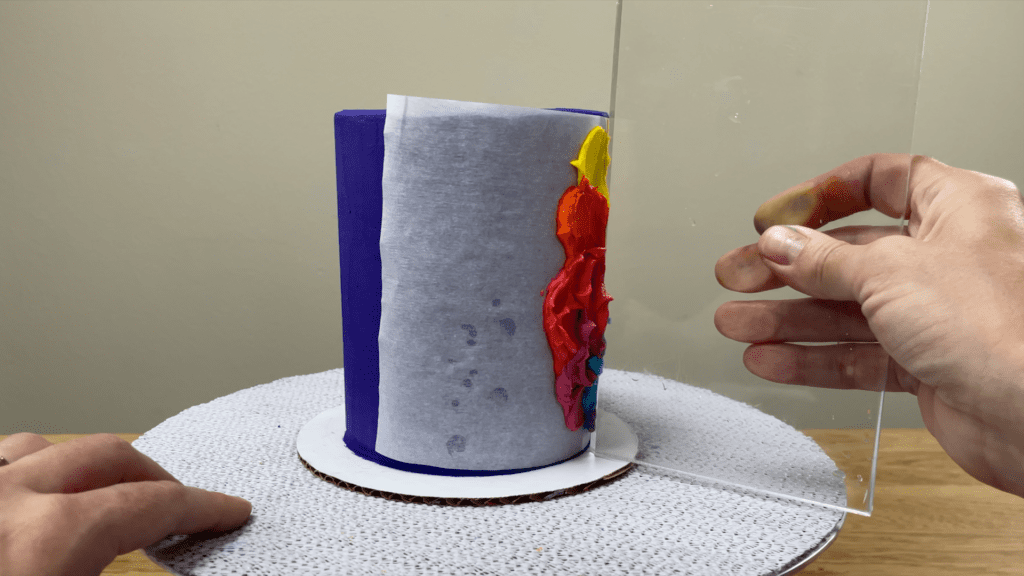
Carefully peel the stencil off from the sides towards the middle, and pull it away.
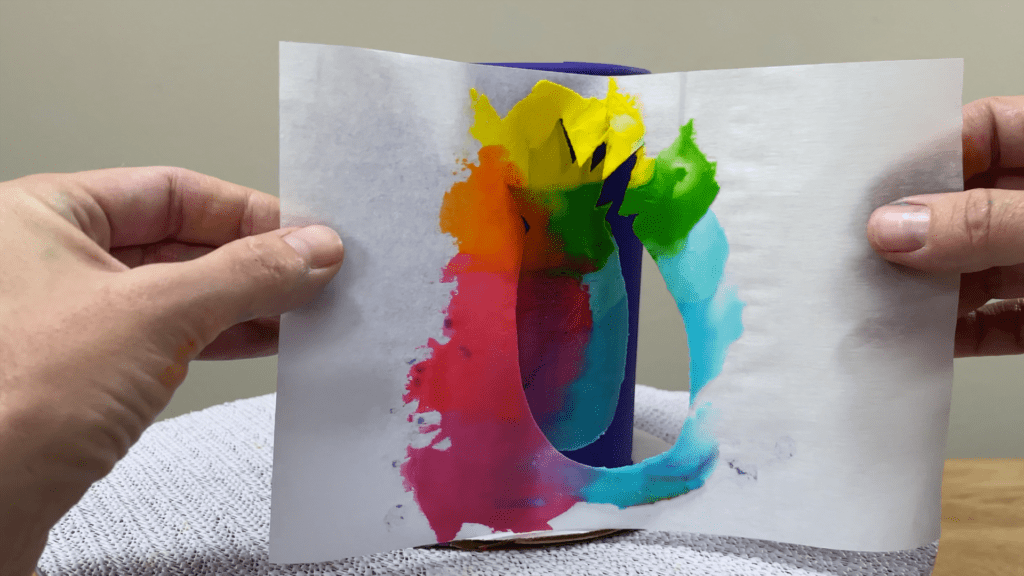
You can scrape off any smudges of buttercream using a toothpick.
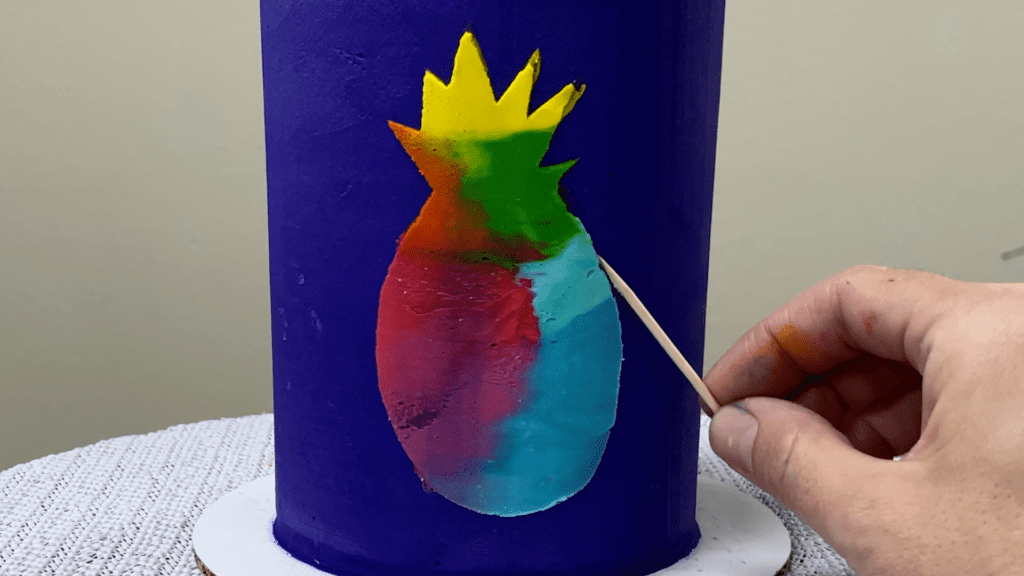
Also use a toothpick to add any details like these grooves here. Because the base frosting on the cake is cold and hard from the fridge, the toothpick will only scrape off the frosting you’ve just spread onto the stencil, and it won’t damage the base frosting on the cake.
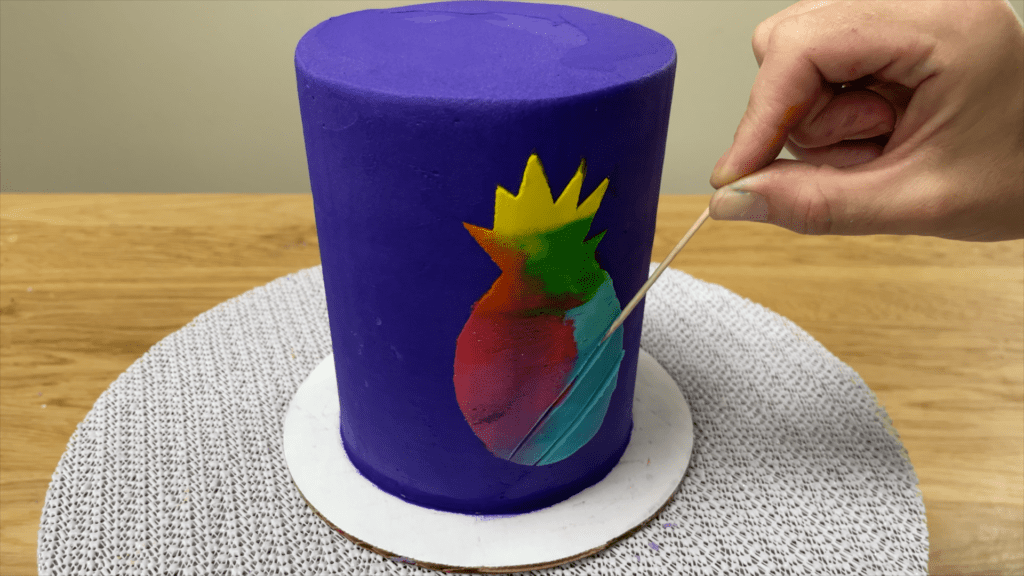
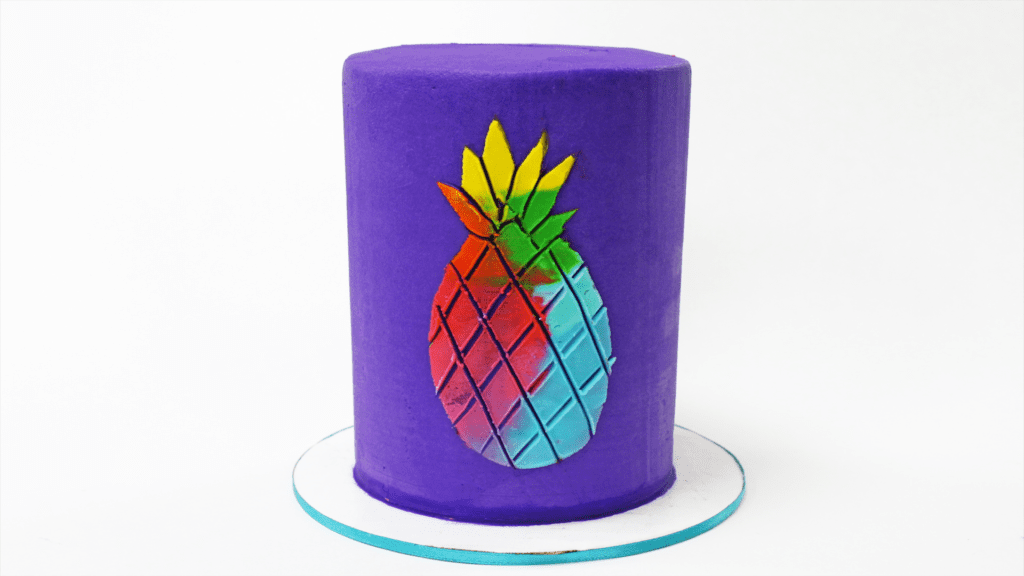
Homemade stencils are a quick way to create any shape on a cake, and simple shapes like this pineapple work best. Detailed cakes don’t have to take all day to decorate – I have an online course called Fabulous Cakes, FAST, teaching how to decorate 10 cakes in less than 30 minutes each, and to find out more and sign up visit my online cake school.
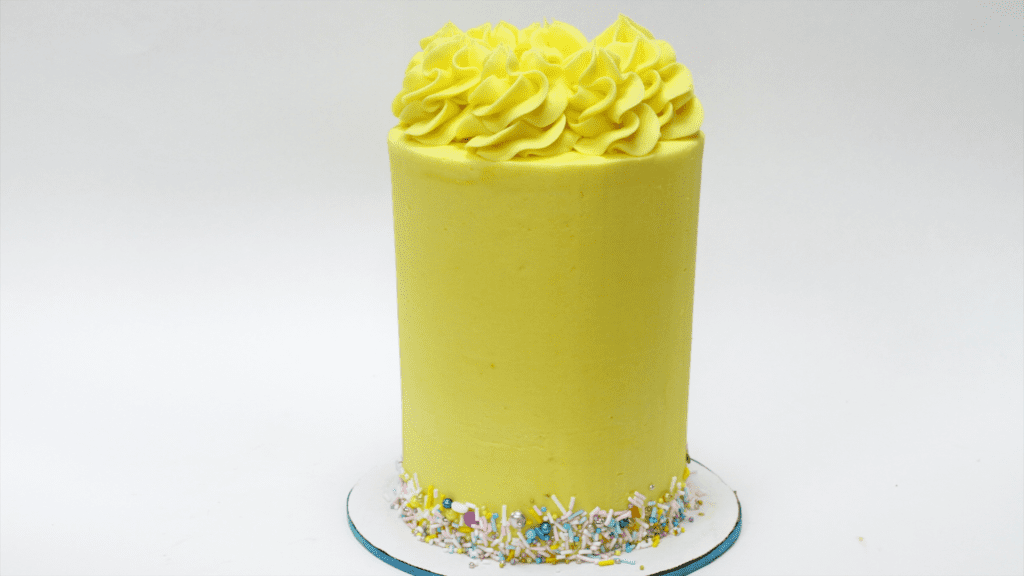
The quickest way to decorate a cake, without having to wait for the frosting to set, is to add some sprinkles around the bottom of the cake to make a border.
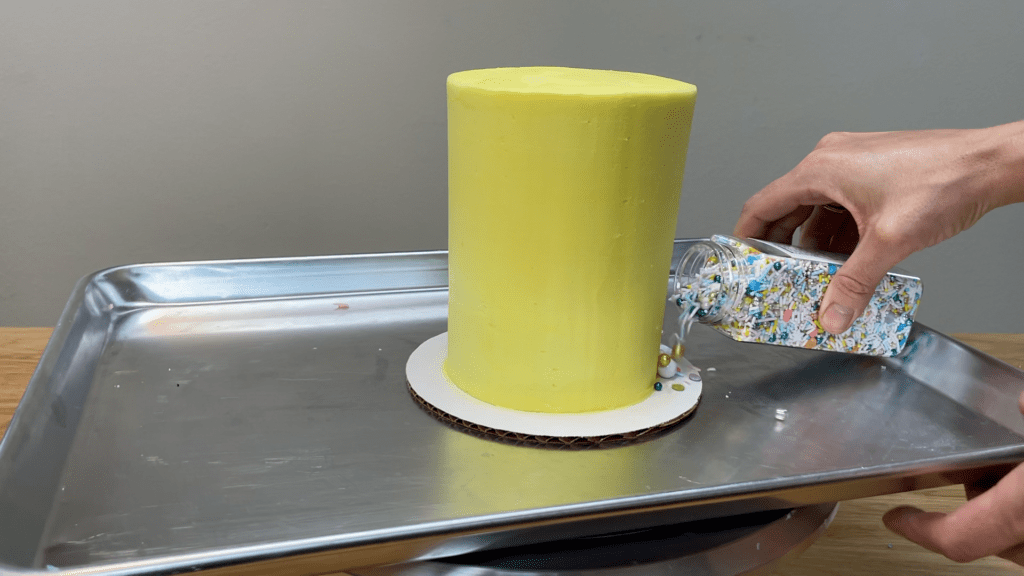
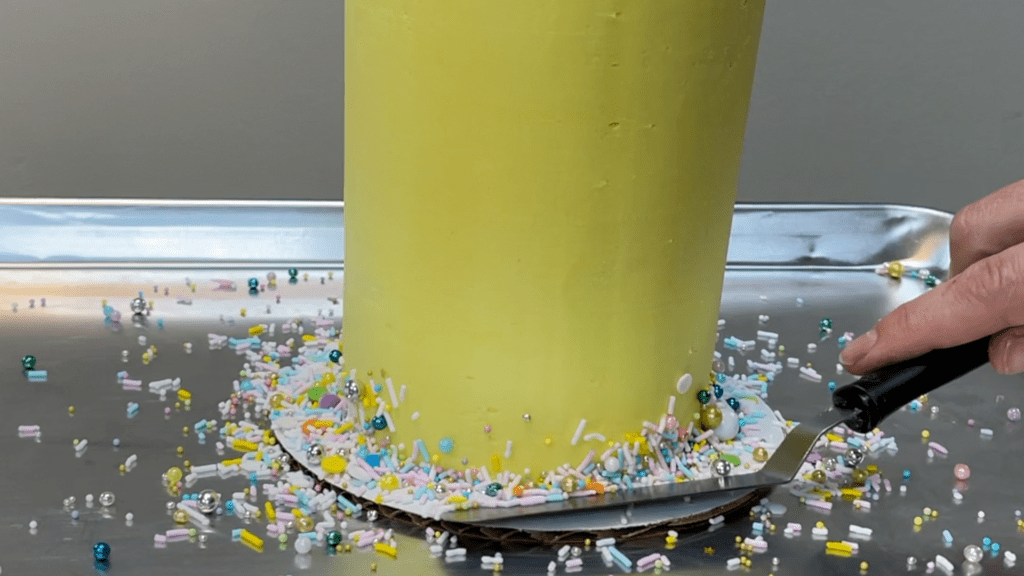
Place the cake on a tray to catch any falling sprinkles so that it doesn’t take you forever to pick those up later! Pour sprinkles onto the cake board all the way around the cake. Don’t worry if sprinkles spill over onto the tray – that’s what it’s there for! you can lift the tray up when you finish and pour the extra sprinkles back into the bottle or packet.
Use an
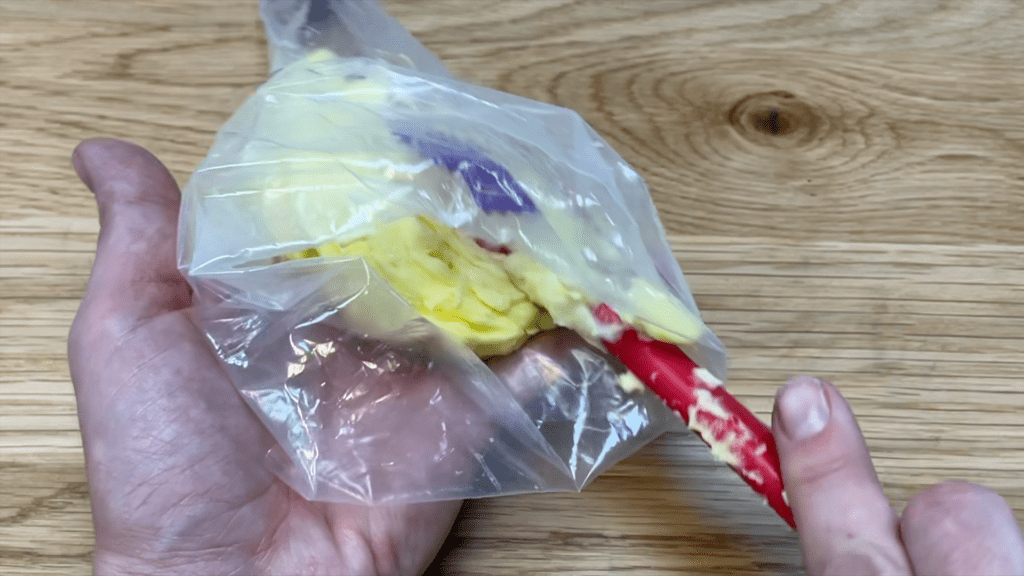
Spoon any leftover buttercream from frosting the cake into a piping bag fitted with a star shaped tip like a 1M tip.
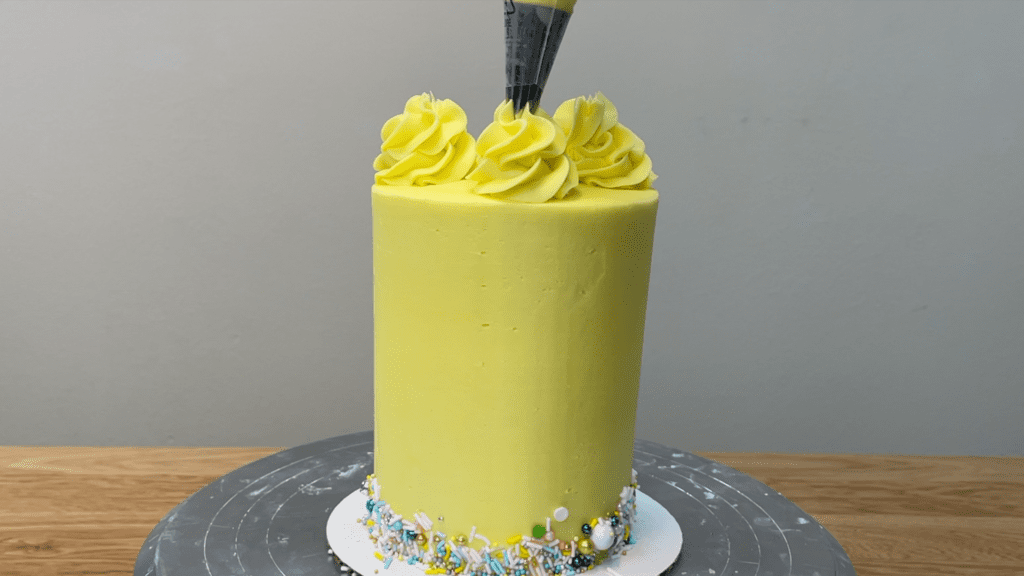
Pipe swirls around the top of the cake, spiraling upwards and making each circle a bit smaller that the previous one until you form a peak on the swirl. Press down slightly, release your pressure on the piping bag and lift it away to leave neat peak.
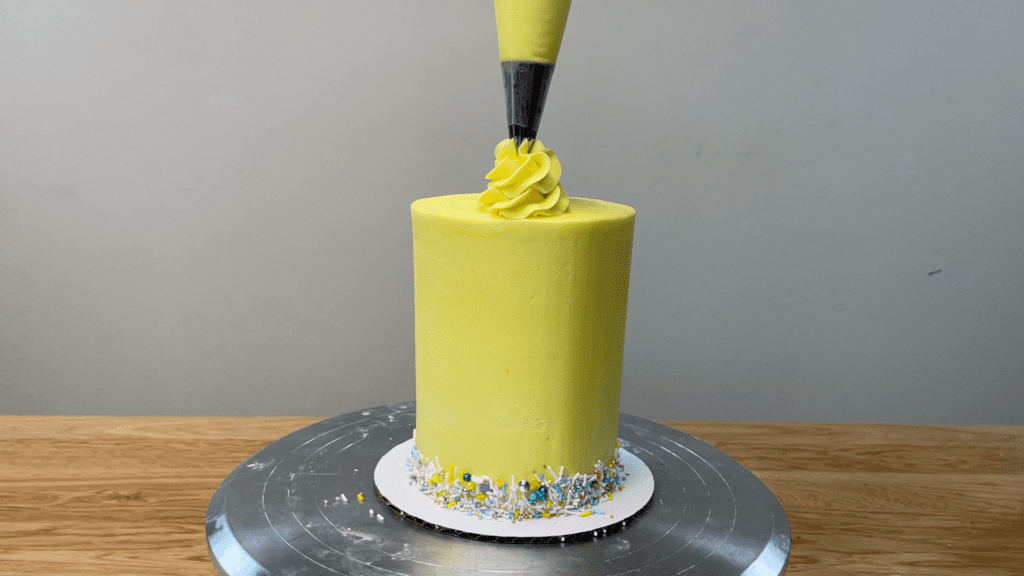
This cake design is simple but the sprinkles provide a burst of colour and the swirls add some height to the cake to make it look more elegant.
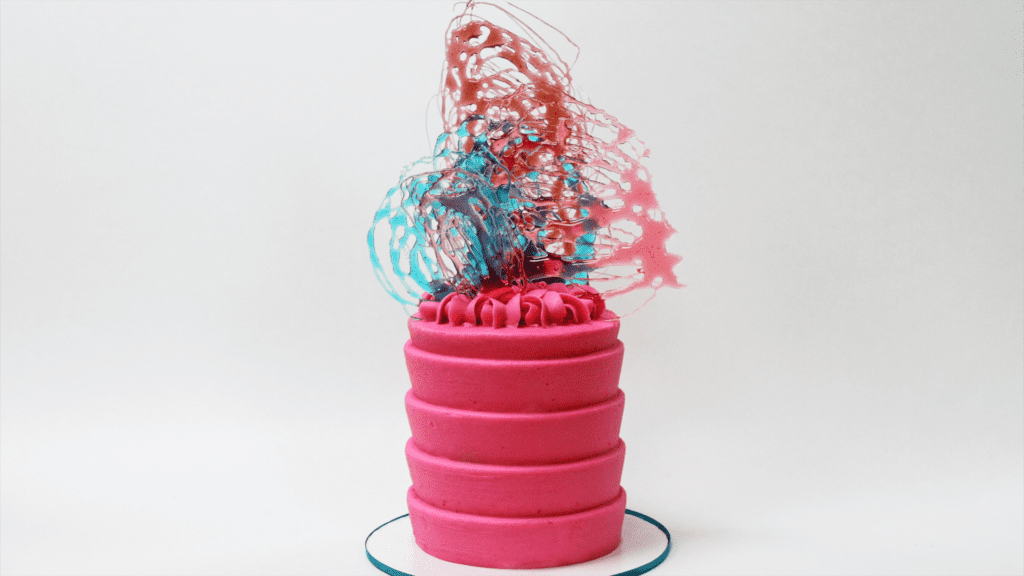
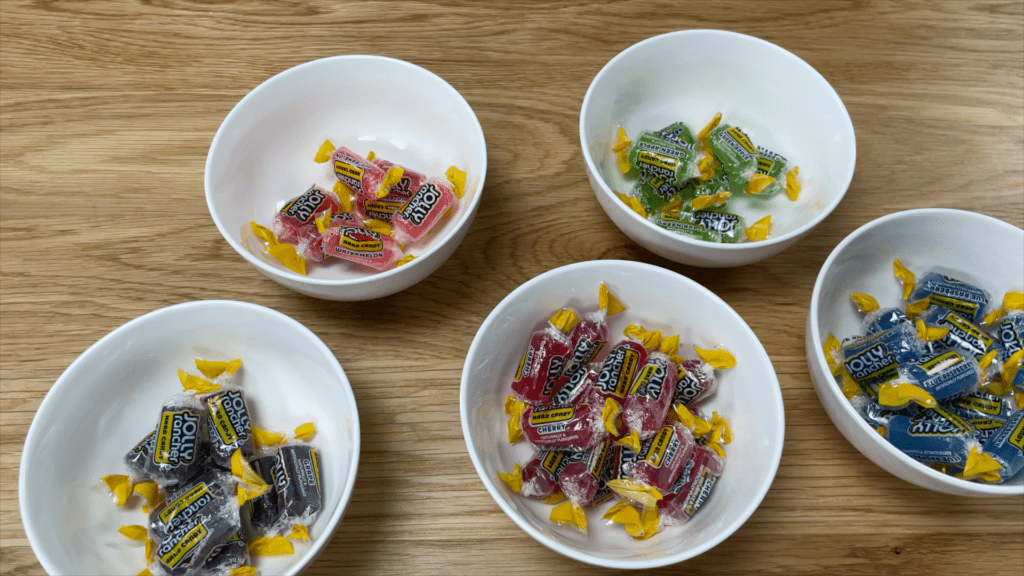
Use any hard candy or boiled sweets to make dramatic cake toppers.
Melt the candy in the microwave for 1 minute, until it’s liquid and bubbling.
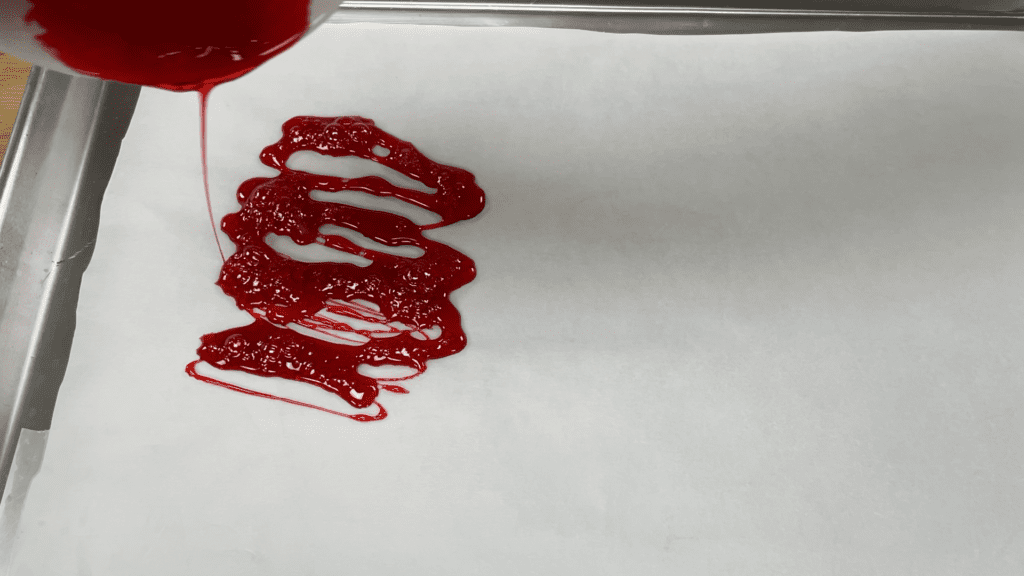
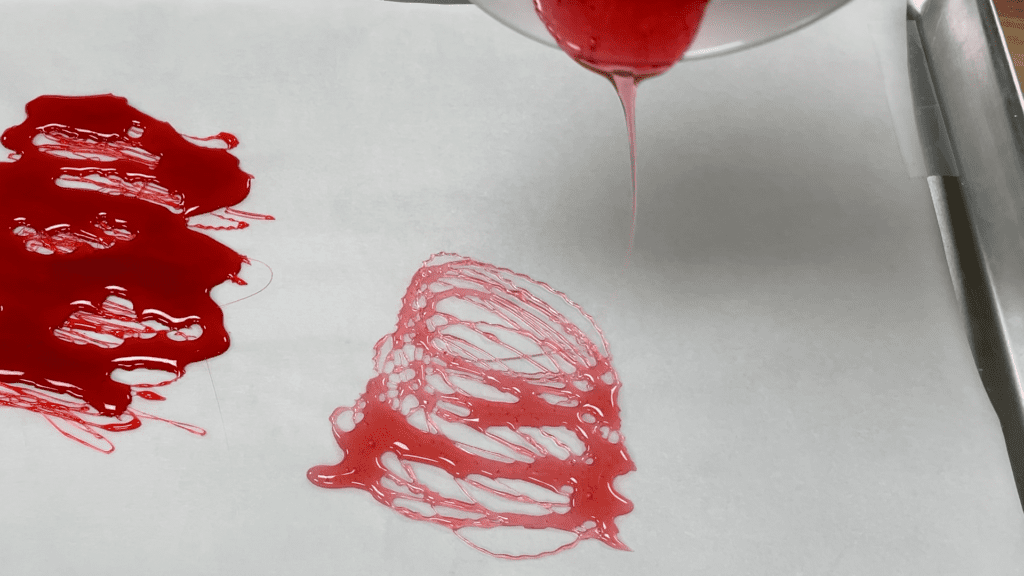
Wait about a minute for the sugar to stop bubbling and then drizzle the melted candy over a piece of parchment paper.
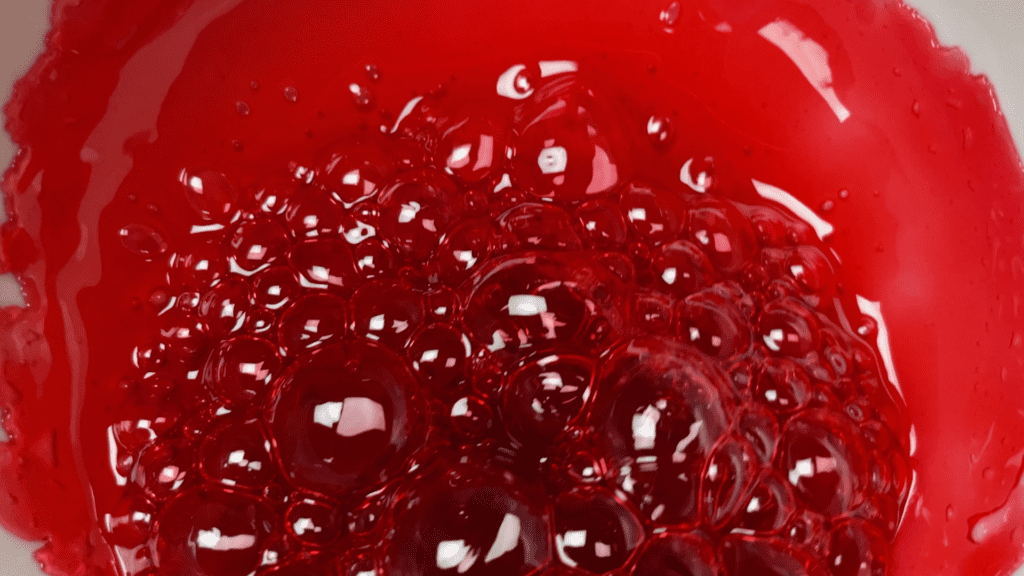
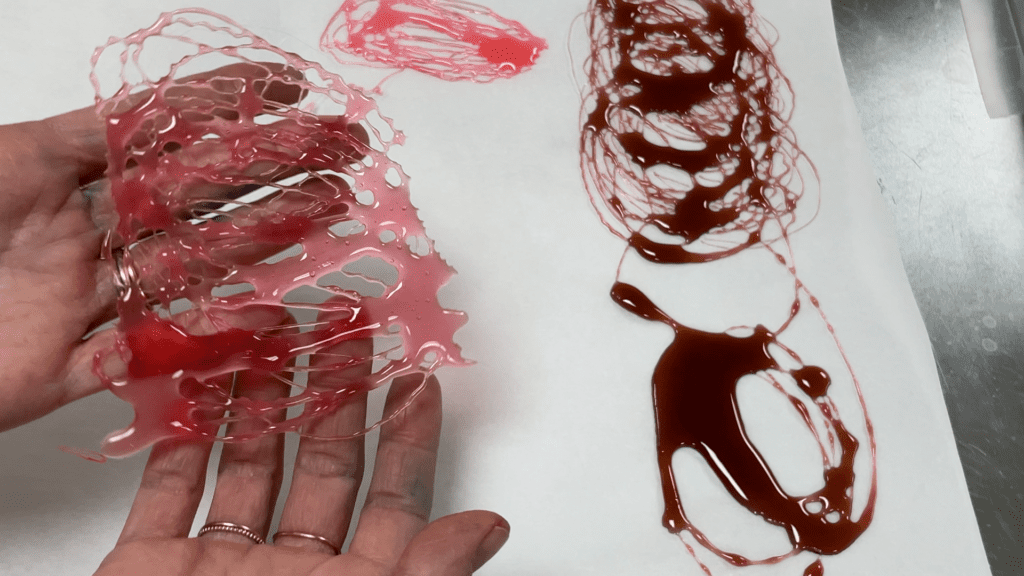
If you don’t wait for it to stop bubbling, the liquid will be too runny to hold it’s shape and it will blob together, like this:
If you wait until the bubbles subside and then drizzle or wiggle it, the lines you make will be thinner and more distinct, like this. The sugar will take about a minute to cool.
Meanwhile, add some piping to the top of a cake. I’m using a 1M tip to pipe these waves, holding the bag slightly in from the edge of the cake and squeezing the buttercream out and letting it bulge out to the edge of the cake and then pulling the bag towards the middle of the cake and swiping away. You can use whatever style of piping you like. The purpose of it is to act as glue, so that the candy decorations will stick to it.
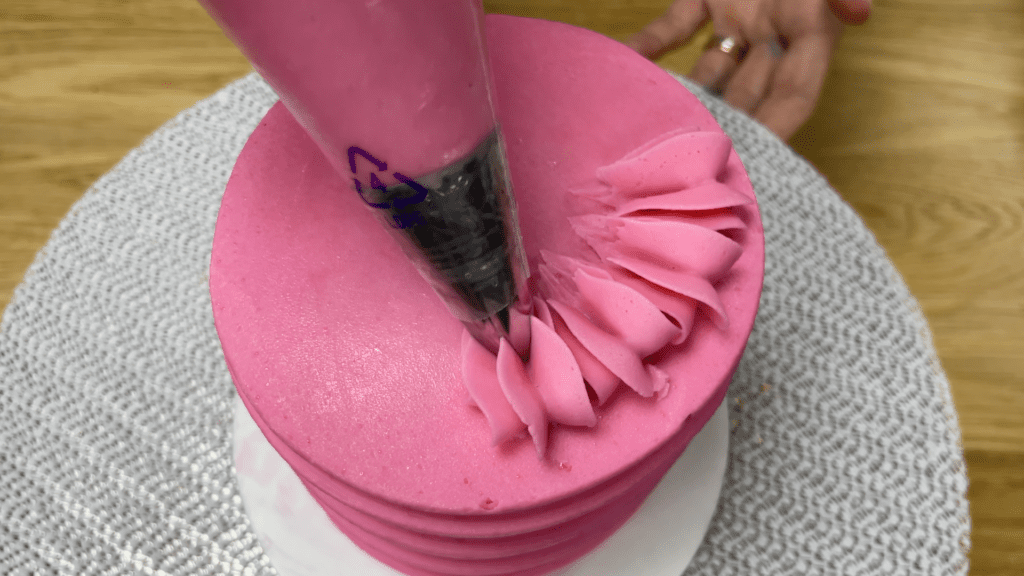
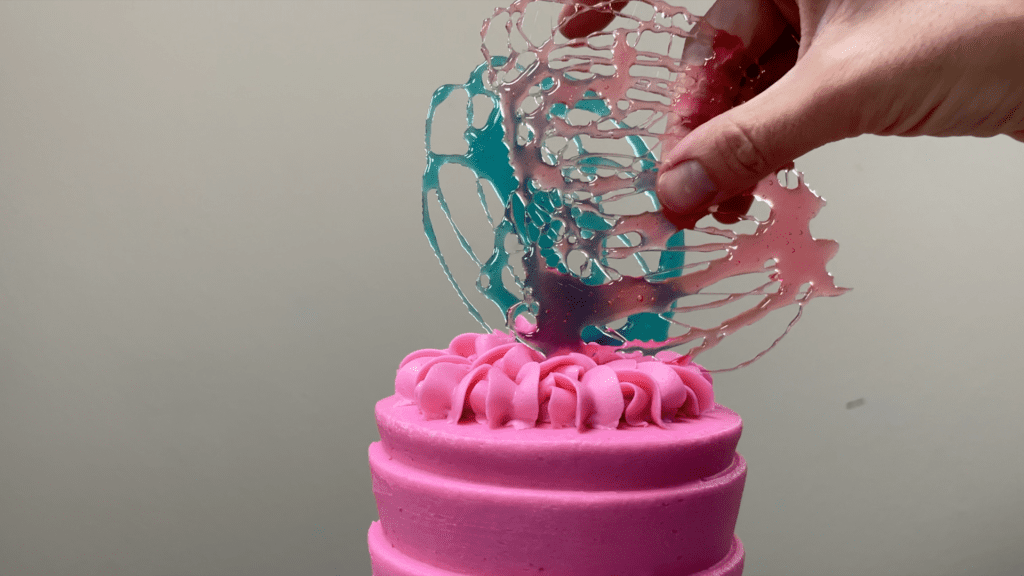
As soon as you finish piping, while the frosting is still soft and sticky, lift your shapes up from the parchment and push them into the piping.
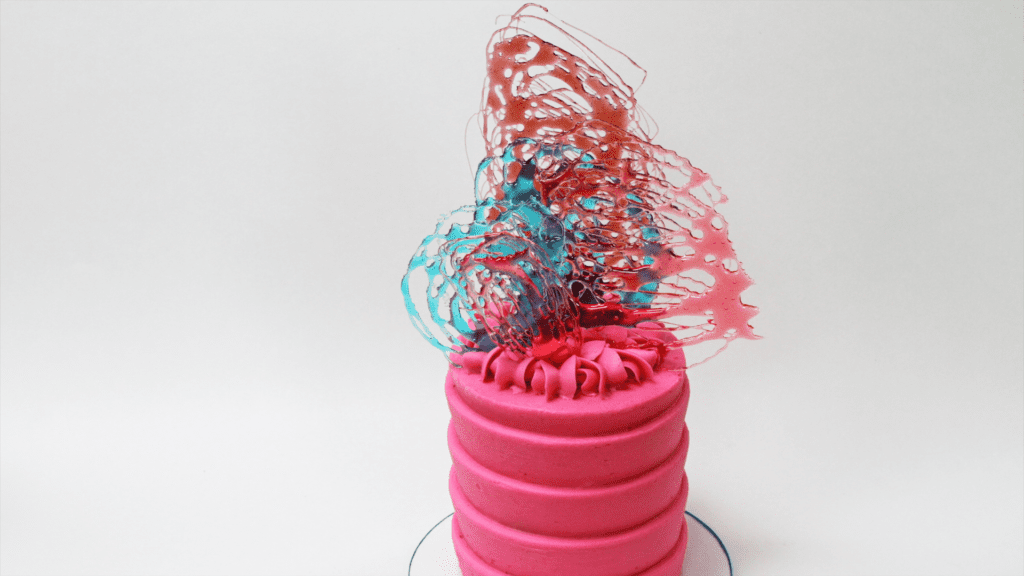
This piping will set and secure the toppers in place. No one will guess you made these topper with melted candy in less than 5 minutes!
I hope you’ve seen some ideas you want to try! Please tag @britishgirlbakes in your photos on instagram so I can see your creations. Visit my online cake school for LOTS of unique cake designs and for monthly cake inspiration join my Club for access to ALL of my online classes as well as live interactive demonstrations and Q&A sessions!
Here’s the video version of this tutorial:
In this tutorial I’m going to show you how to make gorgeous ombre frosting that blends from light to dark gradually, instead of in distinct bands or stripes of colour around the cake. If you prefer to watch a video of this tutorial, scroll to the bottom of the page.
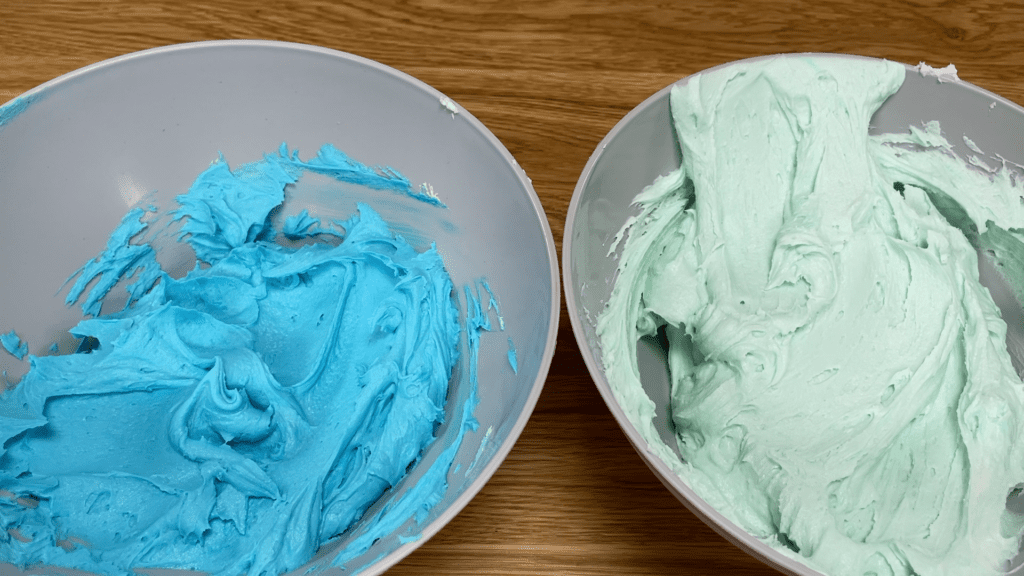
Start with two bowls of frosting, one with twice as much as the other bowl. I’m using my 4 Minute Buttercream but this will work with whipped cream or meringue buttercream, too.
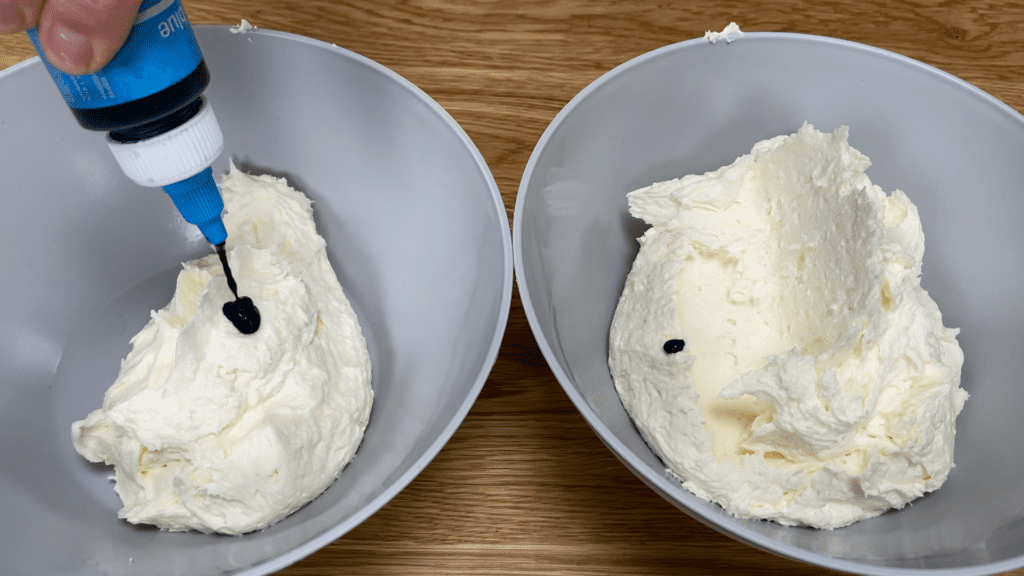
Tint the big bowl of frosting with the lighter colour and the small bowl with the darker colour, using gel colours for the most vibrant shades.
Place your cake on a non-slip mat on a
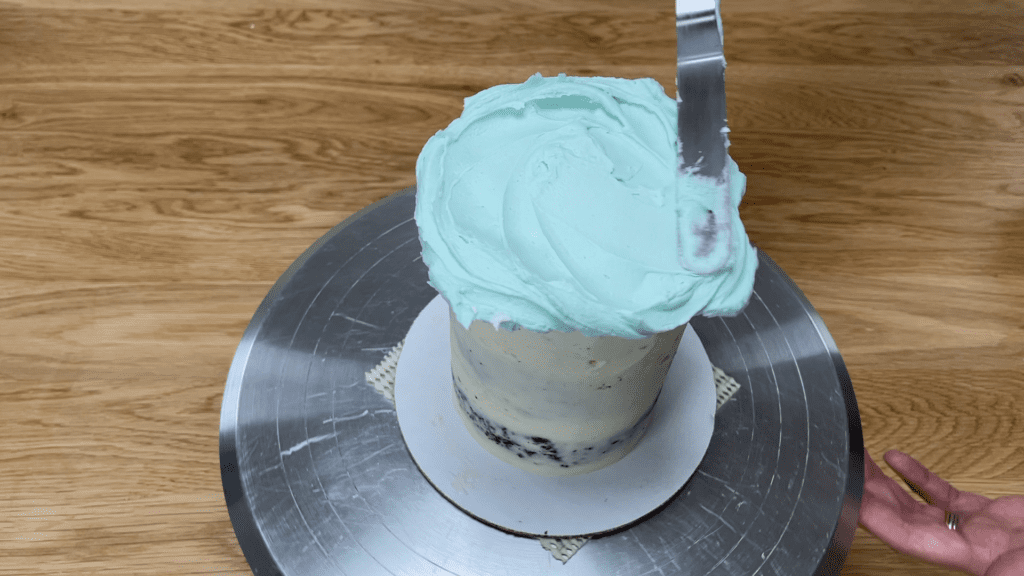
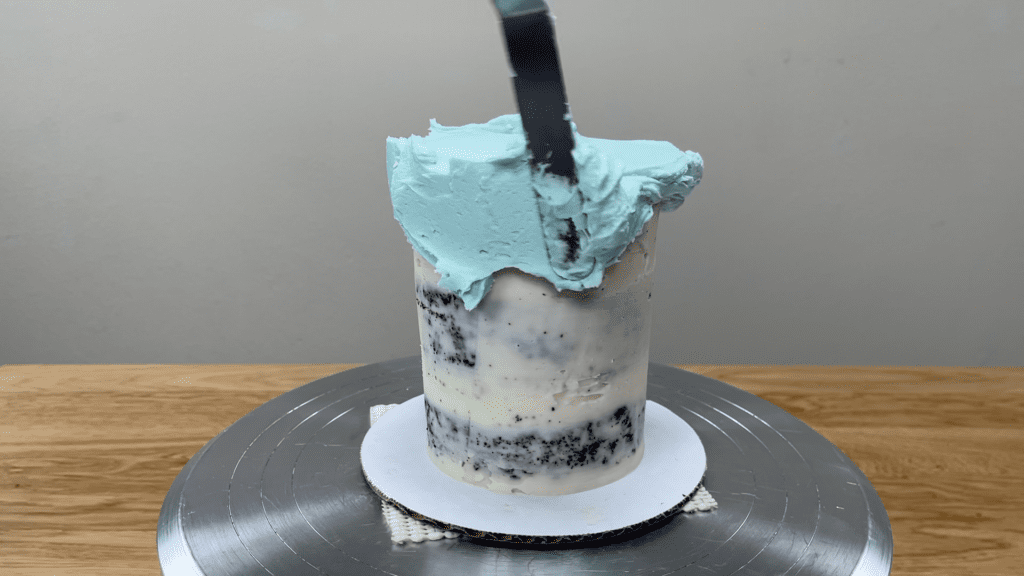
Smooth the frosting on the top of the cake by holding your

Then move onto the sides of the cake, only spreading this lightest colour around the very top of the sides of the cake. Let it stick up above the top edge of the cake, which will allow you to create a very flat top of your cake instead of a domed top.
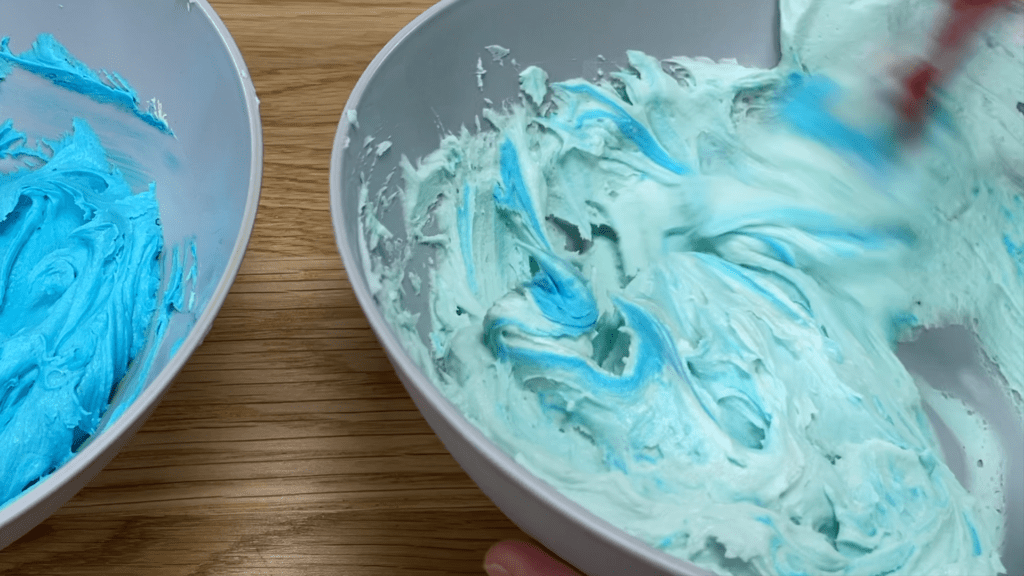
Now scoop up a bit of the darker colour and add it to the lighter colour, stirring it together to create a shade a little bit darker than the original colour that was in this bowl. Leave some of the lightest colour on the side fo the bowl to use for touchups later.
Spread the new colour just below the first colour on the cake, spreading it on as thickly as the previous colour. It’s fine if you spread it over the previous colour because it’s all going to blend together in a minute.
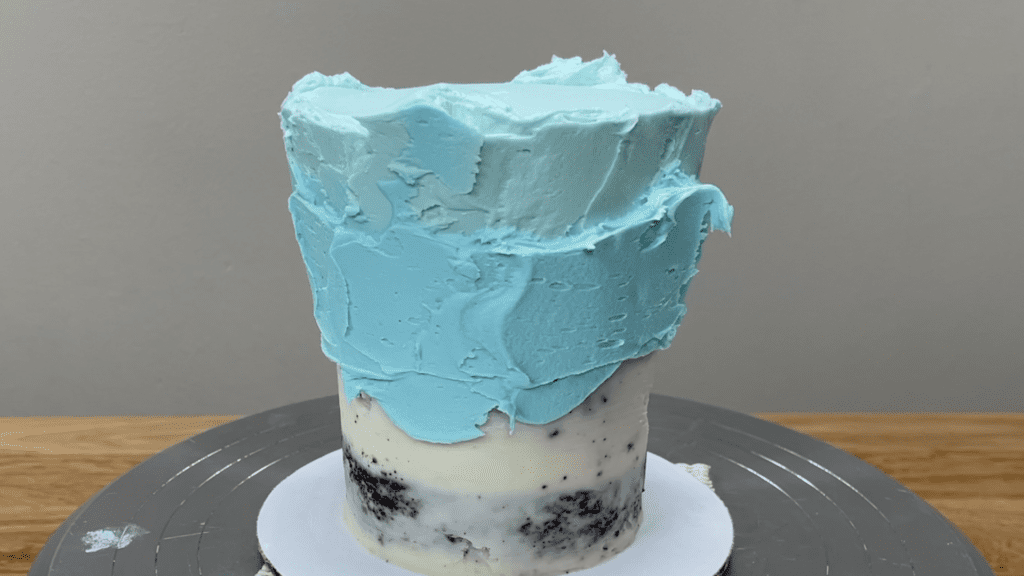
Add more of the darkest colour to the bowl to make a darker shade of the lighter colour. Mix the new colour together, leaving a bit of the previous colour on the side of the bowl to use later. Spread this onto the cake immediately below the previous colour.
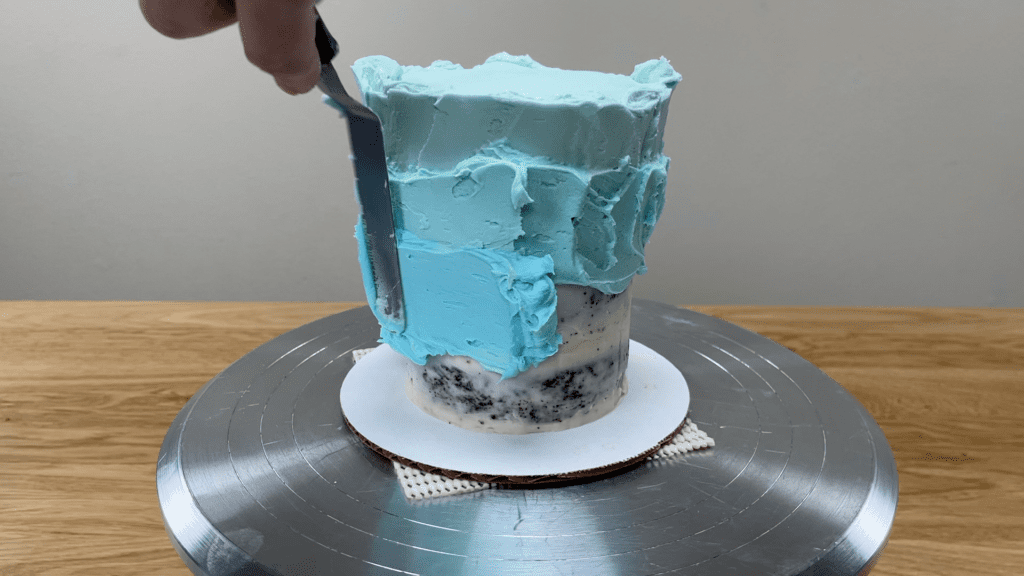
The wider the band of colour you spread on, the fewer shades you’ll fit onto the cake so for an ombre with more shades within the gradient, spread very narrow bands of colour onto the cake. This means you’ll be able to fit in more shades.
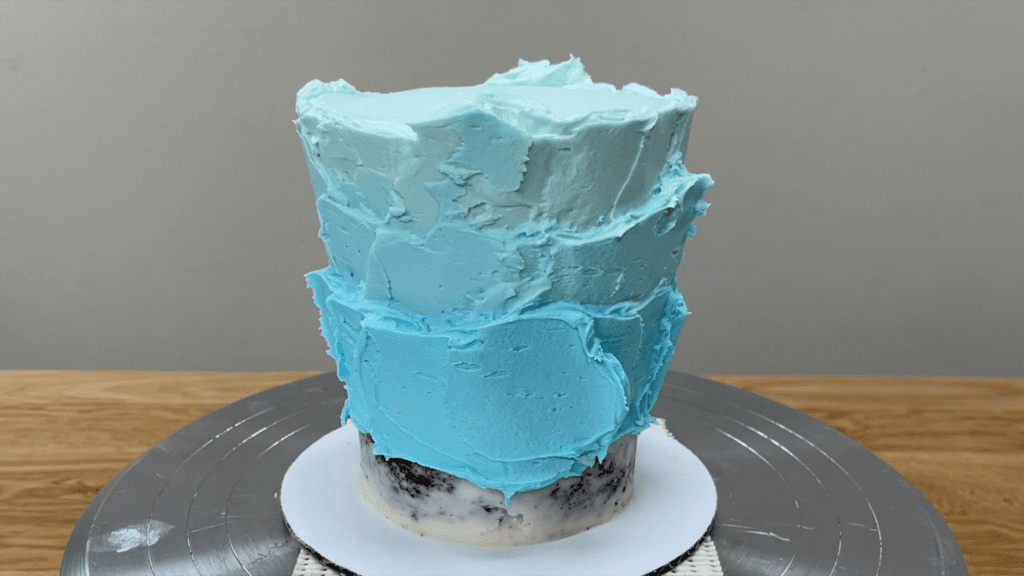
After spreading each shade onto the cake, add more of the darkest colour to the bowl, mix it together leaving a bit of the previous colour saved on the side of the bowl for later, and spread the new colour onto the cake.
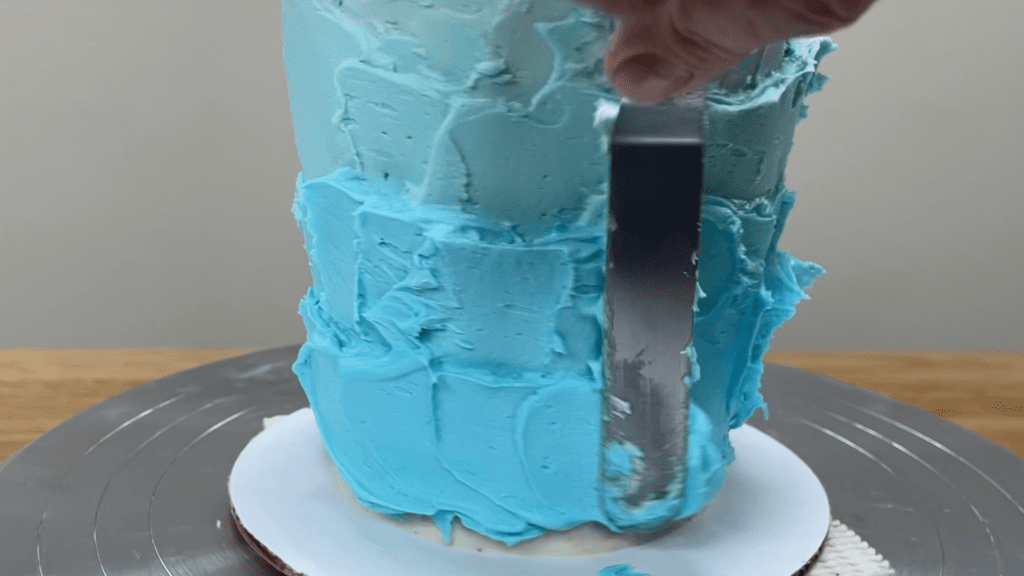
When you get to the bottom of the cake, use only the darkest colour to spread on the final band of colour. Make sure you spread it all the way down to the cake board so the crumb coat is completely covered up and you won’t have any gaps at the very bottom of the cake.
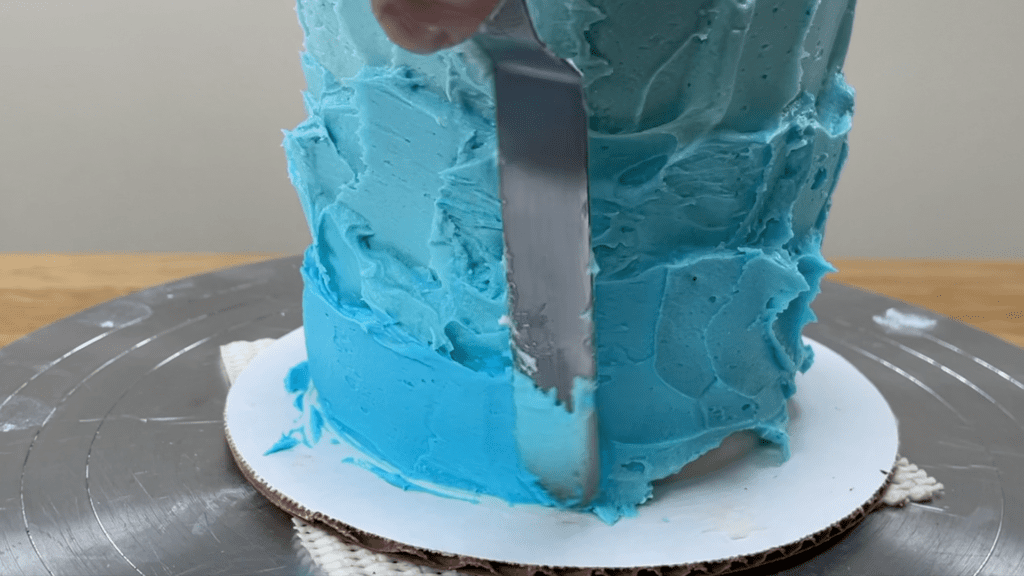
Now use a frosting smoother and scrape around the cake once, resting the frosting smoother down on the cake board to line it up to create straight sides on the cake.
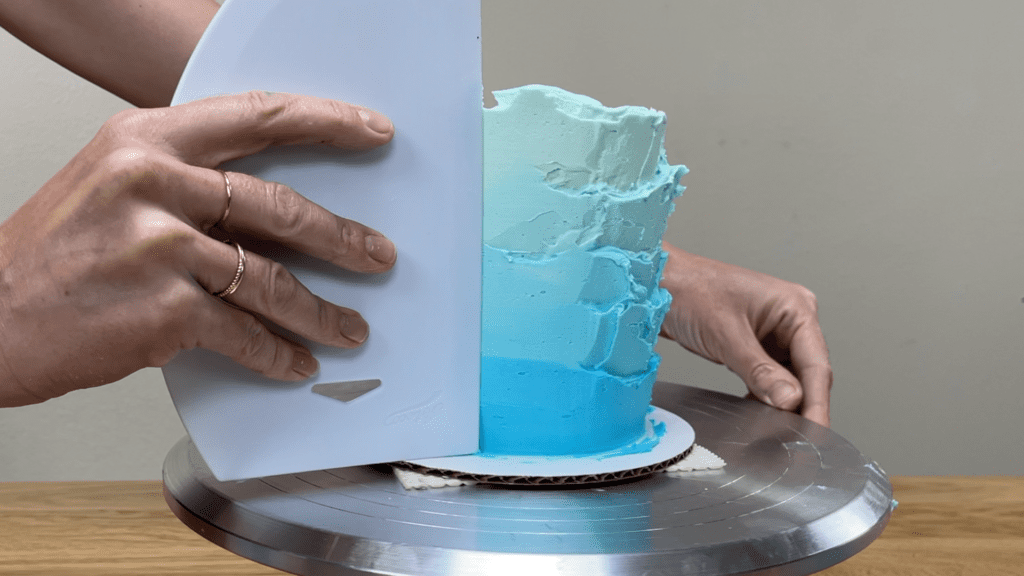
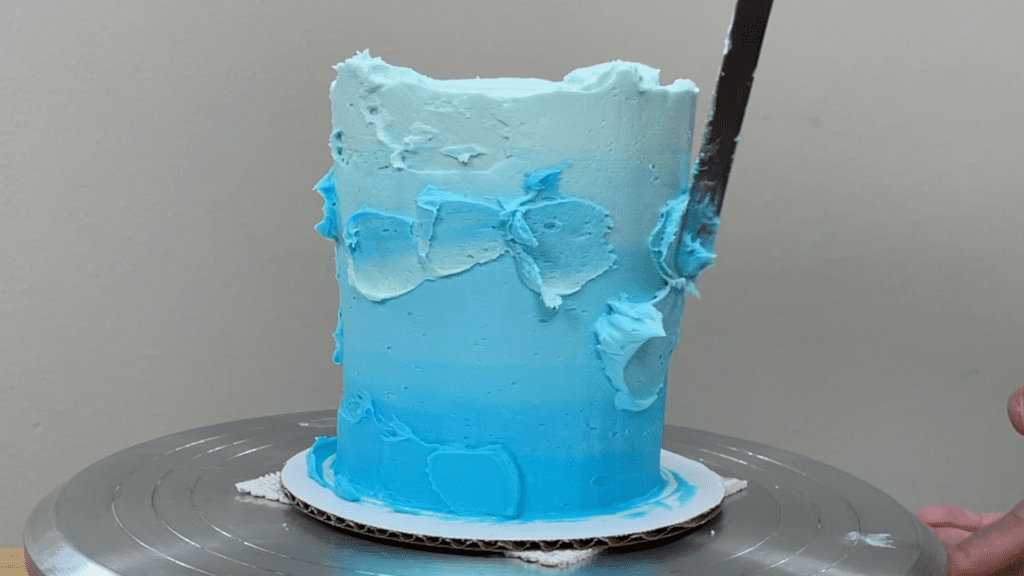
Remember the small amounts of each shade of frosting you saved on the side of the bowl? Here’s where they come in. Scoop them up to spread onto the cake to fill in any indents in the frosting.
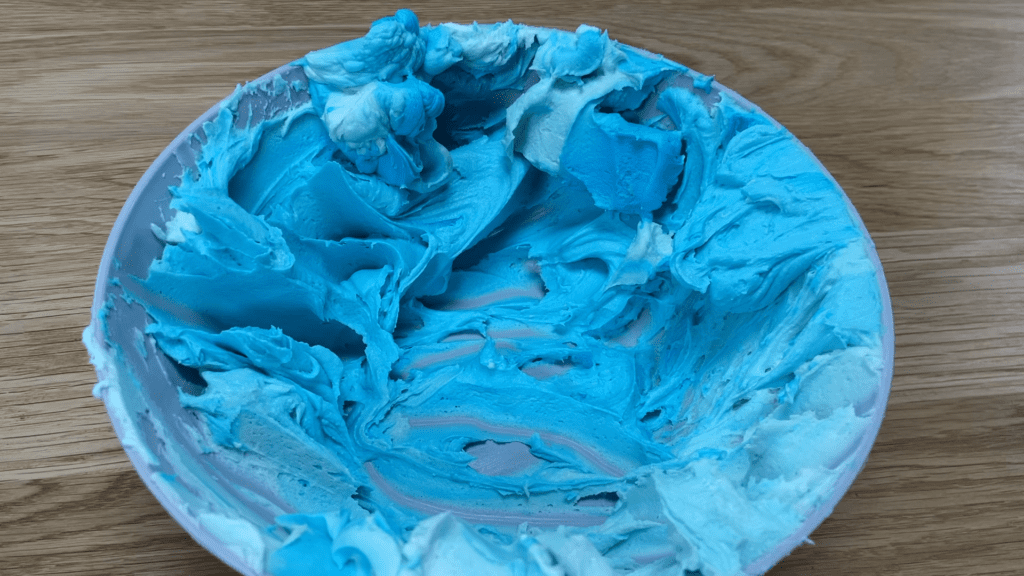
You can use the darker shades to fill in indents lower down on the cake and the lighter shades to fill in indents at the top, or do the opposite: here I’m using darker shades at the top to make the blending more gradual. It’s fun to play around with the different shades as you do touchups,
Once the sides are as blended and as smooth as you want them to be, move onto the top of the cake. Scrape the overhanging frosting towards the middle of the cake with your
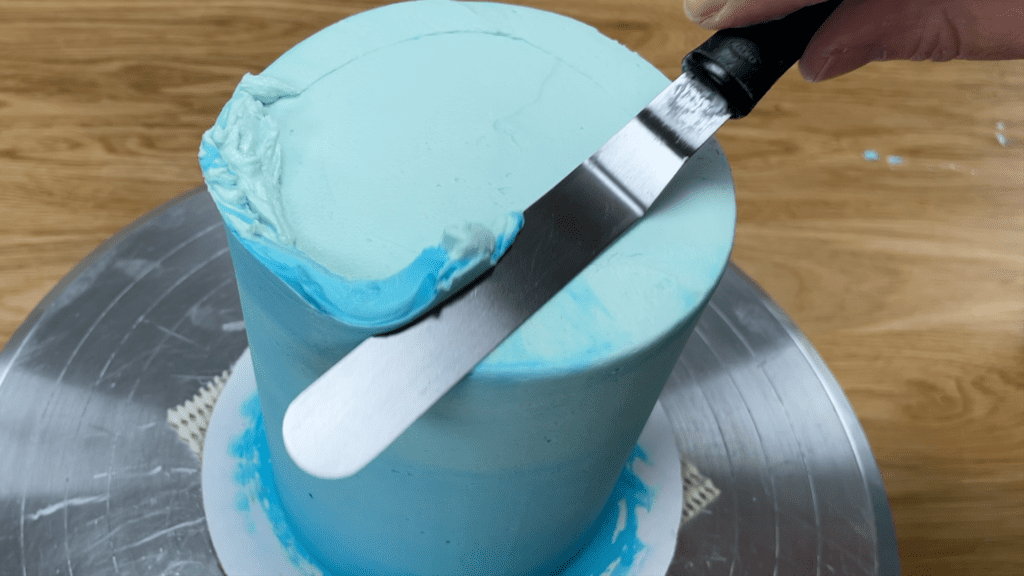
Scrape that frosting into your bowl and wipe the spatula clean and repeat around the top edge to leave sharp edges and a flat top surface of the cake.
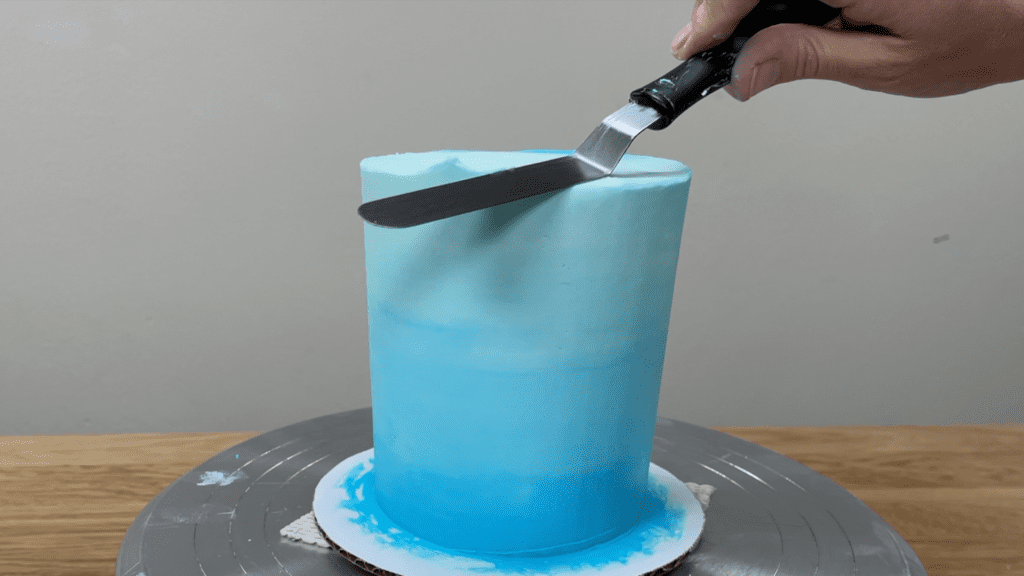
When the top is finished, check the top edge for indents and if you have any, spread more frosting onto those, choosing form the shades you have in your bowl. Scrape around the cake again with your frosting smoother and tidy up the top edge of the cake again.
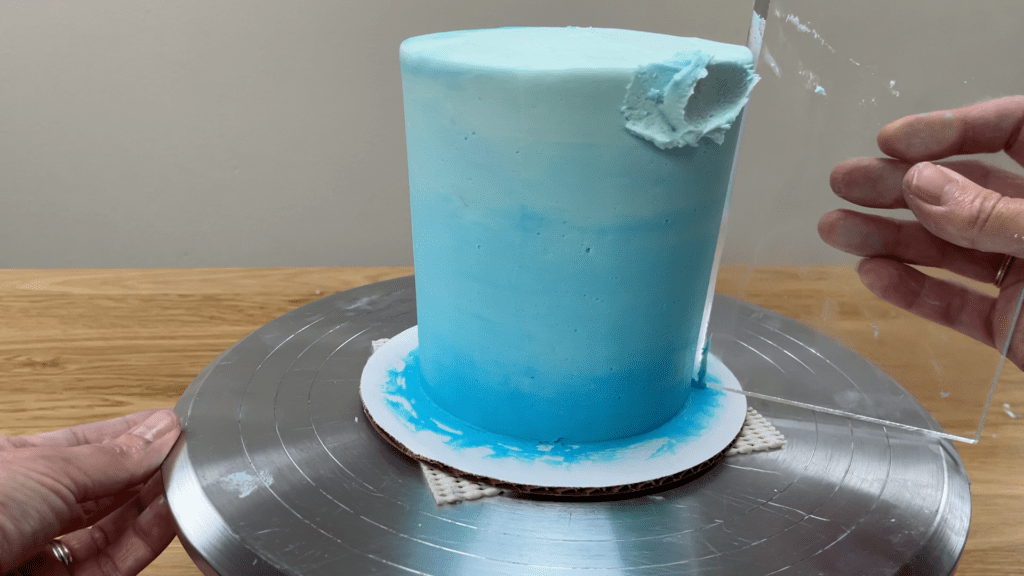
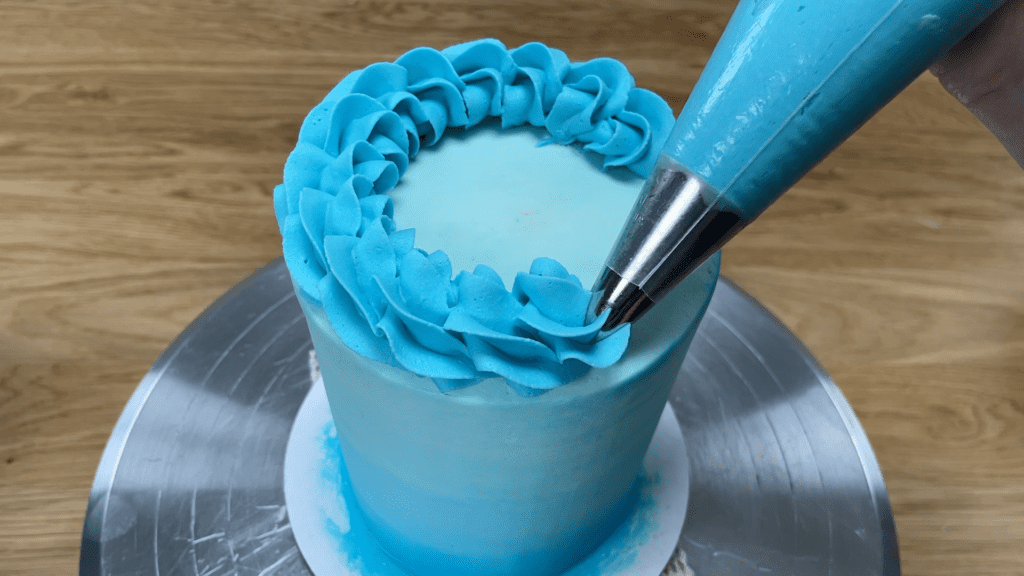
If you want to use up the leftover shades of frosting you have in your bowl, add a border on top of the cake by mixing the colours together and spooning them into a piping bag. For this cake I’m using a 1M star tip and for more ideas check out my tutorial on 5 borders you can pipe with a 1M tip.
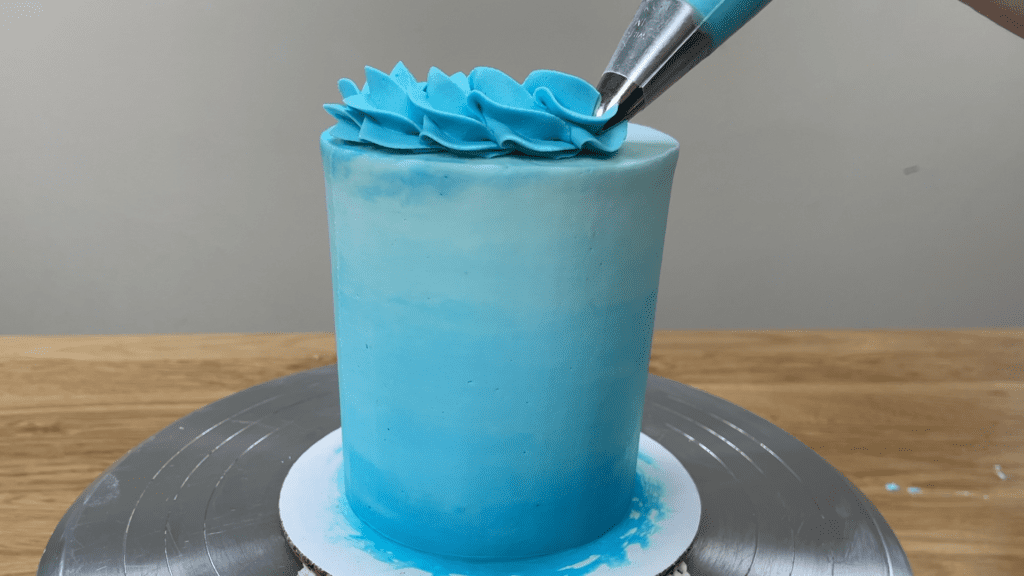
This is a “rope border” with overlapping links of buttercream around the top edge of the cake. For frosting techniques, decorative details, more borders, cake toppers, and different ways to write on cakes, check out my online course on 50 Easy Cake Decorating Techniques or join my Club+ for access to ALL of my online classes and courses as well as live online classes and Q&A sessions for members only!
Here’s the video version of this tutorial:
You probably have ziploc bags in your house already so for these cake decorating techniques you won’t have to go out and buy any special cake decorating tools.
If you prefer to watch a video of this tutorial, scroll to the bottom of the page.
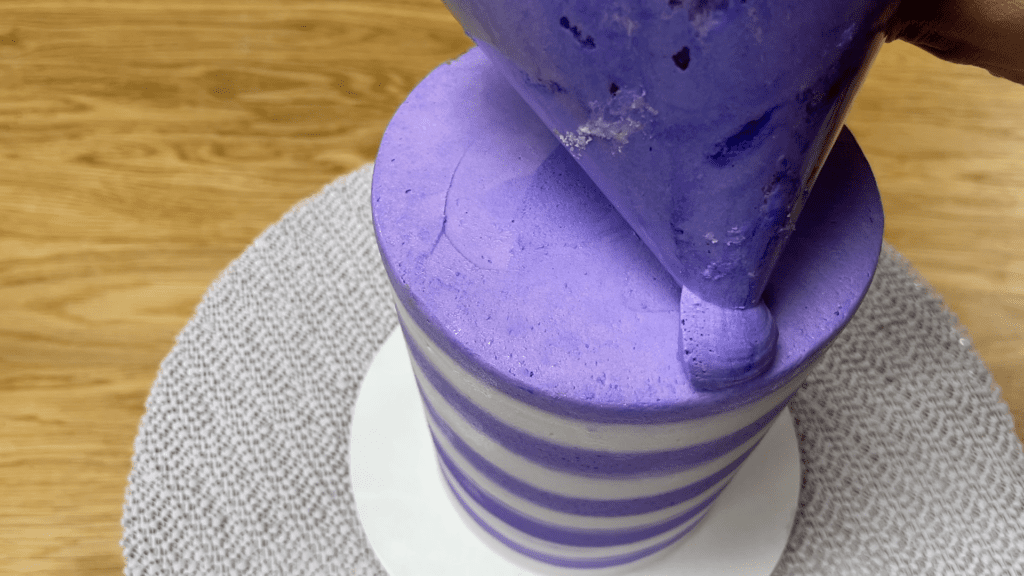
Use ziploc bags to create perfect stripes on cakes, without needing any fancy striped cake combs. Tint two bowls of buttercream or whatever frosting you’re using and put them into large ziploc bags.
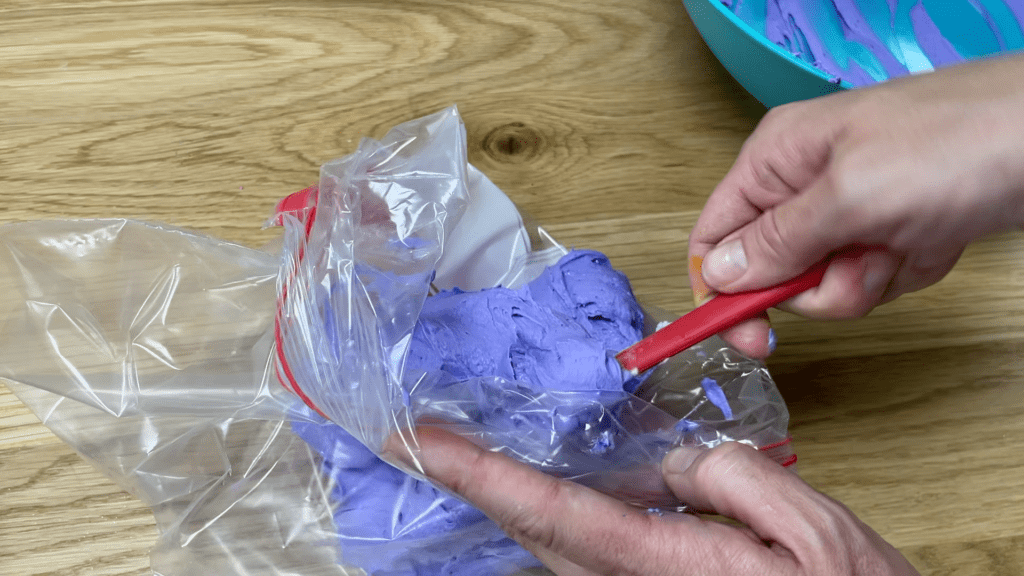
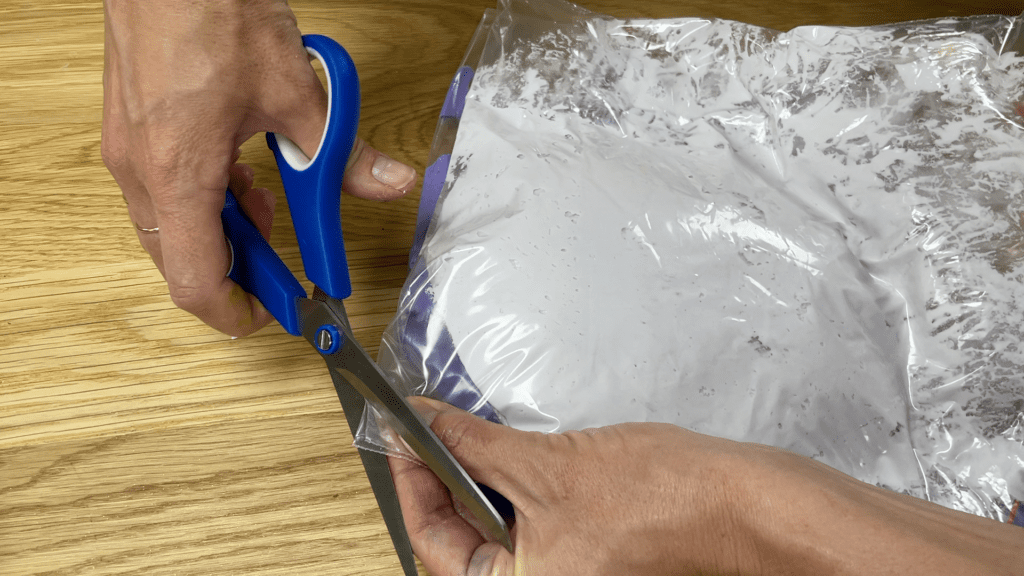
You’ll need to cut a hole in one corner of the bag but it’s important that the holes in both bags are the same size, so line them up above each other and cut the same amount off each bag.
Rest the first bag down on the cake board and squeeze it to pipe your first stripe around the bottom of the cake and then alternate bags, working your way up the cake. Try to pipe each stripe the same thickness and let them touch each other so there aren’t gaps in between them.
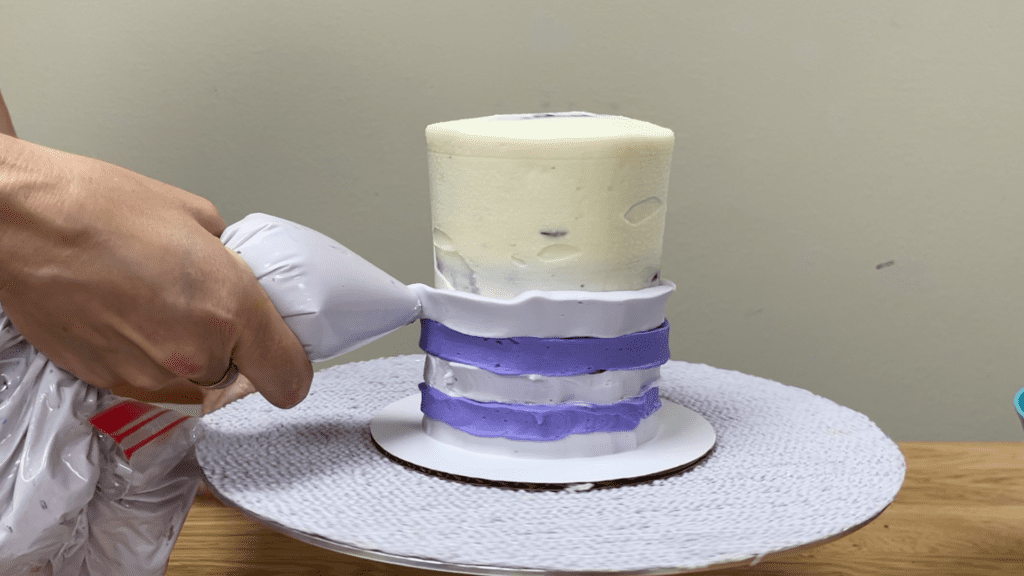
When you get close enough to the top to see which colour will end up at the top, pipe and spread that colour over the top and smooth it with an
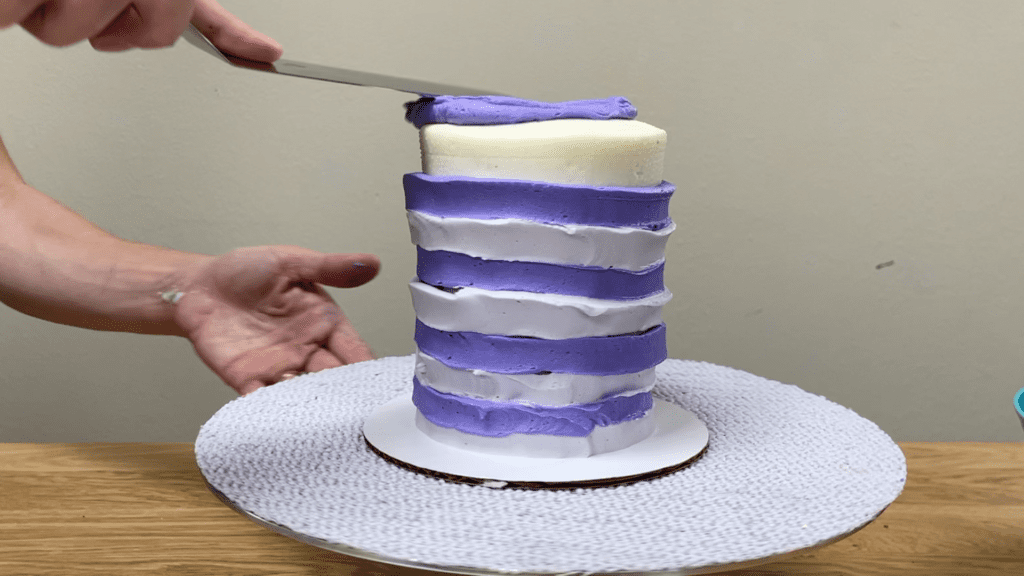
Pipe stripes up to the top edge of the cake and then use a frosting smoother to scrape around the cake a few times to smooth the frosting.
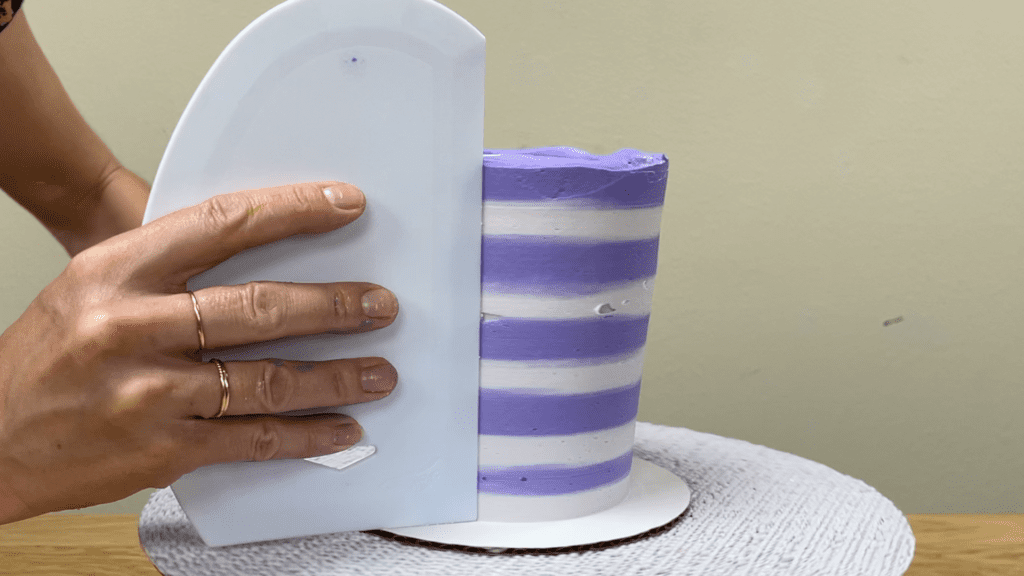
After a few scrapes, touch up any gaps in the frosting by squeezing out some more and then scrape around a few more times to smooth those areas, too.
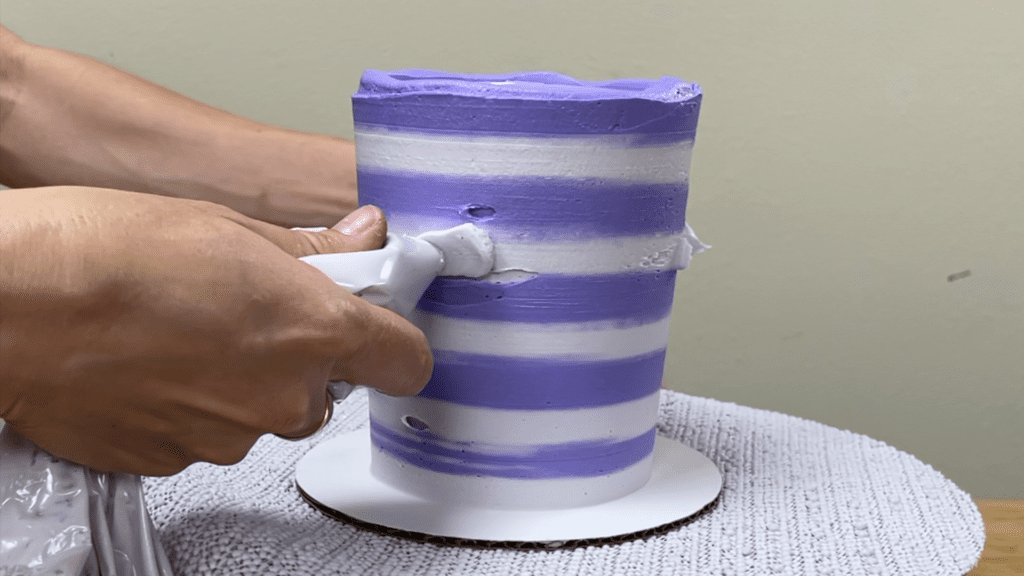
Wipe any frosting off your frosting smoother after each scrape around the cake.
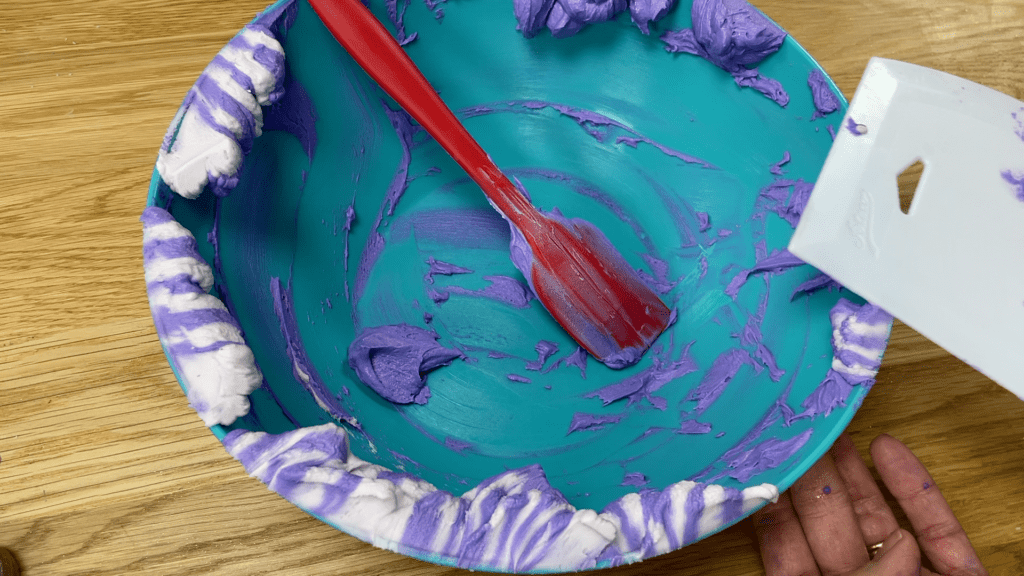
Tidy up the top edge of the cake by swiping across with your
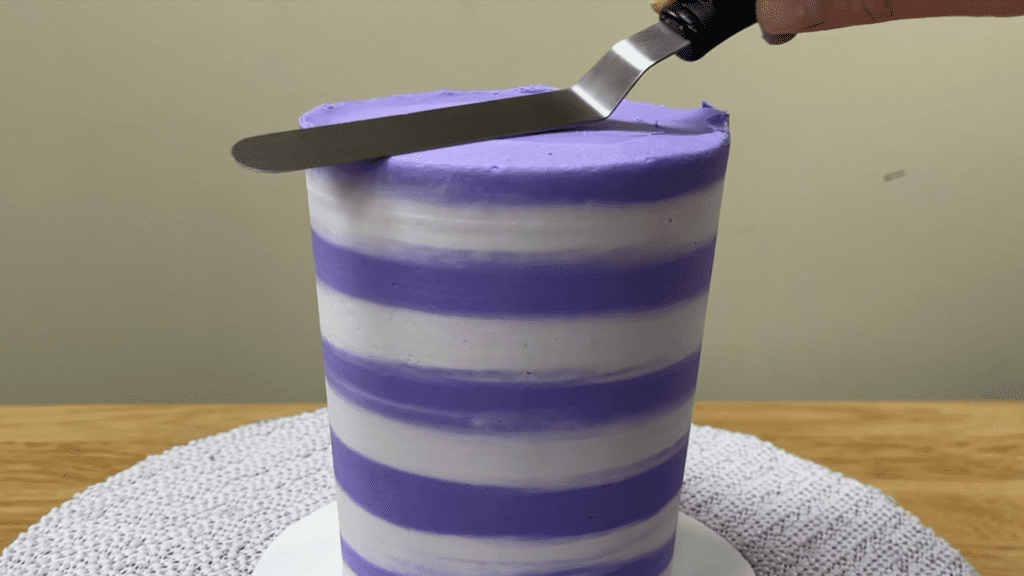
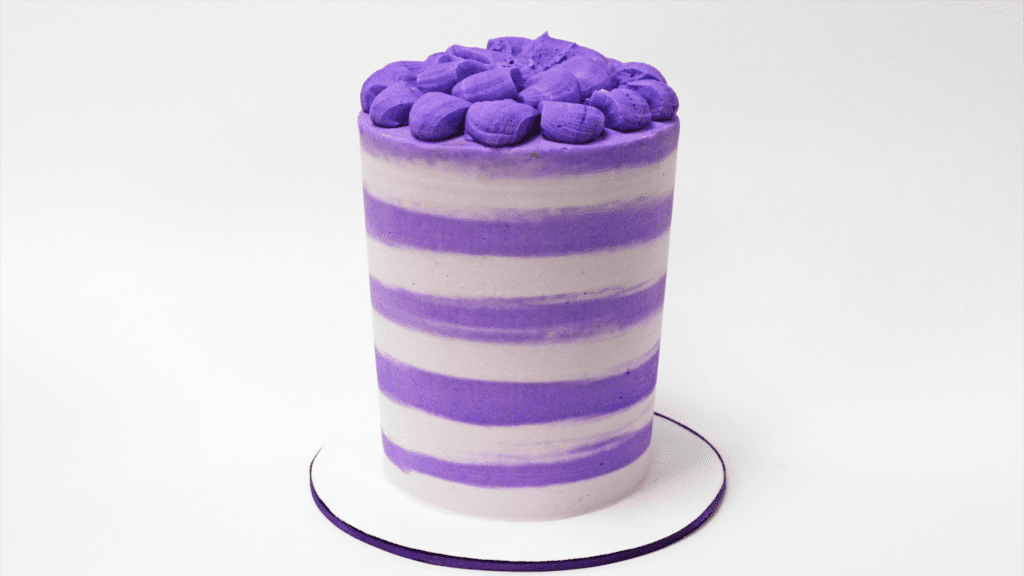
Tadaa! Quick and easy stripes piped with ziplock bags!
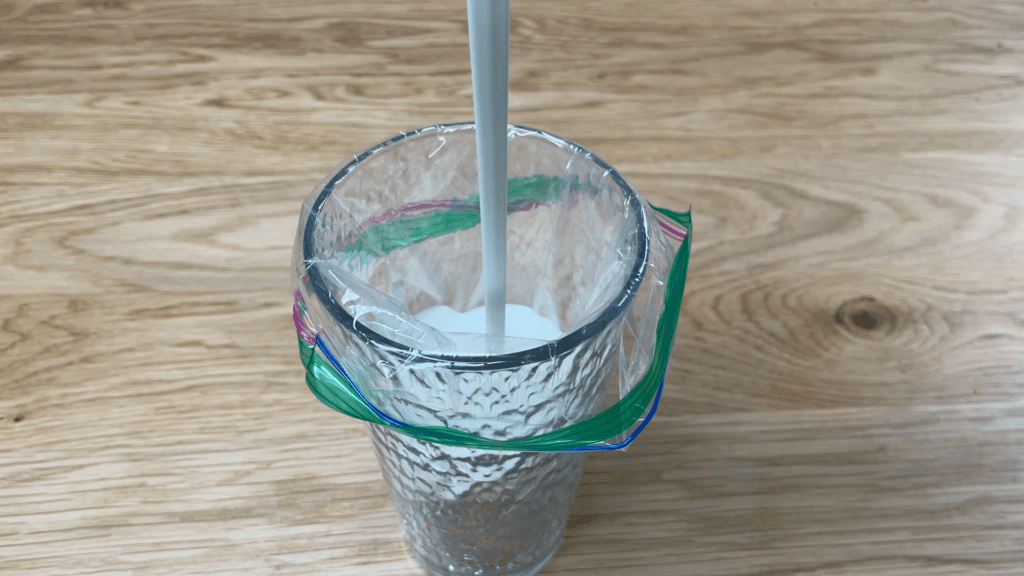
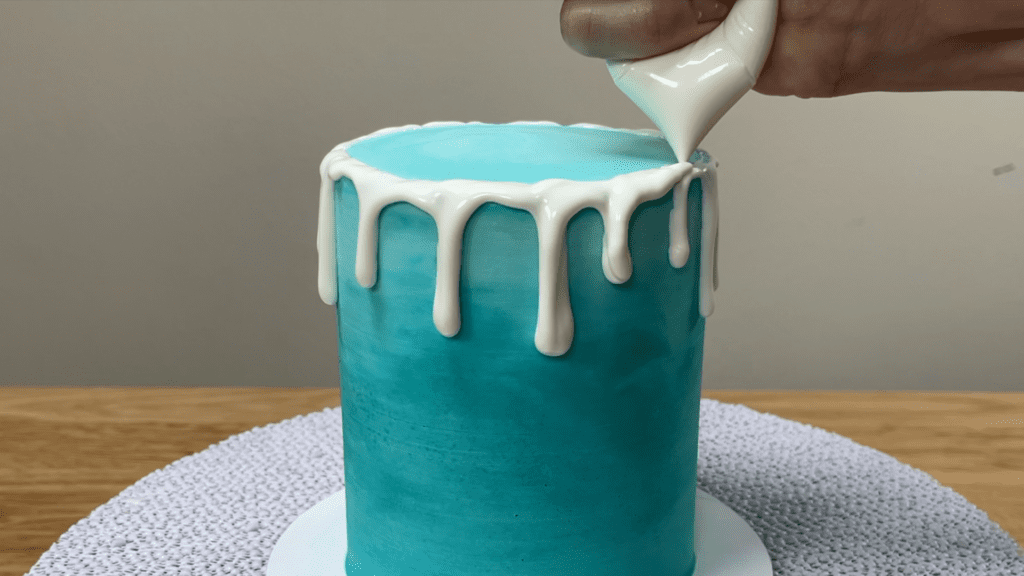
Create a stunning drip with a ziploc bag. Start by melting cream with 3 times the amount of white chocolate in a bowl in the microwave and then pour that into a ziploc bag.
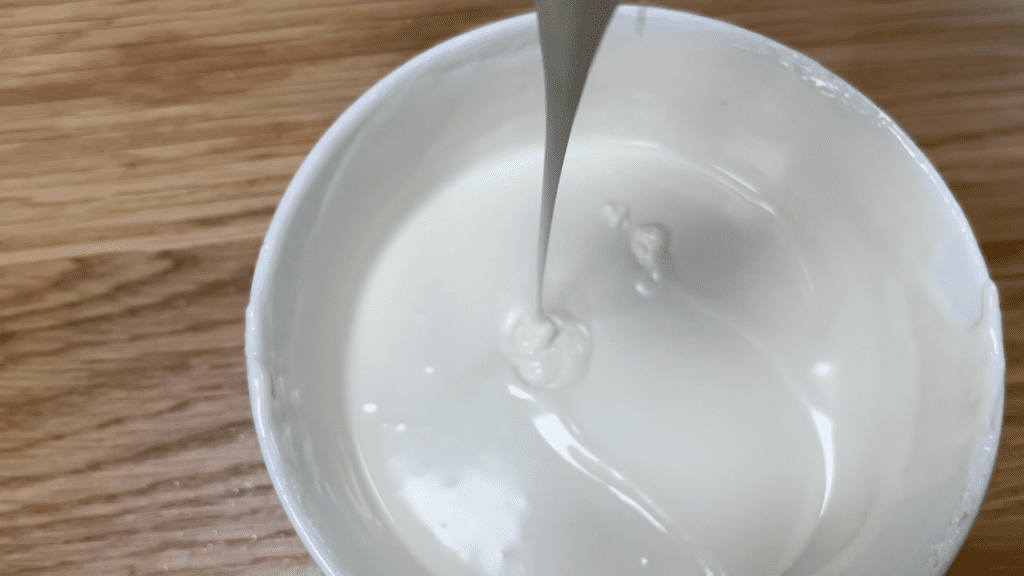
It’s easiest if you fold the bag over a cup or glass to keep it open. Let the chocolate cool for a few minutes until it comes to room temperature and then snip a tiny piece off one corner of the ziplock bag.
Squeeze the chocolate around the edge of a cake that’s been chilled in the fridge, pausing wherever you want to make.a drip to let the chocolate spill over the edge and down the side of the cake. The coldness of the cake will stop the drip before it gets to the bottom of the cake.
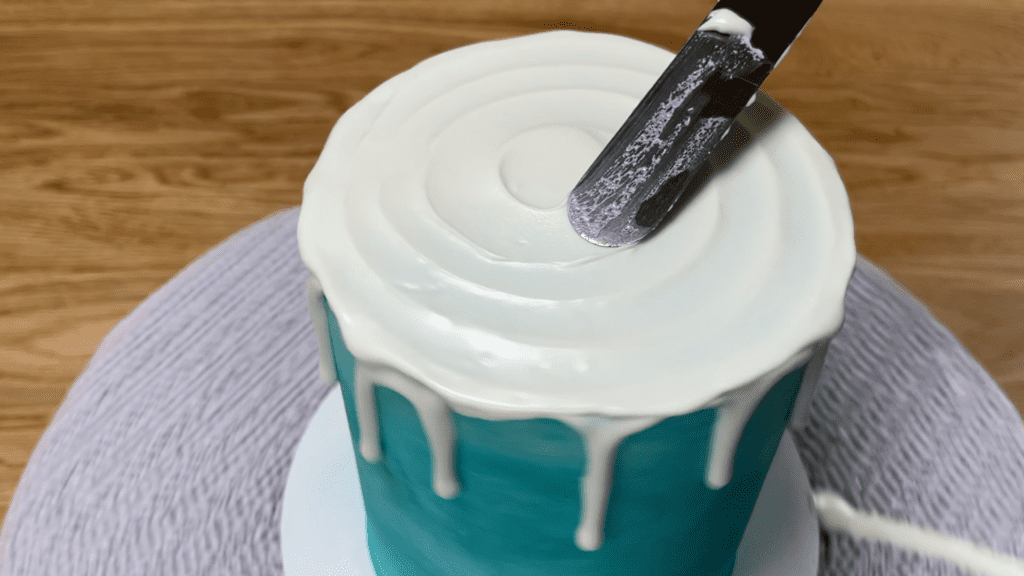
Squeeze more chocolate onto the top of the cake and spread it with an
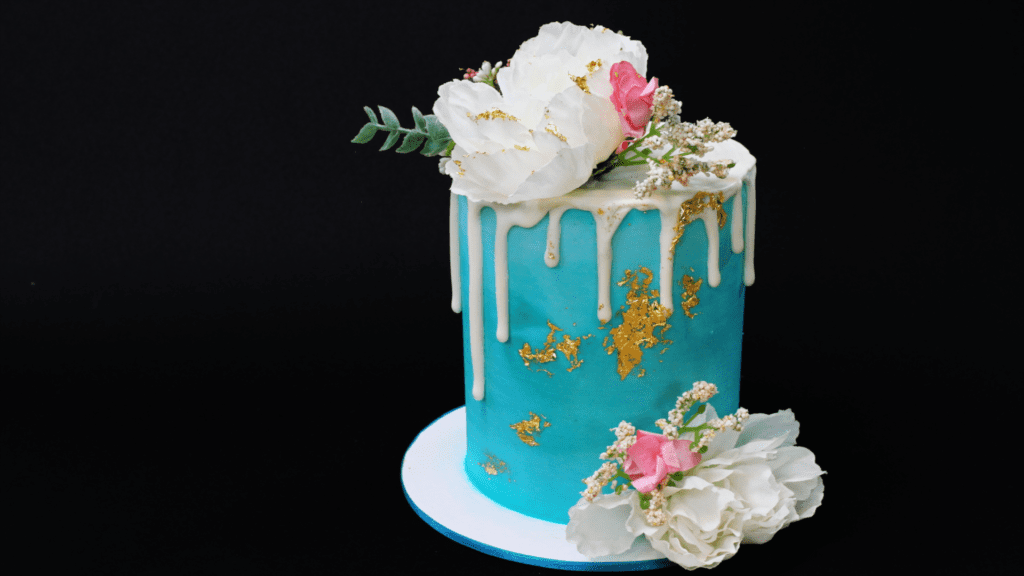
No one would ever guess that this stunning drip was created using a ziploc bag!
Incorporate your favourite cookie into a cake using a ziploc bag! Place a few in a ziplock bag, seal it, and smash the cookies using a mug or a rolling pin.
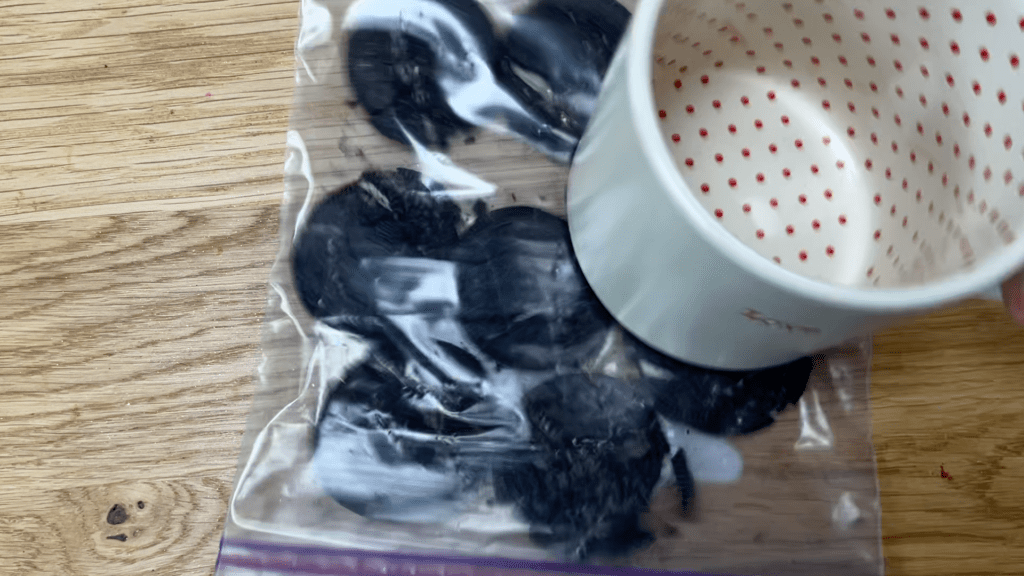
Crush the cookies as finely as you like. If you’re going to use the crumbs in frosting, which I’ll explain in a moment, it’s easiest if the crumbs are very fine without any large chunks.
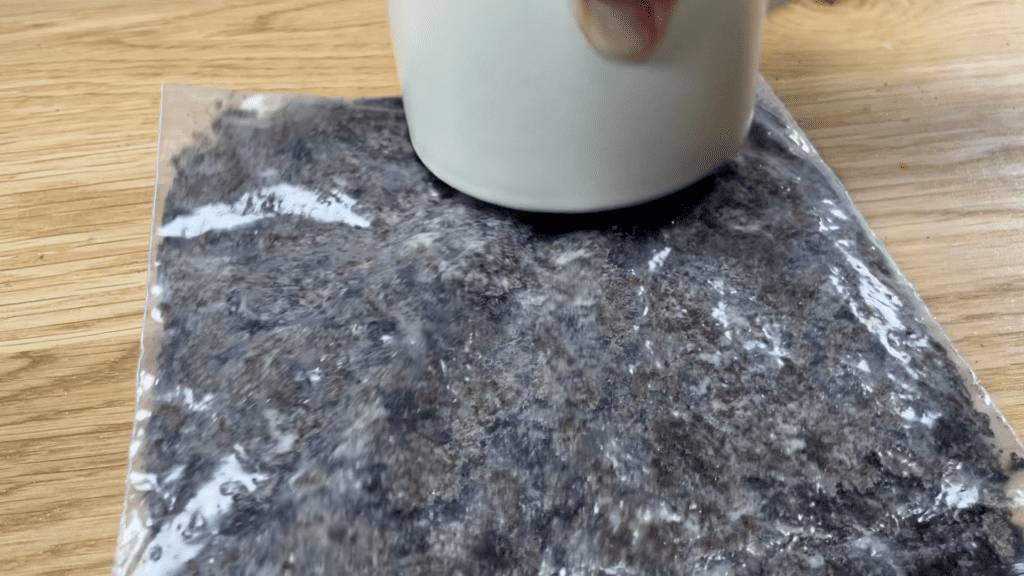
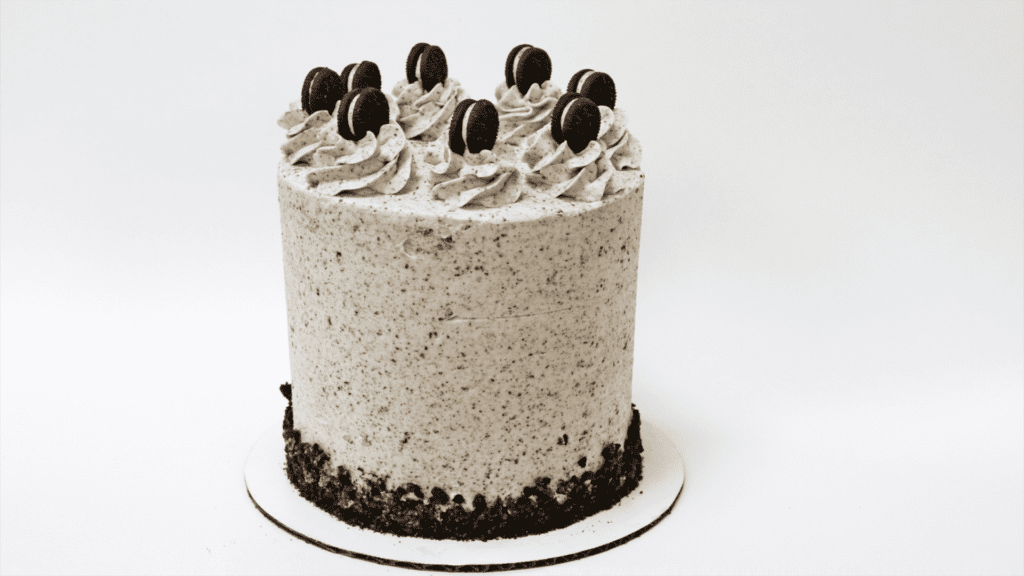
You can use these crumbs in a few ways. Firstly, Oreo crumbs are DELICIOUS in buttercream! I use 6 Oreos for a batch of my 4 Minute Buttercream, which makes enough buttercream to fill and frost an 8″ cake.
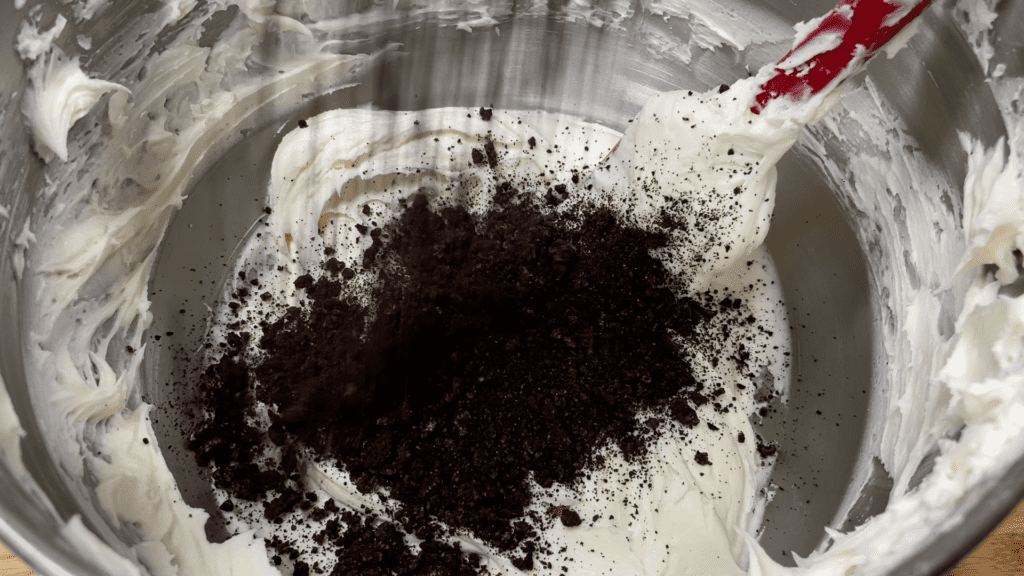
Pour the crumbs into the bowl and stir them just until they’re mixed in. If you keep stirring, you’ll make grey frosting.
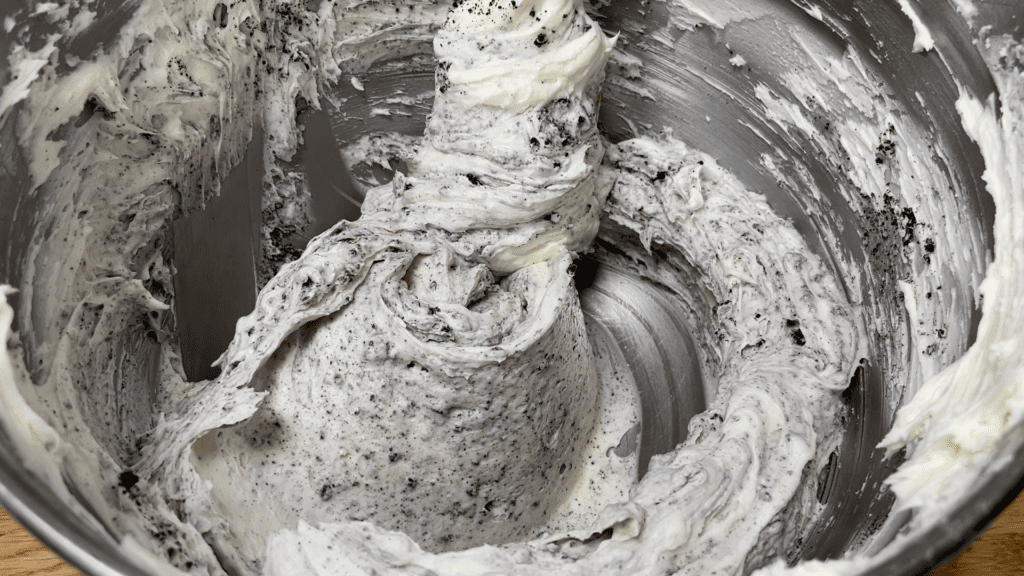
Use this as a filling between layers of cake, or to frost a cake. I love chocolate cake paired with Oreo buttercream but it’s also delicious with vanilla cake.
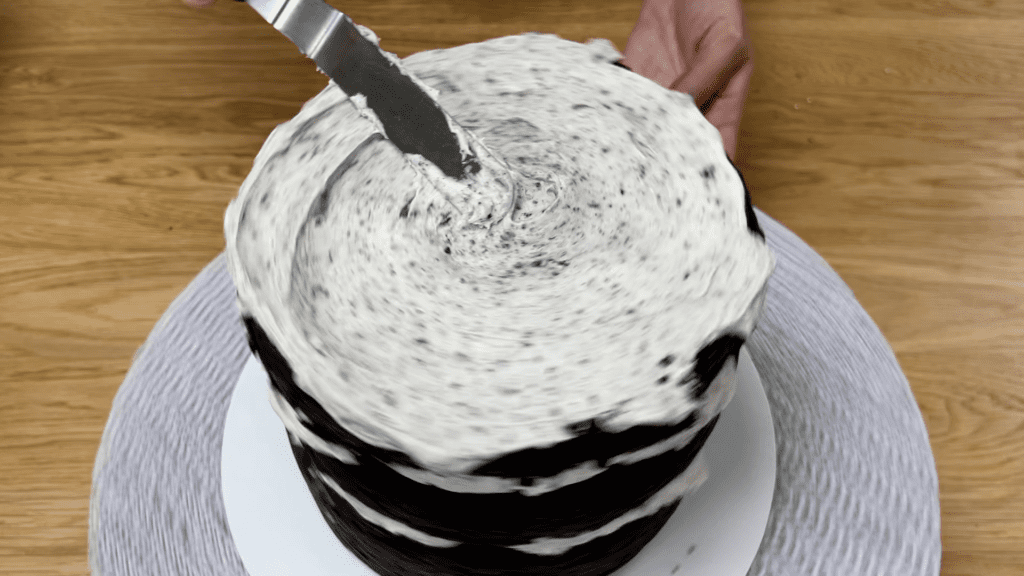
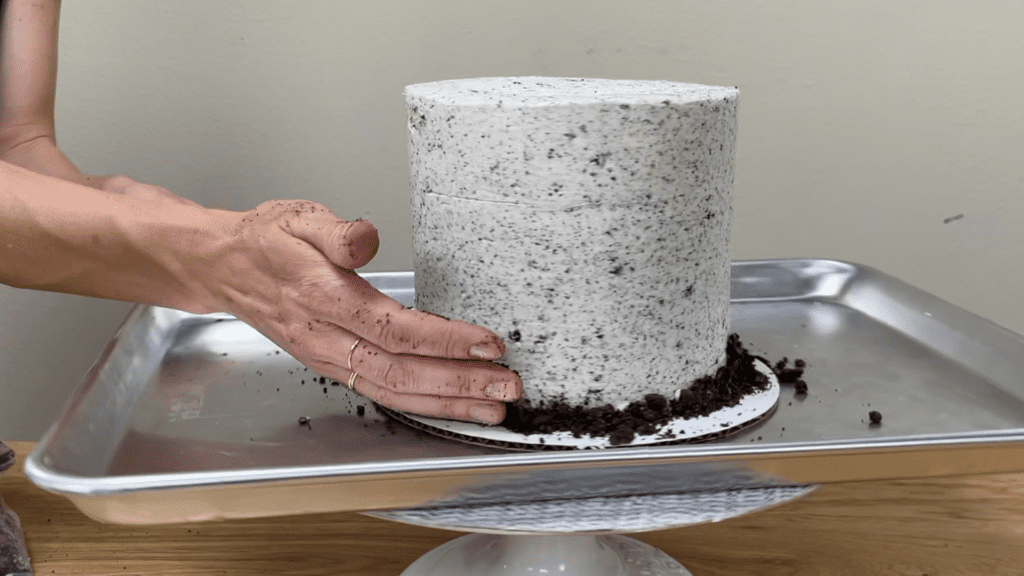
For a yummy border, place the cake on a tray and then press the crumbs into the bottom of the frosting. The tray will catch any crumbs that fall of the cake board, making them easier to clean up.
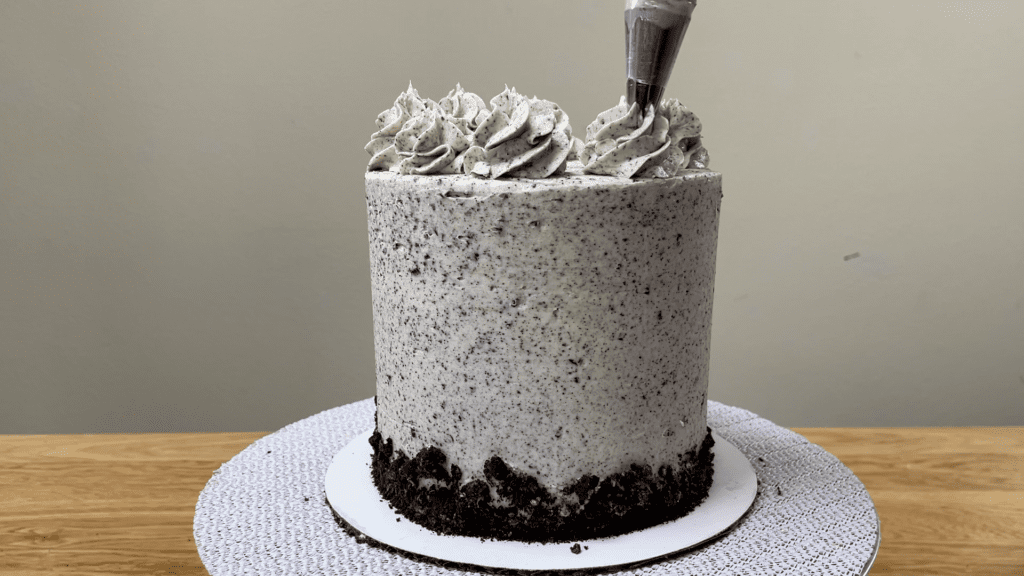
Use any leftover the frosting in a piping bag with a 1M tip to pipe swirls of frosting on top of the cake to finish it off!
Perhaps not the most elegant way to use ziploc bags, but they provide an easy, mess-free method of transforming Oreos from plain cookies to a delicious cake!
To make gorgeous chocolate toppers, melt chocolate in the microwave at 80% power for 30 seconds at a time so it doesn’t seize. Spoon it into a ziplock bag.
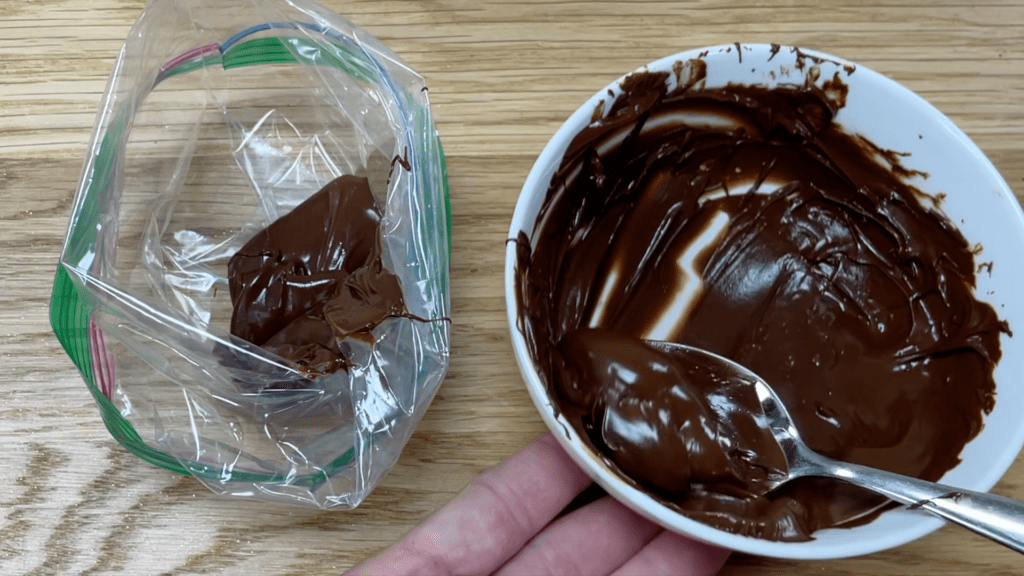
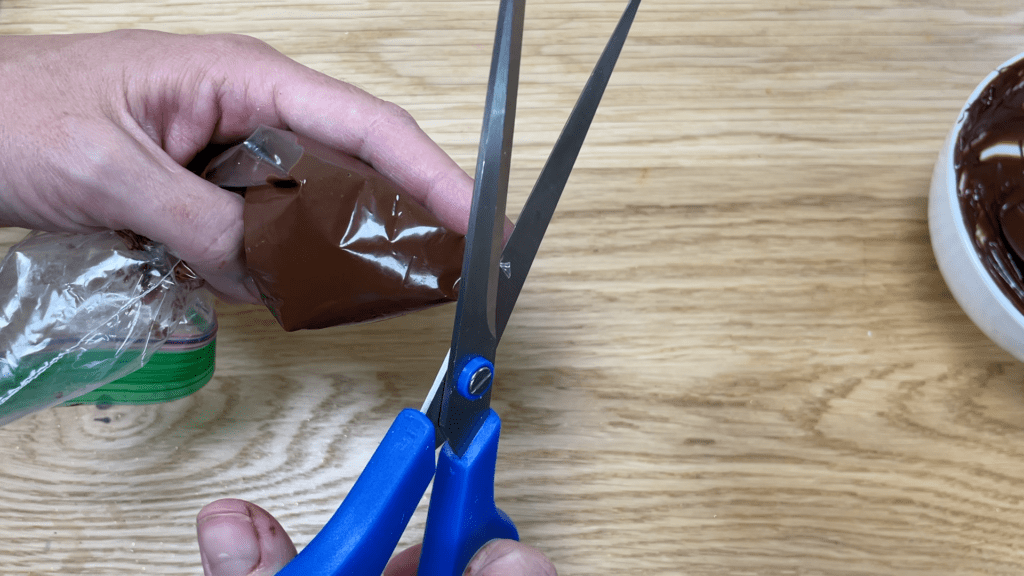
Seal the ziploc bag and cut off a very small piece from one corner. The smaller the shape you want to create, the smaller the hole you’ll probably want to cut.
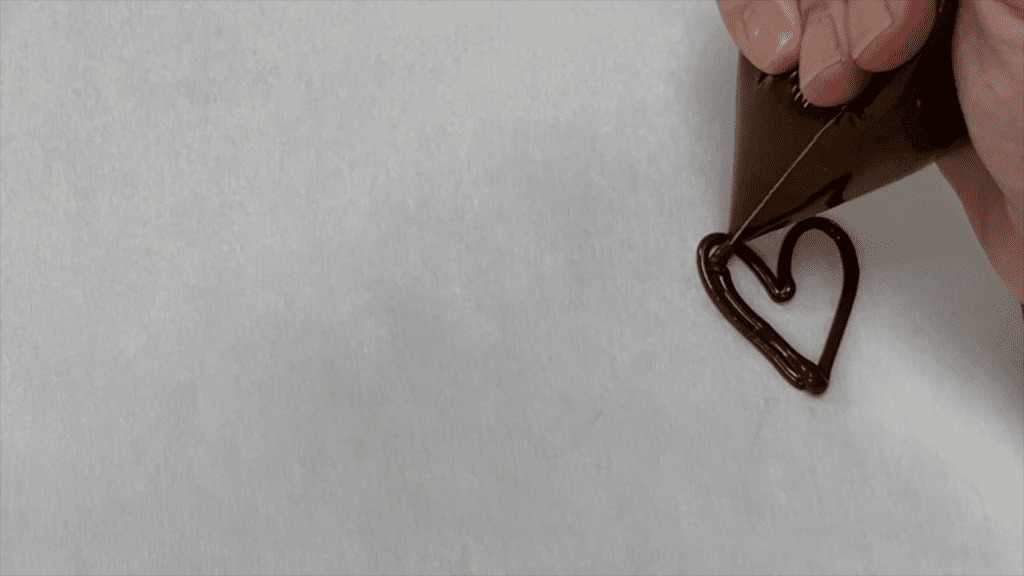
Squeeze the chocolate out to draw whatever shape you like onto parchment paper. Start with an outline and fill it in to make a full shape. I like to tape the parchment onto a tray so it doesn’t move around while I’m piping.
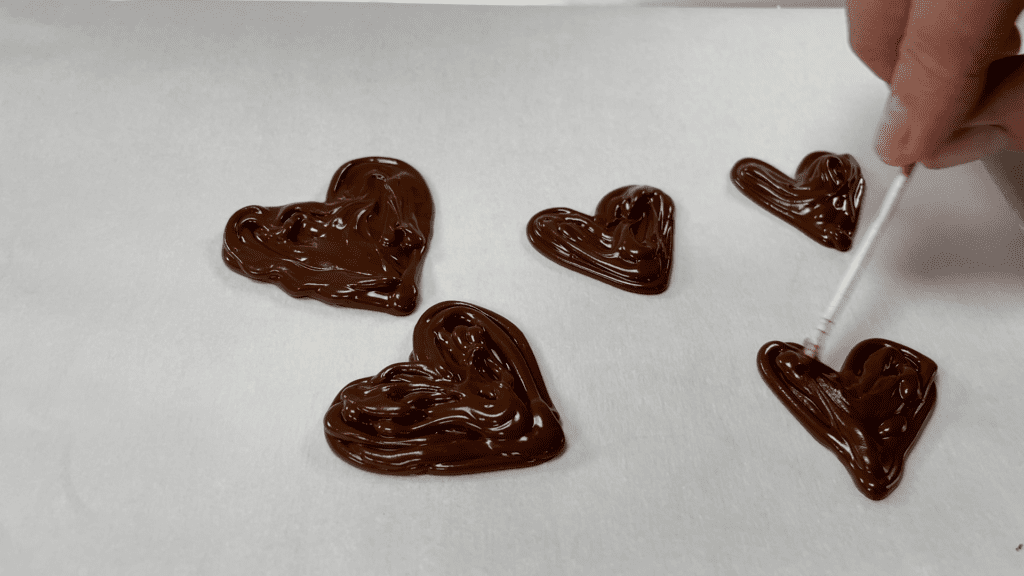
Use a toothpick to flatten the chocolate so it’s all the same thickness, and you can also drag the chocolate out to adjust your outline if you want to.
Pour sprinkles over the chocolate now, while it’s still melted and sticky. If your sprinkle mix has any large sprinkles, gently push them into the chocolate to attach them.
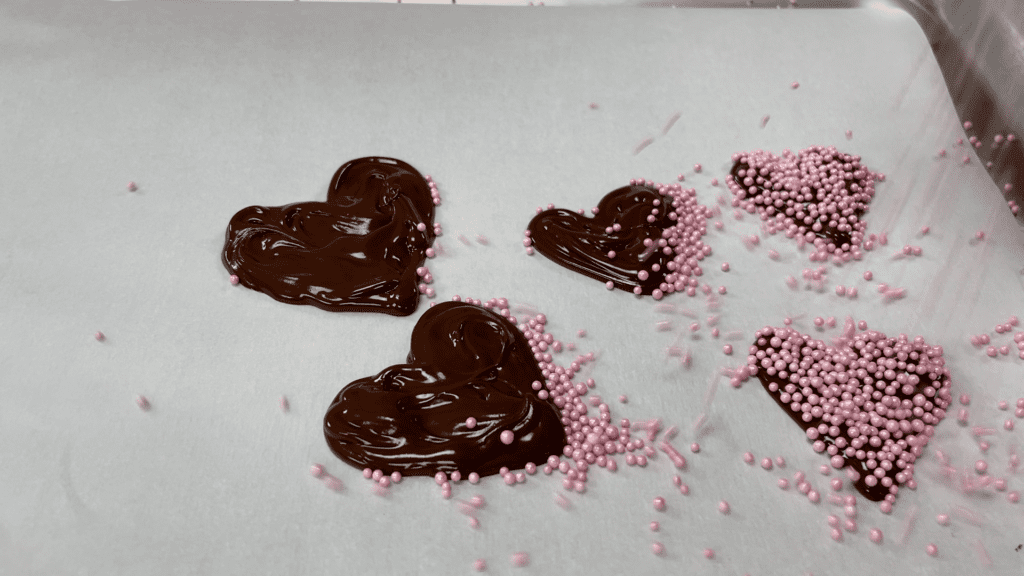
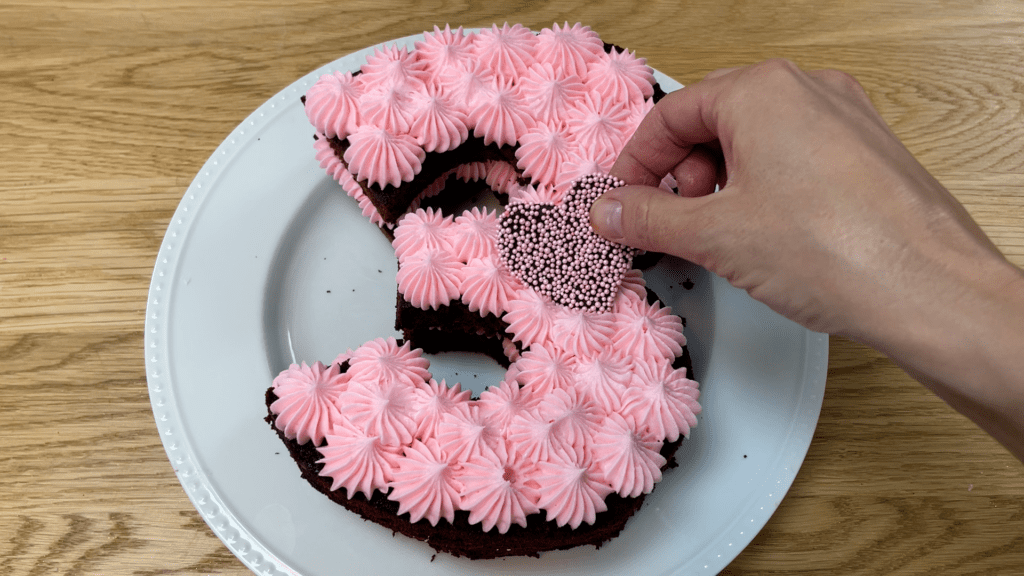
When the chocolate sets you can lift the shapes up and use them to decorate a cake or cupcakes!
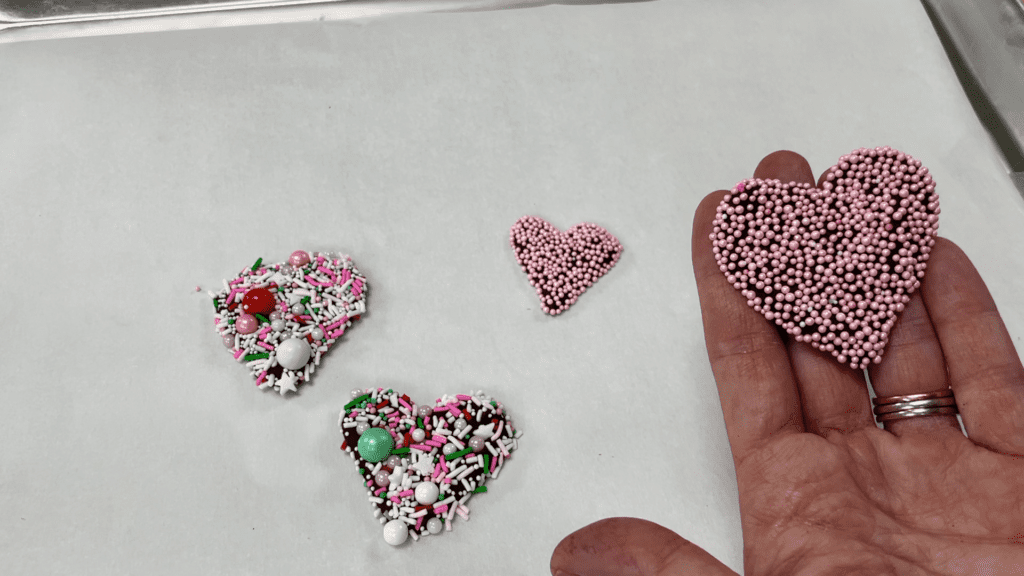
Make sure you push them into frosting just after spreading or piping it, while the frosting is still soft and sticky so that the chocolate shapes attach easily.
To add some detail to the top of a cake, pipe a border with a ziploc bag. Spoon frosting into a ziplock bag and cut a corner off to make a hole about the size of a piping tip, just like for the piped stripes in the first technique.
Hold the bag above the cake, slightly in from the outer edge, and squeeze the frosting out and let it bulge out of the bag up to the edge fo the cake, and then pull the bag slowly towards the middle fo the cake to pull the frosting back with it. Stop squeezing and pull the bag away and continue to pipe like this side by side all the way around the cake to make a ring.
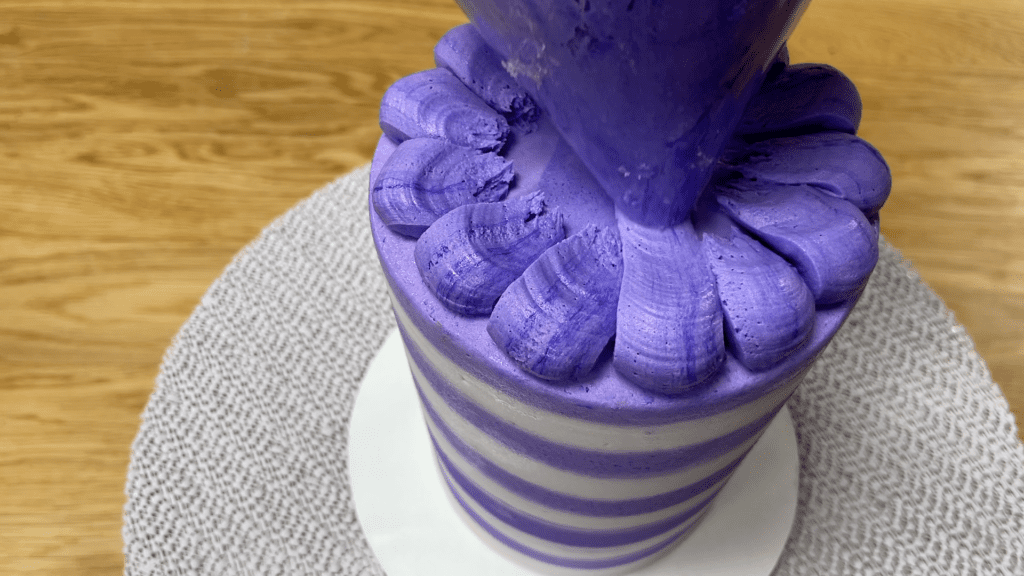
Pipe another ring inside it, overlapping the outer ring to layer the piping on top. This looks pretty from the top but also from the side!
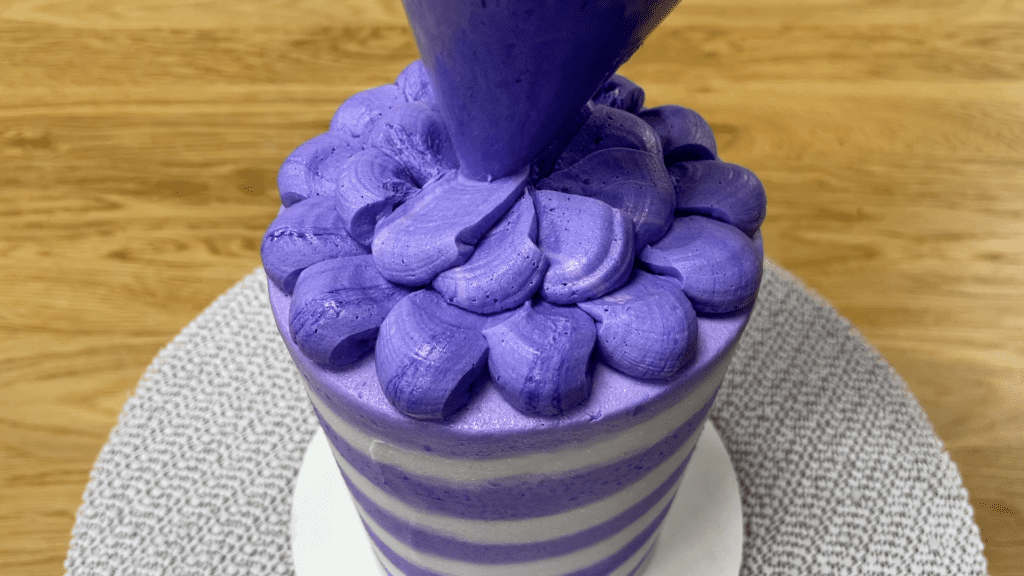
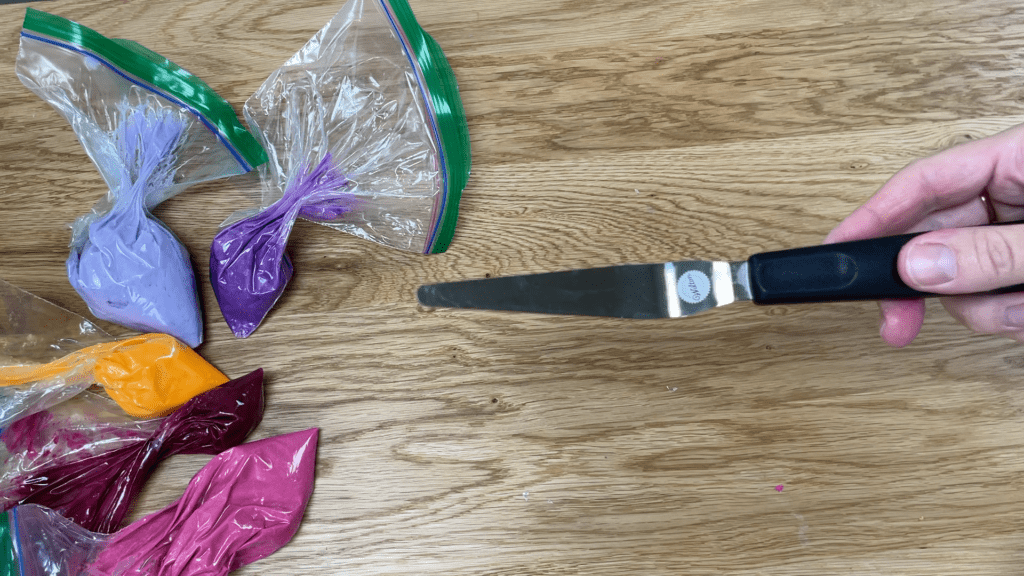
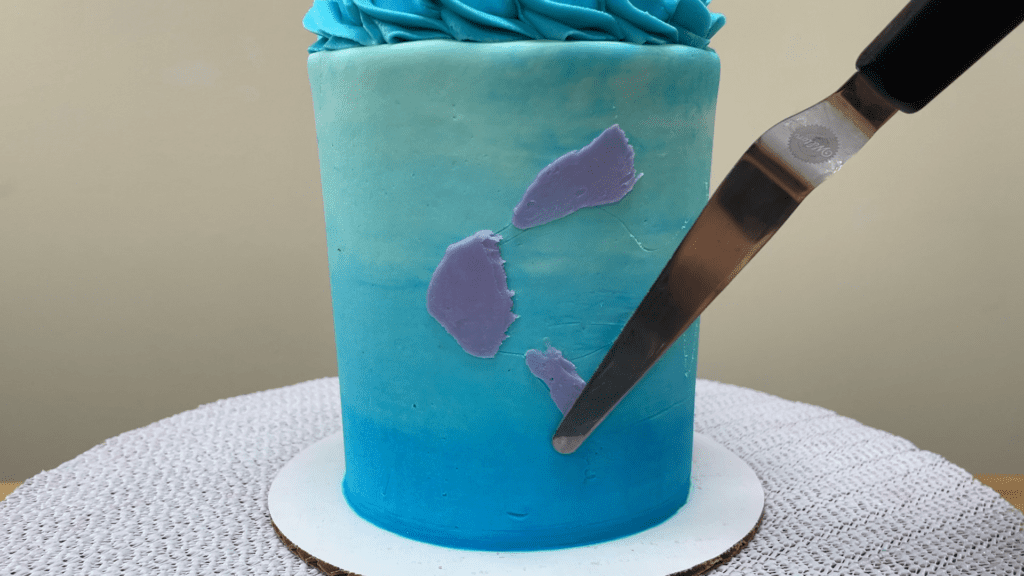
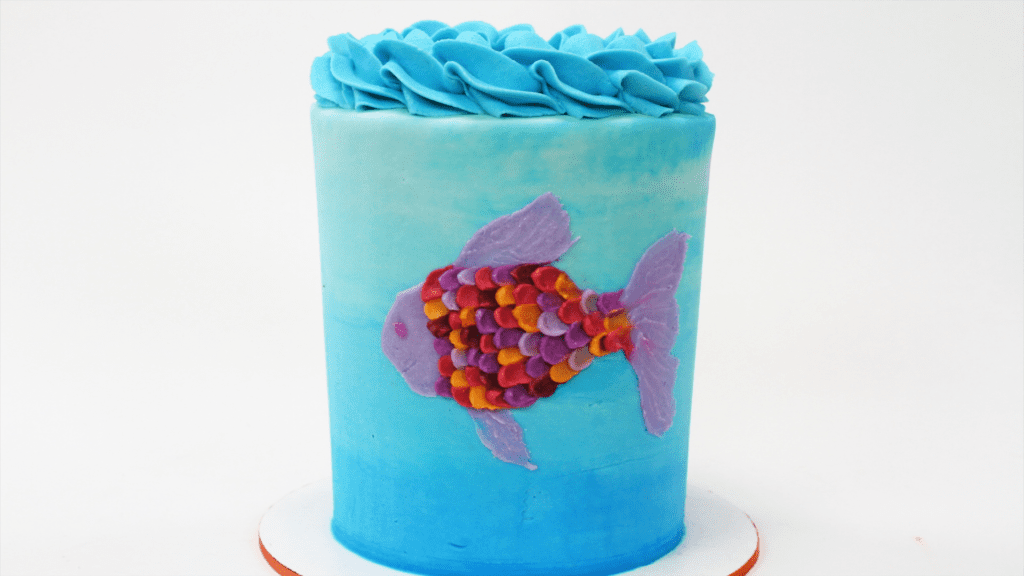
Pipe intricate designs using ziploc bags! You’ll need a few ziploc bags of coloured frosting, a tapered
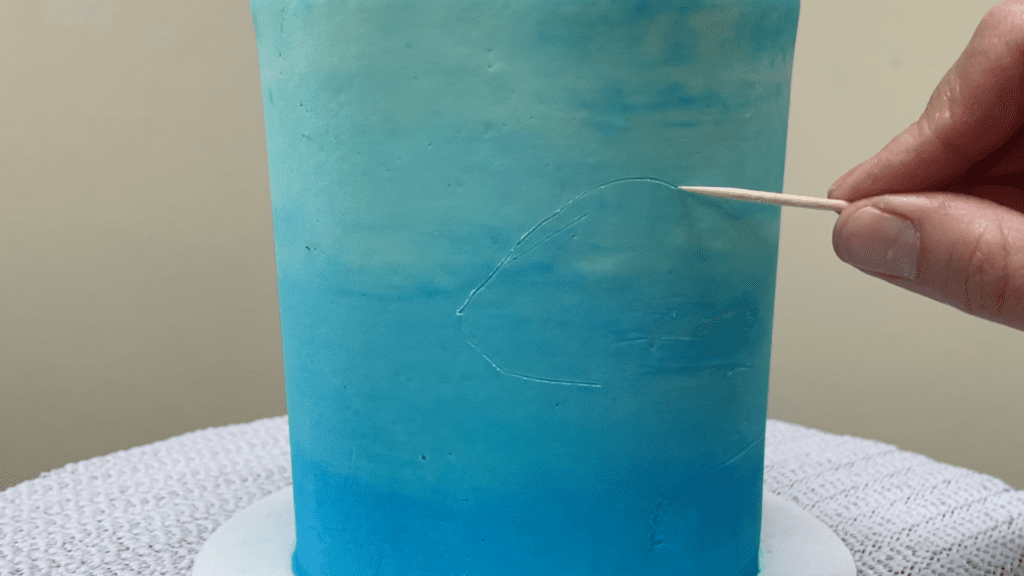
Sketch an outline of your fish into the frosting using a toothpick. You can freehand the design or draw or print an image and cut it out and then trace around it onto the frosting on the cake.
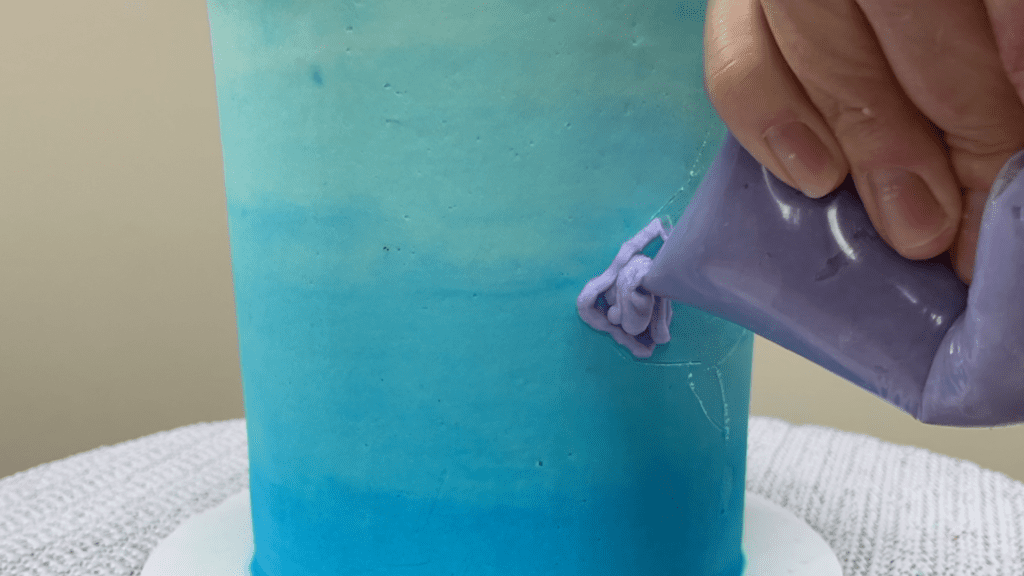
Cut a very small piece off the corner of each ziploc bag and outline the face and fins of the fish by piping frosting with the ziploc bags.
Spread the piping flat with the edge of your
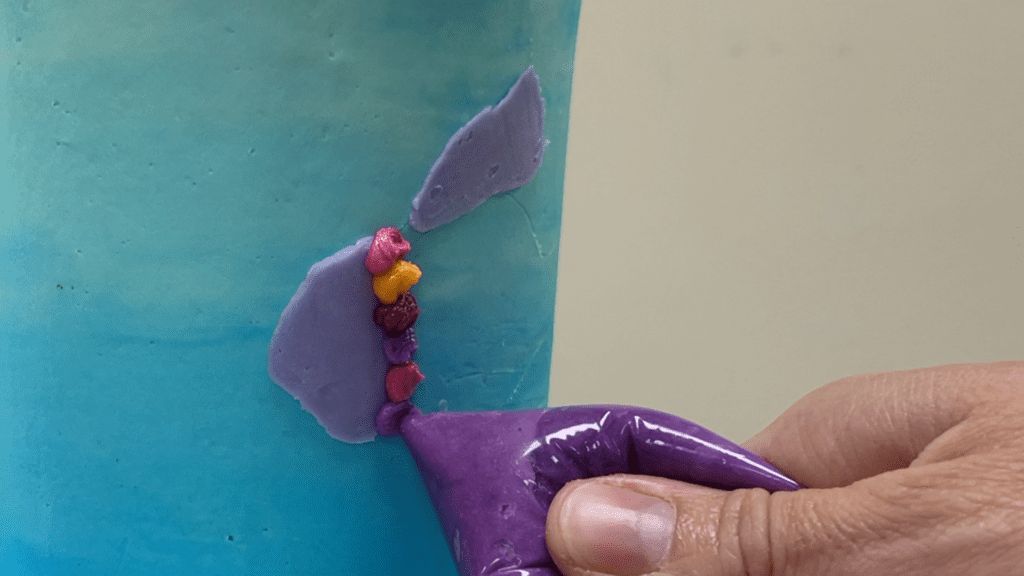
After the face and fins, start piping dots of coioured frosting to create the body of the fish. Pipe in columns, with one dot above the other, and only pipe one line of dots at a time.
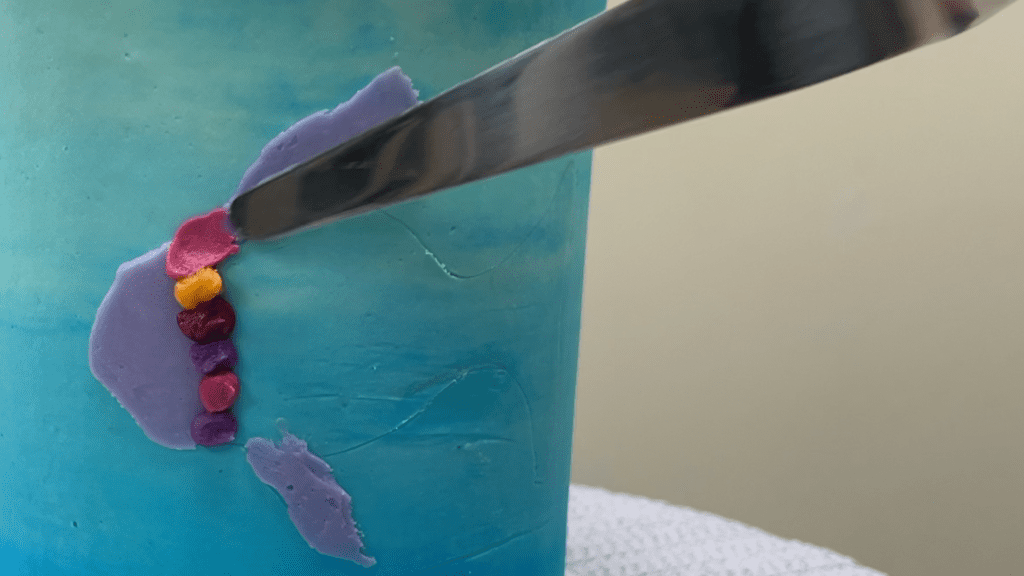
Now turn each dot into a scale by pressing the tip of your
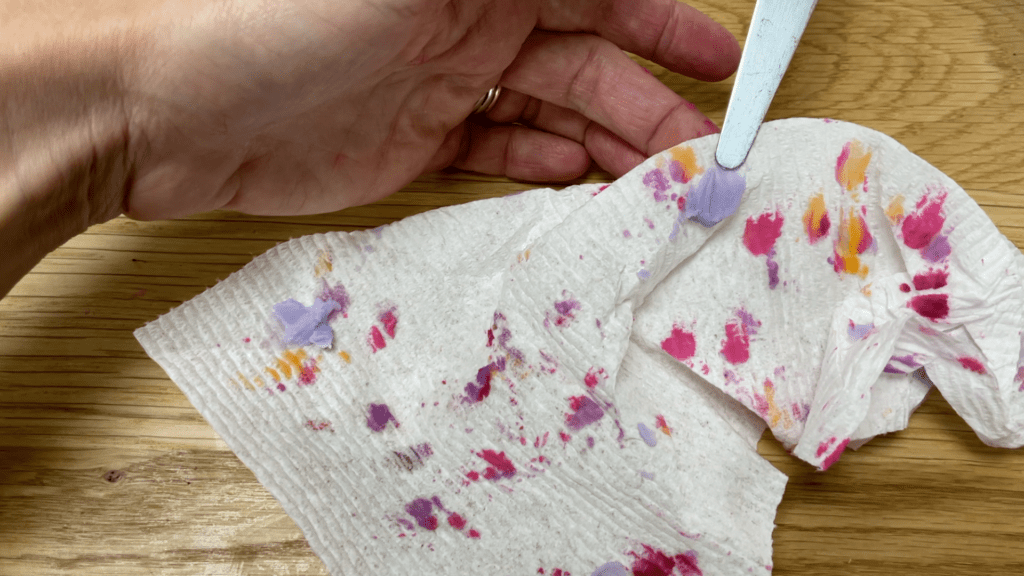
Wipe your
Using ziplock bags is an easy and convenient way to pipe this colourful fish because if you used piping tips, you’d need several identical small round piping tips, which you probably don’t have but you probably DO have a few ziploc bags in the kitchen!
I hope you’ve seen some ideas you’d like to try. Please tag @britishgirlbakes in your photos on Instagram so I can see your creations!
If you’re looking for buttercream inspiration, join my Club for access to ALL of my online classes as well as live interactive online demonstrations and Q&A sessions for members only!
Here’s the video version of this tutorial:
I’m going to show you 5 borders you can pipe with a 1M tip or any other star shaped piping tip. You can use buttercream, whipped cream, ganache, or meringue buttercream for all of these borders. (I’m using my 4 Minute Buttercream for this tutorial.) If you prefer to watch a video of this tutorial, scroll to the bottom of the page.
This is a rope border made with overlapping circles of frosting which look like the links of a rope. Hold your piping bag at a diagonal and pipe little C shapes, and at the end of the C loop back around to pipe another one.
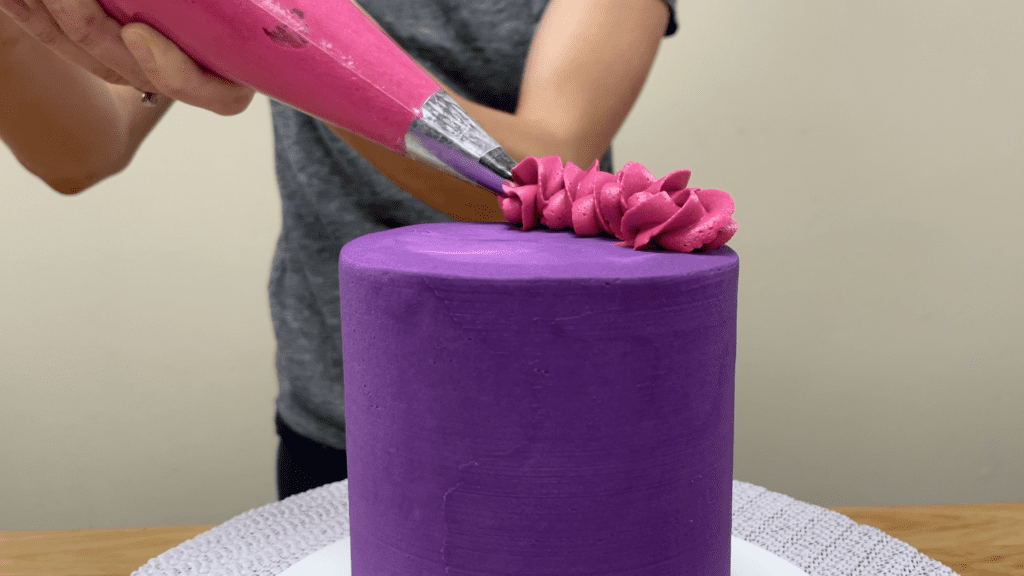
If you need to adjust your piping bag, swipe away at the end of a C shape, adjust the bag, and then start at the same place. That point will be covered up by the next C so you won’t notice the join.
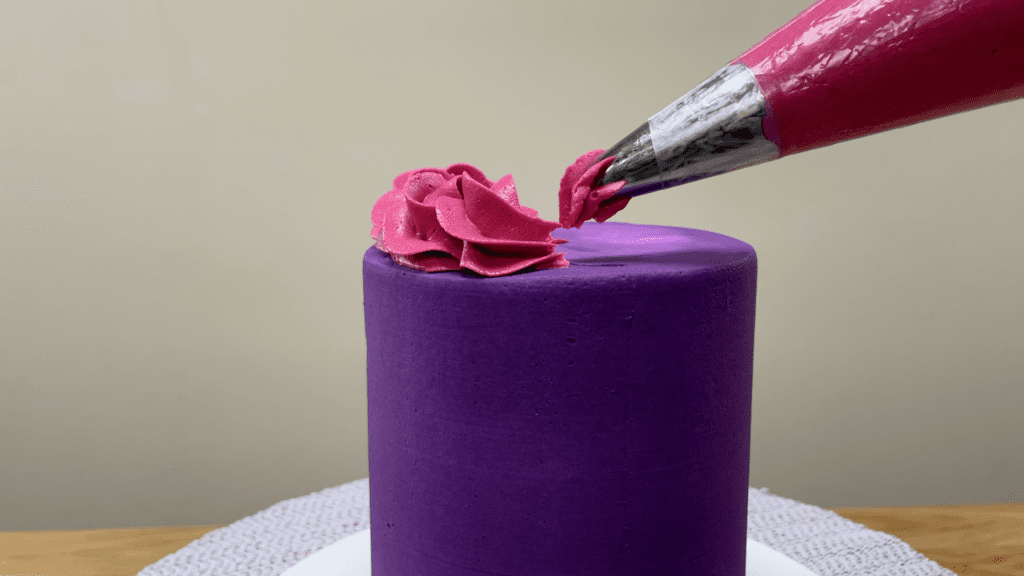
Watch the outer edge of the cake as you pipe, making sure you pipe just up to the edge of the cake but not over the edge. When you’ve gone all the way around the cake, for the final C shape swipe the piping bag away when you finish the link.

The end of the piping gets lost in the rest of the texture of the border so it’s not noticeable after you finish the border.
To pipe a wave or shell border hold the piping tip at a diagonal again and as you squeeze out the buttercream, push the bag away from you slightly to allow the frosting bulge out and form the crest of the wave, or the rounded part of the shell.
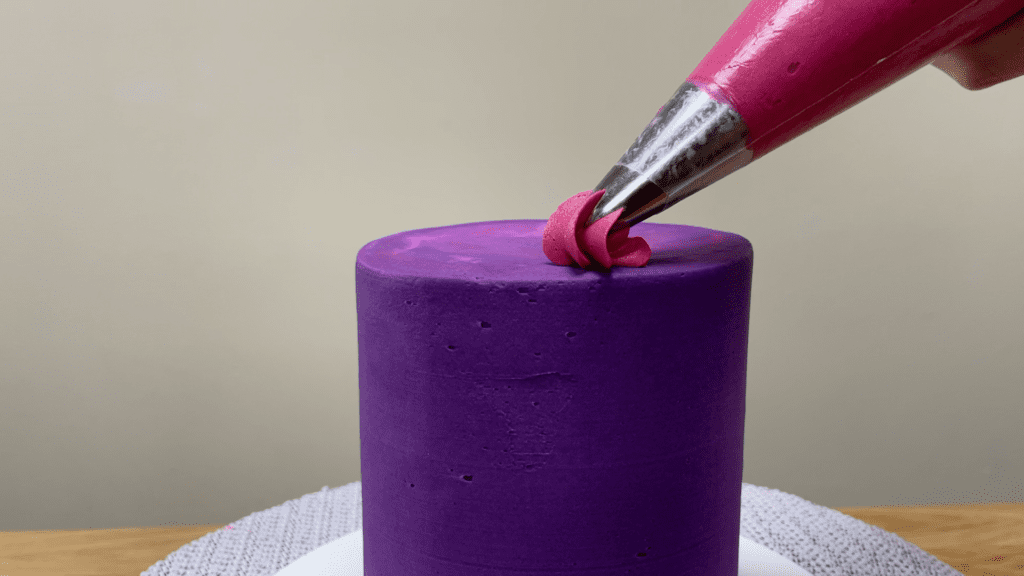
Then pull the piping bag away slowly, and as you stop squeezing on the bag, swipe the bag away. Repeat the motion but overlap the previous wave or shell so that this one begins over the top of the tail of the previous wave or shell.

Keep an eye on the edge of the cake to make sure you’re piping the same distance in from the outer edge, all the way around the cake, and overlap the piping the same amount for each wave or shell.

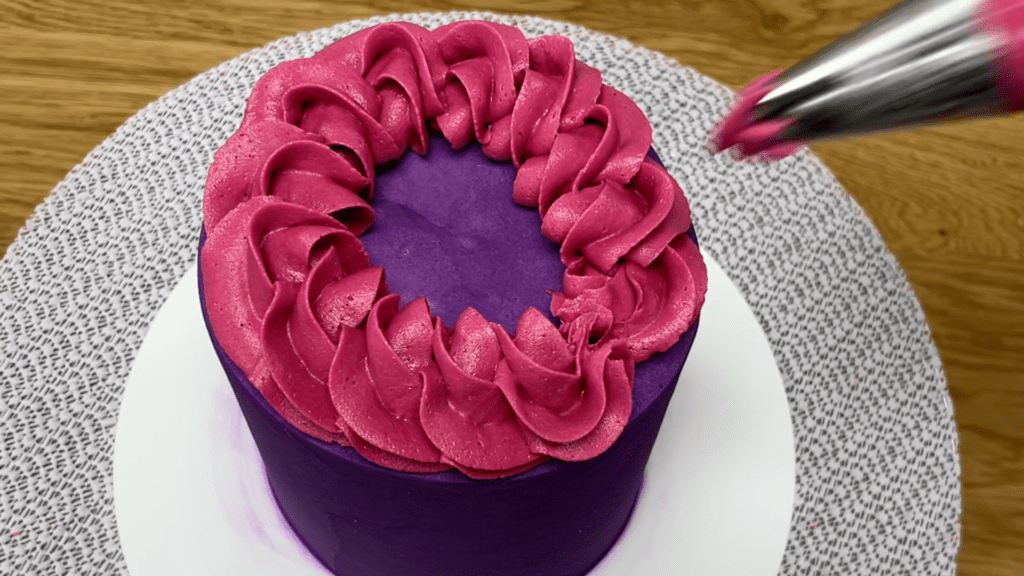
These shape shapes can be used to make rings of waves. Use the same motion to pipe the frosting, pushing the bag away to allow the frosting to bulge out and then pulling the bag away to leave a tail, but instead of piping these top to tail around the cake, pipe them side by side in a ring around the outer edge of the cake.
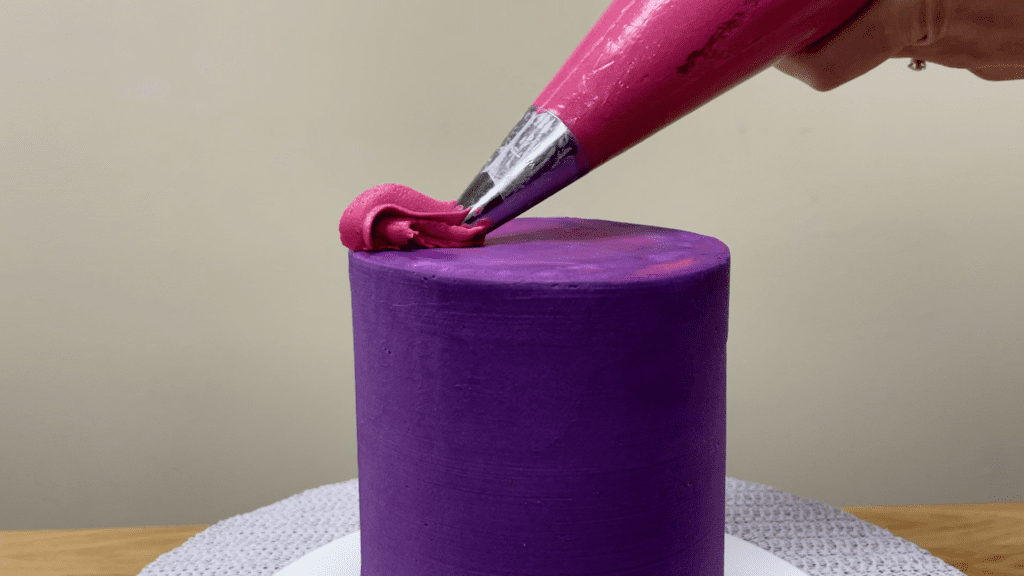
Try to start the same distance in from the edge of the cake each time, and allow the frosting to bulge out just up to the edge of the cake, not over it. Angle your piping bag as you pipe so that the tip is always pointing in the direction your wave or shell will point.
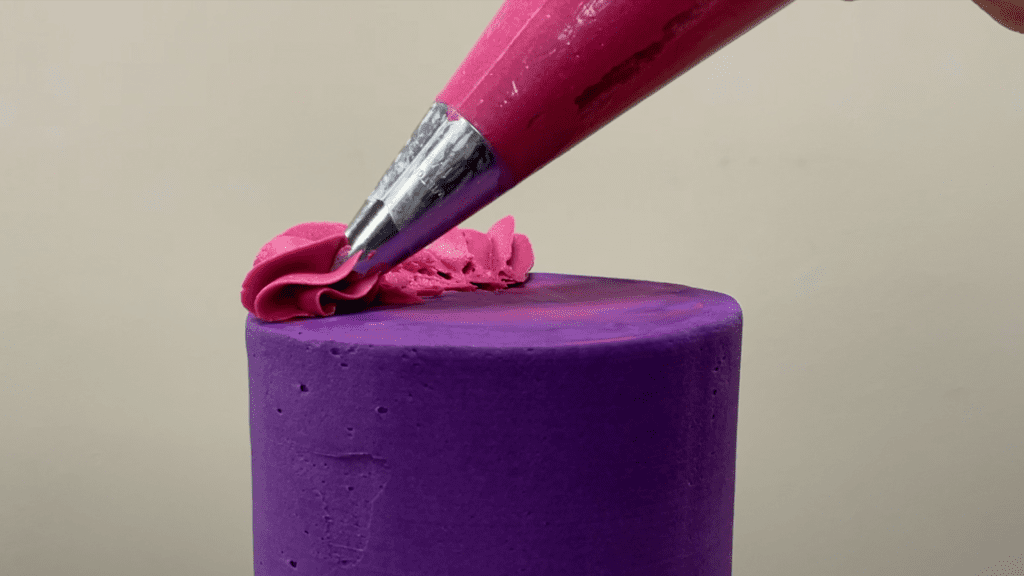
When you finish the first ring, pipe another ring within this one, overlapping the tails of the previous ring of piping. You can alternate colours for each ring of piping to add more colours to the piping, or alternate between colours for each wave or shell you pipe in the same ring.
Continue piping rings of waves until you get to the middle of the cake. I like to pipe a single squeeze of frosting in the middle to cover up the tails of the last ring of piping.
These swirls are the quickest, easiest border. Hold the piping tip about a cm in from the edge of the cake and pipe a spiral, with each ring getting smaller until your swirl comes to a peak.
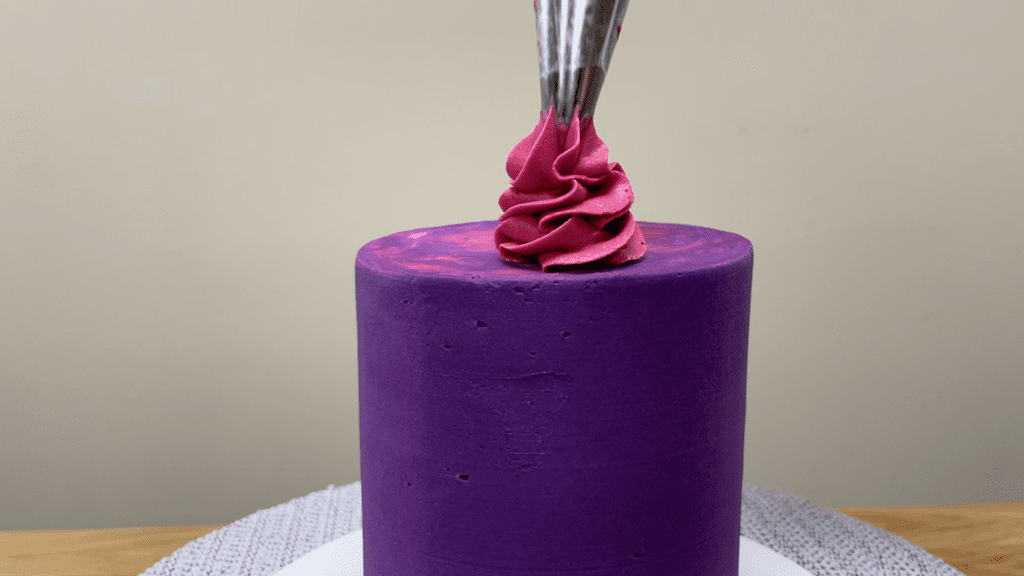
At the top of your swirl push down slightly, stop squeezing the bag, and lift the bag away and that will leave a nice neat point at the top of the swirl. If you’ve ever piped a swirl on a cupcake before, this is exactly the same motion but with a tighter spiral to make a smaller swirl.

Pipe the swirls side by side around the cake if you want them to touch each other or to space them evenly around the cake, pipe them opposite each other at 4 points around the cake and then fill in the gaps, so that there’s the same amount of space between each swirl.
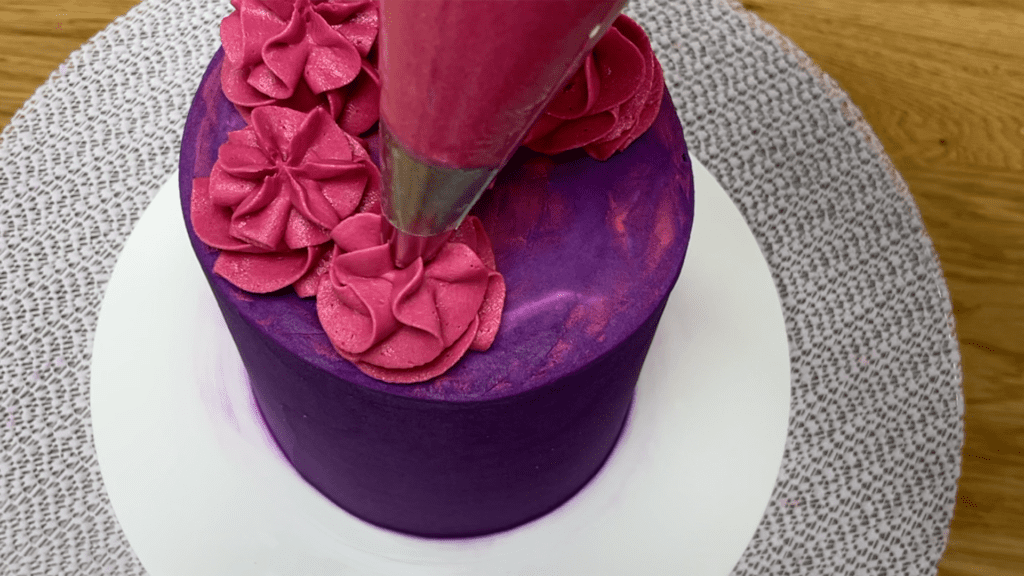
For a ruffle or wiggle border, pipe from side to side and gradually lift the piping bag so that the ruffles fold over each other a few times. Lift the bag up in the middle of a ruffle to leave a peak.
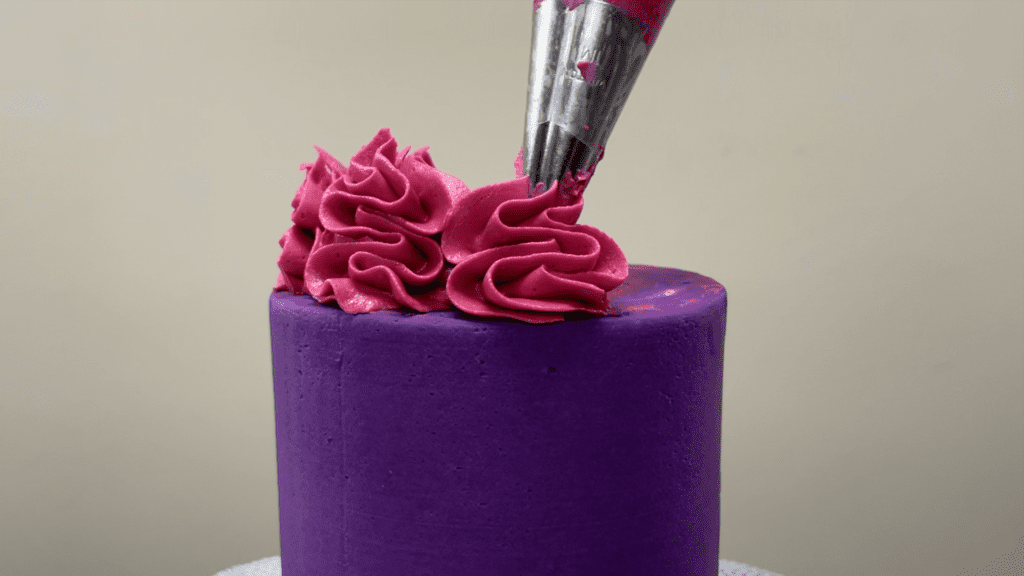
For each ruffle, start at the same side, either the left or the right, and finish all of the ruffles by lifting your piping bag while you’re piping in the same direction, either to the left or the right, so that the ruffles are identical.
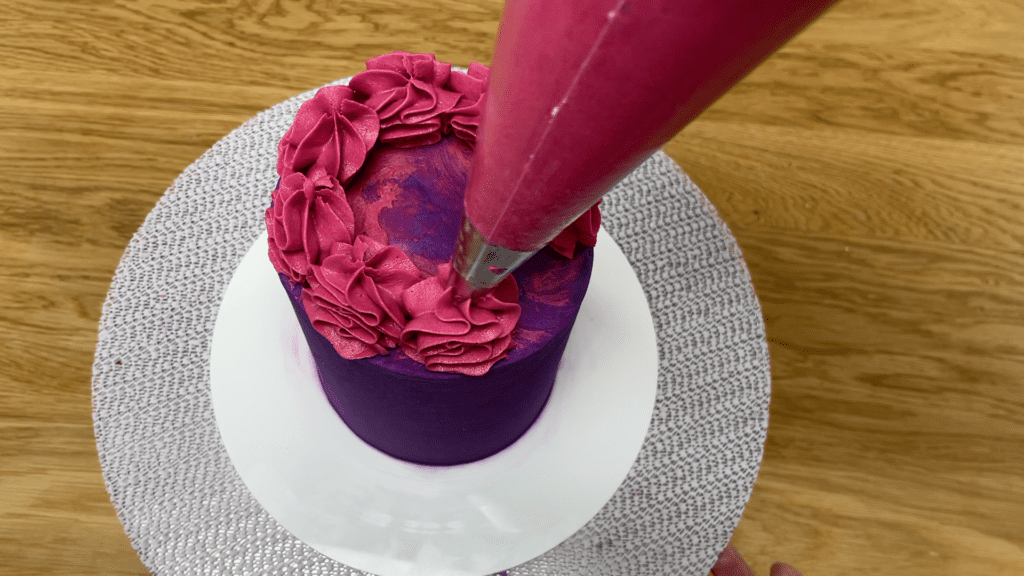
Pipe each ruffle right up to the edge of the cake and hold the piping bag directly above the ruffle as you pipe, so that the ruffle doesn’t lean in towards the middle of the cake to out over the edge.
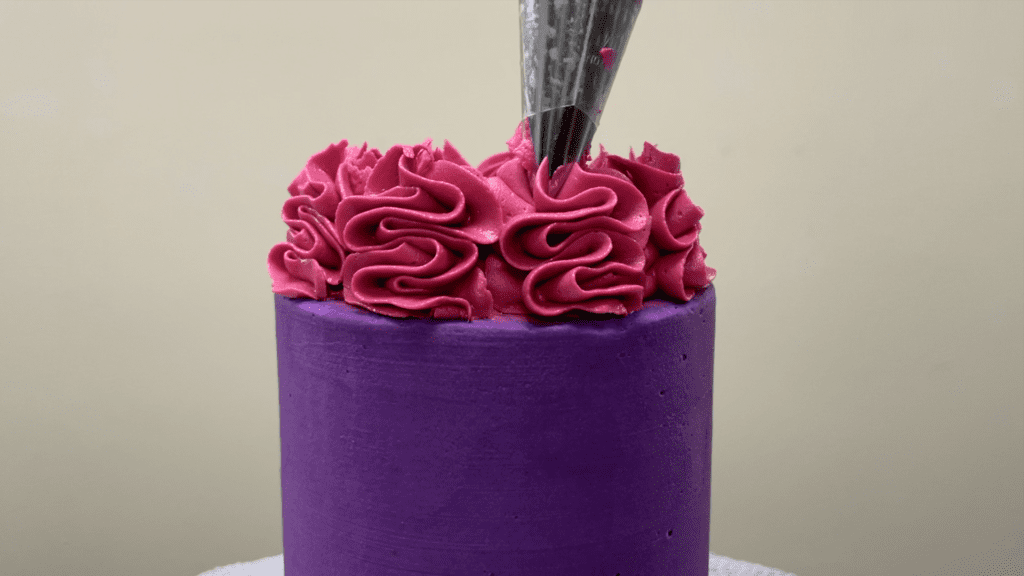
These 5 borders are all quick and easy to pipe but they all create different textures – choose a different one for each cake you decorate to make it unique! Tell me in the comments: which is your go-to border and which one do you want to try next?

If you don’t like something you’ve piped or you change your mind and want to use a different colour or a totally different border, scrape the border off the cake just after piping it and it will come off easily.
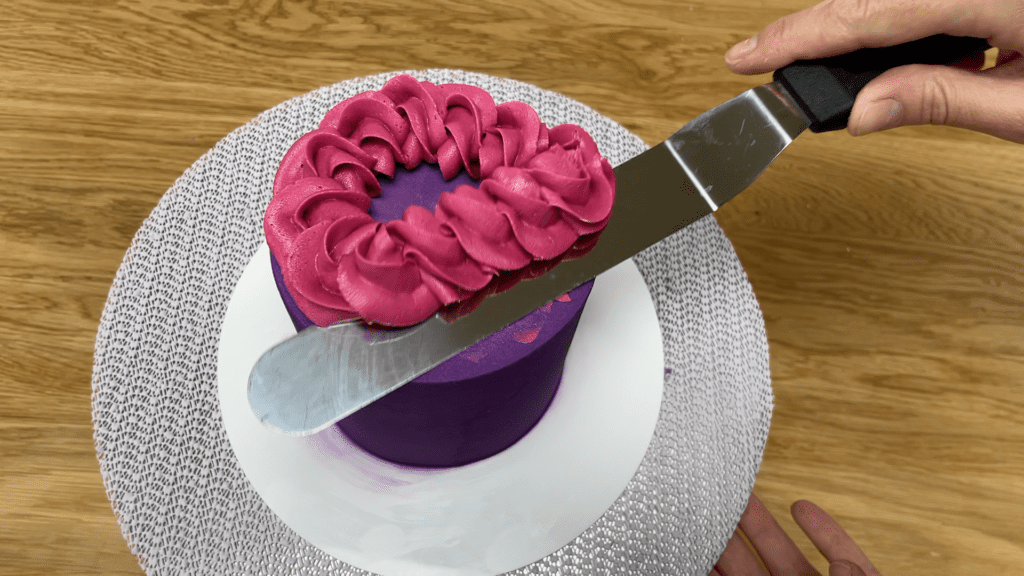
This is the most effective if you’re chilled your cake before adding the border because as you scrape the border off, you won’t damage the frosting on the cake because the base frosting is cold and hard so it will hold its shape.
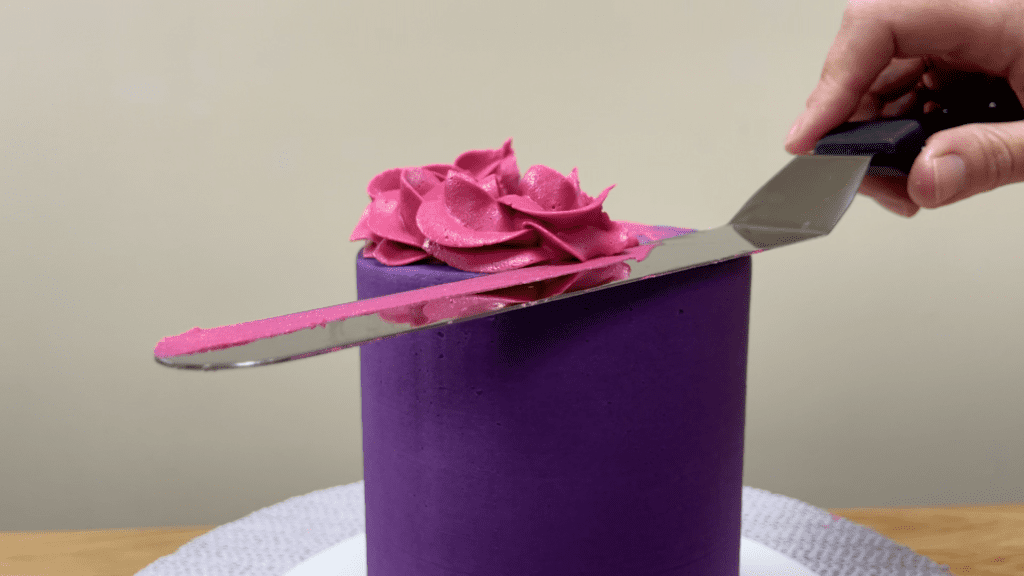
Use an
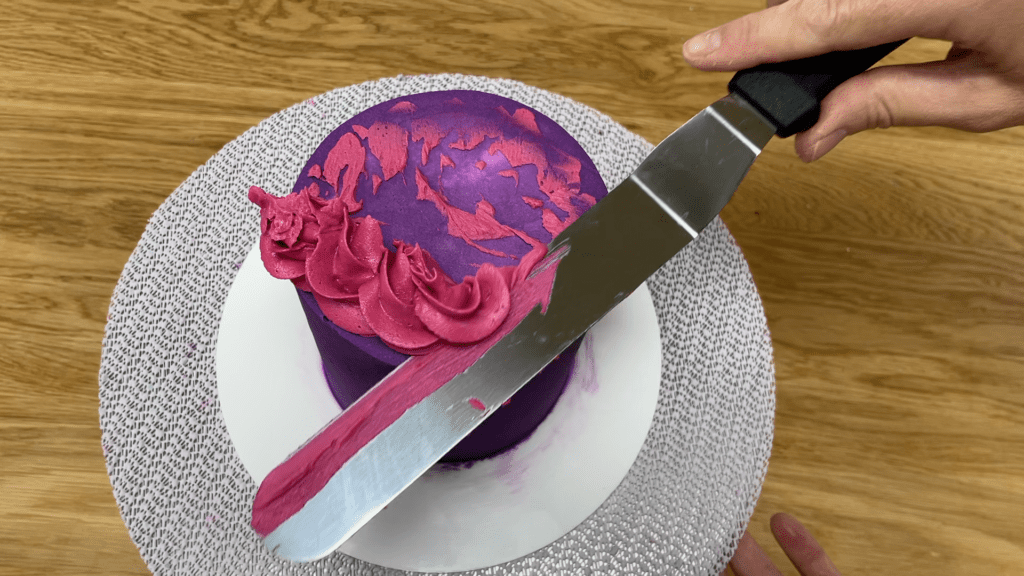
If you’re looking for cake inspiration, join my Club for access to ALL of my online classes and courses as well as live online classes and Q&A sessions for members only!
Here’s the video version of this tutorial:
In this tutorial I’ll show you how to make jet black frosting and how to add colourful galactic details, sparkling constellations, and a gravity defying cake topper! If you prefer to watch a video of this tutorial, scroll to the bottom of the page.
Start by making black frosting. I like to start with a dark brown buttercream made with melted chocolate a cocoa powder so that you need a minimal amount of black gel colour. Click here for my recipe for black buttercream that won’t stain your teeth. It is possible to make plain vanilla buttercream black, like my 4 Minute Buttercream, and that’s what I’m using for this cake.
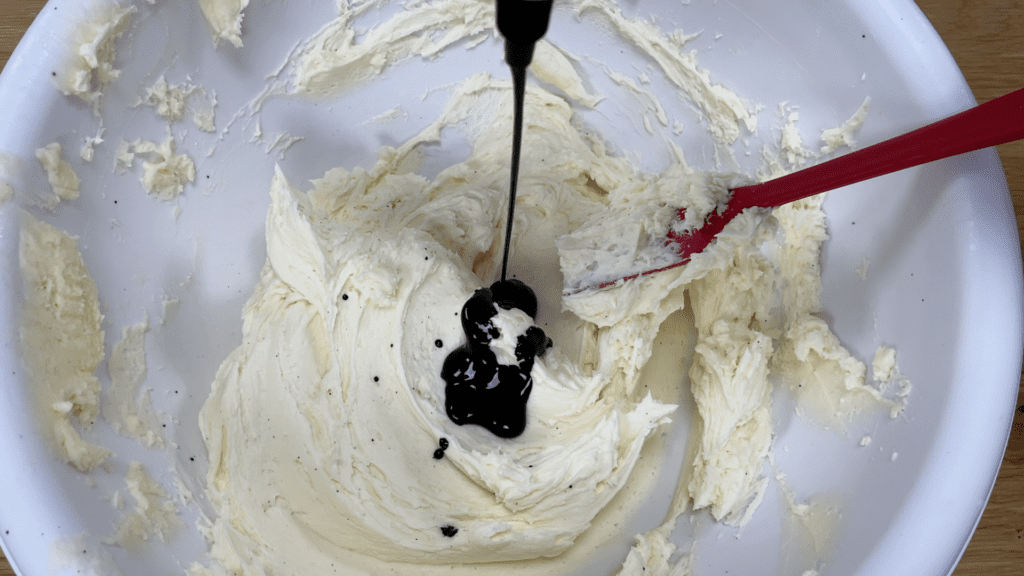
The colour will develop as it sits so after mixing it in, cover the bowl with a lid or with cling film or Saran Wrap and after an hour it will be several shades darker. You can add even more colour if you want, and then cover it again and wait another hour.
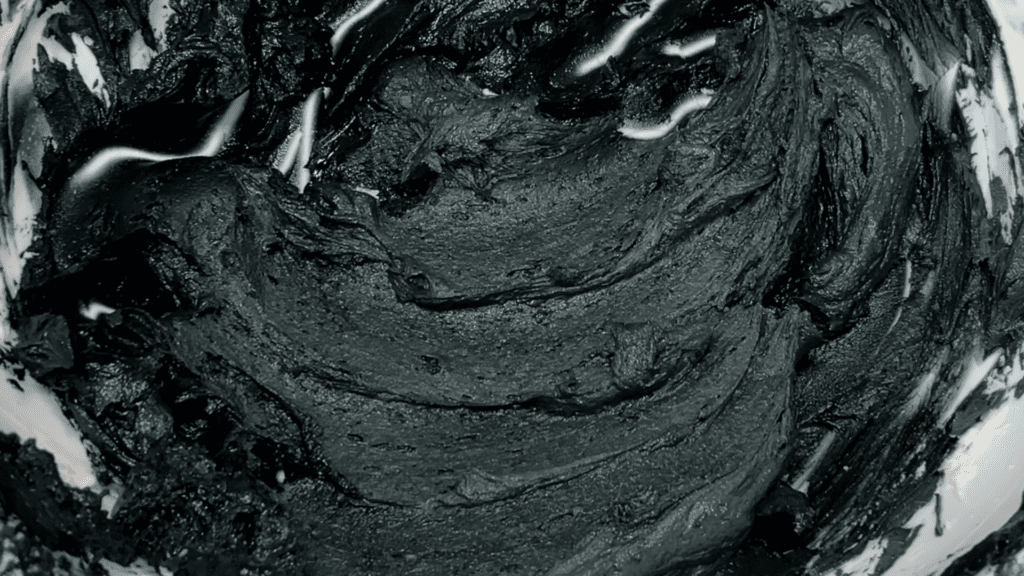
Frost your cake as normal with the black buttercream and scrape around the cake a few times with a frosting smoother until it’s fairly smooth, but don’t worry about getting it perfect yet.
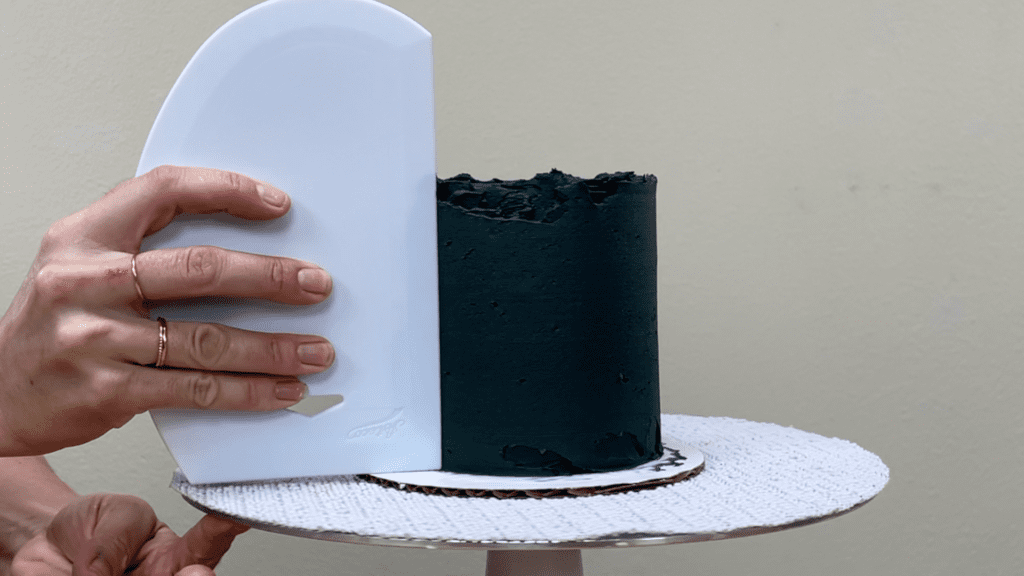
Now spread on a few dabs of brightly coloured buttercream, like pink and teal and purple and blue. I made these bright colours using gel colours because they’re very concentrated so you only need a few drops to get really bright and bold colours.
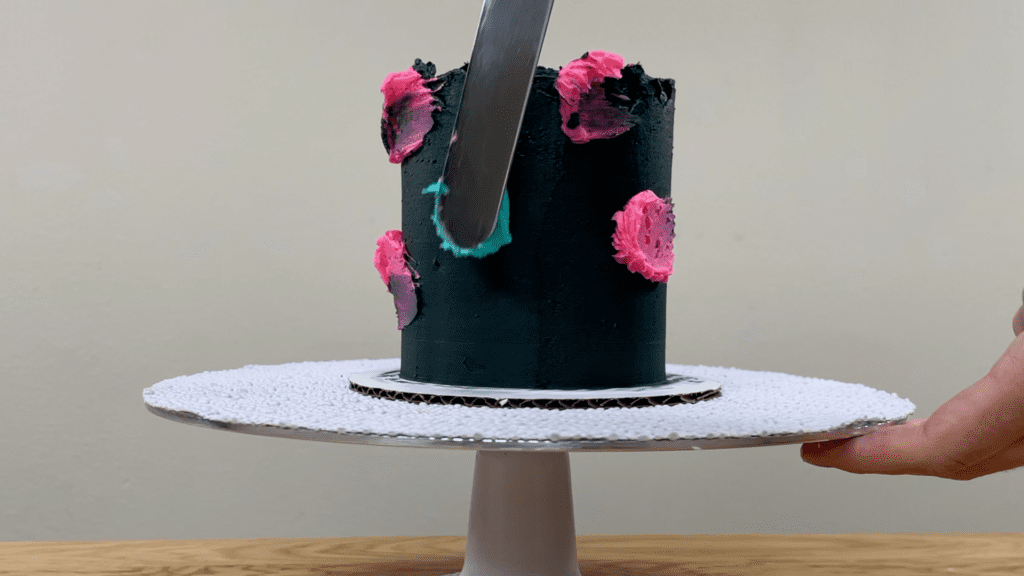
Scrape around the cake once to start to blend the colours. Then touch up any indents in the frosting by spreading on more frosting, either the bright colours or black, depending on how subtle you want the bright colours to be.
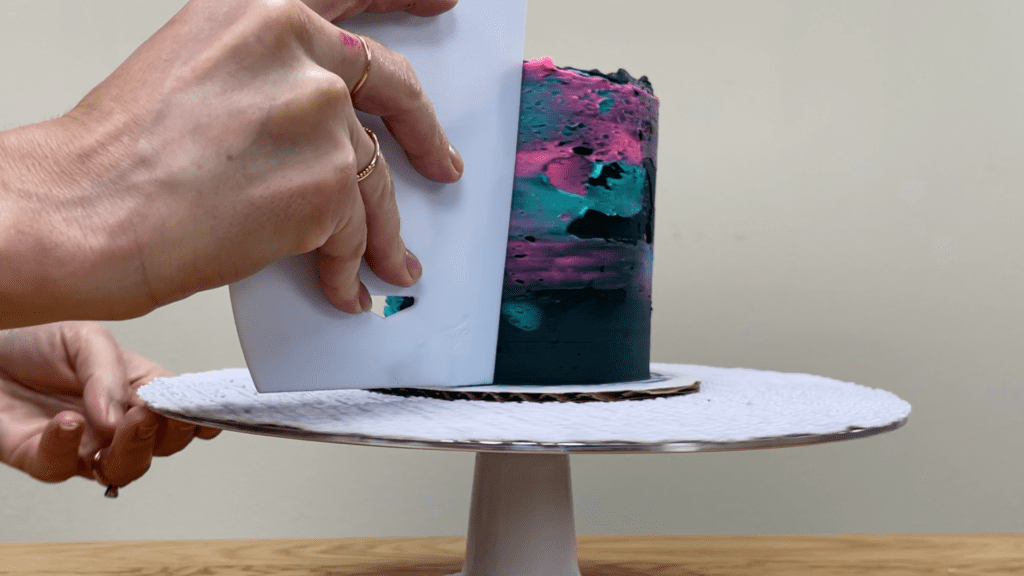
Scrape around the cake again and the purpose of this is twofold: to blend the bright colours into the black and also to finish smoothing the frosting.
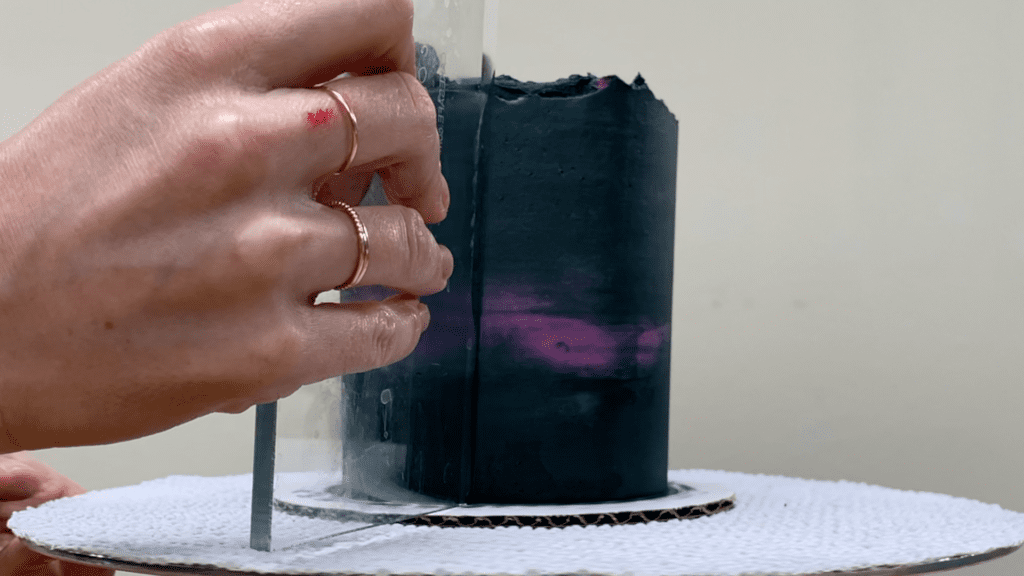
After each scrape, touch up any indents. If you do the touch-ups with black you’ll dull the colours or if you choose to add more of the bright colours you’ll make the bright galactic patches more intense.
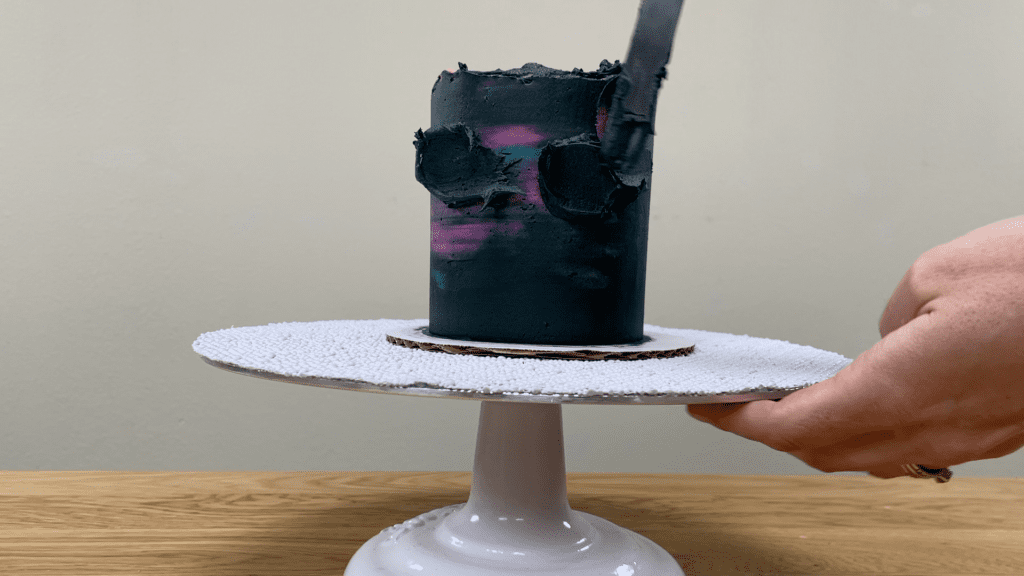
Work as quickly as you can because as the frosting starts to set, which will happen within about 10 minutes if your cake layers are chilled, any coloured frosting you add won’t blend as well with the black frosting so the patches of colour will be more obvious.
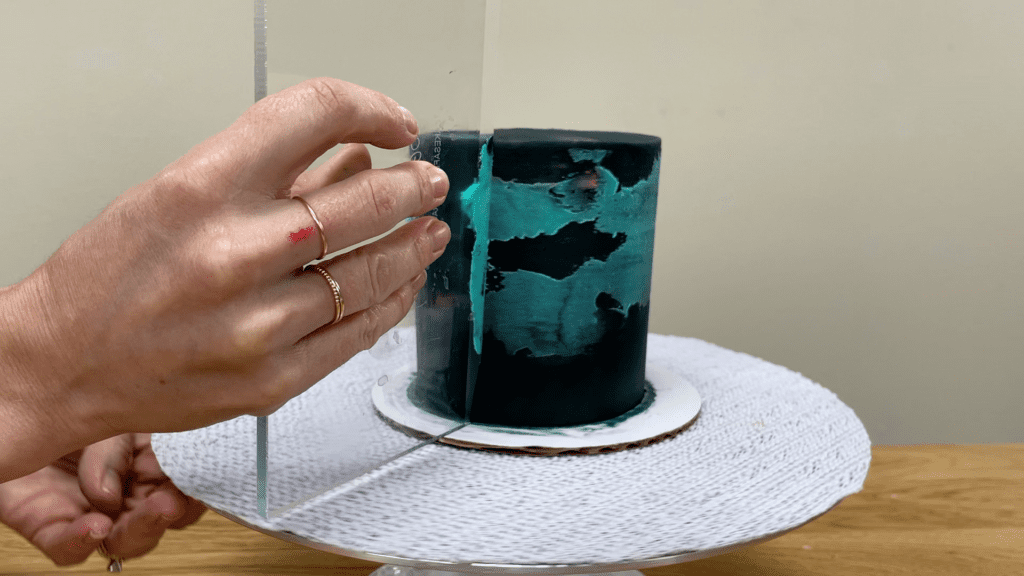
When you’re happy with the sides of the cake, tidy up the top edge by scraping any overhanging frosting into the middle of the cake and then swipe it off the cake on your
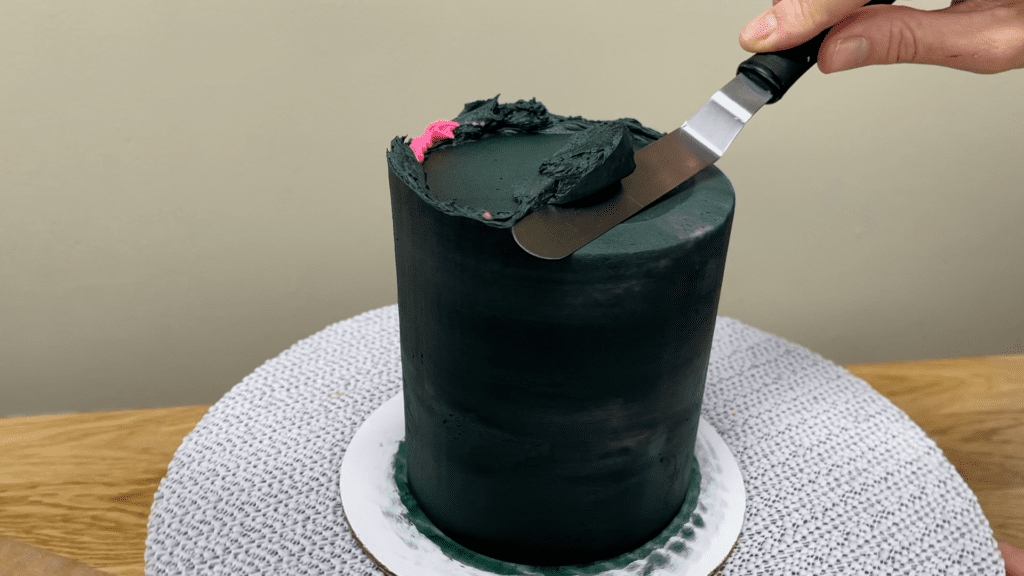
Now it’s time to add some constellations! I’m using silver luster dust for this, mixing it with a few drops of vodka. Any other clear alcohol will work or a clear extract like lemon extract or artificial vanilla extract. Mix it to make a thick paint.
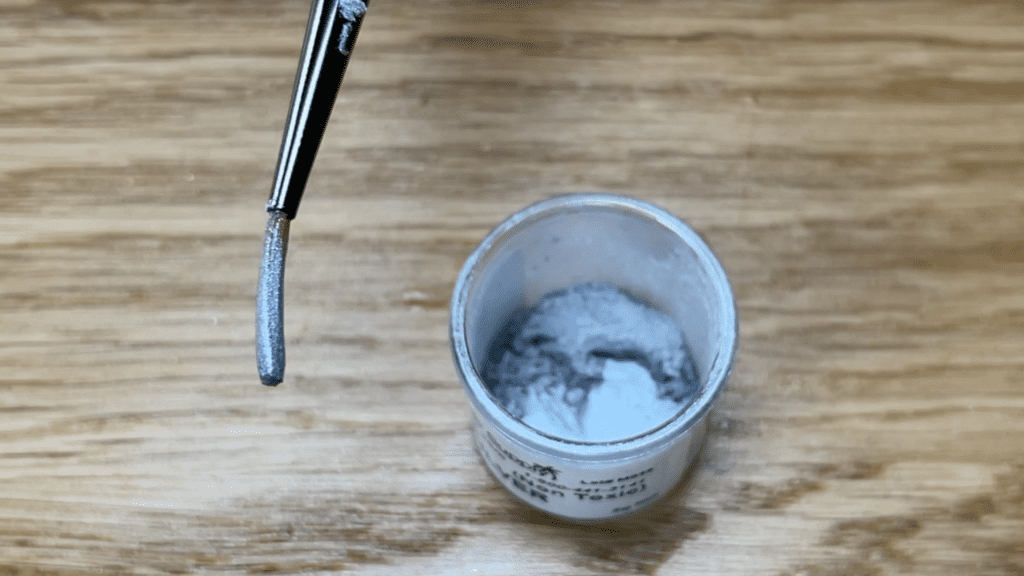
Then flick your paintbrush towards the cake, stopping it just before the cake to let the silver paint spray out over the cake. I like to tap the paintbrush against a finger to stop it suddenly and create the spray. If you don’t use that extra finger, the motion you’re using is a quick flick, how you would cast a spell with a magic wand! You can use white icing color for this instead of silver paint. Remember to do this on the top of the cake as well.
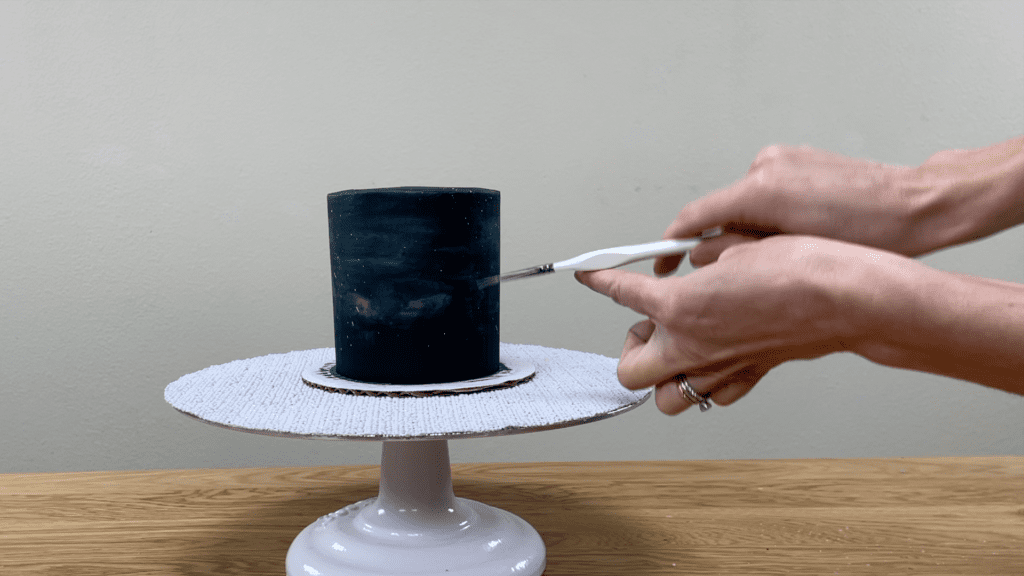
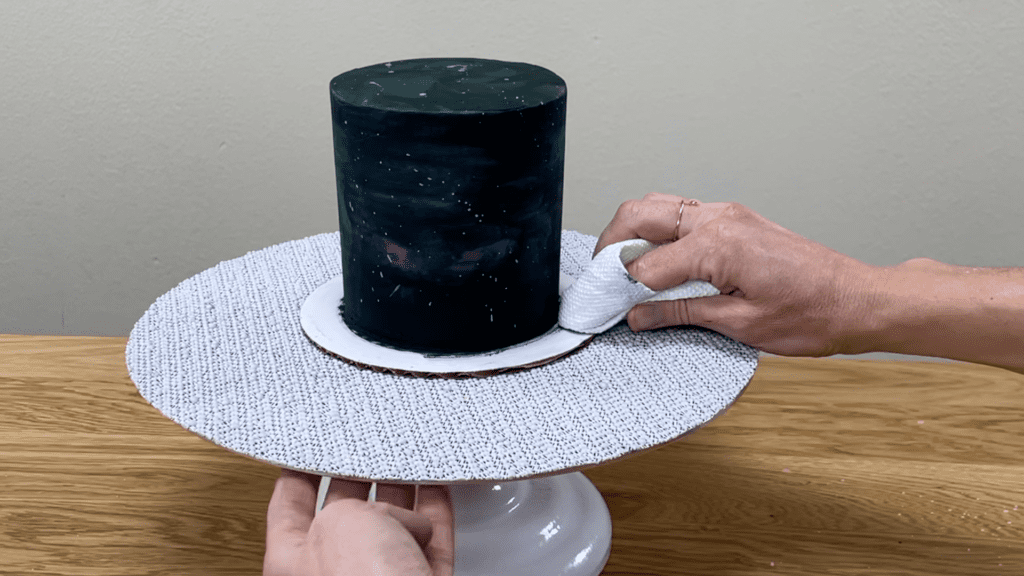
Wipe any smudges of frosting or silver paint off the cake board using a paper towel wrapped around your finger.
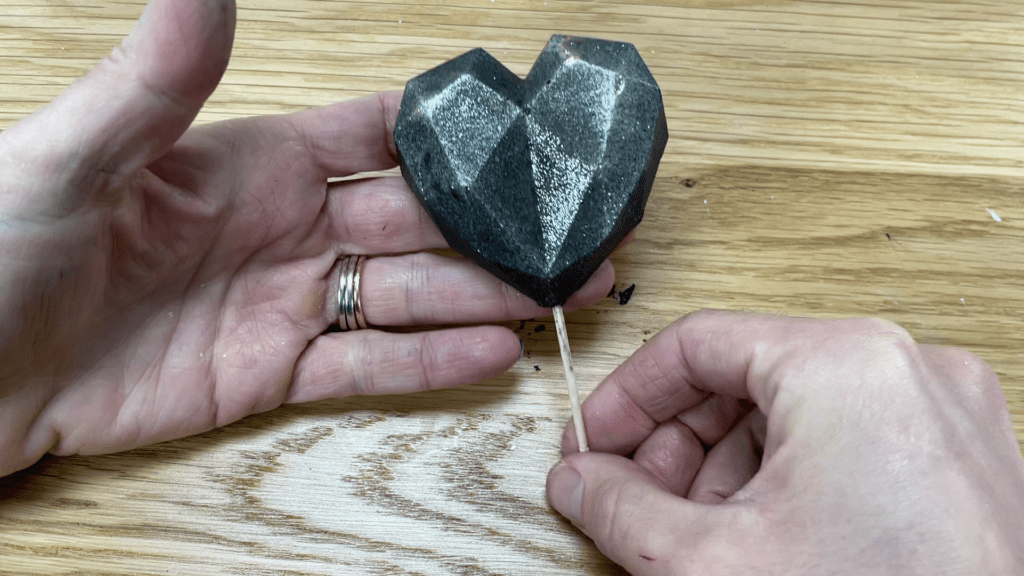
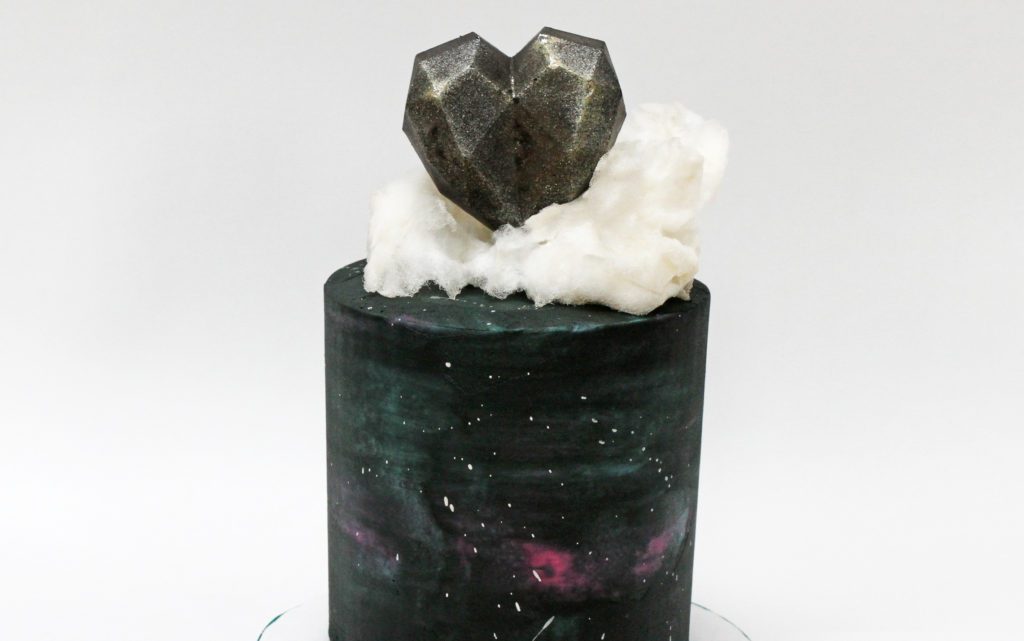
I show how to make this gorgeous black heart topper out of chocolate in my tutorial on geometric hearts. Poke a toothpick or a wooden skewer into the bottom of the heart for support.
Before adding the heart topper to the cake, pull apart come candy floss or cotton candy to make it nice and fluffy and cloud-like and then place that on top of the cake.
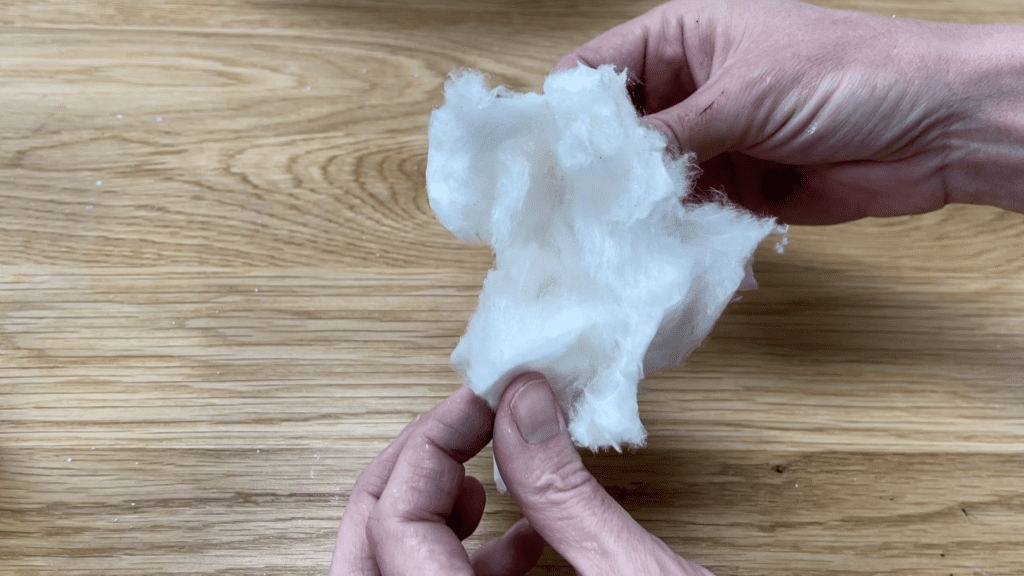
Push the heart on its stick into the middle of the cotton candy to skewer that in place and to conceal the stick so that it looks like the cotton candy and the heart are floating above the galaxy cake. Rearrange it by pinching it and pulling it apart to make it fluffier.
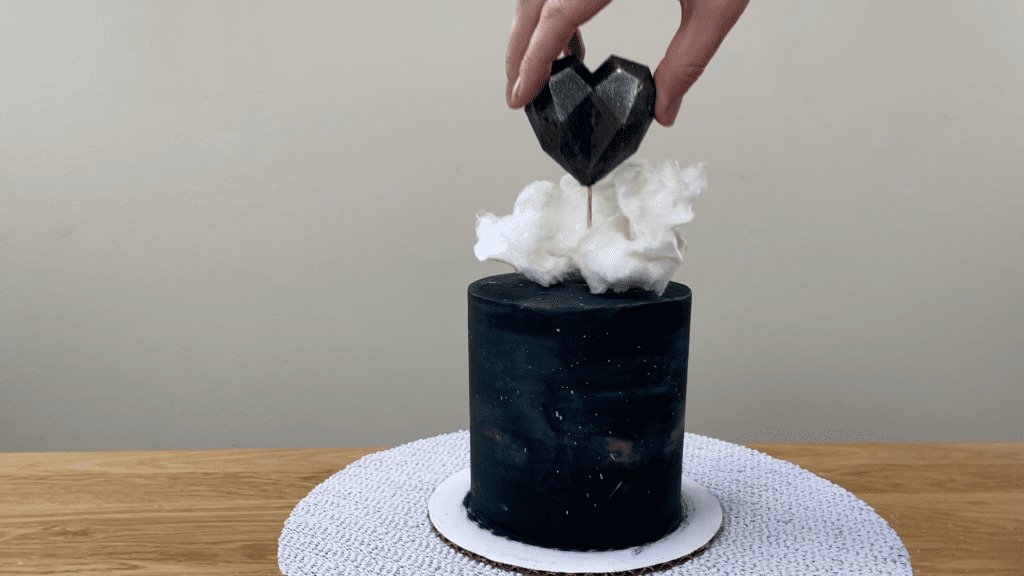
And there it is! A stunning galaxy cake with a gravity defying cake topper! For cake inspiration and to learn all sorts of techniques and designs, join my Club for access to ALL of my online classes from just $5 a month!
Here’s the video version of this tutorial:
In this tutorial I’m going to show you how to make your own stencils easily and cheaply and how use them to create gorgeous cake designs! If you prefer to watch a video of this tutorial, scroll to the bottom of the page.
1. Choose a material
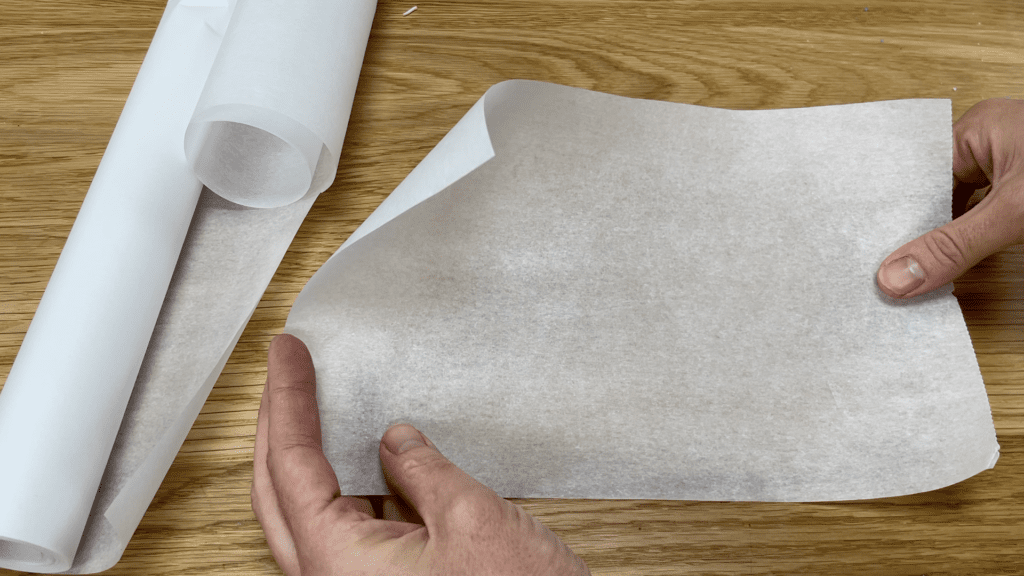
Parchment paper is cheap and easy to find and it’s easy to cut into whatever shape you like. However, it’s flimsy so it’s only effective for very basic outlines like a heart or a star.
Acetate is more expensive than parchment and not as easy to find -you’ll have to look in an arts and crafts shop or on Amazon to find it. It’s a bit trickier to cut into a shape than parchment papers is but it’s thicker and stronger, so you can use it for more intricate designs.
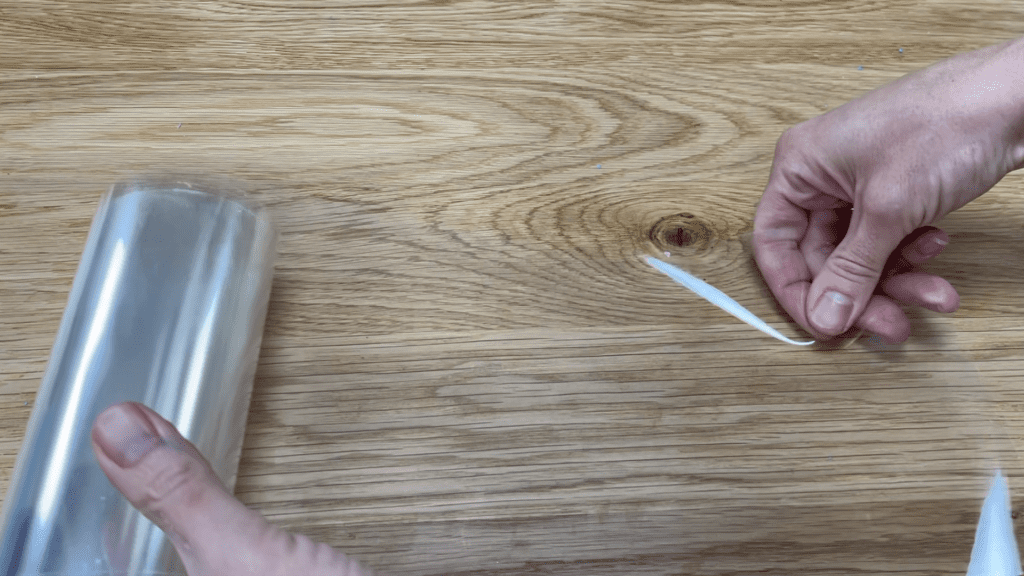
2. Choose your design
This will need to be simple for parchment, which is delicate and will smudge very detailed shapes. You can create more intricate designs with acetate.
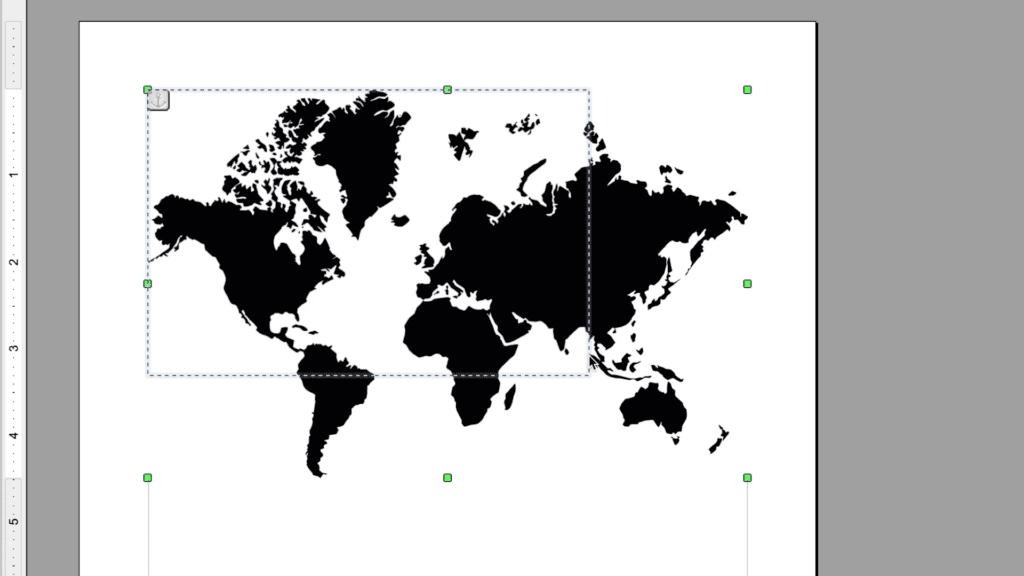
If your design is complicated you might to choose to print it and then transfer it onto your stencil. Before you print it, resize it on the computer so it will fit nicely onto your cake.
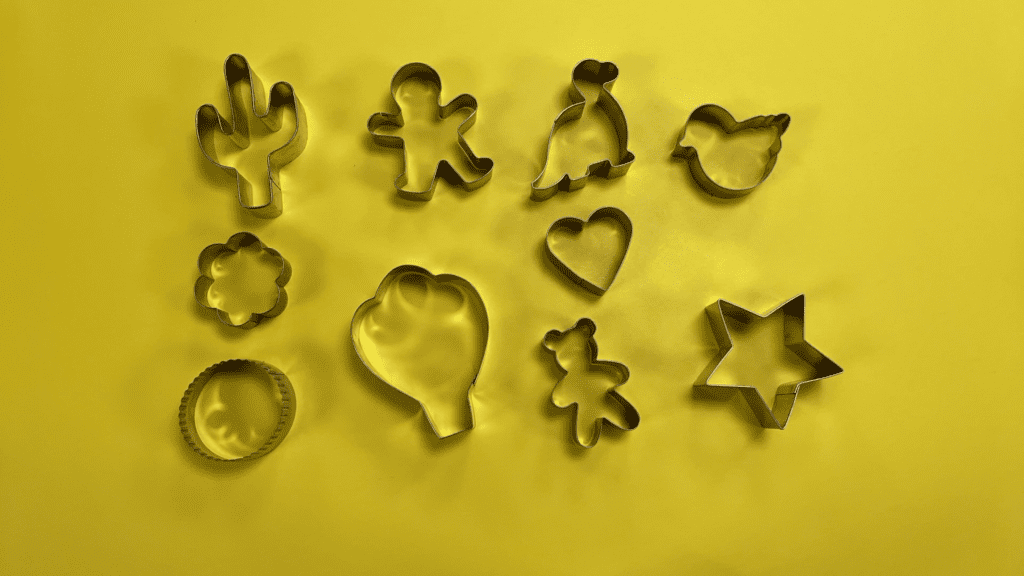
You can use a cookie cutter instead, if you have one that’s the right shape and size.
3. Create your stencil
How you create your stencil depends on the material you’re using. For parchment you can sketch your shape straight onto the paper. Fold it and snip the fold anywhere within the shape and that will provide a place to fit your scissor blade into. Skewer the middle of the shape with your scissors and then cut around the outline of the shape.
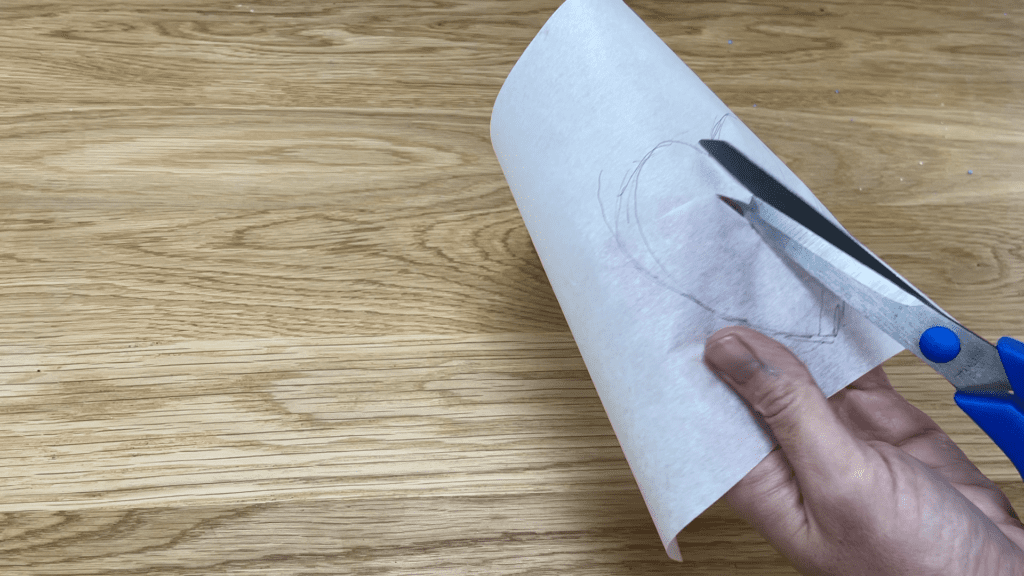
It doesn’t matter that you’re damaging the shape because you’re going to throw that part away. Be careful to cut along the outline of the shape smoothly and to leave the parchment beyond the outline intact because this will become your stencil.
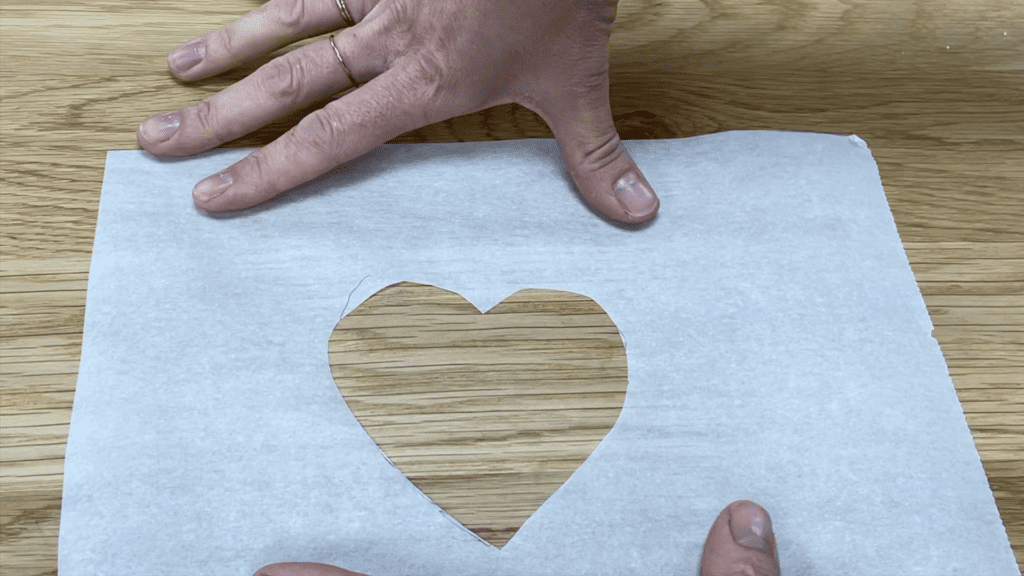
If you’re using a cookie cutter for your design, trace around the shape and then cut that out the same way, skewering the middle with your scissors and trimming around the outline. Again, it’s only the outer part that you’ll need for your stencil, not the actual shape.
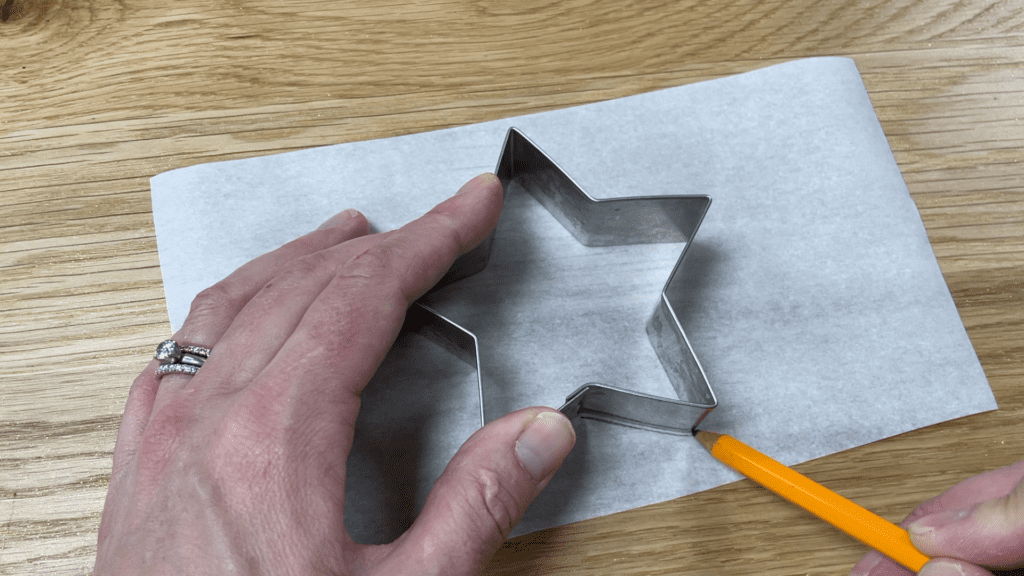
To trace your shape, place parchment over your design, taping it down or holding it steady, and draw over the outline. You can simplify the design if you want to.

Then cut the design out with scissors. It’s quite fast to cut a design out of parchment paper compared to acetate because it’s thin and easy to move around.

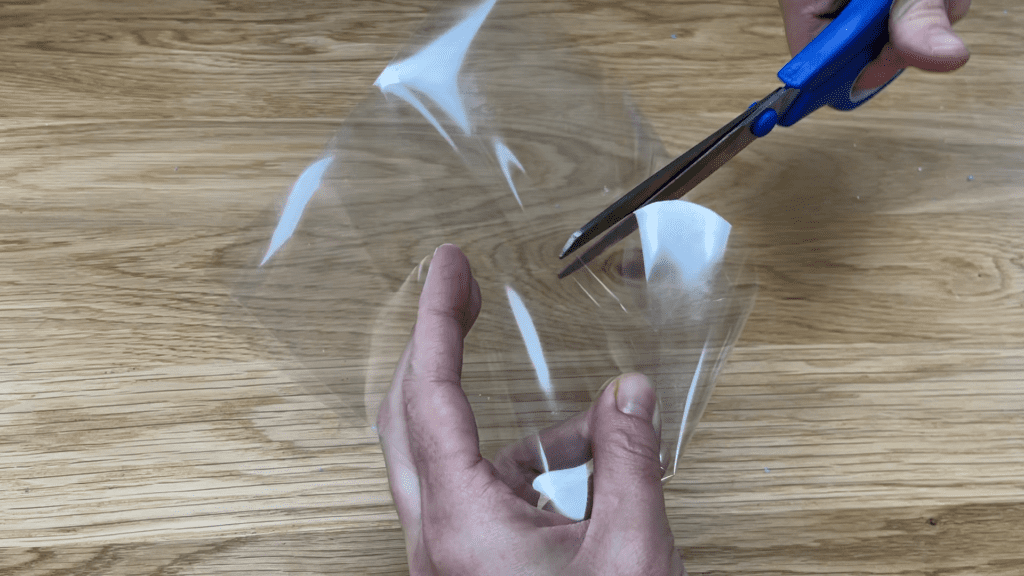
For acetate you’ll need scissors for basic designs or for intricate designs, a cutting, some tape, and a boxcutter or Stanley knife are helpful.
For a simple design like a heart, you can just cut the shape straight out of the acetate, just like you would do with parchment paper.
But for an intricate design like this map, tape the acetate onto the design, place it on a surface like a cutting board that you can cut onto, and then use a sharp blade to cut a line in the middle of each large shape. This makes it easier to insert your scissors to cut around the outline of the design.
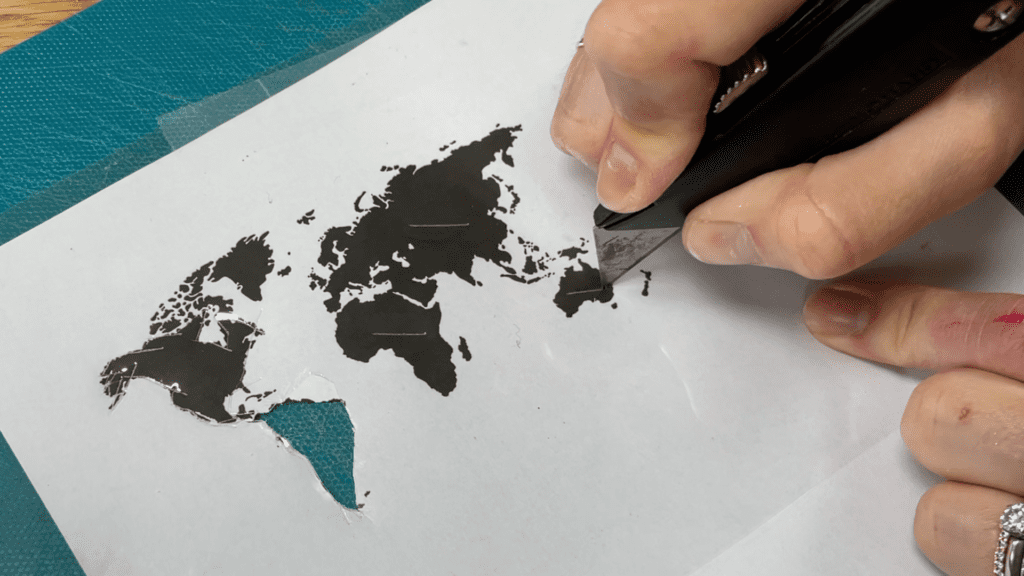
Because acetate is thicker than parchment, cutting out the shape is more time consuming than using parchment paper. But for intricate designs it’s worth the effort and you’ll see the benefits of acetate later on in the process.
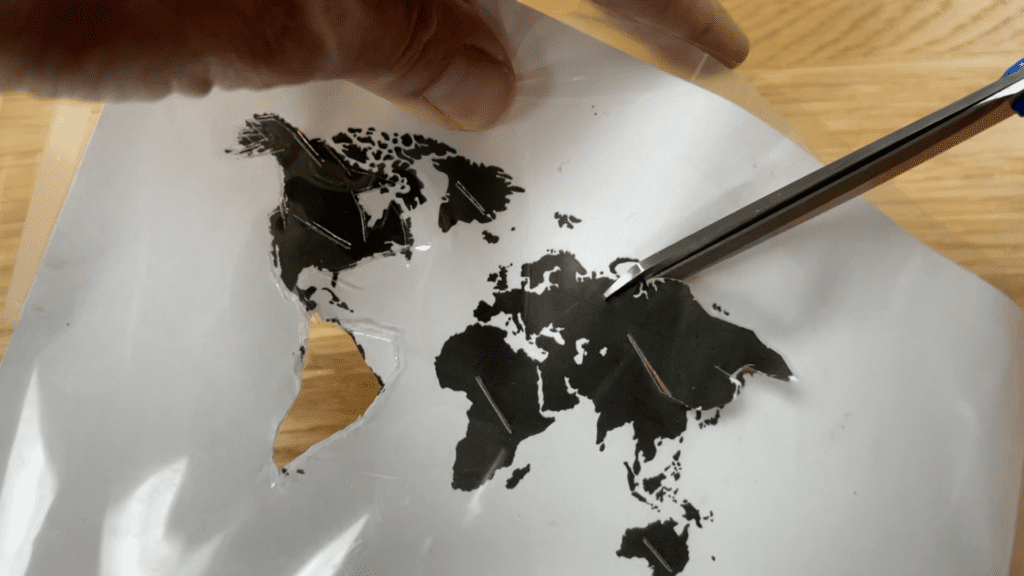
Now that you’ve made your stencil, it’s almost time to use it on your cake. But before applying your stencil, leave your cake in the fridge for at least an hour or ideally overnight, so the frosting gets very cold and really hard.

I made some fun animations for my video version of this tutorial, which you can watch at the bottom of the page. I took a few animation classes on Skillshare to learn how to create these, and I’m excited to partner with Skillshare to offer you a FREE trial of Premium membership so that you can take any of their thousands of inspiring classes for creative and curious people. Explore new skills, deepen existing passions, and get lost in creativity! There are classes on lots of different skills you can use in your cake designs, like illustration and painting. Click here for your free trial!
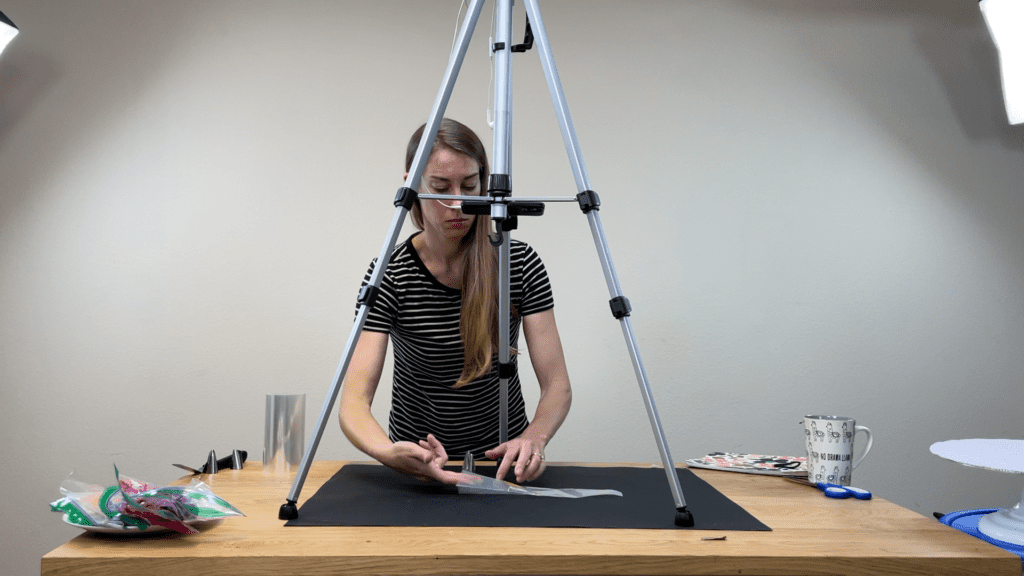
4. Attach your stencil to your cake
You can hold your stencil against the cake, pressing firmly to make sure it doesn’t slide around. This works better with simple shapes than very detailed shapes.
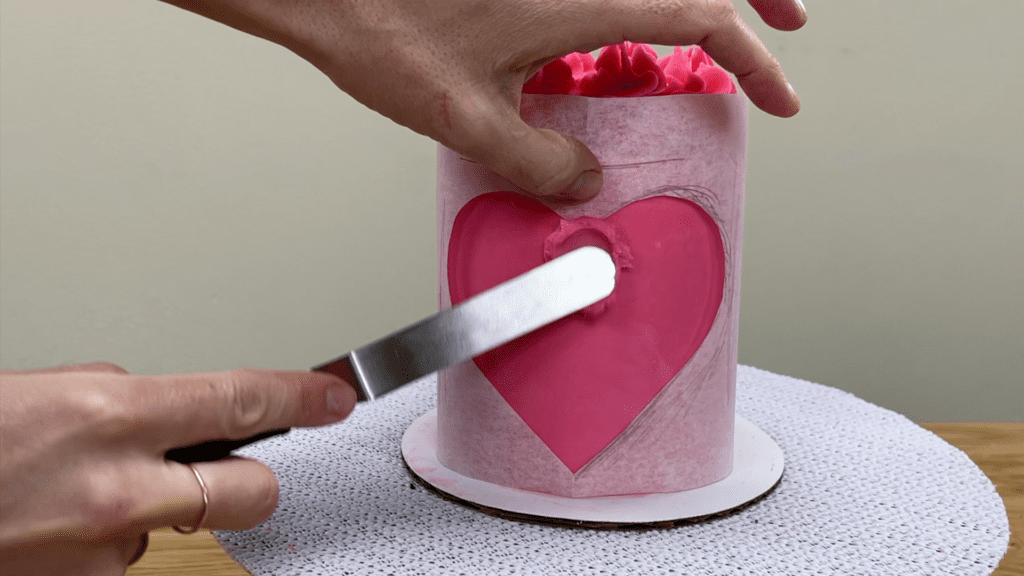
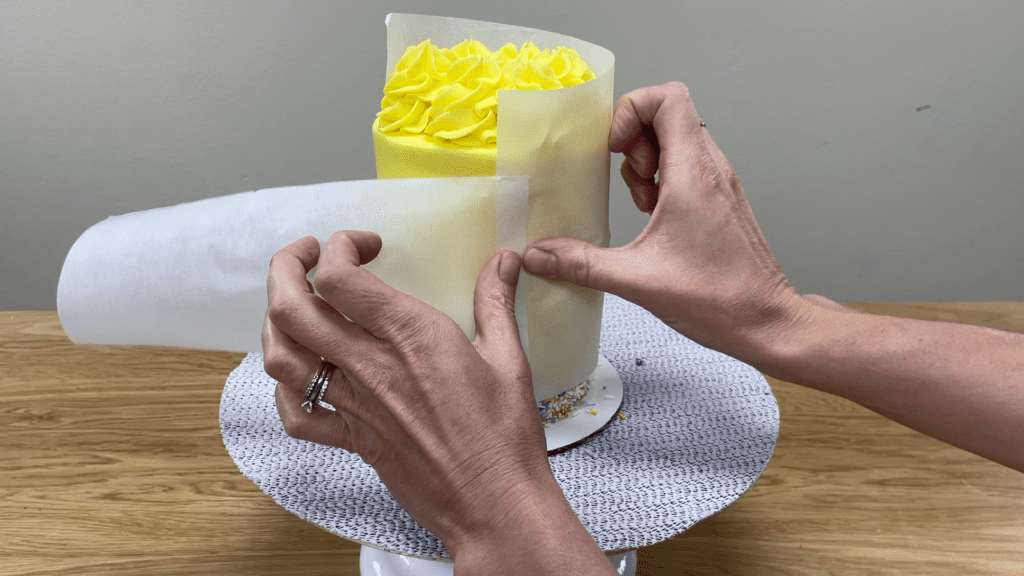
For more security, pin the stencil onto your cake by wrapping it tightly around the cake and then pressing a pin into each side, to hold it still while leaving both of your hands free.
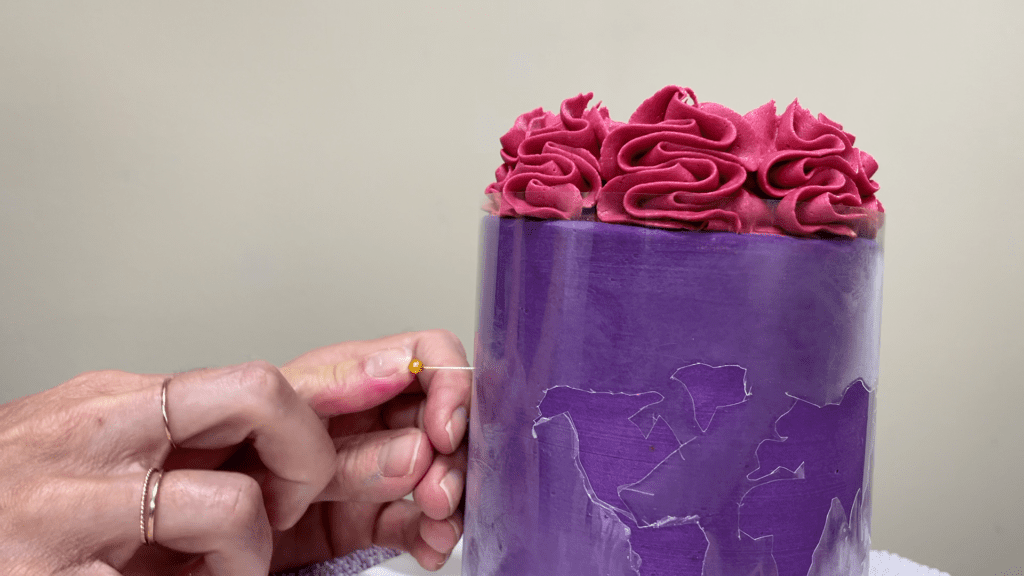
If you don’t want to push pins into the cake you can wrap the stencil around the cake and then use another piece of parchment or acetate to overlap the stencil, taping the two pieces together. Make sure you pull the parchment or acetate tightly before taping it, so that the stencil is wrapped tightly around the cake.
5. Add colour to your design
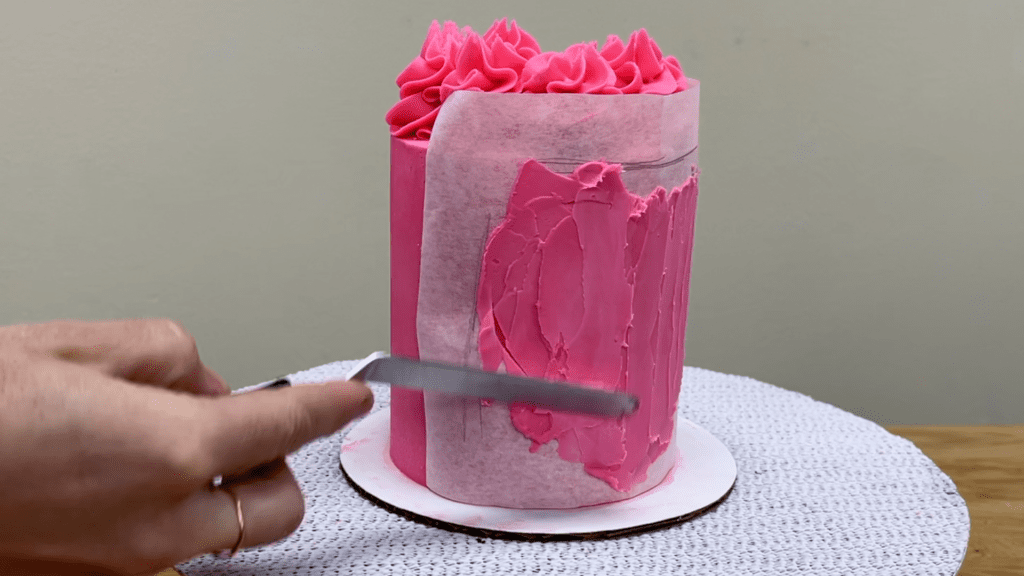
Spread buttercream over the shape onto the exposed cake within the shape you cut out of the stencil. Spread from the stencil over onto the shape, not from the shape out over the stencil, because that might push buttercream underneath the outline of the stencil and that will smudge your design.
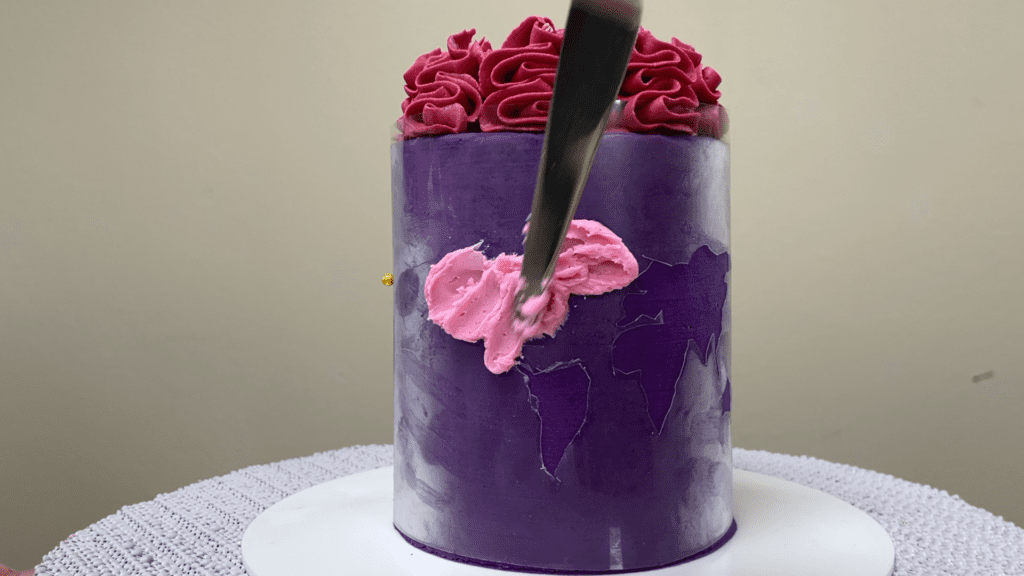
This is especially important for parchment because it’s very thin and flimsy, so buttercream can easily be pushed under it.
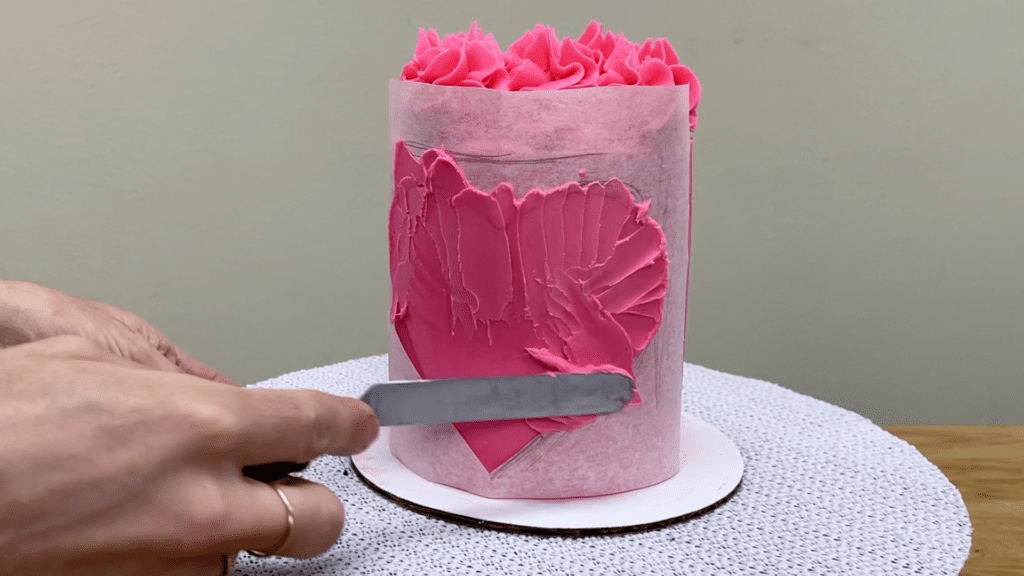
When you’ve covered up the whole design with buttercream you can either smooth it or add texture. To smooth it, scrape across the design with the edge of your
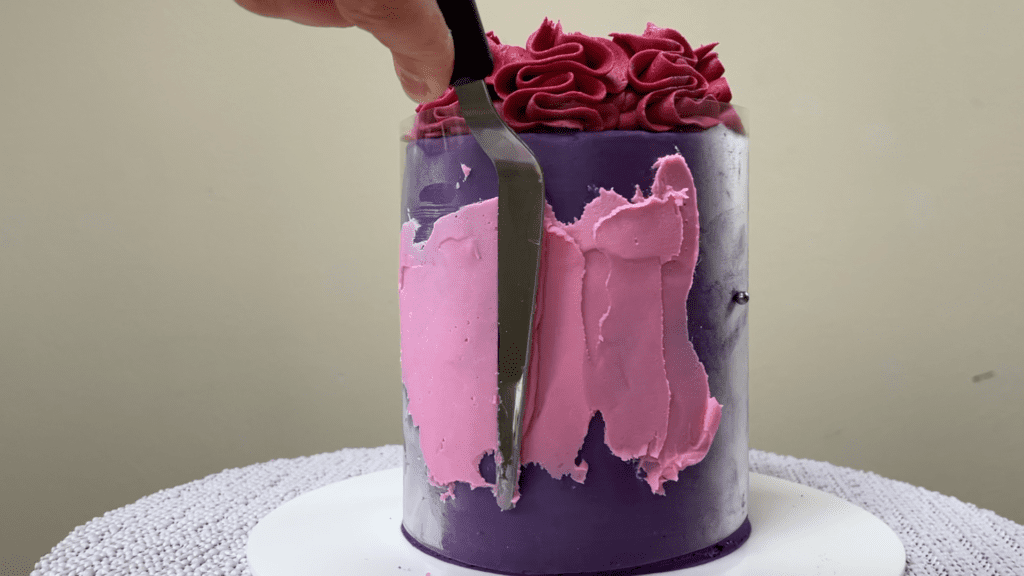
To add texture to the shape, scrape in any direction with your
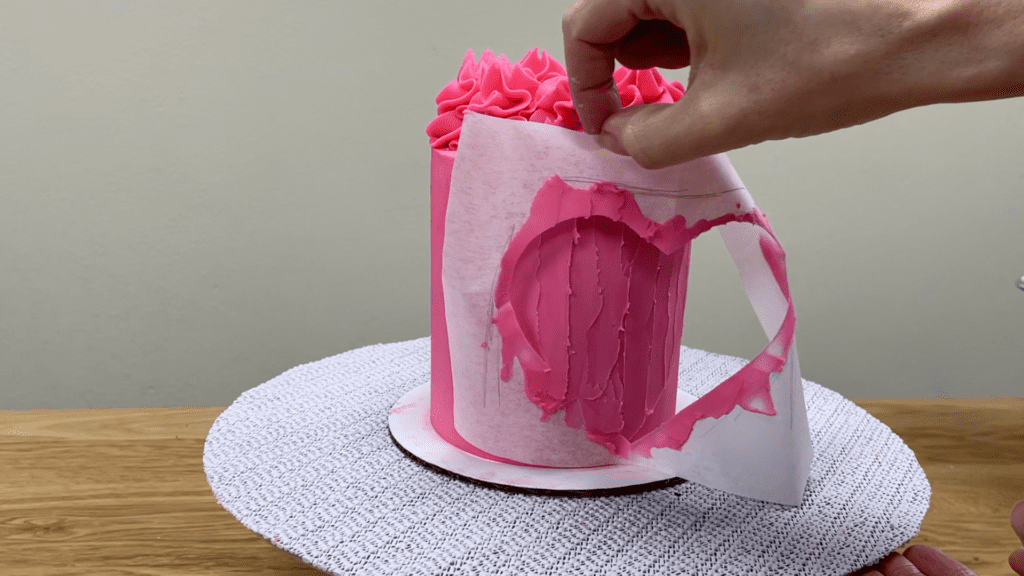
6. Peel off the stencil
Peel the stencil off straight away, before the buttercream sets, for the neatest outline.
If there are any smudges in your outline you can scrape them off with a toothpick or
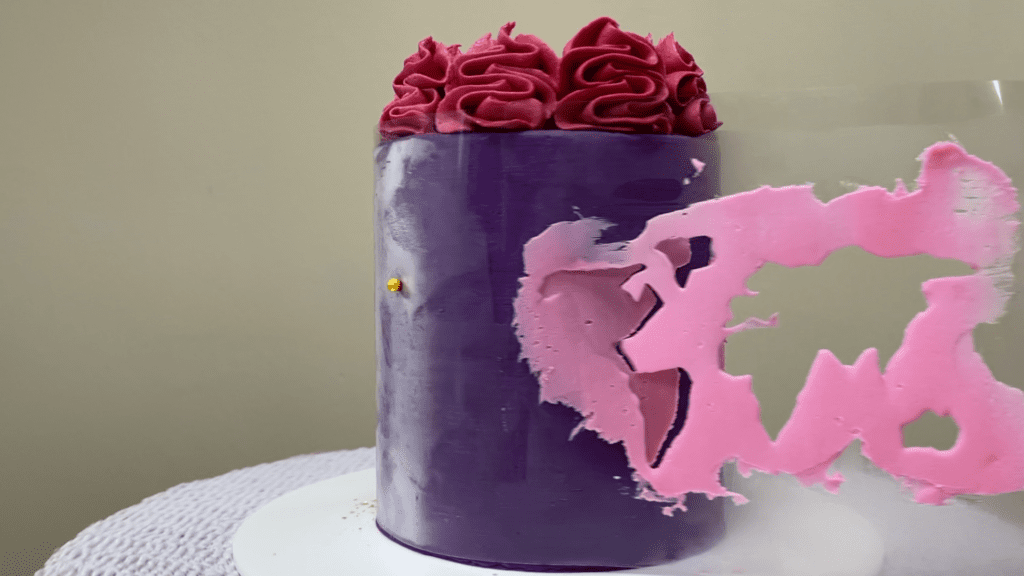
7. Add finishing touches
Sprinkles can be a nice finishing touch for an otherwise simple stencil design. Press them into the outline of the shape either one by one, or by scooping up a handful and angling your hand to press the whole handful of sprinkles into the edge of the shape.
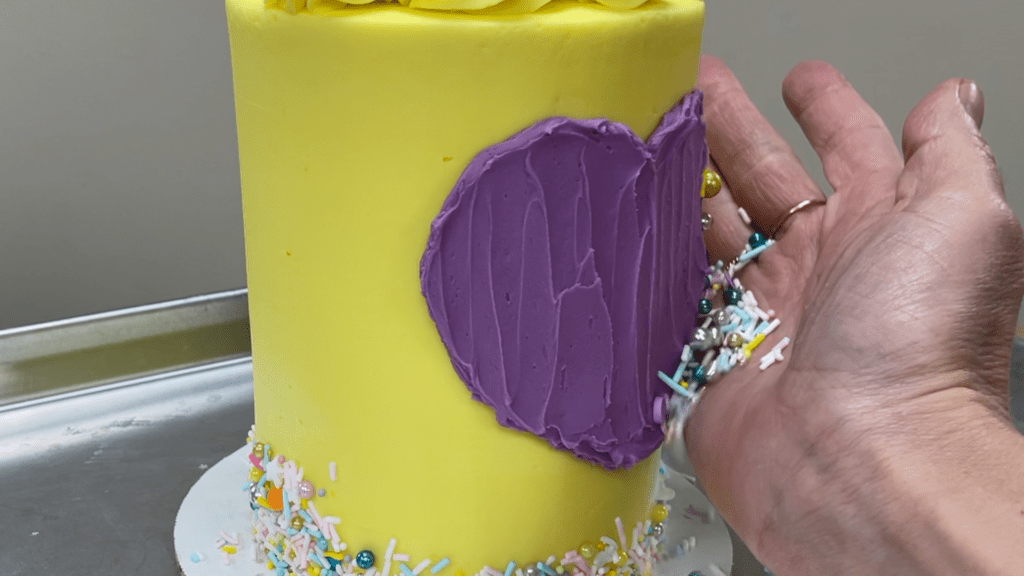
Because the base frosting on the cake has set, it isn’t sticky so that sprinkles won’t stick to that, only to the fresh buttercream you’ve just spread onto the stencil. For more ways to use sprinkles check out my tutorial on 5 sprinkle cake hacks.
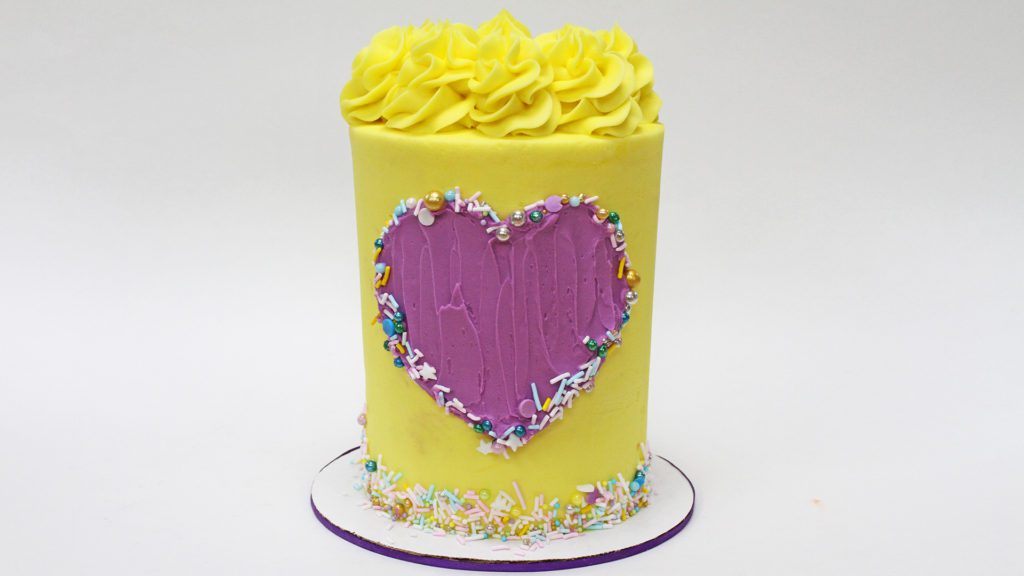
I can’t wait to see what you create! Please tag @britishgirlbakes on instagram so I can see the photos of your beautifully stenciled cakes!
If you’re looking for inspiration, join my Club for access to ALL of my online classes as well as live online classes and Q&A sessions for members only!
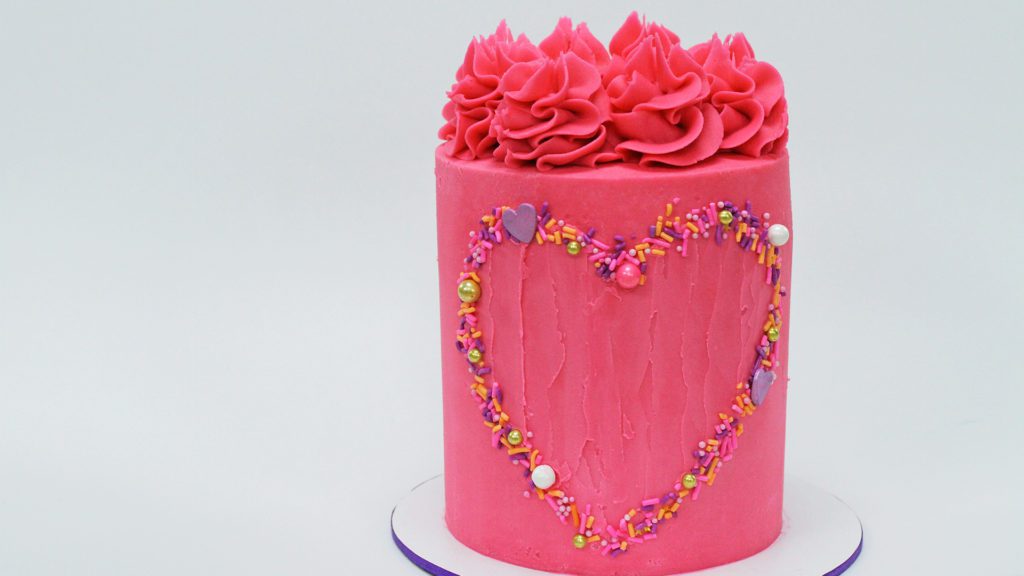
Here’s the video version of this tutorial:
Sprinkles are colourful and fun but there is SO much more that you can do than just sprinkling them onto a cake! Decorate professional looking cakes with these 5 sprinkle cake hacks. If you prefer to watch a video of this tutorial, scroll to the bottom of the page.
Sprinkle Cake Hack #1
For an easy way to jazz up an otherwise plain cake, create a sprinkle border! Place your cake on a tray to catch any falling sprinkles so you don’t have a huge mess to clean up afterwards.
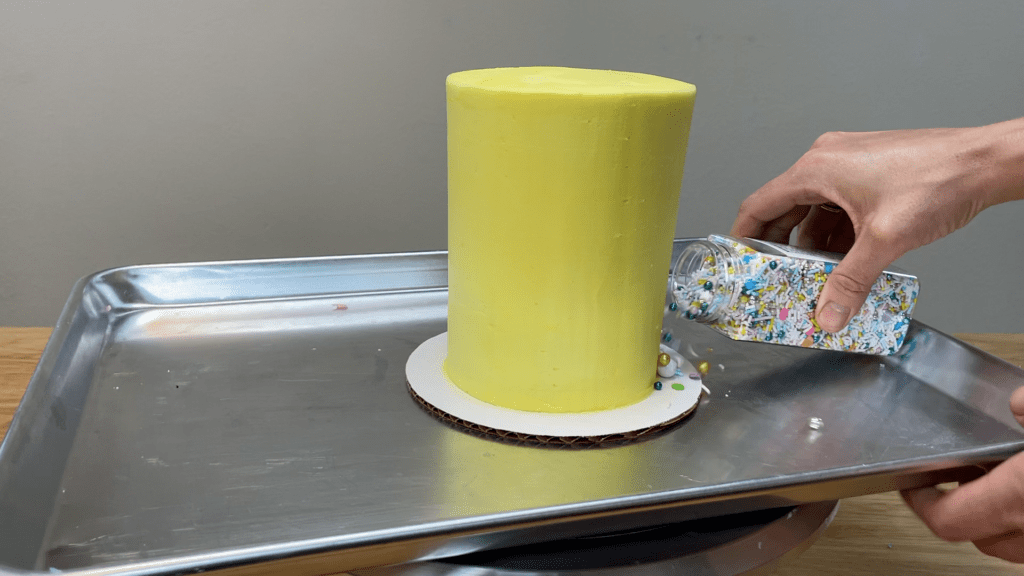
Pour sprinkles around the cake onto the cake board and then use a spoon or an
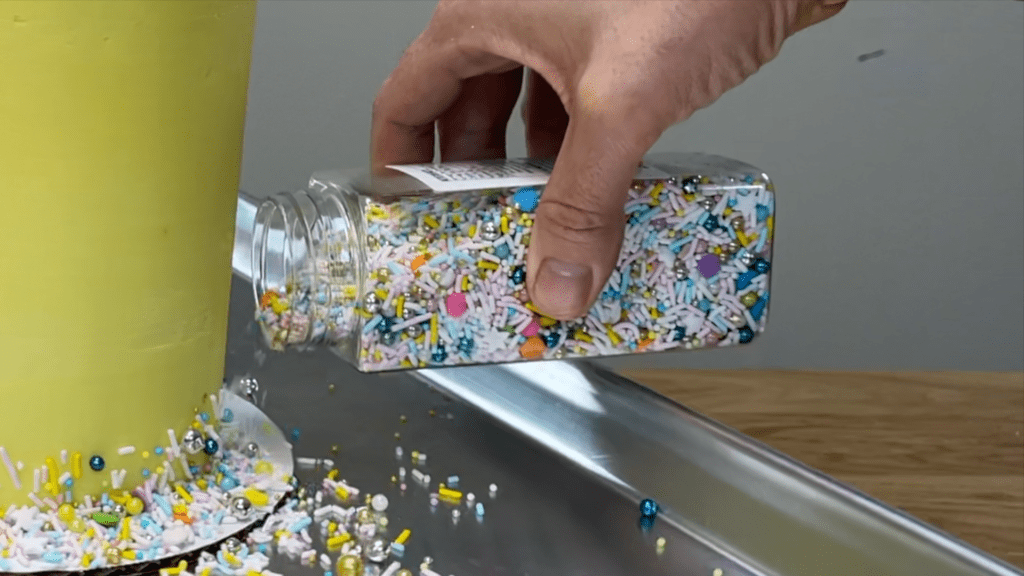
If you’ve just frosted the cake, the frosting will be soft and sticky so the sprinkles will attach easily. If the frosting has set, you’ll have to push them in a bit harder to make them stick.
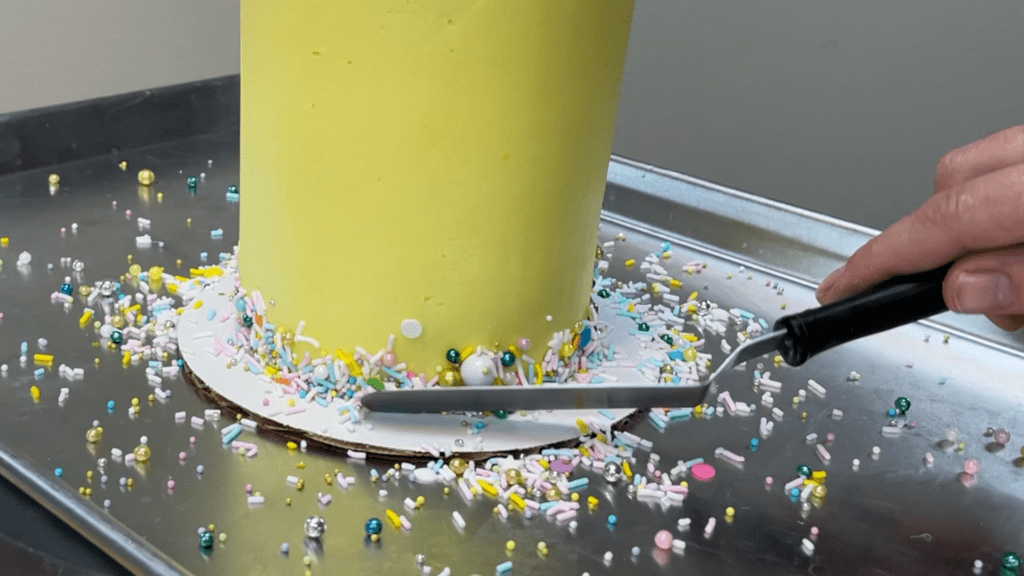
With no other decorations, the sprinkled border makes this cake look glamorous!
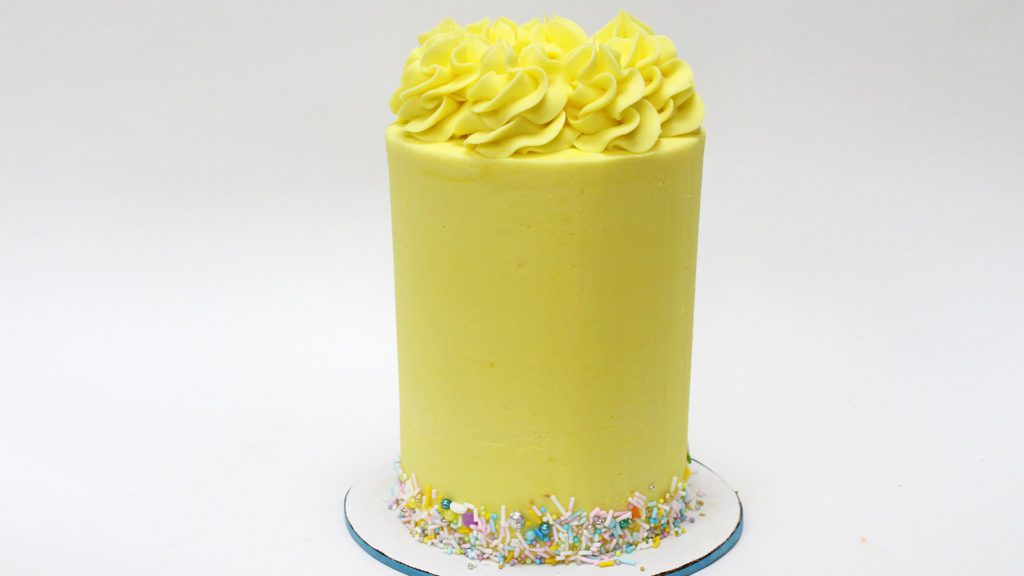
Sprinkle Cake Hack #2
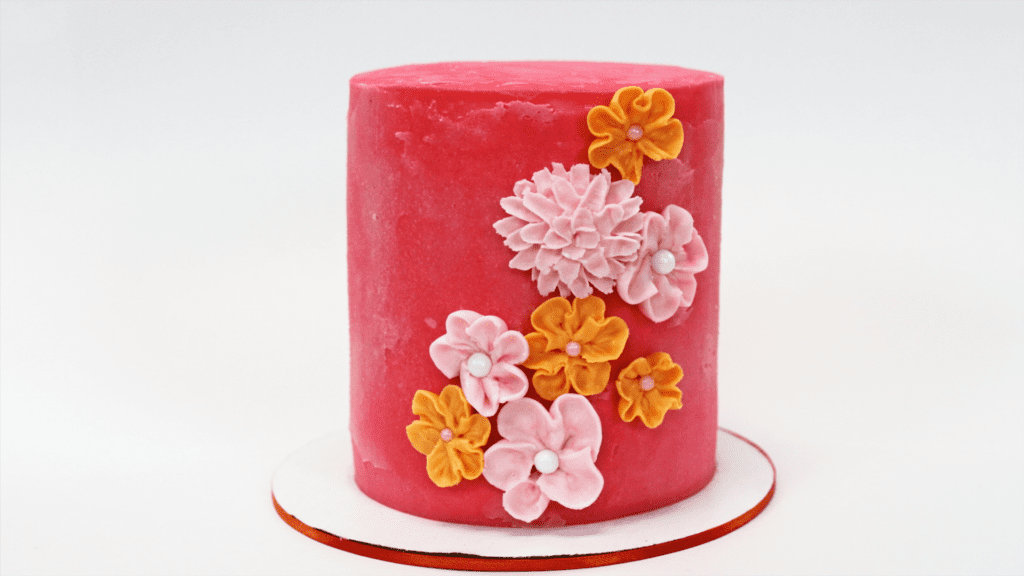
Creating shaped details with sprinkles can be a huge time saver, replacing tedious piping. I’ll show you a few examples. For piped flowers, you could use a small round piping tip to pipe dots of frosting in the middle of each flower using another colour, but that would mean tinting another colour of frosting and dirtying another piping bag and another piping tip.
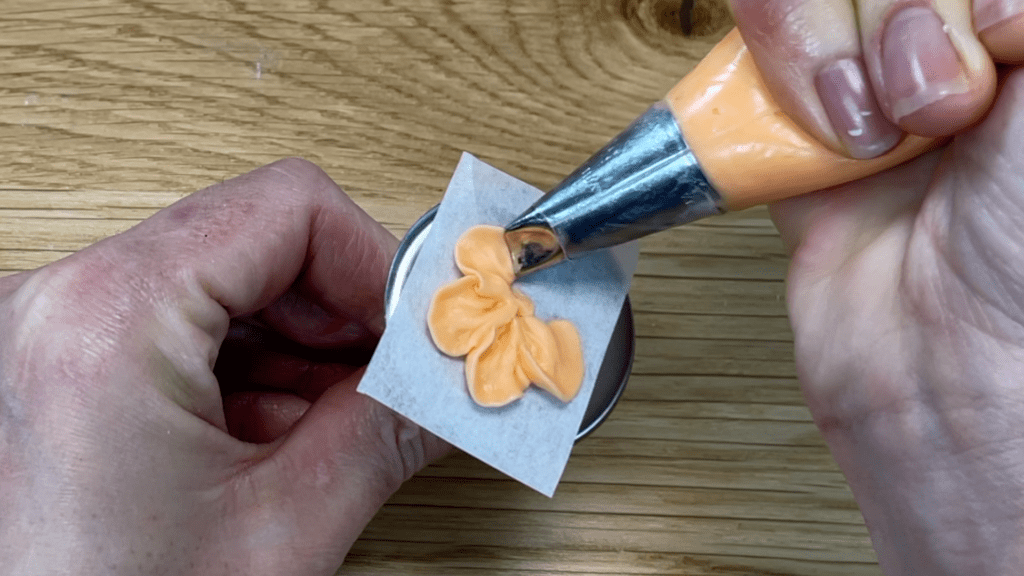
Instead, pushing a sprinkle into the center of each flower takes less than a second!
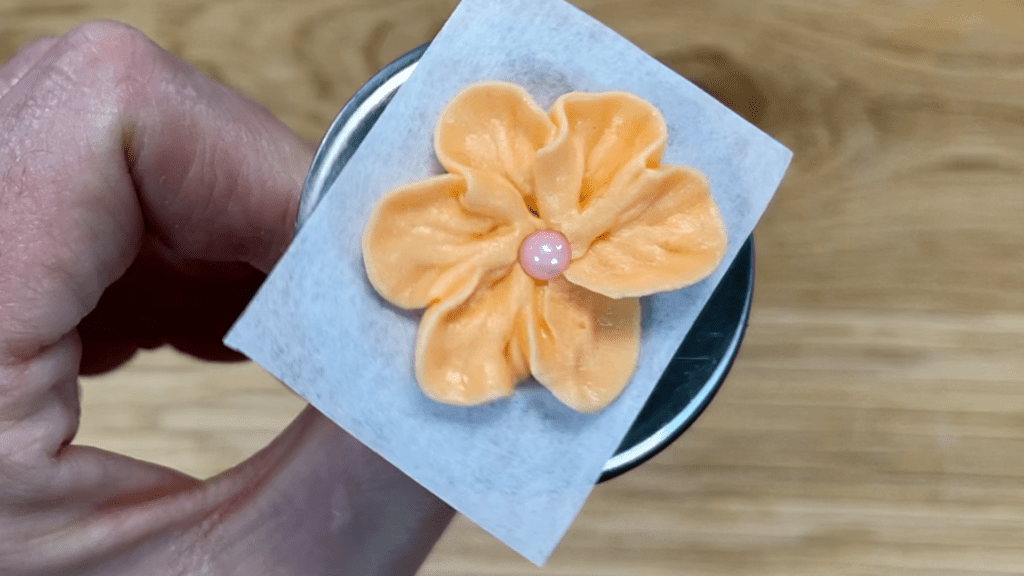
These piped flowers are part on my online course on 50 Easy Cake Decorating Techniques for ANY Skill Level. Take the course or join the ClubPLUS for access to ALL of my classes and courses for just $17 a month!
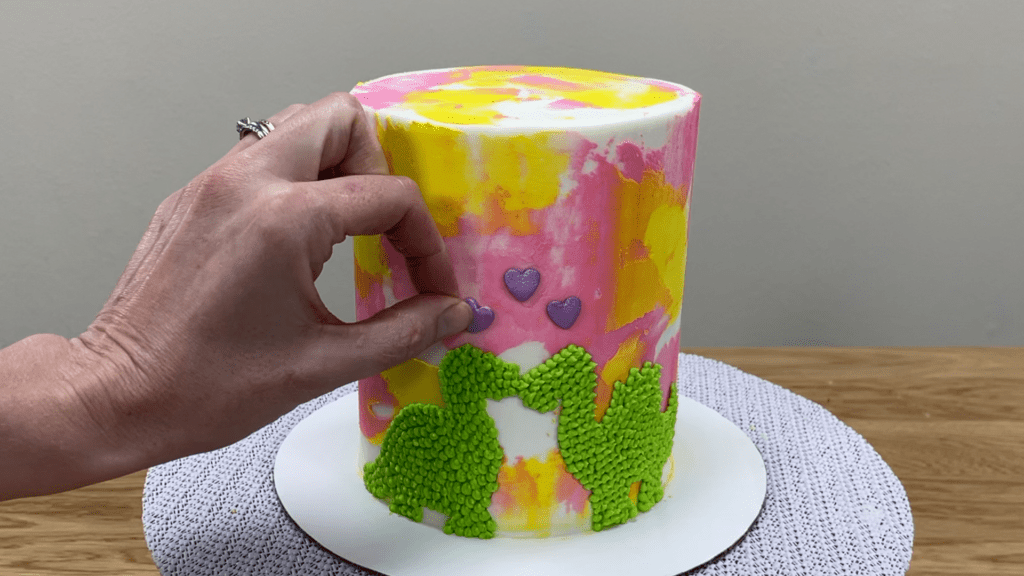
On this cake, to add a heart between the two dinosaurs you could outline the heart with a cookie cutter and then pipe tiny dots to fill the heart shape, OR you can press a heart shaped sprinkle into the frosting instead!
Sprinkle Cake Hack #3
Sprinkles are a convenient way to cover up or distract from imperfections in a cake.
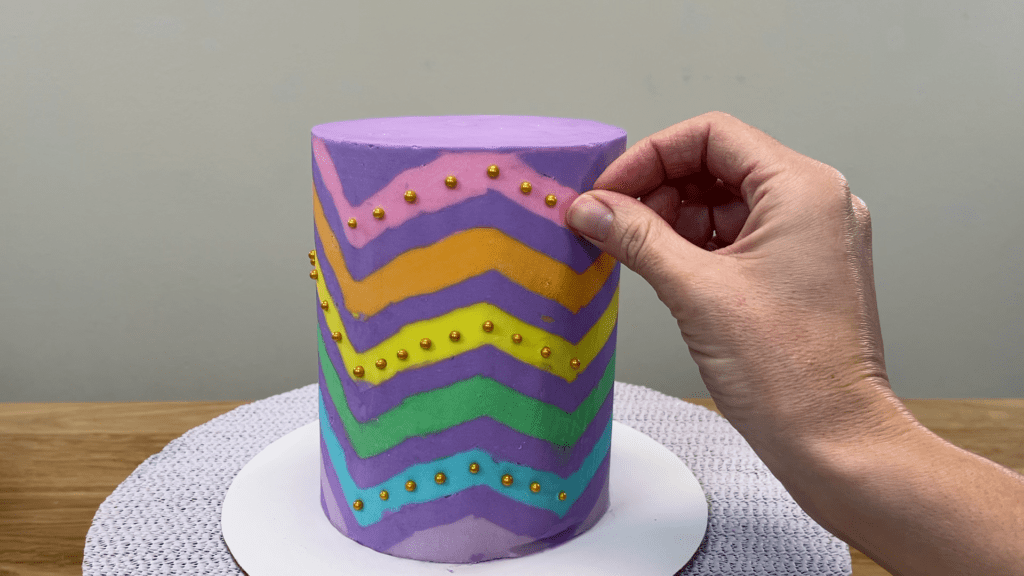
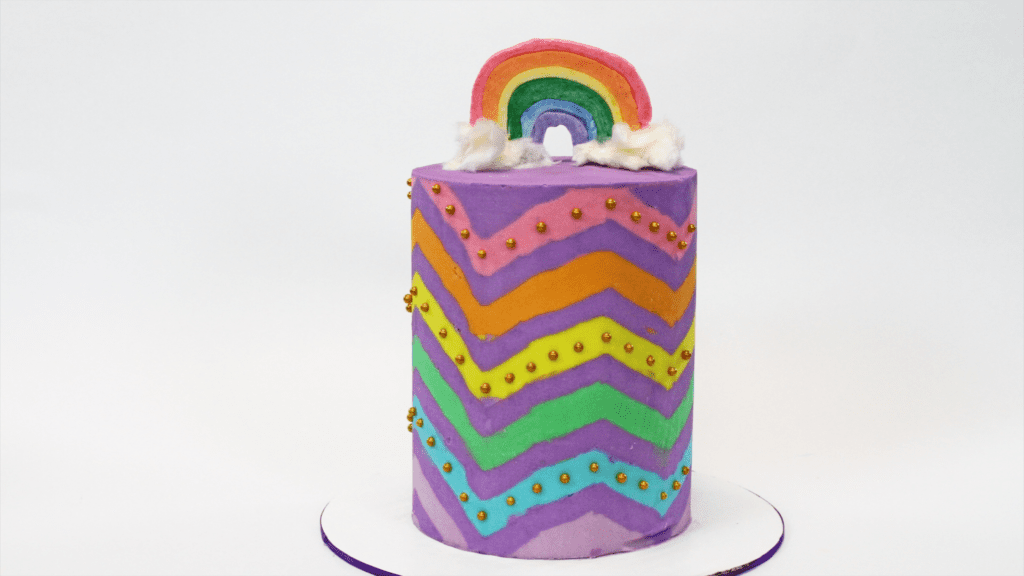
This zig zag design is nice and colourful and although the stripes aren’t perfect, once I’ve added sprinkles to make a gold design within the zig zags your eye is drawn to the texture of the sprinkles and you suddenly don’t notice the imperfections in the zig zags anymore!
Sprinkle Cake Hack #4
Stencils are stunning but tricky and it’s infuriating to peel a stencil off a cake to reveal a smudged outline or a missing part of the design. Instead of scraping the cake and starting all over again, use sprinkles to fix the stencil design! If the outline is smudged, spread the frosting a little bit beyond the original outline of the shape so that the smudge is included in the shape.
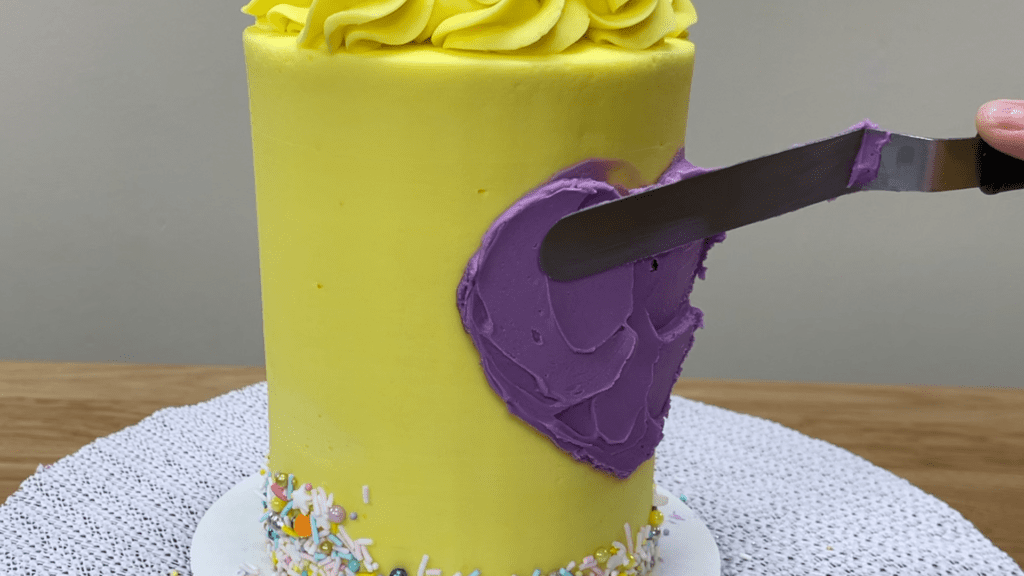
Then press sprinkles into the edge of the shape, again using a tray underneath the cake board to catch any falling sprinkles.
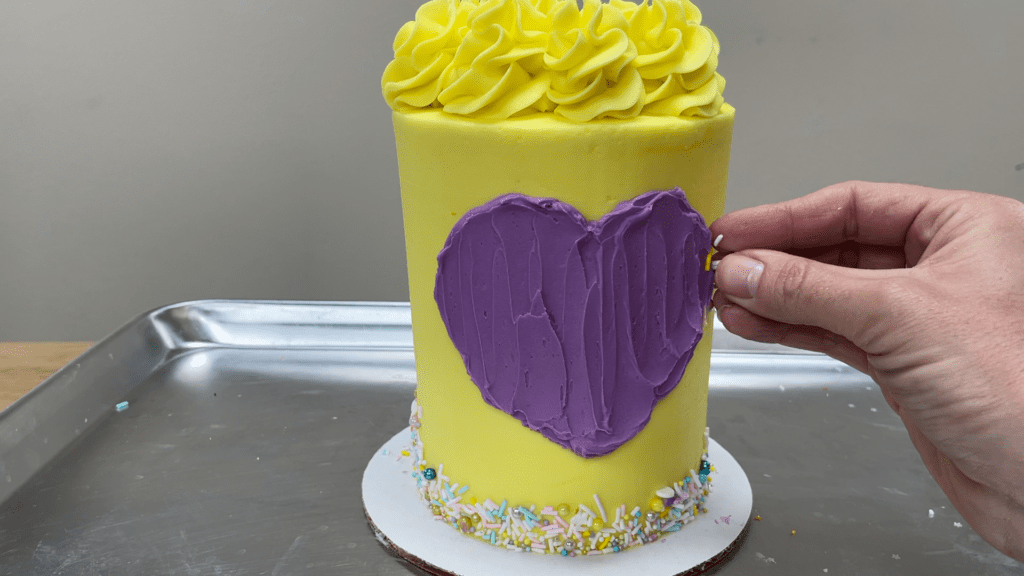
The quickest way to attach the sprinkles is to scoop up a handful and angle your hand so that they fall off against the edge of the shape. Since the base frosting on the cake has set, the sprinkles won’t stick to that but they will stick to the sticky frosting within the stencil shape.
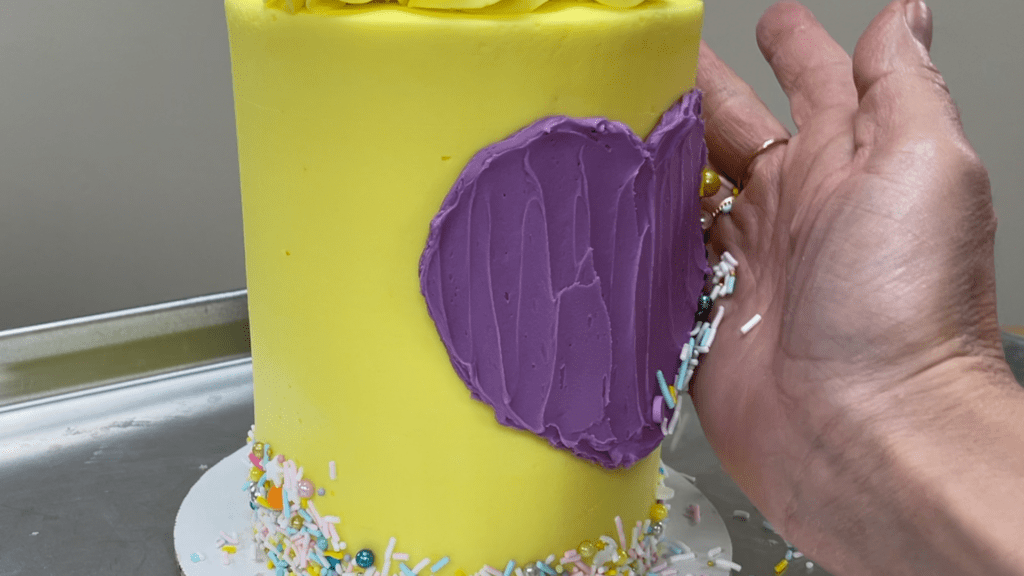
The glitzy sprinkle outline will disguise the smudges AND make the design even more detailed.

If parts of the stencil design are missing because they peeled off with your stencil instead of sticking to the cake, add sprinkles to those sections to fill in the gaps AND add some interesting texture!
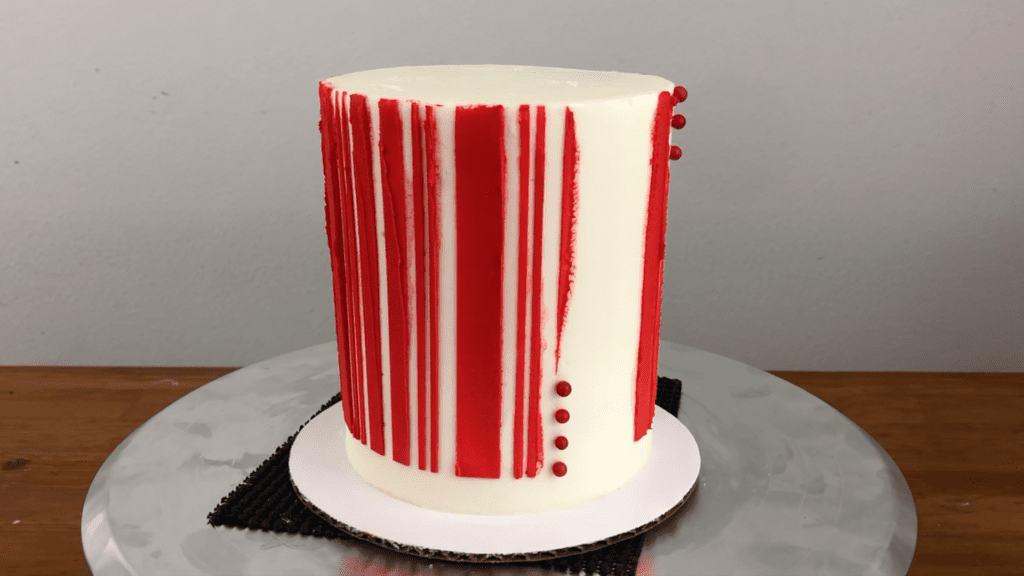
Sprinkle Cake Hack #5
Sprinkles add colour and texture to a cake and but also work excellently on cake toppers that bring the whole cake together by matching a base border. For example, add sprinkles to meringue pops before you bake them and use the same sprinkle mix to create a border around the bottom of the cake using the first sprinkle cake hack from this tutorial.
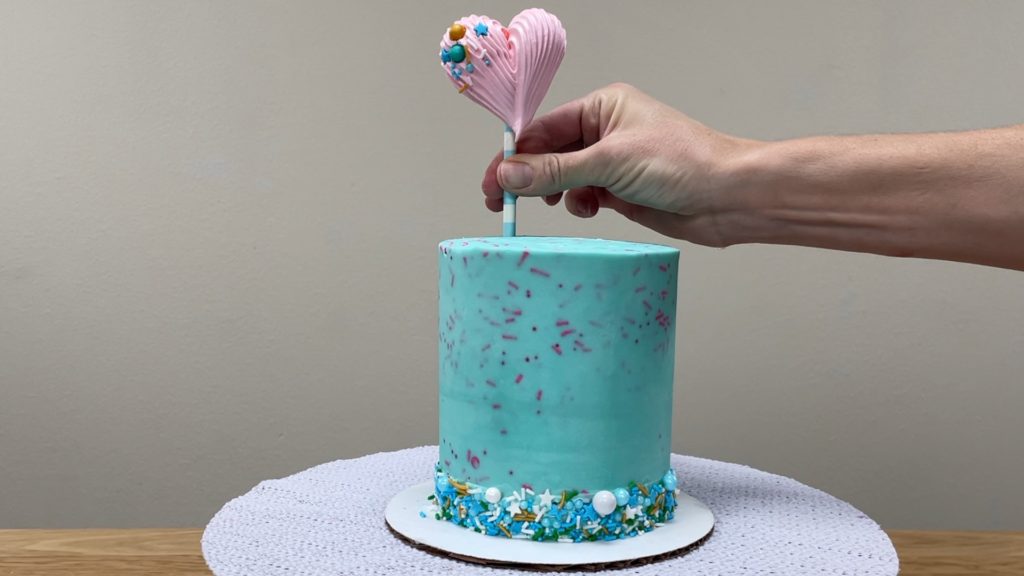
For a super easy no-bake topper, roll sandwich cookies like Oreos in sprinkles. Use the same sprinkle mix for a border to tie everything together.
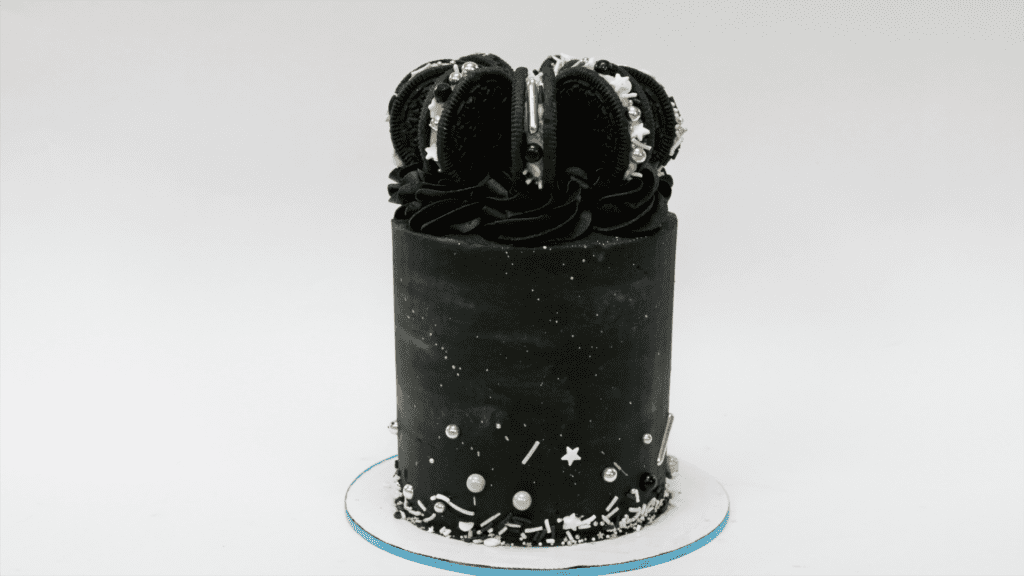
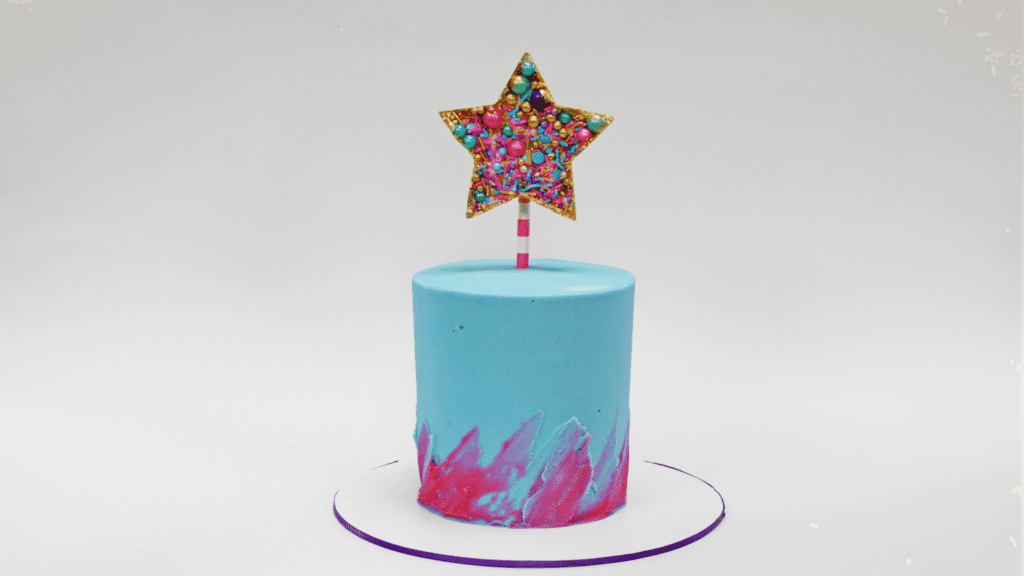
Sprinkles make beautiful chocolate shapes to use as cake toppers, too! I teach how to make all of these cake toppers and more in my online course on 50 Easy Cake Decorating Techniques.
What’s your favourite way to use sprinkles to decorate a cake? Tell me in the comments!
Here’s the video version of this tutorial:
I’m going to show you how to transfer ANY design onto a cake! Pretty notebook covers, wrapping paper, a patterned scarf… whatever you like. Best of all, you don’t have to be an artist to do this! If you prefer to watch a video of this tutorial, scroll to the bottom of the page.
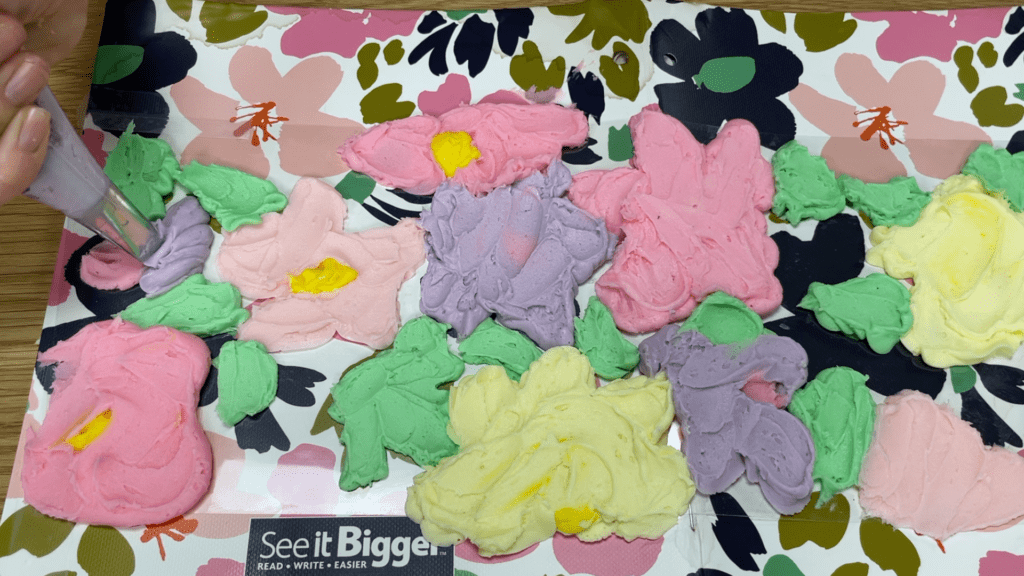
You’ll need the design you choose, some piping bags with any piping tips you have handy, a cake with a crumb coat, and a piece of acetate.
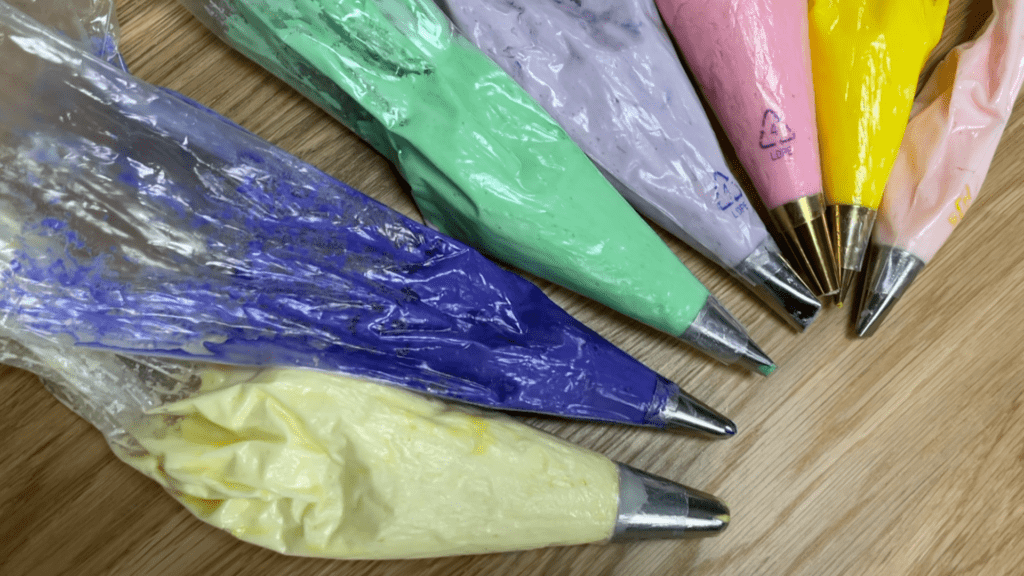
Wrap the acetate around your cake and add a few inches to leave room for frosting. If you can find acetate on a roll, that’s easiest and I’ll show you why later. Pinch the acetate and cut it there, so that you’ve got a piece wide enough to go all the way around your cake plus a few inches and also at least as tall as your cake, too.
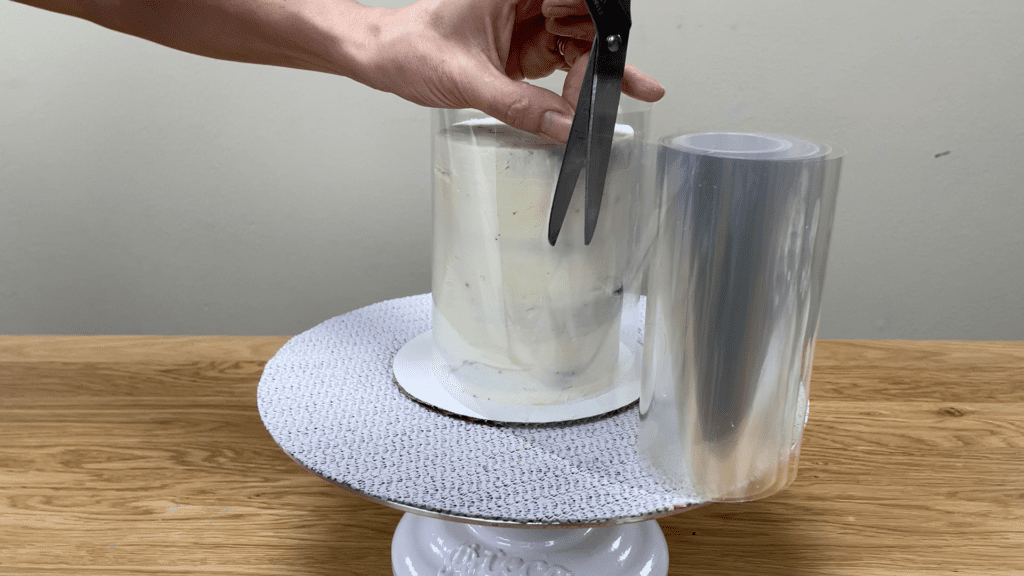
Put the cake in the fridge until you’re ready to transfer the design onto it. Place the acetate down on the counter so that it curves upwards and then tape it down onto the design you’ve chosen, facing that same way.
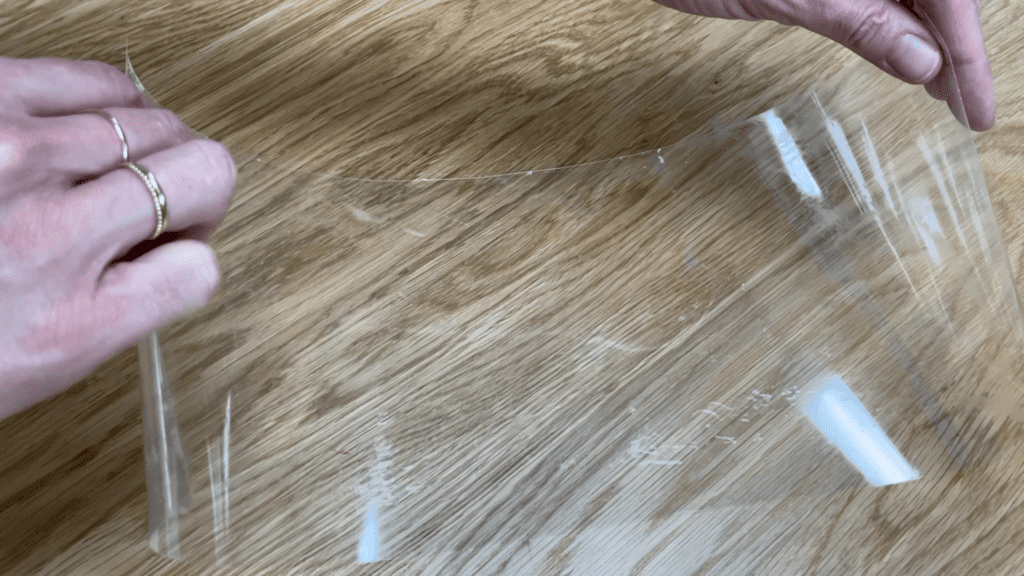
Now use your piping bags to pipe frosting onto the acetate, tracing the design underneath. You can use whatever colours you like instead of matching the original design. This side you can see is going to be pressed against the side of the cake so it doesn’t matter that it’s messy but it’s a good idea to spread it with an
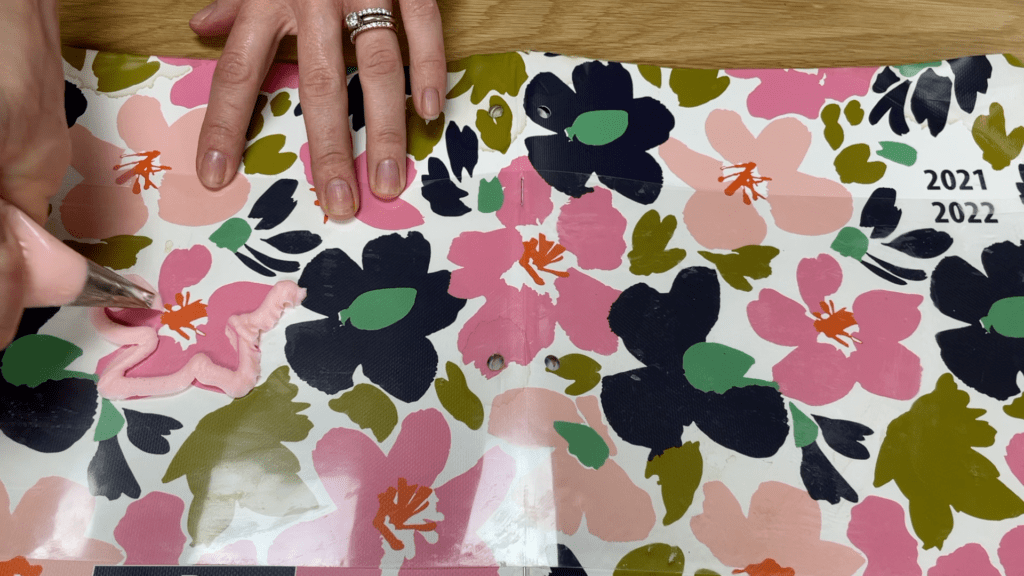
Firstly, to push the frosting down so that it’s pressed against the acetate and there aren’t any air pockets. Secondly, because you want the frosting on the acetate to be the same thickness all over so that it lies flat against the cake later, so as you spread each section you can scrape off any excess frosting to make it level with the rest of the design. Since you’re spreading the frosting, it really doesn’t matter which piping tips you use, although you’ll be able to pipe more intricate, detailed designs if you use small round tips to pipe with.
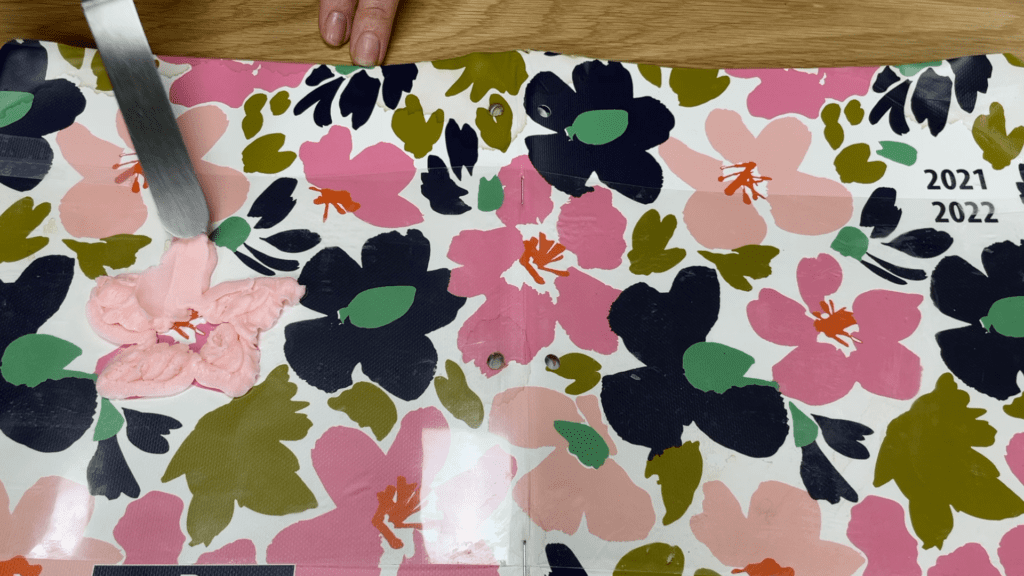
If you don’t have any piping tips you can spread the frosting straight onto the acetate instead of piping it, but your shapes will be much less precise than if you pipe them. I should mention that I’m using my 4 Minute Buttercream for this – I haven’t tried it with whipped cream or meringue buttercream but I suspect that they don’t set firmly enough for this technique to be possible. If you try it, tell me in the comments how it worked for you! After creating the whole design except for the background colour, save the leftover frosting for later and put the acetate in the fridge or freezer so that the frosting sets. It will only take about 5 minutes in the freezer.
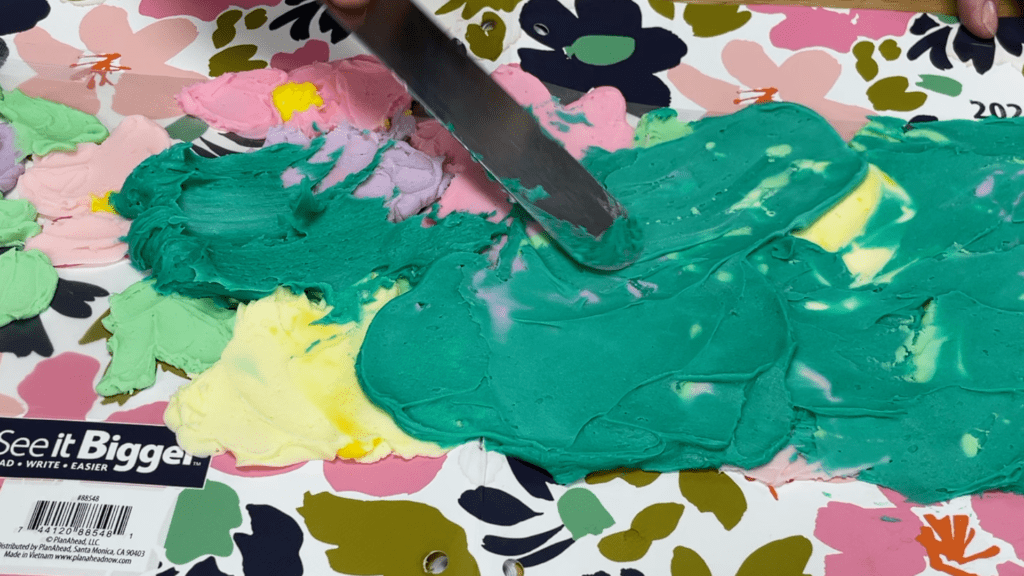
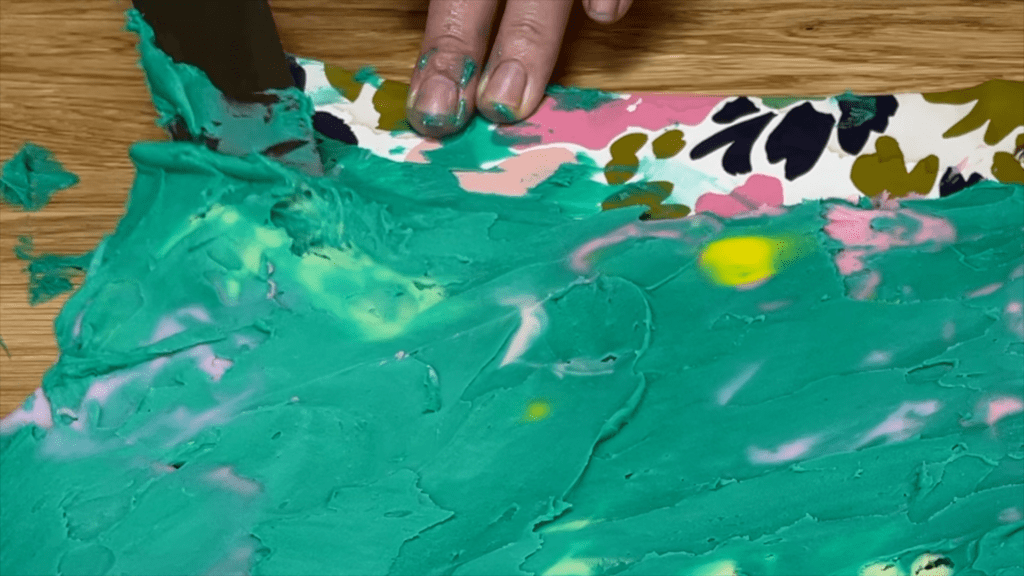
When you take it out, peel the tape off the corners and the weight of the frosting will keep the acetate flat now. Pipe or spread you background colour onto the design, spreading it with your
Spread this colour up to the edges of the acetate to cover it completely and also spread all over the top of those hard parts because now that they’ve set, they won’t be sticky anymore and you need that fresh sticky frosting to attach the design to your cake.
Take your crumb coated cake out of the fridge and it will be cold and firm and sturdy enough to withstand the pressure you’re about to apply to it. Lift up the acetate up by sliding your
Lower the acetate down so that the bottom edge rests on the cake board to make sure the design goes all the way down to the bottom of the cake.
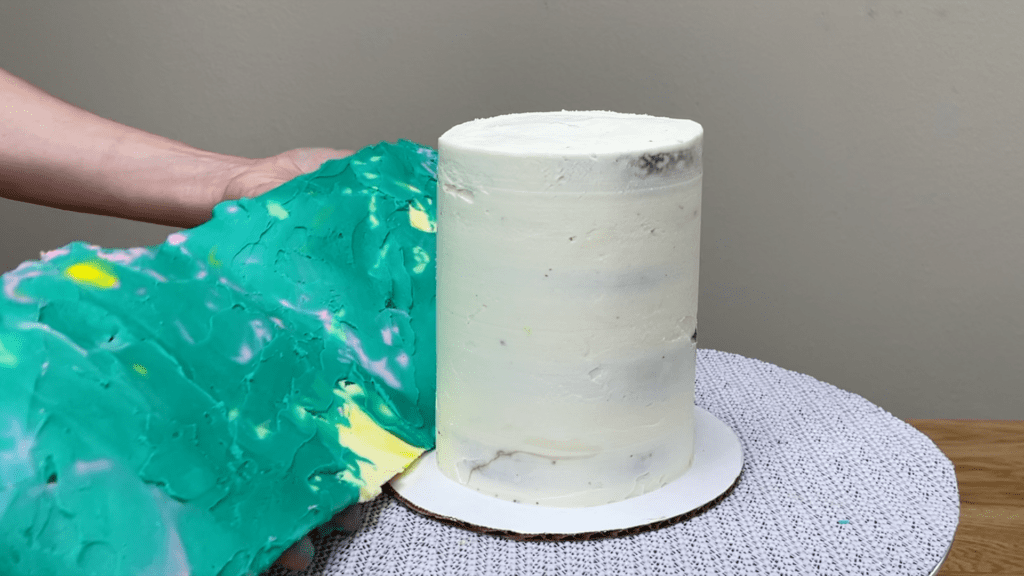
Then raise the rest of the acetate until it’s pressed against the side of the cake. Let the acetate wrap around the cake, and this is why using acetate from a roll is ideal, because it will curve naturally to wrap the cake with hardly any help from you.
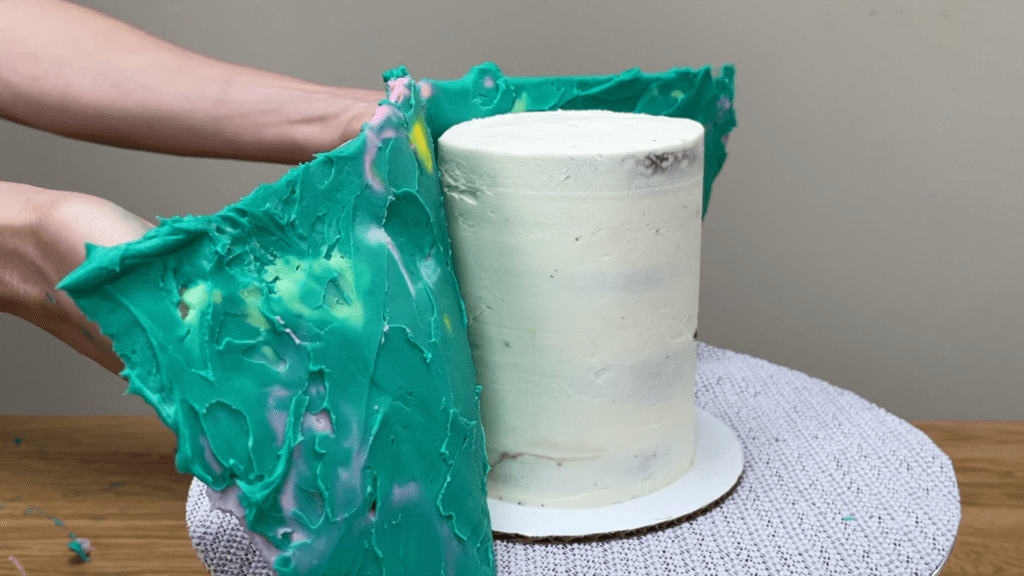
Once you’ve lined the acetate up against the cake, use your hands to press it against the cake, rubbing up and down the sides to attach the entire design to the cake, or you can use a fondant smoother. Press firmly enough so that the sticky frosting attaches to the crumb coat of the cake, but don’t press so hard that you squeeze and distort the frosting design.
The end of the acetate will overlap the beginning and that’s fine – make sure the beginning is pressed flat against the cake and press the end over the top of it and we’ll sort that out later. When the acetate is smooth and pressed securely against the cake all the way around, put the cake in the fridge for at least an hour to allow the frosting to set so that you’ll be able to remove the acetate.
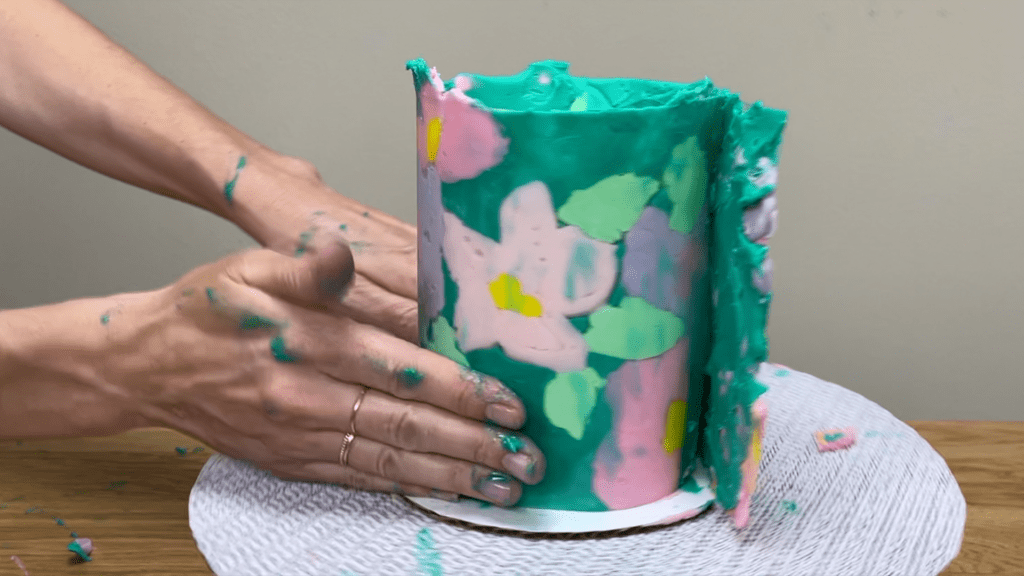
When the frosting is cold and hard from the fridge, pinch a corner of the acetate and peel it off. You’ll see the residue of each colour on the acetate but the frosting shouldn’t peel off with the acetate, it should stay behind attached to the cake in a smooth layer.
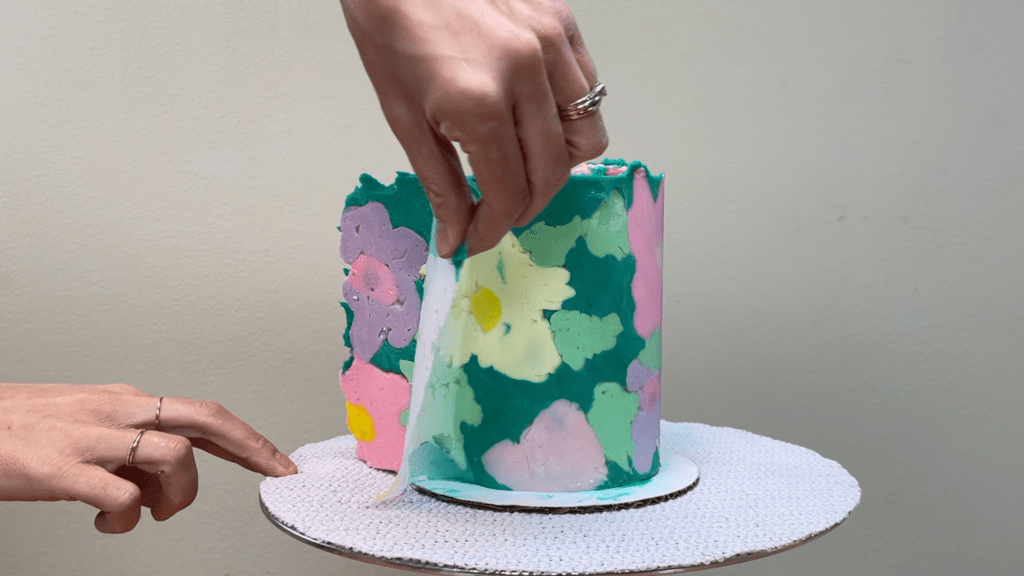
This is what the acetate should look like – the design has left an impression but the frosting hasn’t transferred from the cake onto the acetate.
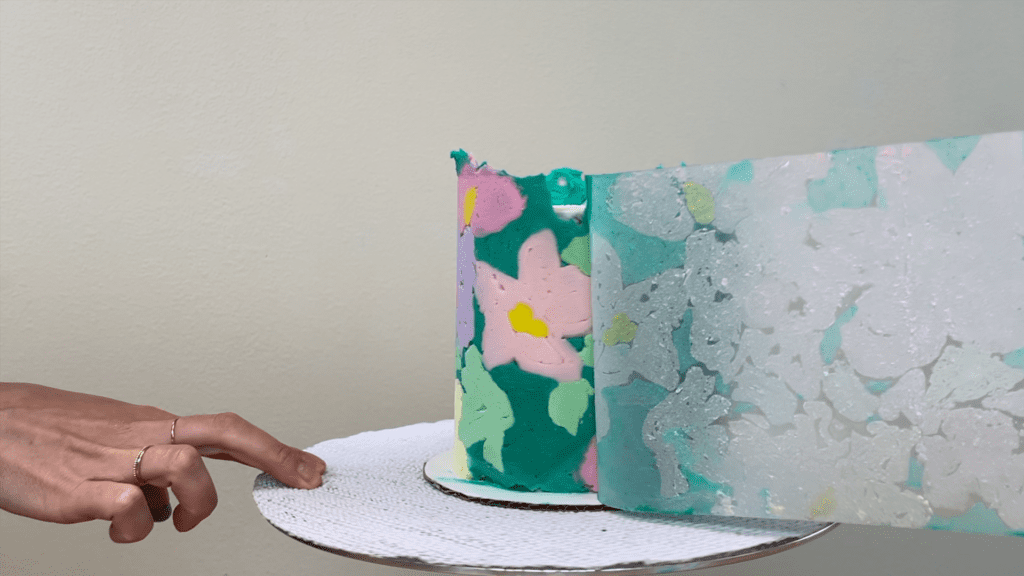
At the join of the two ends of the acetate, use a sharp knife to cut off the excess frosting sticking out and and then carefully peel off the last section of the acetate. We’ll tidy up this seam here in a minute.
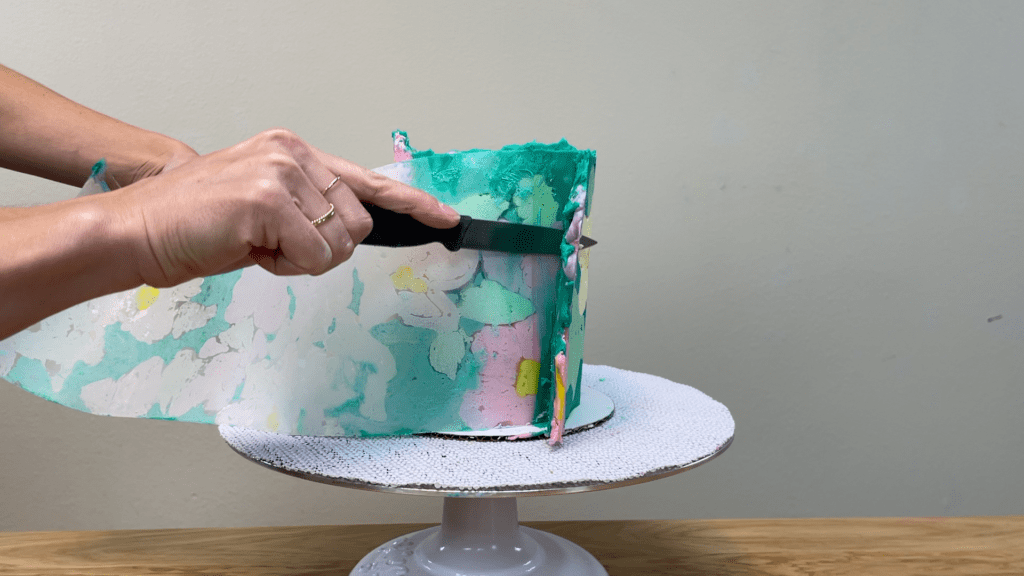
You can see that the frosting goes up higher than the cake because the acetate was a bit taller than my cake. You can trim off the excess with a sharp knife. It should slice away easily if it’s still cold for the fridge. If you feel your knife sticking to the frosting instead of gliding through it you can put the cake back in the fridge to chill it again before you do this.
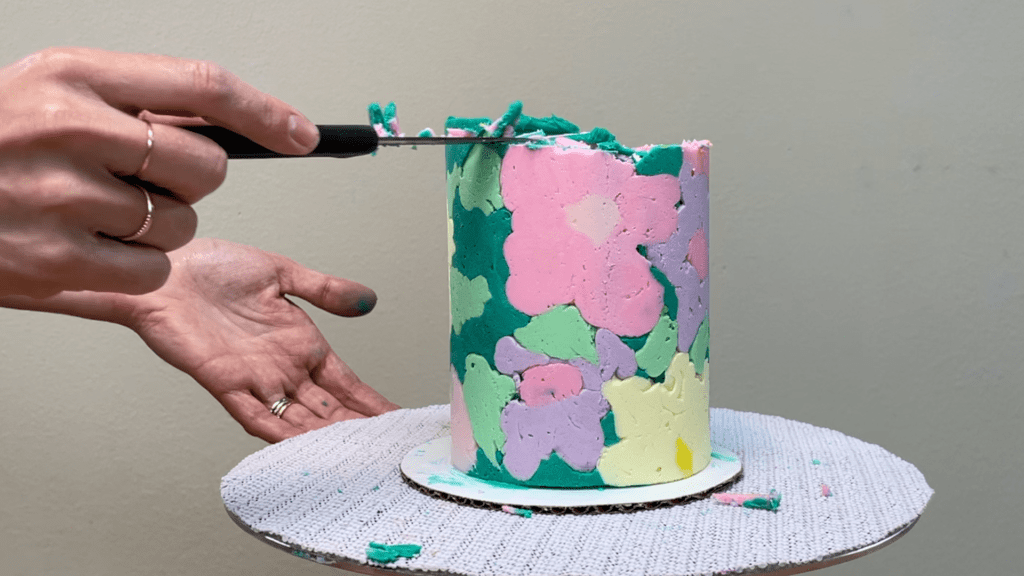
Now spread frosting onto the top of the cake to cover up the crumb coat, making sure the frosting goes all the way over the edges fo the cake so there aren’t any gaps later. Spin the cake around a few times as you press down with your
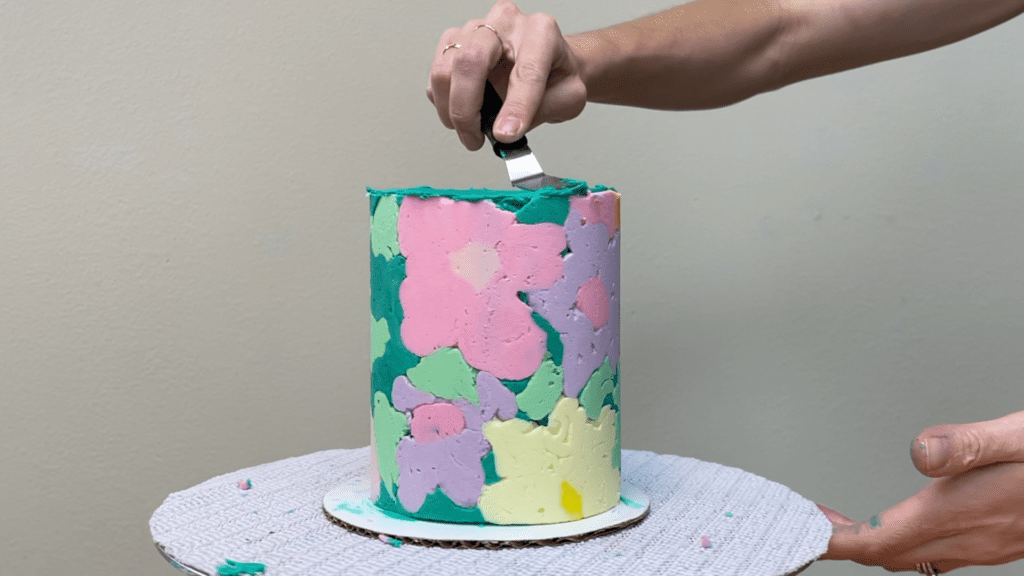
Fill in any gaps around the top of the sides of the cake, where any pieces of frosting broke off when you peeled off the acetate or trimmed the top edge. Don’t worry if you spread this frosting over any other colours in your design – you’ll see why in a moment.
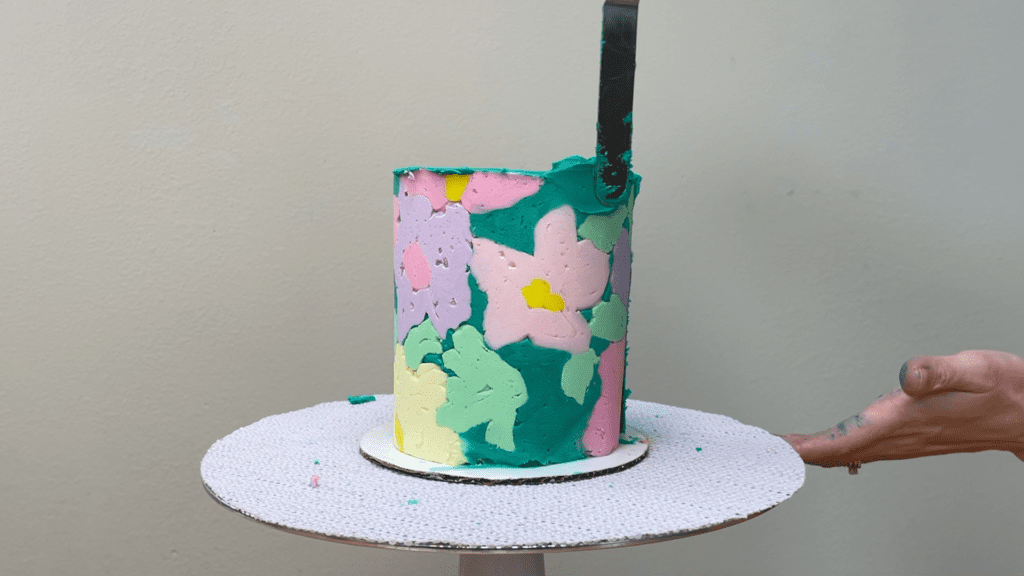
Use a frosting smoother to scrape around the cake, paying attention to the top to take off any excess frosting that you just spread on. The frosting design you transferred from the acetate will be cold and hard so you won’t damage it as you do this.
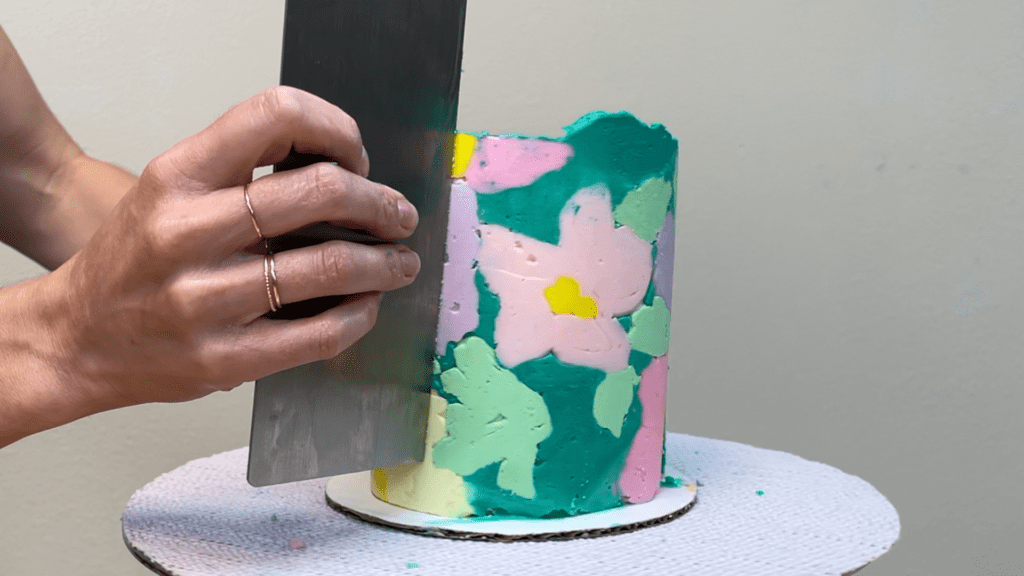
Now the the top of the cake is tidy it’s time to hide the seam, where the two ends of acetate met after wrapping around the cake. Use your frosting smoother to scrape upwards, taking off the excess frosting to leave the sides of the cake smooth. For the part of the seam close to the top of the cake, it’s best to scrape downwards instead of upwards because the frosting at the top of the cake is the most delicate, so by going in this direction that you won’t snap off any of the frosting with the pressure you’re applying.
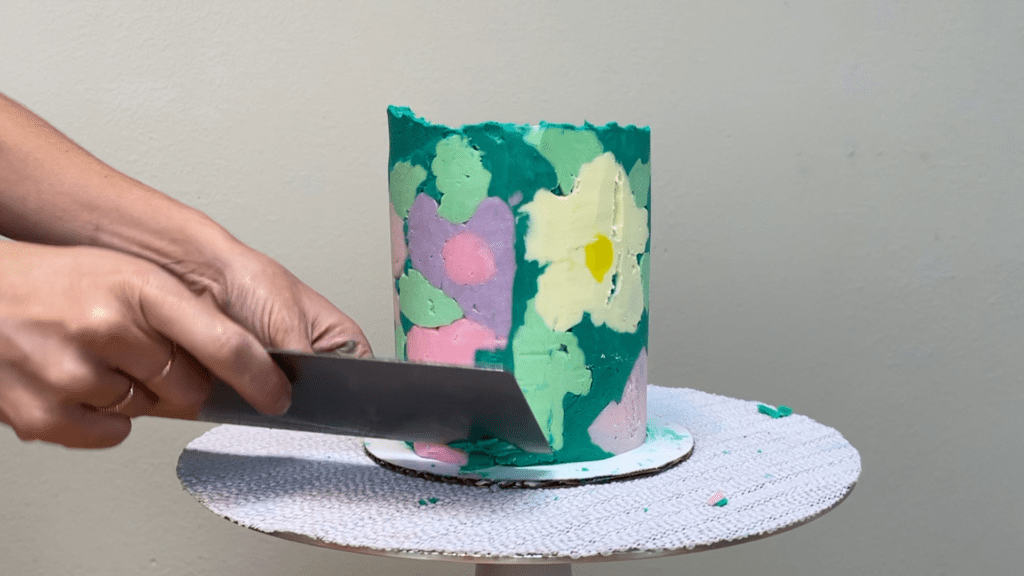
When the seam is smooth and it disappears into the design so you don’t notice it was ever there, it’s time to do any touchups in the design. You’ll notice lots of little air pockets around the design – pipe or spread frosting over them one colour at a time.
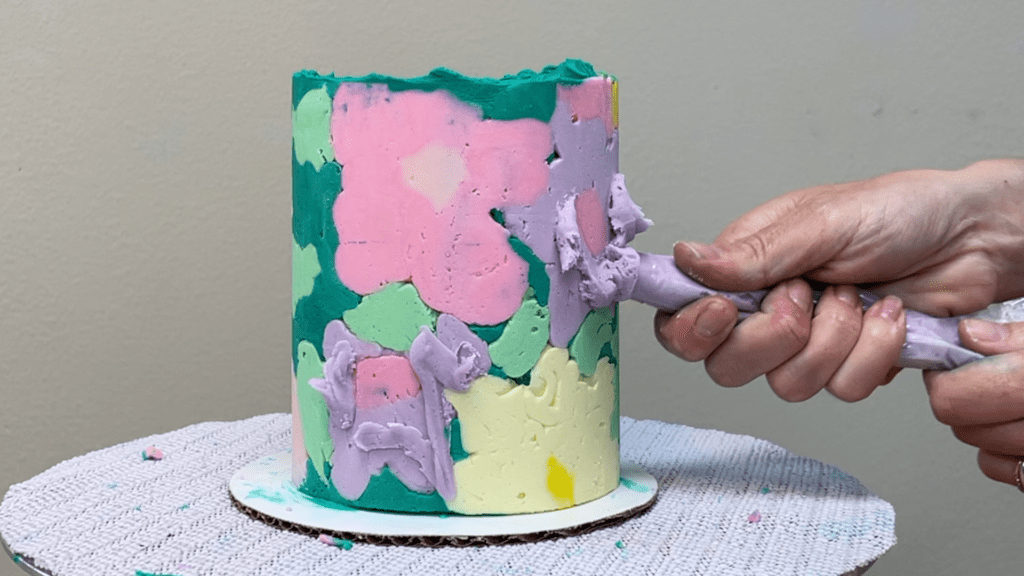
Use an
By doing just one colour at a time, you won’t blend the colours of this fresh frosting together.
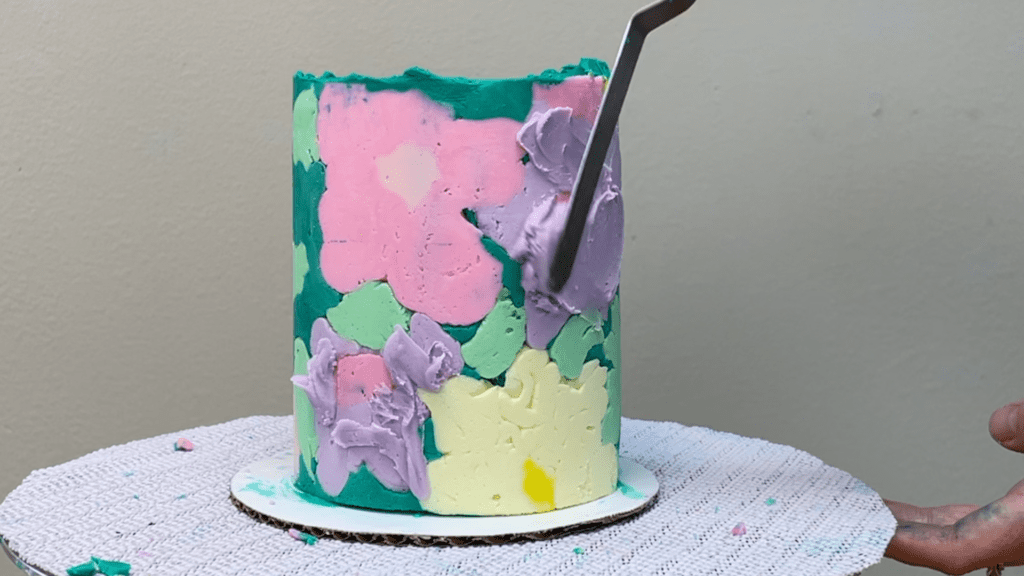
Then use your frosting smoother to scrape over that section to take off the excess frosting and reveal the design underneath. This only works because the frosting of the design has set and it’s cold and firm, so when you spread frosting over it, it sits on top of the design instead of blending together with it. This means you can scrape over it to take off layers and layers of that fresh frosting without damaging the design underneath.
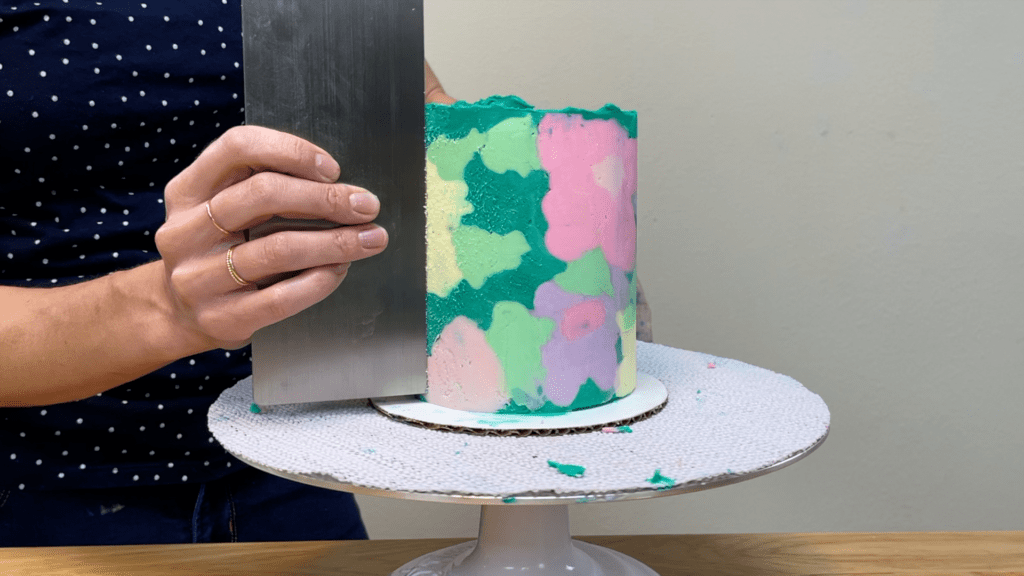
If you feel the frosting of the design softening and your frosting smoother starts to leave texture behind as you scrape, put the cake back in the fridge to chill it again for a few minutes, maybe 15 minutes, and then you can continue spreading and scraping. Wipe any smudges off the cake board with a paper towel wrapped around your finger
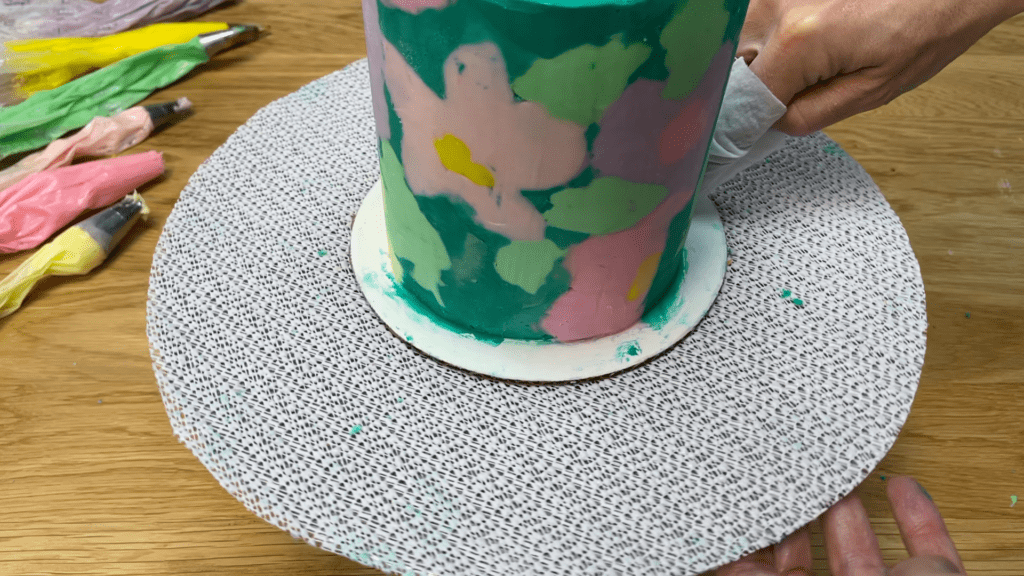
When you spread on more frosting and scrape it off you’ll probably push some of that frosting up about the top edge of the cake. When you’ve finished touching up the sides, tidy up the top edge again with an
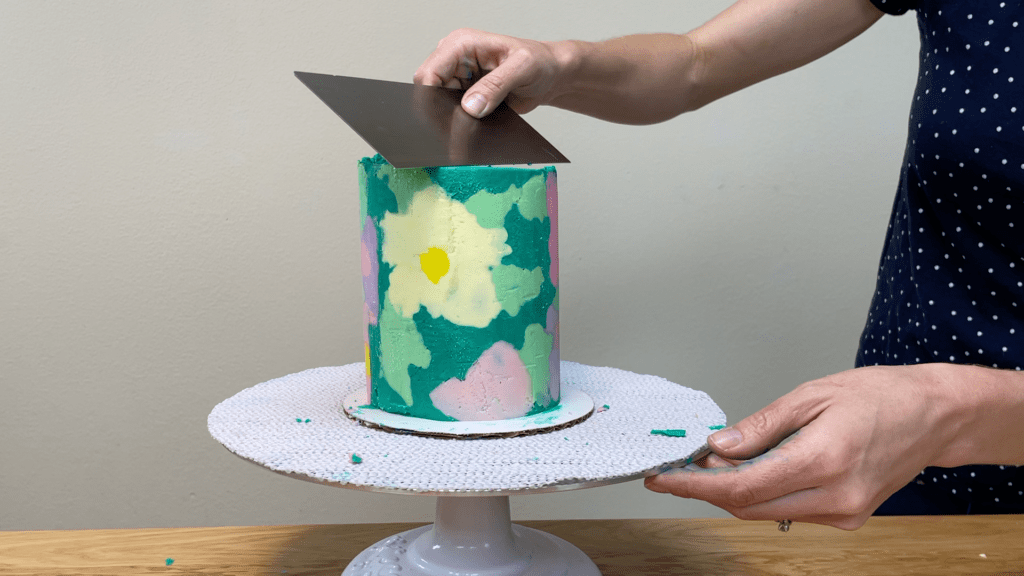
You can leave the cake as it is or there are endless ways to add more detail to it. You can add a border around the bottom as a nice finishing touch. I’m piping this beaded border with a Wilton #4, which is a medium round tip.
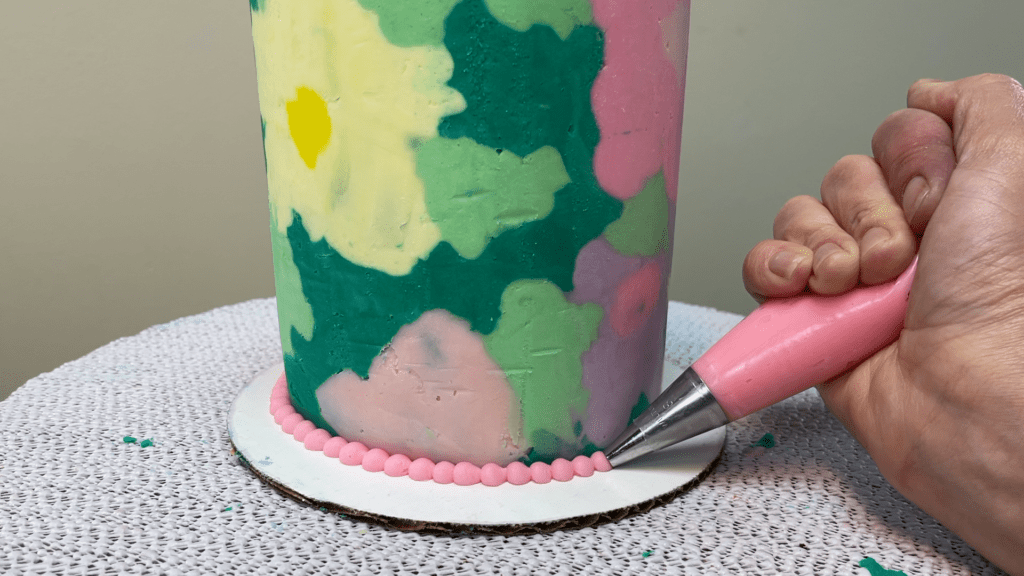
To make the design more detailed and intricate, add shading by spreading on darker or lighter shades of frosting to some areas.
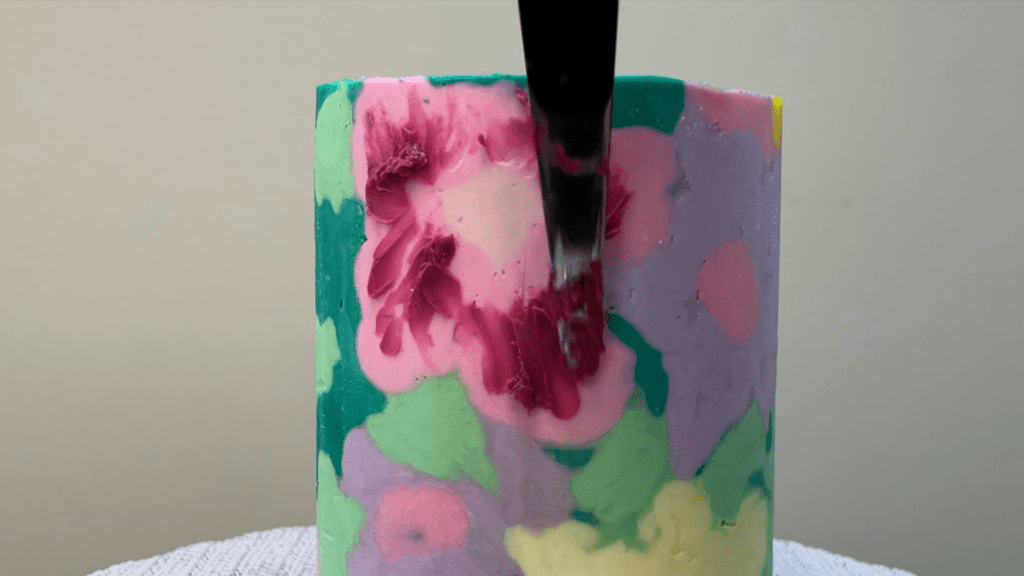
Smoothing this frosting against the design with your
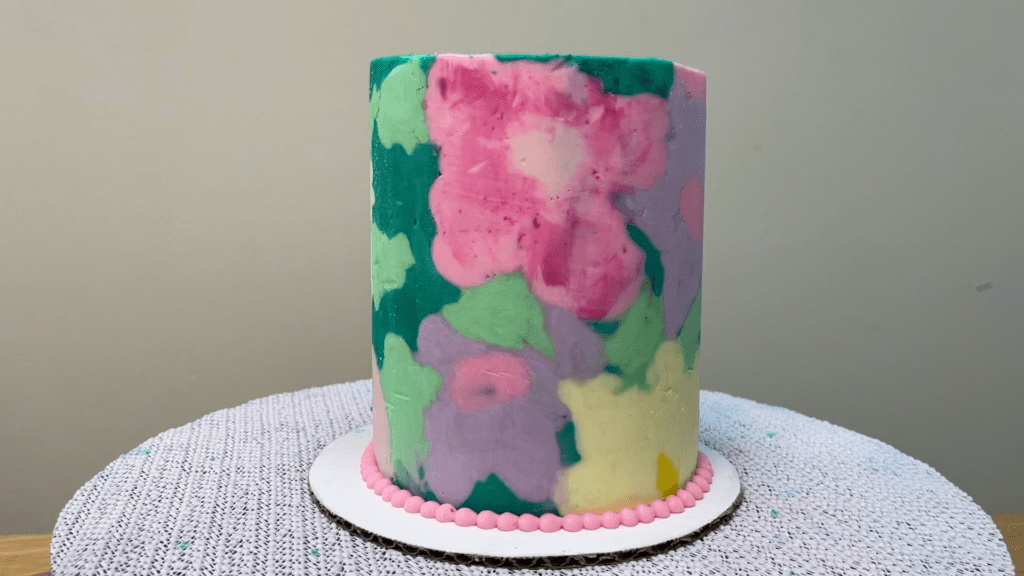
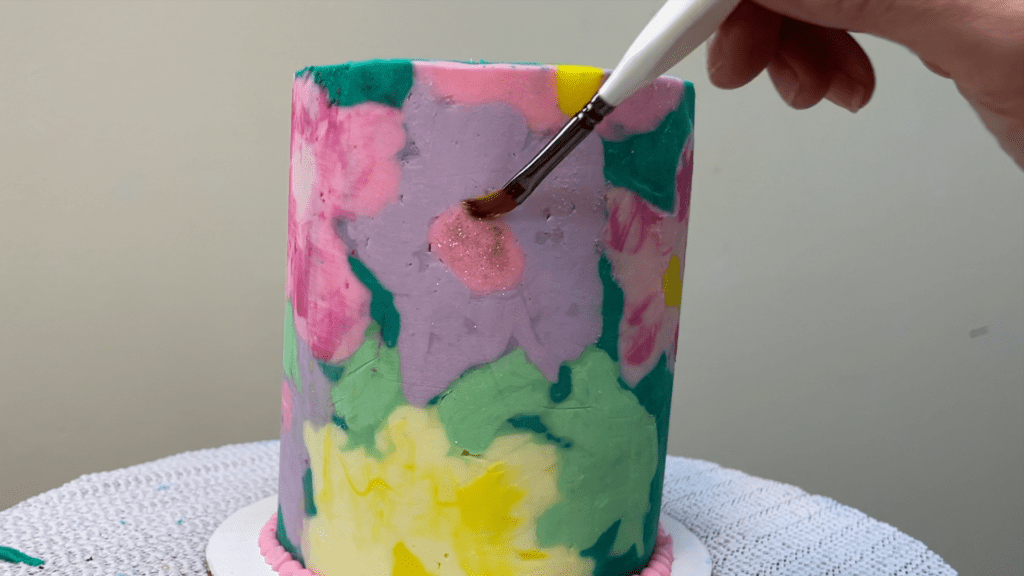
You can add edible glitters or luster dusts for some shimmer or sparkle, and sprinkles add some nice detail and texture, too! This technique has SO many possibilities and I can’t wait to see how you use it – please tag @britishgirlbakes in your photos on instagram so I can see what you come up with!
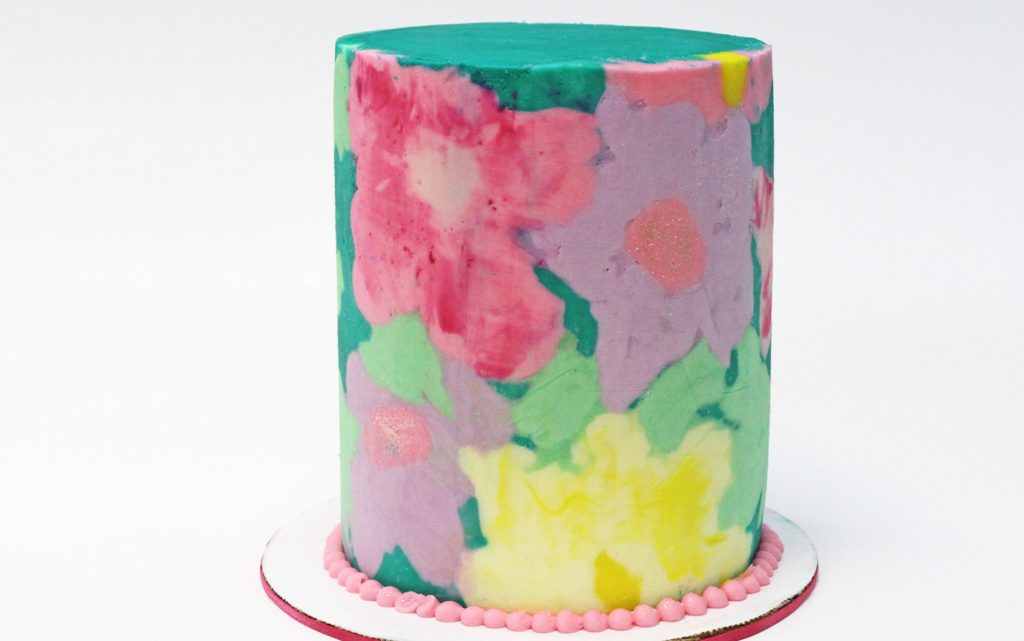
If you’re looking for cake inspiration, join my Club for access to ALL of my online classes, including lots of different designs you can create using acetate including marble and zig zags!
Here’s the video version of this tutorial:
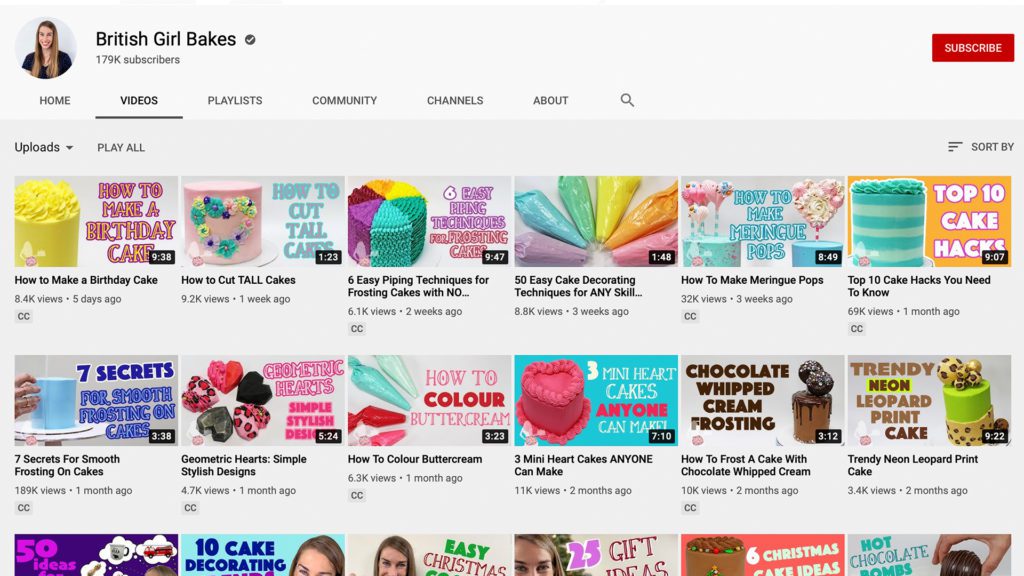
I’m going to share my journey from lawyer to teacher to cake decorator and content creator to show you that whatever path you start on, it’s possible to turn a hobby into a career and generate an income doing something you love. I’ll share seven steps to take you to your dream career, even if you don’t know what that is yet!
I should start by mentioning that creating cake videos was never part of my plan – until a few years ago I don’t think I had ever even watched a YouTube video! So if you’re not sure which hobby you want to turn into a job, or what that job could be, don’t worry, we’re going to cover that too! Let’s dive into the seven steps to turn your hobby into a career.
Step 1: Have a backup plan
When I was sixteen I told my parents I didn’t want to go to university, I wanted to start a stud farm and breed horses. I’m glad they didn’t listen to me because I had no idea what I was talking about. If you’ve had experience doing something and you make an educated decision to pursue it, great! But it’s always good to have a backup plan in case things don’t turn out the way you expect.
For me, this meant going to university and getting a degree that I could fall back on if I changed my mind. Which I did about five minutes later!

Step 2: Experiment and try different things
Some people have always had a dream. If you play the guitar, maybe you’ve always wished you could play in a band. If you like ice skating maybe you’ve daydreamed about skating in the Olympics. But if you’re not sure, don’t be afraid to branch out and try different things. If you’re not sure where to start, think about what you’ve done that you’ve enjoyed – it could be a hobby you did in the past but had to give up for some reason, or it could be something you’ve always been interested in but never had the time to take up.
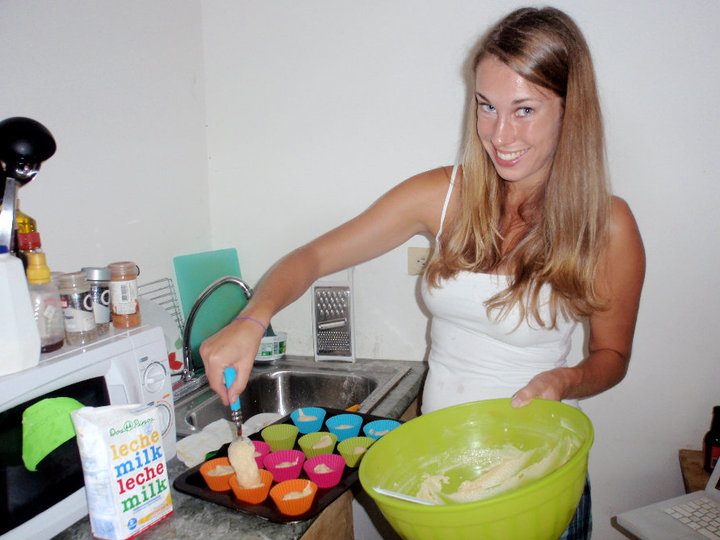
I thought I wanted to teach so I taught English in Costa Rica and loved teaching but I wasn’t passionate about language. I enjoyed cooking so I branched out to try baking and that’s where I found my passion.
Step 3: Don’t be afraid to be different
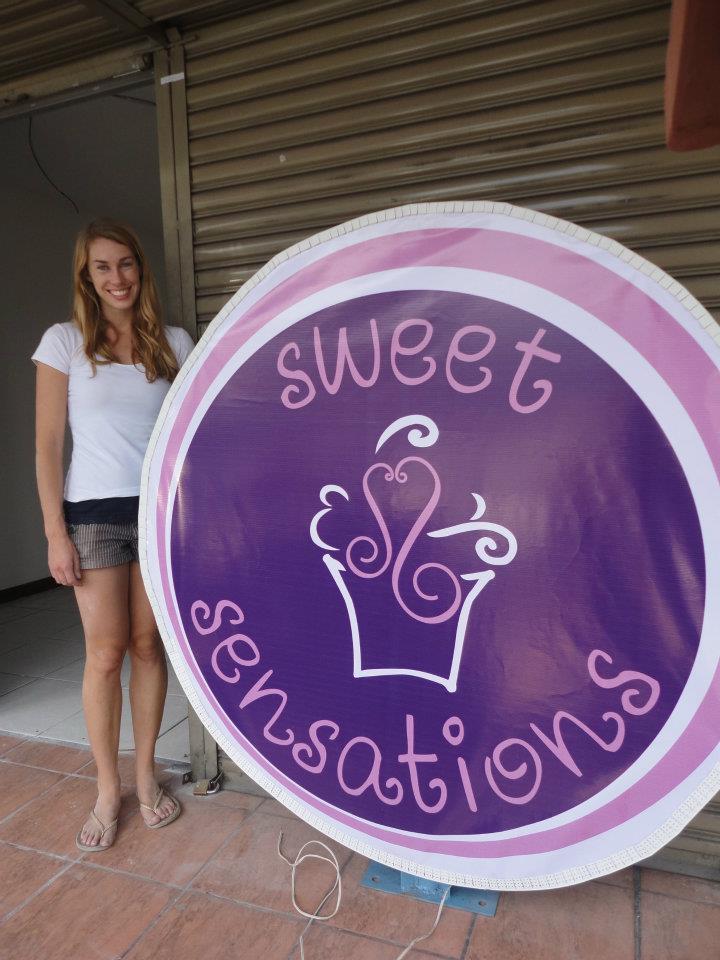
As all of my friends graduated and moved to London to start their corporate careers, I moved to Costa Rica and opened a cake shop and I’ve never looked back!
I’m not saying you should be reckless or do something just because it’s different, but if what you want to do isn’t the same thing everyone else is doing, don’t let that be the thing that prevents you from going for it.
Step 4: Brainstorm job options
Yes, you want to spend your time doing whatever your hobby is – guitar, ice skating, baking. But for every hobby there are LOTS of options of how to use it to earn money. If you play the guitar you can do live performances, you can teach others how to play the guitar, you can write music, produce music, record music… and you might choose to find employment in the field you choose or you might start your own business.
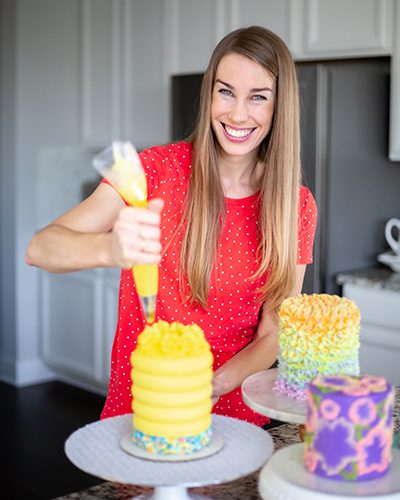
In my case, I started a small at-home business taking custom cake orders and then I opened a cake shop and cafe. I moved to Los Angeles and managed another company’s cake shops and opened new locations for them and then started teaching how to decorate cakes and THAT was where I found my passion. In my case, I tried a lot of ways to turn my hobby into a career but you can save a lot of time if you brainstorm your options first!
If you’re not sure which hobby would be the most fulfilling as a job, or which strengths or skills you have to make the job a success, I really recommend looking into the classes on Skillshare to figure that out. Skillshare has thousands of inspiring classes on entrepreneurship to help you get started setting up your business or if you’re not quite there yet, develop your hobbies with classes on watercolor painting, portrait photography, singing… it’s less than $10 a month with an annual subscription and you can get a free trial of Premium Membership by clicking here. I hope that helps you in your journey of choosing a hobby and a job and we’ll move onto the next steps for that now.
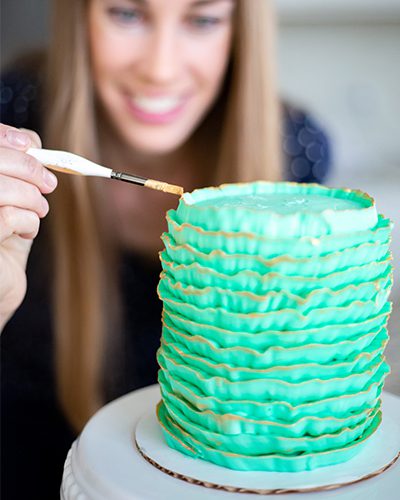
Step 5: Get a second opinion
Once you’ve brainstormed ideas and chosen what job you want to do with your hobby, it’s time for a second opinion. You enjoy your hobby and you want to turn it into a job so you’re looking at your web of ideas with rose tinted glasses.
Is there a market for whatever it is you want to do? You don’t need specific numbers or in depth market research but find out if there are people who will want to buy your product or service. You can search for groups on Facebook or discussion forums or look for other people or businesses doing something similar to see if there’s an interest or need.
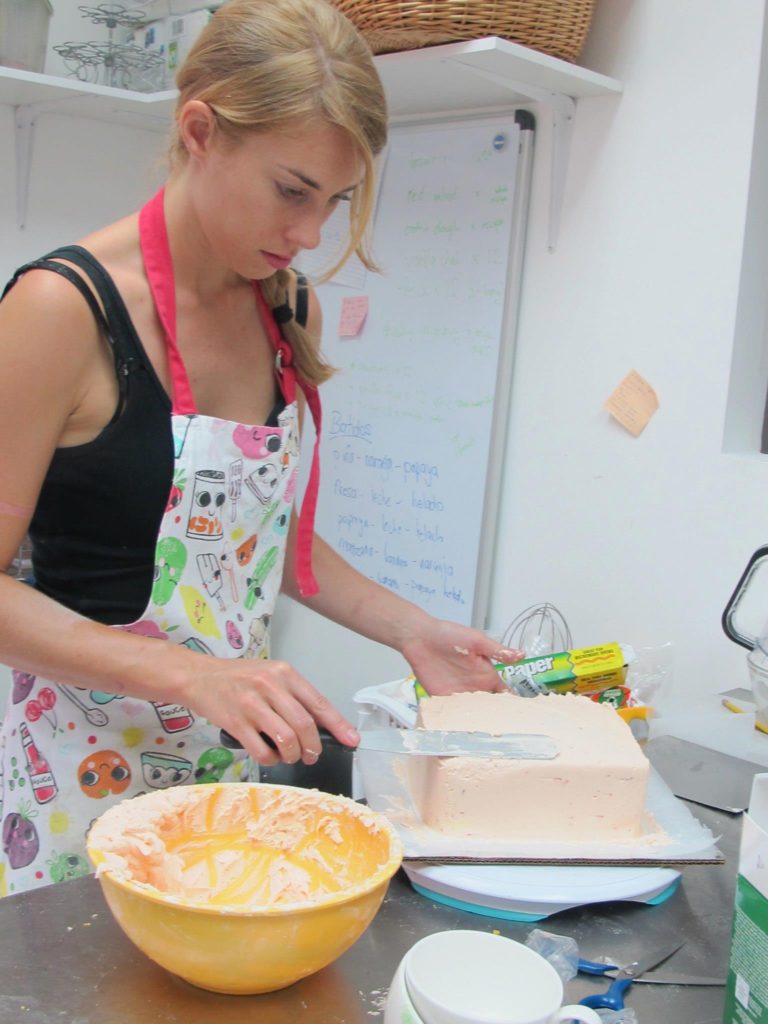
Equally importantly, and this is really difficult to judge yourself: are you good at whatever it is you’re planning on doing?
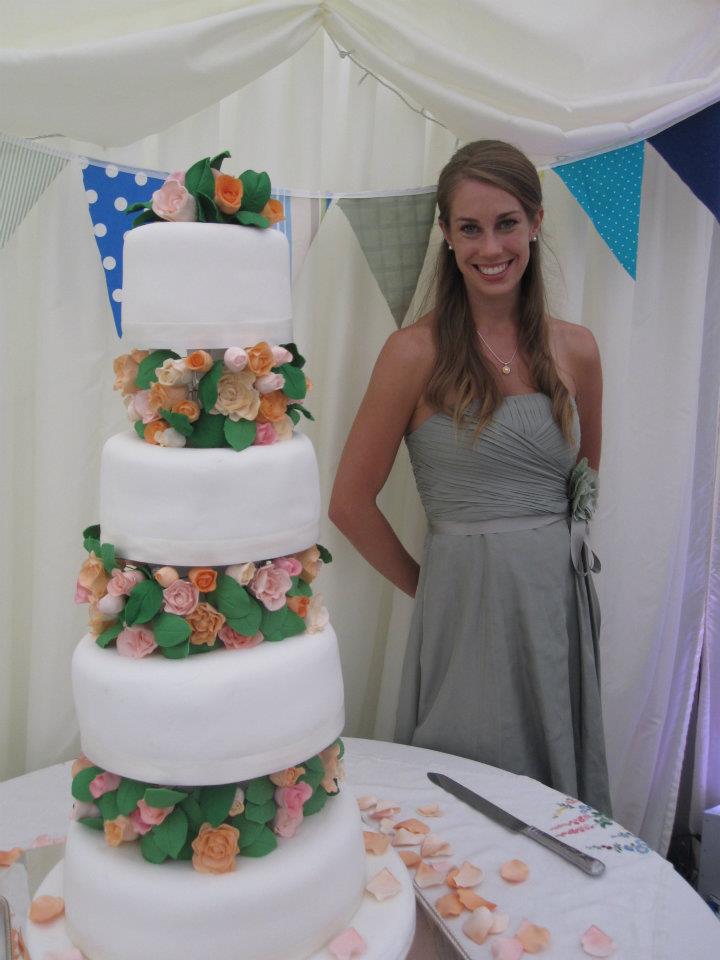
Yes, you might need practice – this is one of my first cakes and I’ve come a long way since then. You’ll gain experience and skills along the way but do you have the skillset necessary to start making money doing what you want to do, or at least have the potential to be good at it? Take a realistic look at that and ask someone who you know will be honest with you.
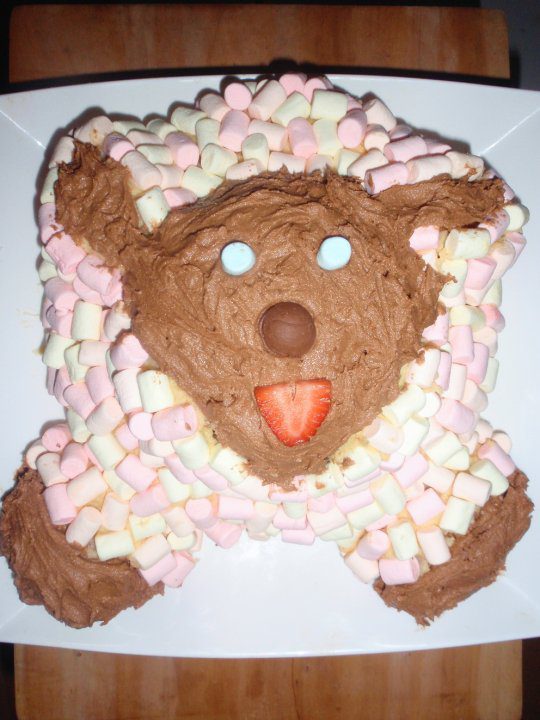
Step 6: Triple check
After choosing what exactly it is you want to do and getting a second opinion, before you commit to turning your hobby into a job and moving on to the next steps, it’s a good idea to pause and really think about three things:
1. Do you really want this?
It’s going to take a LOT of effort with long days and maybe nights. It will probably be an emotional roller coaster and before you start the marathon you should be confident that you’re going to be satisfied when you get to the finish line. For me, when I was teaching in Costa Rica and baking in my spare time to make birthday cakes for friends and students, I played with the idea of starting a cake business. I kept teaching and baking on the side and when I still enjoyed it after a year, I started to seriously consider turning it into a job.
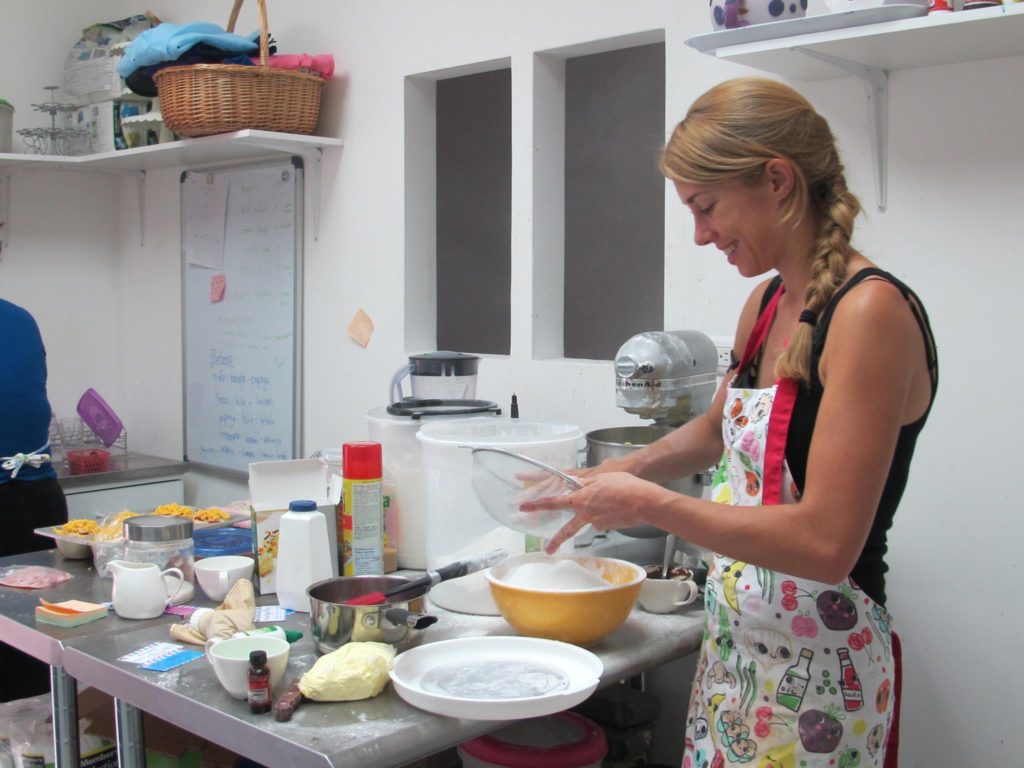
2. Can this hobby make money?
The second thing to think about is whether your hobby has the potential to be profitable. If you’ve been doing it for a while you probably have a network of contacts and maybe even people who already pay you to perform, whether it’s playing the guitar in a cafe or assisting coaching kids at an ice skating rink.
This will give you an idea of how much you can charge for what you do and how many clients or customers you’ll need into order to generate the income you need.
Of course, it will take you a while to get there and your income will grow over time, but before you pour your heart and soul into it, make sure it’s feasible.
3. How are you going to do this?
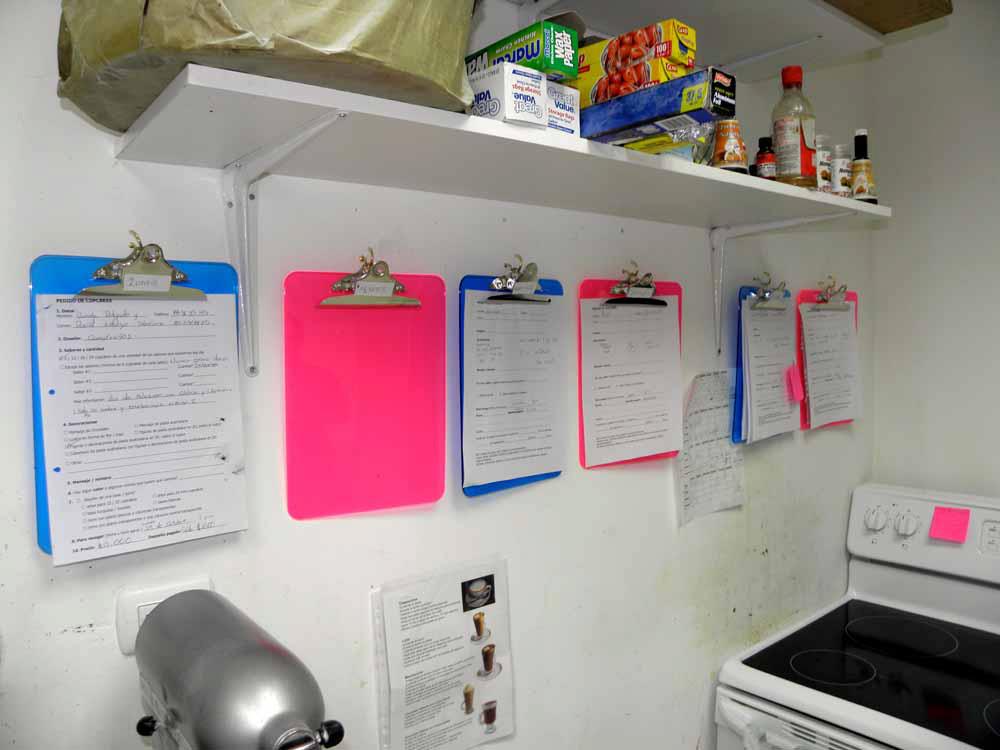
I started taking orders while working a full time job, to test things out. When I stopped teaching I took cake orders from home and after another year, only when I had enough customers and orders that I couldn’t physically fit the orders into my house, I opened a cake shop.
If you already have a full time job, do you have time to start your hobby job on the side? If you’ve already started building up a client base or have some regular gigs, can you afford to work part time at your current job so that you can dedicate more time to your new venture? Can you take some time off work to get yourself set up? Do you have savings to invent or will you need a loan? Figure out the practical details, give yourself a to-do list, and use your passion to motivate you to turn your hobby into a job.
Step 7: Become successful!
There are endless ways to be successful with your hobby and ideally you’ll be able to turn it into a full time job and then into a fulfilling and profitable career. Find ways to stand out by being different: offer something new that can’t be found anywhere else, or include something in your product or service that competitors don’t. Target a group of customers with something tailored towards them and their needs – ice skating lessons specifically for kids with lots of energy, or guitar lessons designed for people with anxiety.
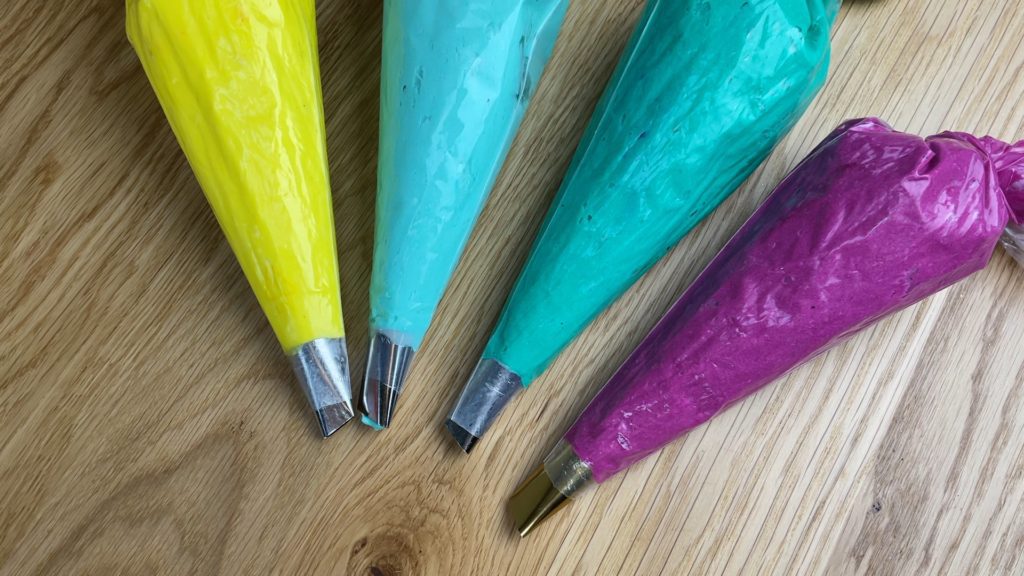
As an example, the cake tutorials and courses I found online that were supposed to be for beginners were sometimes too complicated for me to follow even after several years of decorating cakes, or they skipped steps because it was assumed that that step was obvious. So I started creating videos that ANYONE could follow, even with no cake decorating experience, and I think that’s what makes my tutorials and courses popular.
So these are the 7 steps to follow to turn your hobby into a career. I hope you’ll share in the comments what you decide to do and come back and tell me what you did!
If you’re looking for cake inspiration, join my Club for access to ALL of my online classes as well as live online classes and Q&A sessions for members only!
Here’s the video version of this tutorial: