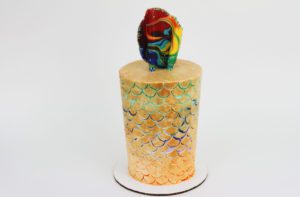
In this tutorial I’m going to show you how to decorate a cake with these gorgeous wavy buttercream ruffles and very easy mermaid tail and seaweed made with sugar! If you prefer to watch a video of this tutorial, scroll to the bottom of the page.
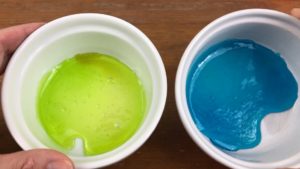
Start by preparing the sugar decorations. You can use any hard candy or boiled sweets for these – I’m using green and blue Jolly Ranchers.
Put them in bowls and microwave them for 30 seconds at a time until they become a liquid that moves around like maple syrup would when you tilt the bowls. These aren’t cooked enough yet – they’re not completely solid but they’re moving very slowly, more like a thick honey than maple syrup, so when I push the green sugar into my mold with a spatula, it sticks to my spatula instead of pouring easily into the mold.
After microwaving them for another 30 seconds the consistency is perfect!
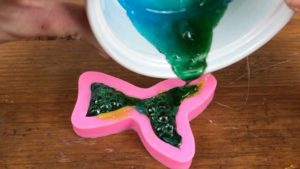
The melted sugar pours easily into the mold, spreading to fill it. This is a silicone mold so its fine to use a liquid this hot, and sugar gets VERY hot when you melt it so be careful not to touch it.
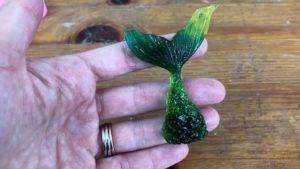
Leave it to set and harden for about 30 minutes and then carefully push it out of the mold. Because the middle of the tail is so thin and narrow, it’s easy to snap it as you push it out and if that happens you can just put the whole thing – the mold with the sugar inside – back into the microwave to melt the sugar again and then leave it to set and try again to take it out.
If you do this too soon, before the sugar has set, the sugar will stick to the mold so you’ll know if needs more time. 15 minutes later and the tail has set so some out of the mold easily. If there are any pieces of sugar around the tail shape you can snap them off now.
Now repeat the process, heating up the rest of the coloured sugar in the microwave and pouring it into the mold, and I like to use two colours for this but you don’t have to. You can try to tidy up the edges now with a knife but sugar I really sticky so it’s a bit tricky, so it’s easier to snap these extra bits off later, when the sugar has set.
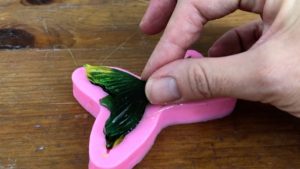
Now immediately push the other tail gently onto the top of this one, so that it sticks to the melted sugar and they’ll merge together as the melted half sets.
Leave it for about 30 minutes and then push it out of the mold, pulling back the silicon and using your fingers to push from behind to gently push out the tail.
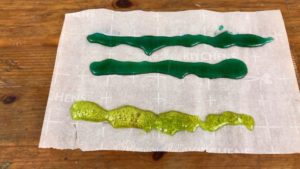
Now for some seaweed! Use some more candy, melting it the same way and then pouring it in strips onto a piece of parchment paper, or you could use a silicon baking mat. I’m using green and blue again, and after reheating the blue a few times it becomes this dark emerald green colour which is perfect for seaweed.
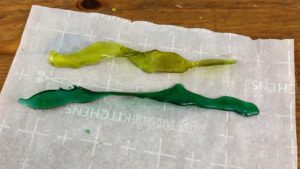
Leave them to set for a few minutes and as soon as they’re cool enough to touch and hard enough to be able to lift up from the paper, peel them off and gently twist the two ends between your hands.
This light green one is the perfect temperature for this, just set but still flexible enough to be able to twist easily, but the darker ones have sat here for a bit too long so I can’t twist them much.
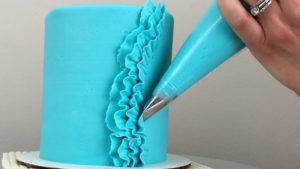
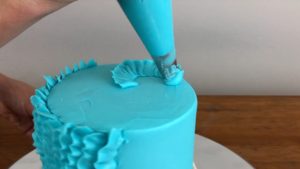
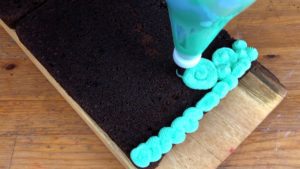
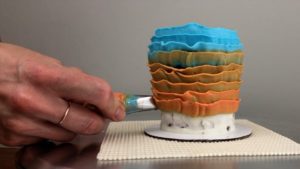
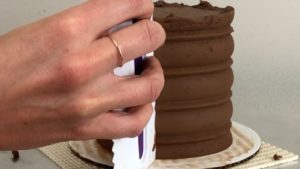
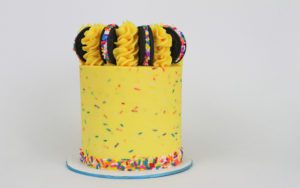
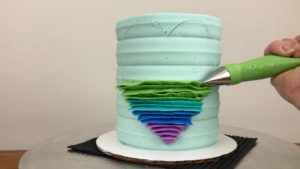
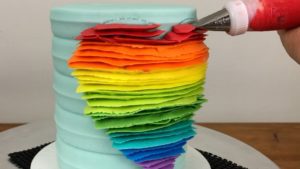
Now you’ll need your cake, which should be covered in smooth frosting. Use a piping bag fitted with a petal tip and hold it with the narrow end of the tip to point outwards, with the wide end pressed against the cake. Squeeze the buttercream out and lift the bag slowly, keeping the wide end of the tip pressed gently against the side of the cake and wiggling your hand to create wavy ruffles going up the cake.
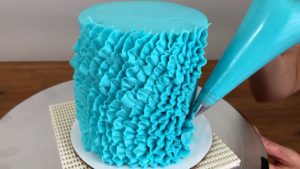
I’m overlapping each ruffle by about half so that you can’t see any of the frosted cake in between them. The more slowly you move your piping bag up the side of the cake as you squeeze the buttercream out, the more your ruffles will wiggle and become wavy, and you can exaggerate this to give the ruffles even more movement by wiggling your hand slightly as well.
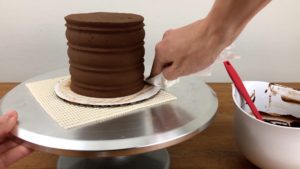
You can do this immediately after frosting your cake, you just have to be very careful that you don’t knock the frosting with the piping tip because you’ll damage it. I like to let the frosting set before piping ruffles because then I can’t damage it and also because it get firmer so it holds its shape, so the weight of the ruffles won’t drag the frosting down which can make your edges around the top of the cake less sharp.
You can use any petal shaped tip for this and with the Wilton petal tips, the higher the number, the longer the petal so the wider your ruffles will be. This is a 104 which I love for this little 4” cake but for an 8 or 10” cake I would use a #125 so that the ruffles would be wider and I think in better proportion to the size of the cake, and I wouldn’t need to pipe as many to cover the surface of the cake.
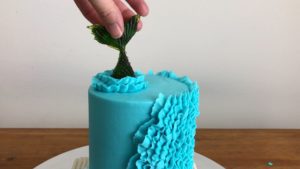
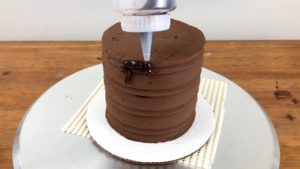
Now make a little splash for the mermaid tail to stick out of, using the same piping tip with the narrow end facing outwards as you spin the cake on the turntable to pipe a little circle. I’m piping another one of top, and you want the hole in the middle of the circles to be smaller than the wide base of the tail so that it’s buried inside these ruffles and it looks like the rest of the mermaid is inside the cake.
Straight away, before the buttercream sets, push the tail into the middle, pushing down until you feel the resistance of the cake so you know the tail is wedged firmly into the frosting.
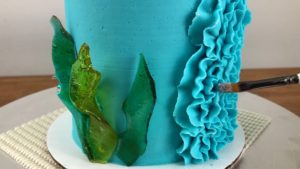
To add the seaweed, just choose where you want it to go and press it into the side of the cake. If your frosting has set you’ll have to use a bit more pressure to attach the seaweed, than if you’ve just frosted your cake, but if you have only just frosted the cake and the frosting is still soft and sticky, you’re more likely to create a bulge in the frosting when you push the seaweed in, so I like to let the frosting set before doing this.
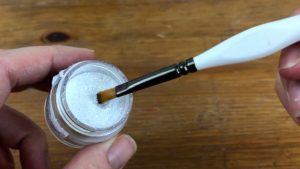
Now refrigerate the cake to chill the ruffles so that they set and hold their shape before adding some sparkle. I’m using disco dust on a paintbrush for this.
Gently dab the edges of the ruffles and because they’ve been chilled you can brush along them without damaging them. If they start to soften as the buttercream warms up you can put the cake back in the fridge for 15 minutes to chill it again.
I recommend refrigerating the cake until 2-4 hours before serving it, so that the ruffles hold their shape perfectly without dropping and after a few hours at room temperature the cake and frosting will have warmed up and will soft and delicious!
Here’s the video version of this tutorial:
This one bag piping technique is not only very easy, requiring minimal tools and with minimal cleanup, but it also creates really striking colorful results! If you prefer to watch a video of this tutorial, scroll to the bottom of the page.
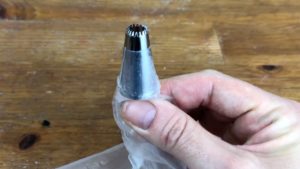
All you need is a piping bag with any piping tip, and I’ll show you a few different examples in this tutorial.
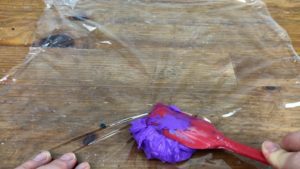
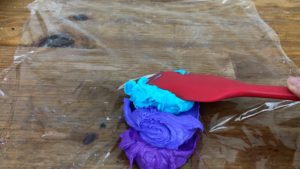
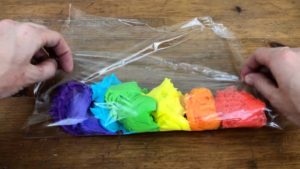
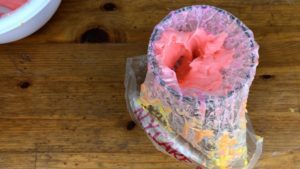
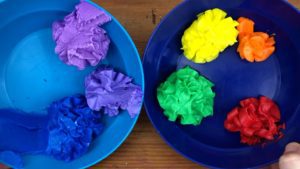
Tint your buttercream the colours you want and the first way to do this is to line them up down the middle of a piece of cling film or saran wrap.
I like this method because you can see what you’re doing and it’s easier to clean the piping bag at the end but I’ll show you two other methods in a moment.
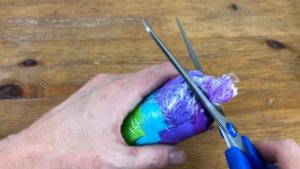
If you use the cling film method, fold the cling film over the buttercream and roll it into a log that will fit into a piping bag later.
Twist the ends to hold the buttercream in place and cut off one end where the buttercream begins.
Then drop the buttercream log into your piping bag with the cut side facing downwards, towards the piping tip.
Now pipe onto your cake and as you pipe, the colours higher up in the bag will gradually push through the middle of the bag and then out through the tip at the end, so the colours will change gradually and blend slowly into each other.
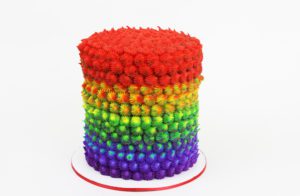
I’m using a 199 piping tip for these rosettes, which are quite dramatic, gothic-like spikes. This one-bag piping technique looks really striking on this cake, as you can see different colours from the bag showing up in different parts of the same piped rosette.
If you run out of buttercream, just add more buttercream to the top of the bag and then continue piping. If you’re using a cling film log within your piping bag, make sure you pull that out before adding more buttercream, otherwise the cling film will get caught in the piping tip as your pipe the buttercream out.
I love how dramatic this cake looks, and no one would ever guess how easy it is to achieve the gradient of colours!
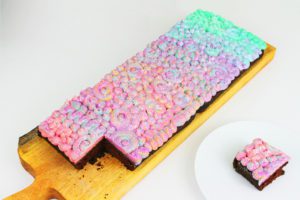
Now for some variations and some notes about what can go wrong and how to avoid or fix those mistakes. You can use this technique for any kind of cake, not just a round one. Here I’m going to use it for a sheet cake and it works well on cupcakes too!
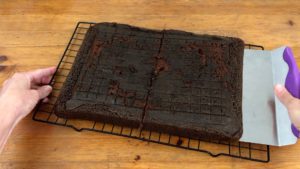
I’m cutting my sheet cake in half to make an extra long cake and arranging the halves on a board to display it.
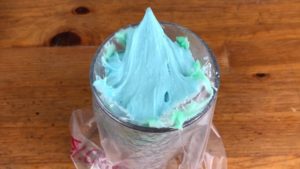
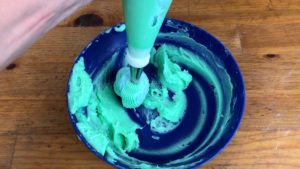
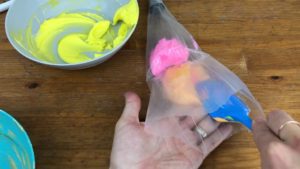
Instead of the cling film method you can spoon your buttercream into a piping bag. It’s easiest and less messy to fold your piping bag over a glass to hold it open while you do this. Make sure you push each colour of buttercream all the way down into the bottom of the bag so that there’s no air trapped in the bag, which will cause the buttercream to spit out later as you’re piping.
And here are my pretty pastel rainbow colours, ready for one-bag piping! By following the colours of the rainbow in order, not jumping around too much, the colours belnd into each other nicely but I’ll show you on the next cake what happens if you don’t order the colours this way.
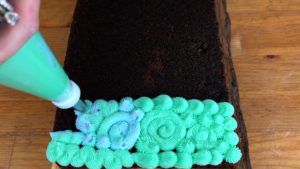
I’m starting at one end of the cake, piping with the first colour of buttercream in the bag, which is this pale green colour.
If you have too much of one colour in the bag and you want to move on to the next colour, like I want to do here, pipe some of the buttercream out into a bowl until you see the next colour coming through and then go back to your cake.
As soon as I see the blue coming through the green frosting in the bowl, I’m going back to the cake, and now the rosettes and swirls are green with some blue.
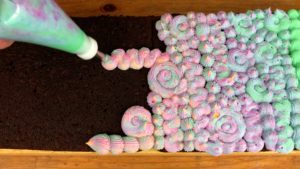
As you continue piping you’ll see the colours blend into each other, moving onto the colours higher up in the bag but still incorporating the previous colours in parts of the piping. With this technique the colours don’t pipe out individually, like they would if you used different piping bags for each color. Instead, each colour pipes through the previous colours, so they blend together gradually.
I’ve run out of buttercream some I’m folding the bag over a glass again and you can either add more of the last colour, which for me would be that pale orange, or a new colour, and I’m choosing to do a pale coral for my last colour.
Squeeze the buttercream all the way down and because the rest of the colours are still lining the bag, when you squeeze the bag to pipe out this new colour of buttercream it’s pushing out past all of those other colours so they’ll also be incorporated in the piping of this new colour, continuing this pretty blending effect throughout the cake.
Here’s an example of when colours don’t blend as prettily together. When you line up colours in the bag that are contrasting, like blue and orange, as the orange pushes through the blue buttercream in the piping bag the colours will blend to make a sludgy shade of brown.
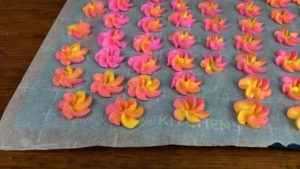
You can use this technique for other buttercream details, not just frosting a cake, like piped flowers. I’m layering my colours in the bag and since I’m not using a glass to open the bag and I’m not pushing each colour down to the bottom of the bag, the colours will blend together randomly.
As I pipe, the first flowers are pink and the more orange and yellow comes through in the later flowers, so I could arrange these on a cake to make a cascade of ombré coloured flowers going down the side of the cake.
I love this technique because it’s so versatile so as well as being easy to do and easy to clean up, there are endless possibilities for cake designs with it! I’d love to see what you create so if you share any pictures on Instagram please tag me, @britishgirlbakes.
Here’s the video version of this tutorial:
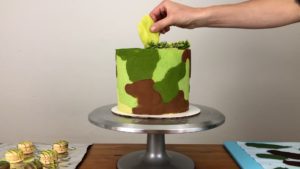
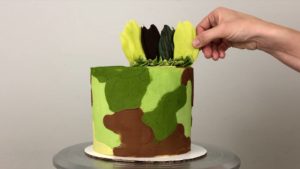
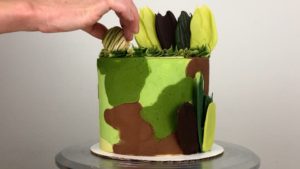
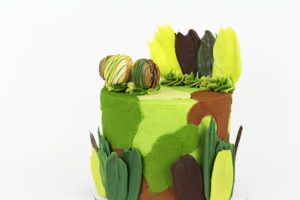
In this tutorial I’m going to show you how to create camouflage buttercream and how to make camouflage cake toppers with chocolate!
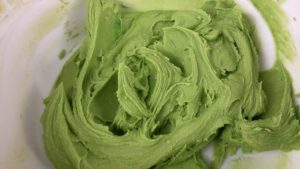
To tint buttercream for camouflage, you’ll need more than just green food colouring because that will make only bright shades of green. To create duller shades of green, add a tiny bit or orange or red or brown with a toothpick.
You can see how this changes the color from grass or leaf green to more of an olive or khaki colour.
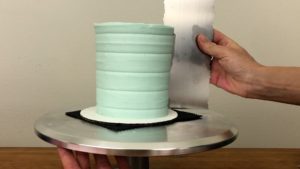
Frost your cake with any of the colours you’re going to use for the camouflage design, but I recommend choosing one of the lighter colours because if you use a darker colour, you’ll need very thick frosting for the lighter colours to cover up that dark base colour of frosting. I have a detailed tutorial on how to get perfectly smooth buttercream with sharp edges.
You’re going to cover all of this base frosting with patches of different shades of green and brown, so it’s okay if you have a few irregularities in it, but this coat of frosting gives the cake its final shape so you want the sides to be straight and the top edge to be sharp. When you’re happy with the frosting, put the cake in the fridge to chill the frosting so that it hardens for the next step.
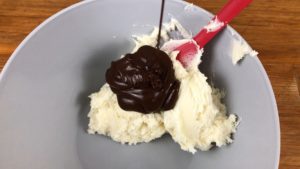
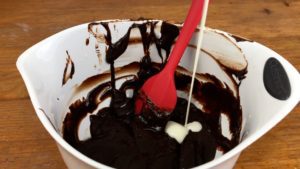
Meanwhile, prepare the rest of your colours. To make brown I’m using melted chocolate, which I’ve let cool for a few minutes before mixing it into my buttercream so that it doesn’t melt the buttercream.
The more chocolate you add, the darker the colour, and if you find that the chocolate makes the buttercream too stiff, just add a bit of milk or cream to thin out the consistency. You could of course use brown colouring instead for this.
For my greens, I’m setting aside some of the frosting that I used for my base frosting on the cake, and adding more leaf green and orange gel colours to the rest to make another two shades of darker green.
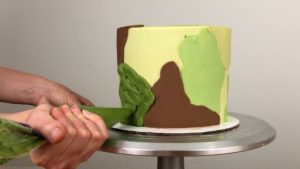
Put your buttercream colours into piping bags with the ends snipped off so there’s a small hole for the buttercream to come out of. If you only have one piping bag you can do this one colour at a time, emptying and washing and drying the bag between colours.
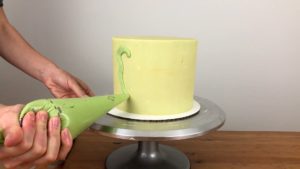
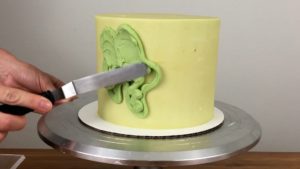
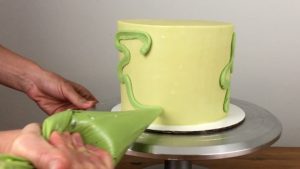
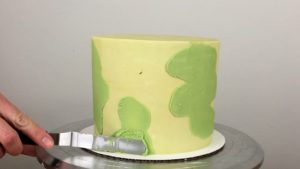
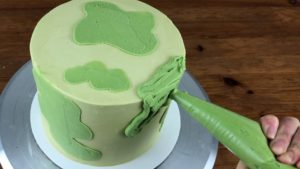
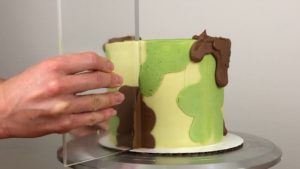
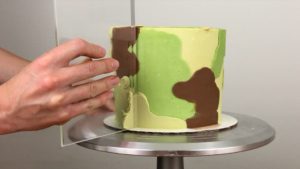
Once your cake is cold and the frosting is firm, create the first patch of colour on your cake. You’ll need an offset spatula and a frosting smoother for this. If you’re using a piping bag, it’s easiest to pipe the outline first and then fill in the middle. If you don’t have a piping bag or don’t want to use one, you can spread the coloured buttercream straight onto the cake. You’ll have a bit less control over the shape of your patches of colour and they’ll be more rugged and uneven around the edges, which might be what you’re looking for anyway.
After covering the area you want with buttercream, use your offset spatula to scrape off any excess so that it’s not too thick.
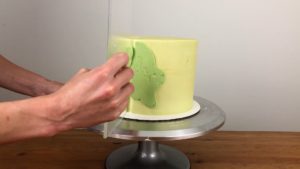
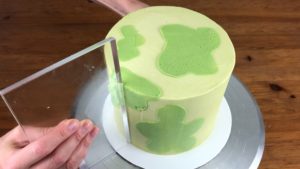
Then use your frosting smoother to scrape over it a few times to smooth it out and also make the frosting thinner so that it doesn’t stick out so much from the frosting on the cake.
If you alternate the direction you scrape, pulling the frosting smoother towards you once and then pushing it away from you the next time, you’ll keep the patch of buttercream closer to the original shape you piped or spread. If you pull the frosting smoother towards you every time, you’ll drag the buttercream closer to you and make the patch wider.
You can pipe or spread several patches at a time and then switch to your frosting smoother to scrape them all, but keep in mind that the longer you leave the piped or spread buttercream sitting on top of the frosting, the colder it will get as it starts to stick to the cold frosting on the cake, and then it won’t spread as easily when you use your frosting smoother.
This means that if you pipe several patches at once, your patches will end up very similar to the original shape you piped or spread.
For example, look at how intentional the patch of colour above is, which I scraped after piping several patches at once, compared to this patch, which I piped and then scraped immediately.
If you scrape too much buttercream off, revealing the frosting underneath, just spread or pipe a bit more on and scrape over it again with your frosting smoother.
You don’t have to stick to the sides of your cake, you can do the top as well. Wipe your frosting smoother off after each time you use it so that you don’t drag buttercream back onto the cake, which will mess up any smoothing you’ve already done.
To make a patch go over the top of the cake and down onto the sides, follow exactly the same technique, starting by spreading or piping on the buttercream.
Scrape off any excess with your offset spatula and then smooth it with your frosting smoother on both the sides and top of the cake, and by alternating smoothing the side and the top you’ll get a nice sharp edge at the top.
Chill the cake when you finish the first colour and when the frosting has set you can do the next colour. Repeat the process: pipe, spread, and scrape to smooth.
I’m doing my lightest colour next, which is the buttercream leftover from frosting my cake. You could just leave some areas without frosting to leave the base coat exposed, but I want the frosting to be smooth so I’m covering up the base coat with a bit of that colour of frosting so that it’s sitting level with the rest of the patches of frosting on the cake.
Finally, my darkest colour of buttercream. You can imagine that if I’d chosen this colour for the base frosting on the cake, since it’s such a dark colour, when I spread the lightest colour of buttercream over it to make light green patches I’d have to spread it really thickly to cover up this dark colour. That’s why it’s best to use the lightest colour or even which for the base frosting.
You don’t have to do this one colour at a time – you can switch back and forth between colours if you like – but you should space the patches out around the cake so that they don’t touch each other until you’ve chilled the cake to set the patches, because if you make two patches of different colours right next to each other, the buttercream will blend together where it meets as you scrape to smooth one colour, instead of being distinct coloured patches.
When you’ve covered the whole cake with buttercream patches, put it back in the fridge to set the frosting and meanwhile, make some camouflage decorations!
Melt chocolate or candy melts in the microwave at 50% power for a minute at a time so that they don’t burn and seize.
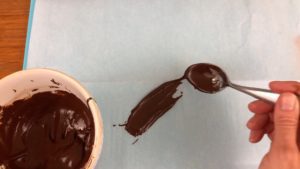
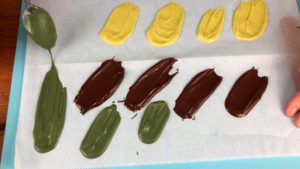
This is parchment paper or you can use wax paper, and I’m spooning the melted chocolate onto the paper and then using the back of the spoon to swipe it upwards to make some chocolate foliage for the cake.
Put them in the fridge to set when you finish, which will take about 30 minutes, or you can leave them at room temperature for about an hour. Since the cake has been chilled in between colours of patches to set the buttercream, these won’t stick onto the frosting on the cake but I’ll show you how to attach them in a minute.
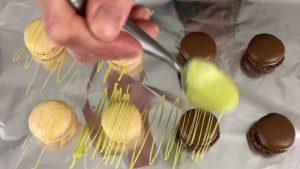
You can use melted chocolate to decorate anything you want to use on top of the cake, like these macarons. I’m shaking my spoonful of melted chocolate back and forth over them to drizzle them with two shades of green.
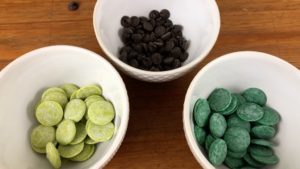
Candy melts are easy to use because they’re already coloured and they melt easily but if you prefer you can use white chocolate and after melting it, add a drop of gel color.
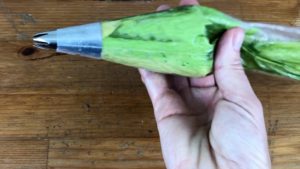
Use your leftover buttercream to attach your camouflage decorations to the cake. I’m using a piping bag fitted with a 1M star tip and I’ve filled it with all of my leftover buttercream colours to make blended coloured buttercream.
Once your chocolate foliage has set, pipe swirls of buttercream onto the top of the cake.
Immediately after piping, while the buttercream is still soft and sticky, lift the pieces of chocolate foliage up from the paper and push them into the buttercream swirls.
If you chill the cake again when you’ve finished, that will set the buttercream swirls and hold the foliage securely in place.
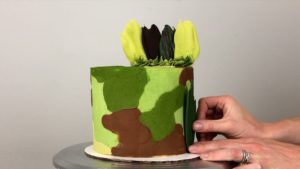
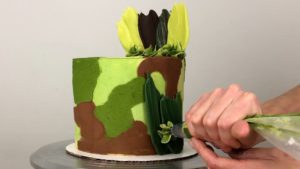
For the sides of the cake, pipe or spread little dots of buttercream wherever you want the chocolate foliage to go.
Then push the foliage into them to attach them to the side of the cake.
If you want to overlap them, pipe buttercream onto the chocolate and then press another piece firmly against it.
I’m piping some more swirls on top to attach the macarons but you could use lollipops or candy in different shades of green and brown for this, or macarons in those colours instead of drizzling them with green and brown chocolate.
I added some more foliage to the side of the cake to finish it and here’s the finished result!
Here’s the video version of this tutorial:
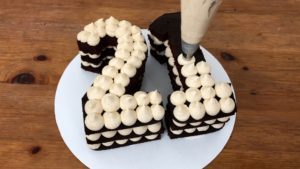
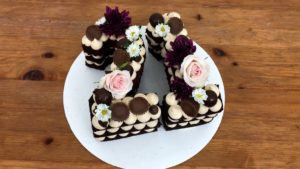
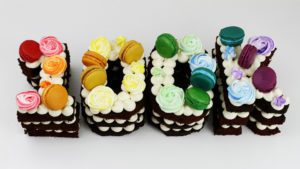
Number cakes are very popular for birthdays but instead of the original version made with sugar cookies I’m going to show you how to use cake! If you prefer to watch this tutorial, scroll down to the bottom of the page.
I started with a batch of my Perfect Chocolate cake batter. For two layers of a quarter sheet cake, which makes two numbers of three layers each, I used enough batter for a six inch cake.
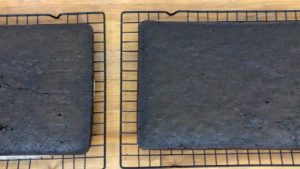
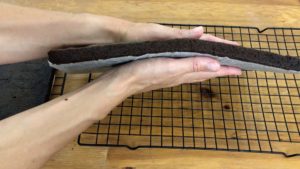
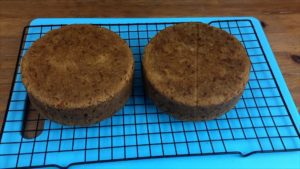
Line your baking pans with parchment paper and leave them on the parchment to give your numbers more support later in the process. After the cakes cool, chill them for thirty minutes in the freezer (still on the parchment) to make them easier to carve into numbers later.
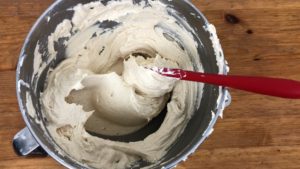
While the cakes are chilling, prepare your buttercream. For two numbers for three layers each you’ll need about half a batch of my 4 Minute Buttercream. I used peanut butter buttercream by mixing a quarter of a cup of peanut butter into my buttercream. Add milk or cream until your frosting is smooth and easy to stir but still holds its shape.
Fill a piping bag with frosting. I’m using a round tip but you can play around with different star or open star tips for a different look.
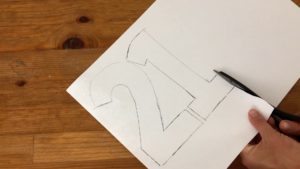
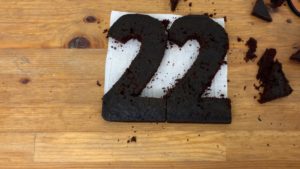
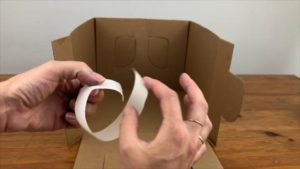
Now sketch out your numbers. Use a piece of paper the size of your cake pan and fold it into three parts or however many numbers you’re going to cut out of your sheet cake. Then when you sketch your numbers within the folds of the paper, you know they’ll fit onto your cake.
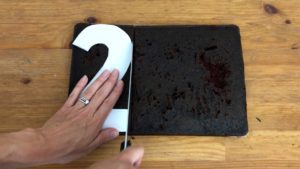
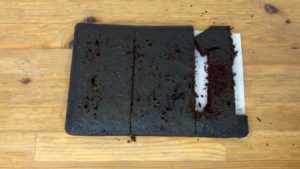
Cut out your numbers and place them on a chilled cake, cutting around them with a serrated knife. Cold cakes are much less crumbly than room temperature cakes so they’re easier to cut neatly.
Don’t worry about how the top surface of your cake looks because it’s going to be covered with frosting soon.
For my cake, I baked 2 sheets cakes and I cut three numbers out of each sheet cake, so I had 6 numbers in total – three 2s and three 1s.
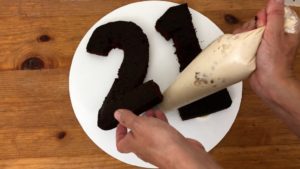
Arrange your first layer of each number on a cake board using a few dollops of frosting to secure them to the board.
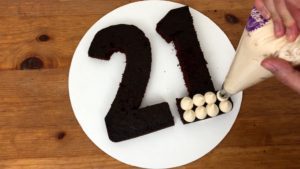
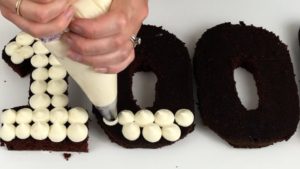
Now use your piping bag to pipe little dollops of frosting on each number. It looks best if you align your dollops and rows but of course if your numbers curve like the top of my 2, you’ll need more dollops on the outer edge of the curve.
If your dollops aren’t forming nice clean peaks because the frosting is breaking off before the tip of the dollop, you’ll need to add more liquid to your frosting.
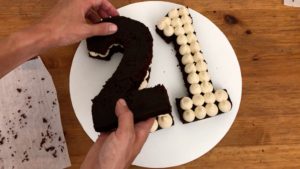
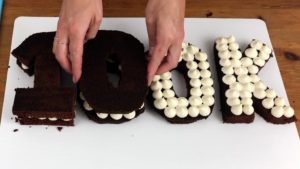
After piping your first layer of dollops, place the second layer of each number on top. I like to do this straight away, while the frosting is still fresh and sticky, but you have to be careful as you lower the cakes because if you have to adjust the position after lowering it, you’ll damage the dollops underneath.
Now pipe on another layer of dollops. Try to keep them all the same size. These dollops are going to be covered by cake so it won’t be very noticeable if they aren’t perfectly neat and even but it’s good practice for the final layer of dollops, which will be visible on top of the cake.
Place your final layers of cake on top. At this point you can tidy up your cake board by brushing away any crumbs using a pastry brush or wiping them off with a towel or paper towel.
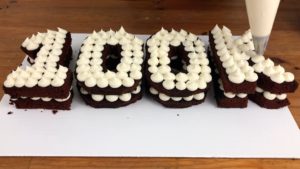
Pipe on your final layer of dollops and then comes the fun part: decorating!
Straight after piping the final dollops, I sprinkled on some gold glitter and pressed every type of peanut butter chocolate I could find into the dollops, adding a few fresh flowers to make the cake more celebratory. It’s important to decorate immediately after piping the dollops, while the frosting is still sticky so the decorations are easy to place and they stick to the frosting.
Store your cake in an airtight container like a cake caddy. If you’re transporting it I recommend putting it in the freezer for about an hour first so it’s firm for the drive.
This cake is obviously perfect for a 21st birthday but also as a whimsical idea for someone older who would love to be 21 again! If you follow this tutorial to make a number cake or letter cake please tag @britishgirlbakes on social media so I can see your creation!
To watch the video version of this tutorial, click the play button below:
Ganache can be used to fill, frost and decorate a cake and in this tutorial I’ll show you how to make it, how to use it to frost a cake, and how to adjust the ingredient ratios for different results, like using it for a drip or to make truffles or a glaze for donuts.
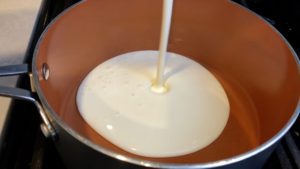
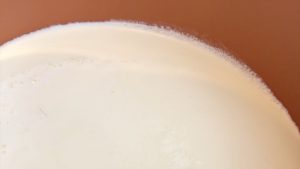
Making ganache is incredibly simple. There are only 2 ingredients: heavy whipping cream, called double cream in the UK, and semi-sweet or bittersweet chocolate. Weigh the ingredients, and I’ll give you the quantities in a moment, and then heat the cream in the microwave or in a pan on the stove.
I like to heat the cream on the stove so I can see what’s happening, because you don’t want to overheat the cream. Remove the pan from the heat as soon as bubbles start forming around the edges of the pan.
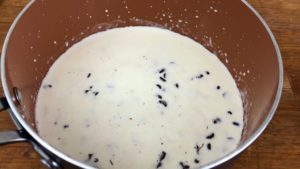
Immediately add the chocolate to the pan. You can use chocolate chips or a bar of chocolate but you should chop up a bar of chocolate into approximately equal sized pieces, so that it all melts at the same speed. Use a spatula to push all of the chocolate underneath the cream and then leave it for 5 minutes, still sitting on the counter, not over heat.
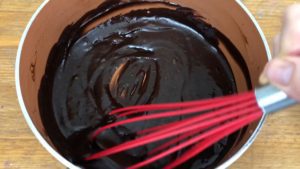
Stir the ganache until it’s smooth. If you still have lumps of chocolate even after stirring for a minute or so, you can put the pan back on the stove over a low heat and stir until the lumps melt.
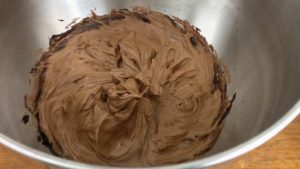
To make ganache to fill and frost a cake, use equal amounts of chocolate and cream, so the ratio is 1:1. So if you use 200g of chocolate, use 200g of cream, too. After making the ganache, leave it to set, which will take about 3 hours at room temperature. You can put it in the fridge to speed up the process but stir it every 15 minutes to keep it smooth. Then use a whisk or a whisk attachment of a mixer to whisk the ganache for a few minutes, until it lightens in colour and has a consistency similar to whipped cream.
Then fill and frost your cake as normal. You’ll probably need a crumb coat, which is a very thin layer of frosting to trap any crumbs that come off the cake, and then you should let that set for about an hour at room temperature or 30 minutes in the fridge before applying your final coat of frosting. You can make smooth frosting with a frosting smoother or textured frosting with a textured cake comb, which is what I’m doing here.
Don’t be intimidated by ganache – frosting a cake with ganache is almost exactly the same as using my 4 Minute Buttercream frosting, so if you’ve used one you’ll be able to use the other. To get rid of any smudges of ganache on the cake board, let the ganache set first and then you can try scraping the smudges with an offset spatula or it’s more effective to wipe them off with a paper towel wrapped around your finger.
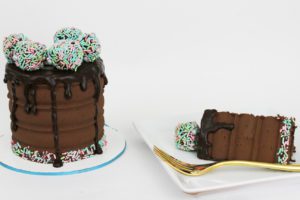
To make a drip, use 3 parts of chocolate and 2 parts of cream, so for example if you use 150g of chocolate, use 100g of cream. Let the ganache come to room temperature before you use it and it will thicken as it cools. Your cake should be chilled in the fridge before you apply the drip. Always do a test drip on the back of the cake to see how the ganache will behave, and then you can adjust the consistency of your drip if you need to.
If the drip is too runny, even if it’s at room temperature, you can add more chocolate, heat over a low heat on the stove, stirring until it’s smooth, and then let it cool to room temperature again. If it’s too thick, you can add more cream to loosen it.
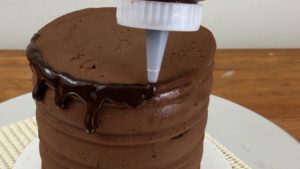
Use a spoon or a condiment bottle to drizzle the ganache around the top edge of the cake, pausing wherever you want there to be a drip. Having a cold cake helps to stop the drip on its way down the cake, instead of running all the way down the cake and pooling at the bottom, on the cake board. You can go back and add more drips if you want to, but you should do that immediately after doin got first drips, so that those don’t set first because then there would be a seam where the new drips join the old drips.
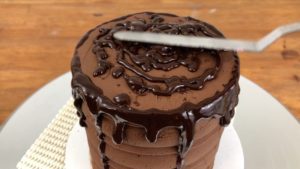
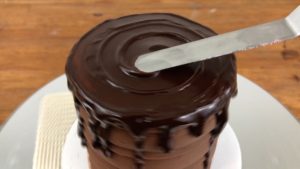
If you’re going to cover the top of the cake you should do that now too, immediately after doing the drips around the edge of the cake. Spoon the ganache on or drizzle it with a bottle and then use an offset spatula to smooth it over the top of the cake.
If you like you can spin the cake while slowly dragging the tip of your offset spatula towards the center of the cake to create a spiral pattern on top of the cake.
To make truffles with ganache, make the ganache with 2 parts of chocolate and 1 part of cream. Put the ganache in the fridge until it firms up, about 2 hours, and then scoop it up with a spoon and roll it between your palms into a ball.
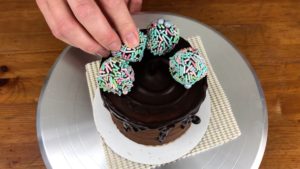
You can drop the truffles into a bowl of cocoa powder or powdered sugar or sprinkles and then move them around to coat them completely. I’m putting these around the top of the cake before the ganache drip sets, so that they stick to the ganache, but if the drip has set you could use a tiny dot of leftover ganache frosting or drip to make them stick.
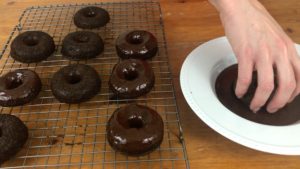
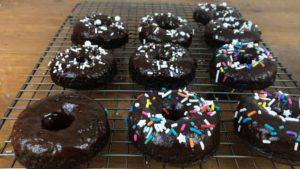
To use ganache to glaze donuts, which is also a 2:1 ratio of chocolate to cream, as soon as you’ve made the ganache and stirred It until it’s smooth, lower a donut into it and twist the donut to coat it in ganache. Lift it up, flip it over, and place it on a wire rack. If there’s ganache in the hole of the doughnut, tap the rack on the counter a few times so that the ganache settles. I cover this in a lot more detail in my tutorial on how to make doughnuts with cake batter.
You can add sprinkles or crushed nuts or candies or whatever you like to garnish or decorate the doughnuts.
If you prefer to watch a video of this tutorial, click the play button below:
I love frosting cakes with chocolate ganache – it’s rich and delicious, spreads smoothly onto a cake, and is ridiculously easy to make! When it sets it’s firm so it’s a good option to apply before covering a cake with fondant.
To use ganache as frosting, the quantities of chocolate and cream are equal but you can change with the consistency of the ganache to get different results, for example to decorate a cake with a drip, make chocolate truffles, or even glaze doughnuts! I have a detailed tutorial on different ways to make and use ganache here.
You can use any kind of chocolate for your ganache but you might have to adjust the recipe – the recipe below is for dark or semi-sweet chocolate, which has a ratio of 1 part chocolate to 1 part cream. For white chocolate you’ll need a ratio of 3 parts chocolate to 1 part cream, for example 300g white chocolate and 100g cream.
Chocolate Ganache Makes enough ganache to frost an 8″ cake
Ingredients 500ml of heavy cream (about 2 cups) 500g (about 3 cups) of semi-sweet or dark chocolate chips or in bar form
Method
1. In a small saucepan over medium-low heat, heat cream until bubbles form around the sides of the pan. Do not let cream simmer or boil.
2. Meanwhile, if you’re using a bar of chocolate rather than chocolate chips, chop chocolate into equal sized pieces no bigger than 1 inch.
3. Remove cream from heat and add chocolate, using a spoon or spatula to move it around so that it is completely covered by the cream. Leave for 5 minutes.
4. Stir the cream until all of the chocolate has melted and the mixture is thick and smooth.
5. Leave to cool for 2-3 hours at room temperature or speed up the process by putting it in the fridge, stirring every 15 minutes to prevent hard lumps of chocolate forming.
6. To make frosting, whisk room temperature ganache for about 2 minutes until it lightens in colour and has a consistency slightly thicker than whipped cream.
To store, refrigerate in an airtight container for up to 1 month.
In this tutorial I’m going to show you 6 ways to use parchment paper or wax paper to decorate cakes! To watch the video version of this tutorial, scroll down to the bottom of the page.
1. Perfectly neat sprinkle borders
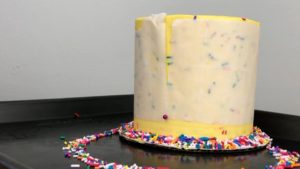
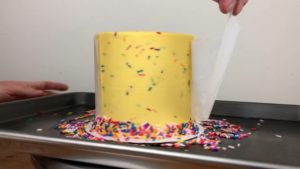
Place a frosted cake on a baking tray, which will catch any falling sprinkles. The frosting needs to have set for this so that it’s firm and no longer sticky. I like to chill my cakes in the fridge for an hour to set the frosting.
Wrap a piece of parchment paper around the cake so that it blocks off the area above where you want the sprinkles to stop. You can pin the parchment in place or if there’s any condensation on the outside of the cake, if you’ve moved it from the fridge to room temperature, the condensation might be enough to make the parchment stick in place. Pour your sprinkles around the base of the cake.
Use an offset spatula or spoon or your hand to press the sprinkles into the cake. I used my 4 Minute Buttercream for this cake and I chilled the cake in the fridge for about an hour to set the frosting before doing this. You’ll need to use a bit of pressure the push the sprinkles into the frosting so that they stick, since the frosting won’t be sticky after it’s set.
Peel the parchment paper off to reveal a neat sprinkle border!
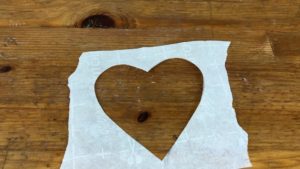
Draw a shape onto parchment paper and cut it out to make a homemade stencil.
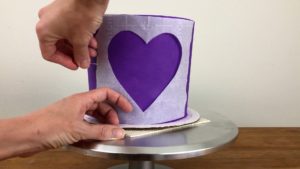
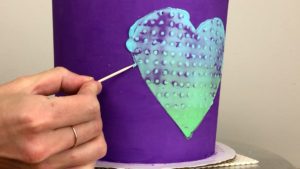
Press the shape against a chilled cake (smooth frosting rather than textured frosting works best for this) and you can pin it into place to hold it still. The frosting on the cake must have set before you do this, otherwise the parchment wills stick to it and pull the frosting off when you remove the parchment.
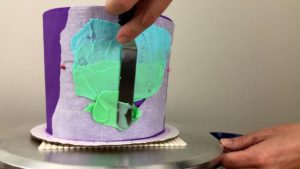
Spread buttercream over the shape, spreading from the outside towards the middle of the shape to make sure you don’t accidentally push buttercream underneath the edges of the shape, which would smudge the outline of the shape.
I’ve made a pattern within this heart using a chopstick and I cover the details in my tutorial on cake decorating with cutlery. Smooth the buttercream with a frosting smoother, scraping until the buttercream is as thick as you want it to be. Here, for example, I’ve scraped until I can see the purple frosting through the colours of the buttercream shape.
Peel the parchment off to reveal a neat shape underneath!
If any buttercream got underneath your stencil you can gently scrape it off with a toothpick. Because the frosting of the cake is cold and hard, you won’t damage it with the toothpick.
Parchment stencils aren’t the best quality but they’re cheap and easy to make and create beautiful results!
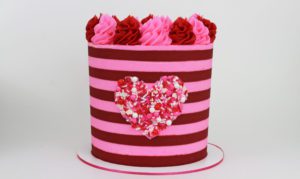
A variation of this technique is to make a sprinkled shape. After spreading buttercream over the stencil and scraping off any excess to leave just a thin layer, press sprinkles into the frosting to fill the shape. Do this on a baking tray to catch any falling sprinkles.
When you peel the parchment stencil off, the shape on the cake will be completely filled with sprinkles!
For more Valentine’s Day cake decorating ideas click here!
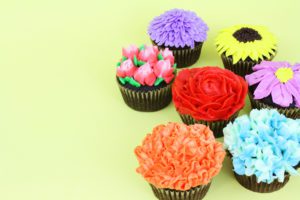
3. Make flowers to decorate cakes or cupcakes
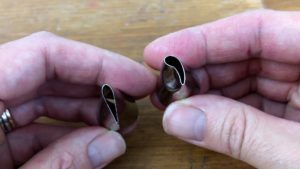
For these flowers you’ll need a petal tip, which can be straight (e.g. #125) or curved (e.g. #61), like either of these tips in the photo.
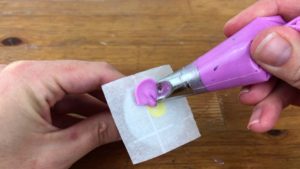
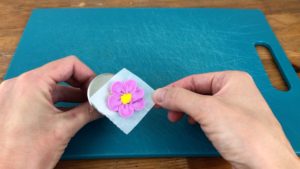
You’ll need a flower nail and little squares of parchment paper, which you can buy pre-cut or just cut out yourself from a roll of parchment paper. Squeeze or spread a little dot of buttercream onto your flower nail and press a parchment square on to secure it.
Hold your piping bag with the narrow end of the piping tip facing outwards and the wide end in the middle of the flower nail.
Squeeze some buttercream out as you twist the flower nail between your fingers and move the piping tip outwards and then pull it back inwards, to pipe a petal.
Continue all the way around the parchment to pipe a flower, starting and finishing each petal in the middle of the flower nail.
Use a small round tip to pipe a dot or a few dots in the middle of the flower to finish it.
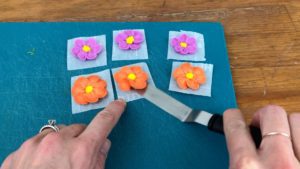
Pull the parchment carefully off the nail and put it on a baking tray or a cutting board and place that in the fridge or freezer to chill and set the flower.
Frost your cake or cupcake and then immediately, while the frosting is still sticky, take the flower out of the fridge or freezer. Slide an offset spatula underneath the flower to separate it from the parchment paper.
Press the flower onto the frosting to attach it. To attach the flower to a cake, if the frosting on the cake has already set you can spread or pipe a dot of fresh frosting onto the cake to act as glue to attach the flower.
If you’re interested in more ways to pipe flowers with frosting, click here for my tutorial on 8 buttercream flowers.
4. Buttercream cut-outs
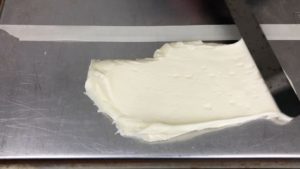
This is one of my favourite techniques! Spread buttercream onto parchment paper, which you can tape onto a cutting board or you can just hold it in place. Spread the buttercream as smooth as you can, and then put the cutting board with the parchment paper and buttercream into the freezer for 30 minutes or the fridge for an hour.
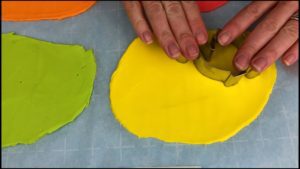
When the buttercream is cold and hard, cut the buttercream out with cookie cutters or a knife. If the shapes lift up with the cookie cutters, gently push them out to release them.
If the shapes stay attached to the parchment paper, use a knife or offset spatula to remove the surrounding buttercream to leave the shapes intact on the parchment.
If the buttercream has started to warm up and soften since you took it out of the fridge or freezer, put it back to chill it again so that the shapes harden. Then lift the shapes up with an offset spatula.
Press the shapes into the frosting on a cake. The frosting on the cake needs to be fresh and sticky for this, so that the shapes attach. If the frosting has already set you can spread some fresh buttercream onto the cake where the shape is going to go to attach it.
I have a very detailed tutorial on this technique with several variations like stripes and mosaic designs and rainbow or ombre patterns and you can watch it here.
5. Chocolate sails
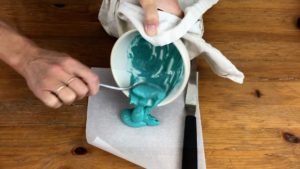
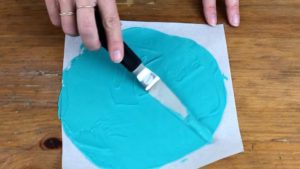
For chocolate sails, melt some chocolate or candy melts at 50% power in the microwave so that they don’t burn and seize. Pour them onto a piece of parchment paper that’s at least as big as the sail you want to make.
Spread the chocolate around with an offset spatula to smooth it out. Aim for an even thickness all over. The thinner you spread the chocolate, the more fragile the sail will be.
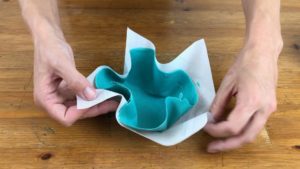
Arrange the parchment inside a bowl, letting it buckle and wave to give the sail some movement. To create an open, bowl-shaped sail, don’t let different sides of the sail touch each other.
Another way to set the sail is to drape it over something like a bottle, arranging the parchment to give the sail the shape you want it to have. Let it set at room temperature for about an hour or if you’re impatient like I am, you can put it in the fridge to speed up the process!
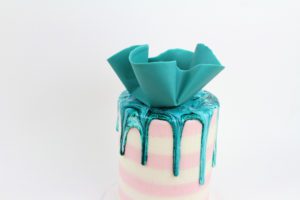
When the chocolate has set, peel it from the parchment paper and arrange it on your cake!
To wrap a cake in chocolate, measure a piece of parchment so that it’s at least as high and as the cake or taller if you want it to be, and long enough to wrap around it with a bit of overlap, maybe half an inch.
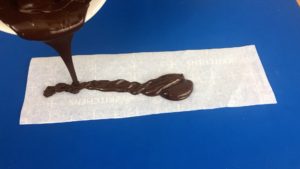
Melt some chocolate and my favourite way to do this is in the microwave for a minute at a time at 50% power, stirring after each time, so that the chocolate doesn’t burn and seize. Pour the melted chocolate over the parchment paper.
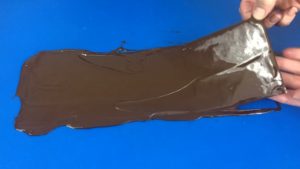
Spread it all over the paper, going right up over the edges, and don’t worry about getting it smooth because this side is going to be pressed against the cake so you won’t see it. The thicker the chocolate is, the less fragile for the next step, so don’t spread it too thin.
Now you’ll need a crumb coated cake. The frosting on the cake doesn’t need to be perfect for this since you’ll be covering it with chocolate, but the cake does need to have straight sides and the shape you want it to have because the chocolate will mold onto that shape. Lift the parchment paper with chocolate up, sliding your hands underneath it.
Rest the bottom of the paper down on the cake board to line it up and lift upwards to press it against the side of the cake. The comb coat needs to have set for this, so I put my cake in the fridge for an hour before this step.
Wrap the chocolate all the way around the cake, making sure the bottom of the parchment rests on the cake board so that there isn’t any cake exposed at the bottom. You can do this with any shape of cake and I’m doing heart for this one. For a circle this is simple – just press it all the way around the cake, but for a shape with angles like this heart you can pinch the parchment at the point at the bottom of the heart so that the chocolate doesn’t curve around it instead of forming that sharp point.
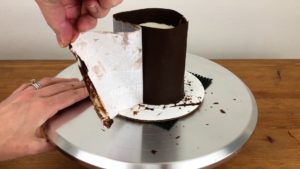
Put the cake in the fridge to chill and set the chocolate for about an hour and then carefully peel the paper off, starting with a corner at the top because that’s the easiest to pinch, and as the parchment peels off you’ll leave a smooth chocolate wall around your cake!
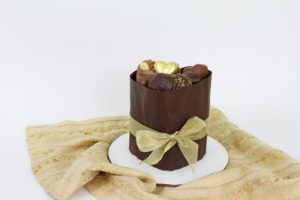
You can decorate this however you like, like with a ribbon tied around it and using cake toppers is fun – I put a variety of chocolates on top of this one.
Store the cake in the fridge until about 2 hours before serving it so that the chocolate doesn’t melt.
To cut into it neatly, dip a sharp knife into hot water before each slice.
If you prefer to watch a video of this tutorial, click the play button below:
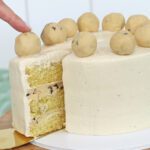
In this cookie dough cake, cookie dough is sandwiched between super soft vanilla cake layers and covered with silky smooth brown sugar frosting. It’s a rich cake but not overly sweet. Everyone who has tried it loves it!
There are quite a few parts to this cake but I’ll show you the quickest way to make and assemble it all.
Make the cake layers
I use my Very Vanilla cake layers for this cake but my Perfect Chocolate Cake tastes delicious with the cookie dough filling and brown sugar frosting, too! You'll find the ingredients and step by step instructions for the cake layers at the bottom of this page.
Prepare the base for the brown sugar frosting and cookie dough filling
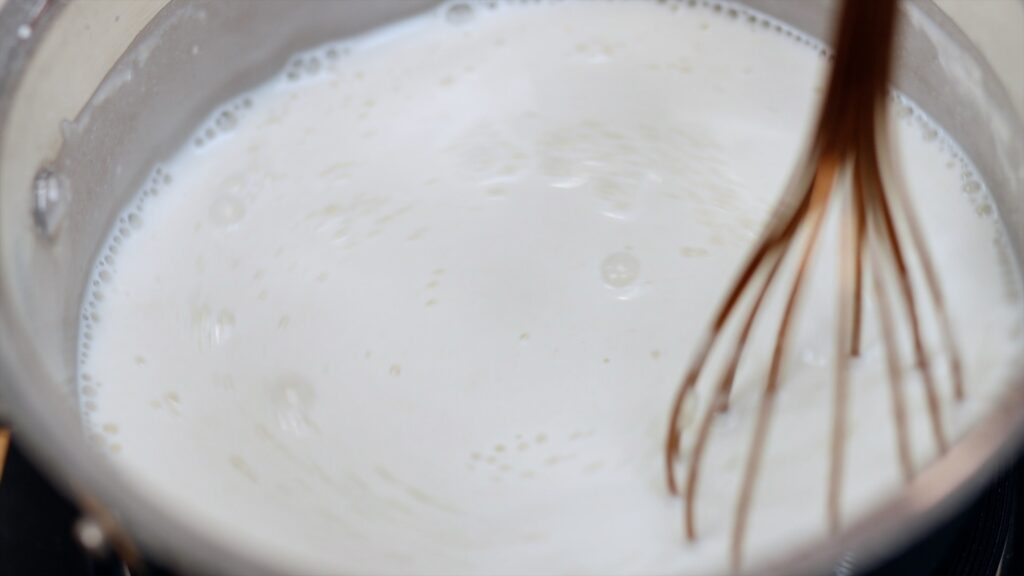
Start by preparing the brown sugar frosting, which begins by cooking flour, milk and salt over a medium low heat for about 5 minutes. Whisk it constantly until it simmers to prevent any lumps forming.
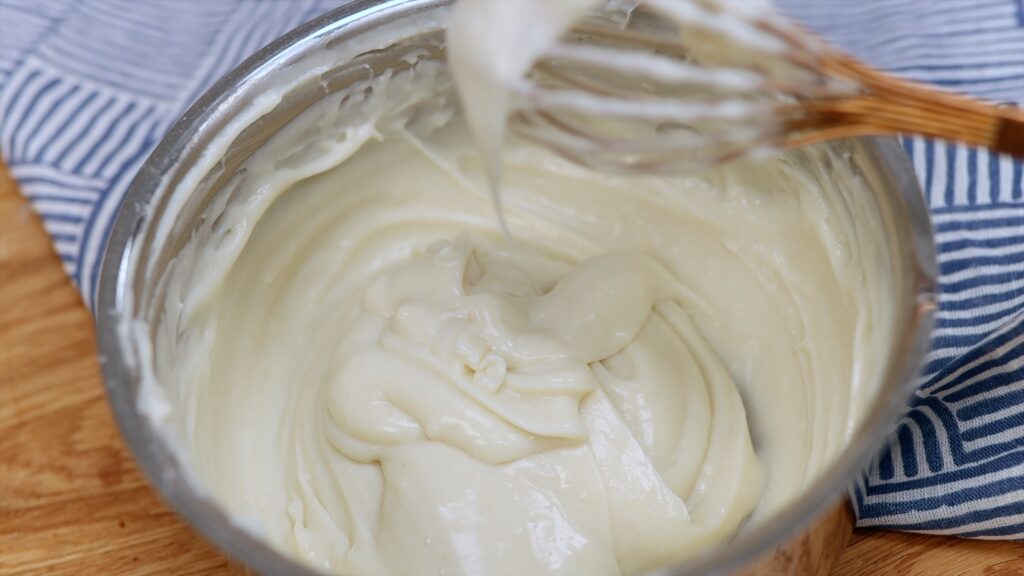
The mixture will thicken suddenly so don't stop whisking for a moment! As soon as it starts to thicken, switch to a spatula. Scraping along the bottom and sides of the pan, stirring for about two minutes until the mixture thicken enough to leave ribbons when you lift the whisk:
It needs to be thick enough to holds its texture when you stir it. It will feel somewhere in between being liquid and solid.
Remove the pan from the heat and add vanilla. Mix that in and then transfer the mixture into a bowl. Cover it with plastic wrap and put it in the fridge to cool to room temperature. It will thicken to a pudding-like consistency.
Now for the cookie dough, bake flour for 5 minutes at 350F or 175C. This kills any bacteria so that it’s safe to eat the cookie dough raw. Let the flour cool and then sift it to get rid of any lumps.
Make the cookie dough filling
In the bowl of an electric mixer, mix butter and brown sugar together at medium speed until it’s light and creamy. It will take about 5 minutes. This is going to the base of the cookie dough AND the brown sugar frosting. Take a third of this out now to use for the cookie dough. If you want to weigh a third, it will weigh 193g.
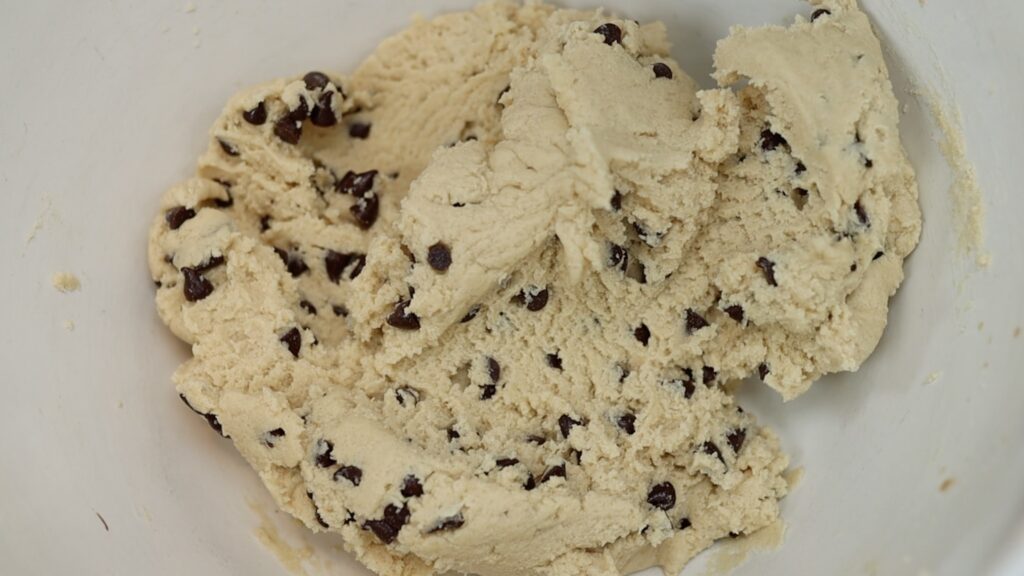
Add vanilla, mix it in, and then add the cooled flour and mix that in. The dough will get crumbly so add milk to pull everything together. It will become the consistency of cookie dough. Add mini chocolate chips and fold them into the dough. I like using semi-sweet chips since it balances the sweetness of the cookie dough. Mini chips are the perfect size because I think full size chips are too big and hard to bite into within a cake.
Divide this cookie dough into three equal parts: two for the filling between cake layers and one for cookie dough balls for the top of the cake.
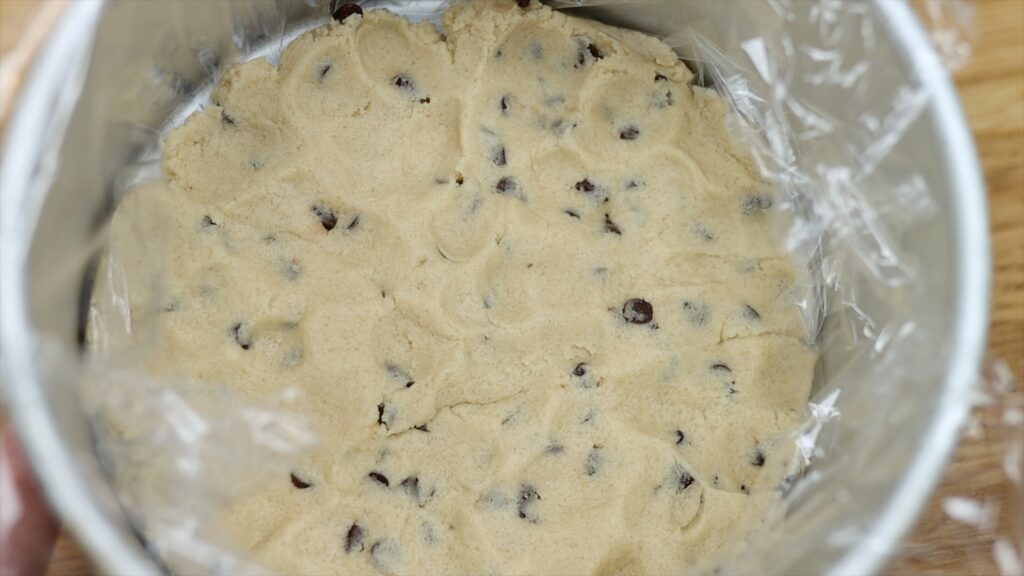
For the filling, you'll need two pans that you baked your cakes in. Line the pans with plastic wrap. Then put one part of cookie dough in each and push it down to the bottom of the cake and up to the edges, to make a flat layer. Fold the plastic wrap over the dough to wrap it up within the pans and then put the pans in the freezer while you prepare the rest of the cake.
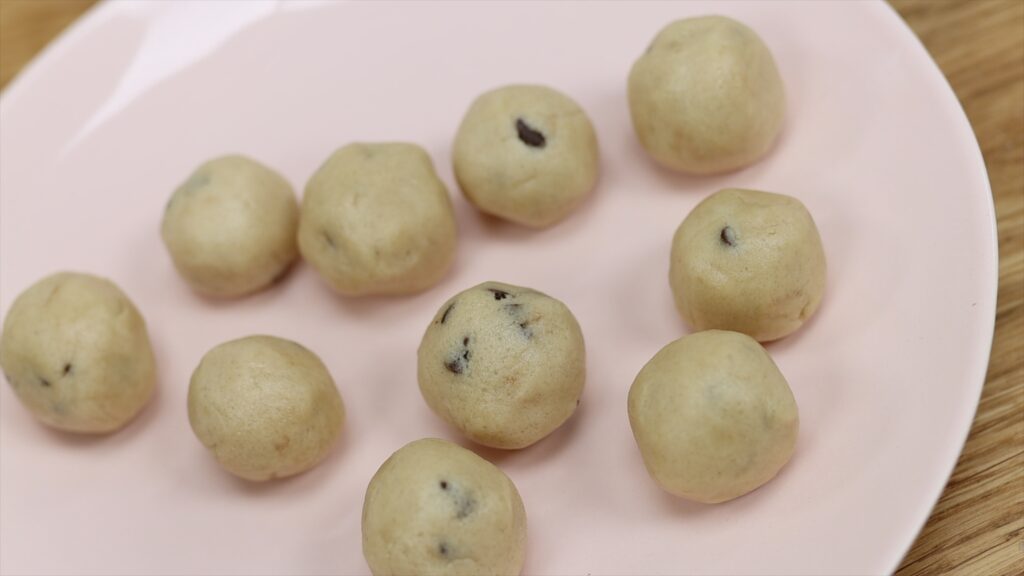
For the final part of cookie dough, use a teaspoon to scoop it up and then roll it between your hands to make 10 cookie dough balls. Put them on plate in the fridge until you’ve frosted your cake.
Make the brown sugar frosting
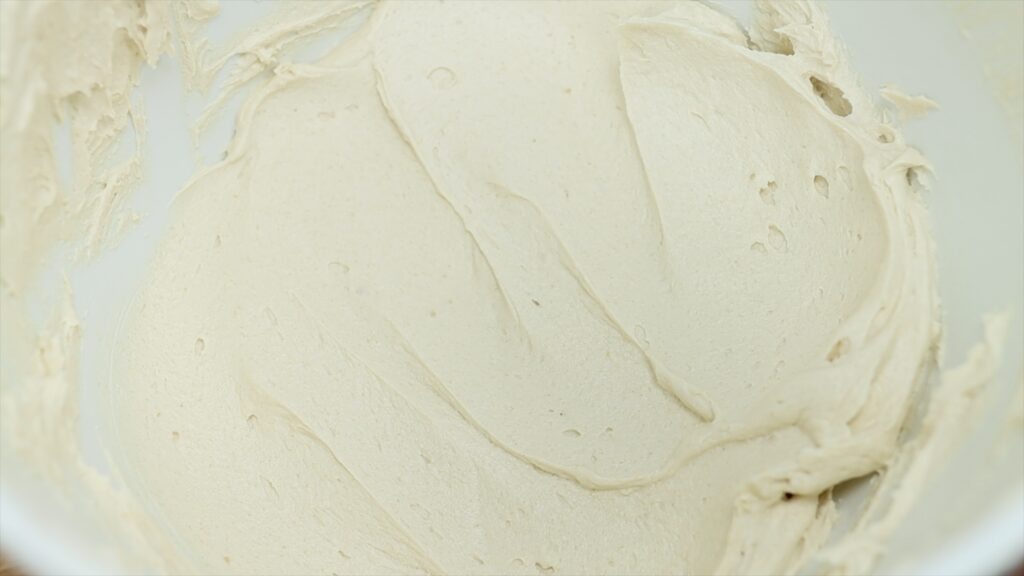
To finish off the brown sugar frosting, take the cooked flour and milk mixture out of the fridge. Add it to the rest of the butter and brown sugar in the mixer. Mix it at medium speed for 5 minutes, until it’s smooth and lighter in colour. Look how silky and decadent this frosting is! I can’t wait for you to taste it!
This brown sugar frosting has a LOT less sugar in it than buttercream so it’s not very sweet at all, which pairs perfectly with the sweet cookie dough filling.
If your frosting doesn’t thicken it could be for two reasons. First, if you don't cook the milk and flour mixture for long enough, until it thickens, your frosting won't thicken. Second, if you add the cooked milk and flour mixture to the butter and sugar before it cools to room temperature it will melt the butter and also won't thicken.
Assemble the cookie dough cake
Take the pans of cookie dough out of the freezer and unwrap them from the plastic wrap. You’ll have two identical cookie dough discs. They'll be cold enough to hold their shape so you can move them around easily as you assemble your cake.
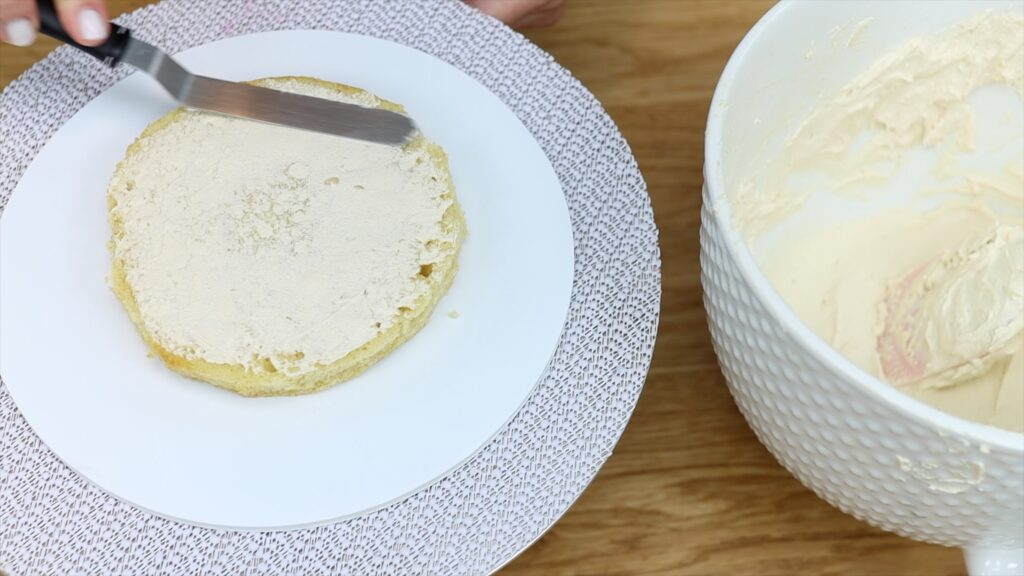
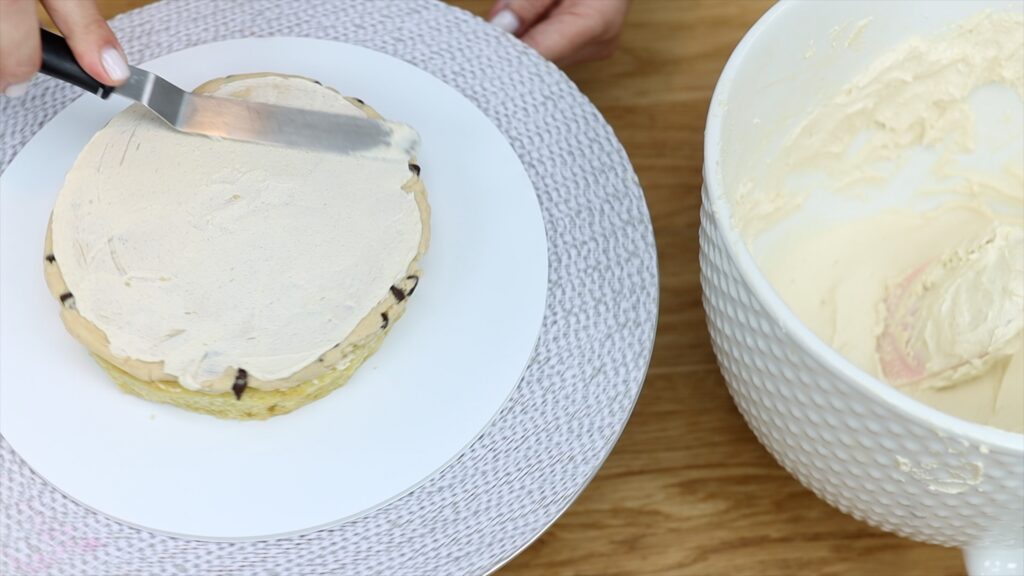
Spread a dot of brown sugar frosting onto the middle of a cake board and press your first layer of vanilla cake onto it. Spread a very thin layer of brown sugar frosting over the cake. This will act as glue to attach the first cookie dough disc.
Spread another thin layer of frosting over the cookie dough to attach your next cake layer and repeat.
If you trimmed the sides of your cake layers, the cookie dough discs will stick out. Use some sharp kitchen scissors to cut off the excess cookie dough so that the sides of the cake are straight. This will make frosting the cake easier.
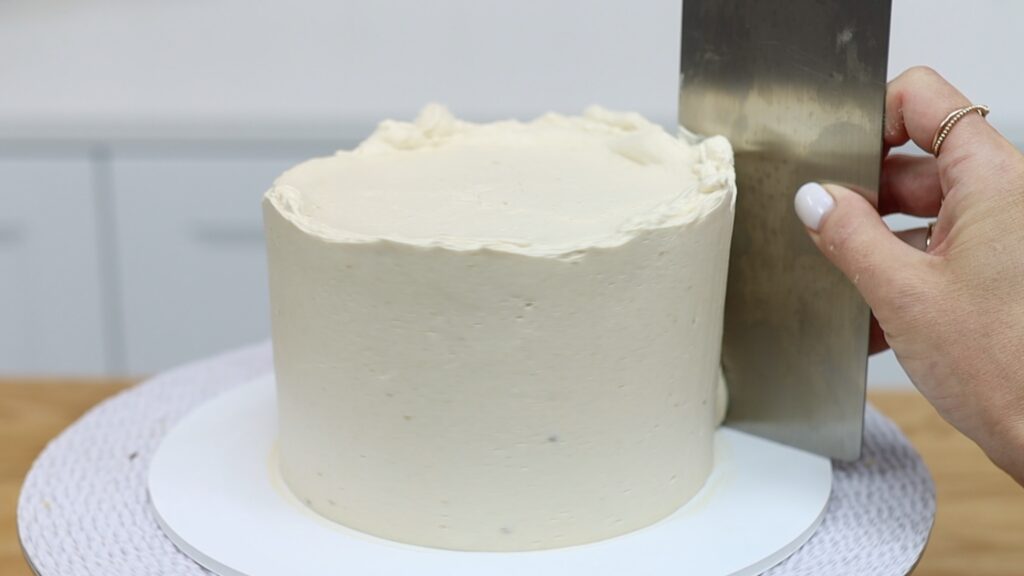
Spoon the frosting onto the cake and cover the top and sides of the cake with a thin layer of frosting. This is called a crumb coat and it traps any crumbs that come off the cake. Then spread another layer of frosting on top, which won’t have any crumbs in it since those are all stuck in the first layer of frosting. This brown sugar frosting spreads onto the cake like a dream and it’s easy to smooth it, too.
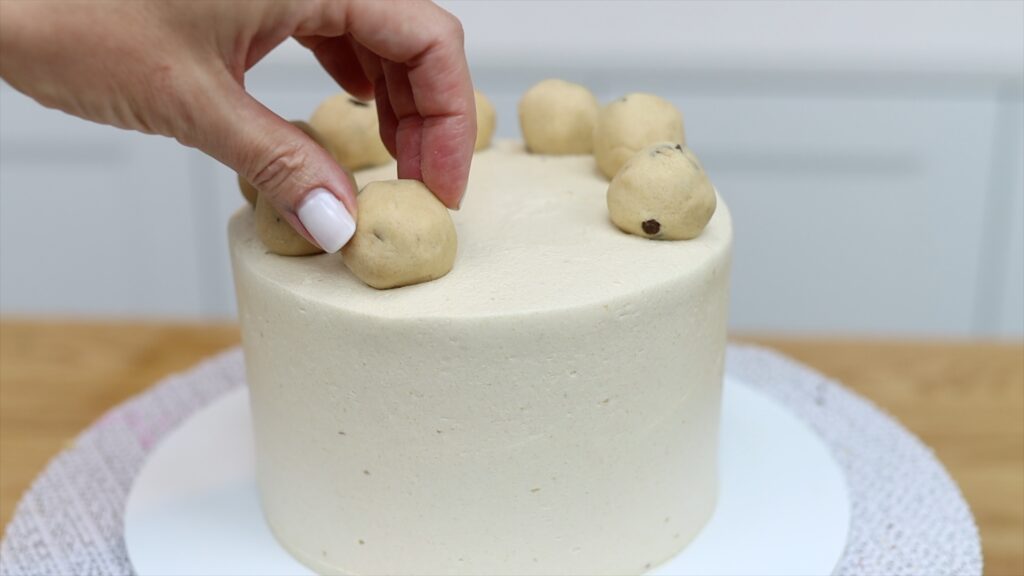
Take your cookie dough balls out of the fridge. They’ll be cold and firm enough to place around the top of the cake without losing their shape. Press them gently into the frosting to attach them.
How to store and serve this cookie dough cake
Wait about 30 minutes before serving the cake so that the cookie dough discs warm up and soften, which will make it much easier to cut through them.
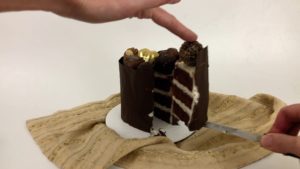
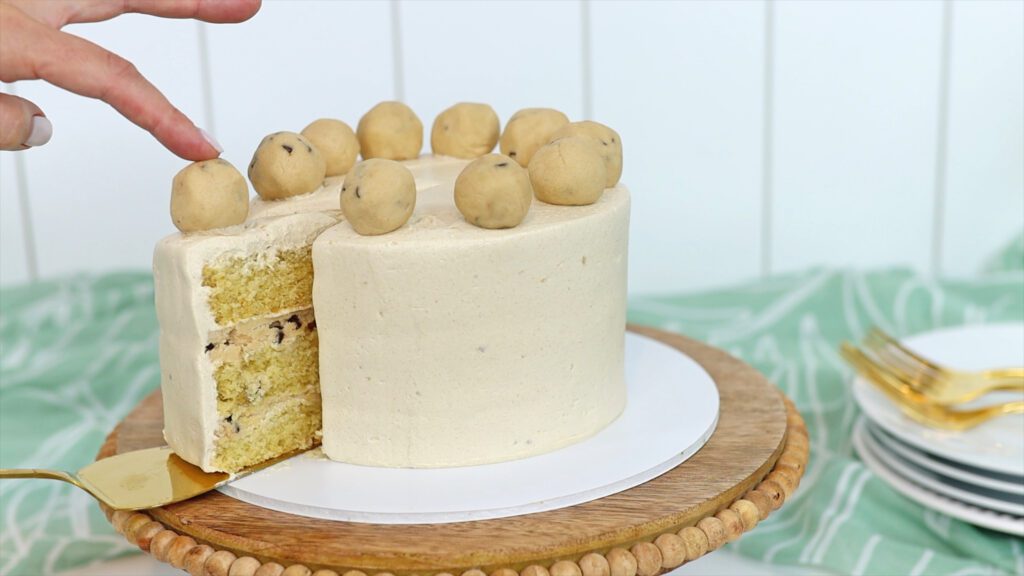
Look at the gorgeous cross section of these slices! I really can’t wait for you to make this cake and tell me in the comments if you’re as obsessed with it as I am!
The cake and frosting taste best at room temperature. If you make the cake in advance, store it in the fridge for up to 2 days but take it out of the fridge 2-4 hours before you serve it. This gives it time to come to room temperature and everything softens up.
This recipe makes a three layer 6″ cake. Double the recipe below by clicking "X2" to make a three-layer 8" cake.
You can watch a video tutorial for how to make and decorate this cake at the bottom of the page!
2. Add egg and vanilla, mixing on the lowest speed until incorporated, about 1 minute seconds.
Cookie dough is sandwiched between super soft vanilla cake layers and covered with silky smooth brown sugar frosting. This cake is rich but not overly sweet. Everyone who has tried it loves it!
Ingredients
UnitsScale
For the cake:
1/2cupunsalted butter
2/3cupwhite sugar
2 eggs
1 teaspoon vanilla extract
1 tablespoon vegetable oil
1/4cupbuttermilk
1 1/4cupsall-purpose flour (plain flour)
1/2 teaspoon baking soda
1 teaspoon baking powder
1/8 teaspoon salt
For the base of the cookie dough filling and brown sugar frosting:
1 1/2cupsunsalted butter
1 1/2cupsbrown sugar
For the brown sugar frosting:
1cup whole milk
1/3cupall-purpose flour (plain flour)
1/4 teaspoon salt
2 teaspoons vanilla extract
For the cookie dough:
1 teaspoon vanilla extract
1cupall-purpose flour (plain flour)
1/4 teaspoon salt
1 tablespoon milk
1/4 cup mini chocolate chips
Instructions
For the cake:
In a mixer with a beater/paddle attachment, beat room temperature butter and sugar on medium speed until pale and creamy, about 2 minutes. Scrape down to the bottom of the bowl once during mixing to make sure no butter or sugar is stuck at the bottom.
Add eggs one at a time, mixing on the lowest speed after each addition for 30 seconds. Scrape down to the bottom of the bowl to make sure everything is incorporated before adding the next egg.
Add vanilla and mix for about 30 seconds to combine.
In a small bowl or measuring jug, mix room temperature buttermilk and oil. Add half to the butter mixture and mix on lowest speed to incorporate.
In a bowl, sift flour, baking soda, baking powder and salt. Add half of the flour mixture to the mixing bowl and mix on lowest speed to incorporate, scraping down to the bottom of the mixing bowl to check that batter is evenly mixed. Add the remaining buttermilk mixture, mix to combine and then mix in the remaining flour mixture.
Grease three 6" baking pans with non-stick oil spray or butter. Divide batter equally between the cake pans.
Bake at 160ºC or 325ºF for 30 minutes, or until a toothpick inserted into the middle of the cake comes out clean.
Leave cakes to cool in their pans for 10 minutes. Use a spatula to loosen the cakes from the edges of the pans and then turn onto a wire cooling rack. Leave to cool completely.
Prepare ingredients for the brown sugar frosting and cookie dough:
For the brown sugar frosting, whisk together flour, milk and salt in a small pan. Cook over medium low heat, whisking constantly, until the mixture starts to thicken. Switch to a spatula and stir, scraping around the bottom and sides of the pan, until the mixture starts to bubble, about 5 minutes. Continue cooking and stirring for 2 more minutes and then remove the pan from the heat and stir in vanilla.
Transfer to a bowl and cover with plastic wrap, pressing the plastic wrap down onto the surface of the flour mixture. Refrigerate for 30 minutes.
Meanwhile, spread 1 cup of flour out on a baking tray and bake at 350F for 5 minutes. Sift it and set aside for the cookie dough.
Now make the base for the brown sugar frosting and cookie dough. In the bowl of an electric mixer, cream butter and brown sugar together at medium speed until light and creamy, about 5 minutes. Transfer a third of the butter and sugar mixture into a bowl. A third of the mixture will weigh 193g (or double, if you're doubling this recipe!). Set aside for cookie dough filling.
To make the cookie dough:
Add vanilla to the butter and brown sugar mixture in the bowl you set aside. Mix to combine.
Add cooled and sifted flour and mix until crumbly.
Add milk and chocolate chips and stir until the mixture is the consistency of cookie dough. Divide into three equal parts.
Line two baking pans (the same sized ones you used to bake your cake) with plastic wrap and put one part of cookie dough into each pan. Press the cookie dough down into the plastic wrap at the bottom of the pan and up to the edges of the pan. Fold the plastic wrap over the top of the cookie dough to seal it. Put the pans of cookie dough in the freezer until you're ready to assemble the cake.
For the final part of cookie dough, use a teaspoon to scoop up the cookie dough and roll it between your hands to make a cookie dough ball. For a 6 inch cake you'll have enough cookie dough to make 10 balls. Place on a plate and put the plate in the fridge until you've frosted the cake.
To make the brown sugar frosting:
Add cooled milk and flour mixture to the remaining butter and sugar mixture in the mixer bowl. Beat on medium speed until smooth, about 5 minutes.
To assemble the cake:
Spread a dot of the brown sugar frosting onto a cake board and press the first layer of vanilla cake into it. Spread a thin layer of frosting onto the cake layer.
Take the pans of cookie dough out of the freezer and peel off the plastic wrap. Placed one cookie dough disc onto the first cake layer and spread a thin layer of frosting on top. Press the next cake layer on top. Spread a thin layer of frosting onto this cake layer, then place another cookie dough disc on top, and spread another thin layer of frosting onto the cookie dough. Place the final cake layer on top.
Frost the cake with the brown sugar frosting. I recommend applying a thin layer first, called a crumb coat, to trap and crumbs and then spreading and smoothing a final layer on top.
Take the cookie dough balls out of the fridge or freezer and space them evenly around the top of the cake. Press them into the frosting to attach them to the cake.
Notes
Store this cake in the fridge but take it out at least 2 hours before serving to let the cake and frosting come to room temperature, when it tastes the best!
If you don't finish the cake, cover the cut side with plastic wrap to prevent the cake from drying out.
If you only want to make the cookie dough filling, use only 1/3 of the base ingredients
To make a three-layer 8 inch cake, double the recipe by clicking "X2" at the top right of the recipe.
I’m going to show you how to make 10 EPIC rainbow cakes! If you prefer to watch a video of this tutorial, scroll to the bottom of the page.
1. Rainbow Stencil Cake
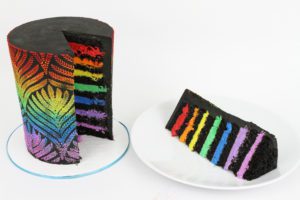
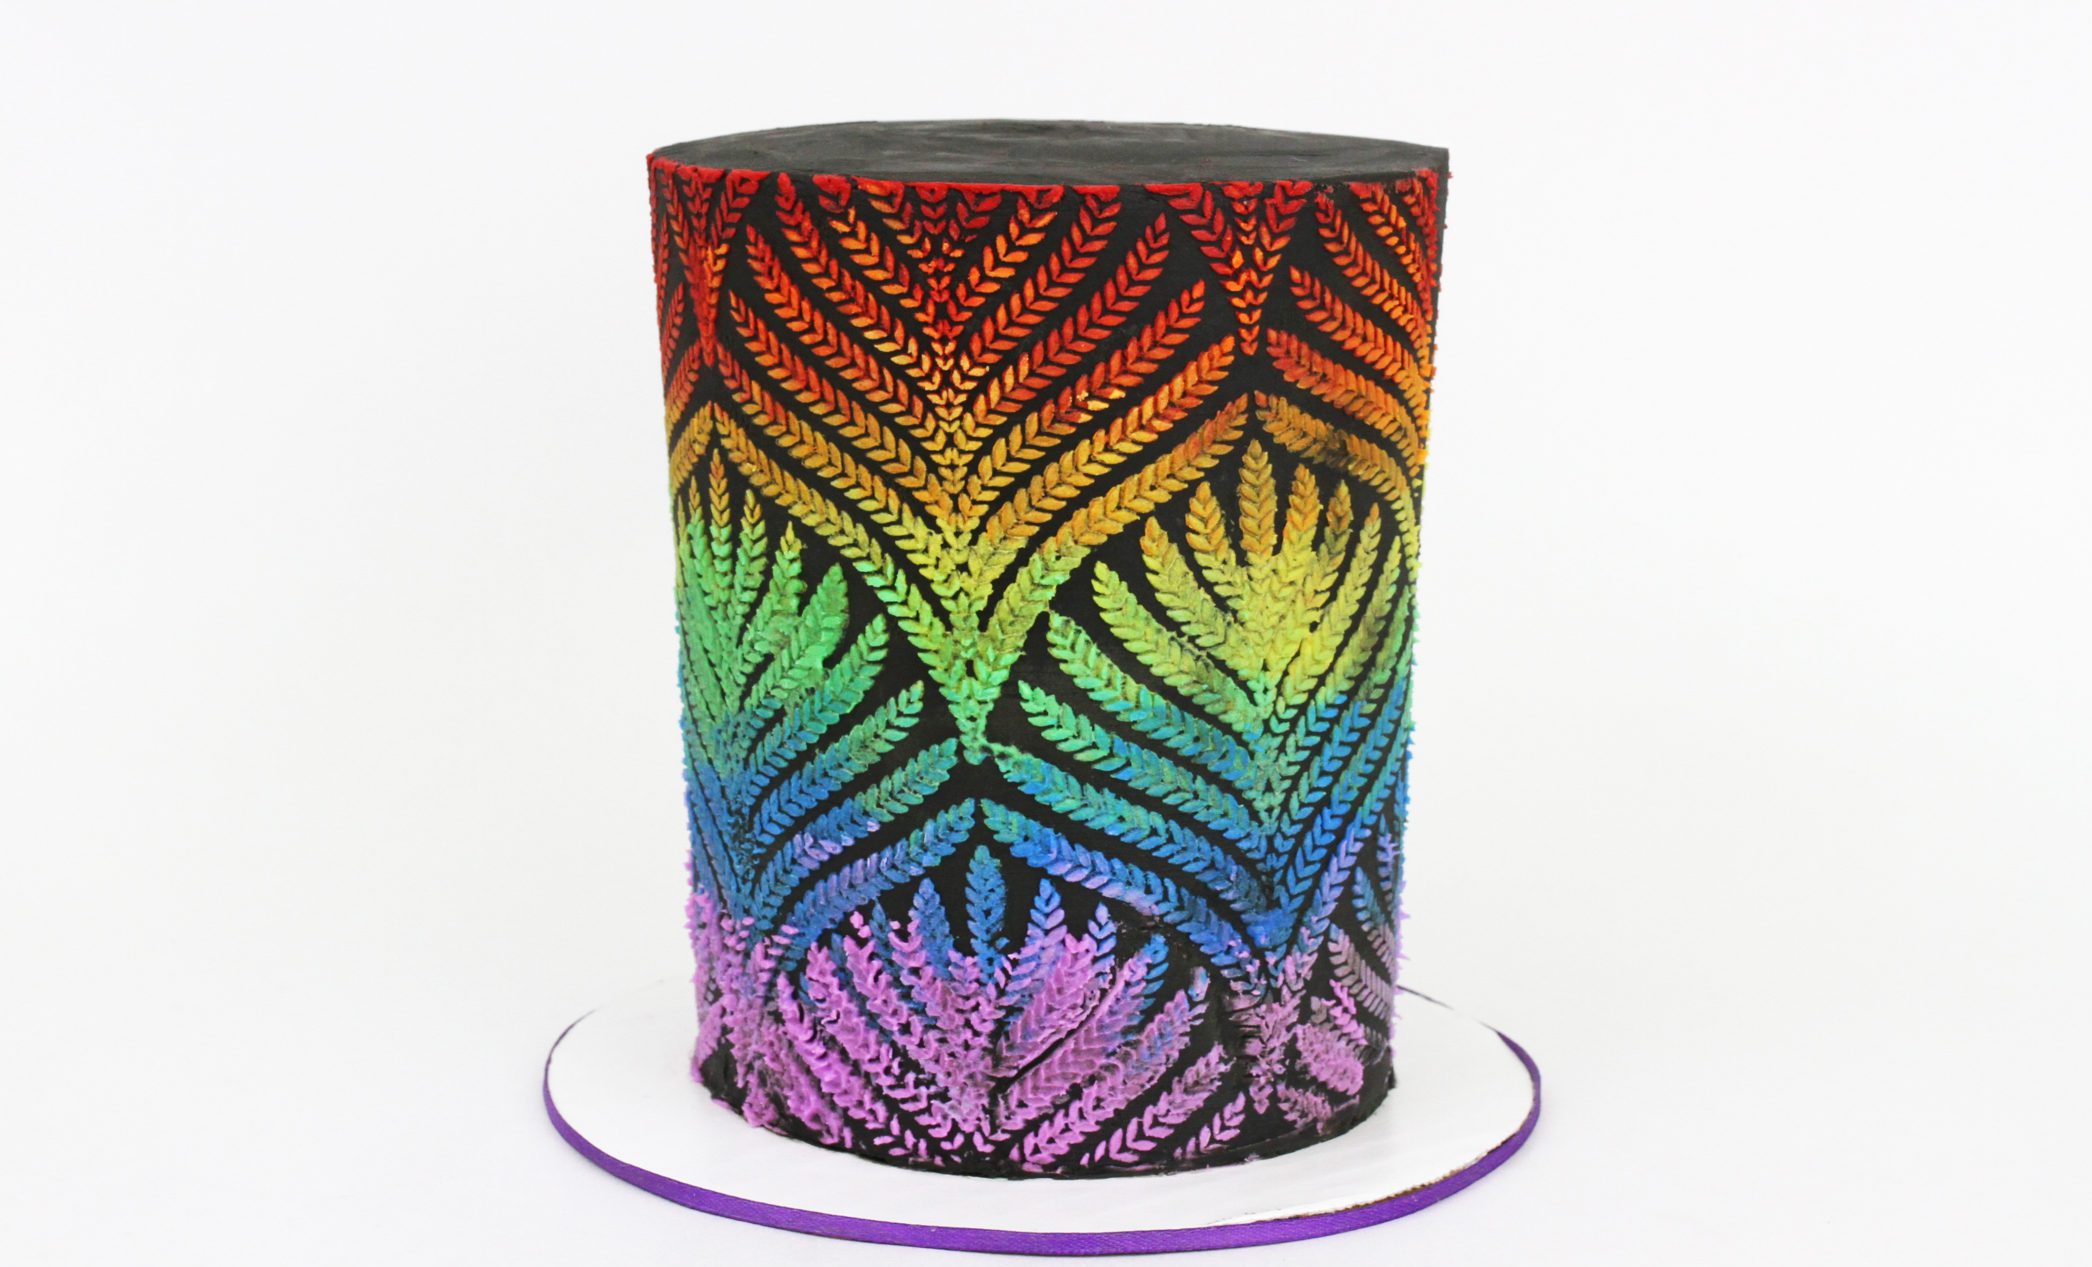
I’ll start with this dramatic black cake with a rainbow stencil design and it has a rainbow on the inside as well!
To assemble the cake I’m dividing 4 cake layers in half to make 8 layers, which will make space for 7 layers of filling – one for each colour of the rainbow!
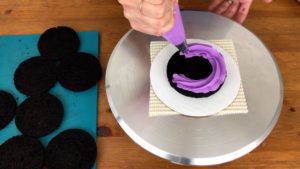
Spread or pipe rainbow coloured filling onto each layer. I’m using a 1M star tip but you can use a piping bag with no tip for this, or spread on the filling onto the cake layers with an offset spatula instead.
This is my 4 Minute Buttercream and I’ve used gel colours to tint small batches of each colour. Save any leftover buttercream of each colour to use for the rainbow cake decorations later.
I’m using my black buttercream to frost the cake, which I love because it’s a deep black colour but won’t stain your teeth when you eat it!
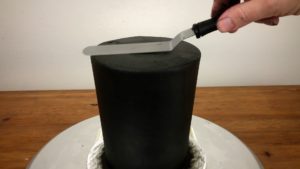
After giving the cake a crumb coat and letting it set, add a final coat of frosting. If you’re struggling with smooth frosting, check out my tutorial on how to get perfectly smooth frosting with sharp edges. You can use any colour for this but I love how the rainbow colours stand out on black frosting.
Chill the cake to set the frosting before using the stencil. You need to it be very firm so leave it in the fridge for at least an hour.
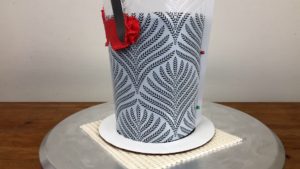
You can use any design of stencil and if you want the design to go all the way down to the bottom of the cake you can cut the bottom section off.
I’m going to use the leftover buttercream from filling my cake, to apply onto the stencil. If you do this, cover the frosting with cling film or saran wrap until you’re ready to use it so that it doesn’t crust.
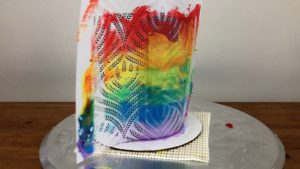
Place your chilled cake on a nonslip mat on a turntable and line the stencil up so it’s resting on the cake board, to make sure the design goes all the way down to the bottom of the cake, and then wrap the stencil around the cake and pin it into the cake to secure it.
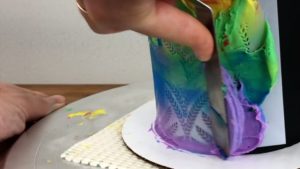
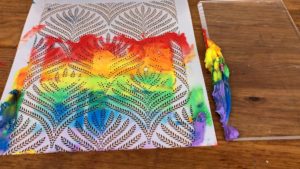
Now spread your first colour onto the stencil with your offset spatula, covering the entire width of the stencil. Don’t worry about the buttercream being smooth yet.
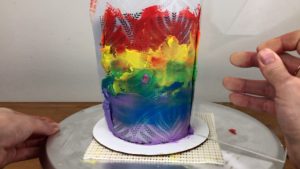
Use all of your buttercream colours to spread rows of buttercream onto the stencil. The rows don’t have to be perfectly even or straight because they’re going to blend together in a minute, so it doesn’t need to be precise.
When the stencil is covered with buttercream, scrape off any excess buttercream to leave a smooth layer, which should be as thin as possible for the neatest results. You can use an offset spatula for this but I find it easier to get a smooth finish with a frosting smoother.
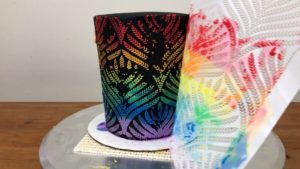
Pull out the pins and peel the stencil off, being careful not to let any part of the stencil brush against the cake again after you’ve lifted it because that will smudge the design.
Chill the cake again to set this part of the design and then wrap the stencil around the next part of the cake, pinning it in place again. It’s essential to let the first section of the design set before doing this, otherwise you’ll smudge it when you press the edge of the stencil over the first section.
You’ll need to wash and dry the stencil and your frosting smoother after doing each section. Repeat the process until you’ve covered the whole cake with a beautiful rainbow coloured stencil design!
Tidy up the top edge by scraping off any buttercream sticking up, using your offset spatula, and because the frosting on the cake is chilled and set, you’ll be able to scrape the buttercream of the stencil design off easily without damaging the frosting on the cake.
If there are any areas where the design didn’t go through the stencil you can chill the cake again and then carefully line the stencil up over that area and spread more buttercream over it to fill in that part of the design.
It’s a bit tricky to line it up perfectly but with a busy pattern like this you won’t really notice if the design isn’t perfectly lined up.
2. Rainbow Number Cake
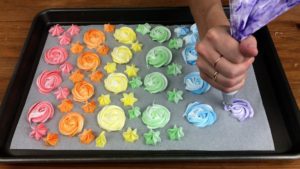
If you hate smoothing frosting, this rainbow number cake is for you! Start by making rainbow coloured meringues, and I cover the recipe and all of the steps for this in my full tutorial on how to make this Rainbow Number Cake from start to finish.
Then optionally, carve your cake layers. You can create this rainbow cake with numbers or letters or shapes or just use plain round or square cakes right out of the baking pan.
Attach the cakes to a cake board using dollops of buttercream wherever you want them to go and the buttercream will act as a glue to secure the cake layers.
Pipe buttercream onto each cake using a piping bag fitted with whatever tip you like. Here I’m using a 1A round tip, but you can pipe swirls or rosettes or open stars if you prefer.
After covering the first layer of cake with piped buttercream, carefully lower the next layer of cake on top. If you’re nervous about needing to adjust the cake to shift the position, which would smudge the piped buttercream below, you can chill the whole cake on the cake board to set the piped buttercream before adding the next layer of cake.
Pipe another layer of buttercream onto the cake. For naked cakes like this I use simple syrup to keep my cake layers moist and I store them in an airtight container overnight so that they don’t dry out by the next day.
Immediately after piping on the final layer of buttercream, arrange your rainbow meringues on top of the buttercream. Since the buttercream is fresh and sticky they’ll attach easily.
I added rainbow macarons as decorations as well – you can get creative with rainbow coloured candies or flowers, or if you want a touch of gold you can use chocolates with gold wrappers. This is such a simple cake to put together but it’s a real showstopper!
3. Rainbow Sprinkled Frosting Cake with Rainbow Sprinkled Oreos
This is a really fun way to incorporate sprinkles into your cake!
Set aside a little bit of frosting for touchups and piping swirls later and then pour a generous amount of sprinkles into the rest of your frosting. I find that these little rods, or jimmie sprinkles, work the best. You probably won’t notice the shape of shaped sprinkles (unicorns, hearts etc) because they’re unlikely to end up facing outwards.
Give your cake a crumb coat, let it set, and then frost your cake as normal with the sprinkled buttercream.
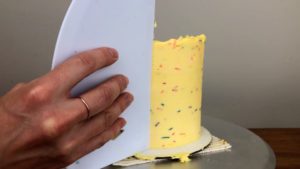
You’ll notice that when you smooth the frosting, some of the sprinkles will get caught by your frosting smoother and dragged around the cake and they’ll leave a trail behind, an indent in the side of your cake.
Before using your frosting smoother to scrape around the cake again, spread on some of the frosting without sprinkles that you set aside at the beginning.
When you scrape around the cake with your frosting smoother again, the plain buttercream will fill in any indents made by the sprinkles and your frosting will be smooth! Tidy up the top edge and spoon the rest of your buttercream without sprinkles into a piping bag with a 1M star tip, for later.
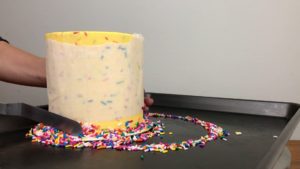
Chill your cake for the next step and now we’re ready for some really fun sprinkled decorations! To make a very neat sprinkle border around the bottom of the cake, place your cake on a baking tray to catch any sprinkles that fall and pour your sprinkles around the cake board.
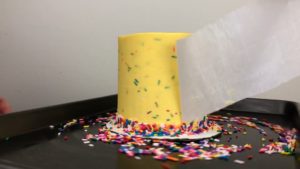
Wrap a strip of parchment paper around the cake, leaving the bottom inch or two exposed and that’s where the sprinkles will stick to the frosting. The cake needs to be chilled otherwise the parchment will texture and damage the freshly-applied frosting. You can use pins to attach the parchment paper to the cake or just hold it in place. Press the sprinkles into the frosting using your hands or an offset spatula or a spoon.
You’ll have to use quite a bit of pressure to get the sprinkles to stick because the frosting has set, but the advantage of this is that you won’t damage the frosting, which you might do if it was still soft. If you like, you can spread fresh buttercream onto the frosting that’s exposed below the parchment and press the sprinkles onto that instead. Peel the parchment paper off to reveal your sprinkle border!
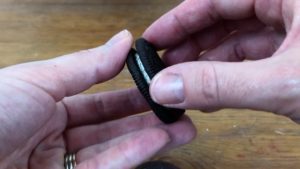
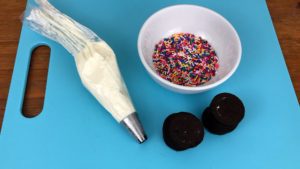
Separate Oreos or any other sandwich cookies. We want the halves with no filling, and the most effective way to separate them neatly is to pull the two halves apart, rather than twisting them, because if you twist them you usually end up with half of the filling on one cookie and half for the other.
Use the halves with no filling, or if you want you can scrape the filling off the other halves and use those too. I need 16 cookies to make 8 cookie sandwiches, because I’m going to pipe 8 swirls on top of my cake and I need a cookie sandwich for each swirl. You’ll also need buttercream in a piping bag with a round tip and a bowl of sprinkles.
If you want more of the Oreo filling flavour you can stir the scraped cookie filling into your buttercream! Pipe a ring of buttercream onto a cookie, not going right up to the edges because you don’t want it to bulge out later, and then gently press another cookie on top to make a cookie sandwich.
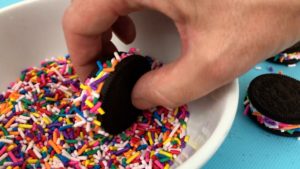
Now roll the cookie in the bowl of sprinkles so that the sprinkles stick to the buttercream you’ve just piped on, spinning the cookie between your fingers so that the whole ring of buttercream is coated with sprinkles.
Do this for all of your cookies. If the sprinkles are sticking out in every direction you can roll the cookie along a cutting board or a baking tray to push them in so they’re a bit tidier.
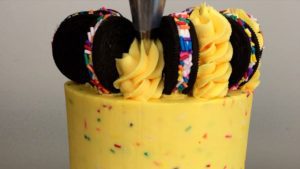
Now take your piping bag and your Oreos and we’re going to decorate the top of the cake! Pipe a dab of buttercream at 8 places around the outer edge of the cake, piping opposite each one to space them evenly around the cake.
This fresh buttercream will act as a glue to attach the cookies. Press a rainbow Oreo into each dab of buttercream, pushing firmly down to secure it.
Hold your piping bag in between two cookies and pipe a swirl, going right up to the sides of the cookies and stopping the swirl when you get to the top of the cookies.
By placing the Oreos first, you’re making sure that the swirls and Oreos are spaced evenly around the cake and that the swirls are the same width and height.
As a sidenote, this is one of my favourite rainbow cakes, with sparkly stripes of rainbow colours and a shiny sugar topper. I teach how to make this step by step in an online class on my online cake school.
4. Rainbow Cake Layers
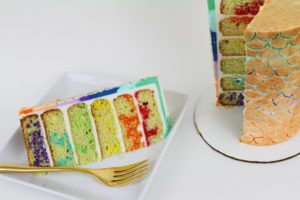
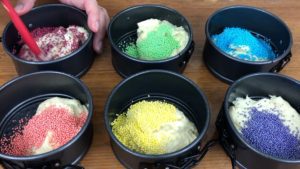
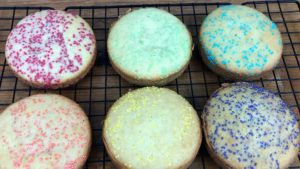
This is another cake with rainbow layers on the inside, this time with rainbow coloured sprinkles baked into the cake layers.
Tiny non-pareil sprinkles work really well for this because they dissolve as they bake, leaving their colour in speckles throughout the cake without adding any texture to the cake.
Divide your batter between your greased cake pans. Pour the sprinkles into the pans and then gently swirl them in using the end of a spatula or spoon. You can do this in bowls instead and then pour the batter into pans, but this makes less mess!
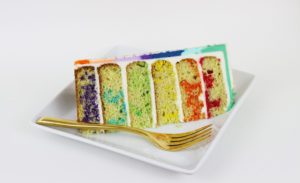
You’ll need quite thin layers of cake for this because you’re going to have lot of layers – I’m using six but you can do more or less if you like. Bake the layers as normal and you’ll see the pretty specks of colour in them.
Let them cool and then assemble your cake by layering the cakes with filling. I’m going in the order of the colours of the rainbow with purple at the bottom and red at the top.
Give your cake a crumb coat and since the cake is so tall it’s essential to secure the cake properly to the cake board. I teach how to do that along with mixing, baking, leveling, dividing, assembling, crumb coating, frosting, storing, transporting and serving cakes in my online course, the Basics of Cake.
When you cut into the cake, the inside is just as colorful as the outside!
5. One Bag Piped Rainbow Cake
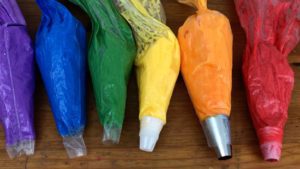
Now for a very very easy technique! Tint small bowls of buttercream with gel colours and the beauty of this technique is that you only need ONE piping bag! You can use whatever star shaped tip you like – I’m using a Wilton 199 open star tip.
Spread out some cling film and along the middle, place a dab of buttercream of each of the colours you’re going to use. It’s possible to spoon the colours straight into a piping bag but much easier this way!
Roll the cling film up and twist the ends and then cut off one end, the end you’re going to start with. Place this end down into your piping bag.
Place a crumb coated cake on a turntable and rest the piping bag on the cake board to start at the very bottom of the cake and squeeze out a little rosette of buttercream from the bag. Continue around the bottom of the cake, piping the rosettes right next to each other so that there aren’t any gaps in between them.
Then move the piping bag up a little bit so that you can pipe another row of rosettes immediately above the previous row. It works well to pipe each rosette of this row in between the two rosettes beneath it, so that it covers up the dip in the frosting and that makes sure the crumb coat is completely covered.
As you continue up the cake you’ll notice new colours slowly start to appear in the rosette you’re piping, as the colours higher up in the bag start to push through the middle of the colors lower down. This makes a really pretty blended effect over the cake as the colours gradually blend from the first colour in the piping bag, all the way through the other colours.
If you run out of buttercream, pull the cling film out of the piping bag and then add more buttercream to the bag. Go all the way to the top of the sides of the cake with your rows of rosettes, and keep piping until your final row sticks up over the top edge of the cake. Then pipe rings of rosettes within that top row, continuing towards the center of the top of the cake to cover the entire surface.
And there it is! Dramatic, colourful texture!
6. Rainbow Russian Tips Tray Bake Cake
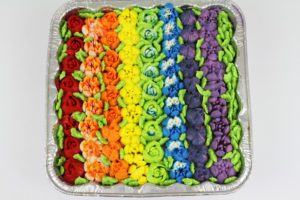
This stunning rainbow flower cake is a tray bake cake, which is the quickest kind cake to make and decorate!
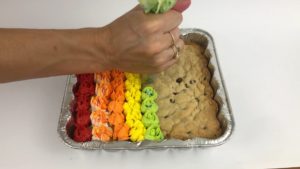
Pour your cake batter or brownie batter or cookie dough into a casserole dish or a baking tray and bake it and then decorate it within that dish or tray, so you don’t have to level and divide and layer your cake, or cover it with smooth frosting.
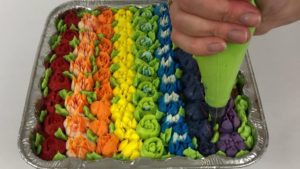
I’m using Russian tips or flower nozzles for this cake with a different bag of coloured buttercream for each row of flowers, some them plain colours, some of them randomly blended, and some of them prepared with one colour for the inner part of the flower and another colour for the outer petals.
This is just a snapshot of how I decorated this cake but I have a very detailed tutorial on 5 Tricks For Russian Tips showing how to get the right consistency for your buttercream and how to prepare the buttercream and use the tips, and another tutorial on how to make and decorate and store tray bake cakes.
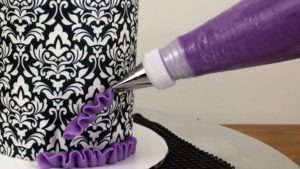
Fit a piping bag with a coupler so that you can use different tips without emptying the bag, and then fill it with a very small amount of purple buttercream and pipe whatever design you like in a small section of the bottom of the cake.
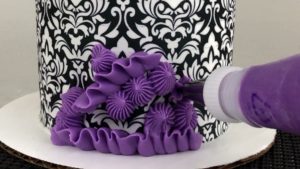
I’m starting with a small petal tip, a Wilton 104, piping little ruffles and then unscrewing the coupler, taking the tip off, and replacing it with a Wilton 199 tip, an open star, to pipe some rosettes. My final tip is a drop flower tip to pipe little stars to fill in any gaps.
I’m following the same steps for blue with my next piping bag, also using a coupler and using the same three tips, washed first of course, or you could use different tips for each colour if you wanted to.
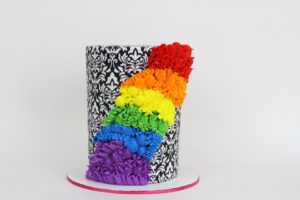
I’m working my way up in a diagonal and I love how the colours and textures stand out against the black and white icing sheet!
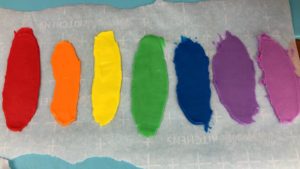
Before frosting your cake, pipe or spread small strips of rainbow coloured buttercream onto a piece of parchment paper placed on a cutting board.
Spread the buttercream as thin and smooth as you can with your offset spatula. Then put the cutting board in the fridge with the parchment paper to chill and set the buttercream for at least 30 minutes.
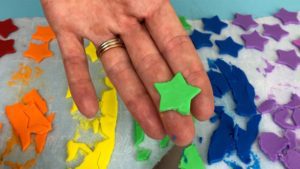
Take it out and use a cookie cutter to cut out shapes. If they pull up with the cutter, gently push them back through the cutter and place them on the parchment paper for later.
Work your way through all of the colours, wiping the cookie cutter clean with a paper towel after each colour so you don’t smudge the stars of the next colour with that previous colour.
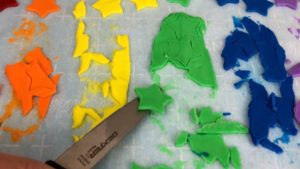
If the stars stay behind on the parchment paper, use a sharp knife to lift them up. If the buttercream starts to warm up and soften as you’re doing this, put the cutting board back with the parchment paper back in the fridge for a few minutes until the buttercream chills and firms up and then continue.
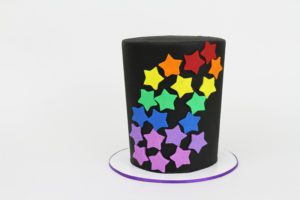
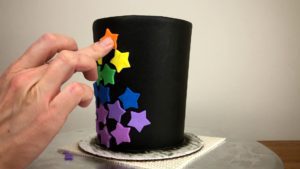
When you’ve set all of the stars to one side, put them back in the fridge while you frost your cake. I’ve used my black cocoa buttercream for this cake. As soon as you’ve smoothed the frosting, while it’s still sticky, take the stars out of the fridge and press them against the frosting so that they stick.
You can create whatever pattern or design you like and these buttercream cut-out shapes have the effect of fondant with the taste of buttercream!
9. Piped Rainbow Heart Cake
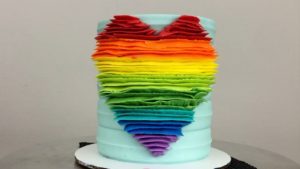
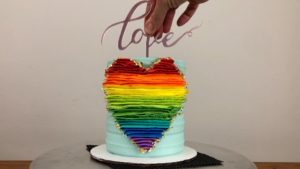
The combination of colours and texture on this cake are eye-catching and good news: it’s much easier to decorate than it looks!
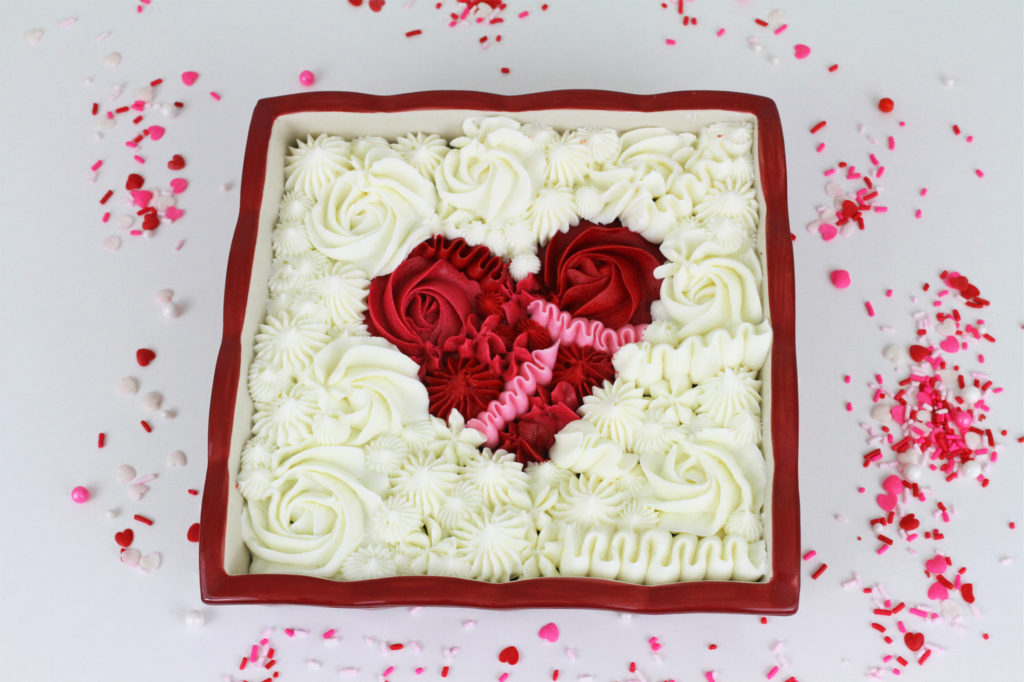
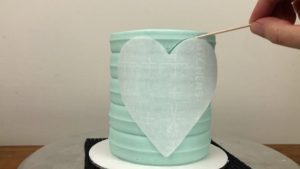
Start by frosting the cake however you like. I’m using a textured cake comb to make textured frosting for this one, This texture is really useful as a guide for how many lines of each colour to pipe. I’m going to use 8 colours so I’ll pipe each colour just between two of the grooves of the texture.
Draw a heart or any other shape onto your cake as an outline for your design. I’ve cut this heart out of parchment paper to trace around but to do this you have to the frosting set before you press the shape against it. I left this cake in the fridge for an hour before doing this.
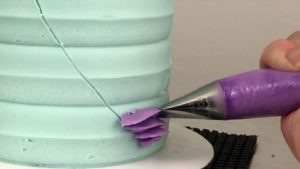
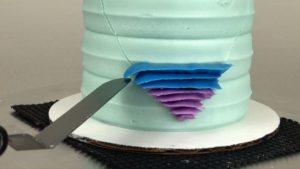
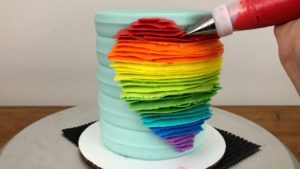
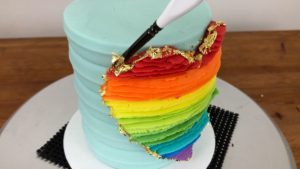
Use a petal tip (I’m using a Wilton 104) and pipe your first colour of buttercream at the bottom of the shape, piping lines that start at one edge of the outline and finish at the other. It’s best to start at the bottom and work your way up because it’s easier to see what you’re doing, and also to hold your piping bag so that you’re piping on top of each ruffle, instead of trying to angle it to pipe underneath the previous ruffle.
If you want to tidy up any of your lines you can use an offset spatula or a toothpick to manipulate them now, while the buttercream is still soft and pliable.
Hold the piping bag with the narrow end of the tip pointing away from the cake and the wider end pressed against the cake and that makes the outer edge of the line really thin and creates a bit of movement, like a ruffle.
If only have one piping tip then having several piping bags and a coupler is really useful so that you can take the tip off, wash it, and use it in another piping bag the next colour, without first having to squeeze out all of the buttercream from the first bag and wash and dry and refill it with the next colour.
This top section of the heart is a bit different, only because you’re piping two separate lines across each ruffle to leave that indent in the top of the heart.
I’ve piped the ruffles a bit too far apart from each other, so you can see the frosting showing in between some of the ruffles. I’m going back in to fill those areas in with some short little ruffles to cover up the frosting, and because the ruffles are so unique and random, you don’t really notice.
Of course, you can use whatever colours you like for this, so you can stick to the 7 traditional colours of the rainbow or vary it, like here where I’ve added teal green and lime green to the spectrum.
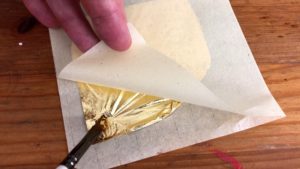
If you want to add a gold outline to the heart, chill the cake in the fridge for about an hour to set the ruffles and then use a paintbrush to lift gold sheets from their baking and transfer them onto the edge of the frosting.
Gold sheets stick to anything they touch so you don’t need a lot of pressure at all for this, just gently guide where you want it to go.
I love how versatile this design is because it makes it so simple to pipe a shape, and the texture and colours are really eyecatching! A pretty topper finishes it off nicely.
10. Vertical rainbow stripes
This last one is a technique I’m really excited about: vertical stripes!
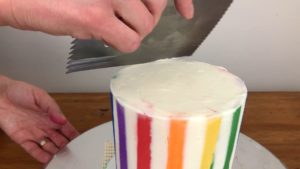
Tape a piece of acetate onto a cutting board and cover it with buttercream. The acetate needs to be at least as tall as the cake and wide enough to wrap around the cake, plus an inch or two. Spread the buttercream so that it’s flat and the same thickness all over. You need to push the buttercream down to fill in the grooves indented in the buttercream, otherwise you’ll have air pockets later.
Scrape the buttercream with a striped cake comb to imprint grooves in the buttercream. I have a very detailed tutorial on this technique with more details about how to imprint really neat stripes and some troubleshooting tips for tidying up the stripes at the end. Chill the buttercream until the buttercream sets, about 15 minutes in the fridge,
While the stripes are chilling, fill piping bags with the colours you’re going to use for your stripes. The piping bags can have no tips or you can use round or open star tips – anything approximately the same width as the stripe grooves will work.
Fill in the stripe grooves with your colours. You need to push the buttercream down to completely fill in the stripe grooves, otherwise you’ll have air pockets later. Don’t worry that you’re smearing the colours together – this is the inside of the cake and this side won’t be visible.
Lift the acetate up, resting the bottom of the acetate on the cake board, and wrap it around a crumb coated cake. Press it to attach it to the crumb coat of the cake but don’t use so much pressure that you warp the stripes.
Chill the cake to set the striped frosting, which will take about 30 minutes in the fridge. Peel the acetate off to reveal the vertical stripes underneath!
You can trim the buttercream if you need to, if the acetate is taller than your cake. Then spread buttercream onto the top of the cake so that it’s the same height as the sides of the cake and smooth it with an offset spatula or frosting smoother.
Do any touchups (I cover those in my full tutorial on vertical stripes) and then decorate the cake however you like! I’m using cling film to prepare buttercream to pipe rainbow swirls on top of my cake, piping on all of the colours into the middle of a piece of cling film.
Wrap the cling film around the buttercream to make a log and then cut off one end and drop it with that end down into a piping bag. I’m using 1M star tip but any closed or open star tip would work.
Pipe swirls onto the top of the cake, holding the bag in the same position around the cake so that the colours stay the same direction all around the cake.
I hope you’ve found some fun rainbow ideas to try and I’d love to see your creations so please tag me (@britishgirlbakes) in your cake photos on instagram!
Here’s the video version of this tutorial:
If you travel to visit friends or family, I’m sure you’ve been tempted to take them a cake but the logistics of taking it on a flight or in a fully packed car seem too daunting. In this tutorial I’m going to share the steps and essential packing list to transport a cake in your suitcase, and also how to do this with cupcakes. If you’d prefer to watch a video version of this tutorial, scroll to the bottom of the page.
Of course, you could bake, frost and decorate your cake, put it in a cake caddy or cake box, and fly with it on your lap or under the seat in front of you. But if your trips look anything like my family trips, with enough suitcases to move countries even though you’re only going somewhere for a weekend, that’s probably not a realistic option.
If you do choose to travel with a fully decorated cake, use a box at least 4 inches bigger than your cake. This provides there’s enough space around the cake so it doesn’t get damaged if you knock the box or you have to put it through a security scanner at the airport. Use masking tape or a non-slip mat to secure the cake board in place inside the box.
For my method to travel with a cake in your suitcase, the first step is to bake your cake. Bake the cake as normal up to a month before you travel.
Level and divide the cake layers it if you want more layers of cake (and filling!). I strongly suggest drizzling the cake layers with simple syrup to keep them moist, since you’re going to be freezing them and because the cake probably won’t be eaten on the same day you take the layers out of the freezer. Make simple syrup by simmering equal parts of water and sugar until the sugar dissolves and once it cools, brush or drizzle it over your cake layers.
Next, make your frosting. If you’re using my 4 Minute Buttercream as a filling, assemble your cake now by spreading buttercream onto each cake layer and lining the next layer of cake up evenly on top. This ensures a straight cake.
I don’t recommend assembling before travelling if you’re using fillings that need to be refrigerated (like lemon curd or whipped cream, because they’ll be out of the fridge for several hours while you travel) or if your filling isn’t as stiff as buttercream (for example, pudding or custard or fresh fruit or other unstable or slippery fillings) because your cake won’t be as stable when you travel.
For those fillings, don’t assemble the cake and instead, wrap your cake layers individually in two layers of cling film or saran wrap. You’ll assemble the cake when you get to your destination, where you can buy fresh whipped cream or fruit or whatever else you’re using for the filling.
If you’ve assembled your cake, wrap the entire thing in cling film or Saran Wrap, using 2 layers to make sure it’s airtight and that nothing will leak later.
The cake will be fine in the freezer for up to a month. Individual cake layers will also freeze well for up to a month. Freezing the cake or layers makes them more stable to transport and also means you can prepare ahead of time.
Put your buttercream into a ziploc bag and press it flat, squeezing the air out of the bag before you seal it. The bag will need to fit inside your coolbox (explained later!) so if the ziploc bag is too big, fold it in half before you freeze it.
On the day you travel, take the cake and frosting out of the freezer and place them in a cool box or lunchbox with an icepack, or several icepacks if you can fit them. The cake and frosting will defrost on your journey, so by the time you get there they’ll be thawed and ready for the final steps, but you want this to happen as slowly as possible and that’s the reason for the icepacks.
Prepare the cool box just before you leave the house and place it in your suitcase. This way, the contents will stay cold for as long as possible.
You’ll also need an offset spatula and if you’re going somewhere with no kitchen utensils, you’ll need to pack a plate, which can just be a plastic plate, and ideally a rubber or silicone spatula as well. If you’re going to someone’s house they’ll probably have these things for you to use.
Optionally, you can pack any decorating supplies, like a piping bag and piping tip and sprinkles.
For cupcakes, the steps are very similar. Bake the cupcakes as normal and after they cool, arrange them in a tupperware container.
It’s important that the cupcakes fit snugly in the tupperware so they don’t move around when you travel. If you have space in between the cupcakes you can use scrunched up paper towels to fill the spaces.
This way, even if the tupperware gets shaken around or flipped upside down while you’re travelling, the cupcakes won’t get knocked against the sides of the tupperware or squished against each other.
Make your buttercream and freeze it in a ziploc bag. Freeze your tupperware of cupcakes as well. You could use a large ziplock bag instead but a tupperware will protect them better for travel. Freezing everything keeps them stable, cool and undamaged during transport.
On the day you travel you can either put the cupcakes and frosting in a cool box in your suitcase, like I did with my cake, or if they don’t fit you can wrap them in a plastic bag. I recommend wrapping the plastic bag in a towel so that if there’s any condensation as they defrost, they won’t wet anything in your suitcase. Also pack a piping bag and your favourite piping tip – mine is a Wilton 1M.
When you get to your destination, take the coolbox out of your suitcase and remove the cake and frosting. I’m squeezing my buttercream out of the ziploc bag into a bowl but you can use it straight out of the ziplock bag to minimize tools and the number of dishes to wash up!
If you decided to travel with a cake in your suitcase, put a dollop of frosting onto the middle of your plate and press the cake on top so that it sticks to the frosting.
Now cover the whole cake in frosting using your offset spatula, trying to get an even coating over the cake that’s thicken enough to cover up the cake so you can’t see it through the frosting.
I have a tutorial on how to get perfectly smooth frosting but it’s not realistic when you’re working without a turntable and on a plate with these raised edges, which means that even if you took a frosting smoother with you, you wouldn’t be able to line it up straight against the sides of the cake.
Instead of attempting to smooth the frosting, I like to apply texture with a piping bag or with my offset spatula. For this cake I’m making swooshes by swiping my offset spatula up along the frosting from the bottom to the top of the cake, going all around the sides of the cake.
Wipe the offset spatula off on a bowl whenever the frosting starts to build up so that it doesn’t drag dregs of buttercream back onto the cake for the next swoosh. You can try using the back of a spoon for this same technique to get a slightly different shaped texture. Check out my tutorial on easy ways to frost a cake with different textures that don’t need a turntable or any special tools, just an offset spatula and a piping bag and tip.
I’m adding some sprinkles as a final touch and voila!
A delicious, homemade cake made with love and easily transported, in this case to Seattle!
If you chose to travel with cupcakes in your suitcase, when you get to your destination the cupcakes and frosting will have thawed.
Squeeze the frosting into your piping bag and pipe swirls of frosting onto the cupcakes.
To make the cupcakes more celebratory, add some sprinkles straight after piping on the buttercream, while it’s still sticky.
You won’t believe how moist and fluffy the cupcakes are after defrosting – I honestly can’t taste the difference between freshly baked cupcakes and ones that have been frozen!
I hope this tutorial was helpful and that you can take a cake or cupcakes with you next time you travel. I took these cupcakes and cake to Seattle, Washington! I’d love to see your experiences… please tag @britishgirlbakes in your photos on Instagram or Facebook!
If you’d prefer to watch a video of this tutorial, click the play button below: