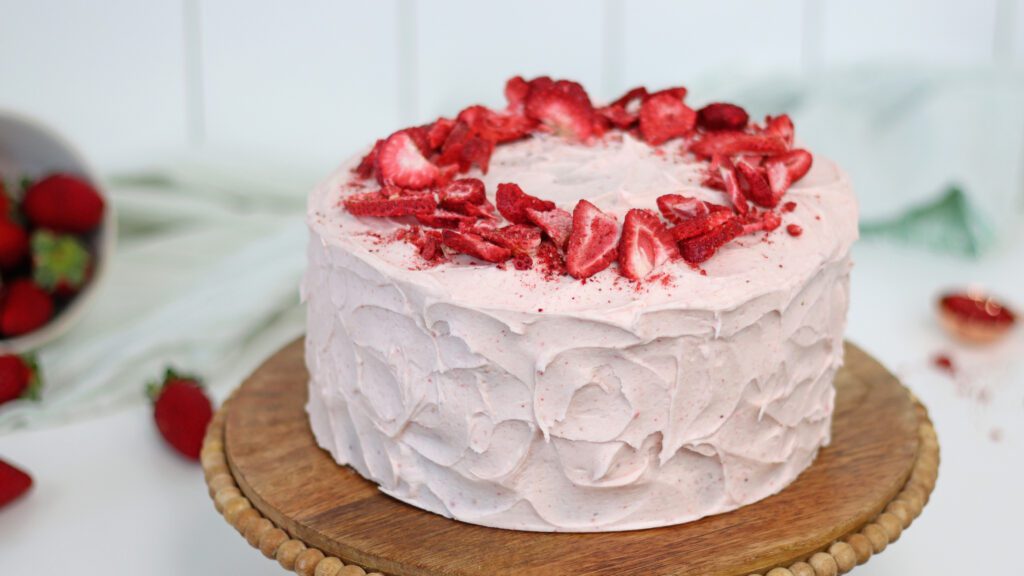
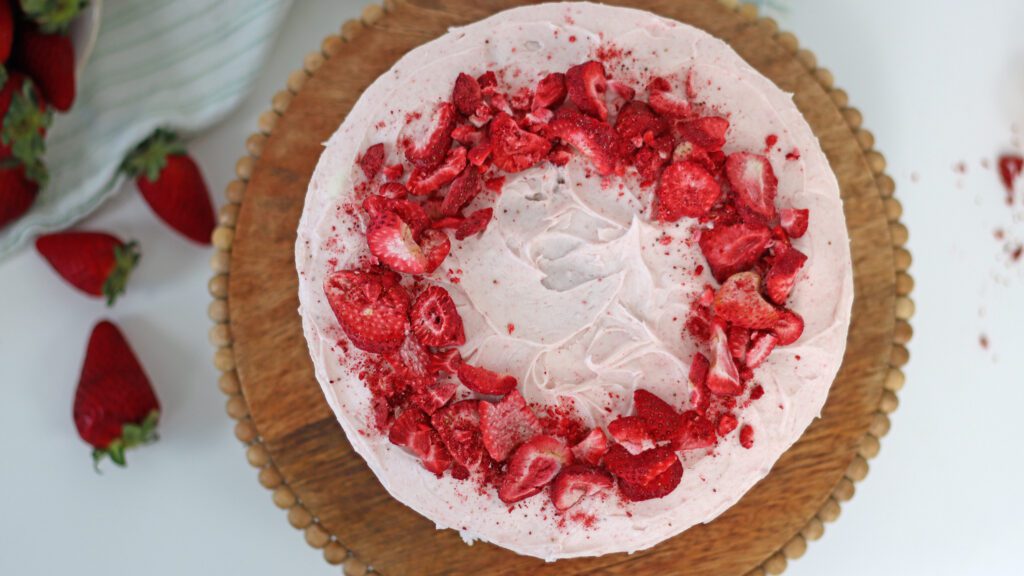
This strawberry cake, filling and frosting are bursting with strawberry flavour and there are two types of strawberry ingredient that make it taste so perfect.
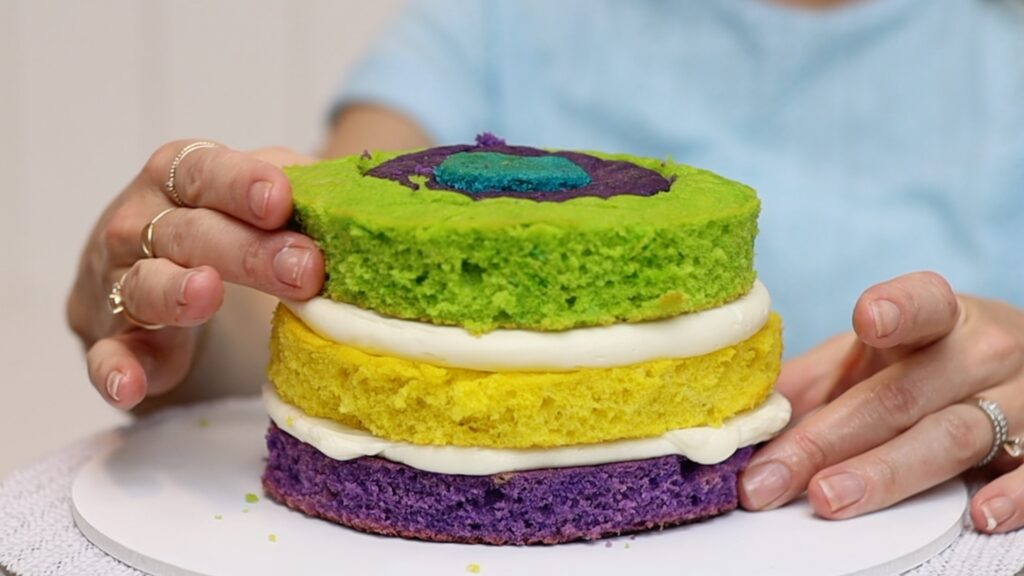
How to make strawberry cake
Just like with any cake, all of your ingredients need to be at room temperature. Take your eggs, milk and butter out of the fridge a few hours before you start baking.
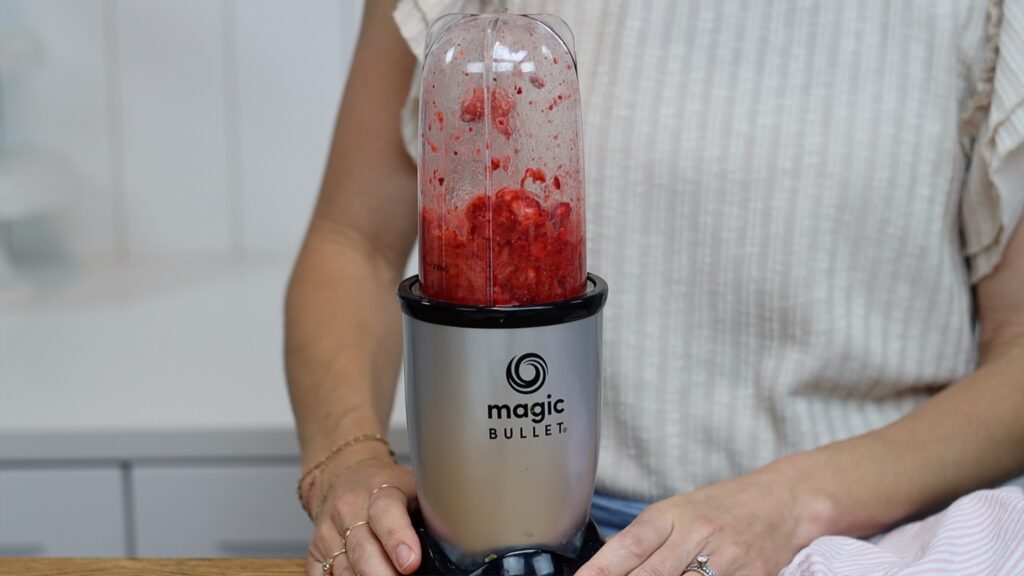
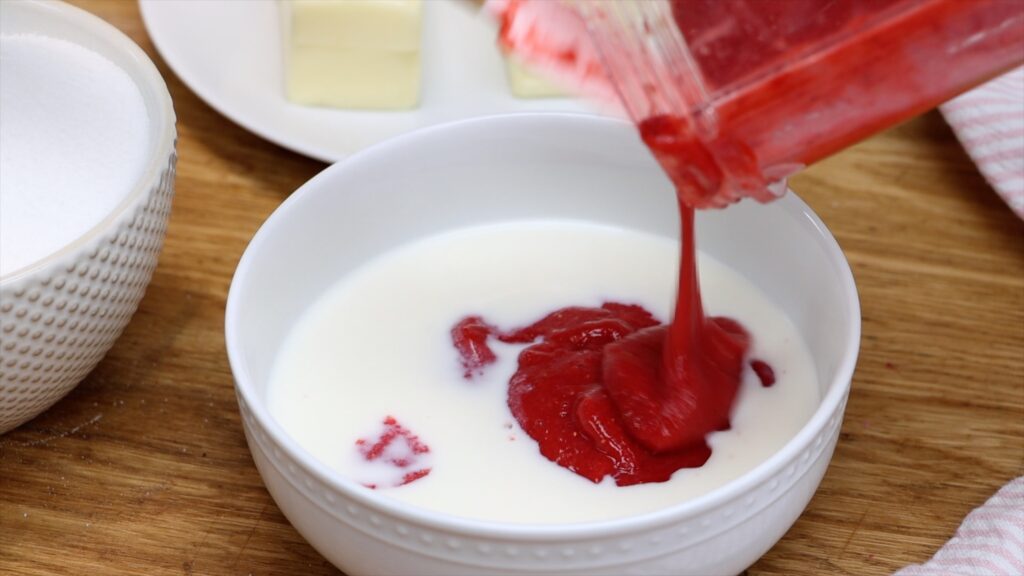
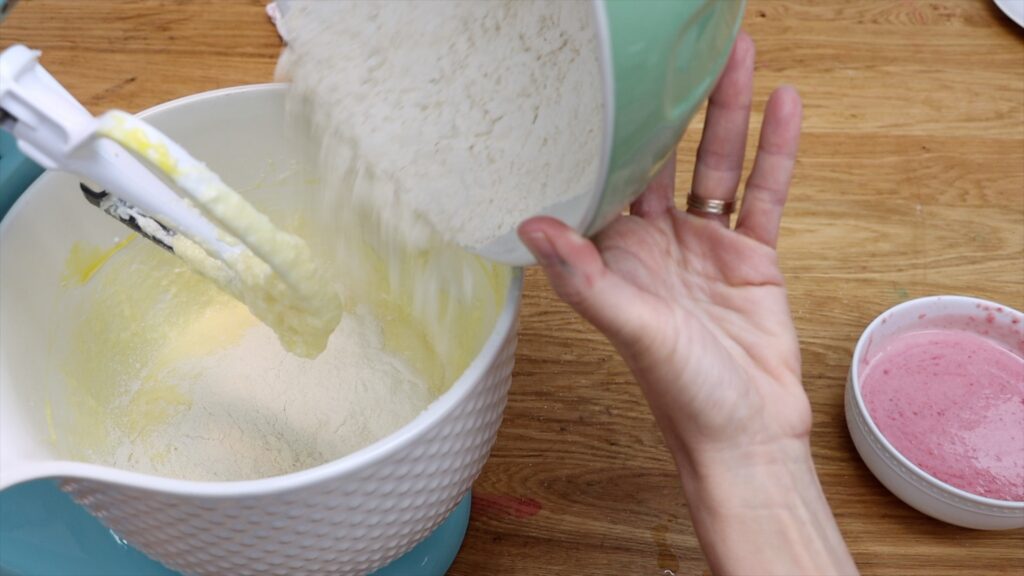
This is an easy strawberry cake recipe with just a few steps. Before you start, whisk the dry ingredients (flour and baking powder) together and mix the wet ingredients together, too. These are milk, vanilla and blended strawberries. This recipe uses two kinds of strawberries: fresh or frozen and also freeze-dried strawberries. This will give you the maximum fresh strawberry flavour and colour without making the cake heavy or dense.
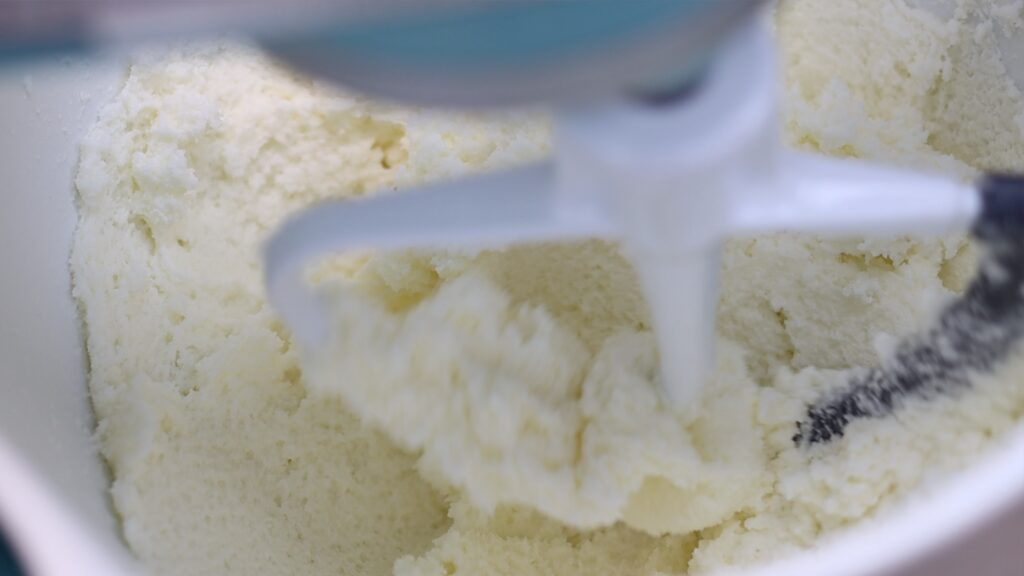
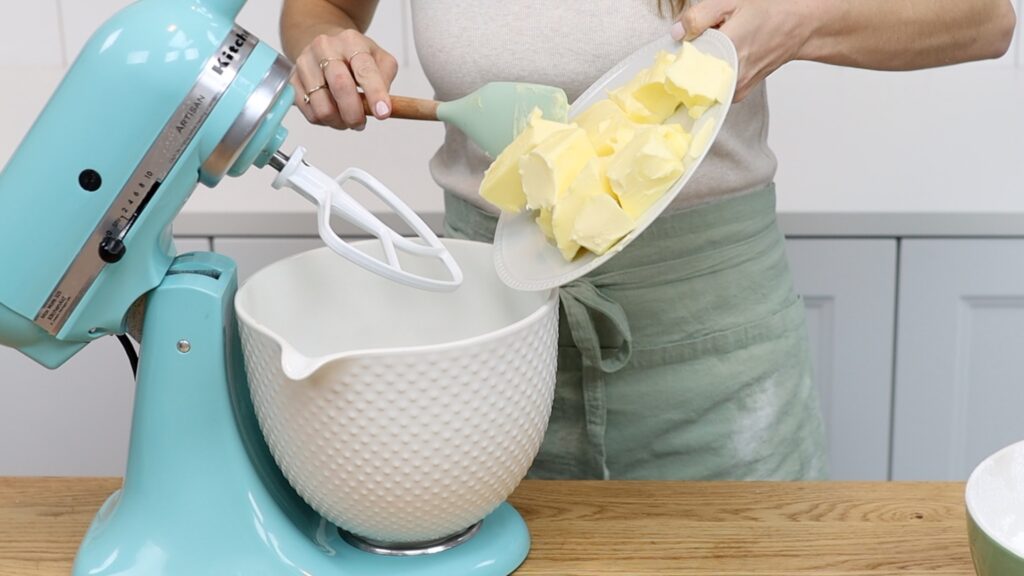
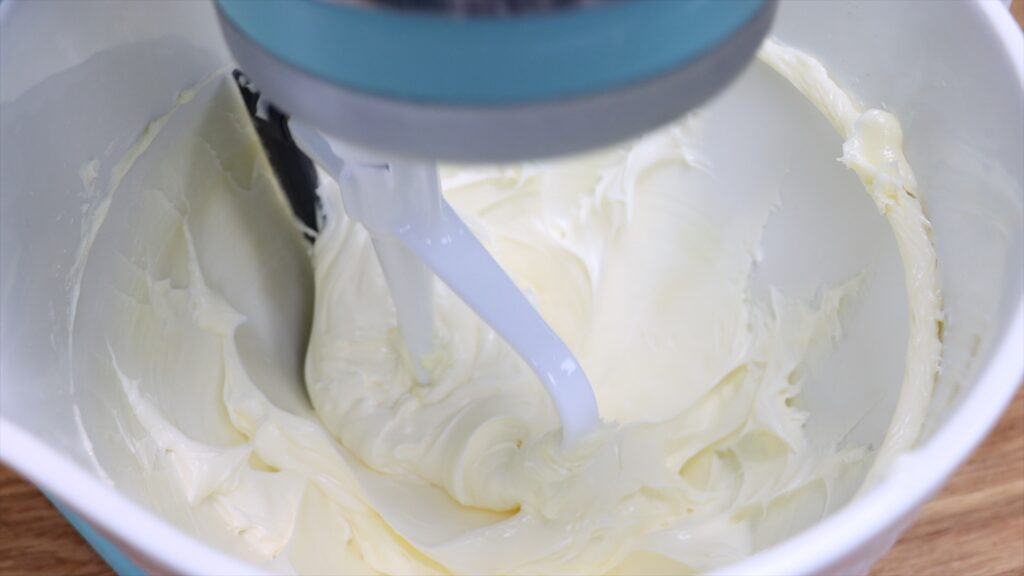
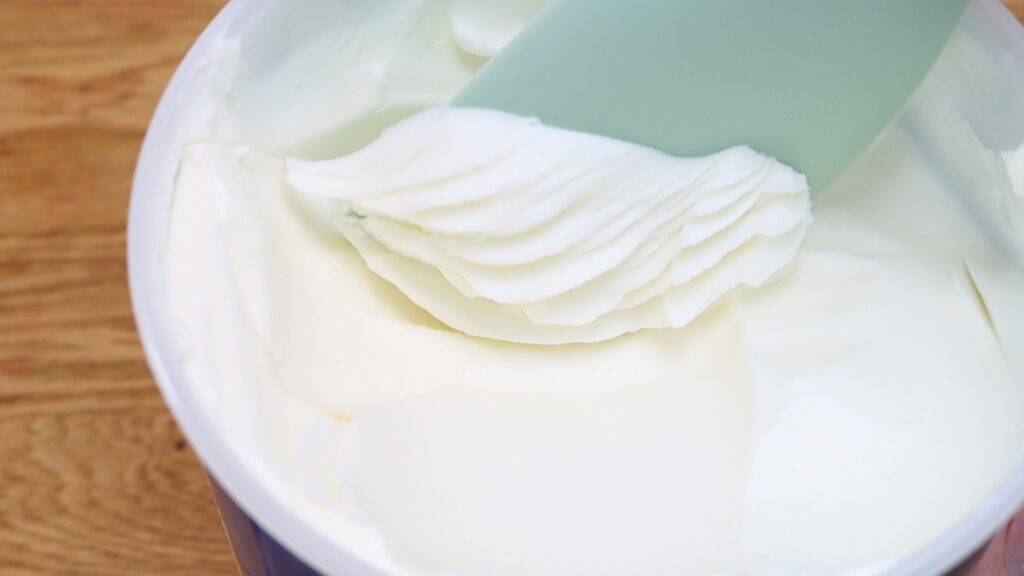
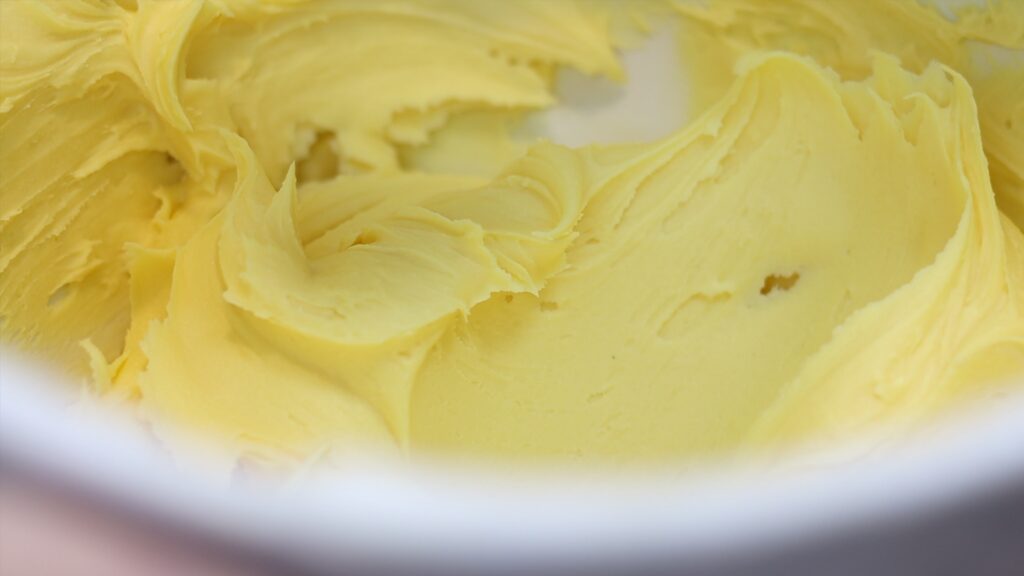
Now it's time to put it all together. Mix the butter and sugar together at medium speed for about 3 minutes until it's light and creamy, like this:
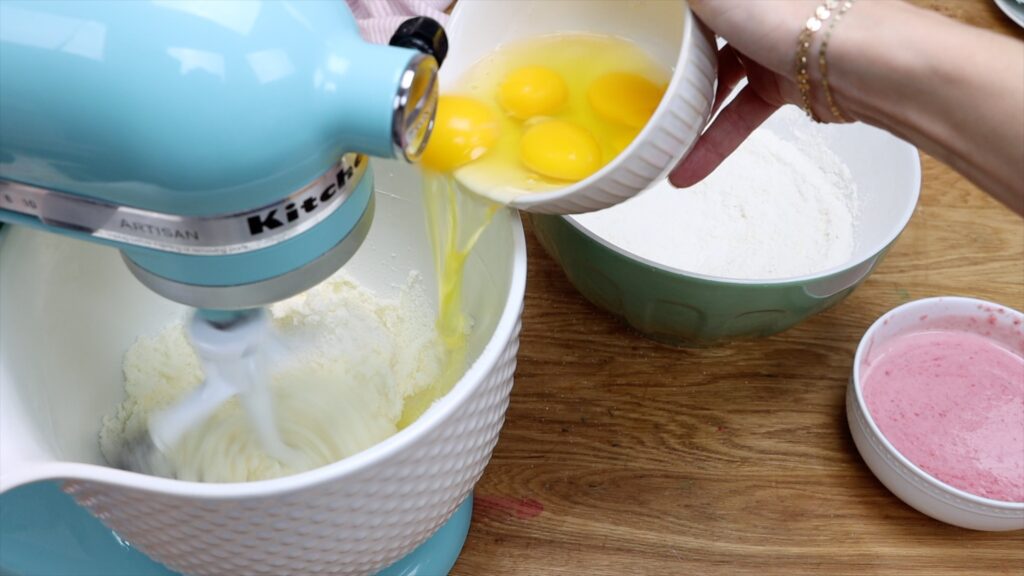
Add the eggs one at a time, mixing for about 30 seconds after each one. This will make your cake light because the ingredients are properly mixed together.
Scrape down to the bottom of the mixing bowl with a spatula to make sure there aren't any clumps of sugary butter stuck to the bottom. Then add a third of the flour mixture, mixing only until it's blended in.
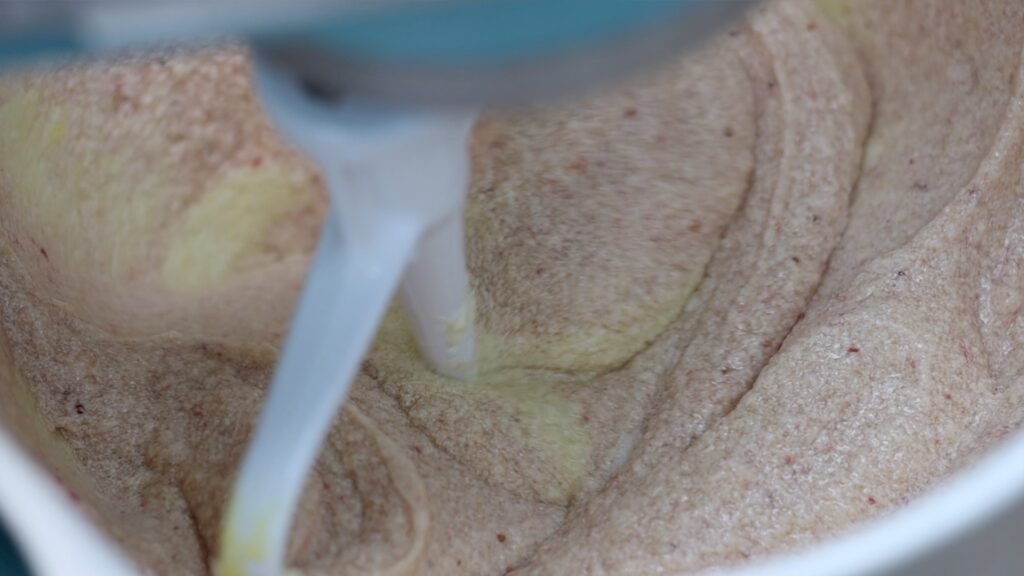
Then add add half of the strawberry mixture and mix that just until it's incorporated, too. This cake batter will be pink from the strawberries but if you want it to be pinker you can add some food colouring.
Mix in another third of the flour, then the rest of the strawberry mixture and then the rest of the flour mixture.
How to bake a strawberry cake
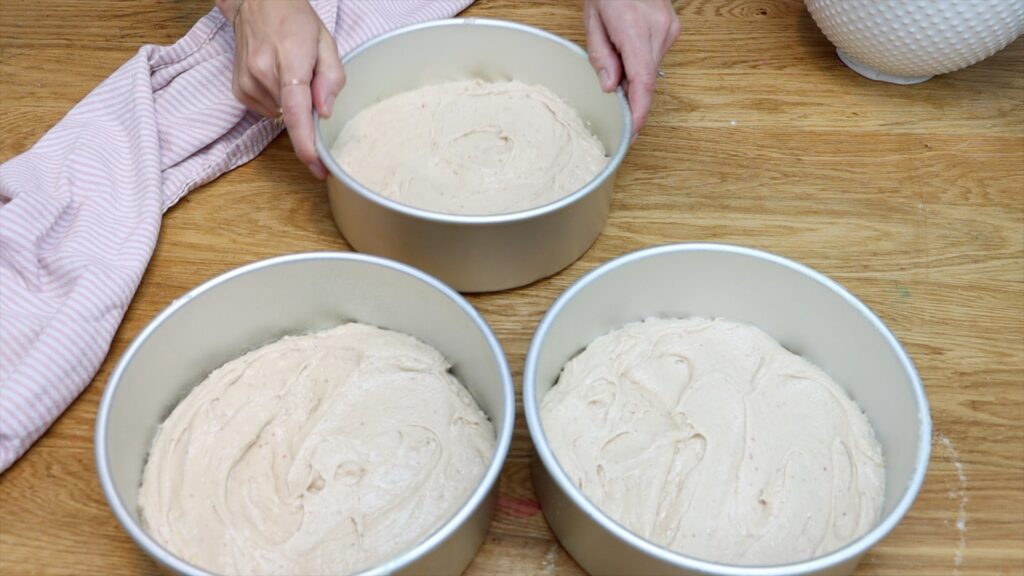
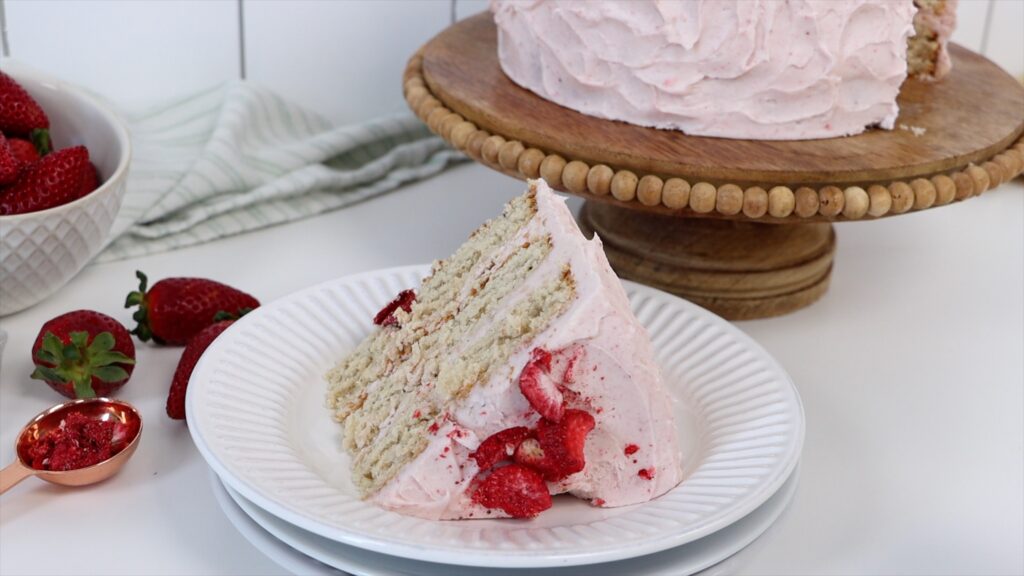
Divide the strawberry cake batter between two or three 8 inch pans. I like to use three so there are more layers of cake and also more layers of filling.
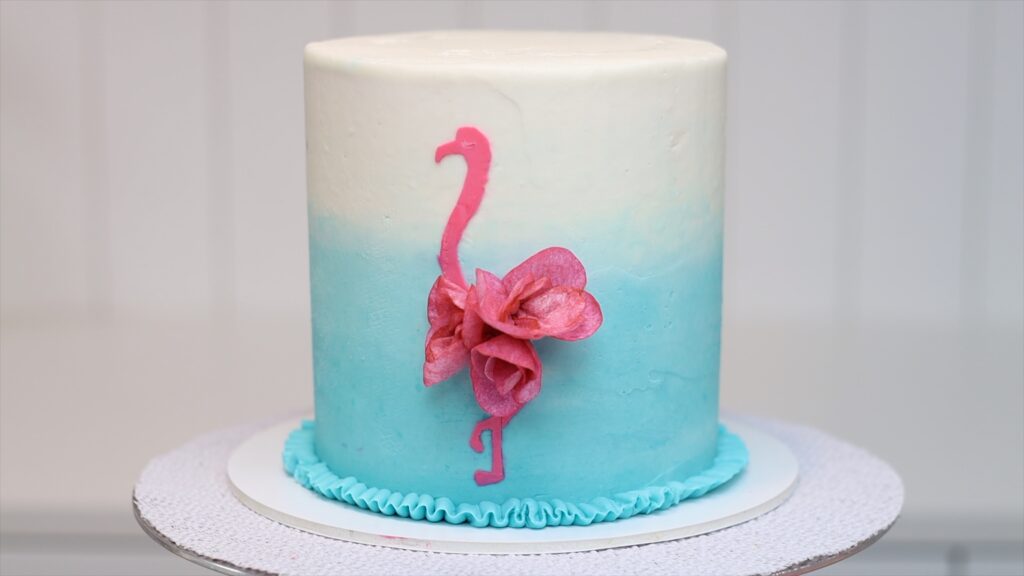
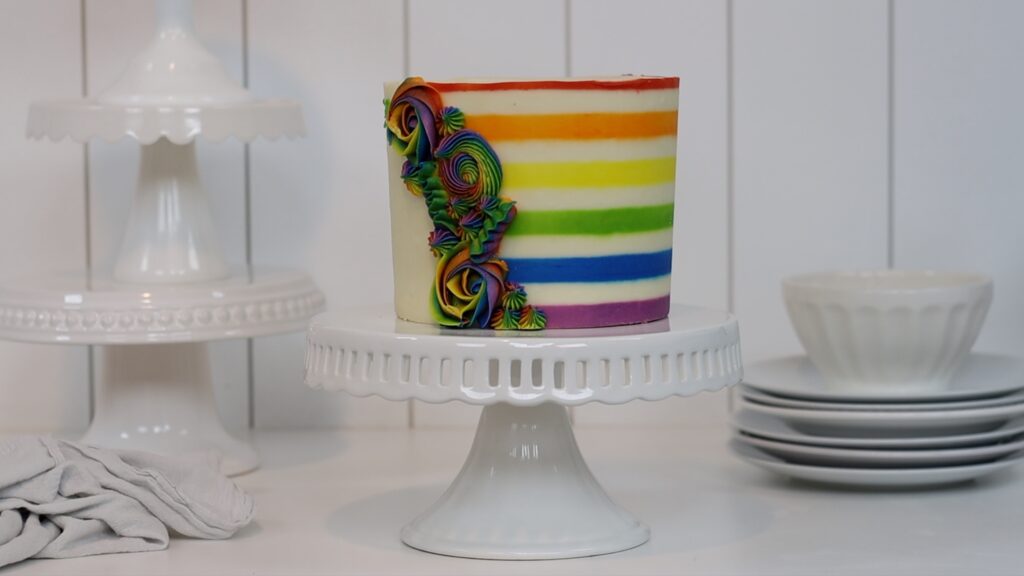
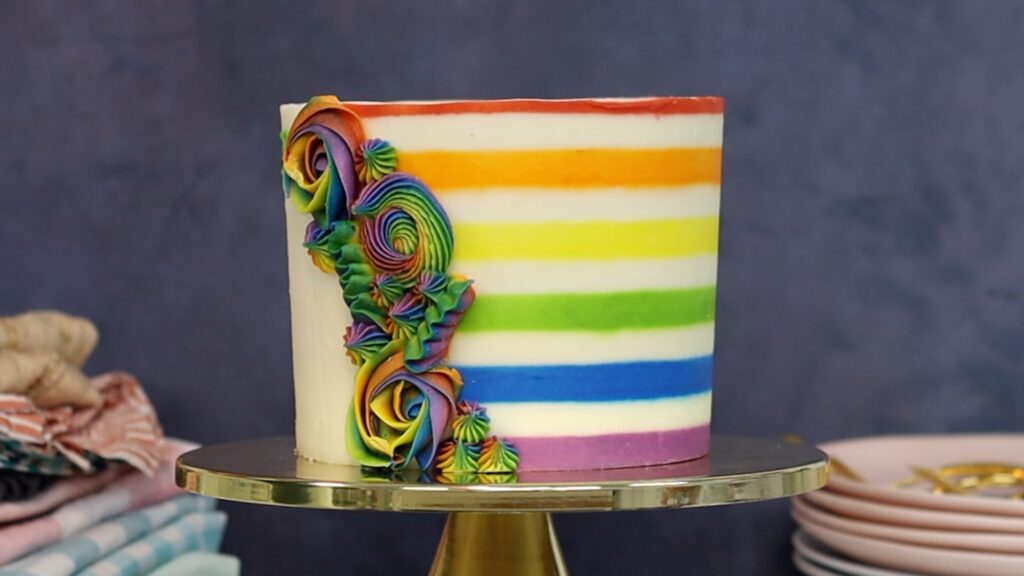
If you want a smaller, taller cake you can use the same recipe in four 6 inch cake pans. This makes a really elegant cake with lots of space on the sides to add decorations. More about that, later in this tutorial!
Tap the pans on the counter to level the batter and then pop these into the oven. Bake 23 minutes at 350° F or 175° C. When the cake springs back up when you poke it, the cakes are baked. Don't bake any longer than this or the cakes will dry out.
Let the cakes sit in the pans for 5 minutes to cool slightly. When you can touch the pans without an oven glove, then turn over onto to a wire rack. Leave them for about 2 hours to cool completely.
How to make strawberry buttercream
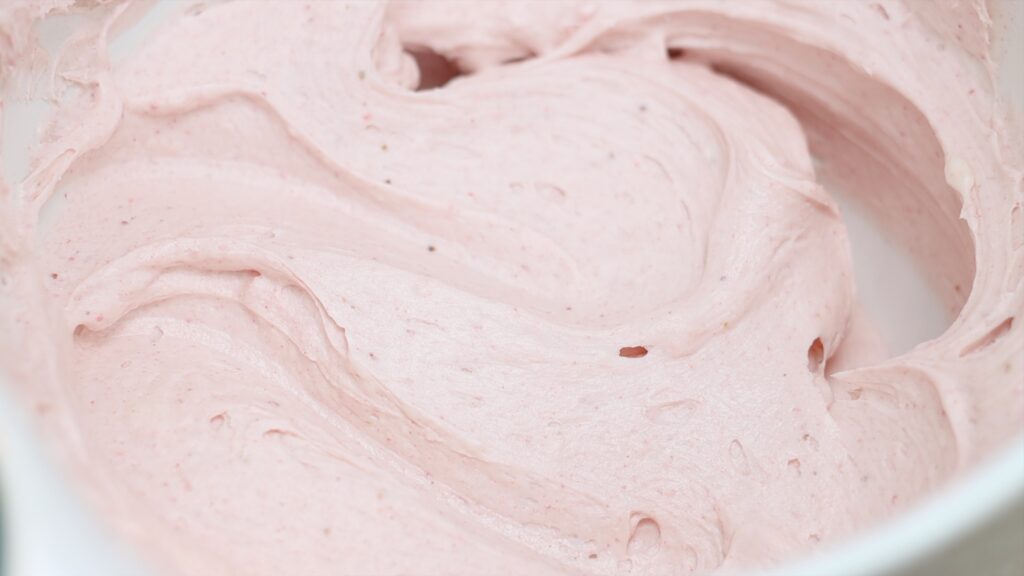
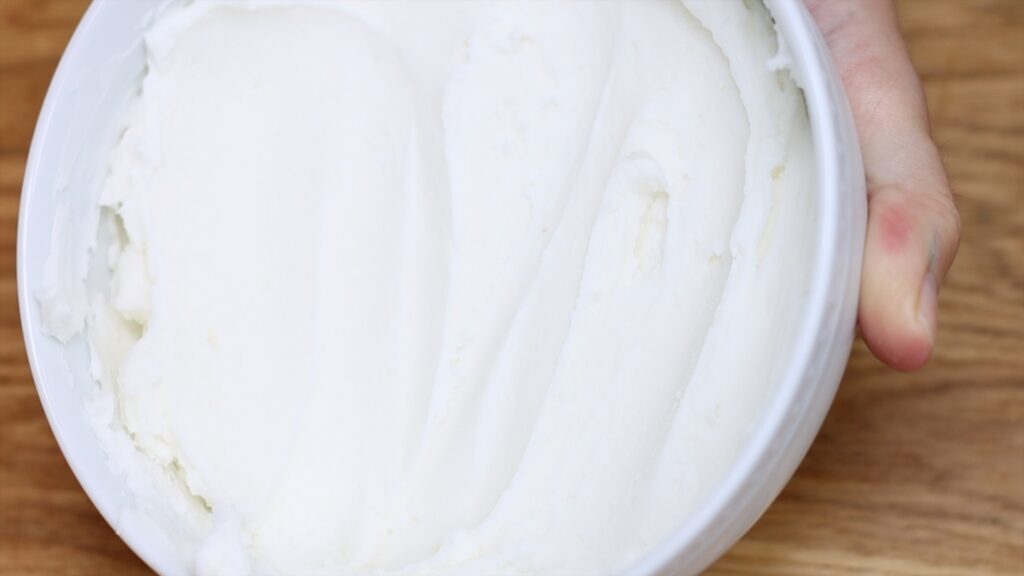
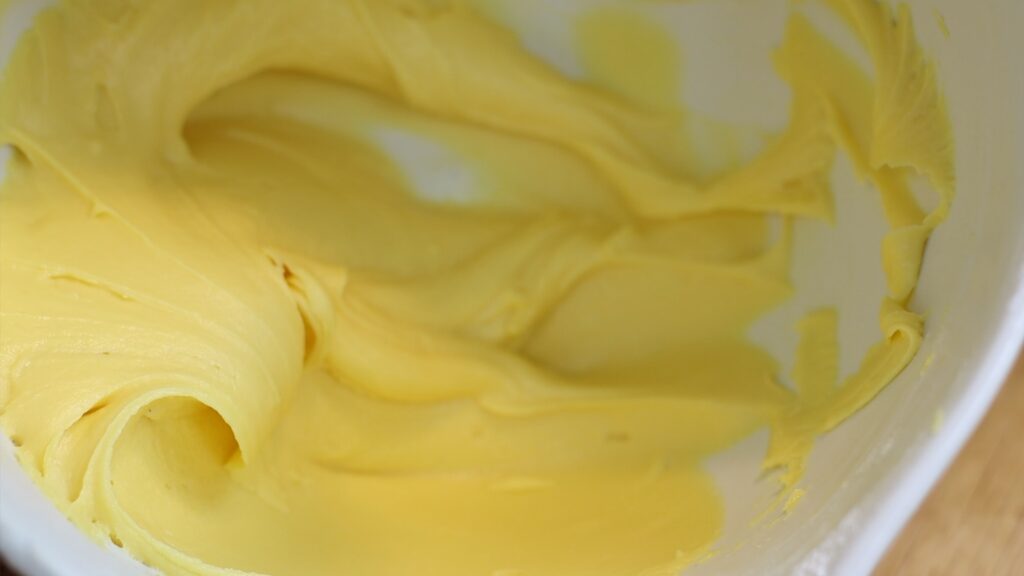
Meanwhile, make the most delicious strawberry buttercream! Mix butter and powdered sugar or icing sugar on the lowest speed to prevent air bubbles in the buttercream. Add freeze-dried strawberries, blended into a fine powder for a smooth buttercream. Using freeze-dried strawberries instead of fresh strawberries gives you all the strawberry flavour without making the buttercream too runny. Finally, add 1 to 2 tablespoons of milk to thin the buttercream out slightly. This will make it easier to spread onto the strawberry cake.
This strawberry buttercream is so delicious, you can eat it out of the bowl with a spoon! It also tastes incredible paired with my Very Vanilla Cake.
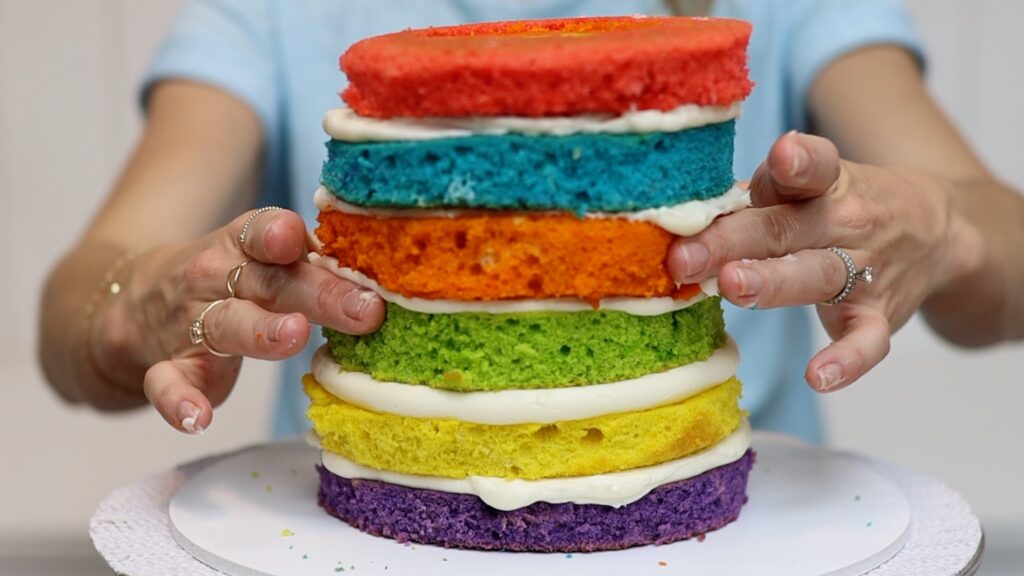
Layer strawberry cake and strawberry filling
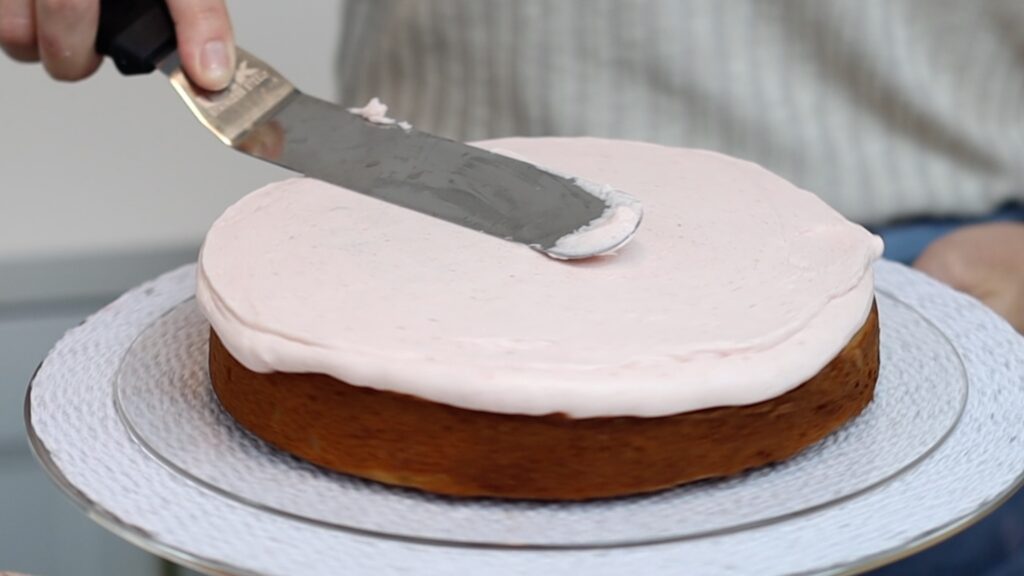
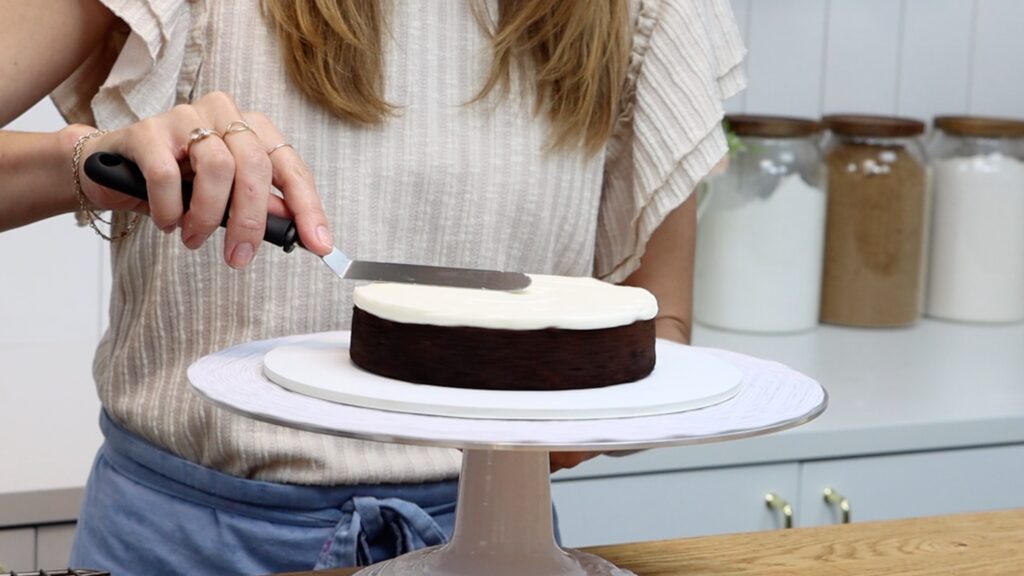
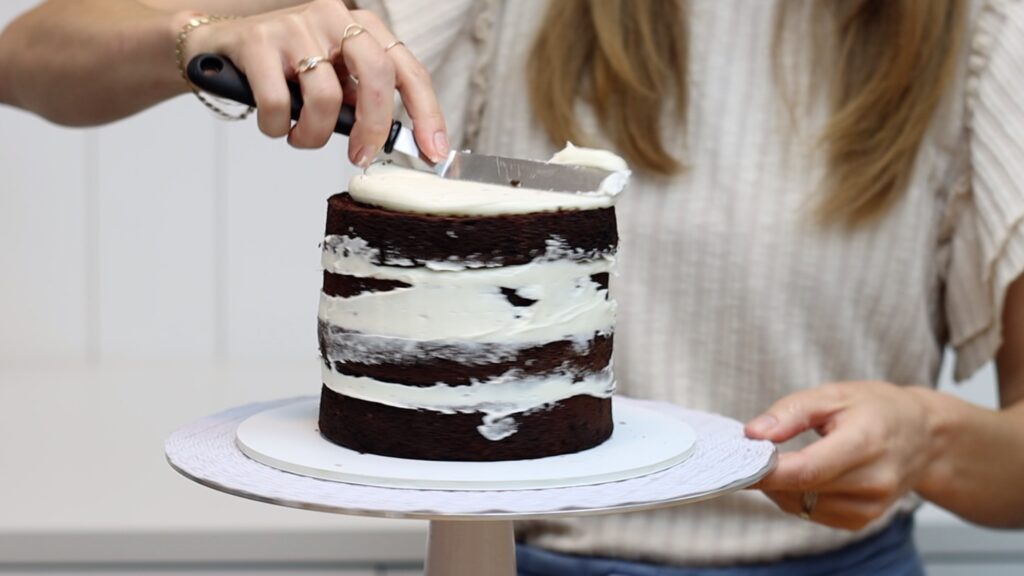
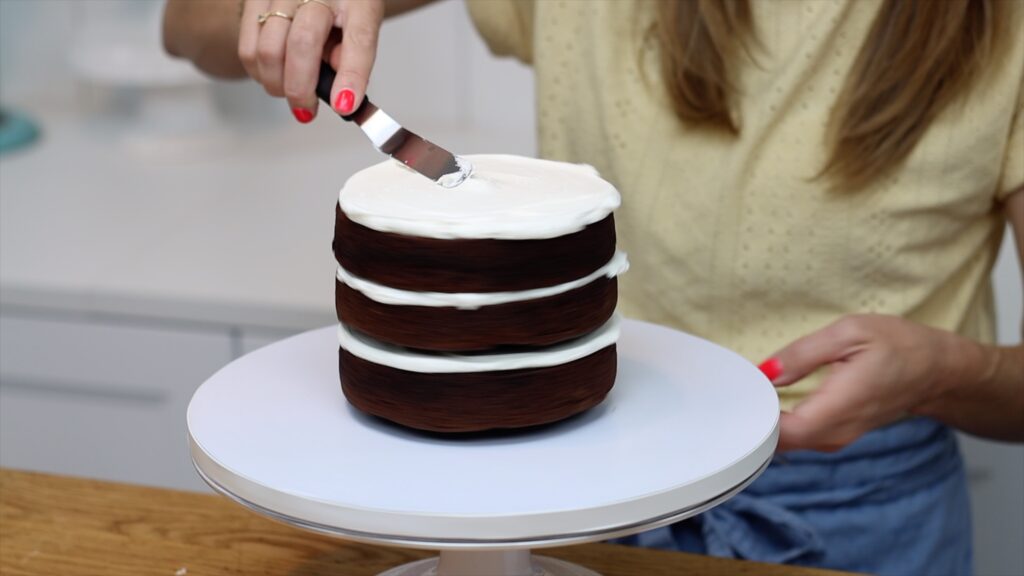
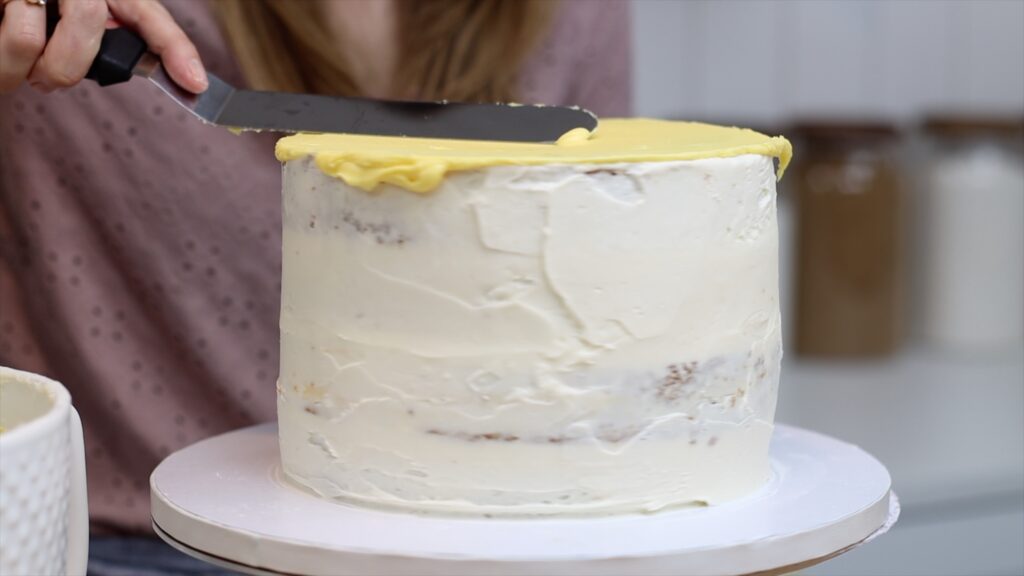
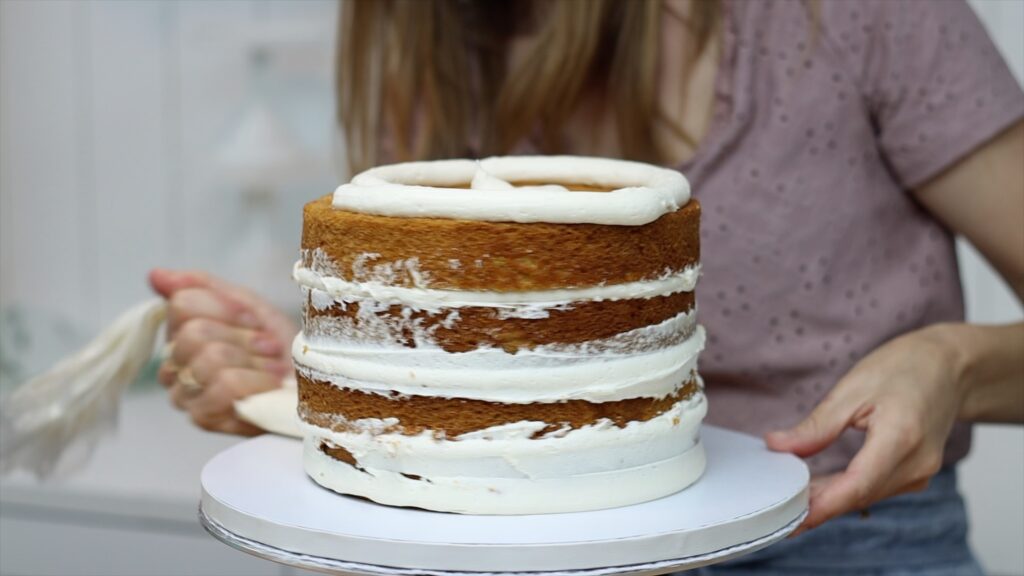
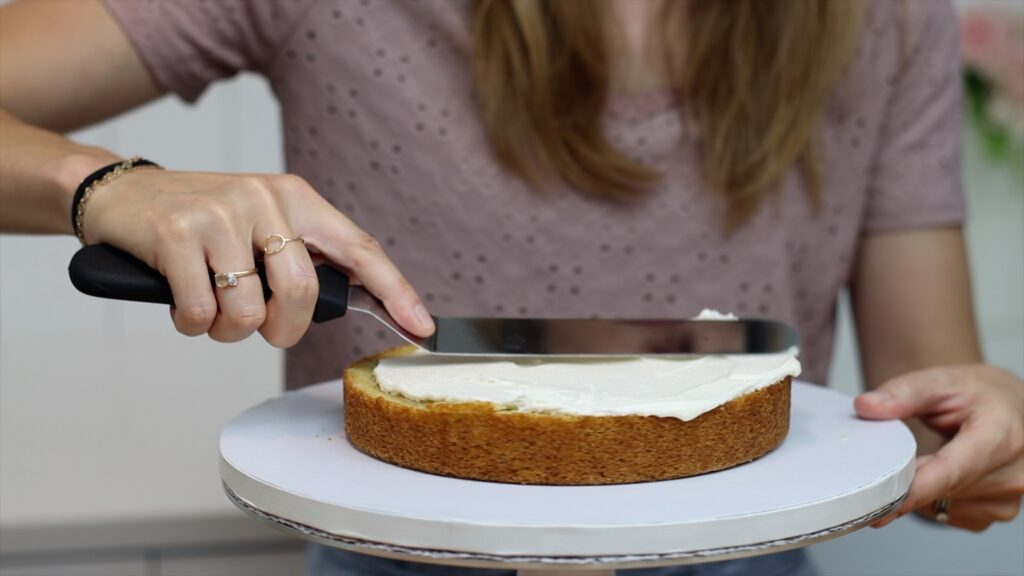
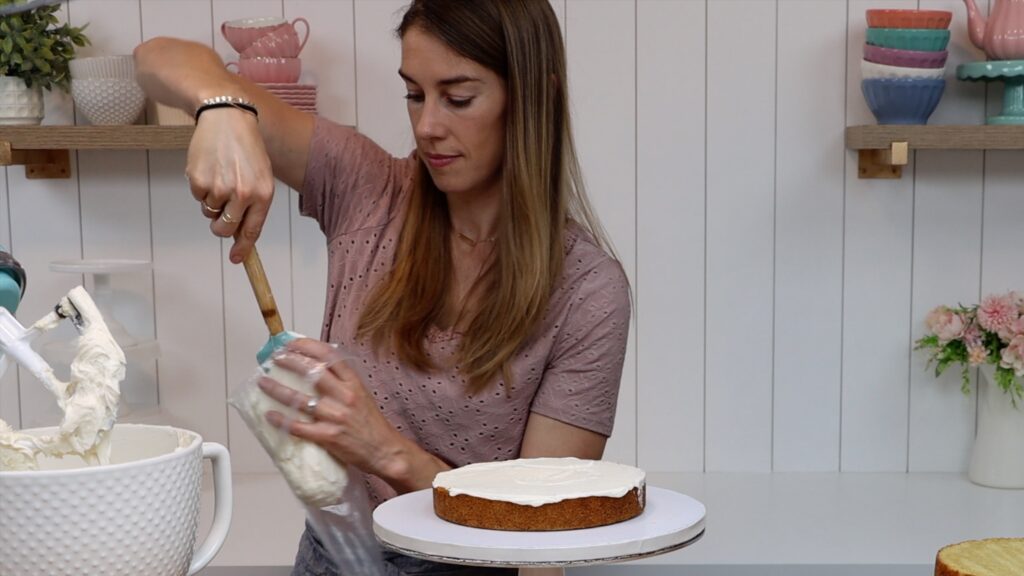
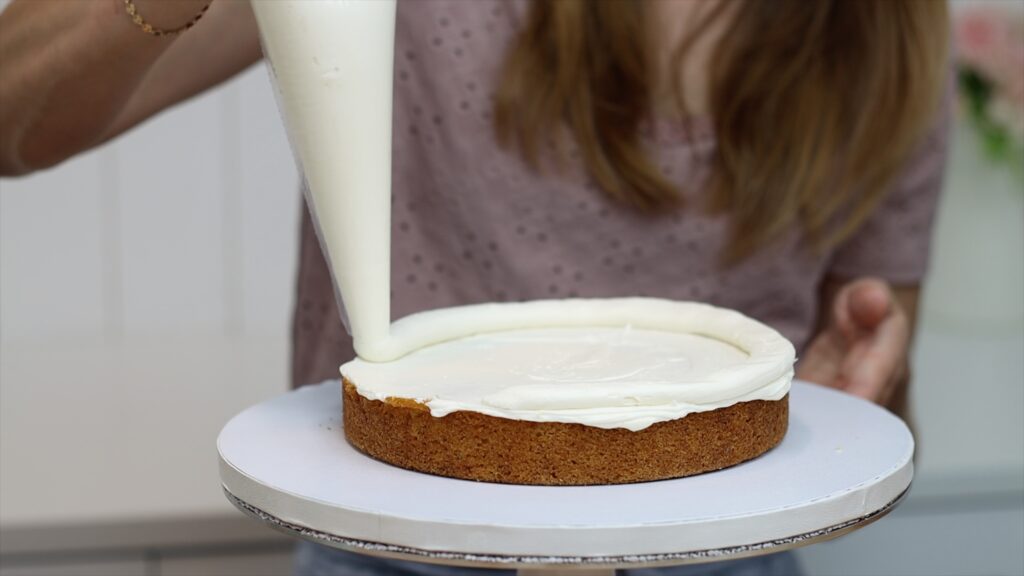
Once the cake layers have cooled, spread a bit of buttercream onto a cake board or plate or platter. This will attach the first cake layer and hold the cake still when you frost it next. Pipe or spread some buttercream to cover the cake, which will be the filling. The smell is so good with the two types of strawberry ingredients in the cake and also in the buttercream. Yum!
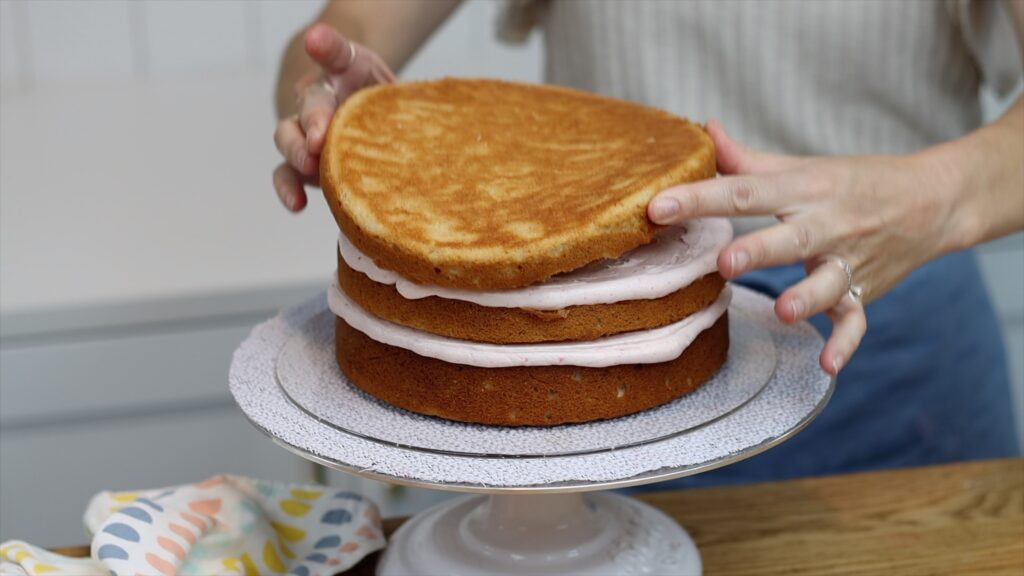
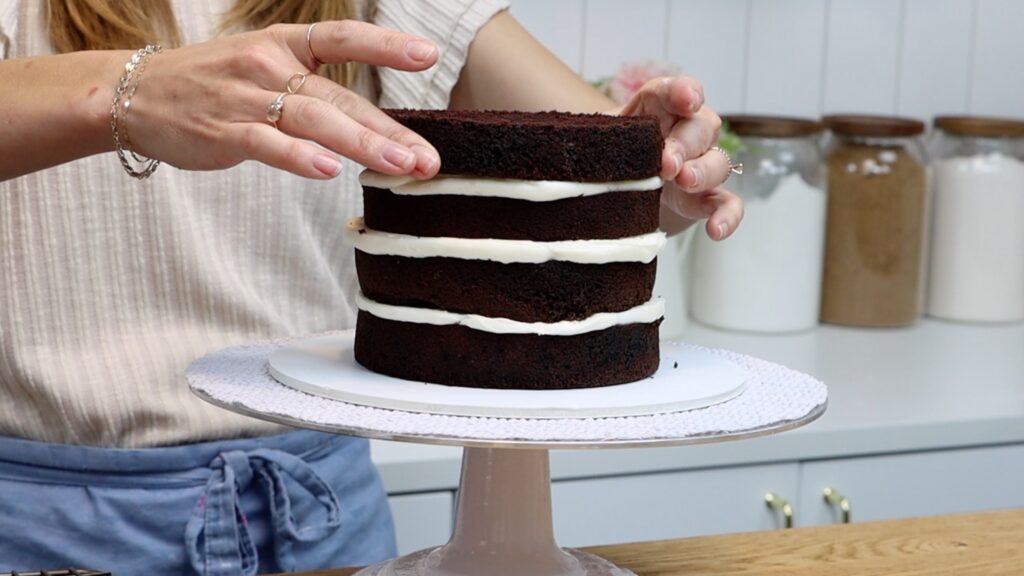
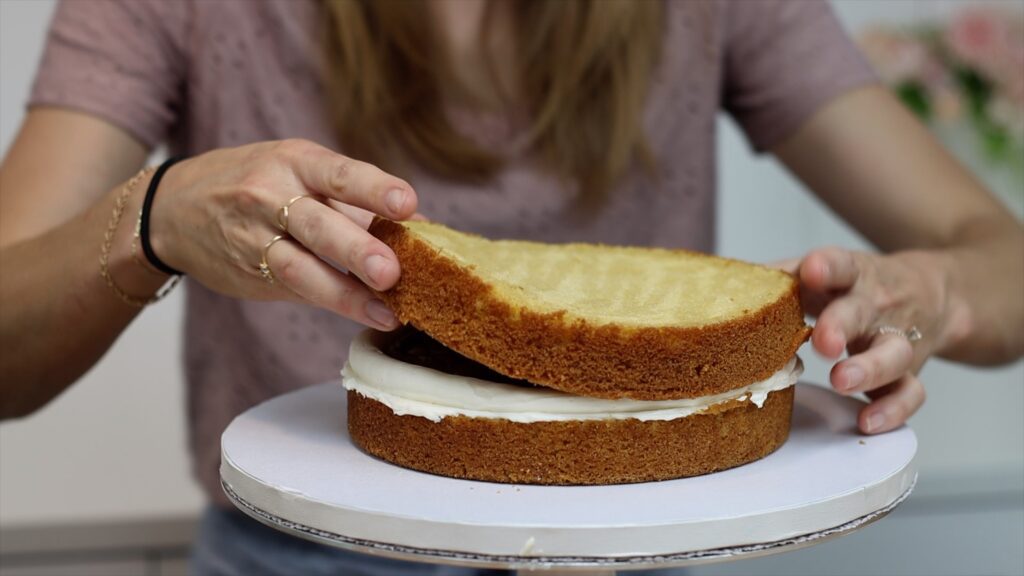
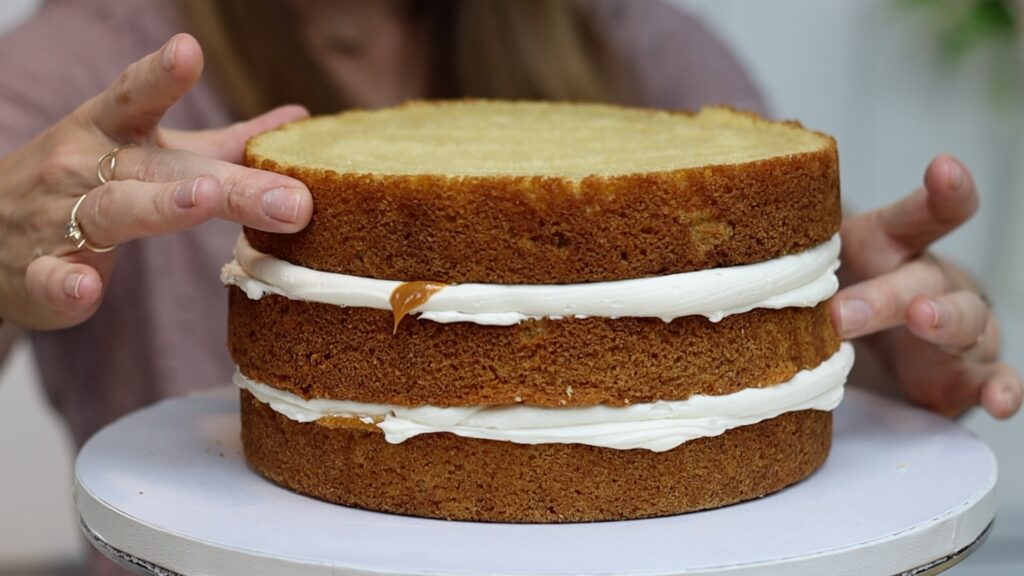
Lower the next cake layer down on top, lining it up straight. Pipe or spread on some more buttercream and finish with the top layer. I like to place the top cake layer upside down with the flattest, least crumbly side facing up.
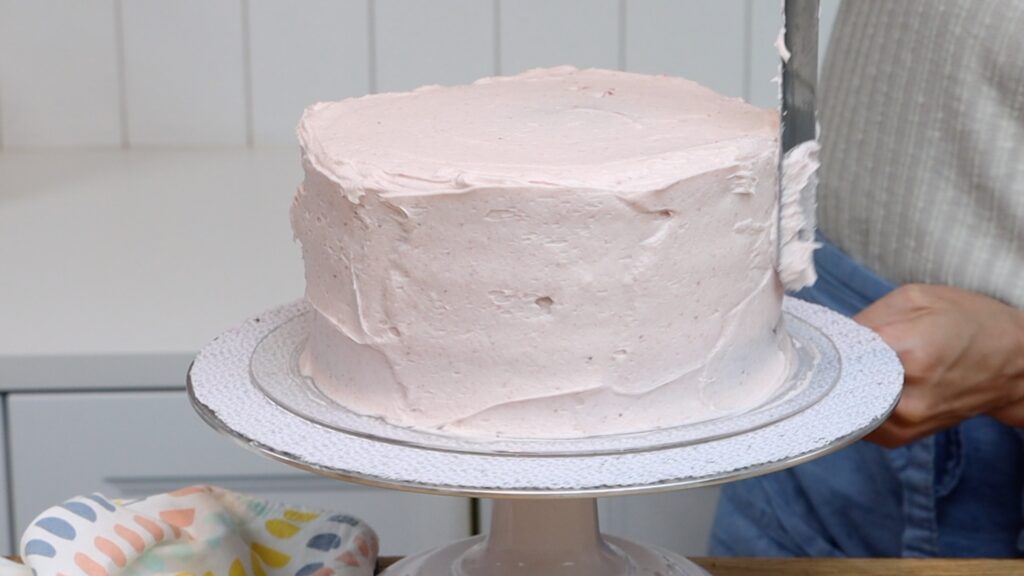
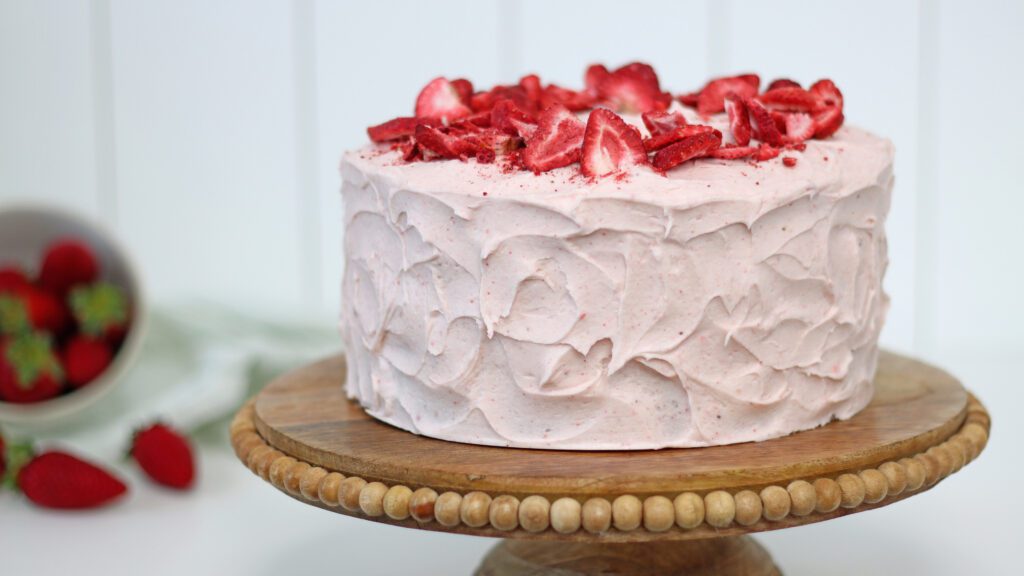
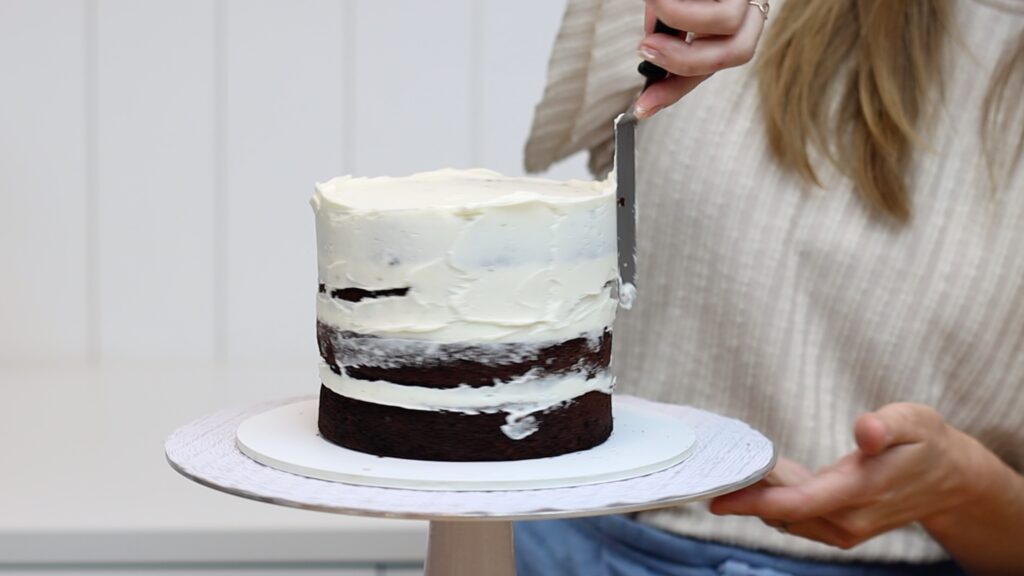
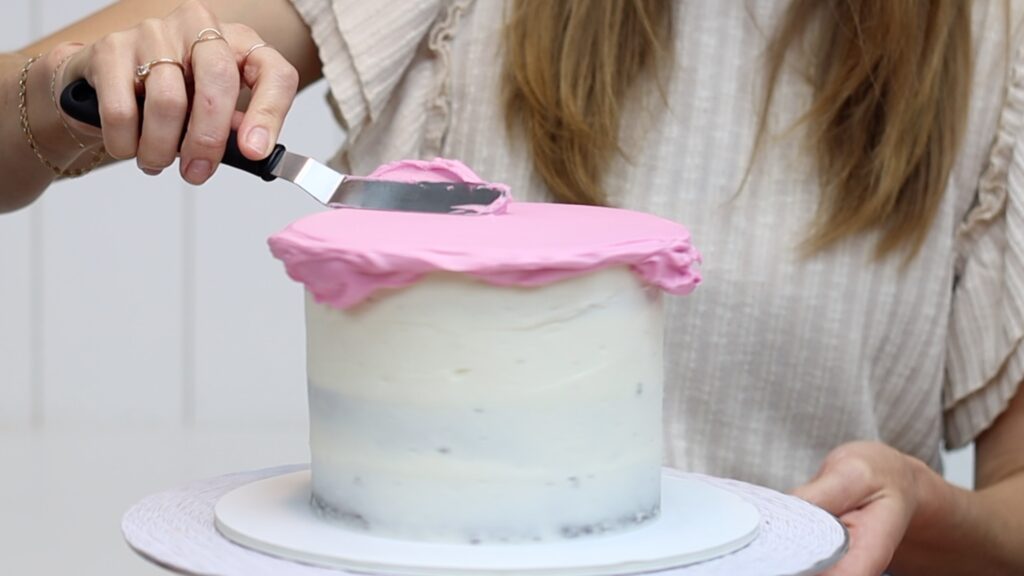
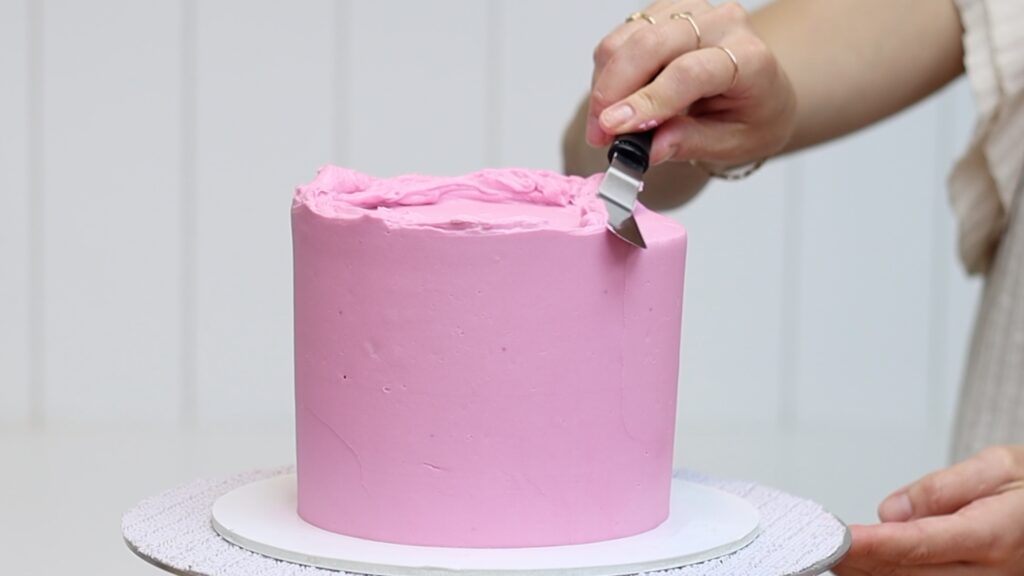
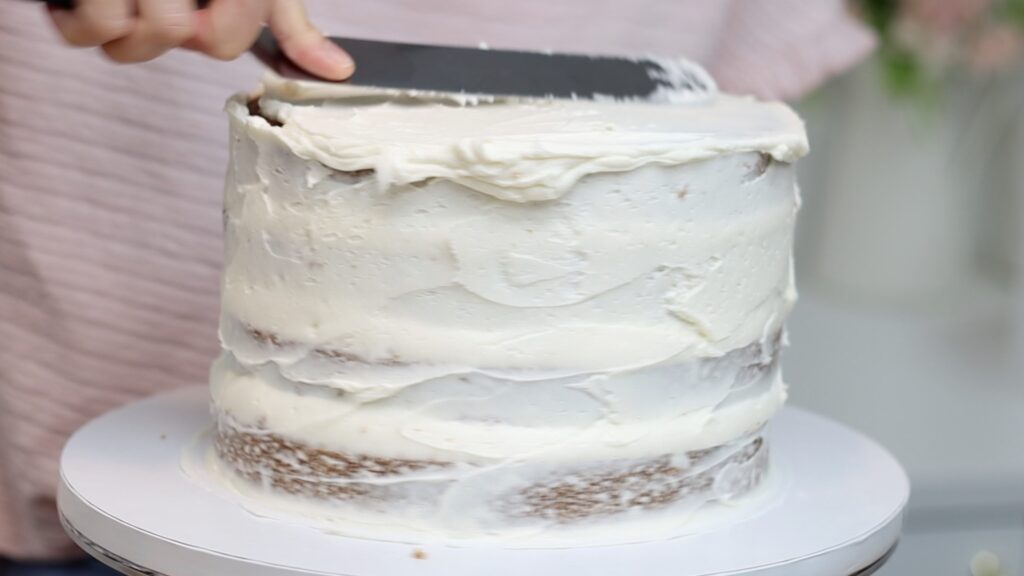
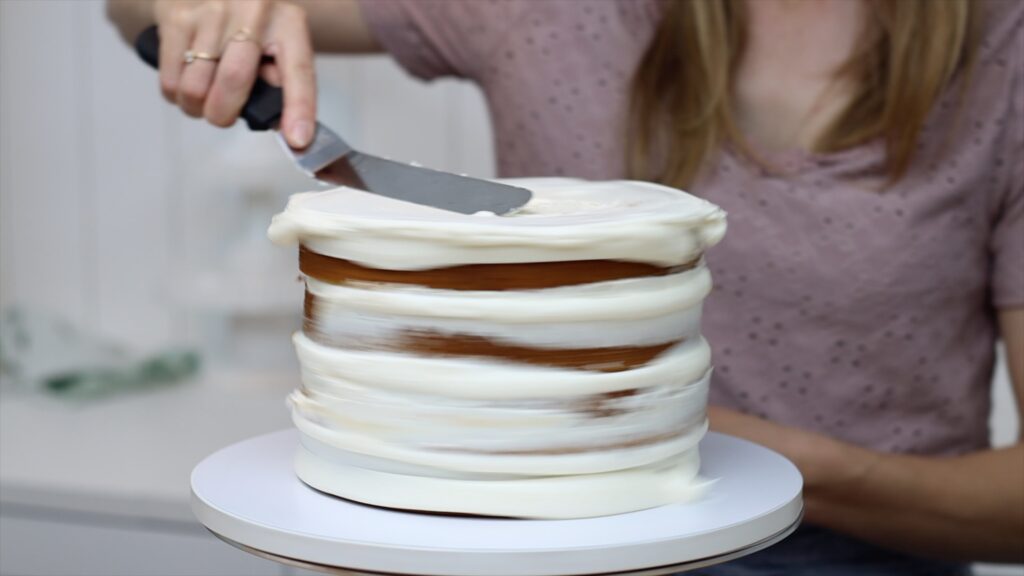
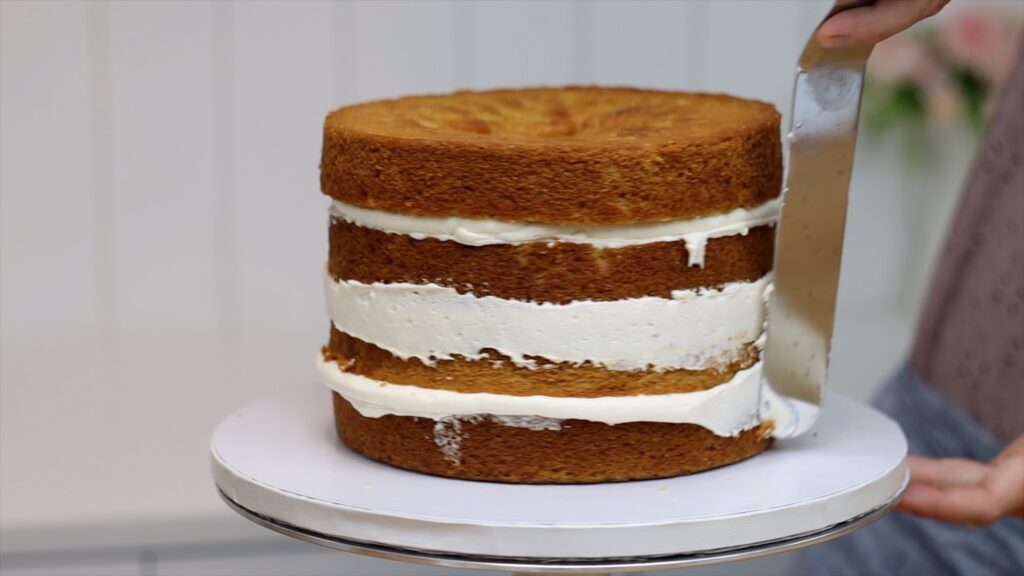
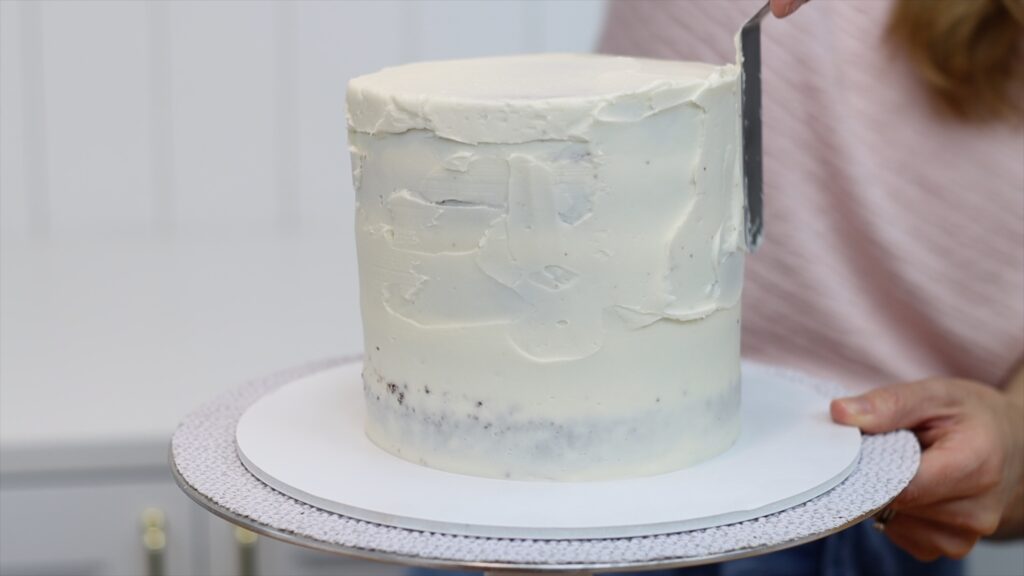
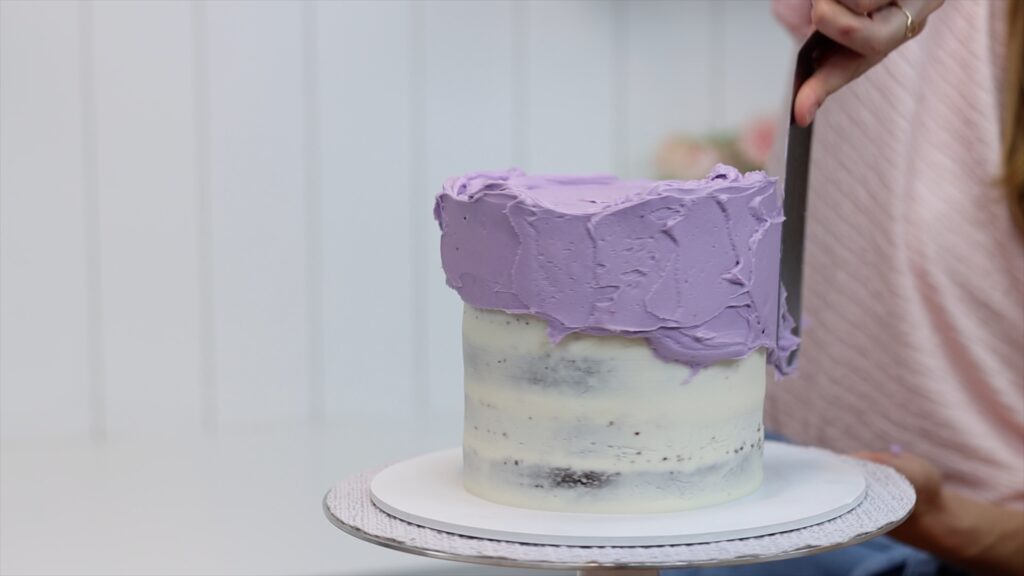
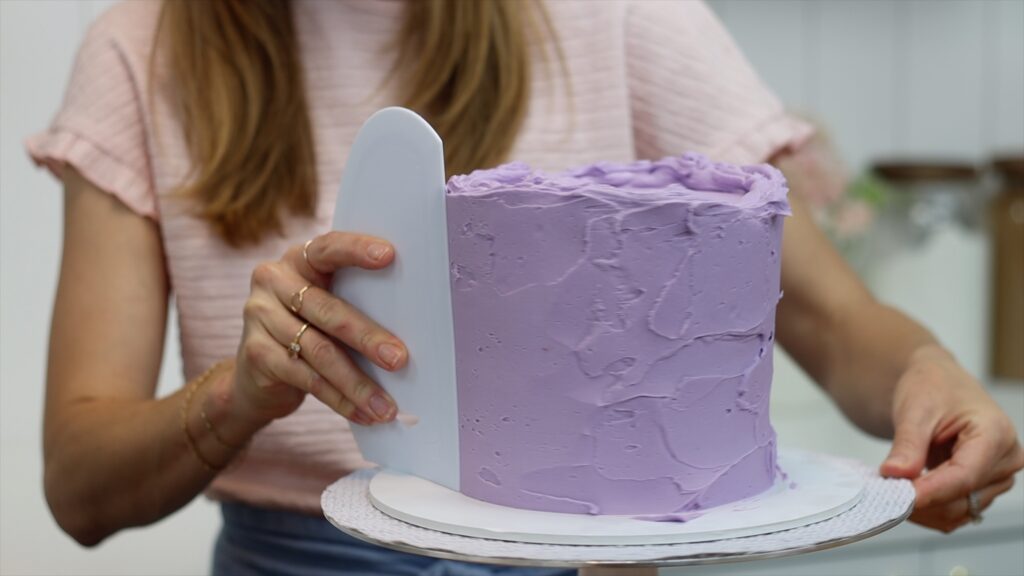
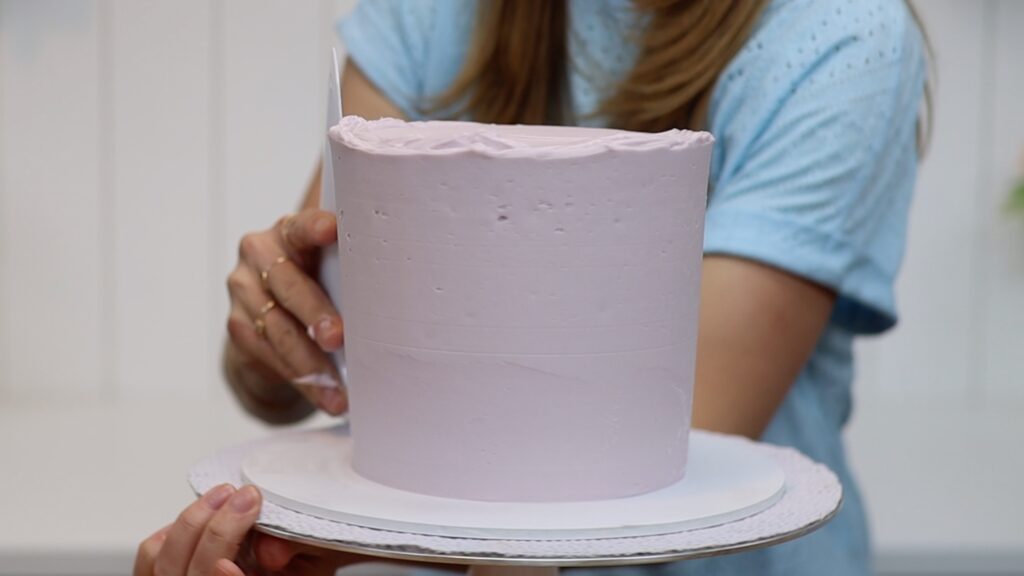
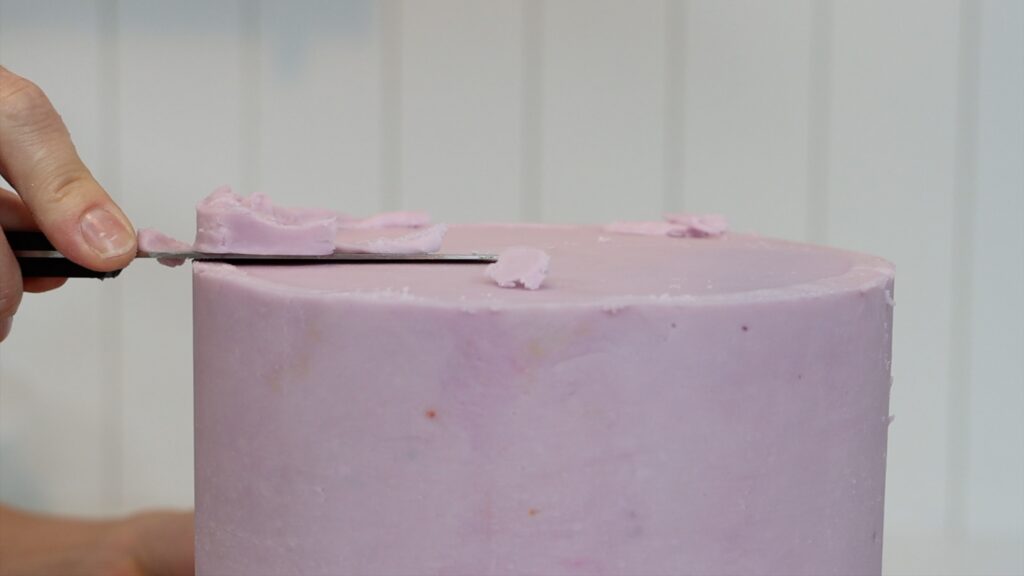
Cover the whole cake with more strawberry buttercream. Since this isn't a crumbly cake, the strawberry frosting will glide over the cake and you don't need a crumb coat!
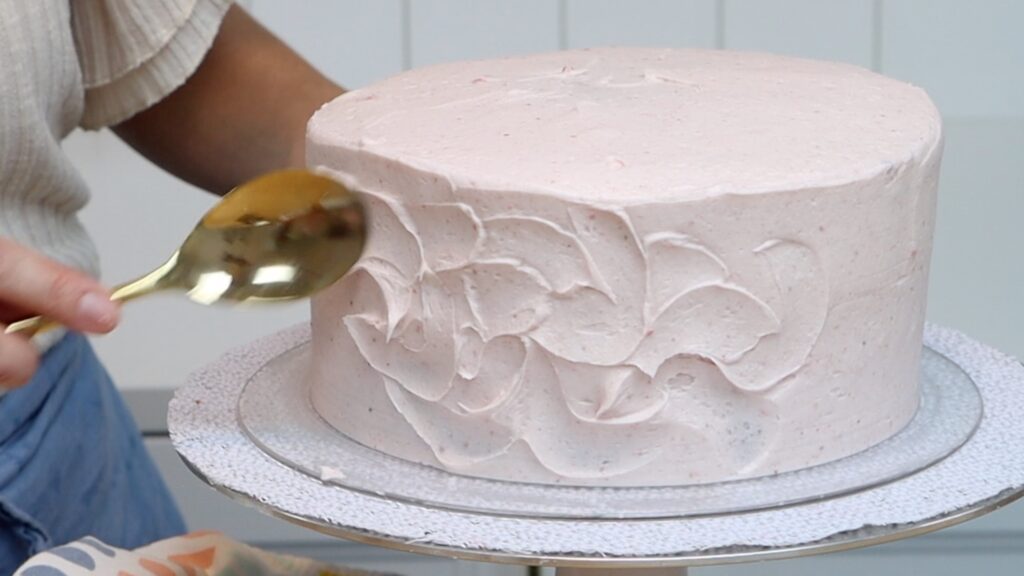
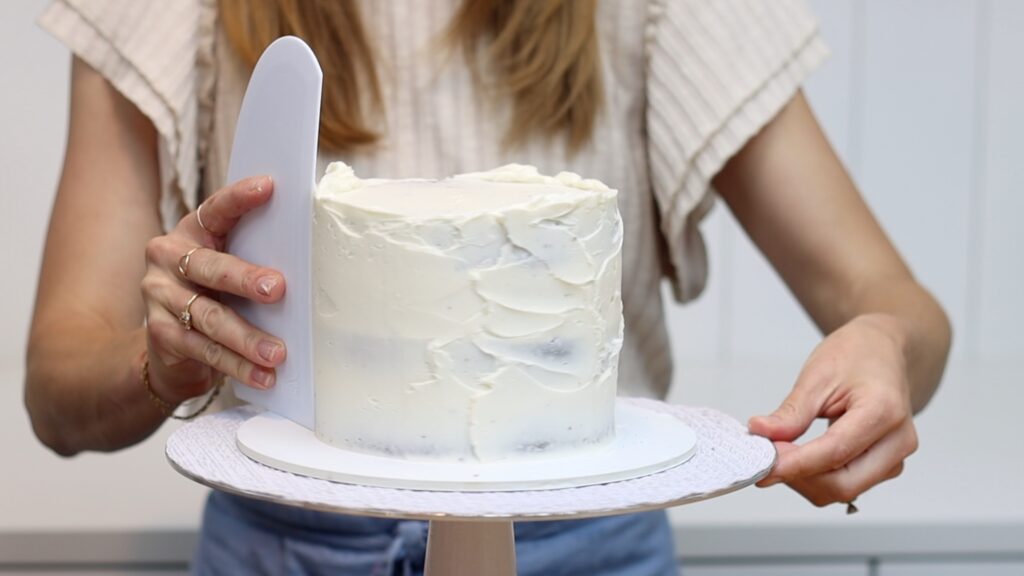
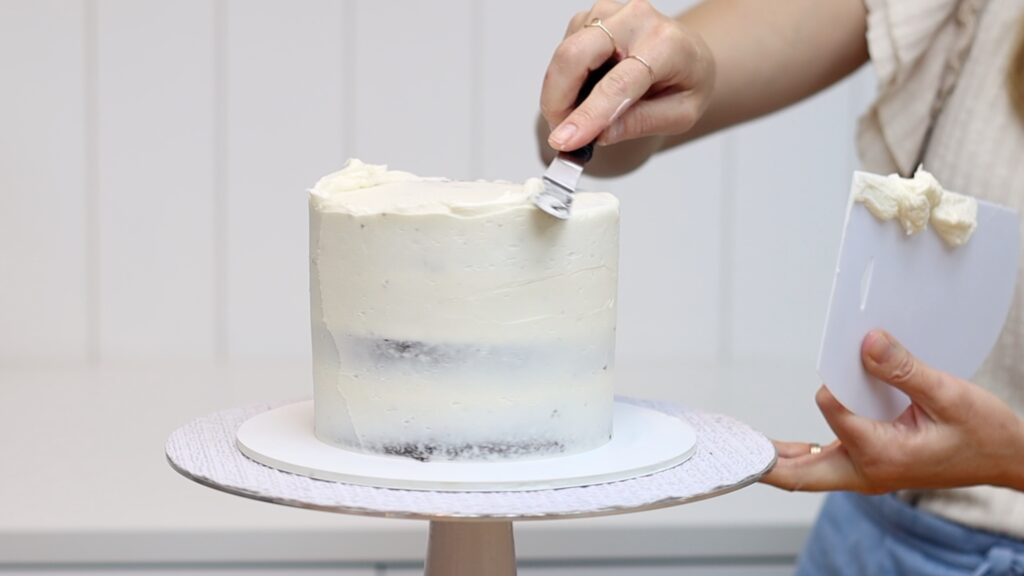
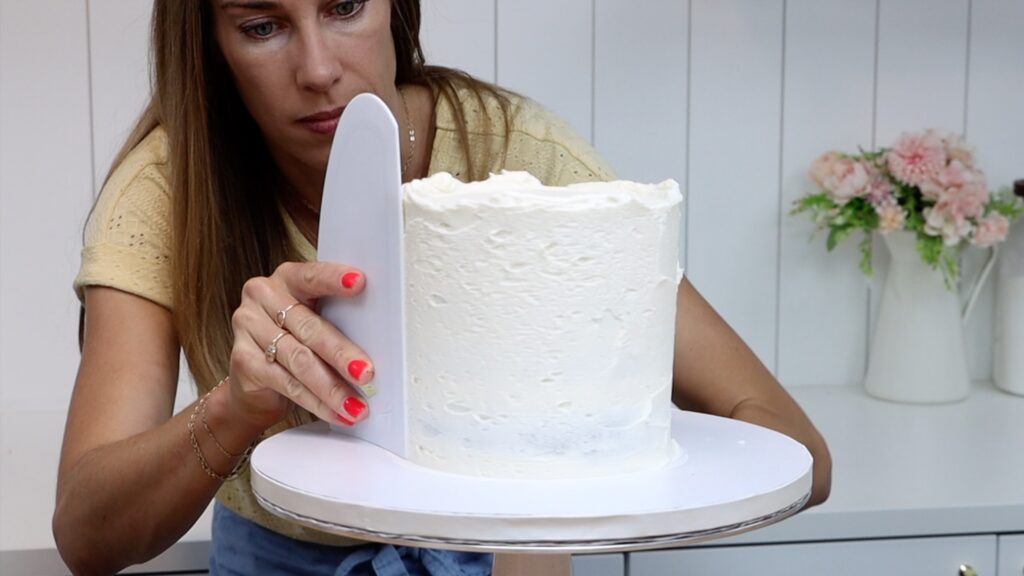
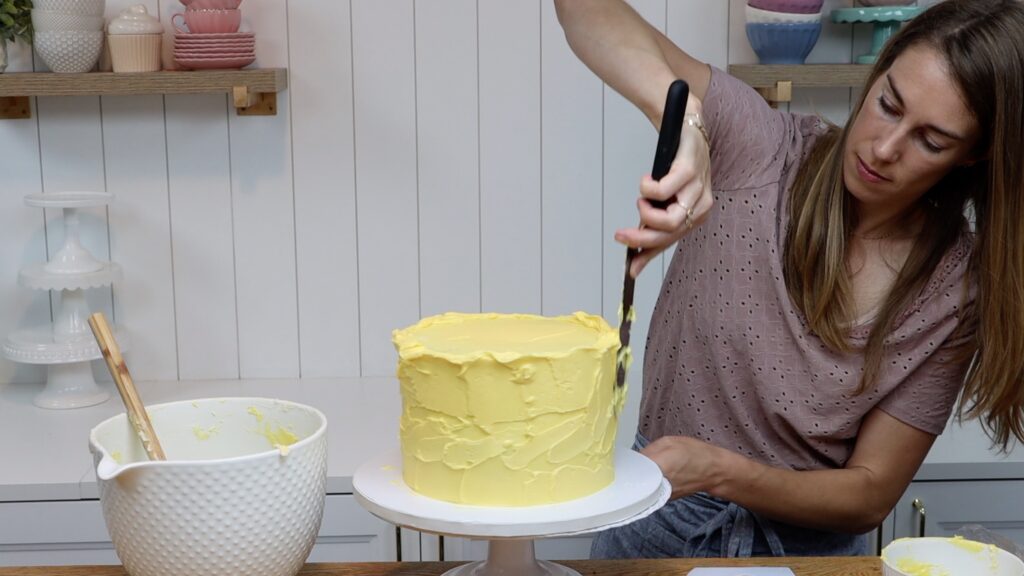
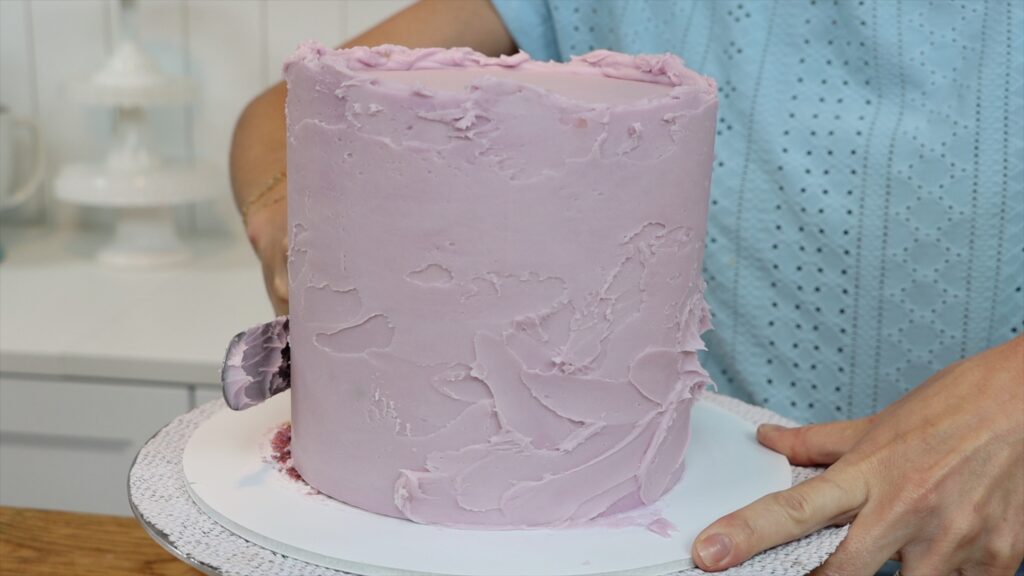
My favourite way to decorate this rustic style strawberry cake is with texture. This means you don't need to be a master at smooth frosting! Scrape around the cake with a cake comb or your offset spatula to smooth the frosting slightly and then use the back of a spoon to add texture. You can drag the spoon upwards or sideways around the cake, or in little curves or arc shapes.
You can decorate this with fresh strawberries or freeze-dried strawberries, or both! I love the way freeze-dried strawberries look and they won't leak any strawberry juices onto your cake.
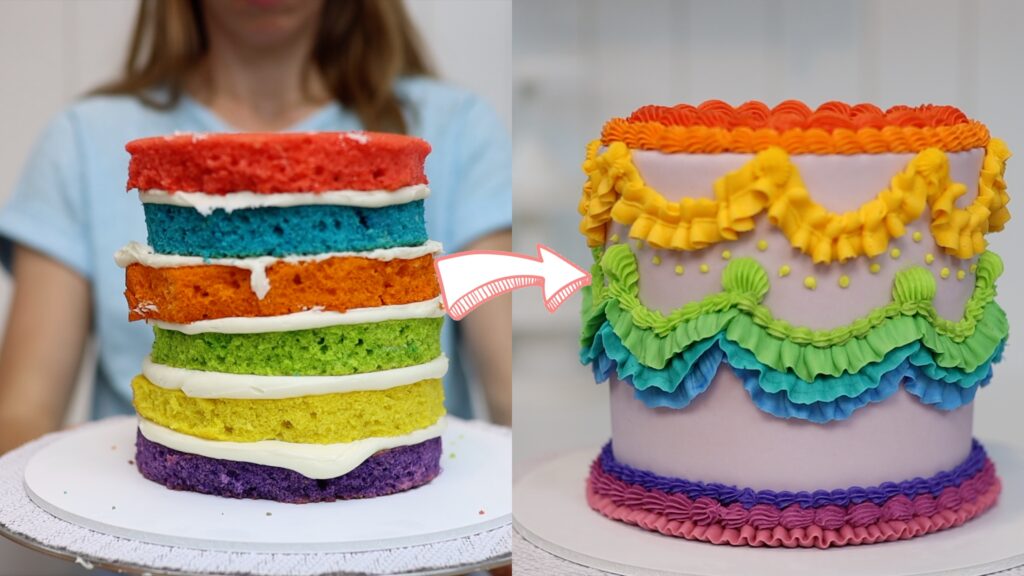
If you want to decorate the cake with a theme using different colours and styles, use the strawberry buttercream as a crumb coat. Let it set in the fridge for about 30 minutes before adding different frosting on top. This way you'll have all of the flavour of the strawberry buttercream but whatever unique decorations you like. For the Flamingo cake below I baked this recipe in four 6" pans and used three quarters of the strawberry buttercream recipe for the filling and crumb coat.
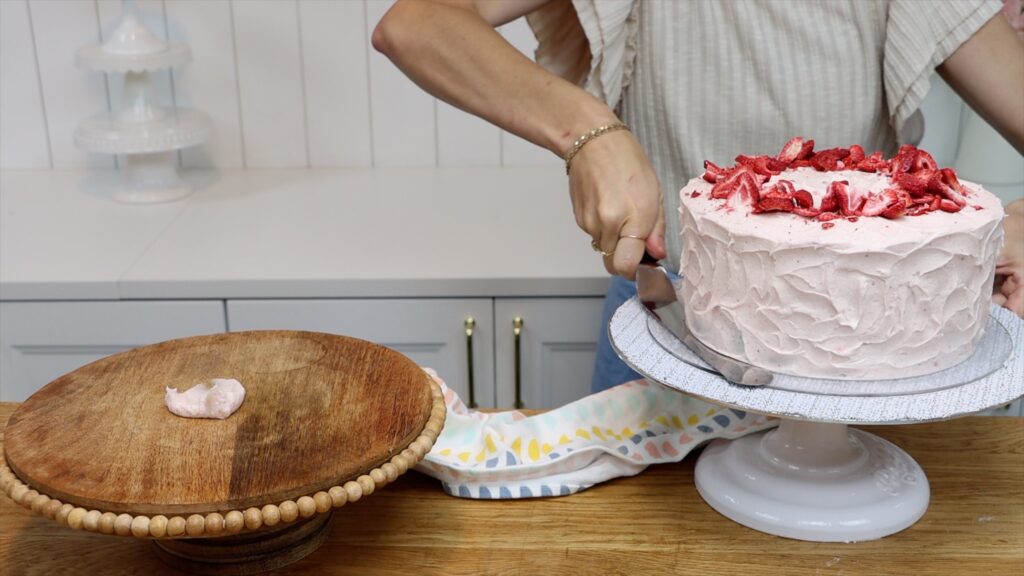
How to move a cake onto a cake stand or platter
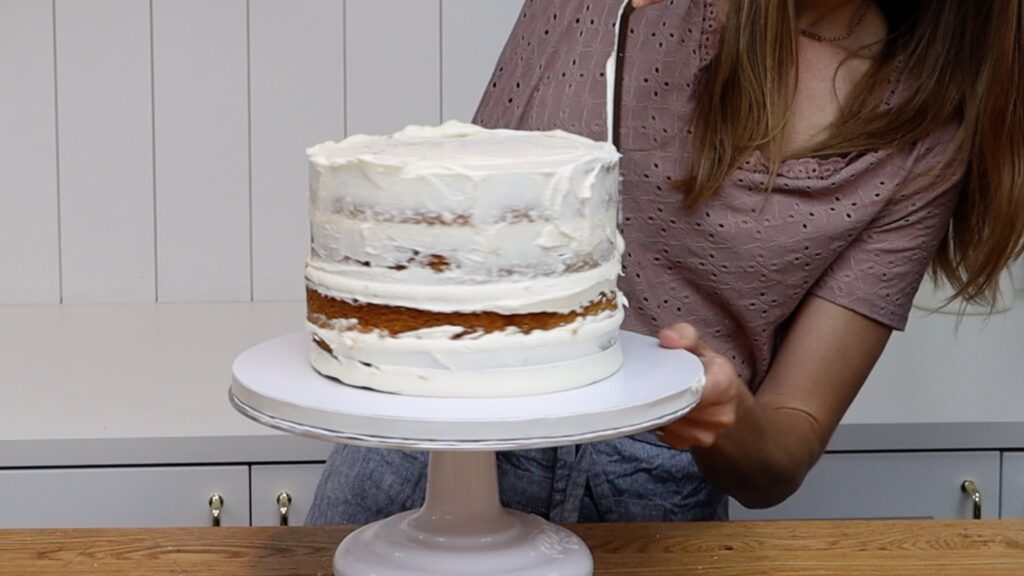
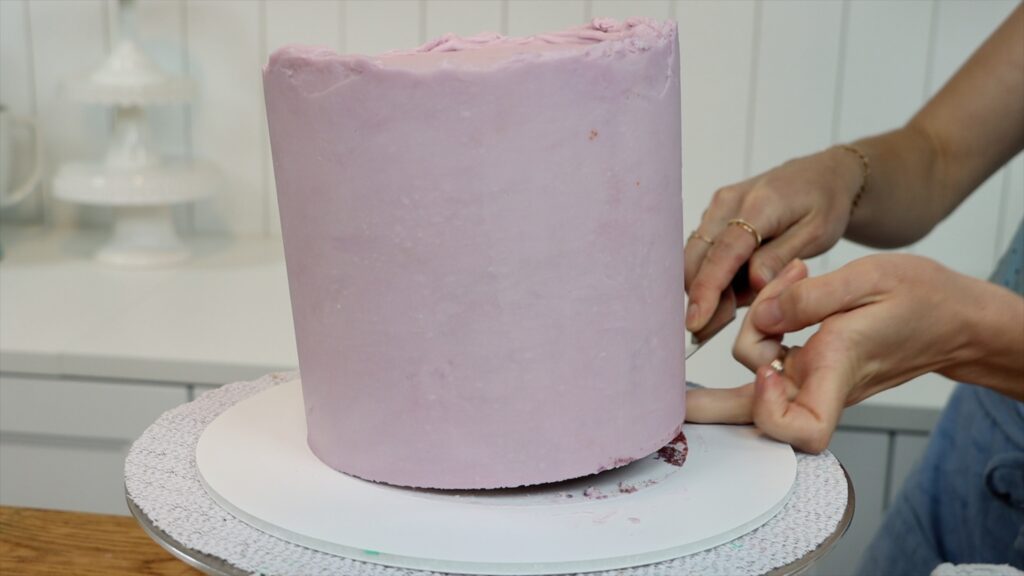
If you frosted the cake on a cake board, you can move it onto a platter or cake stand. Put the cake into the fridge for an hour or two to set the frosting so it's very firm. Then slide a spatula underneath it to separate it from the board. Spin the spatula all the way around, between the cake and the cake board. Then lift the cake up and lower it down onto the cake stand. I spread a bit of buttercream on the cake stand to attach the cake so it doesn't move when I lift it.
You can keep this cake in the fridge for a day or two before serving it. Take it out of the fridge at least two hours before you serve it so that it warms up to room temperature. That's when the cake and buttercream will taste the best.
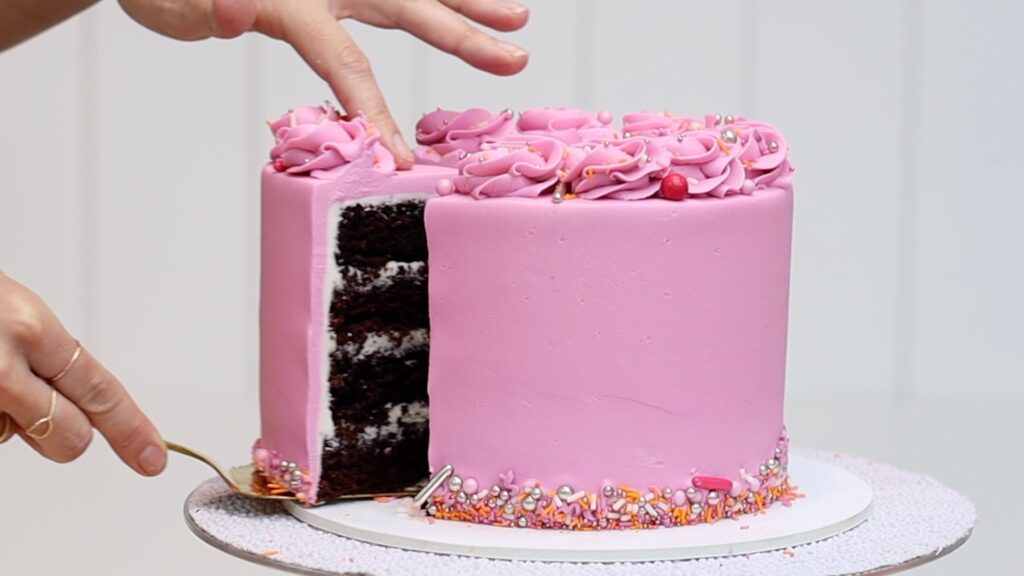
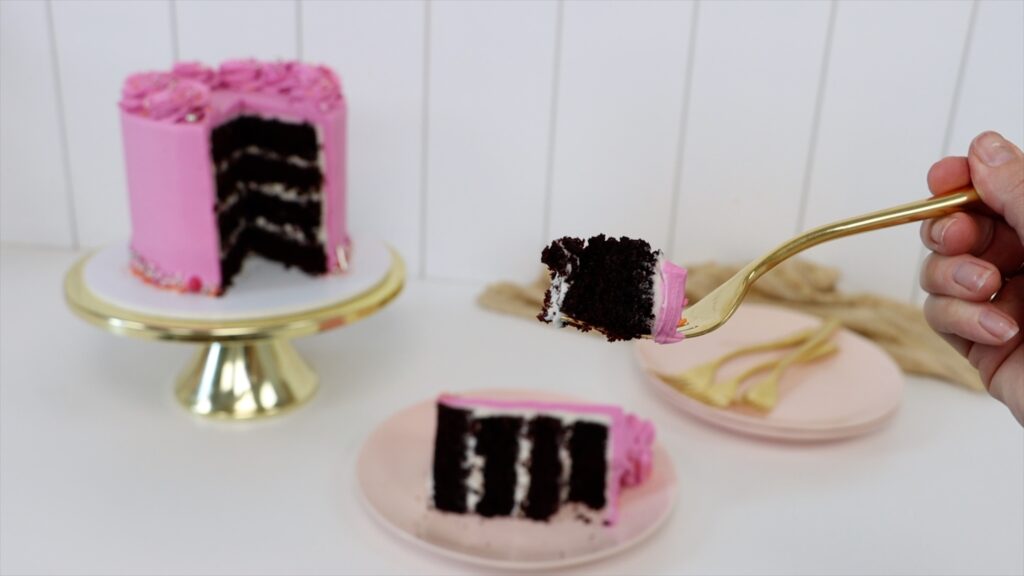
The fresh and freeze-dried strawberries make the cake taste just as full of strawberry flavour as the buttercream and it's just heavenly! I hope you love this fresh strawberry cake as much as I do.
If you try this recipe, please leave a review below! And you'll find a step by step video tutorial of this recipe below as well.
This cake, filling AND frosting are bursting with strawberry flavour!
Ingredients
UnitsScale
For the strawberry cake:
1cupunsalted butter
2cupssugar
4 eggs
3cupsall-purpose flour (plain flour)
2 teaspoons baking powder
1/2 teaspoon salt
1/2cup whole milk (full fat)
3/4cup fresh or frozen strawberries
1cup freeze-dried strawberries (15g)
1 teaspoon vanilla
For the strawberry buttercream:
2cupsunsalted butter
6cupspowdered sugar (icing sugar)
1/2 teaspoon salt
3/4 cup freeze-dried strawberries (plus 1/4 cup for decorating, optionally!) = 15g
1 teaspoon vanilla
1-2 tablespoons whole milk (full fat)
Instructions
To bake the strawberry cake:
In a mixer, beat the butter and sugar at medium speed until light and creamy, about 3 minutes.
Add eggs one at a time, mixing on medium speed for 30 seconds after each one, before adding the next. Scrape down to the bottom of the mixing bowl with a spatula to make sure all of the butter and sugar are mixed in.
Whisk together the flour, baking powder and salt. Add a third of the flour mixture to the mixer and mix on low speed only until incorporated.
In a blender or food processor, blend fresh/frozen and freeze-dried strawberries until smooth.
Whisk together milk, strawberries and vanilla. Add half of the strawberry mixture to the mixer and mix at low speed only until incorporated. Mix in another third of the flour, then the rest of the strawberry mixture, and then the final third of the flour mixture.
Divide the batter between three greased 8” pans. Tap the pans on the counter to level the batter and then bake at 350C or 175C for 23 minutes. When the cake springs back up when you poke it, the cakes are baked. Don’t bake any longer than this or the cakes will dry out.
Let the cakes sit in the pans for 5 minutes to cool slightly and then turn over onto a wire rack and leave them to cool.
To make the strawberry buttercream filling and frosting:
Mix butter and sugar together at low speed for 4 minutes, until smooth.
Blend freeze-dried strawberry in a blender or food processor to make a powder. Mix the powder into the buttercream.
Add milk 1 tablespoon at a time until the buttercream is the consistency of peanut butter or stuff whipped cream.
To layer and frost the cake:
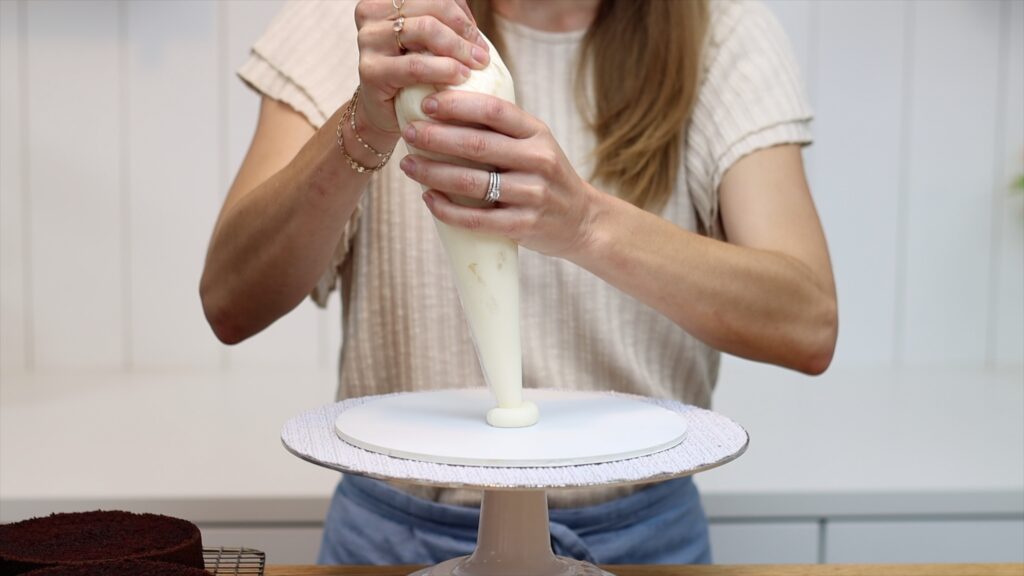
Spread a bit of buttercream onto the middle of a cake board or flat plate or platter. Press the first cake layer onto the buttercream to secure it in place.
Spread strawberry buttercream to cover the top of the cake layer and then place the next cake layer on top. Spread strawberry filling on top and then add the final cake layer.
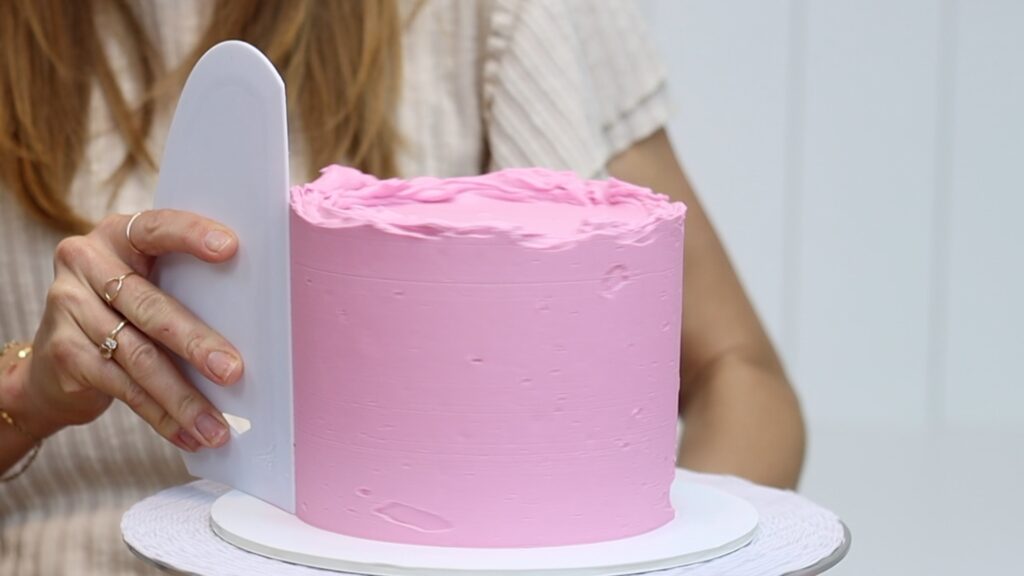
Spread strawberry buttercream to cover the cake. Smooth with a cake comb or offset spatula. To add texture, drag a spoon in arc motions, pushing it gently into the frosting to make swirls.
Serve this cake at room temperature. You can refrigerate it for 2 days but take it out of the fridge at least 2 hours before serving.
Notes
You can use salted butter instead of unsalted butter - just leave out the salt in the recipe.
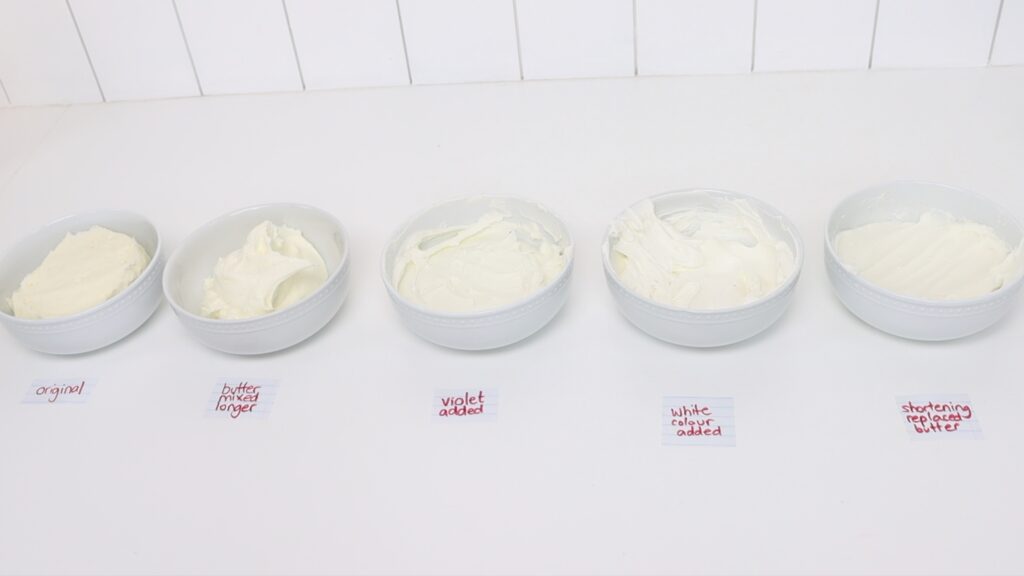
How to make white buttercream frosting is one of the most commonly asked questions about cake decorating so in this tutorial I'll share four hacks to help you say goodbye to yellow buttercream!
#1 Beat the butter
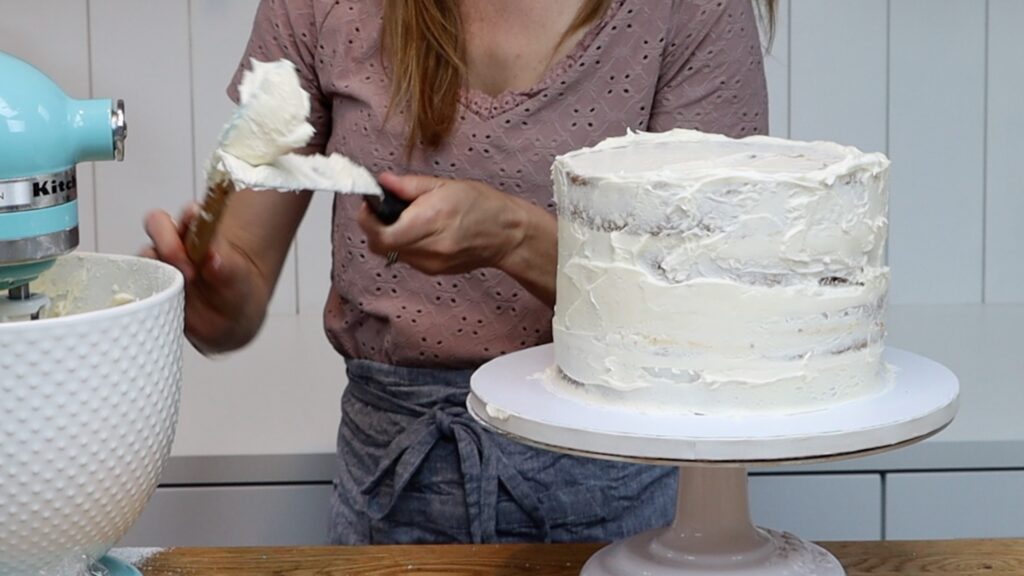
The first hack for white buttercream frosting is also the very first step of making it. I'm using my 4 Minute Buttercream recipe in this tutorial and I use it for all of my cakes.
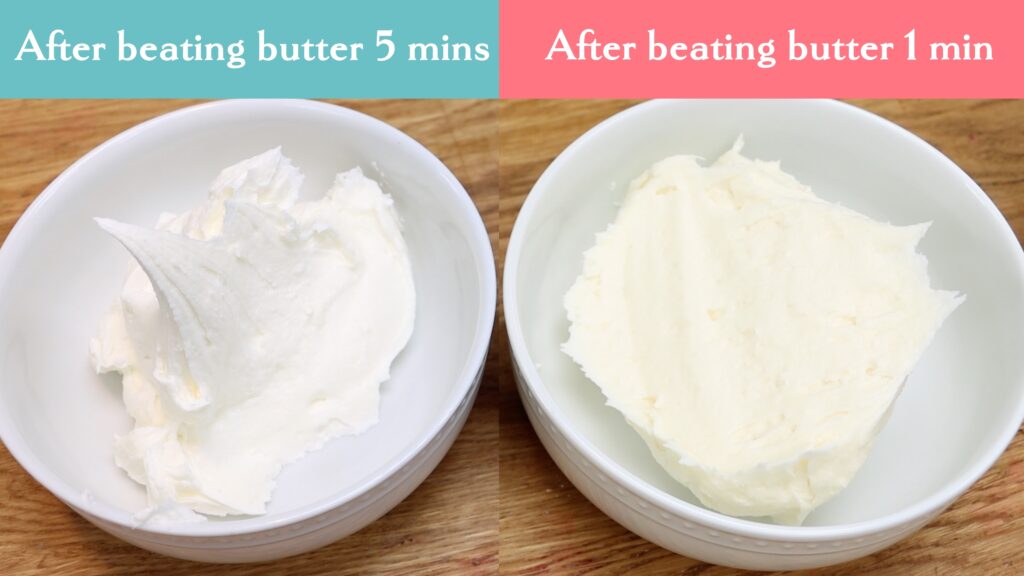
Beat the butter first, all on its own for a few minutes at medium speed. You want it to be completely smooth and move easily around in the mixing bowl. This only happens if butter is at room temperature so take it out of the fridge about 4 hours before.
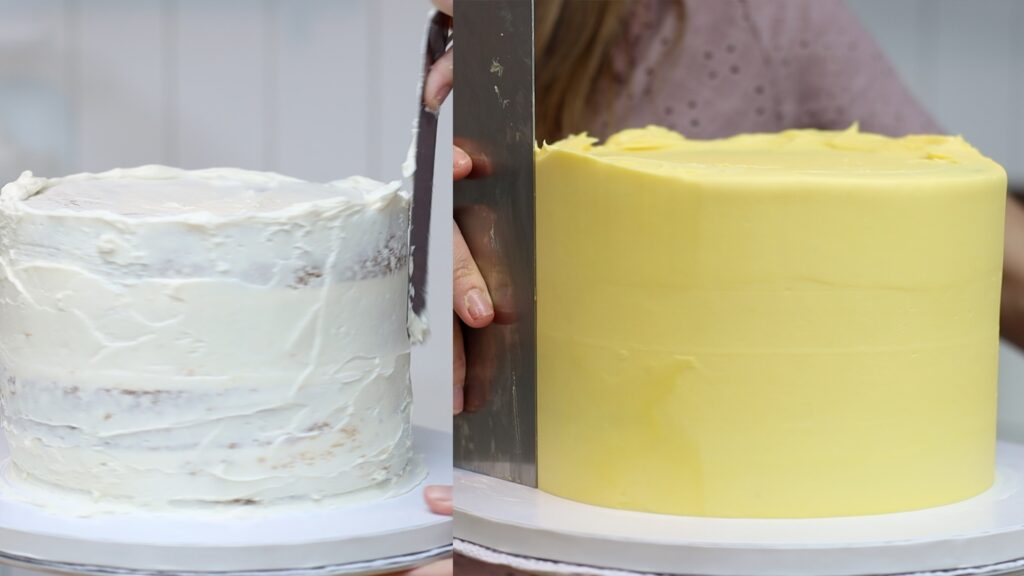
Now add the icing sugar or powdered sugar, which will lighten the butter a lot more. Continue with the recipe and your buttercream will be whiter than if you hadn't beaten the butter alone. Look at how much lighter the buttercream is after beating it for five minutes, compared to one minute:
#2 Add violet to make white buttercream frosting
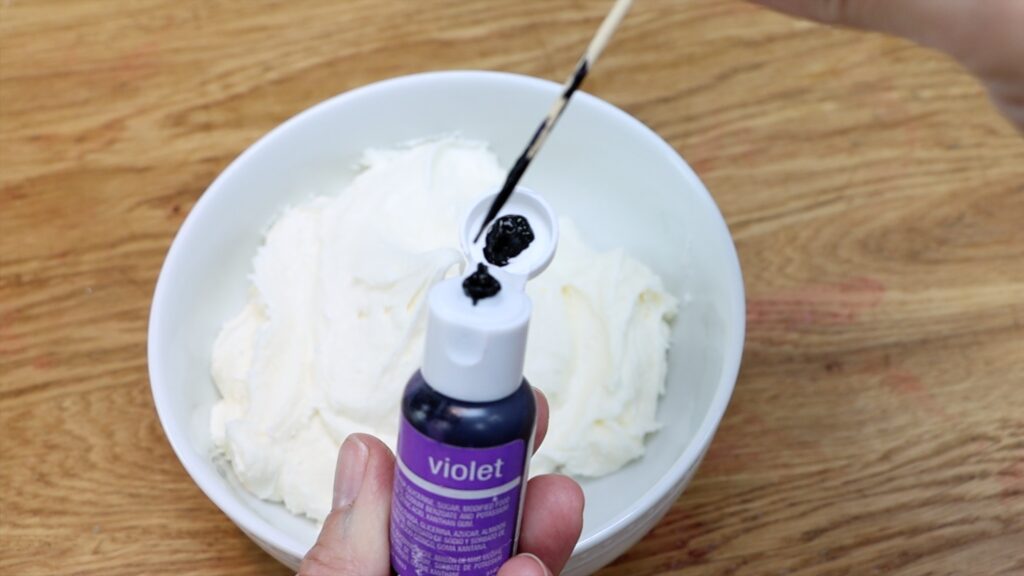
If the buttercream is still yellow, add a tiny bit of violet. This has to be violet - purple won't work because it's the blue tint of violet that offsets the yellow. Dip a toothpick into the bottle to get a tiny amount because a full drop will be too much. Check out this tutorial for more ways to use toothpicks for cake decorating!
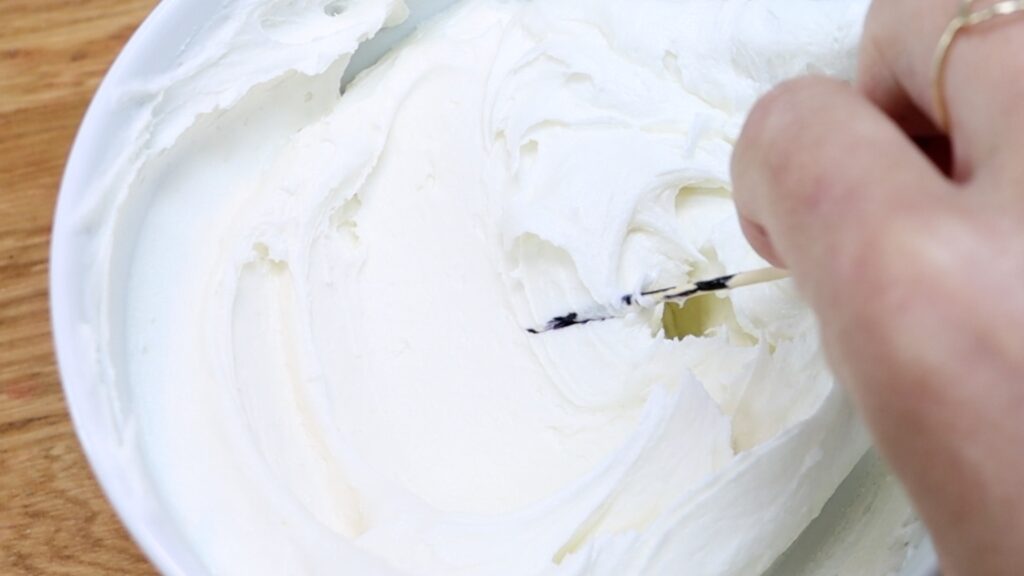
Drag the toothpick through the buttercream to leave a streak behind.
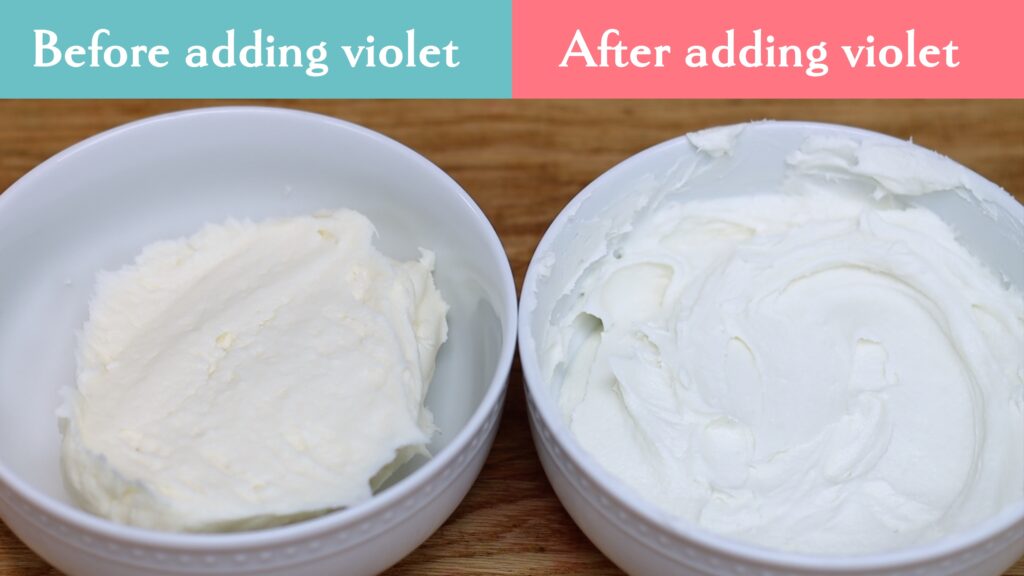
Mix it in and look at the difference before and after adding violet:
You could add white colouring or white icing color but you'll need a lot for a full batch of buttercream. There are two negative side effects: an unpleasant flavour and it will make the buttercream very runny.
#3 Choose your background
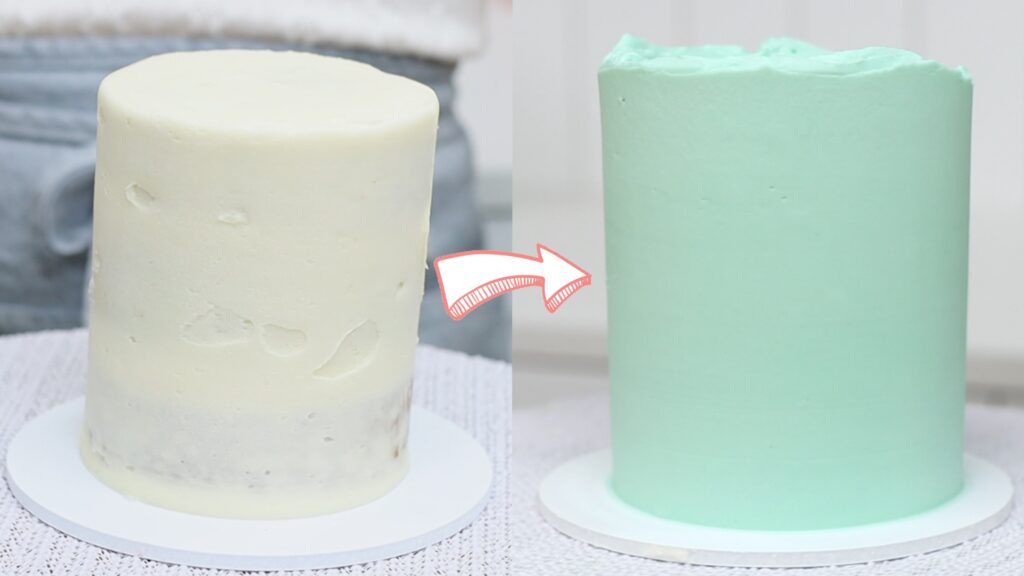
This third hack for white buttercream actually has nothing to do with the buttercream itself. You only notice off-white isn't bright white when it's next to something that is bright white. So after making a cake, choose your background wisely. Opt for colourful decorations and don't display the cake in front of a white background either. Look how different this white buttercream frosting looks when the background is white compared to colourful. The cake looks whiter when the background isn't white.
#4 Use shortening for white buttercream frosting
If none of these hacks make your cakes look white enough, the final hack is to tweak your buttercream recipe. As you saw at the beginning, the butter in buttercream is yellow and gives buttercream that yellow tint. You can replace the buttercream with a vegetable shortening like Trex or Crisco.
These are white, not yellow, so your buttercream will be bright white. Think of the cakes you can buy from a grocery store or supermarket - those are made with shortening instead of butter.
The flavour will be different without butter so with this substitution, you're sacrificing that. An alternative is to substitute half of the butter with shortening. This will make the colour whiter but you'll keep the delicious buttery flavour. An added benefit of using all or half shortening is that the buttercream will be more stable. This is a great option in hot climates when the cake will be served outside.
I hope this tutorial has been useful. Visit my cake school to learn hundreds of cake decorating techniques and designs, with courses and membership options too, to take your buttercream cake skills to the next level.
Layer your cake and fillings, cover everything in buttercream or any other frosting, add some decorations and tadaa! With the right tips and tricks it really can be this easy and in this tutorial I'll show you how to decorate a cake!
How to assemble a cake
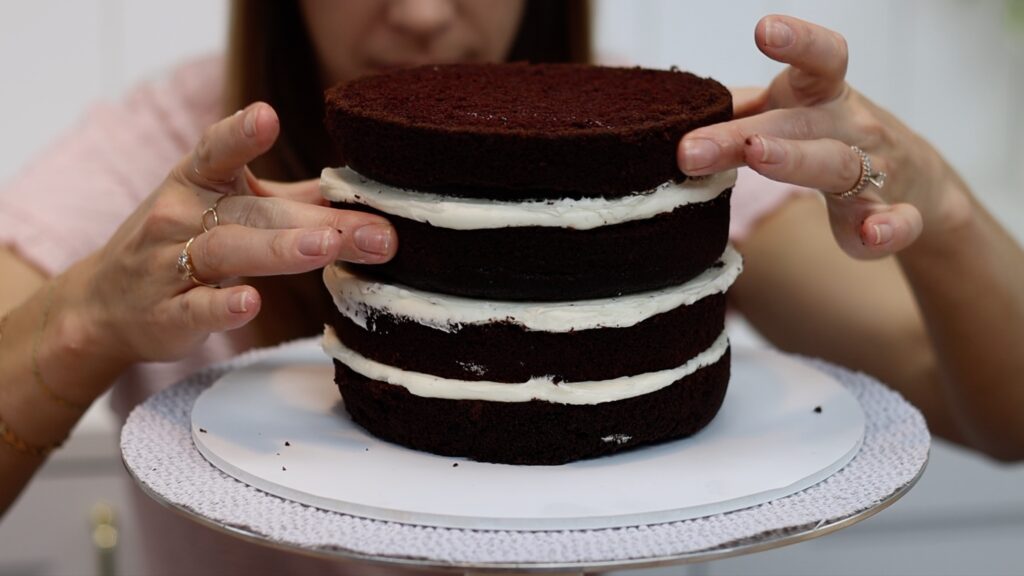
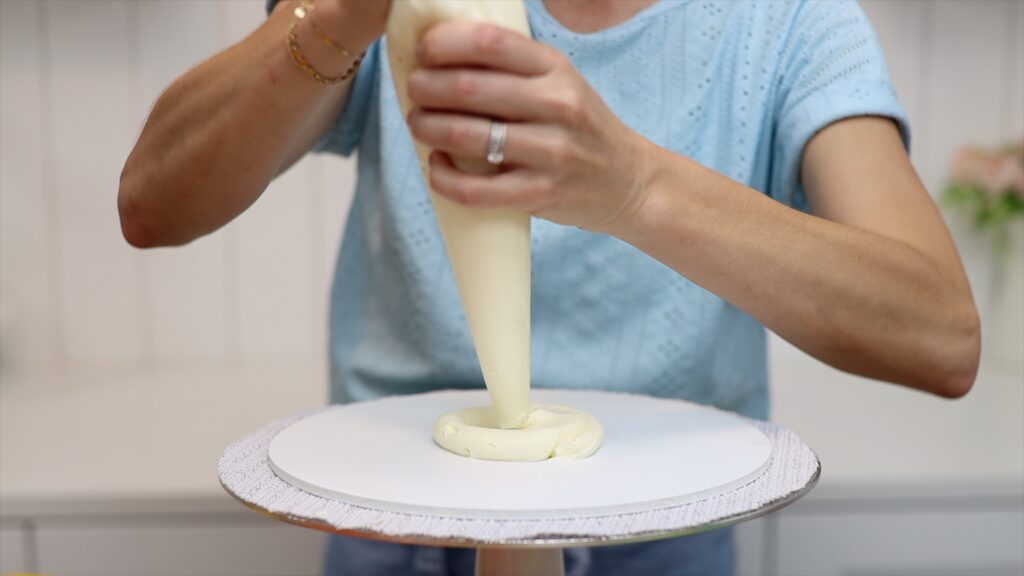
Maybe the most important part is to pipe or spread a bit of buttercream onto the middle of your cake board. This will attach the cake so it doesn't slip and slide around while you frost and decorate it. Push your first layer of cake down onto this and it will will act like glue to hold it still. I'm using my Perfect Chocolate Cake and my 4 Minute Buttercream for this tutorial.
Now alternate between your cake layers and your filling. You can divide your cake layers in half to make twice as many layers, which means more filling in between. Your filling can be buttercream or you can use jam or lemon curd or Nutella or anything else you like. Filling adds flavour but it has two other purposes as well. It helps to level the cake so that it's flat for every layer you put on top. It also acts as glue to hold the next cake layer in place so that the cake is straight.
You can pipe the filling on using a piping bag or you can spread it on. Using a piping bag is quicker and neater but both work.
How to crumb coat a cake
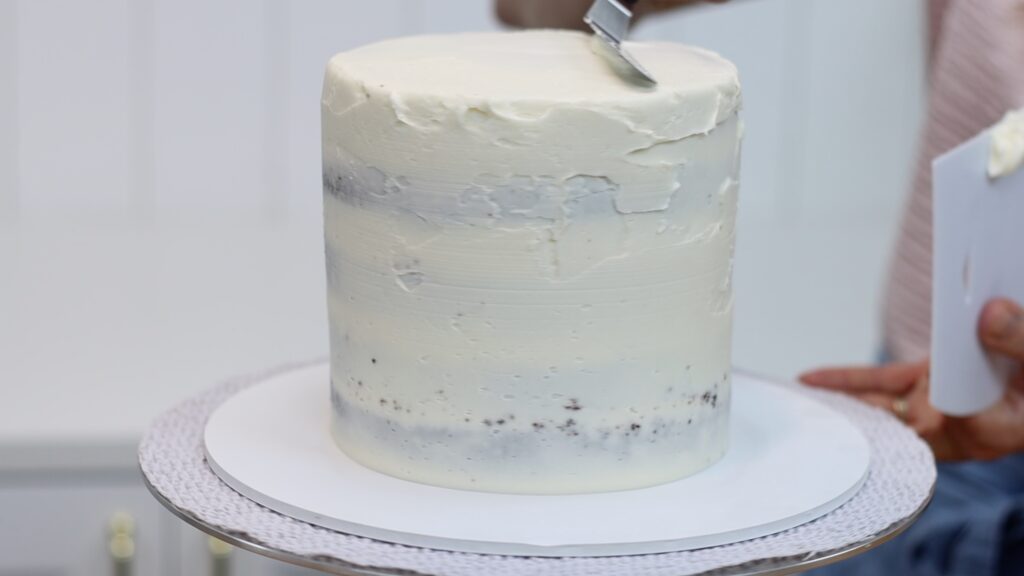
After you've assembled your cake it's time for the crumb coat. This is the first layer of frosting you're going to put onto your cake. Spread (or pipe and then spread) this all over the top of the cake and around the sides. The purpose of the crumb coat is to trap any crumbs that come off the cake so they get stuck in this layer of frosting. This means they won't go into the final layer of frosting, so you won't have visible crumbs on your cake.
Because this is going to be covered up with another layer of frosting, this doesn't need to be really neat. It does need to cover up all of the naked cake so those crumbs can't get into the final layer of frosting.
When you've finished your crumb coat, put the cake into the fridge or the freezer to chill it. It will need about 15 minutes in the freezer 30 minutes in the fridge. When the crumb coat gets cold it will set, which is necessary before the next step.
How to frost a cake
After chilling the crumb coat, your final layer of frosting will sit on top instead of blending together with it. This is what keeps the crumbs out of the final layer of frosting.
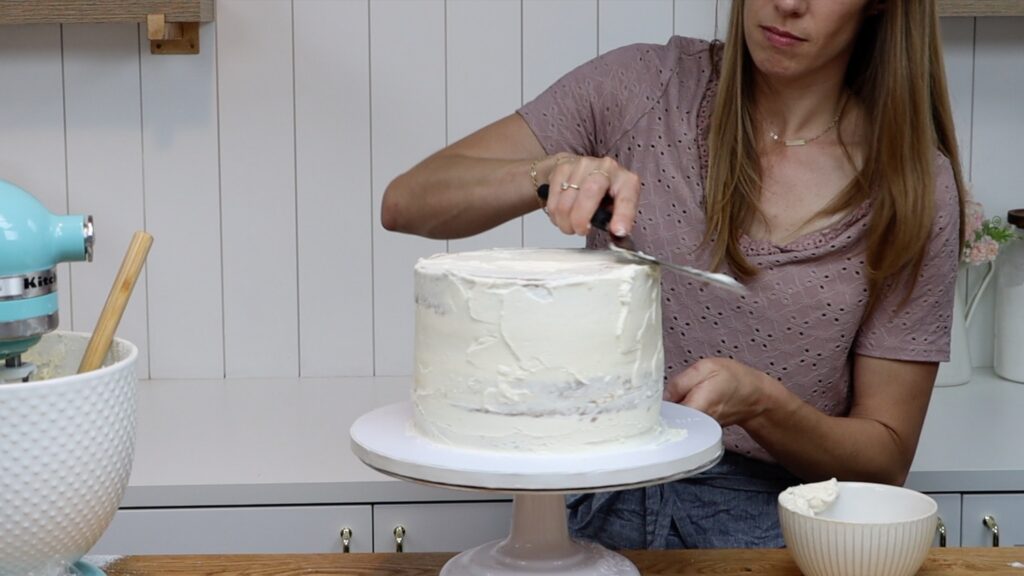
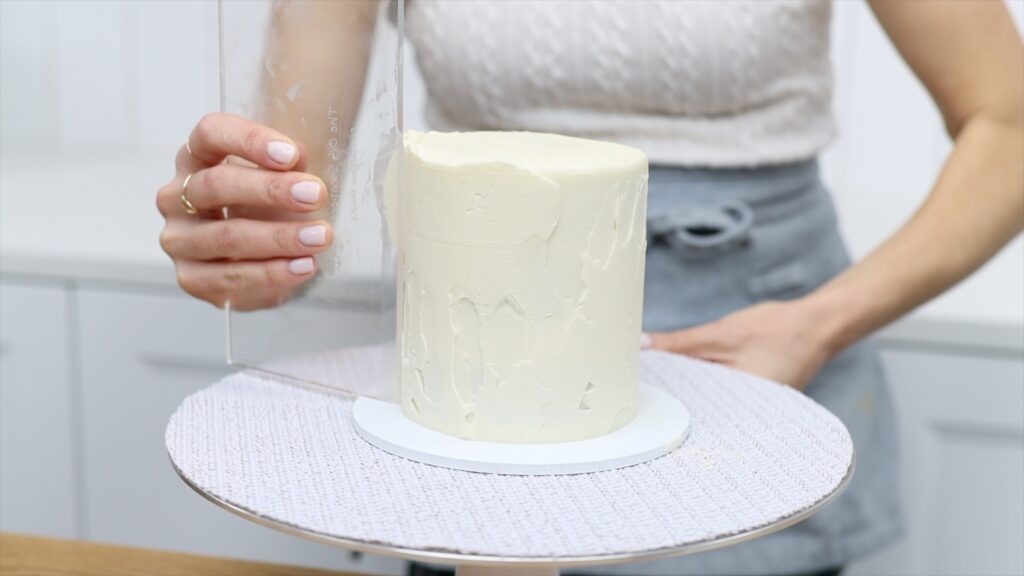
Spread your frosting all over the top and sides of your cake and then switch to a straight cake comb. This is the first reason for using a cake board: it provides a flat surface to rest your cake comb. Now you can line the comb up straight to create straight sides as you scrape around the cake. So push the base of your cake comb down on the cake board as you spin the turntable. Press very gently against the cake to scrape off the outer layer of frosting. If you press too hard you'll cause the buttercream to tear and create air bubbles. You might also take off too much frosting and expose the crumb coat underneath.
After scraping around the cake a few times, spread more frosting over any indents or air pockets and scrape again.
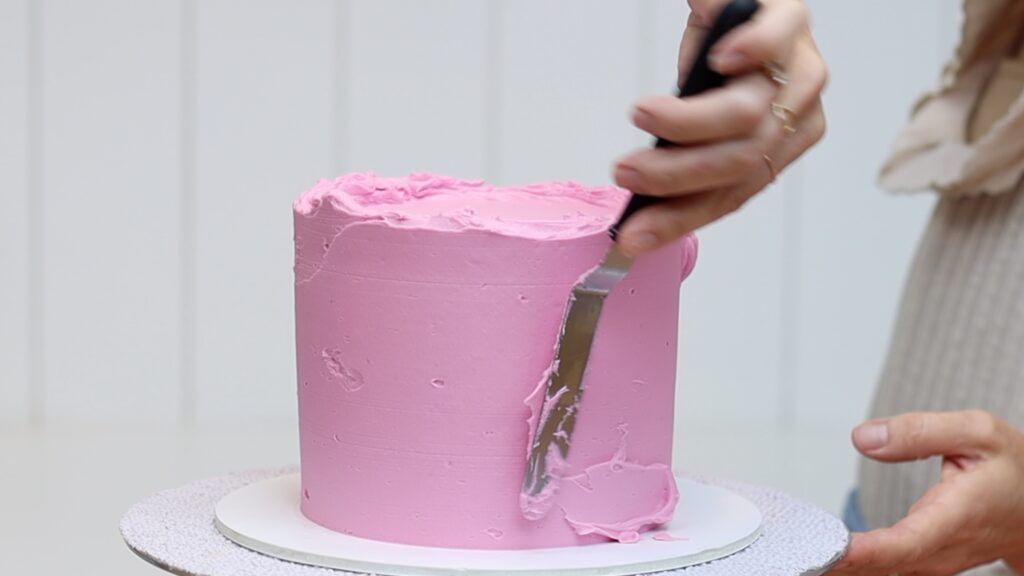
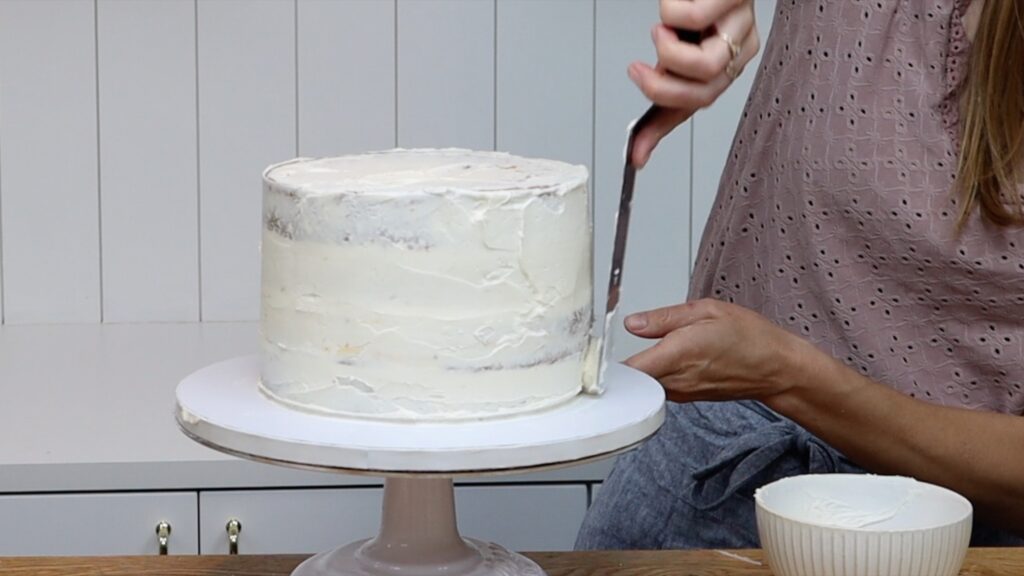
When the frosting is smooth, tidy up the top edge by pushing sideways with your offset spatula. Make sure you don't push down because that will cause bulges around the sides of the cake.
How to decorate a cake
How to decorate a cake with sprinkles
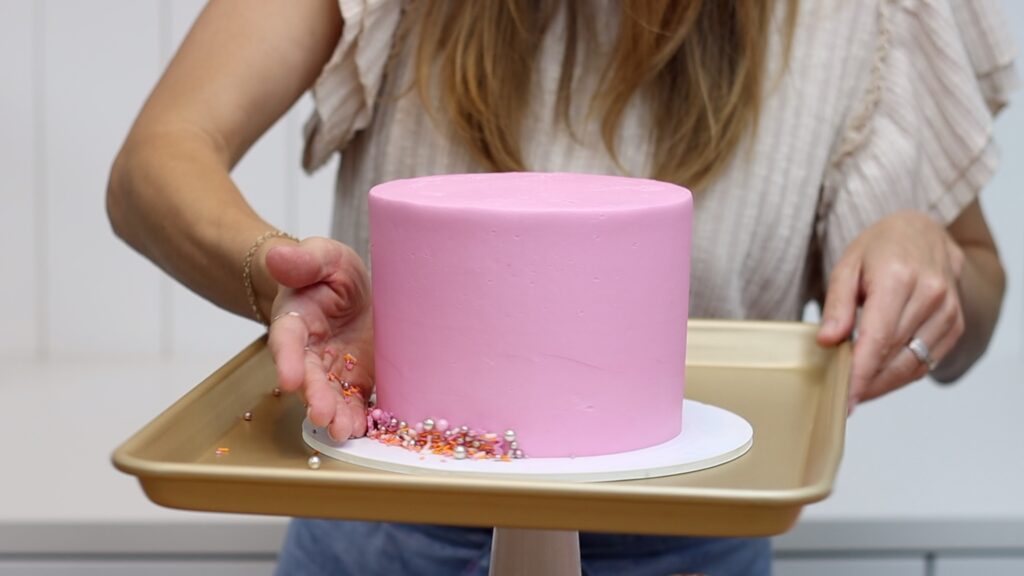
The best time to add sprinkles to the cake is now, while the frosting is still soft and sticky. Lift your cake up and put it onto a tray, which will catch any falling sprinkles. This is the second reason for using a cake board: it makes it easy to move the cake around while you're decorating it or to transport or serve.
I like to pick the big sprinkles out of a sprinkle mix and only push the smaller ones into the side of the cake. Press them into the bottom inch or so of the frosting. Then at the end, hand place the biggest sprinkles so that they're evenly spread around the cake.
When you finish, tap the cake board a few times so that the extra sprinkles fall off onto the tray. You can do this is because you've chilled the cake so it's set onto that dot of buttercream on the cake board. You don't need to worry about the cake falling over! Tilt the tray so that the sprinkles roll down to the bottom corner and then pour them back into the container.
How to decorate a cake with piped swirls
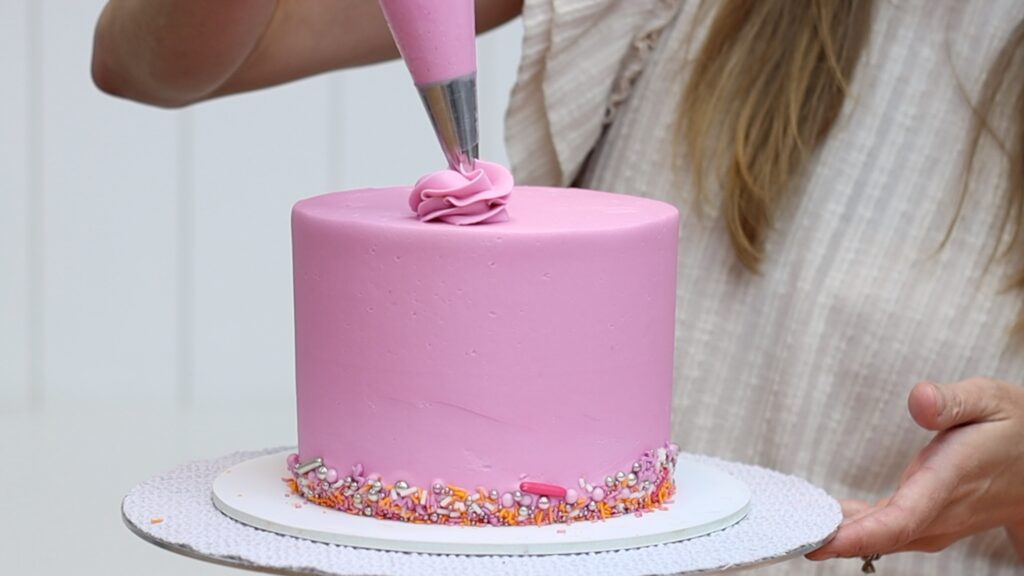
Before piping onto the top of the cake I really recommend chilling the cake briefly to set the frosting. 15 minutes in the freezer or 30 minutes in the fridge is enough time. While it's chilling, scoop up your leftover frosting and put it into a piping bag fitted with any star-shaped tip. I'm using a 1M tip.
Take your cake out and that short amount of time in the fridge or freezer will have firmed up the frosting. Now the weight of the swirls you pipe on top won't cause the frosting to sink or droop.
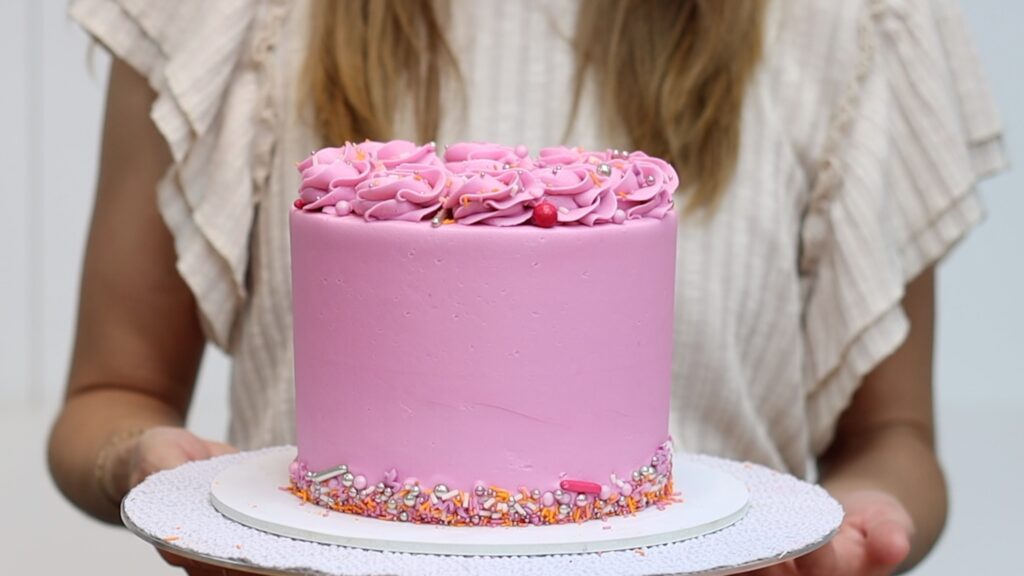
You can pipe very tall swirls, like the ones you would pipe onto a cupcake, or just pipe a few rings. I'm piping two laps around for each of my swirls. Always pull away in the same direction so that the swirls look neat at the end.
Add a few more sprinkles on top while the piping is still soft and sticky so that they attach easily. I recommend storing cakes in the fridge so that the frosting and decorations don't droop or slide off the cake.
How to serve a cake
Take the cake out of the fridge 2 to 4 hours before you serve the cake. This allows the cake and buttercream to warm up to room temperature and that's when they will taste the best!
I hope this tutorial has been useful! I can't wait for you to make your first cake. Visit my cake school to learn hundreds of ways to decorate cakes with my online courses and memberships.
Turn any image into an eye-catching, edible mosaic cake with this simple but stunning technique! Use basic tools and materials like parchment paper or wax paper, a toothpick, and coloured buttercream.
Assemble a layer cake
Alternate cake layers and filling to assemble a layer cake. The taller the cake, the more space you'll have for your mosaic cake design. Check that each layer is lined up directly on top of the layer below so that your cake is straight. If the sides lean even slightly, it will be impossible to wrap the mosaic tightly around the cake.
Cover the cake in a crumb coat, which is a thin layer of frosting to trap any crumbs. Normally this doesn't need to be neat but for this design it's important it's smooth. The mosaic design is going to sit on top, mimicking this shape of the cake.
Measure the cake and your mosaic cake design
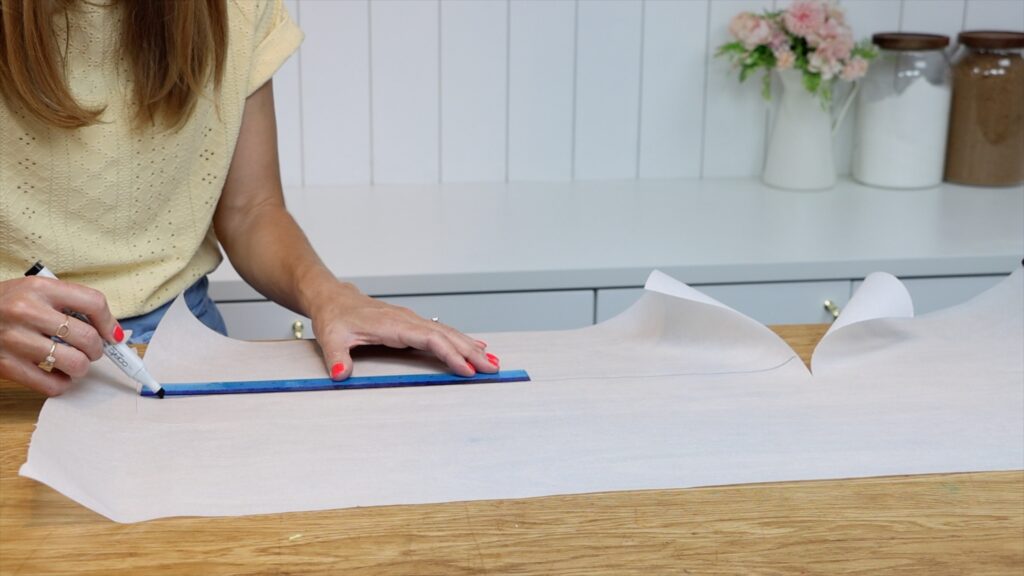
Now measure the height of the cake so that you know how tall to make the design. To measure the circumference, wrap string around the cake or just multiply the width by 3.14 to calculate the circumference. Cut a piece of parchment or wax paper about a finger taller and two fingers wider than the circumference.
Draw a mosaic cake design
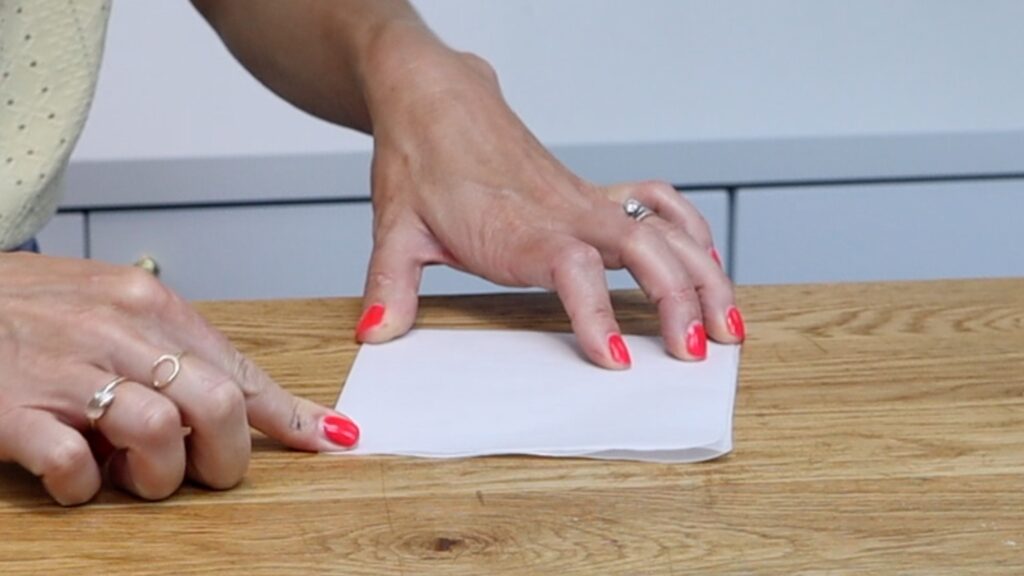
Chill the cake in the fridge while you draw your design. I'm folding my paper in half twice so that I have four sections for four different flowers.
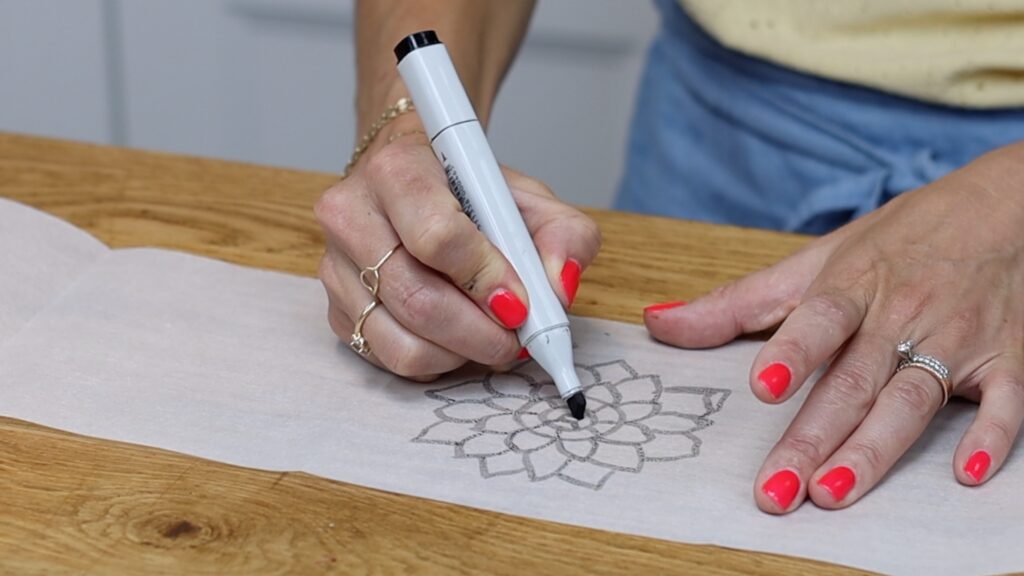
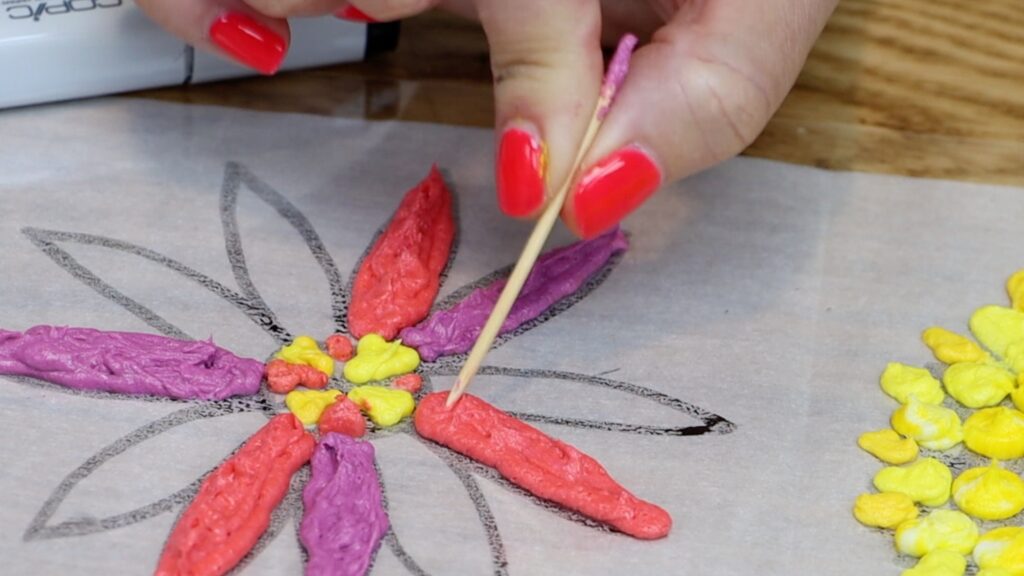
Use a thick pen or marker to draw because it makes wide gaps in between each petal. This way, each petal will become a separate tile when you transfer the image to create a mosaic cake.
Transfer your design onto paper or acetate
You can create your design on parchment paper or wax paper by adding buttercream to the other side, but acetate is thicker and stronger so if you have it, that's ideal.
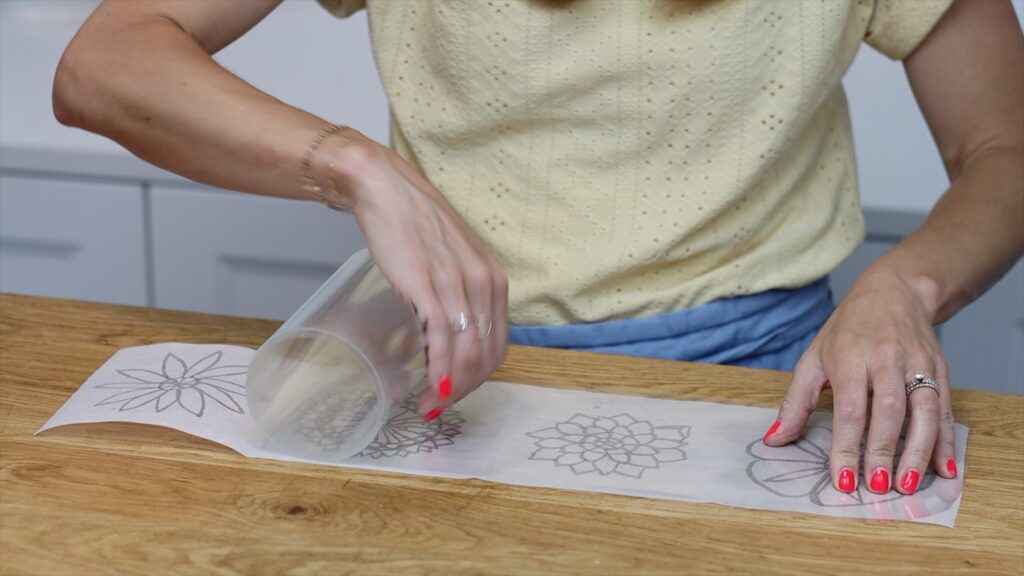
Notice that if your parchment or acetate comes in a roll it will curve. Put your design on the inner side of the curve so that it's curling up from the table or countertop. Tape down the corners or use some objects to weigh it down.
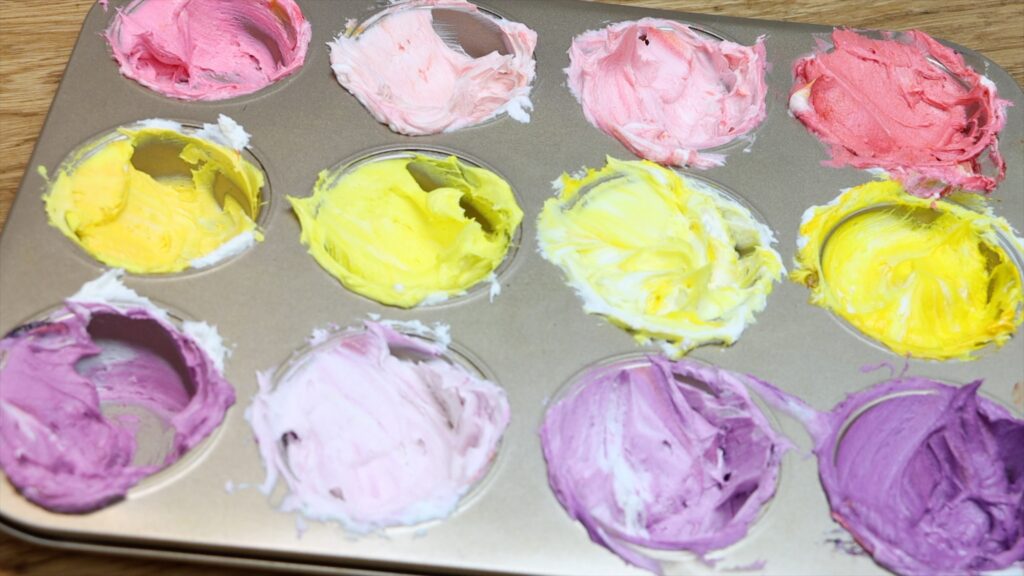
Tint buttercream whatever colours you choose. To make a few shades of each colour, mix the colour and divide it between a few bowls or holes in a muffin pan. Then add different amounts of plain white buttercream to each.
Next, you'll trace the image you drew to turn the drawing into a mosaic of buttercream tiles. There are lots of ways to create the tiles for the mosaic design, both with and without piping bags.
Pipe a mosaic cake design using piping bags and several piping tips
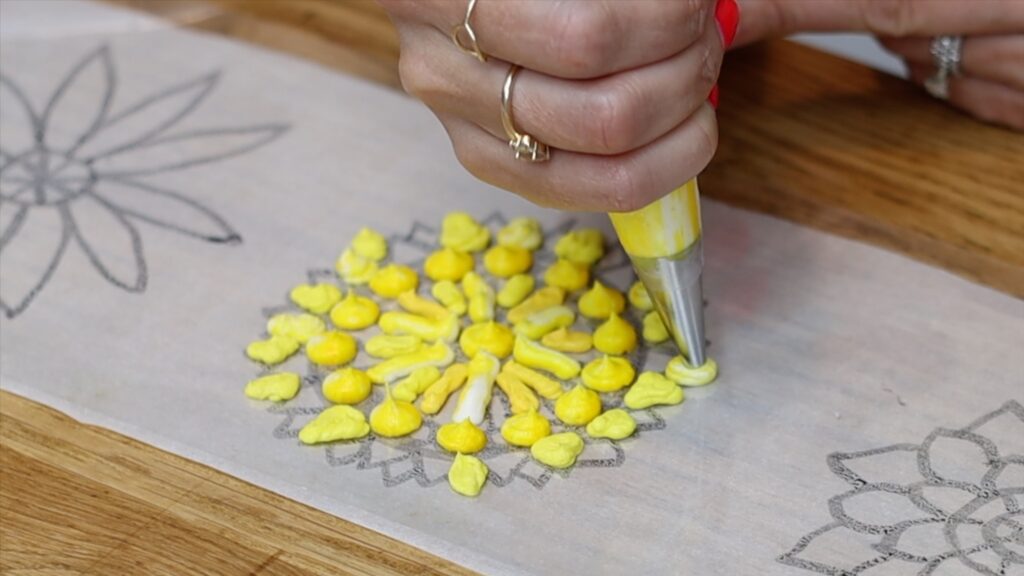
If you have several piping bags and small round piping tips, use a different one for each colour. Switch between the colours to pipe your design by squeezing the buttercream out to trace over the design you drew earlier. The smaller the piping tip, the easier it is to pipe little details.
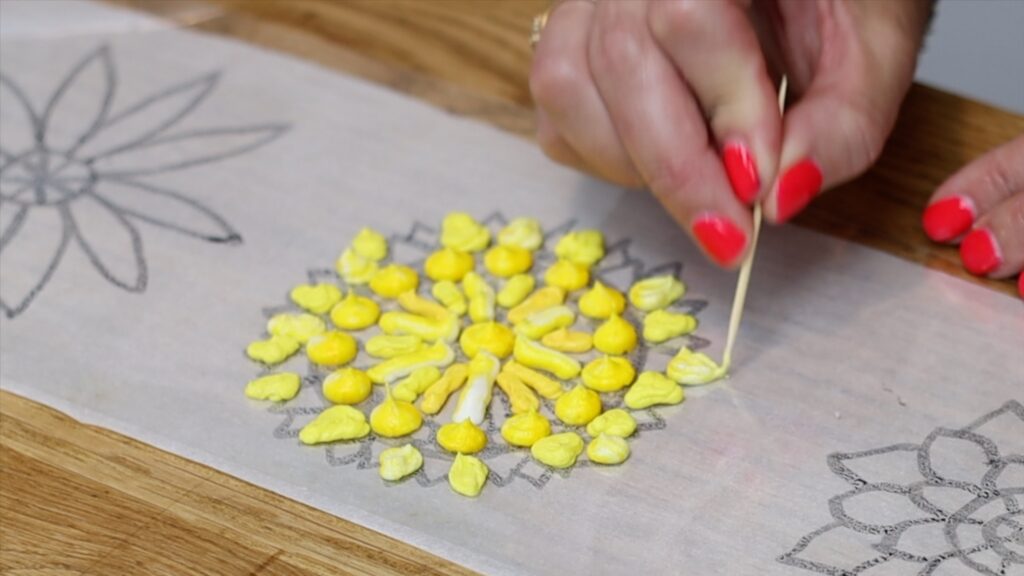
Make points at the tips of petals with a toothpick, nudging the buttercream to reshape it while it's still soft, before it sets. The consistency of your buttercream is really important for this. If it's too stiff it will take a long time to pipe all of the mosaic tiles of a design. You'll have to squeeze the bag hard to push the buttercream out, which is tiring and will cause cramping. The best consistency for buttercream is runnier, slightly thicker than whipped cream. You'll be able to squeeze it easily out of the piping bag and it will fill your outlines easily. I'm using my 4 Minute Buttercream for this mosaic cake.
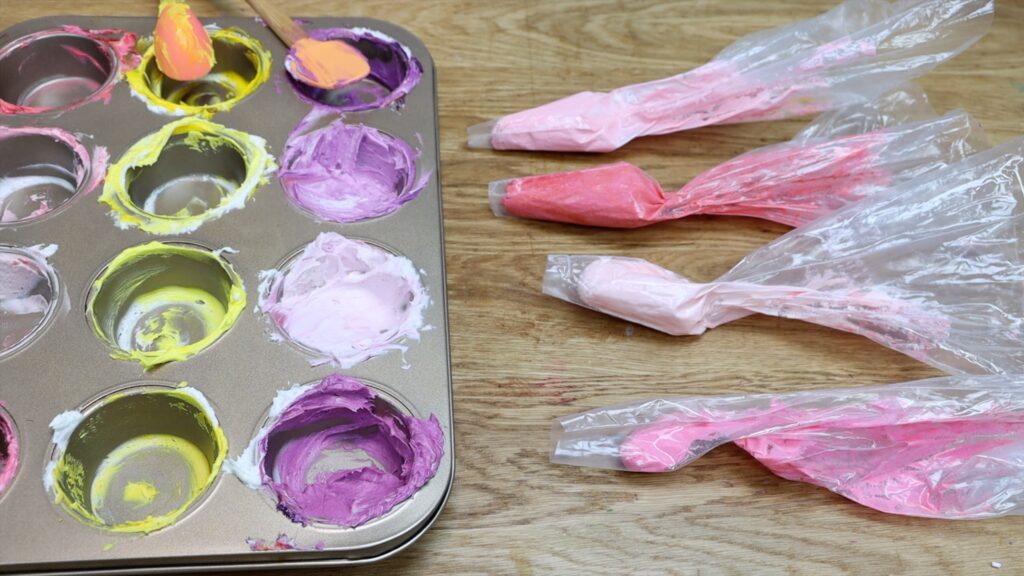
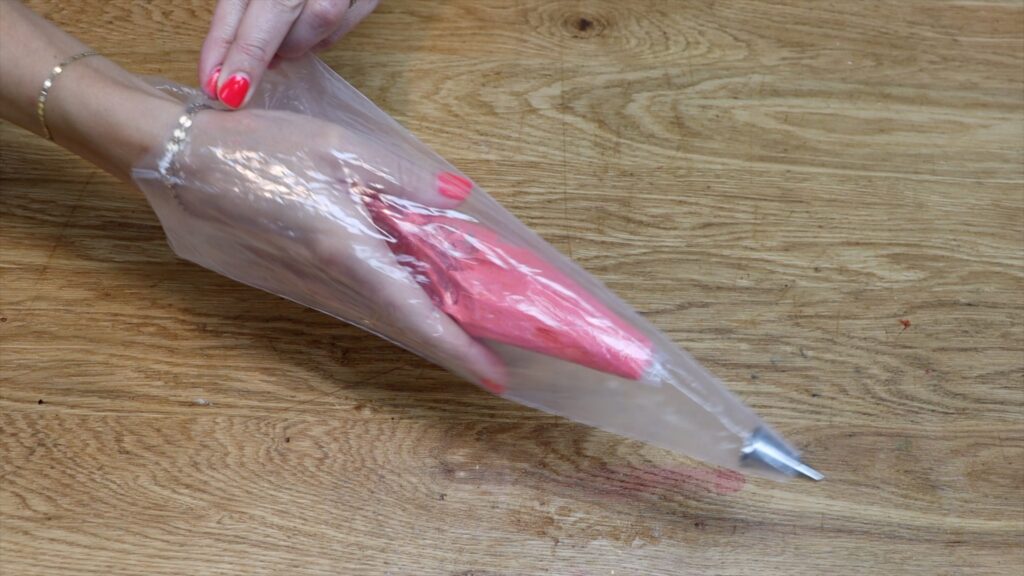
Use piping bags with only one piping tip without couplers
If you only have one small round piping tip, you can use it with several piping bags. Put your coloured buttercream into piping bags with no piping tips, just the ends of the bags cut off.
Then put the piping tip into another piping bag. Now drop one of the coloured bags into the bag with the piping tip.
When you squeeze the bag you'll push the buttercream out through the piping tip. And when you finish with this colour it's easy to switch to a different colour. Just pull this coloured bag out of the bag with the piping tip and drop the next coloured bag in.
Squeeze the bag to get the last little bit of the previous colour out, piping it into a bowl. When you see the new colour coming through, it's ready to pipe!
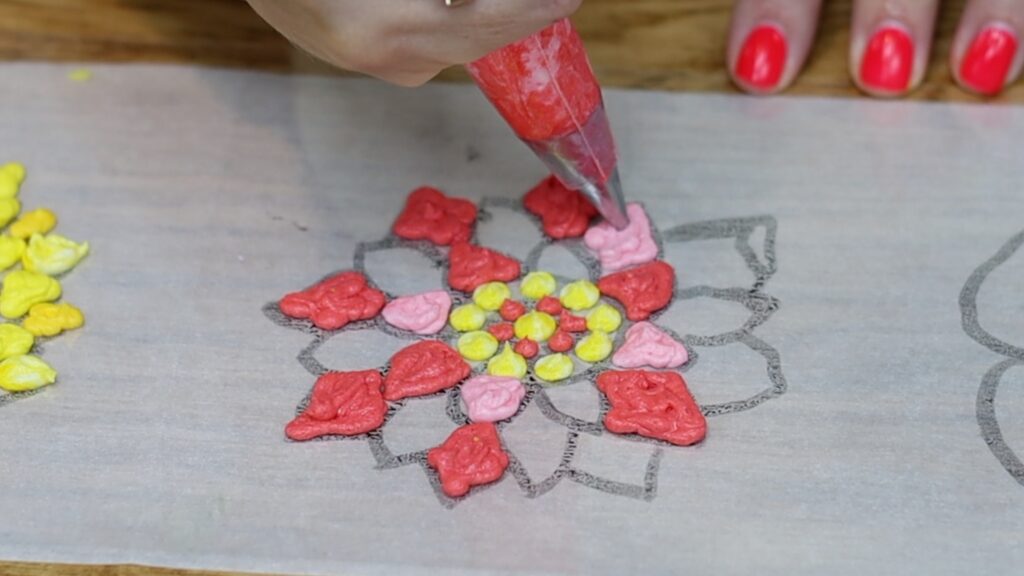
Start with the outline of each petal or shape and then fill it in with zig zags. Make sure you don't pipe over the lines you drew because you need those gaps to stay there. The gaps keep the tiles spaced apart from each other, which will turn the piping into a mosaic.
Pipe all of the details you want to be this colour. Then pull this colour out and drop the next colour in. Squeeze until you see the new colour coming through and then pipe with this colour.
Use piping bags with couplers
If you have couplers it will be even easier to switch between colours. After putting a coupler into each piping bag, put your piping tip onto the outside of one of the bags. Screw it onto the coupler using hte coupler ring, to hold it in place. Then fill the piping bags with different colours of buttercream. Pipe with the first colour and when you finish, unscrew the coupler ring and take the piping tip off. Put it onto one of the other couplers and pipe with that colour next.
Pipe a mosaic cake design
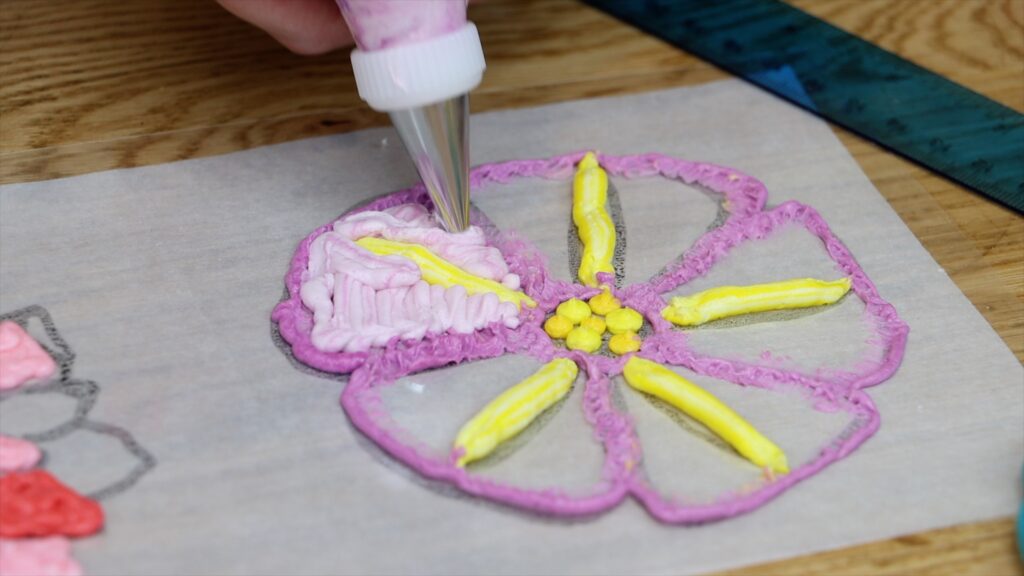
The more colours you use, the more interesting the mosaic cake design will be. But of course, more colours also makes it more time consuming to create your design. Aim for an equal thickness of the buttercream all over your design for the smoothest finish later. To layer colours over each other, let the first colour set first by putting the acetate into the freezer for about 5 minutes. Then add your next colour on top. This way the second colour won't blend with the first colour, it will sit on top of it.
This side you can see here isn't going to be visible because it will be pressed against the cake.
It's common for air to get trapped in between this buttercream you're piping and the acetate or parchment below it. As you fill in sections of colour by zigzagging back and forth within an outline, squeeze quite hard to push the buttercream down. Then use a toothpick to flatten it, using dabbing motions to press the buttercream into any air bubbles.
Use piping bags with couplers
If you don't have piping bags or piping tips, use sandwich bags like Ziploc bags instead. Spoon buttercream in and push it down to one of the bottom corners. Cut a tiny piece off the corner to make a hole to pipe through. You have less control over the buttercream you pipe through a soft plastic hole compared to a hard metal piping tip so your lines won't be as neat but you can tidy them up with a toothpick. Sandwich bags are really ideal I think for the next step, which is to fill in the background.
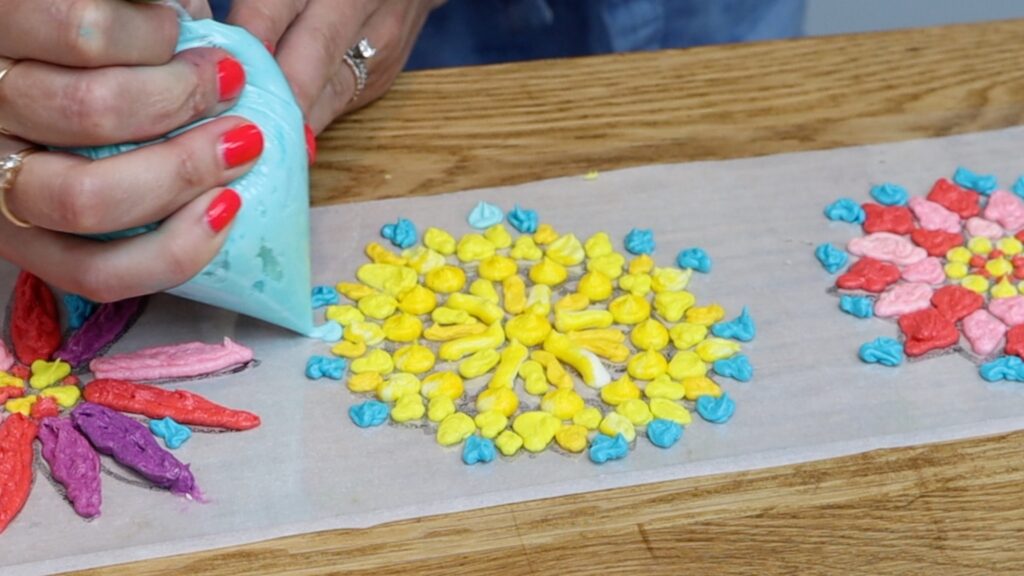
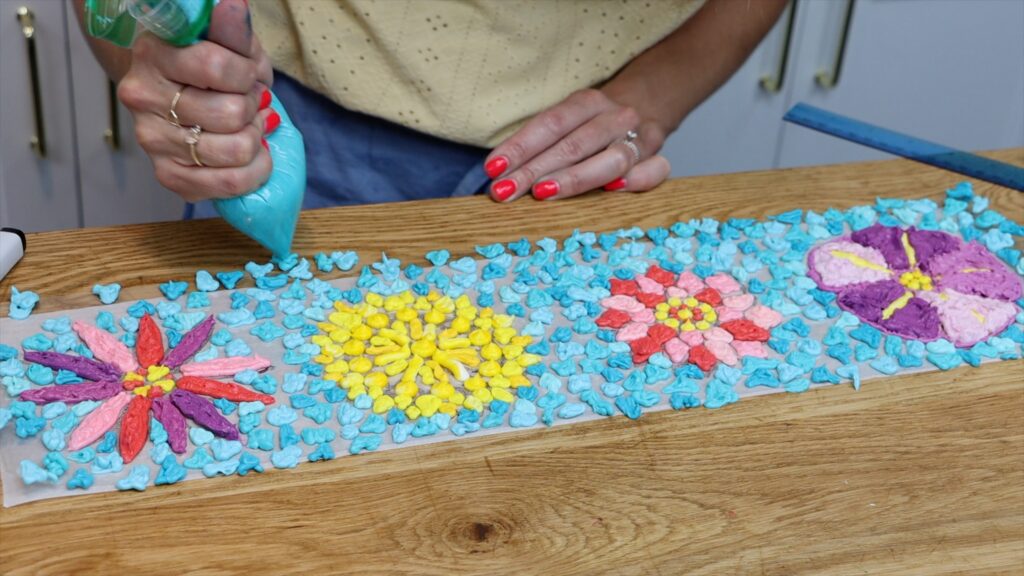
Pipe the background of the mosaic
For the background the goal is simply to fill in the remaining area with tiles. The exact size and shape of the tiles doesn't matter like it did with the flowers I piped first. That's why sandwich bags are perfect for this step. These slightly blobby shapes are fine and the sharper angles or narrow points aren't necessary like they were for the petals.
The more random these shapes are, the better. Using several shades or colours will make the background more interesting than using the same colour for all of the tiles.
Create a mosaic on top of the cake
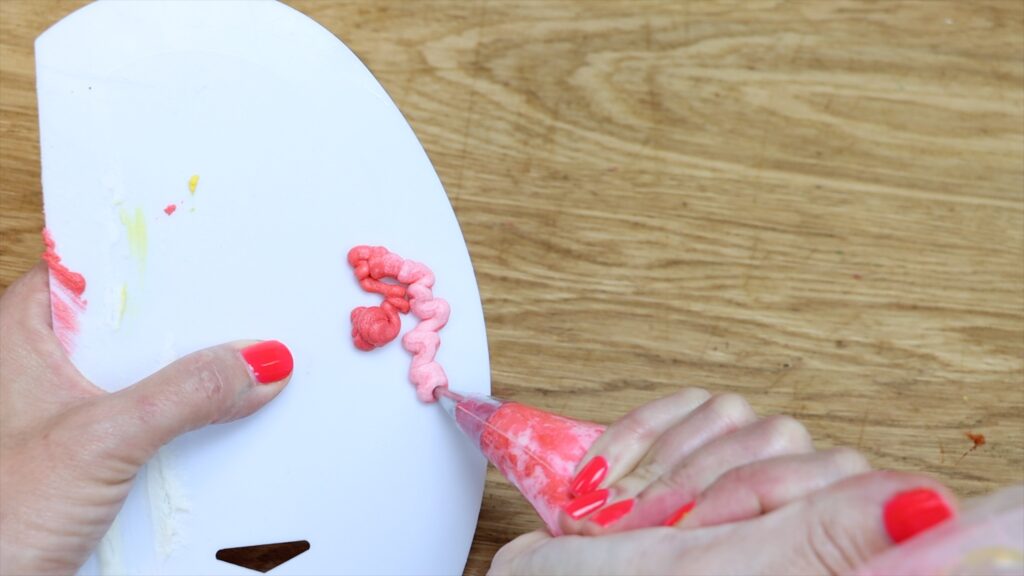
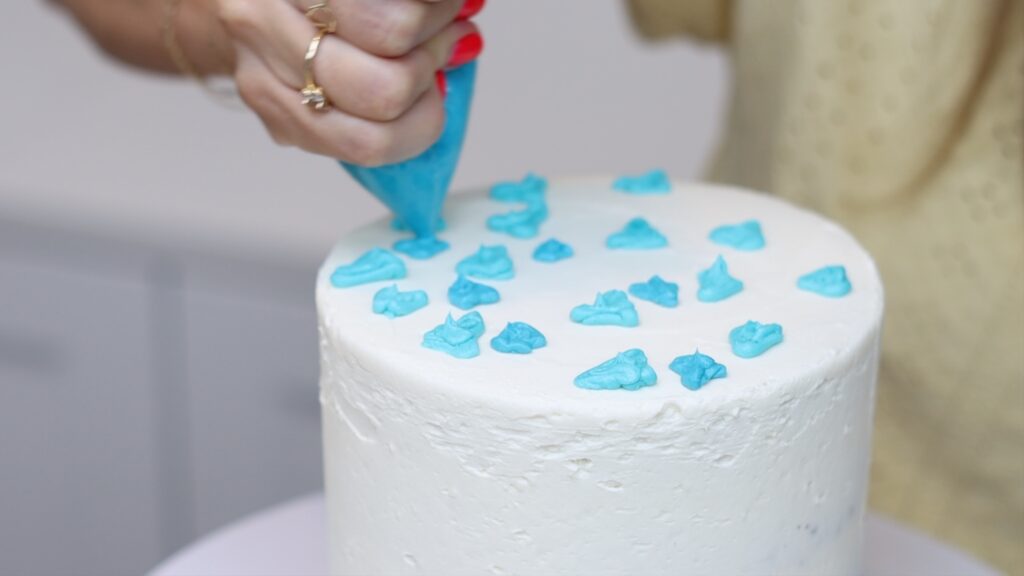
When you've covered the acetate or parchment with tiles, pick it up and put it into the freezer for 15 minutes. This will set the buttercream so it gets very cold and firm. Meanwhile, pipe a design onto the top of your cake or just cover it with the background color tiles. Use the same technique of piping individual shapes with gaps in between them.
I'm free-handing these tiles because there's no set design for them. For another flower or specific design you might choose to sketch out your design first. Use a toothpick to scratch the shapes into the frosting on the cake, which you can then trace with buttercream.
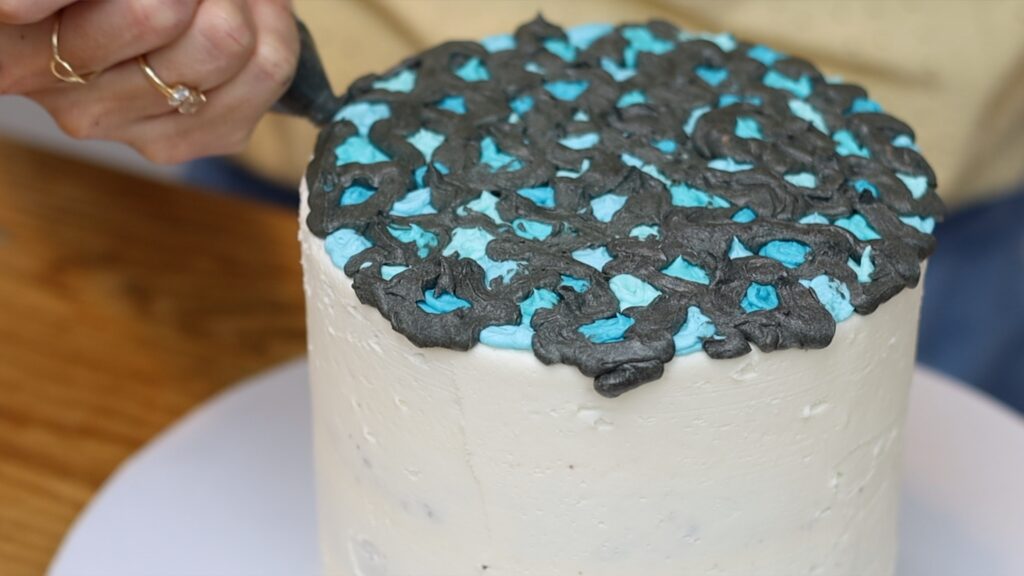
Put the cake in the freezer for 15 minutes to set these tiles. Meanwhile, prepare a colour to fill in the gaps between the tiles, which would be grout on an actual mosaic. Grey or a sandy colour are the most common for mosaics but you could use chocolate buttercream for brown. You can use the leftovers of your other colours to make this colour but save a bit of every colour for touch-ups later.
When the tiles on the cake have set, pipe or spread this colour on top, covering up the tiles. Don't try to smooth this yet because you'll knock off pieces of the frozen tiles into the gaps.
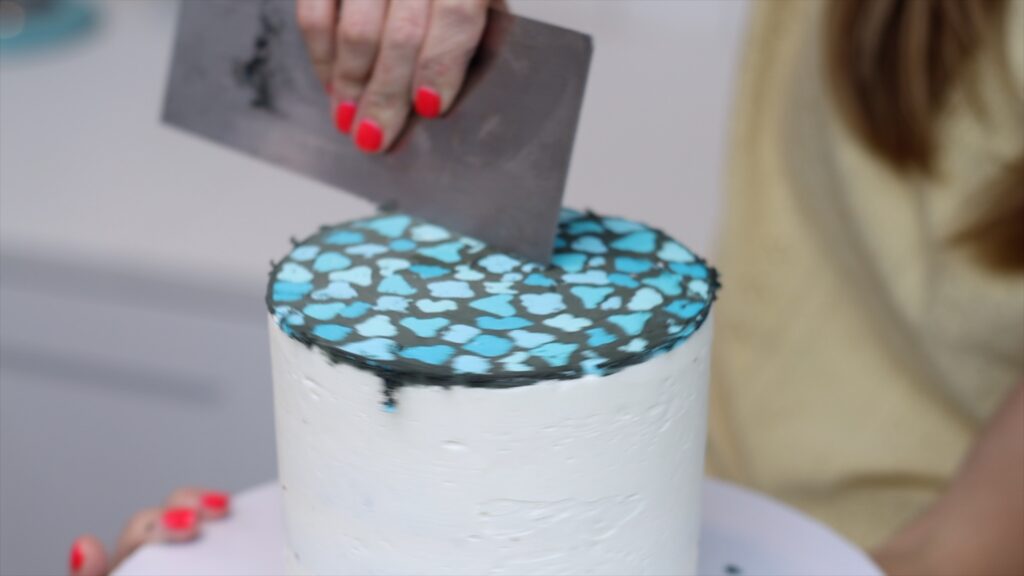
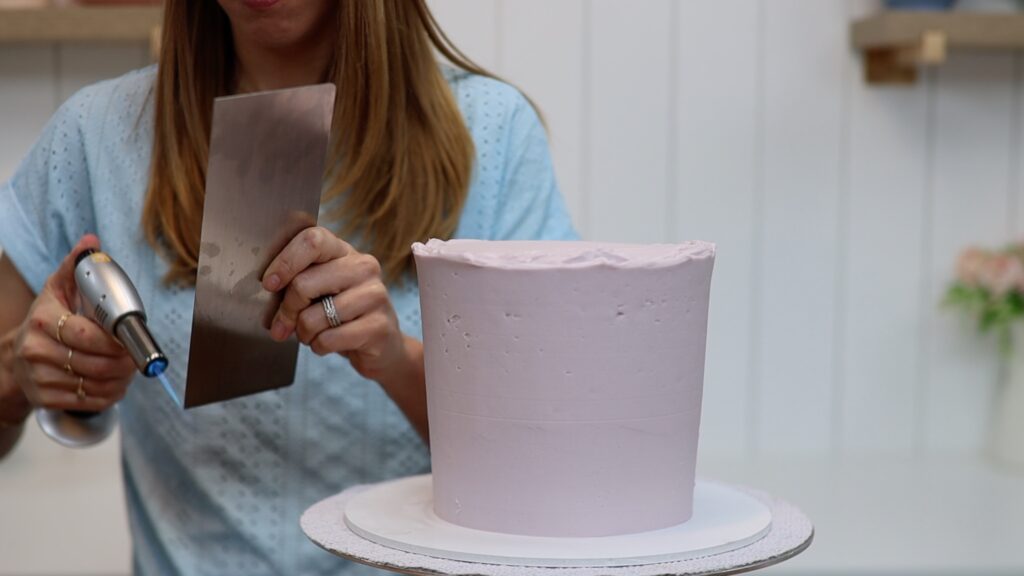
Put the cake back in the freezer for 15 minutes to set the buttercream grout. Then use a warm metal cake comb to scrape the top flat. I'm using a blow torch to heat the straight edge of the comb but you could use hot water instead. Scrape off the excess buttercream revealing the smooth, colourful tiles underneath and creating a flat, level, sharp edge around the top of the cake.
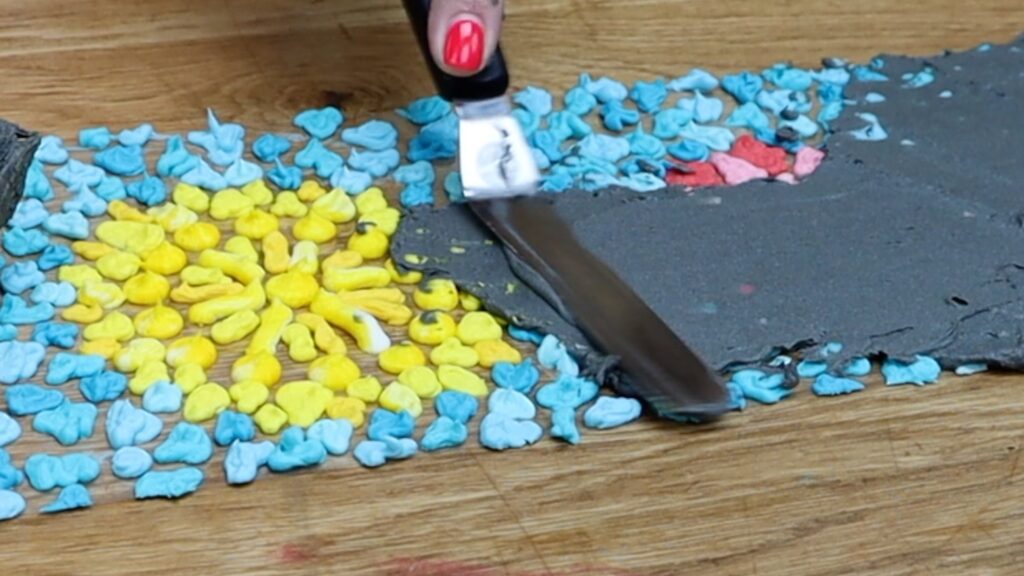
Add buttercream grout between mosaic tiles
Now take the design out of the freezer and spread that same colour, grey for me, over the whole design. Push this colour into the gaps between the piping to fill them in like the grout in between mosaic tiles. Also spread it over the whole design because since it's been in the freezer it's not sticky anymore. This final colour of buttercream will act as glue to attach the tiles to your cake. Spread back and forth with an offset spatula or a cake comb to flatten and smooth the frosting.
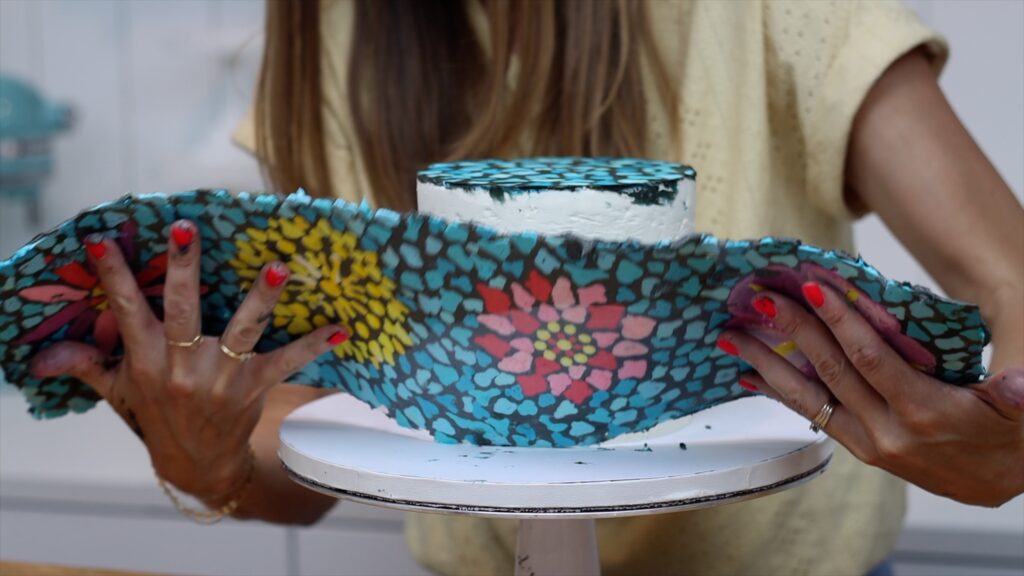
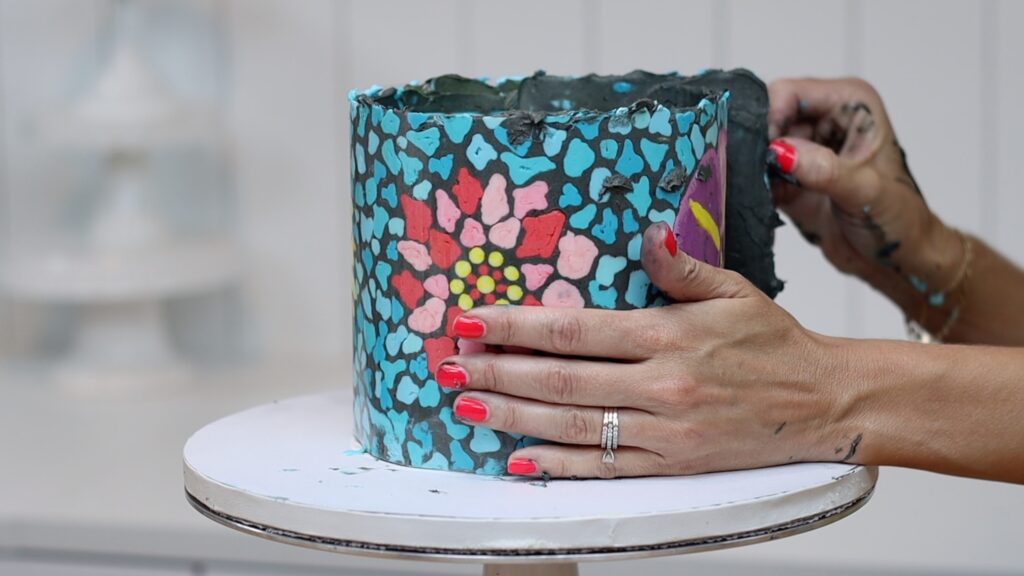
Wrap the mosaic cake design around the cake
Straight away, lift up the acetate or paper and wrap it around your cake. By piping onto the inner side of the curve it will wrap easily around the cake, doing most of the work for you.
Rest the bottom of the design on the cake board so there are no gaps down there. Press the design tightly around the cake so it doesn't buckle or crease or warp, especially if you're using parchment paper instead of acetate since it's thinner and not as strong.
Press gently against the cake to attach the design and to flatten and smooth it. The join of the beginning and the end of the acetate or parchment should overlap slightly. Now put the cake in the fridge for at least an hour or the freezer for 30 minutes.
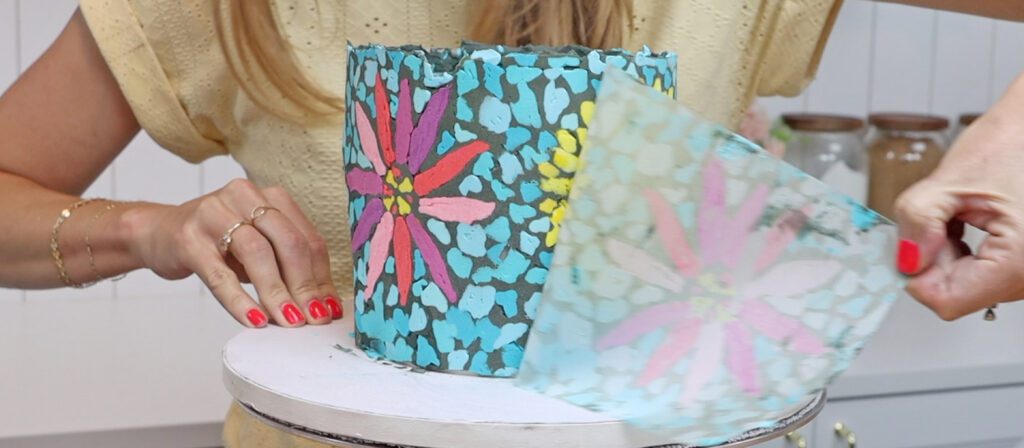
Unwrap the acetate or paper and do touch-ups
Pinch a corner of the acetate or parchment and peel it off to reveal this eye-catching mosaic cake design.
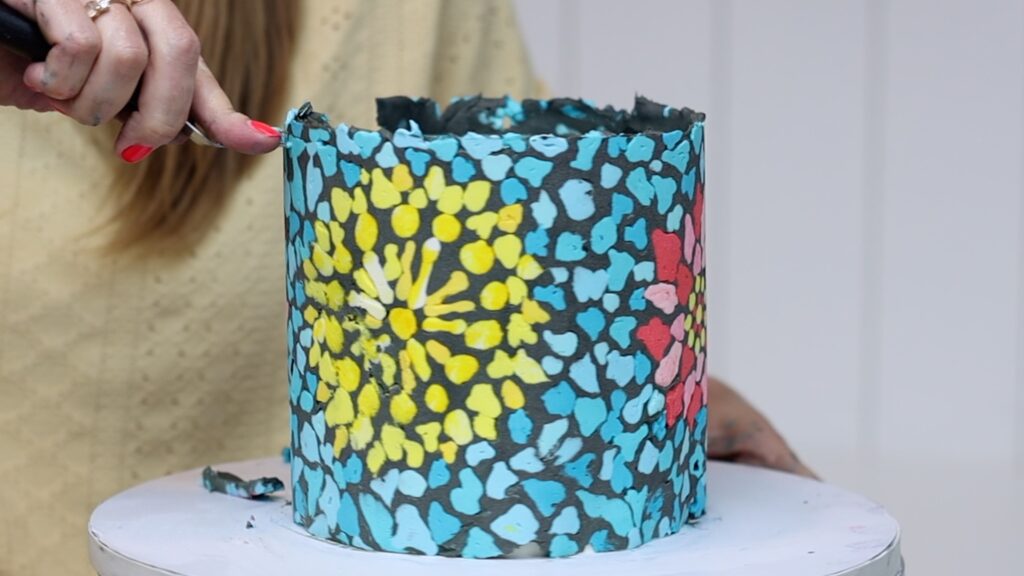
To level the top edge, use the edge of the blade of your offset spatula or a sharp knife. Slice around the cake, taking off the excess buttercream to tidy up any imperfections.
Hold your metal cake comb under hot water or run a blowtorch along the edge to heat it. Then scrape around the cake a few times to smooth any bumps or imperfections in the frosting. The hot metal will melt the outer layer of frosting and drag it around the cake, filling in tiny air bubbles. Air bubbles happen when the buttercream you pipe doesn't go all the way down to the acetate or parchment paper because there's air trapped down there.
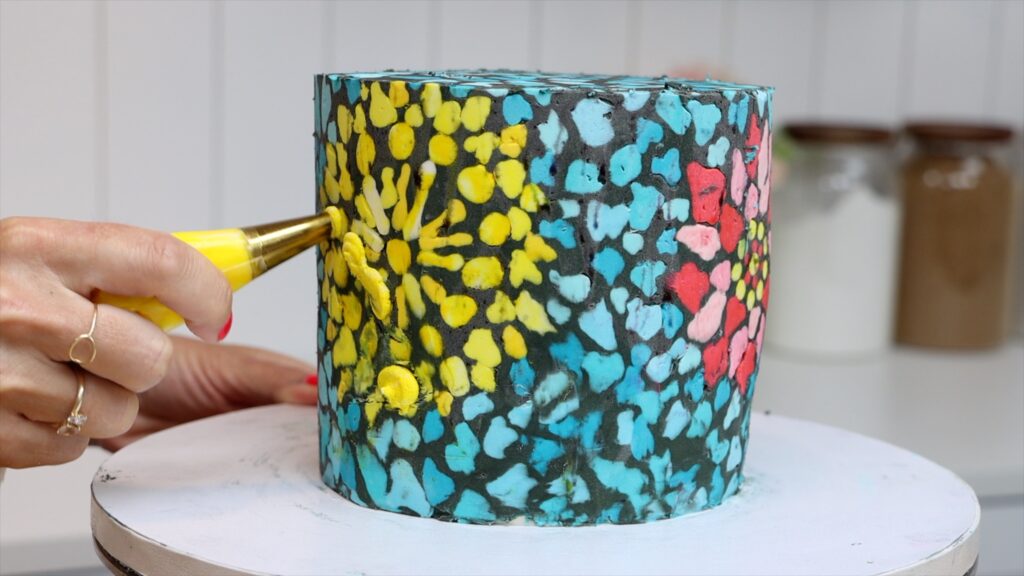
Pipe or spread coloured buttercream into any deep air bubbles to fill them in. Then scrape over that part of the cake to take off the excess buttercream and leave a flat surface behind.
The result of this mosaic cake technique is a very elaborate design that only uses basic tools and materials. From start to finish this cake took 2 hours to assemble, frost and decorate.
What do you think? Will you try this? Tell me in the comments and ask me any questions there too! And visit my cake school to learn hundreds of other cake decorating techniques and designs!
Let's start with buttercream consistency. I like to use gel colours because they're more concentrated than liquid colours so they won't make the buttercream watery. As you mix the colours in you'll notice a lot about the consistency. It's too stiff if it's difficult to stir and it tears as you stir, breaking apart from itself and creating air pockets. You'll see lots of little lines of texture within the buttercream if it's thick and stiff. This buttercream is too stiff:
You can thin out buttercream by adding milk just a spoonful at a time. The other option is to scoop out a third of the buttercream and put it into a microwave safe bowl . Then microwave this for just 10 seconds. It's going to be very runny and melted and when you pour that into your buttercream it will thin out the thick stiff buttercream. The two consistencies will mix together to make a silky smooth buttercream, perfect for frosting a cake. Stirring it will also knock out any air bubbles in the buttercream. Can you see how much smoother this is than it was before?
The technique for how to frost a cake
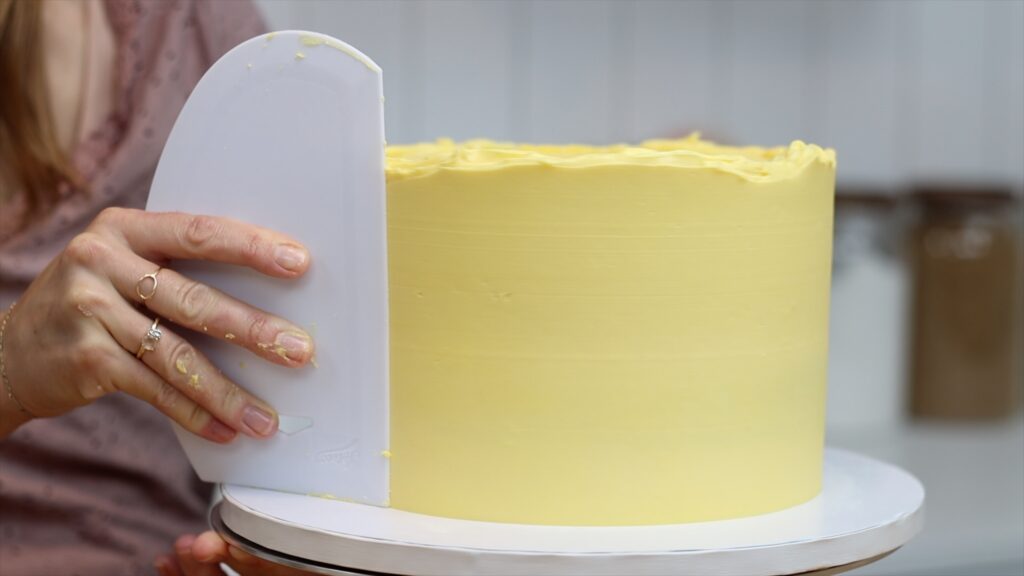
Even with the perfect consistency, you won't get smooth frosting without the right technique. For this you'll need an offset spatula and also a cake comb. I like to use both a plastic and a metal comb and I'll show you why later.
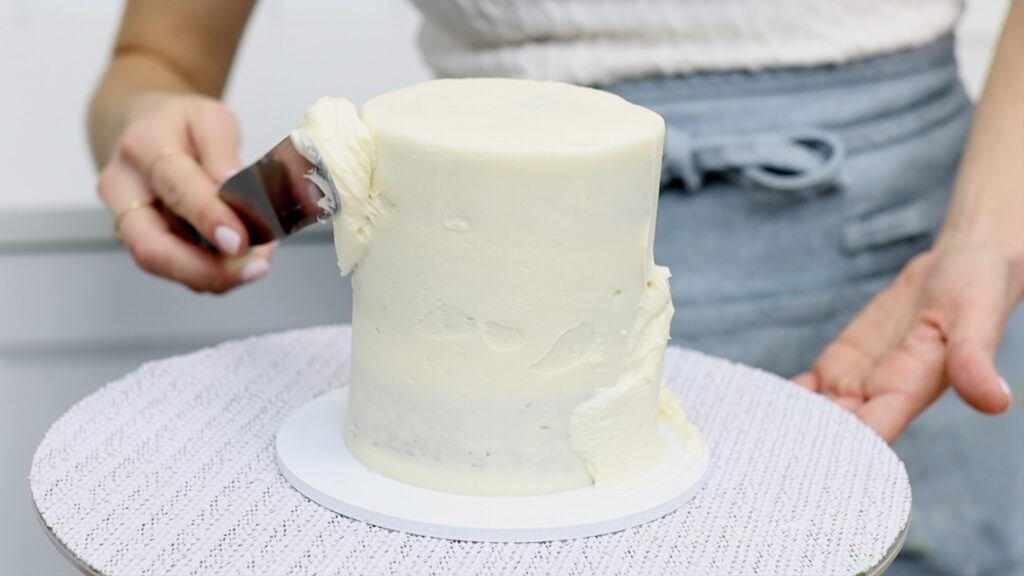
Start by spooning some buttercream onto the top of your cake. The crumb coat should have set while chilling in the fridge for at least 30 minutes first. Spread the frosting to cover the top of the cake and you want it to stick out over the sides as well. That will help you get really nice sharp angles later. Hold your offset spatula at a 45° angle and spin the cake to flatten the frosting on top.
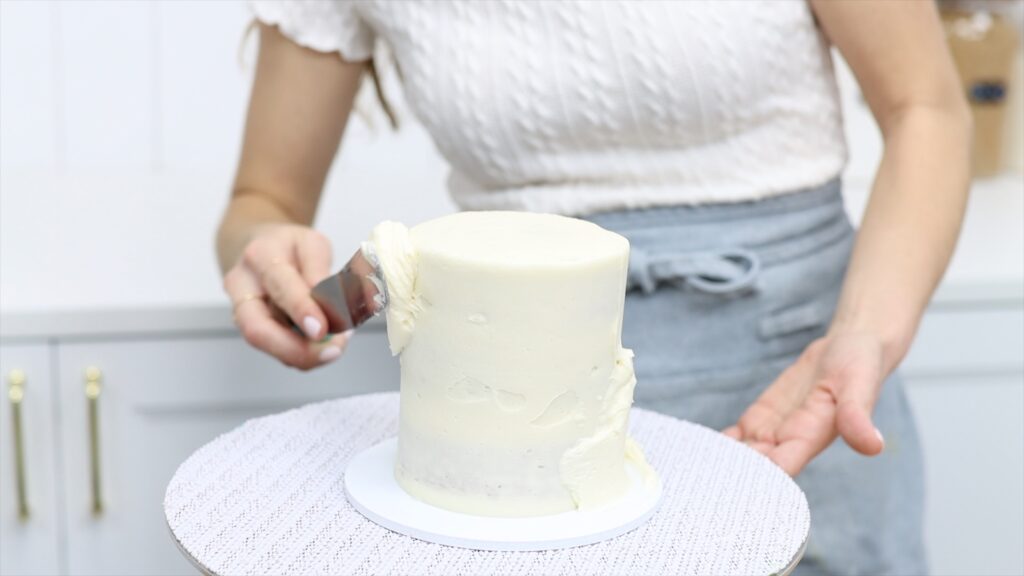
Then whisk the spatula away and scoop up more buttercream and spread it onto the side of the cake. I like to start at the top of the sides, spreading from side to side. At this point you're just covering the whole cake so that you can't see the crumb coat anywhere. Don't worry about how smooth this frosting is yet. However, you're aiming for an even thickness so if the frosting seems thinner in some parts, add more there now.
If your frosting is the right consistency it will transfer easily from your spatula onto the crumb coat. Your spatula will glide over it as you spread it, leaving a smooth surface behind. You won't see lots of tears or air bubbles or texture.
Go all the way to the bottom of the cake, covering up the crumb coat down to the cake board. Once it's all covered up, check the evenness of this frosting. On my cake the frosting looks thicker at the bottom so I'm spreading more around the top of the cake.
Push diagonally upwards to make the frosting stick up above the top edge of the cake. This lip or wall is important so that you can get sharp angles from the sides to the top later.
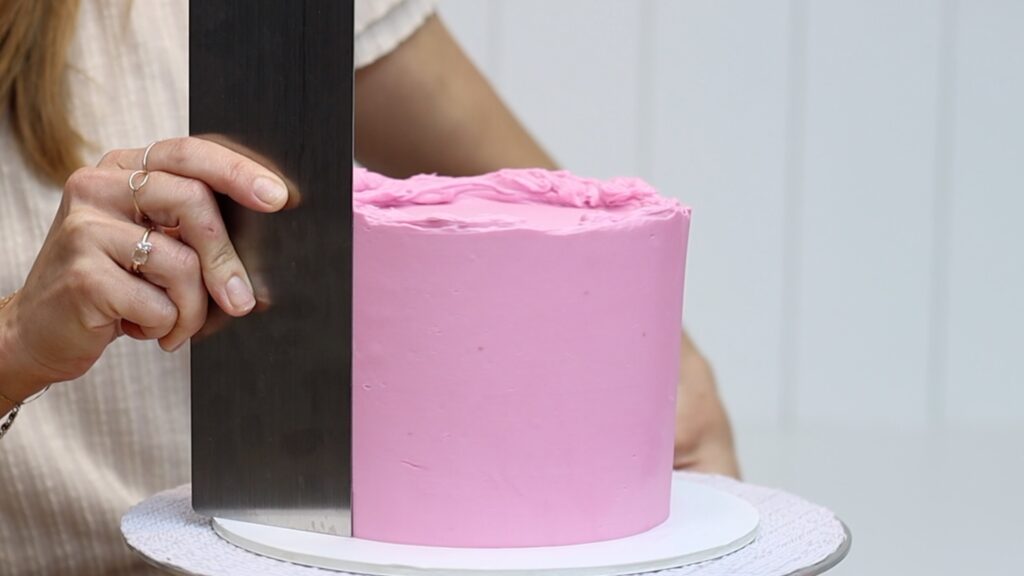
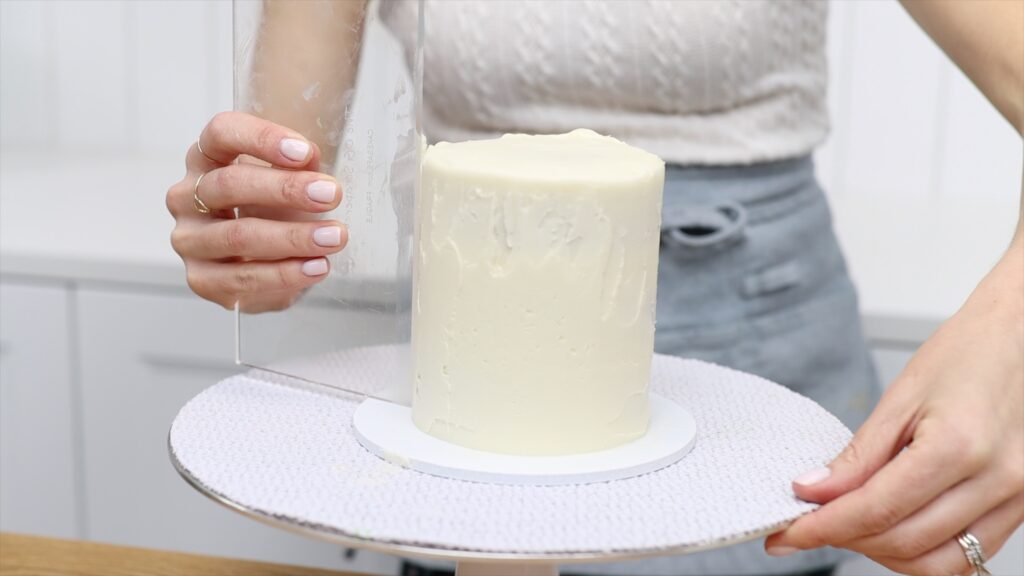
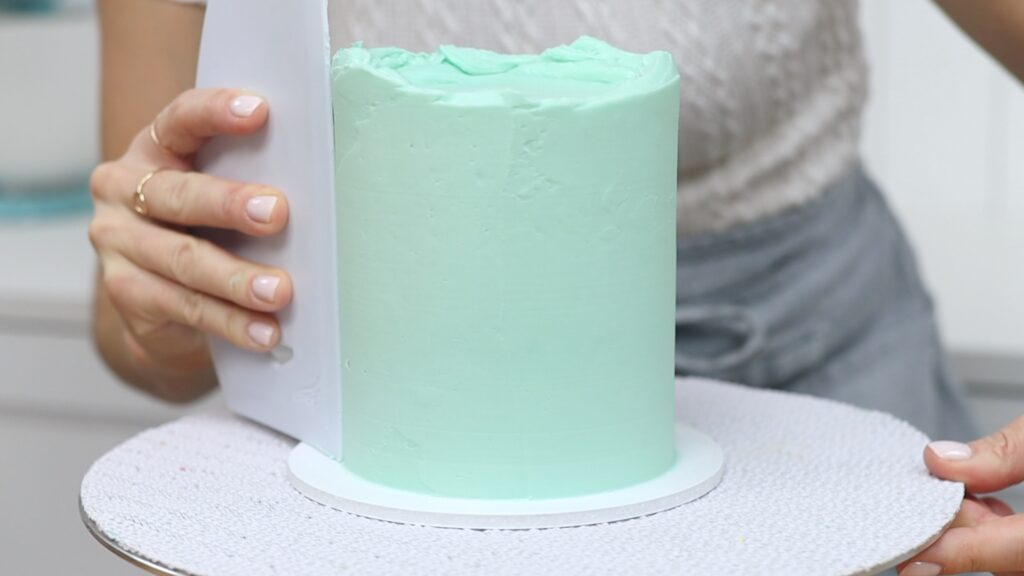
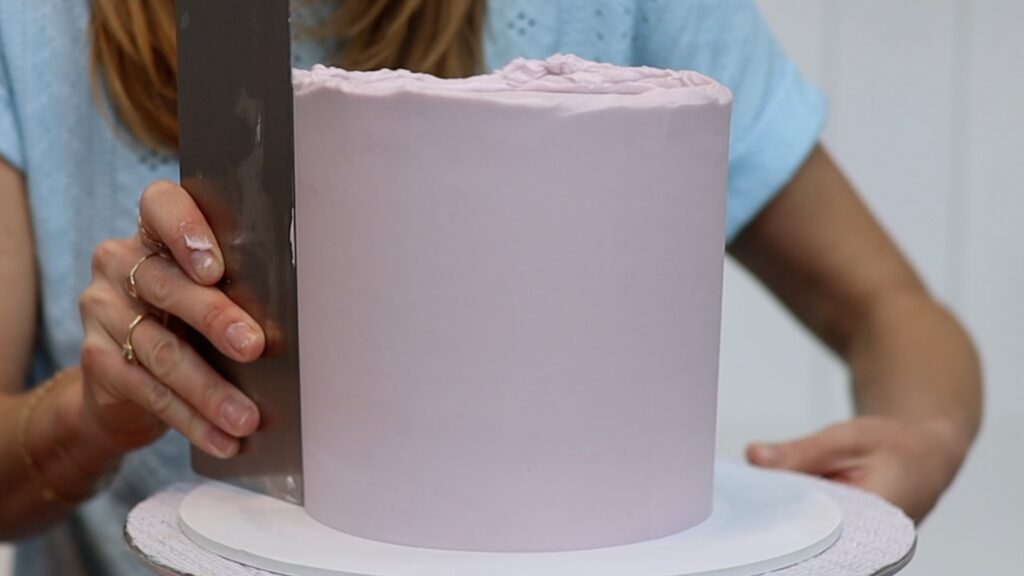
Now switch to your cake comb. Reach as far around as you can with your left hand for a really long spin on your turntable. Hold your cake comb on the cake board, pressing down to line it up straight. Push it slowly against the cake and then spin the cake on its turntable. You'll be able to scrape all the way around the cake because you reached so far around the turntable. Swipe away and then scrape this buttercream back into your bowl. There should be no crumbs in it because you've let the crumb coat set so you can reuse this buttercream for touch-ups later.
After scraping around the cake two or three times with your cake comb, you'll see where the frosting is thinner. Spread more frosting over those parts and any little indents, too. Scrape around the cake again to take off the excess and leave a smooth surface behind. Do these touch-ups as many times as you need to, spreading on more frosting to fill in any shallow areas and then scraping around the cake to smooth the frosting.
Now let me show you why I like to use a metal cake comb as well as this plastic one. The plastic comb is quick to use and I like the lightweight feel and flexibility. But it gets dinged along the edge easily by knocking or dropping it and those bumps drag along the frosting and leave trails behind.
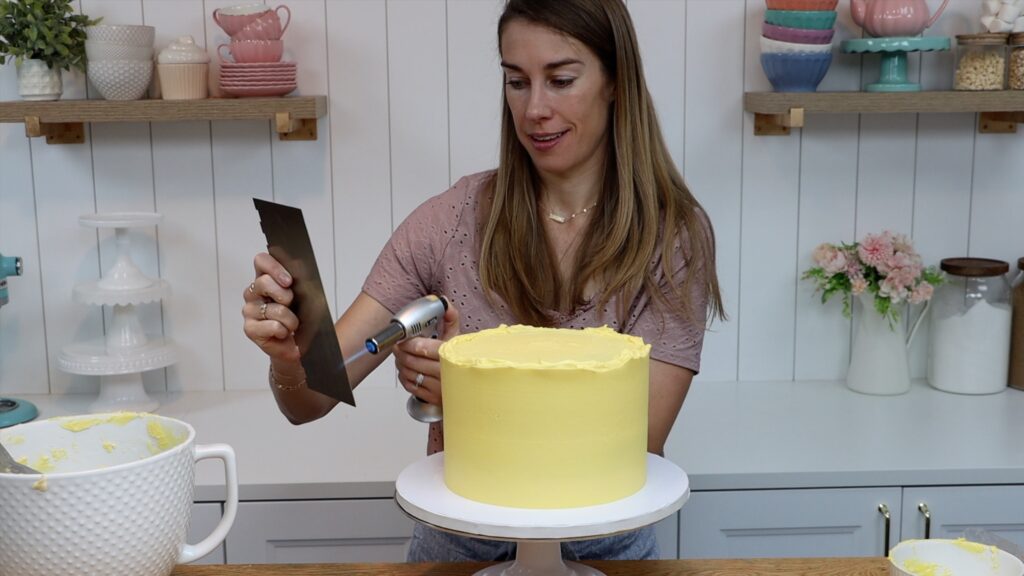
If you're wondering how to frost a cake with a metal cake comb, here are the details. After getting the frosting fairly smooth, heat the edge of a metal cake comb. You can do this by running it under hot water or dipping it into a bowl or tray of hot water. The method I like best is to use a torch to heat it!
The edge of a metal cake comb doesn't get damaged as easily as plastic, so you'll get smoother frosting with it. By heating it, as you scrape around the cake it melts the very outer layer of frosting and drags it around the cake to fill in any imperfections. This leaves a super smooth surface on the frosting.
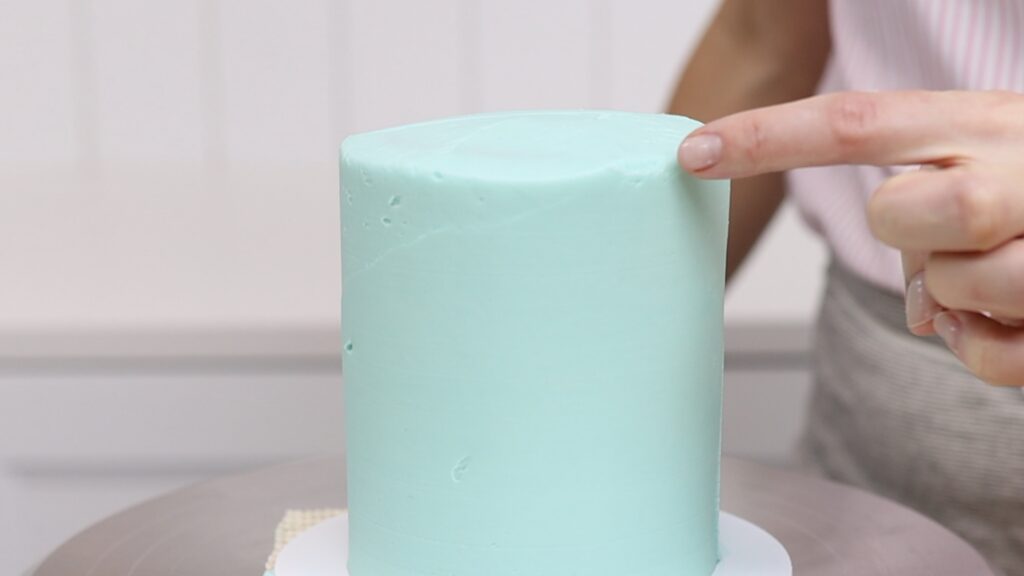
How to frost a cake with sharp edges
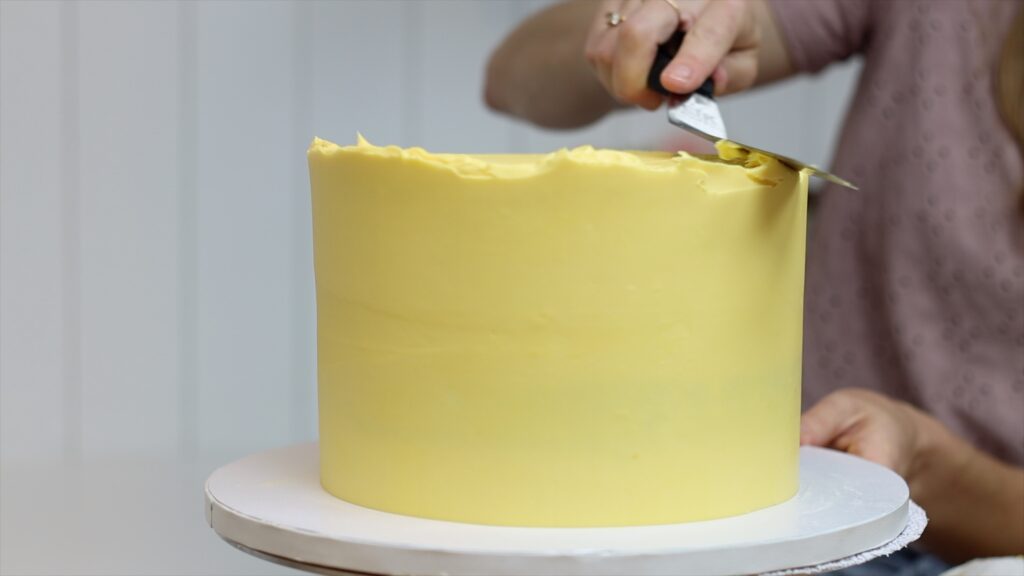
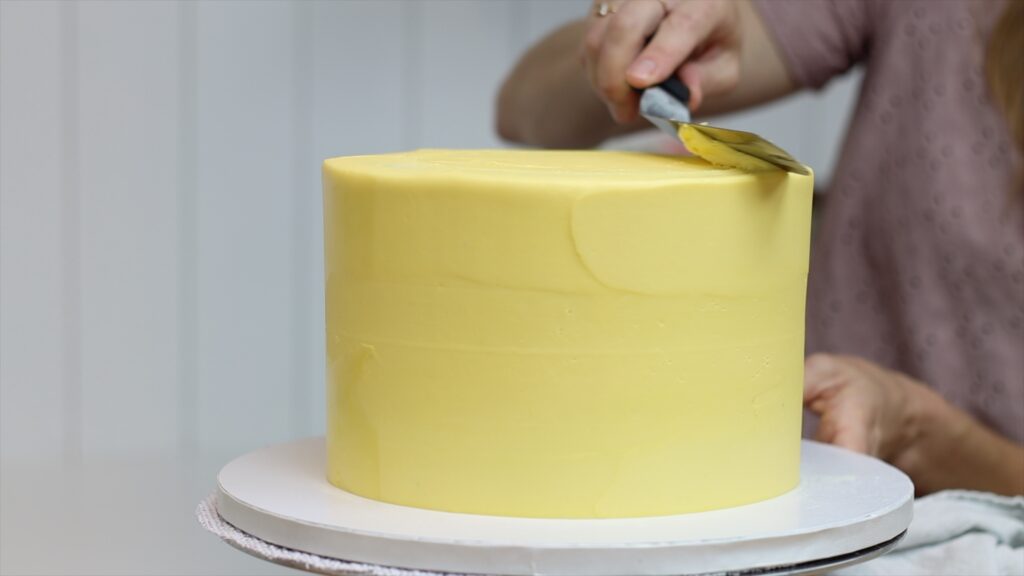
When the sides are smooth, it's time to tidy up the top edge, where the frosting sticks up above the cake. I use a long offset spatula for this. It needs to be clean so wipe any buttercream off it before you use it. To tidy up the top edge it's really important to push sideways. Don't push down at all or you'll create a bulge in the sides of the frosting around the cake. Push this buttercream across the top of the cake and lift it off on your spatula. Scrape it back into your bowl and wipe the spatula clean on a towel or paper towel. You don't want any frosting on the blade. Then spin the cake to do the same for the next section of the cake.
Look what happens if you don't spread your frosting high enough. There are gaps in the frosting where it's thinner or shallower, which will become indents in the top edge. Spread more buttercream onto the indents on top and on the side of the cake and then scrape around the cake again with your cake comb. You'll smooth this touchup frosting so that the sides are straight. Swipe sideways with your offset spatula to flatten and smooth it on top of the cake, too.
When you finish, go around the cake again and swipe wherever the frosting is higher. This will make the top edge straight and level all the way around the cake.
Summary of how to frost a cake
For super smooth frosting on a cake there are three tricks. First, the cake needs to be assembled, crumb coated and chilled correctly. I showed how to do those steps in the previous two tutorial in this series: how to make layer cakes and how to crumb coat a cake. Second, the buttercream needs to be the perfect consistency and third, you need to have the right technique.
If you have any questions, ask me in the comments! What comes next, after frosting the cake? You decorate it! To learn hundreds of cake decorating techniques and designs, visit my cake school.
A crumb coat is an essential step before a final layer of frosting. In this tutorial I'll show you why and how to crumb coat a cake from start to finish!
What is a crumb coat?
A crumb coat is a very thin layer of frosting that covers the cake and seals in the moisture. Also, very importantly, it traps all of the crumbs. As you spread your frosting on the cake, any crumbs that come off will get stuck in this crumb coat of frosting. After setting this crumb coat, the crumbs won't get into the final layer of frosting. This means there will be no visible crumbs on your frosted cake.
A very, very important step before crumb creating your cake is to chill it. 30 minutes in the fridge will make the cake firmer, which means the layers won't slip as you frost them.
Let's look at what happens if you don't chill the cake after assembling but before frosting it. The pressure as you frost it can push the upper layers sideways, causing the cake to lean. This is definitely not a good look!
This happens because the filling is still soft and slippery so spreading pushes the cake layers away from your spatula.
To avoid this, put the cake in the fridge for 30 minutes to set the filling before you frost it. Then spread or pipe your frosting on. It's quicker to pipe the frosting rather than scooping it from a bowl and spreading it on but both work.
How to crumb coat a cake
I like to start with the top of the cake before doing the sides. If I'm piping it, I'll also pipe around the very bottom of the cake since that's the trickiest part to reach.
On the top of the cake spread the frosting all the way over the edges of the cake to completely cover it. Then hold your offset spatula at a 45° angle as you spin the cake and that will flatten the top.
Then spread frosting from side to side all the way around the cake. I'm using my 4 Minute Buttercream for this cake. It's delicious as a filling or frosting (or both!) and it's easy to get really smooth as frosting. It's also stable enough for piping and other decorations on your cakes.
This crumb coat doesn't have to be neat because it'll be covered up by another layer of frosting next. The purpose of the crumb coat is to trap any crumbs that come off the cake so spread it over the entire cake. You don't want any naked cake exposed. Notice that this cake doesn't have the neatest shape to begin with but the crumb coat and final coat of frosting will fill in any imperfections. By the end, the shape of the cake looks perfect!
To scoop up more frosting from the mixing bowl, use a clean spatula to transfer it to your offset spatula. Don't dip your offset spatula into the bowl because the crumbs in that frosting will get into the frosting that you'll eventually use for your final coat of frosting.
Although it's not necessary to get this frosting perfectly smooth, you don't want any bulges of frosting to stick out. Those will get in the way when you spread and smooth the final layer of frosting.
For the top edge of the cake, push sideways with your offset spatula to lift off that frosting sticking up. Scrape off that buttercream from your spatula into a small bowl because you don't want this crumbly frosting to mix with your main bowl of frosting. I spread the crumbly frosting from my little bowl over the cake, instead of throwing it away.
Tips for crumb coats
I should mention that this crumb coat can be white or the same colour as your final coat of frosting. If your final coat colour is dark like red or black, a white crumb coat will act as a barrier to prevent that dark colour from staining your cake underneath.
A crumb coat is an important step to prevent any crumbs getting into your final layer of frosting. In the next part of this tutorial I'll share how to do the final layer of frosting, where you take your time to make it smooth and neat. That part will be coming next week!
I hope this has been useful! Ask me any questions in the comments and visit my cake school to learn hundreds of cake decorating techniques and designs to take your cakes from beginner to professional.
In this tutorial I'll show you how to make layer cakes. Start by preparing your cake layers, then add your fillings without making the cake lean or bulge, and then prepare the cake for frosting. Follow these step by step instructions for beautiful, stable layer cakes!
Prepare cake layers
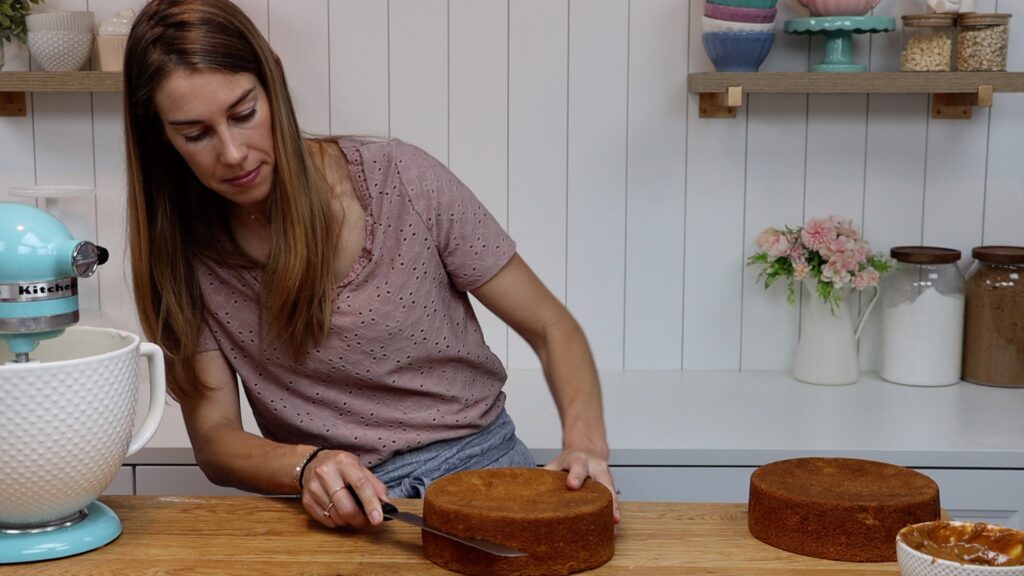
To make a layer cake of course you'll need cake layers! You can bake each one individually or bake tall cake layers and then divide each one in half. To divide cakes in half you'll need a serrated knife like a bread knife. It's really important to wait until your cakes have cooled completely before you cut into them. If they're still warm or hot they'll dry out so let them cool for 2 hours after baking before you do this.
There is no set way to divide cakes but I'll show you the way that works really well for me. Put a cake down on the countertop or a cutting board and use your knife to score around the middle. Spin the cake as you cut and when you've gone all the way around, the beginning of your line should meet the end of the line. This shows that you've made a level scored line around the whole cake.
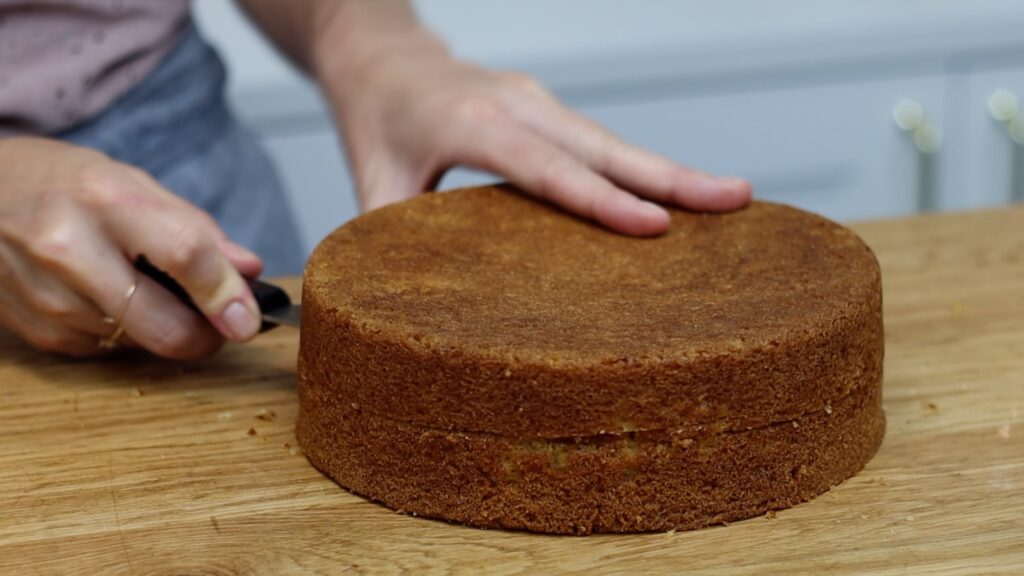
Then continue spinning as you gradually push your knife closer towards the middle of the cake. When you feel the knife moving effortlessly because you've cut all the way through, slide it out. I'm using my Very Vanilla cake for this tutorial.
Now you'll have two cake layers instead of one! Do the same for all of your layers of cake to divide them in half horizontally. The advantage of four cake layers instead of two is that you'll have three layers of filling instead of one. This means more flavour and also a moister cake.
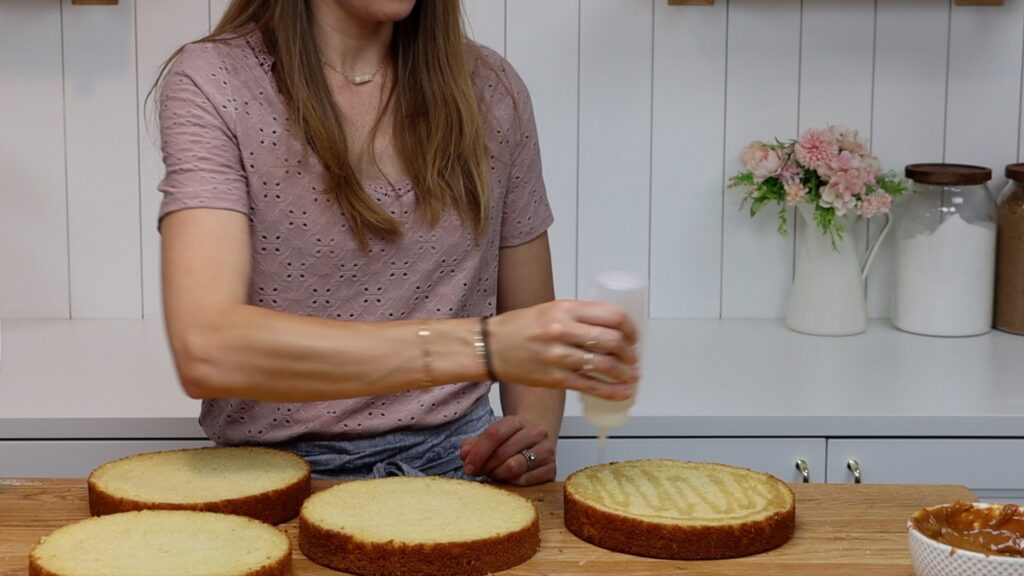
If you're won't eat your cake the day you bake it, it's a good idea to use simple syrup. Simple syrup keeps the layers moist and it's very easy to make! Measure equal parts of water and sugar, for example half a cup of each, and bring to a simmer. You can do this in a pan on the stove or in a bowl in the microwave. Let it cool before you brush or drizzle it over each cake layer. Pay special attention to the outer edge, which is where it will dry out first.
Prepare your tools and ingredients
A turntable is not essential but it's helpful to make the assemble process quicker for layer cakes. You will need a cake board of any material: cardboard, acrylic, or a cake drum. This is important because it makes it easy to move the cake around later and it provides a flat surface when you are frosting your cake, which will help you get straight sides. More on that later.
Now let's talk about fillings. There are lots of different ingredients you can use to fill a cake like buttercream, ganache, caramel, fruit curds and jams. For anything that is runnier than buttercream, you will need a buttercream dam and I'll show you what that is for this cake.
How to assemble layer cakes
Attaching cake layers to a cake board
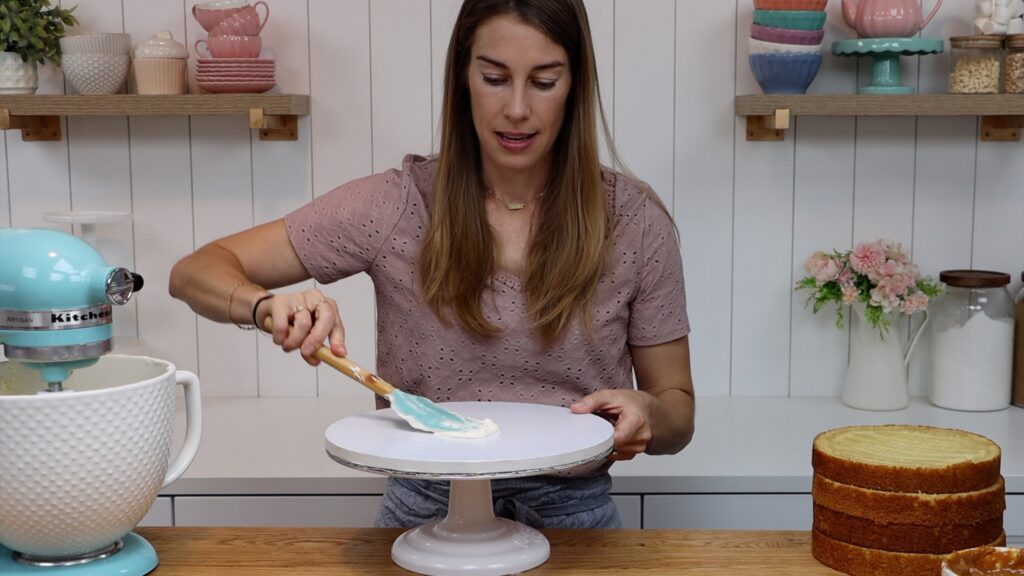
You'll need to attach your first cake layer onto the cake board. If you just place it straight down on the cake board, when you frost it you'll push the cake all over the cake board with your spatula or cake comb. To prevent that, take a little bit of buttercream frosting and spread it onto the middle of your cake board. This will act as glue.
Then press your first cake layer down onto the buttercream and it will hold it in place. Make sure the cake is centered in the middle of your cake board and then continue with your fillings.
Adding fillings to layer cakes
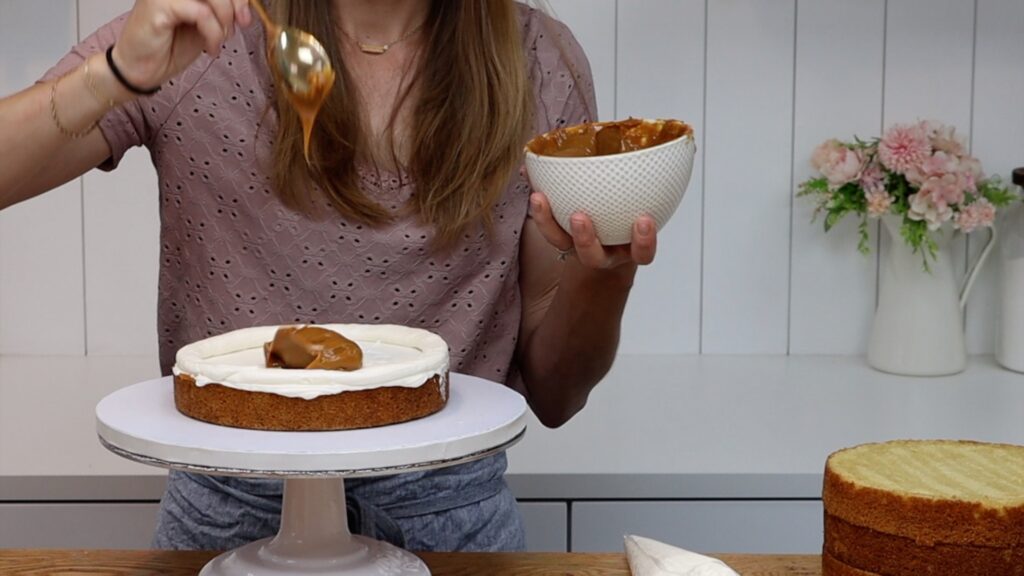
If you're using buttercream as a filling, spread it up to the edges of the cake. Then hold it at a 45° angle as you spin the cake to level it. This creates a flat surface for the next filling. I'm using my 4 Minute Buttercream. If you're using a runny filling you should spread a very thin layer of buttercream over each cake layer first. This will stop fillings like caramel or jam from absorbing into the cake underneath.
If you add runny filling onto this, it will ooze out the edges of the cake and cause bulges in the frosting later. It can also cause all of the higher layers of the cake to slip so the cake doesn't stay straight. So what do we do? Make a buttercream dam.
Using buttercream dams on layer cakes
Spoon some more buttercream into a piping bag. You don't need a piping tip, just with a hole cut off the end of the bag. Only fill the bag half full so it's easy to grip onto. Push the buttercream down to the end of the bag and twist it at the top. It should be pressed tightly around the buttercream. This makes it easier to squeeze the buttercream out.
Now pipe a ring around the edge of the cake layer like a dam or a wall . This will hold the runny filling in place so that it doesn't ooze out of the sides of the cake.
If you don't have a piping bag you can spoon buttercream into a sandwich bag like a Ziploc bag. Cut off one of the bottom corners and then squeeze the buttercream through that to pipe a ring or a dam around the cake.
Next, spoon your filling into the middle of this ring you piped. Spread it around to cover the cake, right up to the edges of the ring. This filling shouldn't be higher or taller than the ring.
The layer of buttercream spread underneath the filling will stop the filling from sinking down into the cake. The piped dam will hold the filling in so that the cake and frosting stay straight and smooth without bulges.
This is probably obvious but for cooked fillings like caramel or lemon curd, make sure they're cool before you add them to the cake. A hot or warm filling will melt the buttercream dam and completely defeat the purpose of it!
Assembling layer cakes
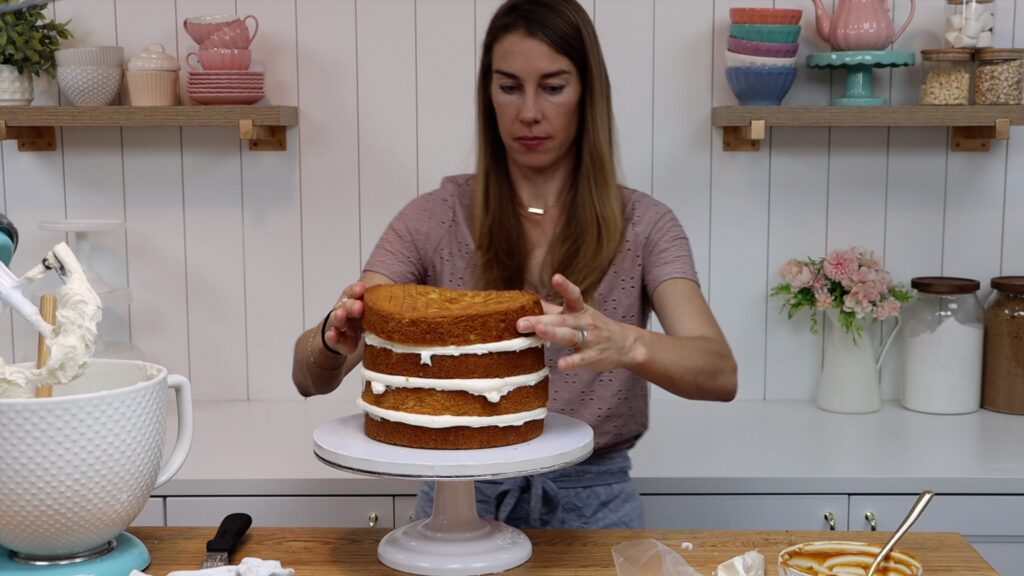
Place your next cake layer gently on top, not pushing down yet. Get down to eye level and spin the cake to check that this second layer is directly on top of the layer beneath. You don't want it to stick out to one side. A turntable is useful to spin the cake and check it from all sides.
If you're using plain or flavoured buttercream for the filling then you don't need to use a buttercream dam. The only time you need a dam is when the consistency of the filling is loose or runny.
Place your final layer of cake on top and spin the cake to check it's straight, nudging any layers over if they're sticking out to one side.
Preparing layer cakes for a crumb coat
The final step is to which is to smooth the filling around the sides of the cake wherever it's sticking out. You don't want those bulges to get in the way when you frost the cake later.
Since a layer cake is made up of several pieces stacked on top of each other, it's important that they attach to each other before you apply any pressure to them. Spreading frosting onto layer cakes can push the layers off-center and make the cake lean to one side. The most effective way to attach the cake and filling together is to chill them. 30 minutes in the fridge is ideal or if you're in the rush, 15 minutes in the freezer.
I hope this has been useful! Please ask me any questions you have in the comments and visit my cake school to learn hundreds of cake decorating techniques and designs to take your cakes from beginner to professional.
Use these three tricks to fix a leaning cake before or even after you frost it!
#1 Adjust a leaning cake after assembling
You might be creating a leaning cake right at the beginning of the process! As you layer your cake and filling, place each cake layer directly on top of the layer below. This ensures the sides of the cake are straight. If you position any layers off-center, the cake will lean to one side.
To avoid this happening, Trick #1 is to spin the cake on a turntable after you position each layer. As the cake spins, check that the sides are straight and adjust the top layer if you need to. It's easiest to do this now, before the cake and filling set together. Double check the cake after placing the final layer on top. If necessary, nudge the layers so that they’re centered and the sides are straight.
I should mention that the sides of your cake don't need to be perfectly straight! It's fine if the silhouette of the cake isn't perfect because frosting will fill in any imperfections. The crumb coat and final coat will even it out so that the final frosted cake looks perfect! What you’re trying to avoid is a lean, where the cake is tilting over to one side.
To learn how to make a vintage cake like the one in the photo above, check out my tutorial on 10 secrets for vintage cakes.
#2 Fix a leaning cake after frosting it
A cake might start to lean after frosting it. Even if your cake looks straight after assembling it, frosting it straight away can create a lean. The pressure of your spatula or cake comb against the cake as you spread and smooth the frosting can push the layers off center.
To prevent this, chill the cake after you assemble it, before you frost it. In the fridge or freezer, the filling will chill and set and hold the cake layers in place. Then when you frost the cake, the layers won't slide around.
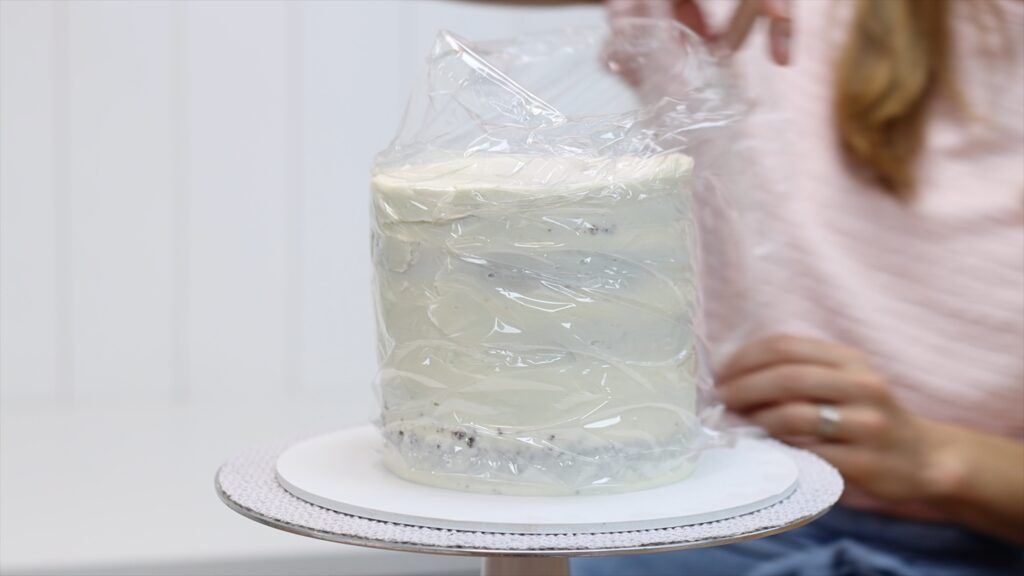
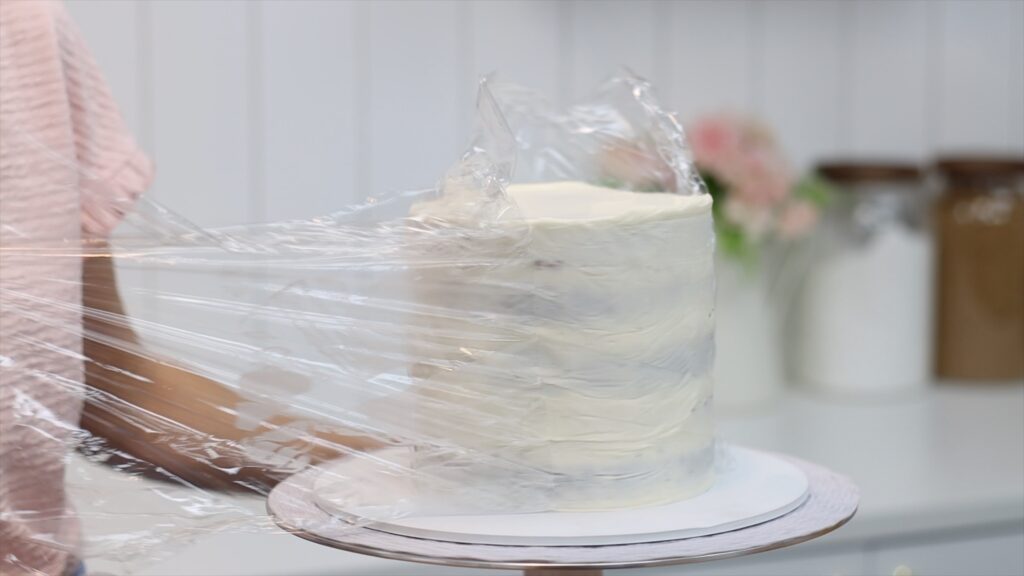
If the layers do move and you find yourself with a leaning cake, try this trick! Wrap the cake in cling film or Saran Wrap so that the sides are covered. Then gently push the cake into an upright position.
Spin it to check it’s straight from all sides. Then put the cake, still wrapped in plastic, into the fridge for an hour. The cake and frosting will set and when you take it out, unwrap it striaght away. The plastic will leave a smooth surface behind on the frosting, instead of pulling it off with it. You’ll have a straight cake, ready for the final layer of frosting.
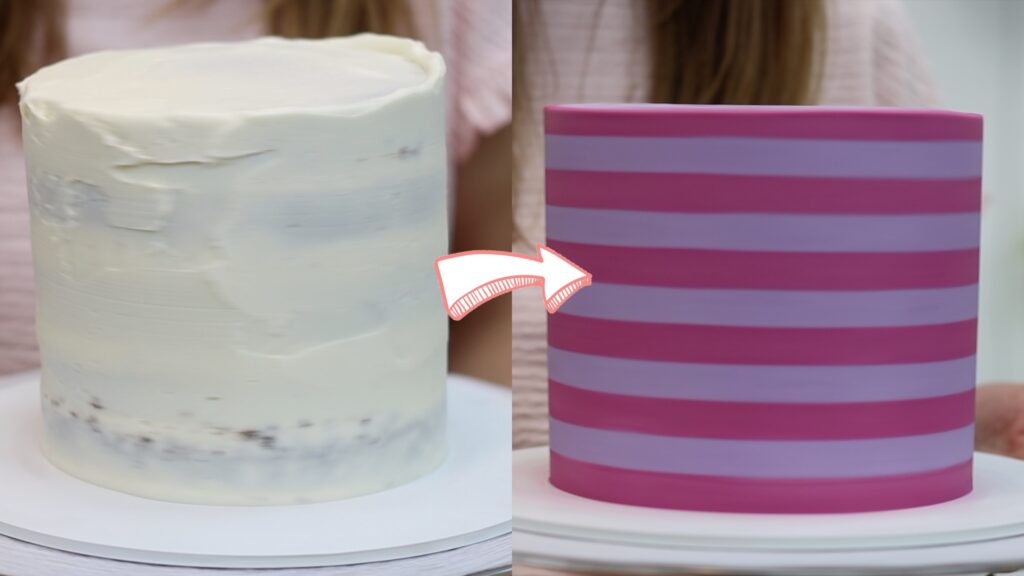
The striped cake below is the same cake and you wouldn't guess it was leaning dramatically a few minutes earlier!
If you notice a cake is leaning after the crumb coat has set, it’s too late to push it straight. Instead, use this trick! Spread more frosting onto the cake to fill in the lean. You'll need to spread it onto the bottom of one side and the top of the opposite side.
Then when you scrape around the cake, press your comb down on the cake board to line it up straight. You’ll smooth this frosting you’ve spread on to create straight sides on the cake. The frosting won’t look smooth and neat but that’s fine, the crumb coat doesn’t need to!
Put the cake in the fridge for 30 minutes to set this frosting before adding your final layer of frosting. Push the base of your cake comb down on the cake board as you scrape and this will help line the cake comb up straight against the cake and make the sides of the cake straight. Scrape around a few times and you'll get rid of the leaning or tilting effect!
So, three tricks to fix a leaning cake:
Nudge the cake layers immediately after layering the cake and filling, before anything sets in place
Wrap a crumb coated cake in cling film or Saran Wrap and push it into an upright position
Use frosting to thicken some parts of the crumb coat to even out a lean.
Which one of these tricks are you going to try to fix your leaning cake? Tell me in the comments!
Follow these 6 easy steps to make a perfect striped cake! In this striped cake tutorial I’ll share everything I’ve learned since makingmy first striped cake back in 2018.
#1 Assemble a straight cake
The first step is to assemble a straight cake. Of course, you’re always going to try to make your cake straight, but this is especially important with striped cakes because when you eventually hold your striped cake comb against the side of the cake, you want the grooves to push through the frosting evenly all the way up and down the cake. If the cake leans to one side like in the photo below, the stripe grooves will dig through the crumb coat up here and you’ll get crumbs in your striped frosting.
To make sure your cake is straight, get down to eye level to check the sides after placing each layer. Spin the cake around the check it from all angles and if necessary, adjust the layer to center it.
#2 Crumb and chill your striped cake
Before you frost the cake with stripes, you need a crumb coat. This is this thin layer of frosting to cover the cake, and it traps any crumbs that come off the cake so that you don’t get any crumbs in your stripes. It doesn’t have to be perfectly smooth because you’re going to cover it up next, but focus on straight sides by pushing the base of your cake comb down on the cake board as you scrape, to line it up straight. Then put the cake in the fridge for 30 minutes to chill this frosting so it gets firm.
#3 Use different cake combs on your striped cake
When you can touch the crumb coat without damaging it, it’s set, and you’re ready for step 3: The final layer of frosting! Spread it all over the top and sides of the cake, so that it sticks up around the top of the cake.
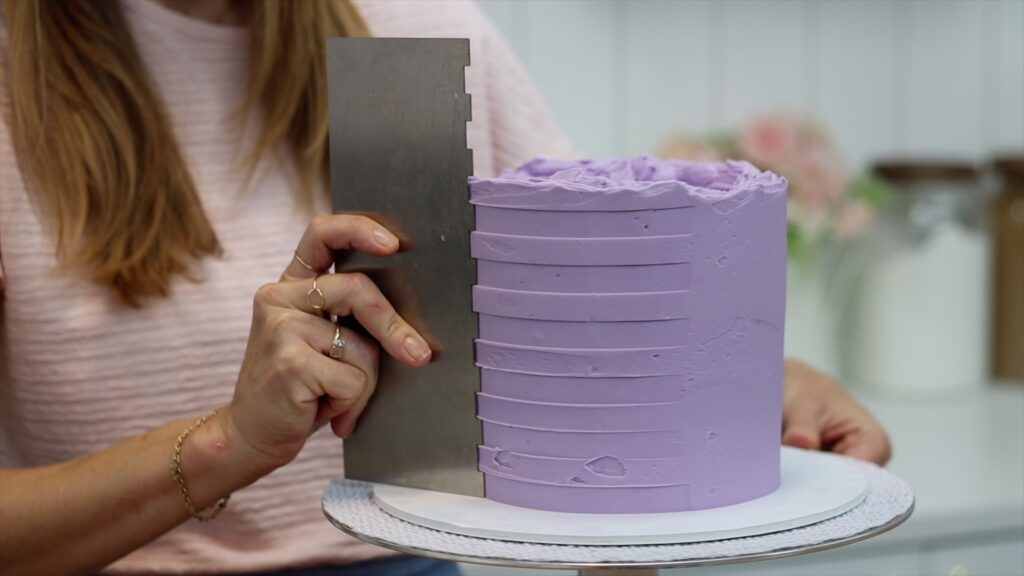
This frosting needs to be at least as thick as the grooves on your striped cake comb. A striped cake comb looks something like this, and it can be made of metal or acrylic or plastic and all of those will work!
But you'll need another cake comb before using this. First,use a straight edged cake comb to scrape around the cake a few times until the sides are smooth and straight, without any big gaps or indents.
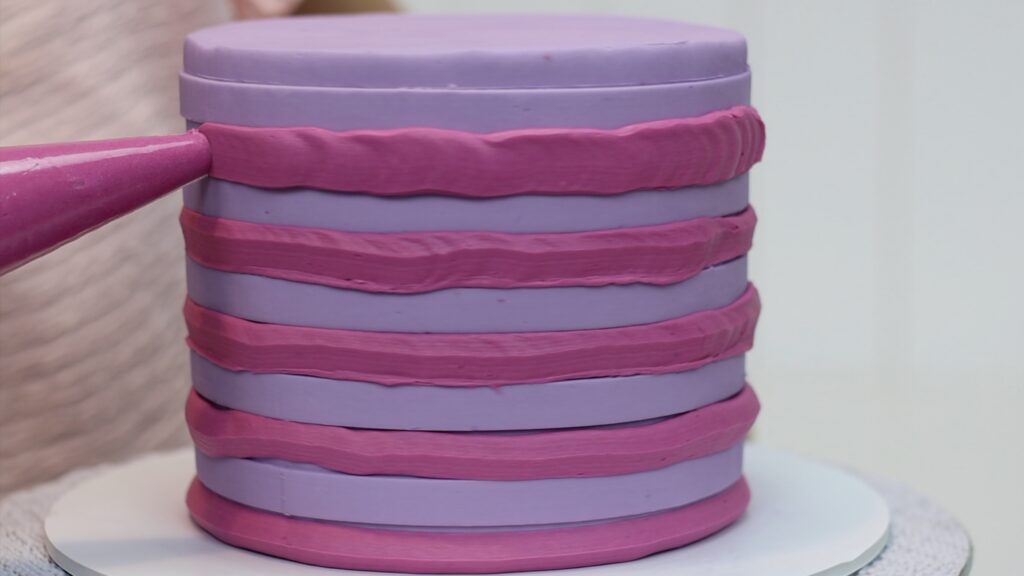
Then switch to a striped cake comb and press the base down on your cake board before pressing it gently into the frosting as you spin the cake, imprinting the grooves of your comb into the cake.
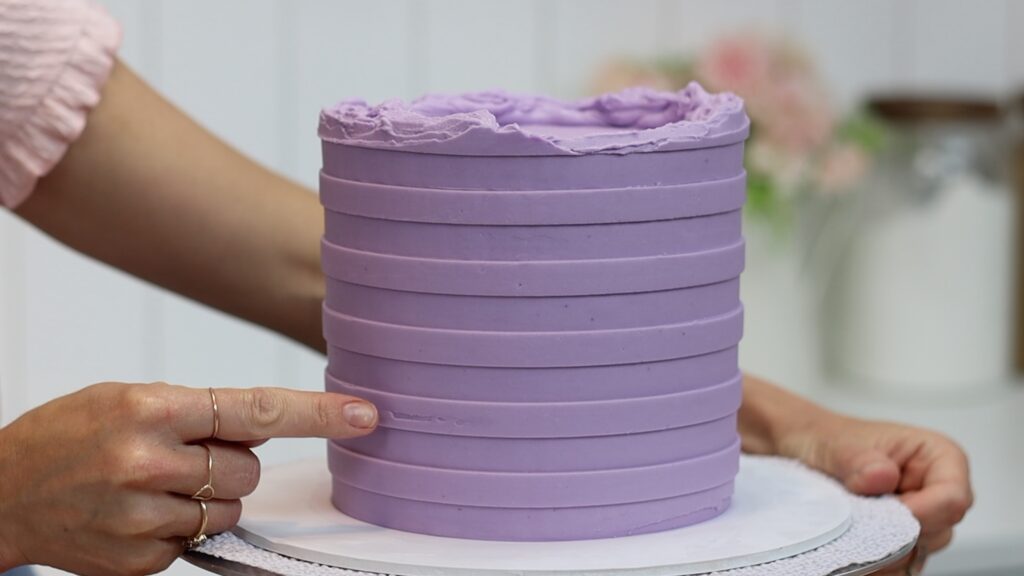
You’ll need to scrape around the cake a few times to get these really neat. You’re looking for a smooth surface the frosting within the grooves, and also on the stripes that stick out.
If there are any indents or air pockets within the stripes, fill them in by piping or spreading more buttercream over them. Then scrape until they're smooth. If you continue without filling them in, you'll get dots of the next colour within those spaces.
#4 Freeze your striped cake
When it’s neat, put the cake into the freezer for 20 minutes. Set a timer because 20 minutes is the perfect amount of time for this step! You want the frosting to be firm enough that it will hold its shape, but not completely frozen.
#5 Fill in the stripes
Next, fill the striped grooves with whatever colour or colours you choose. You couldspread this on but it’s much quicker to pipe it into the grooves. Make sure this frosting fills the entire groove, so that there aren’t big gaps or air pockets within the stripes.
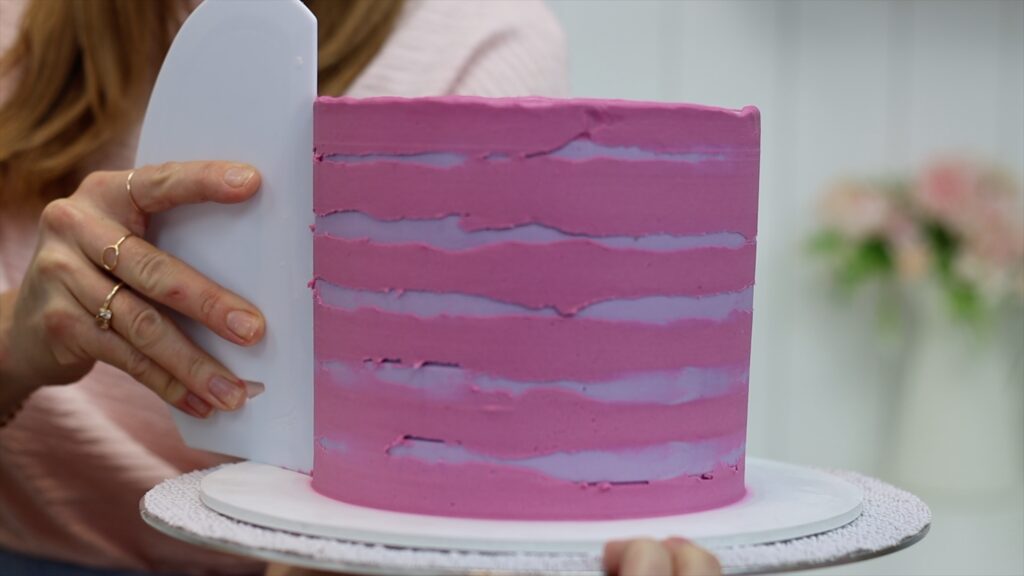
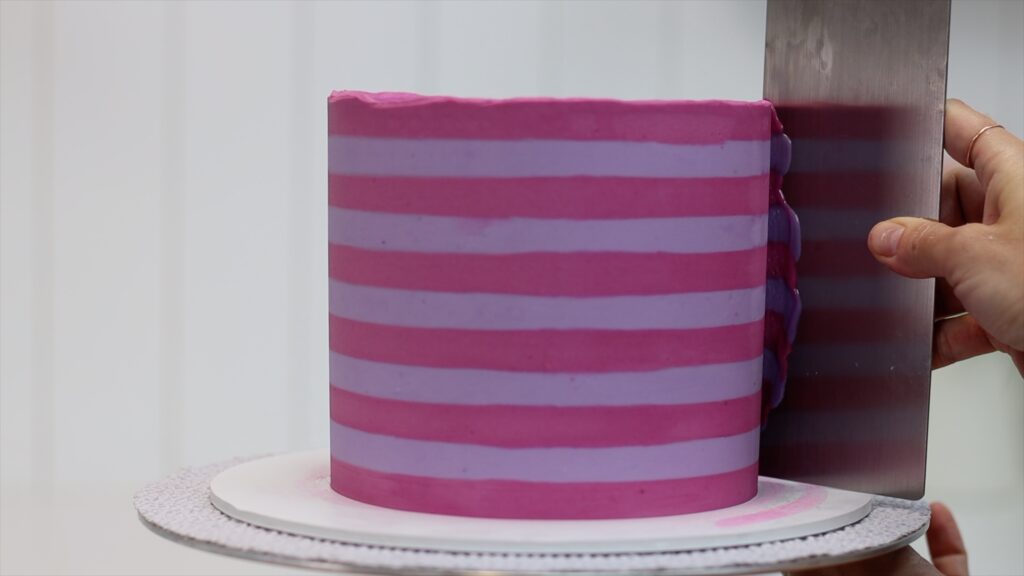
#6 Scrape until the stripes are smooth
Then move straight onto step 6, which is to scrape, scrape, scrape, scrape! You might doubt the whole process because there will be frosting smudges all over your cake. But suddenly, after several scrapes, you'll take off the last of the excess frosting and leave behind impossibly neat stripes.
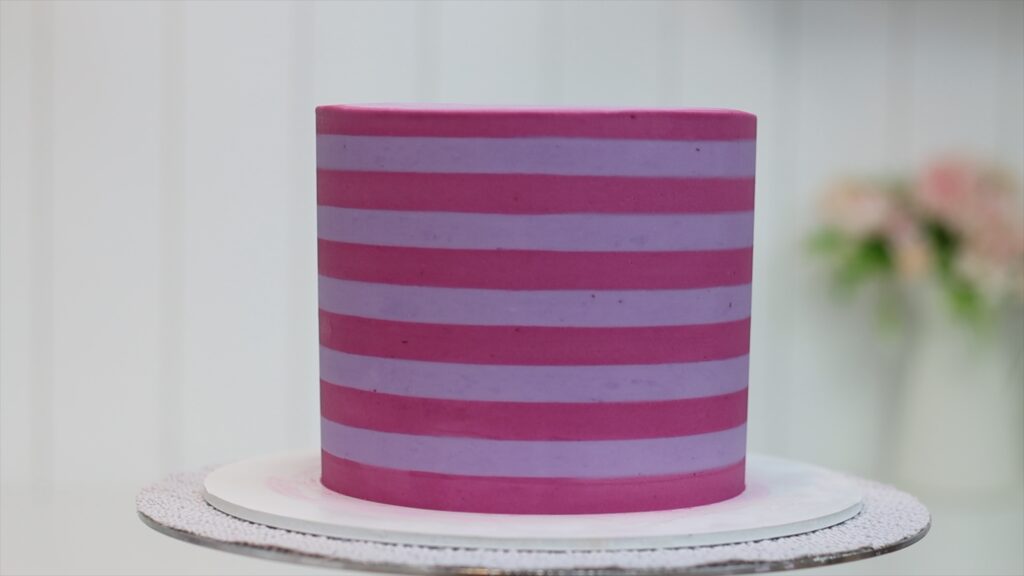
If you see any specks of colour within the stripes, it’s because there were air bubbles in the first colour of frosting, the one you used the striped cake comb on. You can dig those out with the corner of a cake comb and then spread or pipe the correct colour into that hole, then scrape to smooth it and tadaa!
And that’s it! Perfect buttercream stripes in 6 easy steps! Please subscribe to my channel for a new cake decorating tutorial every week and visit my cake school on BGB.com to learn hundreds of cake decorating techniques and designs! Thanks for watching!
In this tutorial I’ll solve the 10 most common cake struggles! Leaning cakes, food coloring stains on everything, never enough countertop space, air bubbles in your frosting, lack of cake decorating inspiration, sprinkles everywhere... Get ready for these practical solutions!
#1 Piping tips down the drain
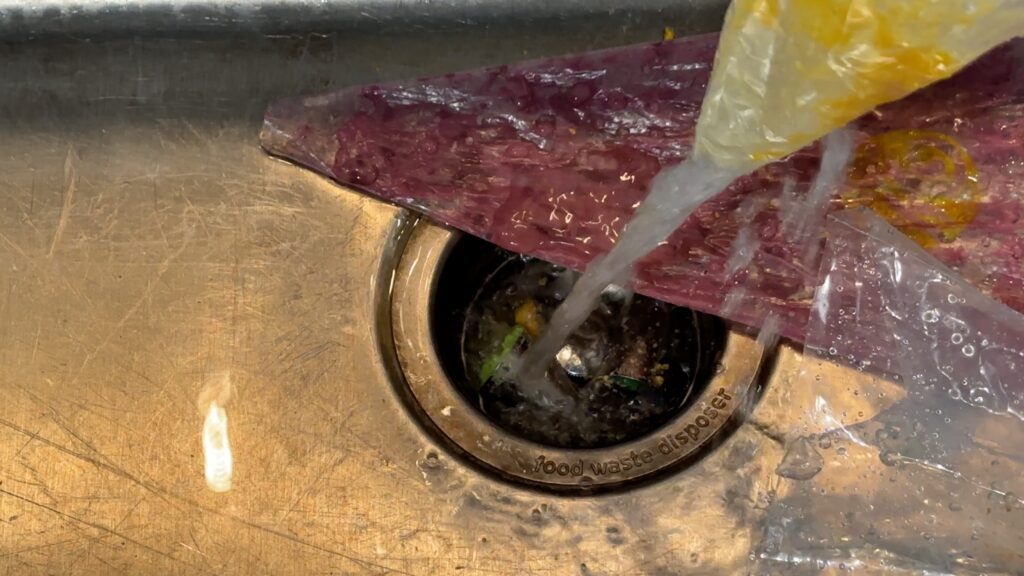
Most cake decorators have an impressive collection of piping tips that have been mauled by the garbage disposal or insinkerator.
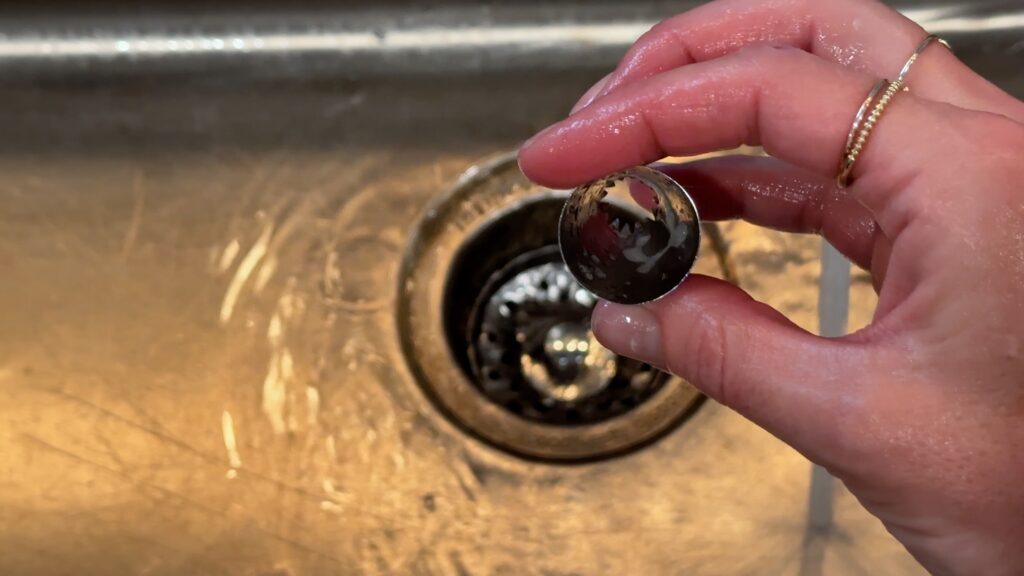
Whenever you wash piping bags and piping tips, use a drain sieve in the sink. I find these annoying the rest of the time but with piping tips they’re so useful! Frosting from piping bags will go through the sieve but piping tips will wait patiently for you in it. As a bonus, as the hot water flows down the drain it will clean the piping tips for you!
#2 Cake struggles with sprinkles
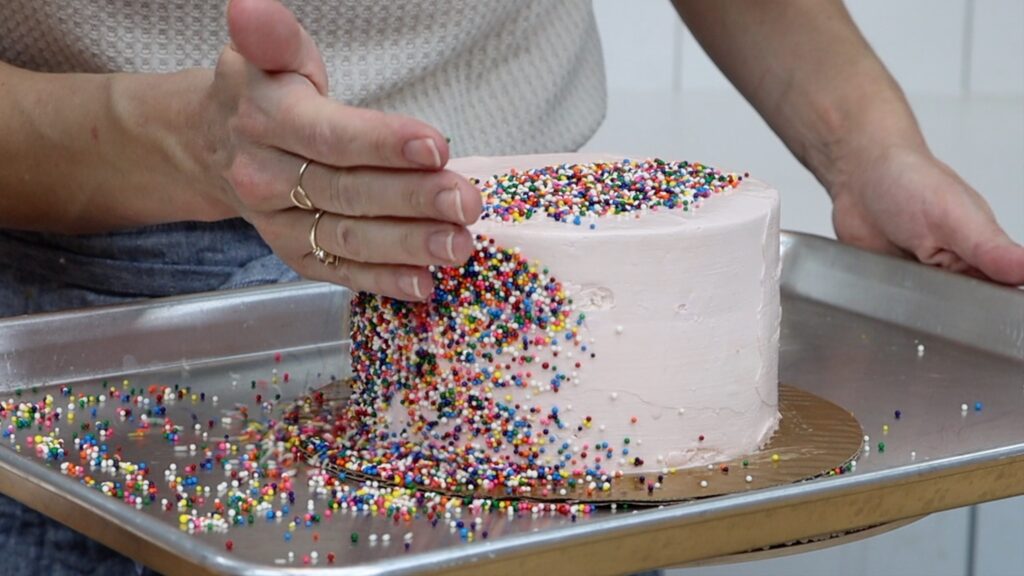
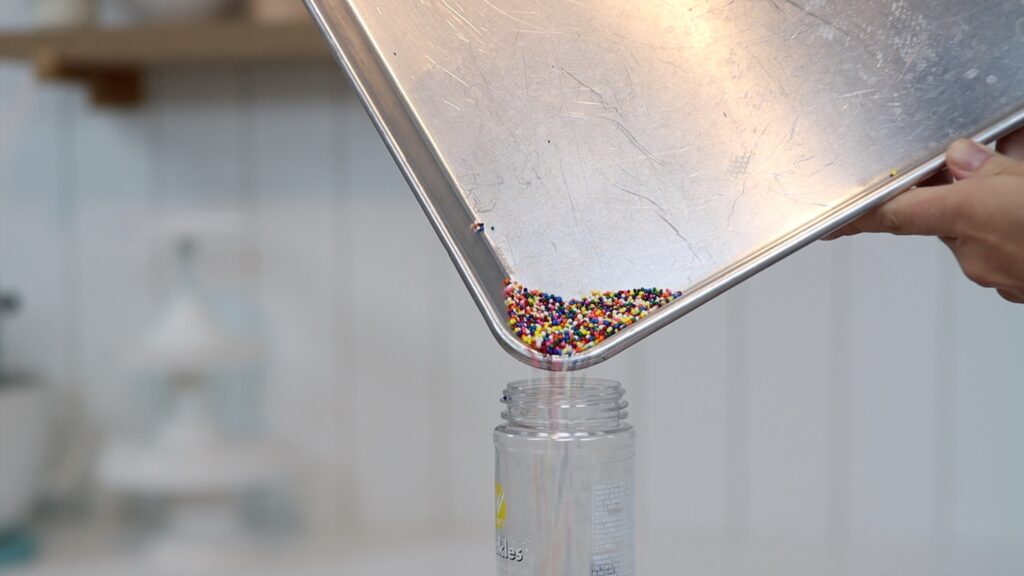
Sprinkles are beautiful but they can travel fast and far. Whenever you’re using sprinkles, catch any runaways by decorating ona baking sheet or tray. Any sprinkles that roll and bounce off the cake will be trapped by the rim around the tray.
When you’ve finished decorating, tap the cake board to knock the final sprinkles onto the tray. Then tilt the tray and pour the sprinkles into their jar or packet.
To be even morecareful, pour your sprinkles into a piping bag before you use them. Cut a small piece off the end of the bag and you'll have more control over where they go.
#3 Food colouring stains
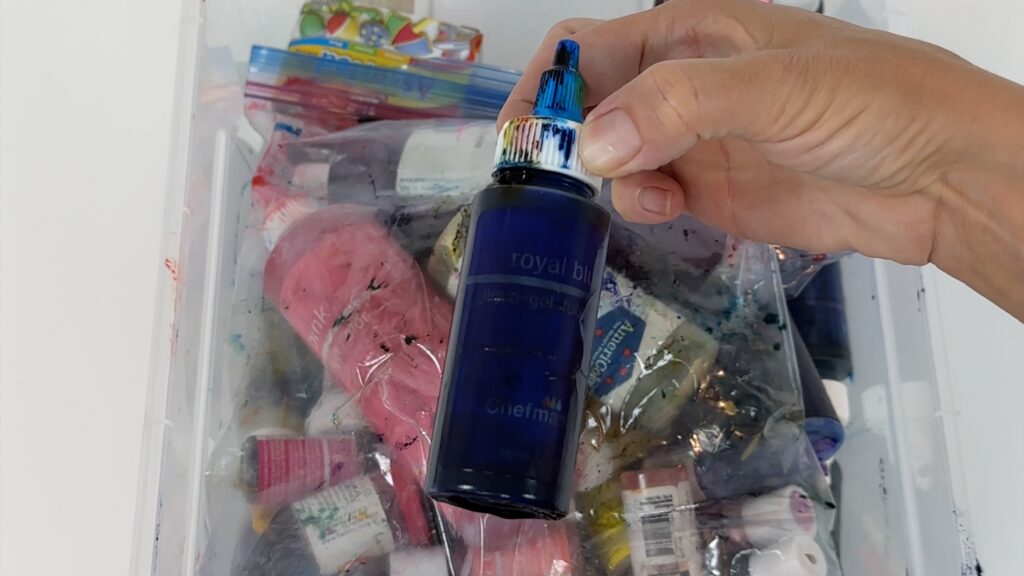
The worst of the cake struggles, I think, is food coloring stains. They’re so difficult to wash off! When bottles topple over they leak onto each other so whenever you pick up a bottle you’ll stain your hands.
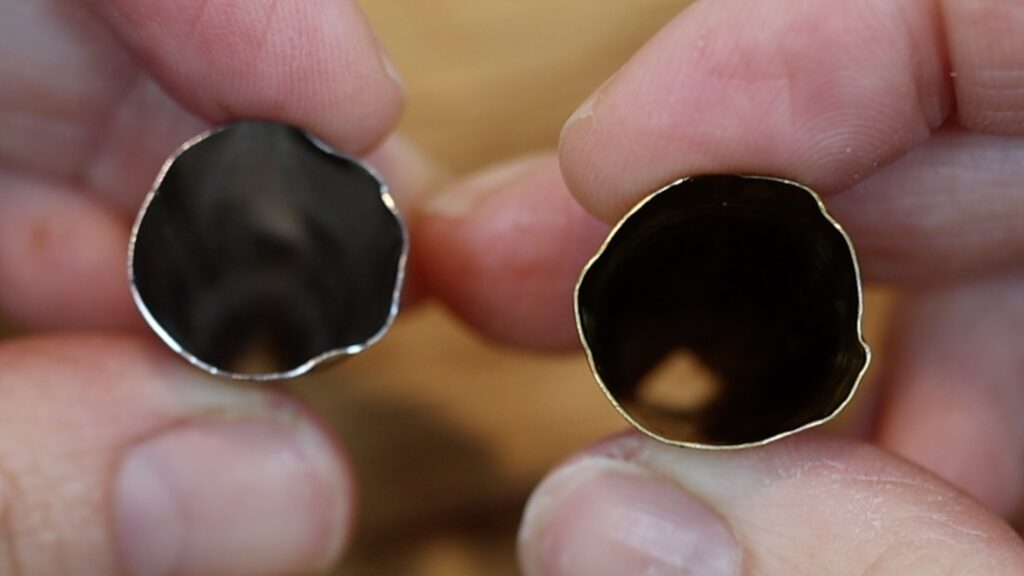
There are two solutions for this. First, open your bottle using the spike on the inside of the lid. Unscrew the lid and press the spike into the lining that covers the bottle. You'll make a small hole, which is much less likely to leak than if you peel the lining off.
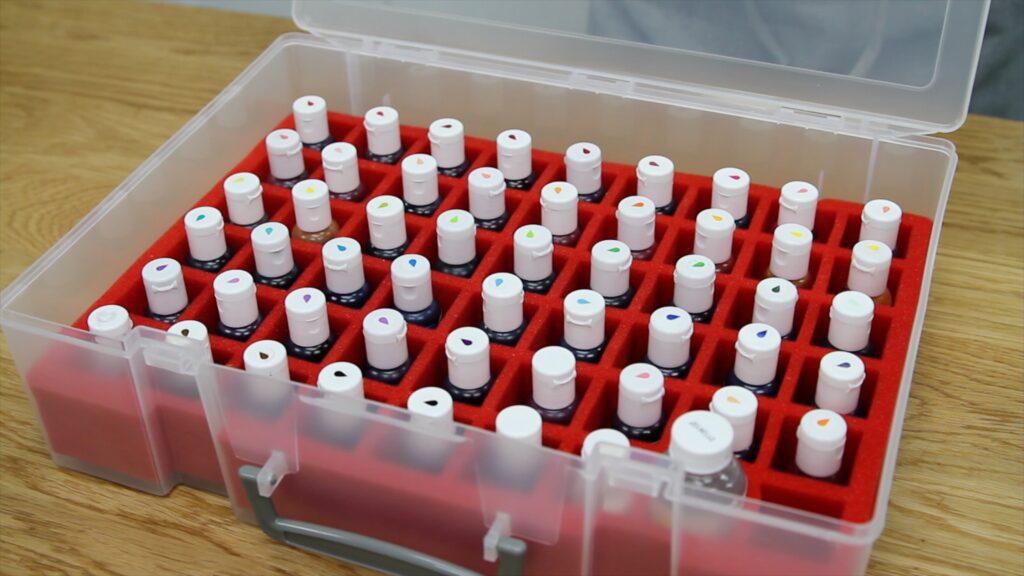
Secondly, store your bottle upright instead of letting them fall over. I use a storage caddy intended for nail polish, which is exactly the right size for gel colours! No more leaking and no more staining!
#4 Limited countertop space for cake decorating
Countertop space is in high demand when you’re cake decorating and there is never enough! Here are my tips for making the most of what you have.
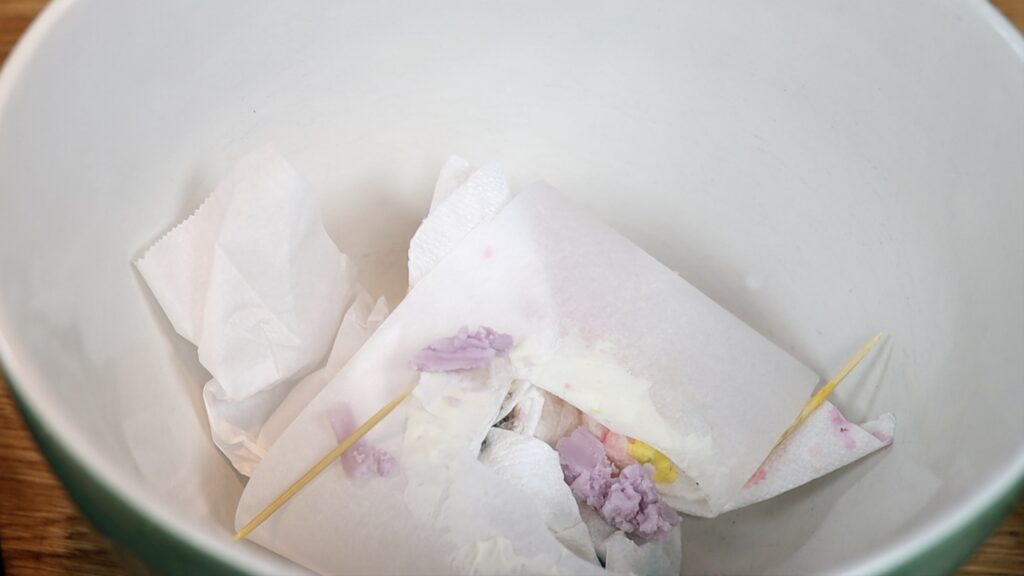
If you’re not next to a rubbish bin or garbage can, use a throw away tub. Throw cake scraps, cut off ends of piping bags, and any other rubbish into this tub or bowl or bucket. This saves you the time of walking back and forth to the rubbish bin and keeps rubbish off your countertops.
If you’re not working next to a sink, have a washing tub too. Use this for anything dirty like piping tips, spatulas or cake combs. Then carry it to the kitchen sink when you're finished!
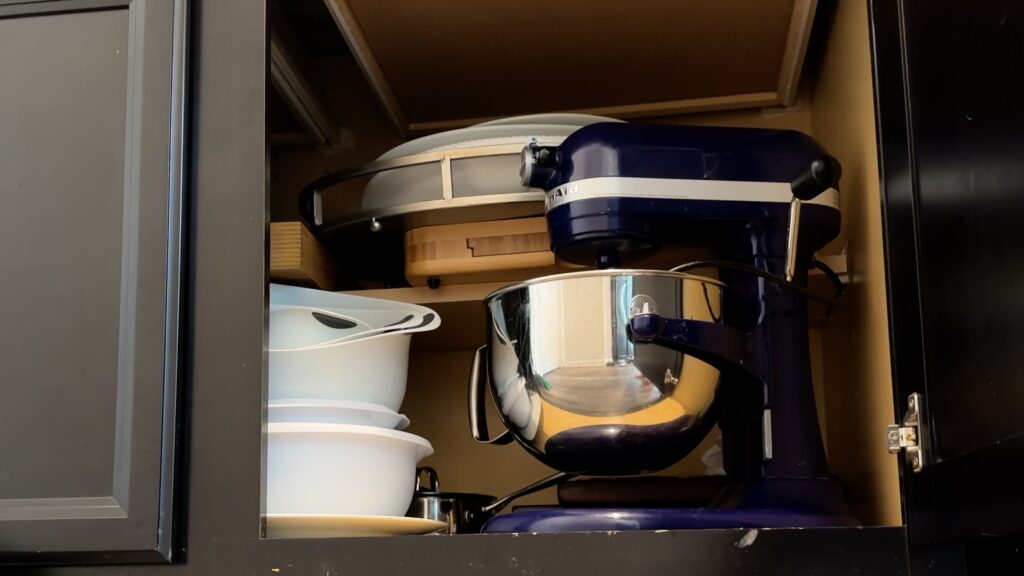
Store appliances in cabinets rather than on the countertop to make more space. Even a mixer can fit into a cabinet, reducing countertop cake struggles.
Don't store tools and supplies on your countertops either, which brings me to my next solution below.
#5 Baking organization hacks
Free up space, reduce clutter and make it easier to find everything with my favourite baking organization hacks!
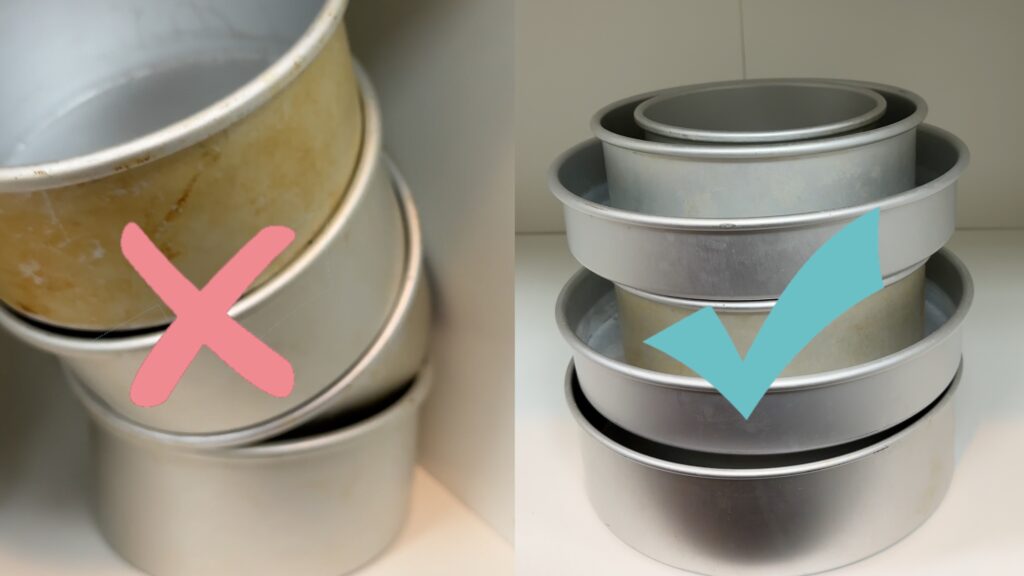
Tired of cake pans tumbling out of your cupboards? When you stack pans on the same size you'll build a leaning tower than topples over easily. Instead, put small pans inside big pans and they’ll balance the next layer of pans.
Your tower of pans will be stable and also much shorter, taking up less space!
Most cake decorators have several types of cake combs for smooth and textured frosting. Don’t stuff them into a drawer because it’s a pain to find the one you’re looking for. Racks intended for pan lids work excellently as a divider for different types of cake combs.
In a split second I can grab a smooth acrylic comb, a textured metal comb, or whichever one I want. I use the same rack for my cake boards to separate those by size and material.
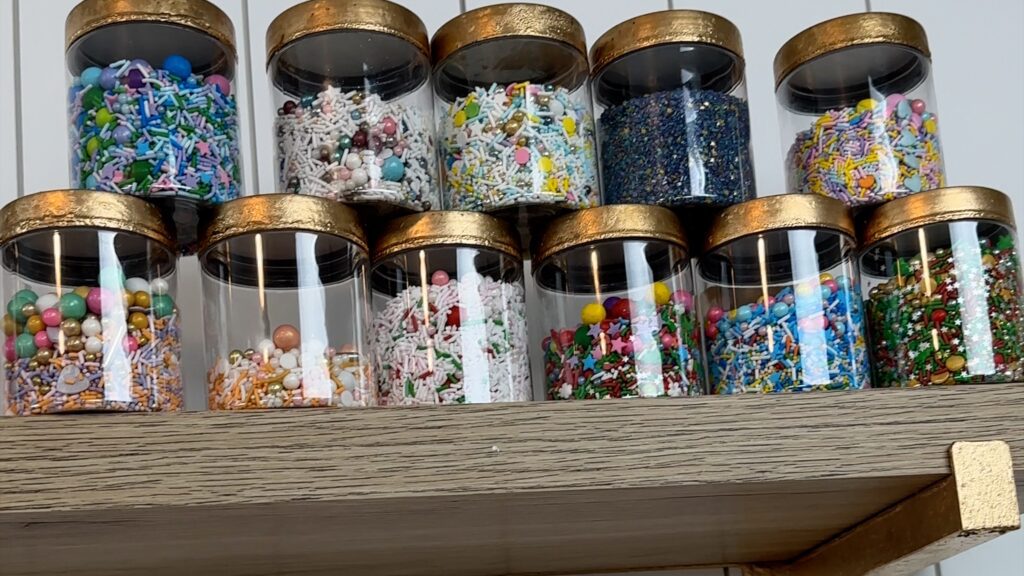
Sprinkles get mixed up in a box or drawer and it takes forever to find then one you’re looking for. Pour your most used mixes into jars and arrange them on a shelf. Now they’re easy to find and they’ll add a colourful decoration to your room!
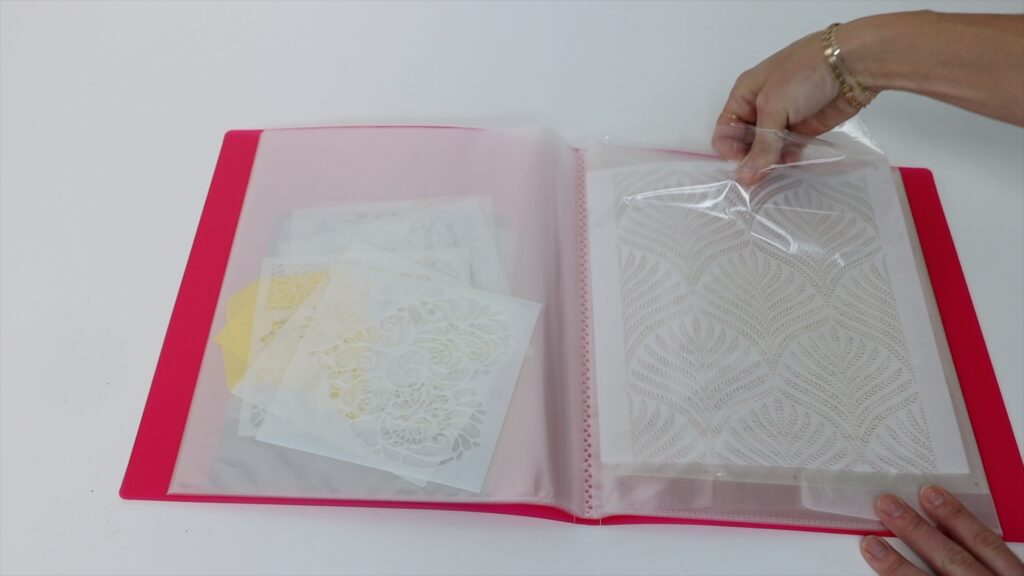
Stencils are super thin but if you have several, they end up taking up a lot of space. A folder with plastic wallets is an easy storage solution for these. Put one stencil in each wallet and optionally, organizer them by material or theme. You can label the sections with tabs if you like. Now you can flick through the folder quickly, making it quick and easy to choose and remove your stencil.
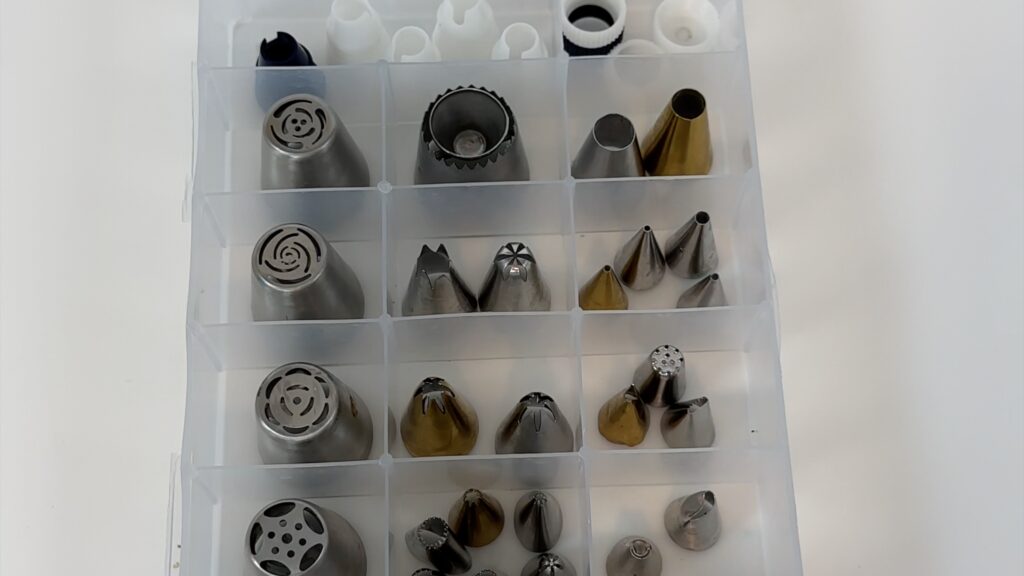
Piping tips cause cake struggles when they fall into the insinkerator but also when it comes to storage. Piping tips love to hide inside each other and to lie sideways, so that they all look identical! This makes it difficult to find the one you’re looking for. Use a craft box and either place one tip in each section or group them together. For example, I keep star tips in one section, petal tips in another, and grass and leaf tips in another.
#6 Cake struggles with slipping cakes
If cakes move around while you frost them, it's impossible to get smooth frosting! Why do they slide? Because they’re not attached to the cake board!
Before you start assembling your cake, pipe or spread some frosting onto the middle of the cake board. Then press your first layer of cake down onto that frosting. This will stick the cake to the cake board and as you layer your cake and filling, it won’t slide around.
But there’s one more step to this! Chill the cake for about 20 minutes before you frost it to set that frosting so that it glues the cake in place. Next, as you spread frosting onto the cake and then scrape aroundthe cake, the cake will resist that pressure. The frosting on the cake board will hold the cake securely in place so that it doesn't move.
If it does move it's because your spatula or comb pushed the cake off the buttercream dot. To fix this you'll need to add some fresh buttercream 'glue'. Lift the cake up by sliding an offset spatula or cake comb underneath it. Next, spread some buttercream onto the middle of the cake board and lower the cake back down.
If the cake isn't cold, put it into the fridge or freezer for a few minutes to set that fresh frosting. Now the cake will be securely attached to that dot!
#7 How to fix a leaning cake
If your cake looks like it’s leaning sideways, your layers aren’t placed directly on top of each other. The good news is that even if you’ve already started frosting your cake, it’s not too late to fix this! Use more frosting to fill in the lean on the bottom of one side and the top of the other.
When you scrape around the cake again, press your comb down on the cake board to line it up straight. You’ll smooth this frosting you’ve spread on to create straight sides on the cake.
Add your final layer of frosting and you’ve got rid of the leaning or tilting effect!
#8 How to fix air bubbles in frosting
Even if your buttercream looks smooth in the bowl, after frosting your cake it can be covered in air bubbles. These are usually caused by under-mixing or over-mixing your buttercream.
Luckily, like the other cake struggles in this tutorial, there's an easy solution. A metal cake comb and heat! You can use a blowtorch to heat the edge of your cake comb or hold the comb under hot running water.
The heat of the metal will melt the very outer layer of frosting, dragging it around the cake to fill in any air bubbles in the frosting. The result is perfectly smooth frosting!
#9 Gaps in the top edge of frosting
If you have ugly gaps around the top edge of your cake, it’s because your frosting wasn’t high enough. It needs to stick up above the top edge before you level it with a spatula or knife.
To prevent this, push upwards with your offset spatula when you’re spreading frosting onto the cake. You want to create a lip or wall around the top edge of the cake. Then when swipe sideways to level it, the top edge will be straight and even. Another option is to put the cake into the fridge for 15 minutes and then use a sharp knife to cut the top edge. You'll slice off the frosting that’s sticking up, leaving a super sharp edge around the top of the cake. You'll need to skim around the cake several times with your knife to get it level and smooth.
#10 Cake struggles with inspiration
Losing cake inspiration is common, especially if you’re trying to think of cake designs daily for your instagram account! A quick decoration that will match your cake to any colour scheme is to make a sprinkle mix. Use different shapes and sizes and colours for unique combinations. Press the sprinkles into the bottom of the cake for a sprinkle border or sprinkle them on top of the cake.
I hope you’ve seen some ideas you’d like to try! To learn hundreds of cake decorating techniques and designs, visit my cake school where you'll find courses and also memberships for access to everything on the cake school - start your free 7 day trial!