
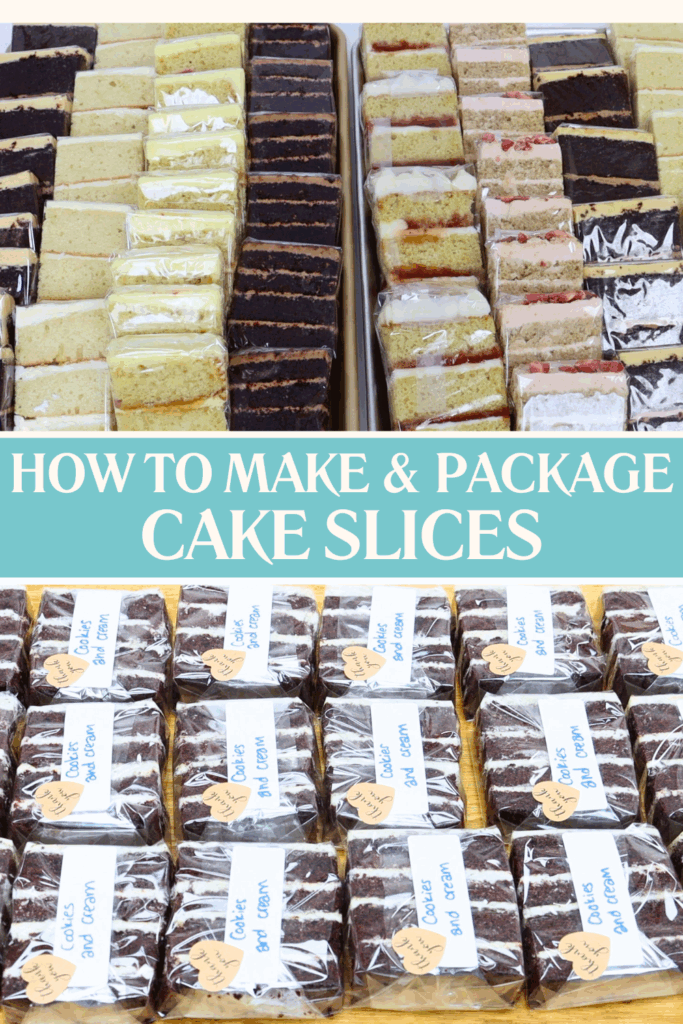
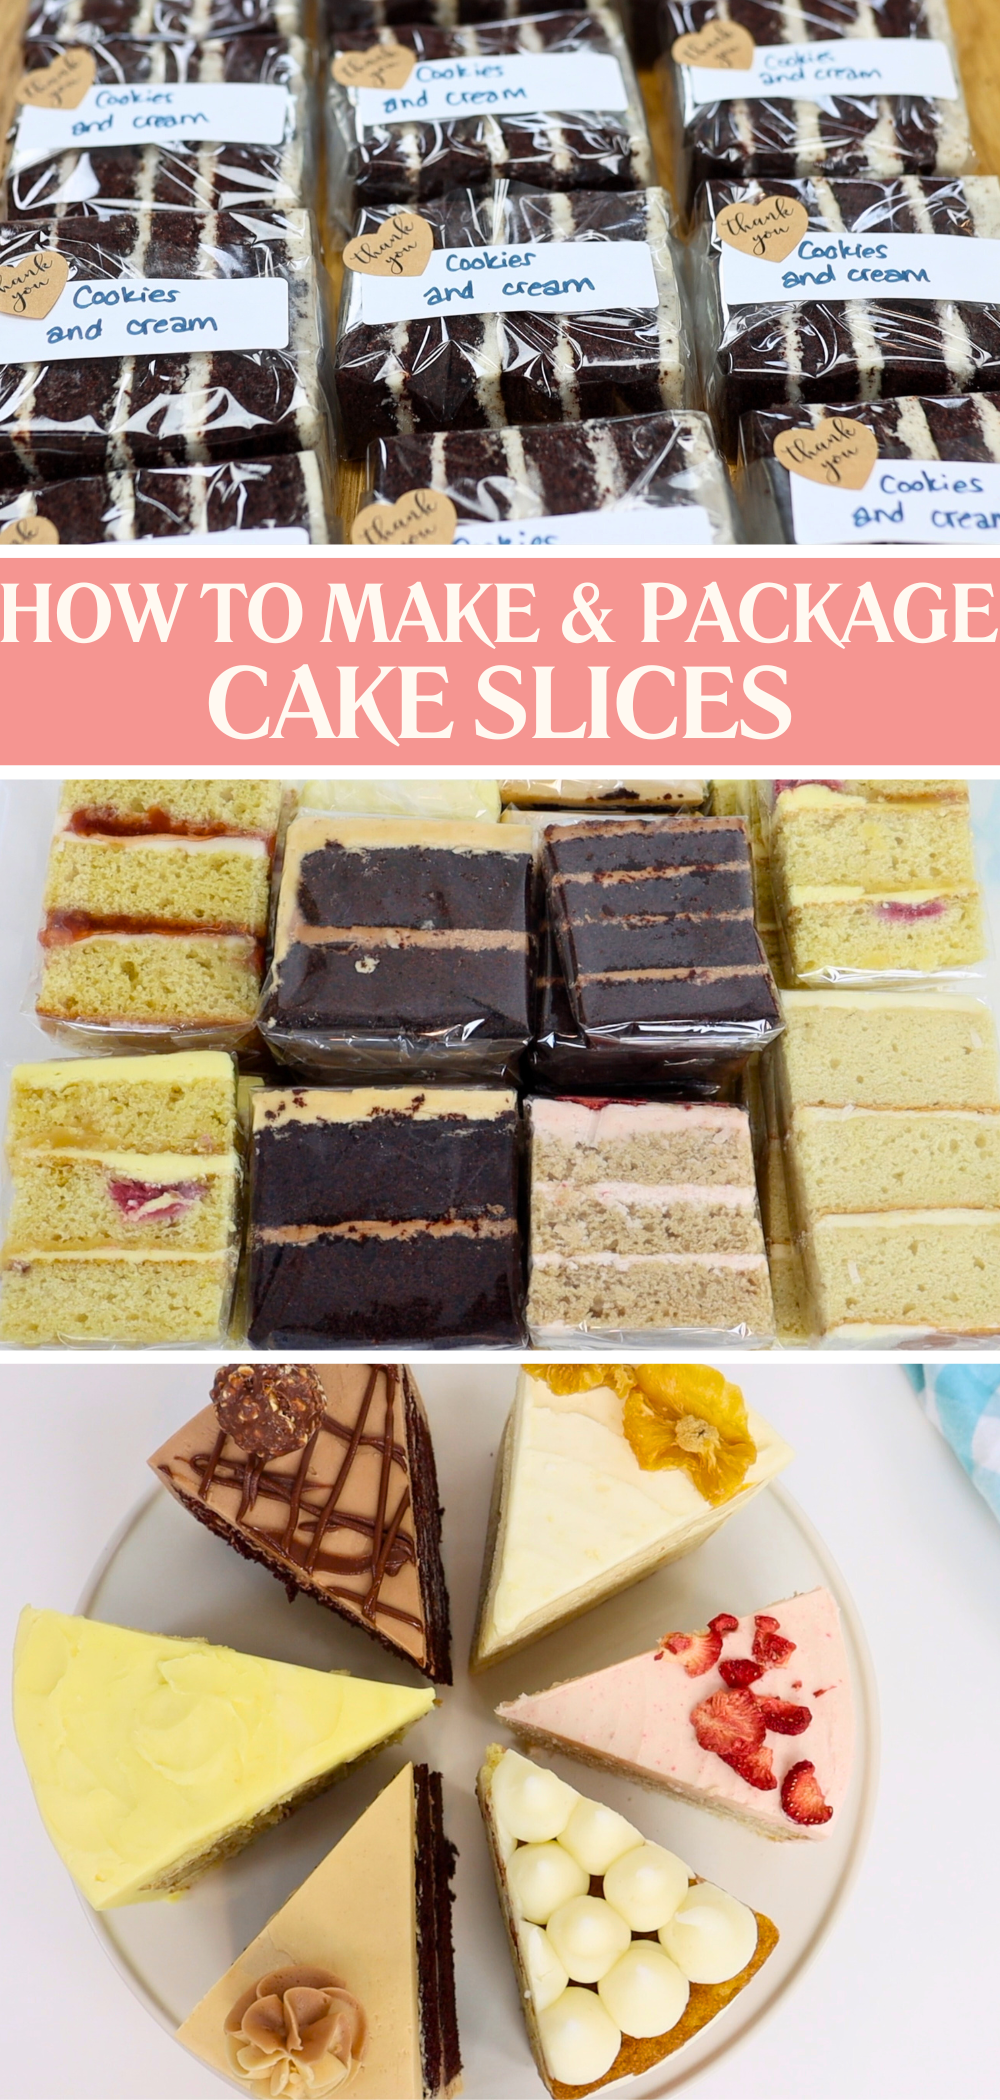
Planning ahead for a big event, bake sale, or client order? Learn how to make and package cake slices to keep them delicious and beautiful! Not only does it save time on the day, your cake slices will look professional and irresistible. Use this tutorial when you make cake slices for a school celebration, a brunch, or a wedding tasting!
In this tutorial I’ll walk you through everything from baking and assembling your cake, to cutting it neatly, wrapping each slice beautifully, storing them so they stay fresh, and transporting them without a single smudge. It’s all beginner-friendly, and you don’t need any fancy tools to get started!
You can make cake slices out of round or rectangular (sheet) cakes. But if you’re just starting out, a sheet cake is probably the easiest to handle. Bake at least two layers so that you can add filling and your slices will be tall and flavourful.
If your sheet cake is on the larger side, removing it from the pan without it breaking can be a bit nerve-wracking. Here’s a trick: place a wire rack on top of the pan while the cake is still inside. Then flip the whole thing upside down so the cake lands neatly on the rack. Lift the pan away and ta-da! A perfectly intact cake, ready for decorating.

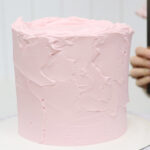
I’m making a cookies and cream cake here, so I’m stirring crushed Oreos into my quick, four-minute buttercream. The finer you crush the cookies, the easier the frosting will be to spread.
Assemble the cake layers directly on a cutting board to make things simple later on. Start with your first layer, spread your buttercream evenly with an
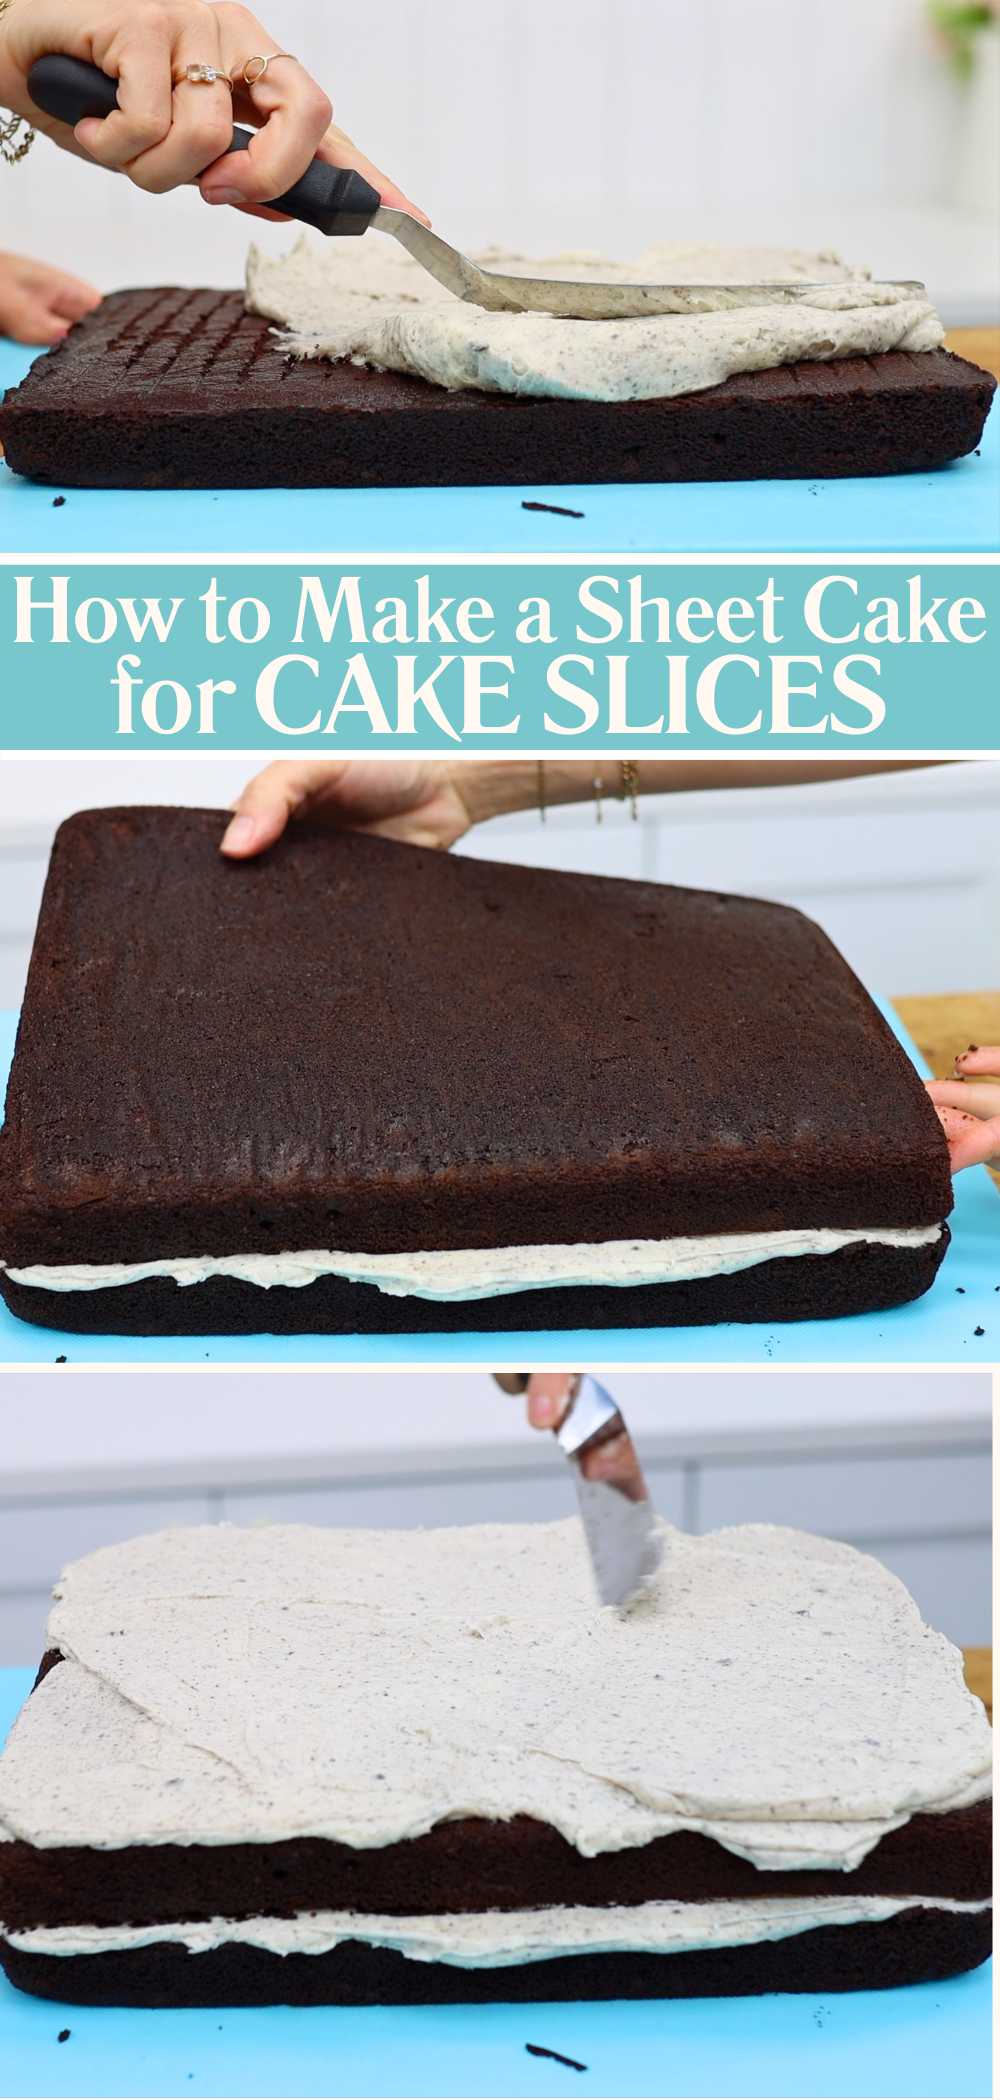
Want to add height without baking more layers? Slice each layer in half horizontally to double the number of layers. You can do this with a serrated knife or a wire cake leveler. Carefully saw back and forth until you’ve split the cake cleanly — this gives you extra layers of filling, and adds both flavour and height to your finished slices.
Before we move on to how to cut and package cake slices, there’s a step you can't skip: chilling the cake. Pop it into the fridge for at least 30 minutes or the freezer for about 15. This firms up the cake and frosting so when you cut it, you get clean, sharp edges.
Cutting a cake while it’s still soft will drag the filling through the cake and smear frosting everywhere, so don’t rush this part!
While the cake chills, use the time to clean your workspace. It’s also the perfect moment to prep your flavour labels. These little details add professionalism and if you’re packaging cake slices for sale, they’re important for allergens and presentation.
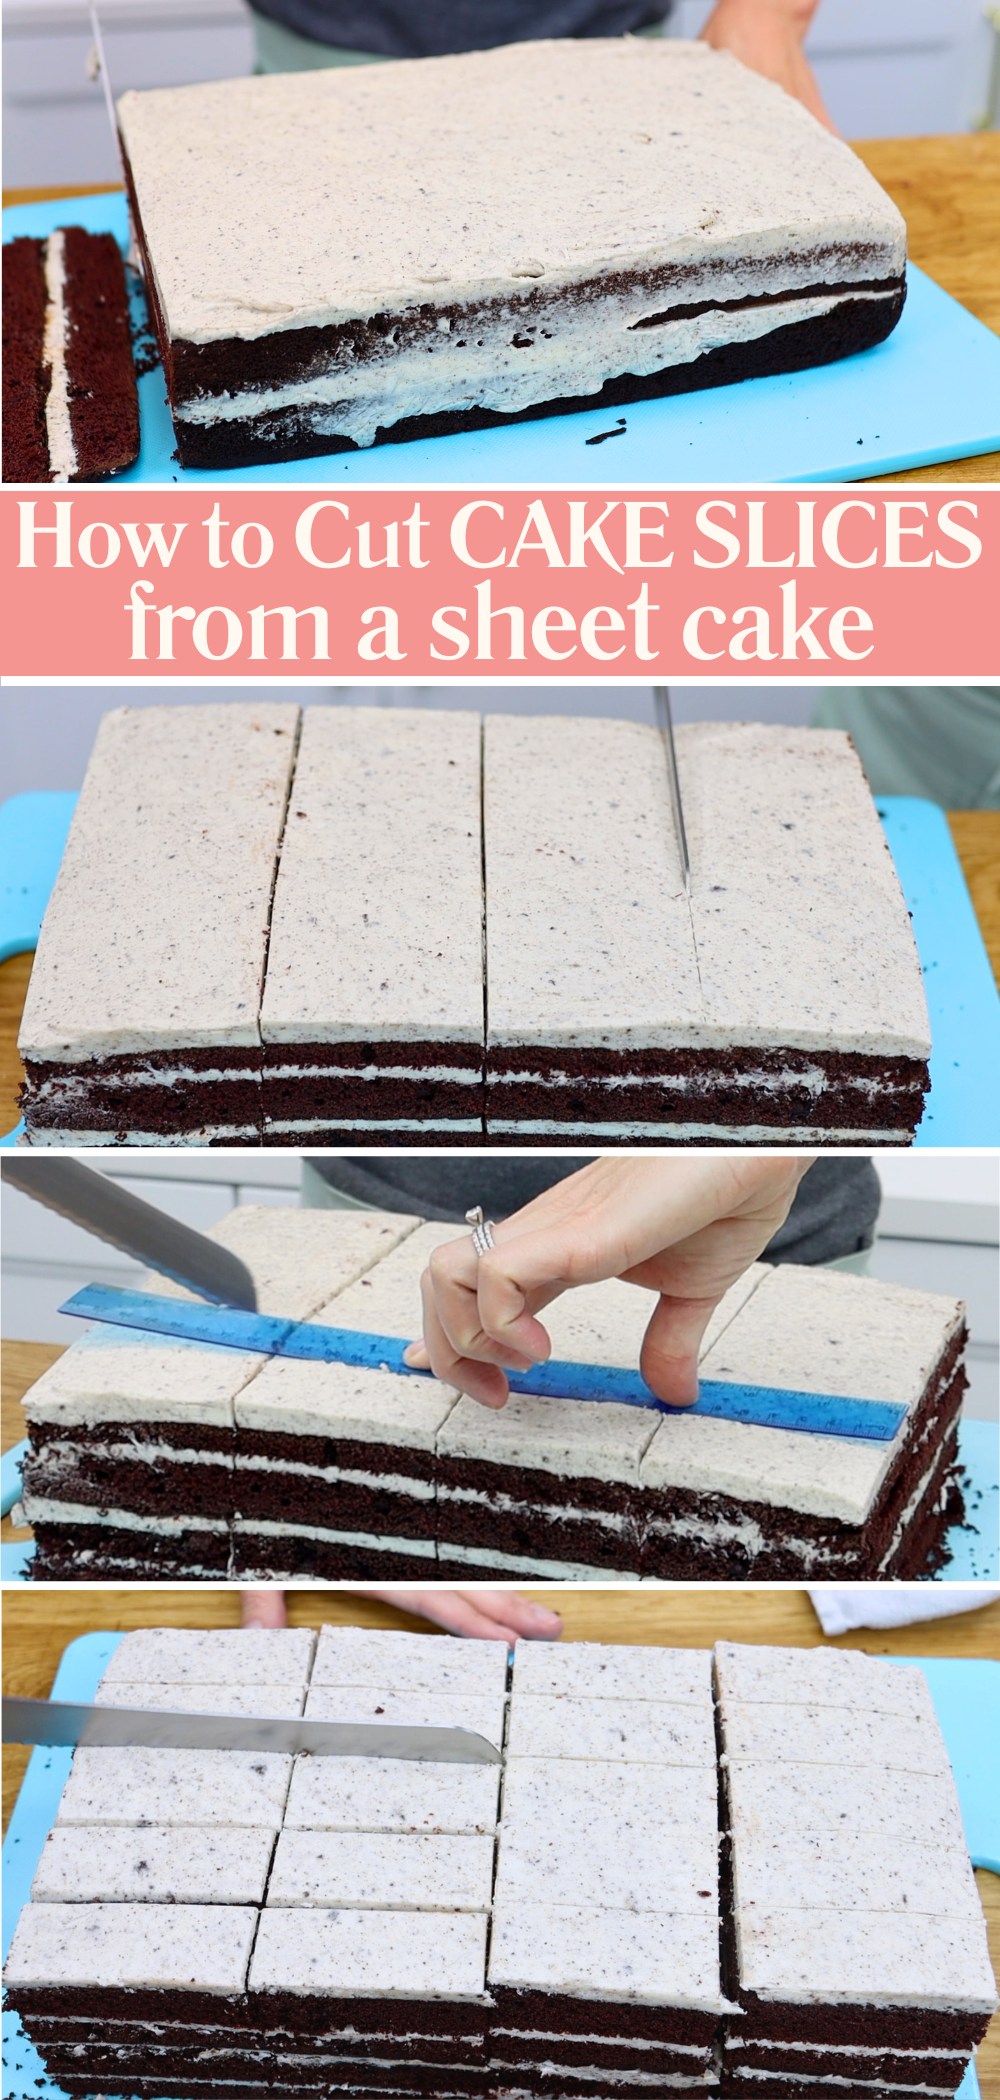
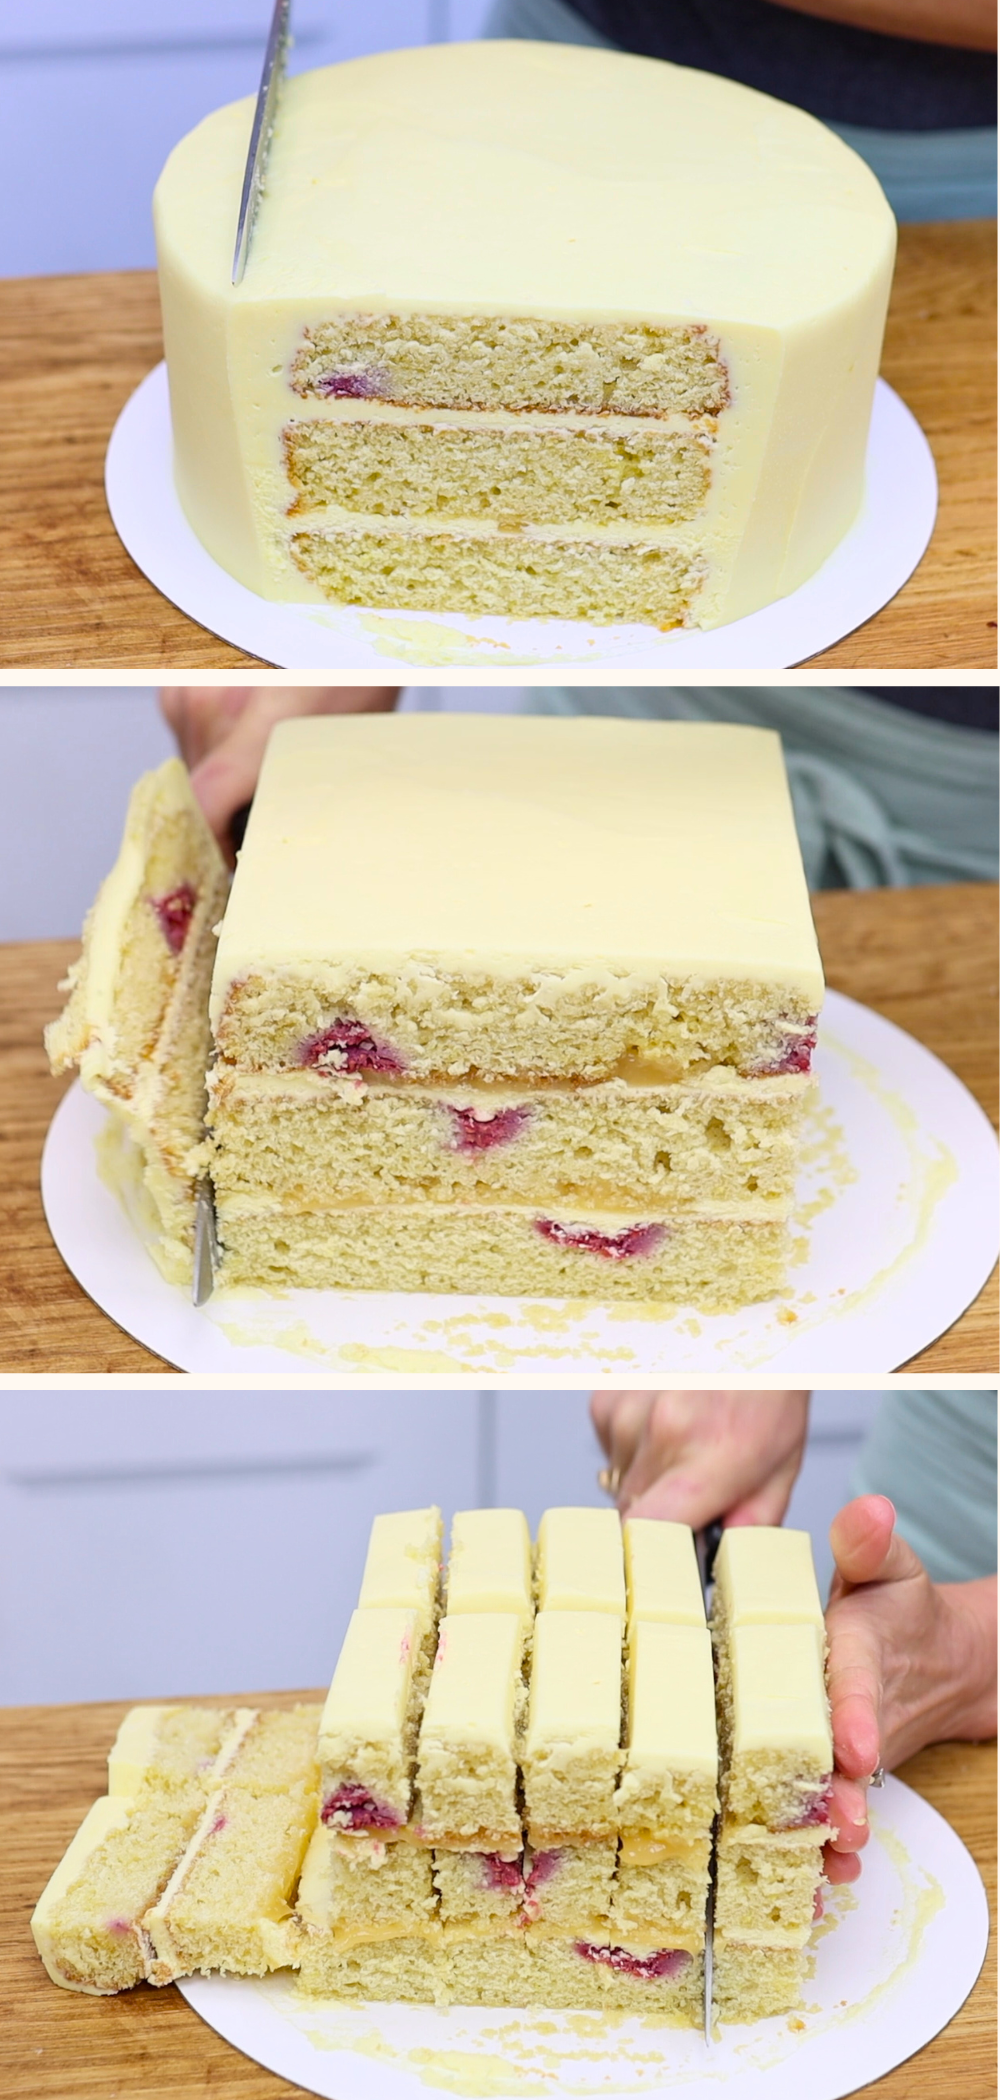
Once your cake is fully chilled, you'll need a serrated knife and a ruler to cut it.
I like to started by scoring lines along the long side of the cake, which will determine how wide each slice is. Use your ruler to lightly score the top of the cake where you’ll cut, then slice slowly with a bread knife.
For the thickness of each slice, use the width of your ruler as a handy guide. Clean your knife in between slices and you'll notice how easy the slices are to handle since they're cold!
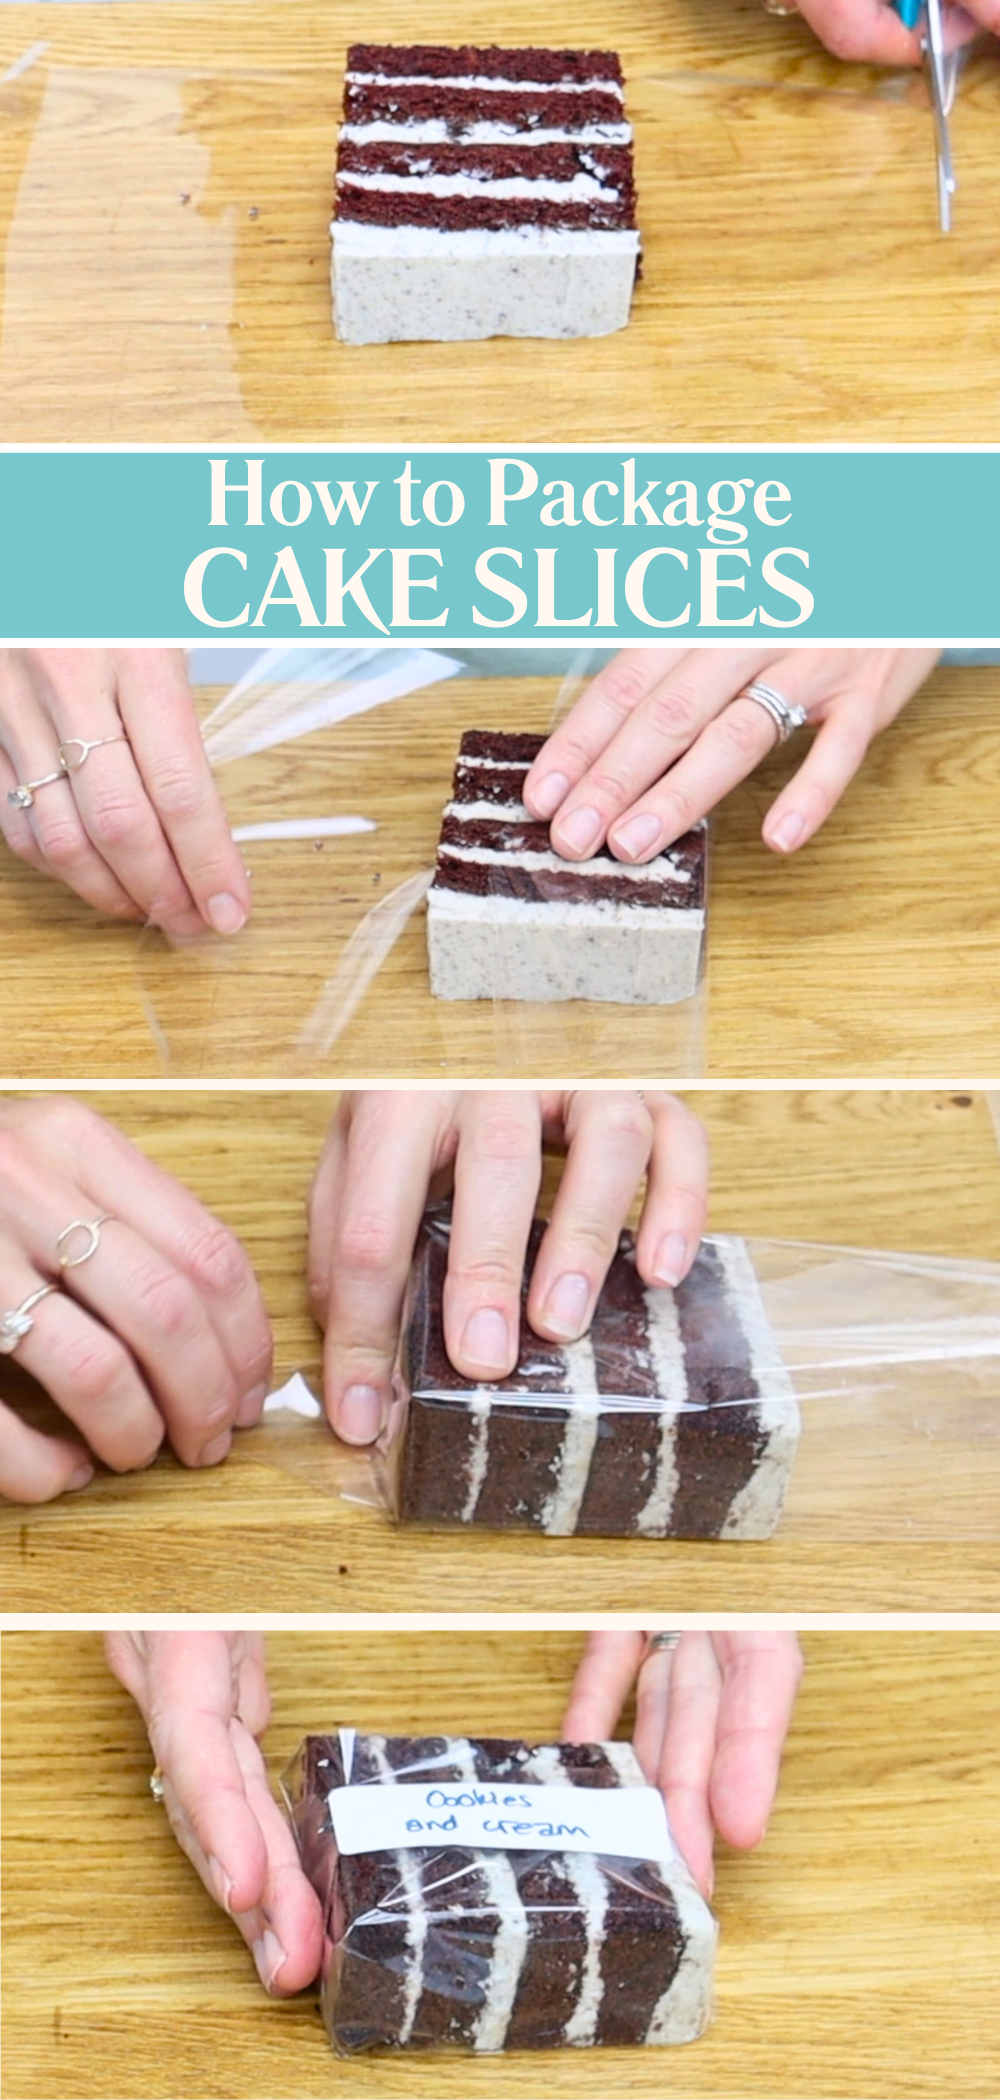
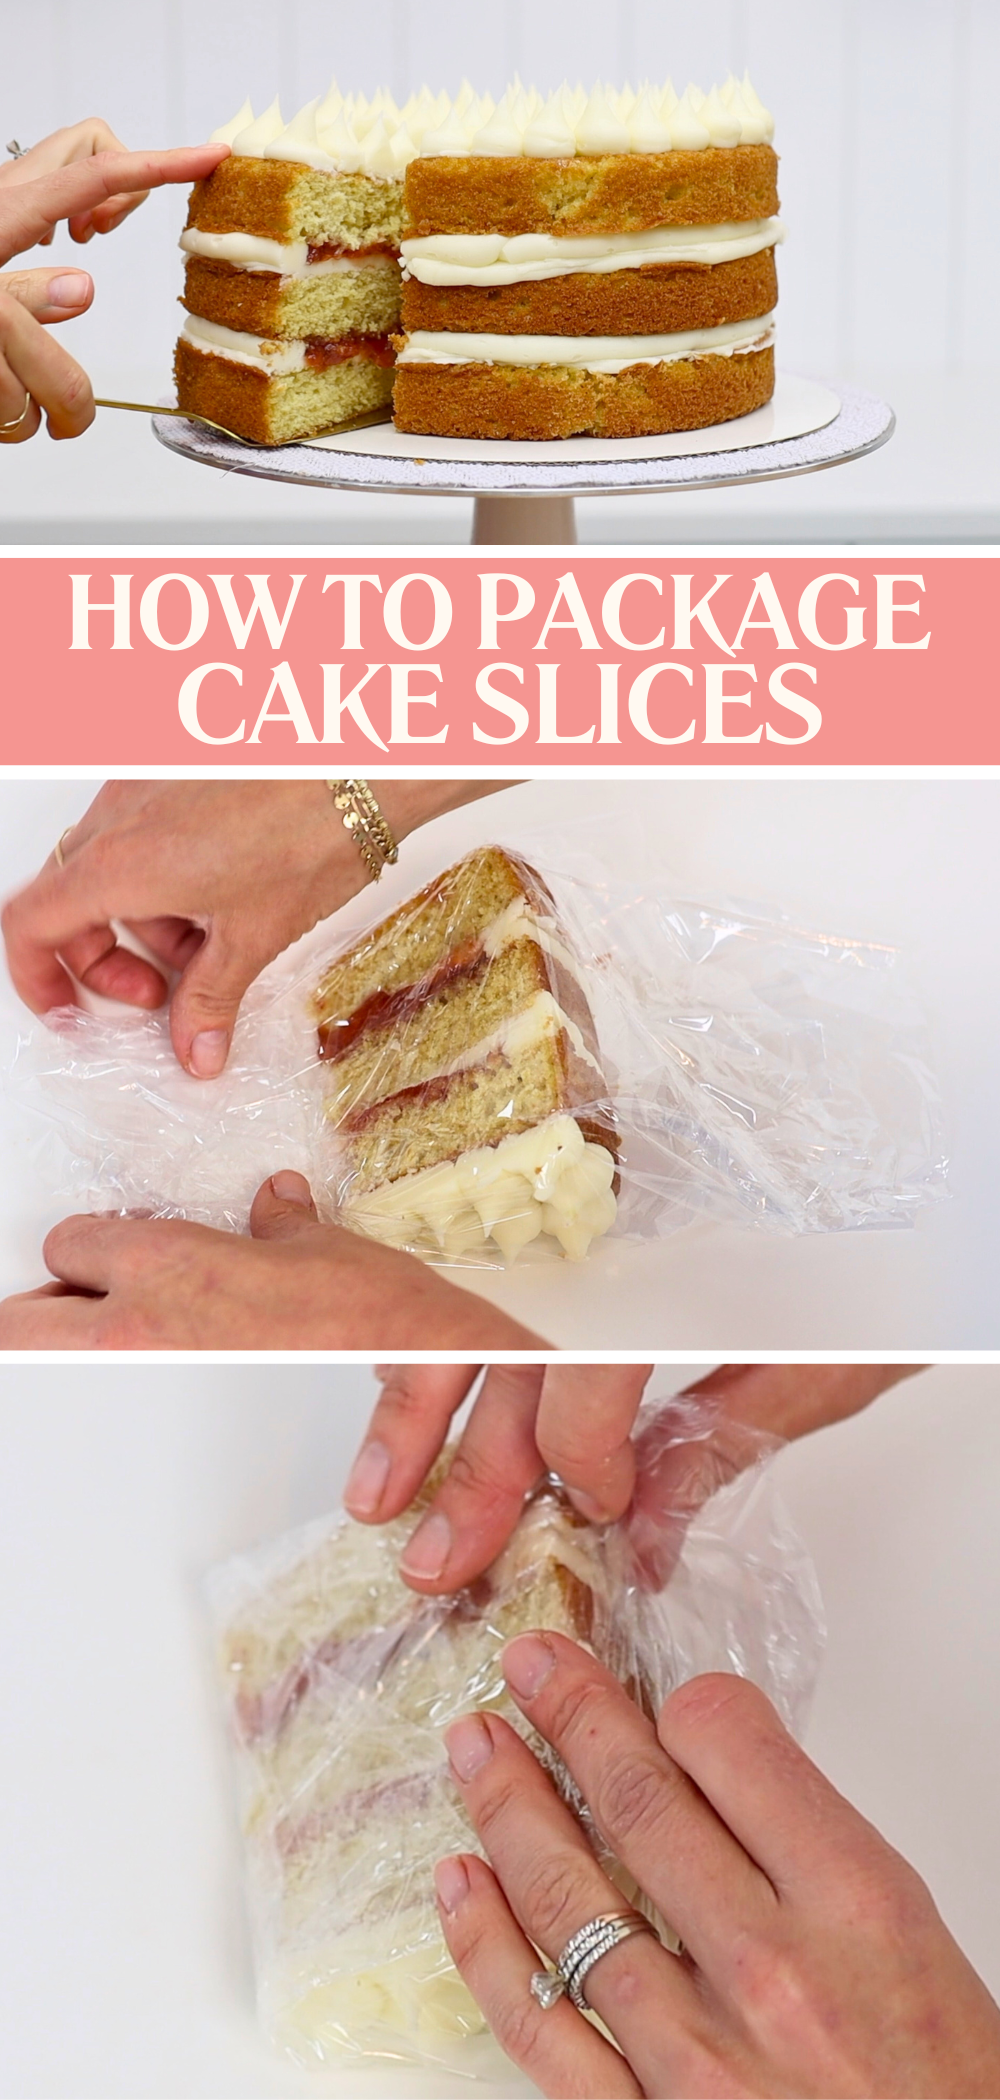
When it comes to wrapping your cake slices, cellophane is your best bet for rectangular slices. It gives crisp edges and a professional, glossy finish. If you don’t have any on hand, cling film (plastic wrap) will do, though it won’t look quite as sharp.
Place your cake slice onto the middle of a piece of cellophane. Fold each long side over the cake until they overlap slightly, but don’t seal it just yet. Keeping your finger pressed gently on the fold, tuck in each end like you’re wrapping a present: make two triangles on each side, then fold those up and over the front of the slice.
Seal the wrap with a sticker or flavour label — this adds a sweet finishing touch and keeps everything in place. Make sure the label direction is consistent on each slice. I like the text to flow the same way as the frosting, with all slices facing the same way when displayed.
You’ll need to adjust the size of your cellophane depending on the height of your slices. Taller cakes need bigger wraps so you have enough room to fold and seal neatly.
If you’re using cling film, wrap in the same way. It won’t give those crisp triangle edges, but it will still protect your slice well.
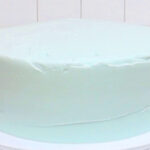
If you’ve baked a round cake, you’ve got two options.
The first is to cut it into traditional wedges. These make big, indulgent servings that look beautiful at events. Slice your cake and place the slices on a tray lines with parchment paper or wax paper. Put it into the freezer for 10 minutes to chill the slices so you don't damage the buttercream. Then wWrap each wedge with cling film, letting the ends meet under the base of the slice so the top stays neat. Cellophane doesn’t work well here because it won’t sit flat against the curved edges.
Use this second method if you want rectangular slices from your round cake. Cut about an inch or two in from the edge of the cake, on four sides to leave a square. You can use the outer curved pieces for cake pops or tasters. Then slice the centre square just like you would with a sheet cake, and wrap them the same way.
If you’re not serving your slices right away, proper storage is essential. Once wrapped, place the slices in an airtight container — like a sealed Tupperware, zip-top bag, or a cling-film-wrapped tray. This prevents them from drying out or absorbing flavours from the freezer.
Yes, you can absolutely freeze them! In fact, it’s a brilliant way to prep ahead for busy weeks. Slices will keep for a month in the freezer if wrapped and stored properly. Just move them to the fridge the day before you need them, and they’ll be perfect to go.
This is the exact method I used for Teacher Appreciation Week at both of my kids’ schools — there’s no way I could have done it all in one day!
Here’s the final stage: transport and serve your slices with care.
Always move them while cold, straight from the fridge. The buttercream will be firm, so they’ll hold their shape as you transfer them from storage to display.
When you arrive at your event or drop-off, arrange them on trays, stands, or dessert tables. Leave them at room temperature for about an hour before serving — this softens the buttercream and sponge for the best flavour and texture. Cold cake can taste dry, but room temp? It’s creamy, fresh, and tastes like you made it that day.
Now you know how to make and package cake slices for any occasion — and exactly how to cut, wrap, store, and serve them like a pro. Whether you’re gifting them, selling them, or prepping ahead for a big day, this method saves time and gives your cakes that polished, professional touch.
Watch a video of this tutorial on how to make and package cake slices:
Save this tutorial to Pinterest for later with one of these Pins:


Thank you, Emily! This is very helpful. Haven't been on YouTube to watch this because we are on vacation.
I'm happy it's helpful! Hope you're having a great vacation!
I understand that chilling or freezing your cake slices before they are wrapped is a must to prevent the frosting from getting messy while handling and wrapping ,but after they get to room temperature, what keeps the frosting from sticking to the wrapper or cling wrap? They look beautiful before but what will they look like when you are unwrapping them?