Looking for ideas for ideas for Easter cakes and cupcakes? These designs are cute, colourful, and surprisingly simple to decorate. In this tutorial you’ll learn how to create seven designs using buttercream, including a stencil Easter bunny cake, a speckled egg cake, carrot cake decorations, piped rose cupcakes, carved buttercream, and a technique that reveals a hidden design inside the frosting. Most of these use basic tools and simple techniques but still give really impressive results.
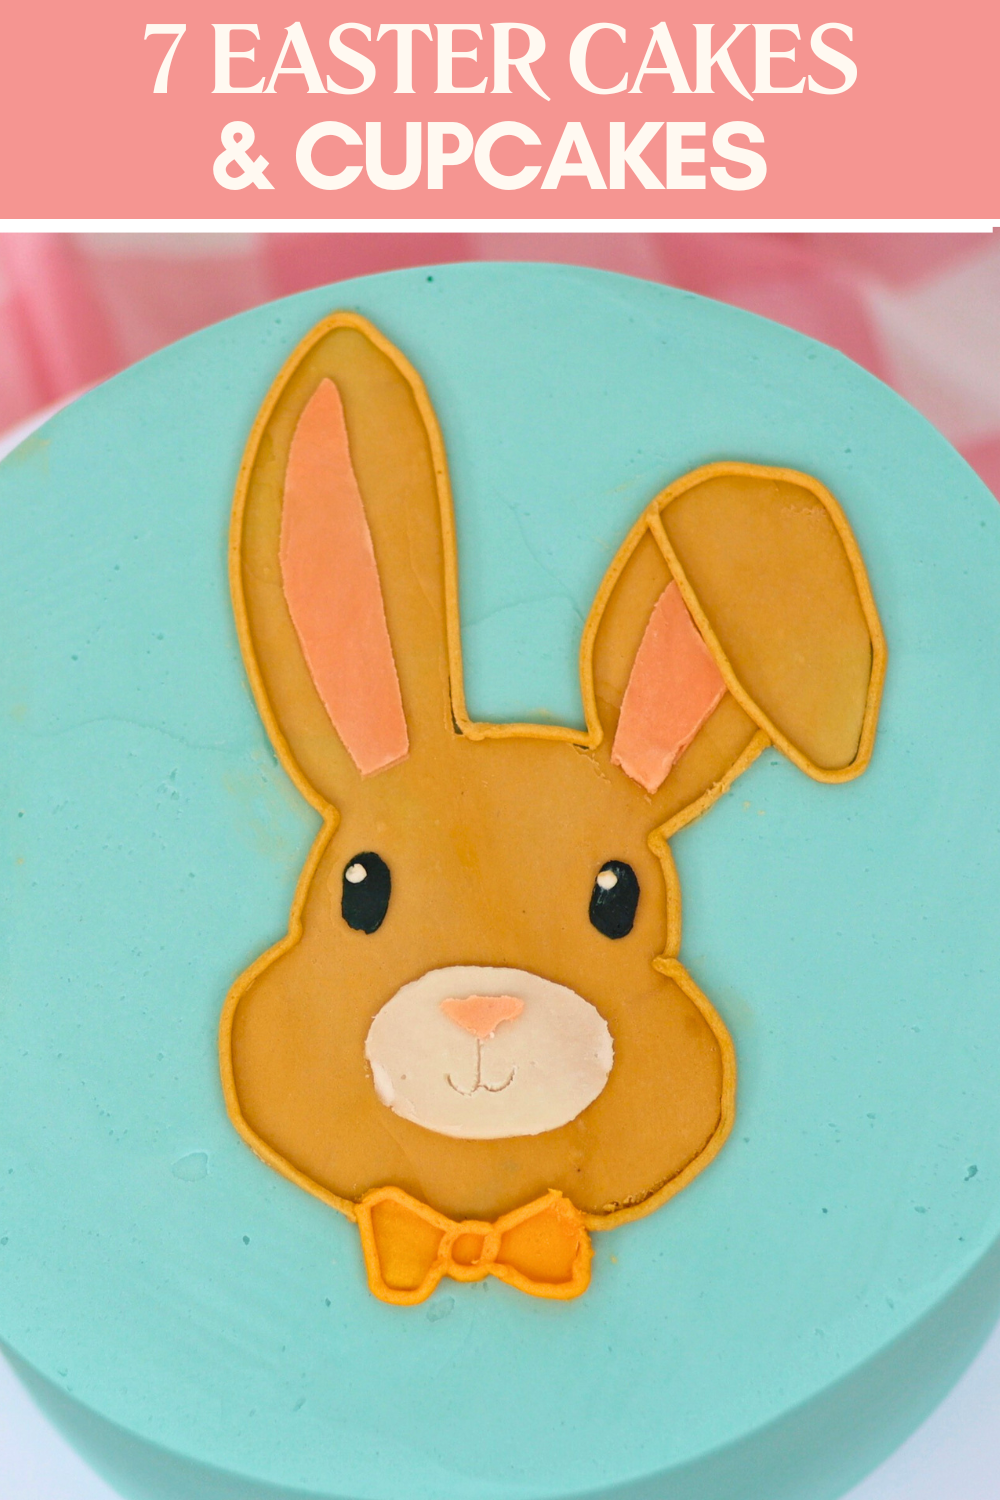
This Easter bunny cake is decorated using homemade stencils, which makes it much easier than it looks. Start by drawing or tracing your design. I traced a bunny with a bowtie from my computer screen onto paper. Then place parchment paper or wax paper over the sketch and trace the background shape first, which will be your first stencil and your base colour. Next, trace the details onto separate pieces of parchment or wax paper, using a new piece for each colour. Once everything is drawn, cut out the shapes.

After frosting your cake, chill it until the buttercream is firm. Meanwhile, mix your buttercream colours. A time-saving tip is to use a cupcake pan as a palette by putting a spoonful of buttercream into each hole. Then add a few drops of food colouring to each one and mix. A cupcake pan is the perfect size for techniques like stencilling and it's quicker to cleanup than lots of little bowls.
Press the background stencil onto the cake and spread buttercream over the top. Smooth it a few times so that only a thin layer remains, then carefully peel the stencil away. If there are any smudges, you can tidy them up with a toothpick.
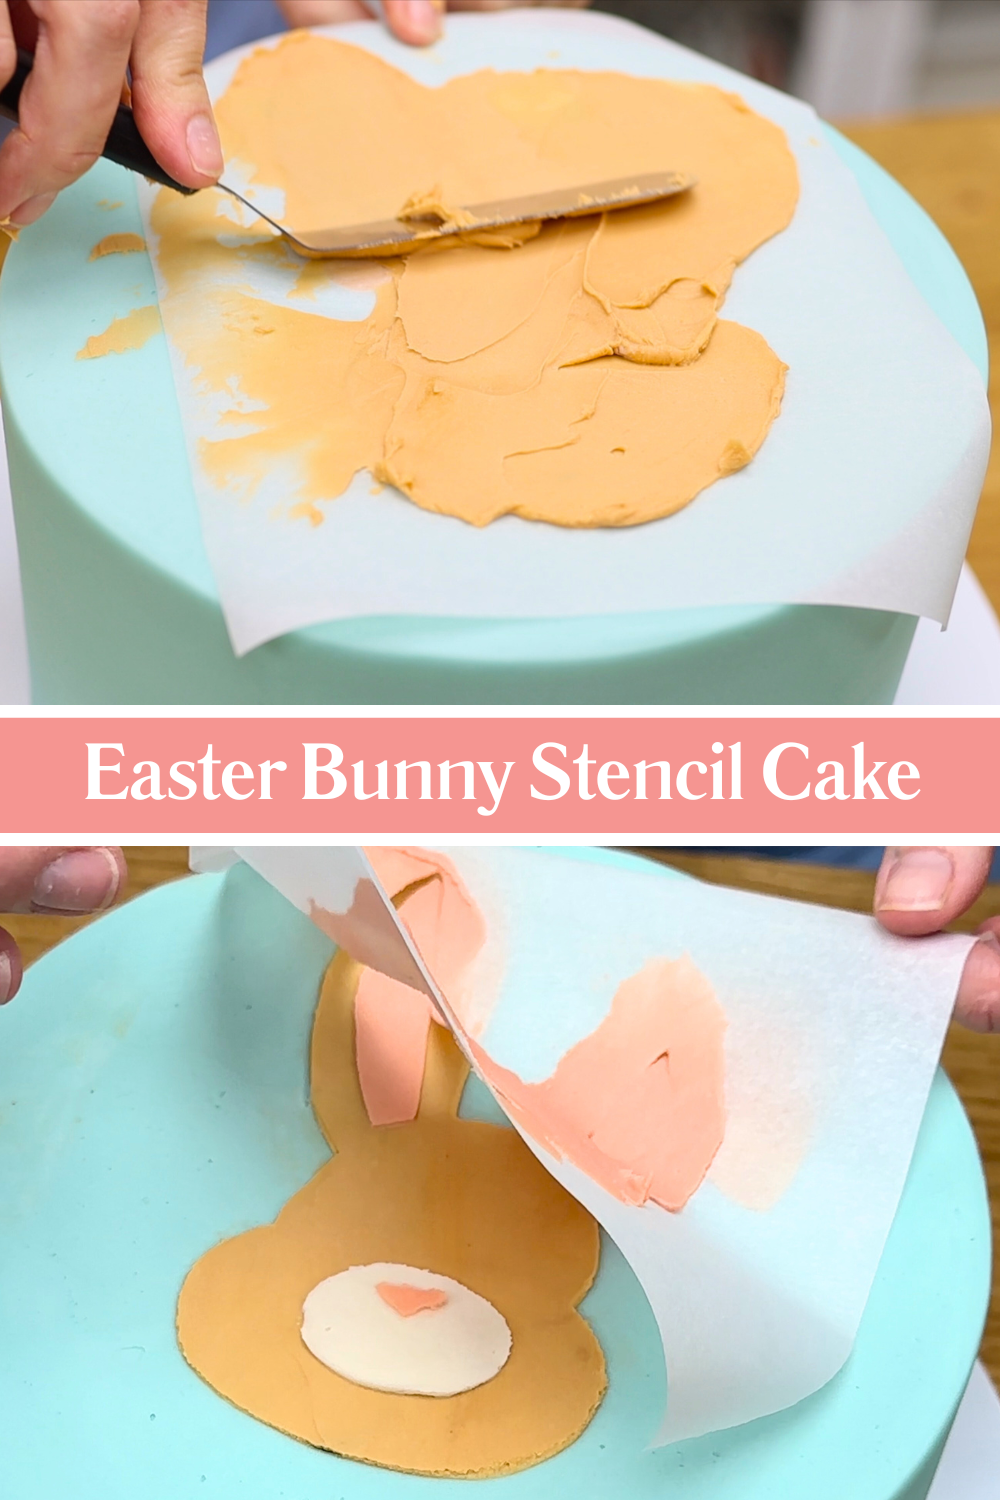
Put the cake back into the fridge or freezer for about 10 minutes to set the buttercream before adding the next stencil. Continue layering the stencils from the back of the design to the front.
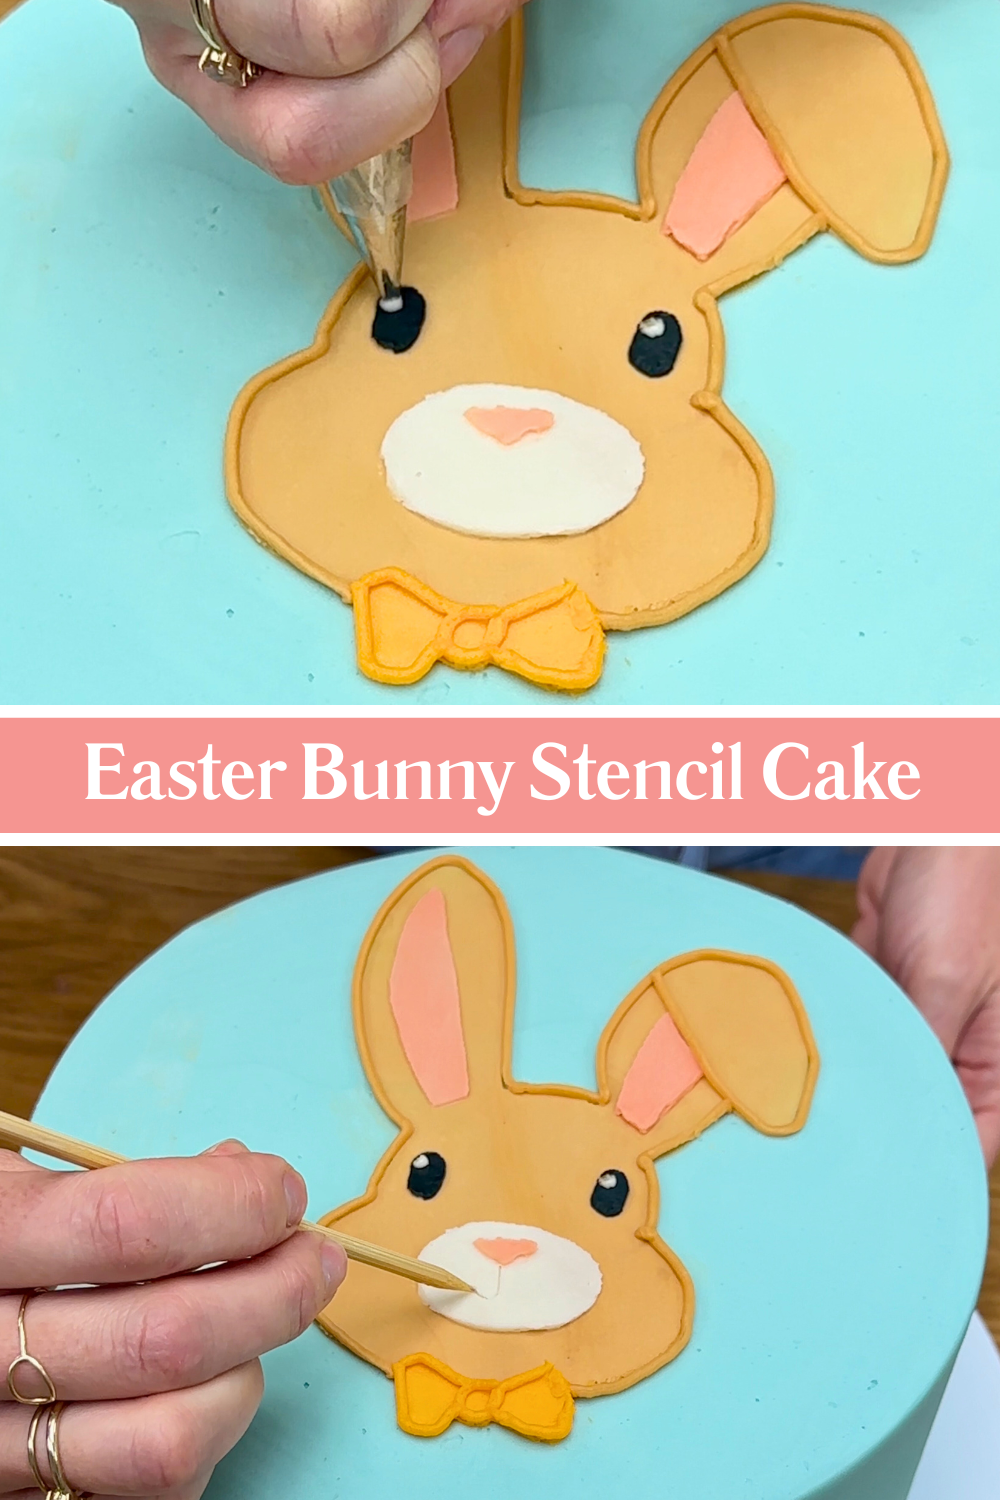
At the end, you can optionally pipe around the coloured sections to make the design stand out. I find it easier and neater to pipe small details, like dots within the eyes, instead of using a stencil. For the mouth I like to score a smile with a toothpick because unless your cake and design are huge, piped lines always seem too thick.
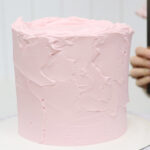
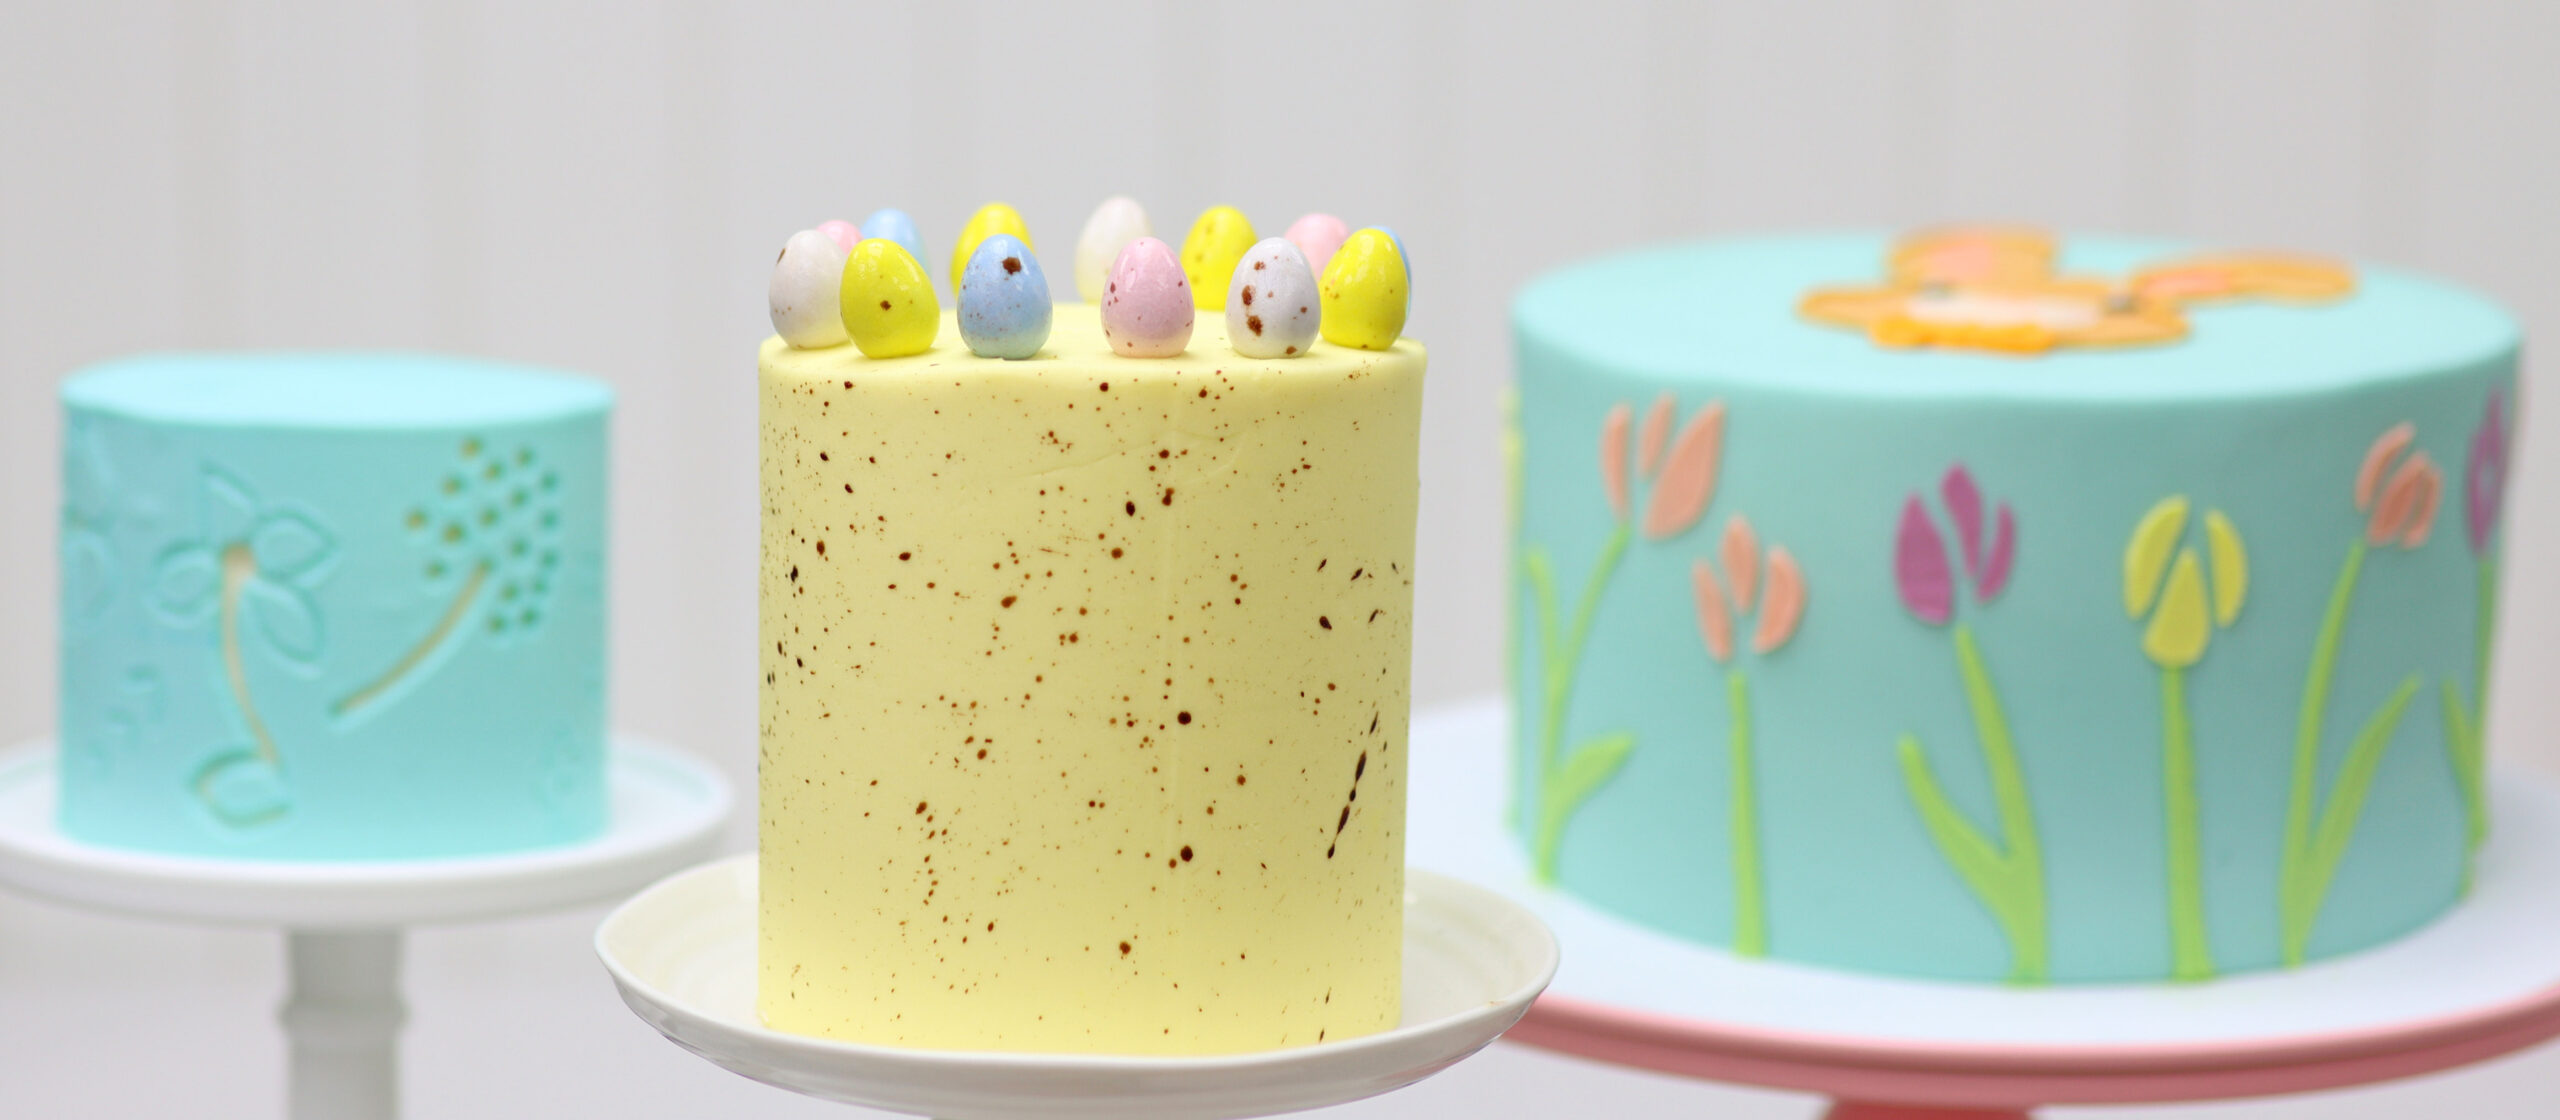
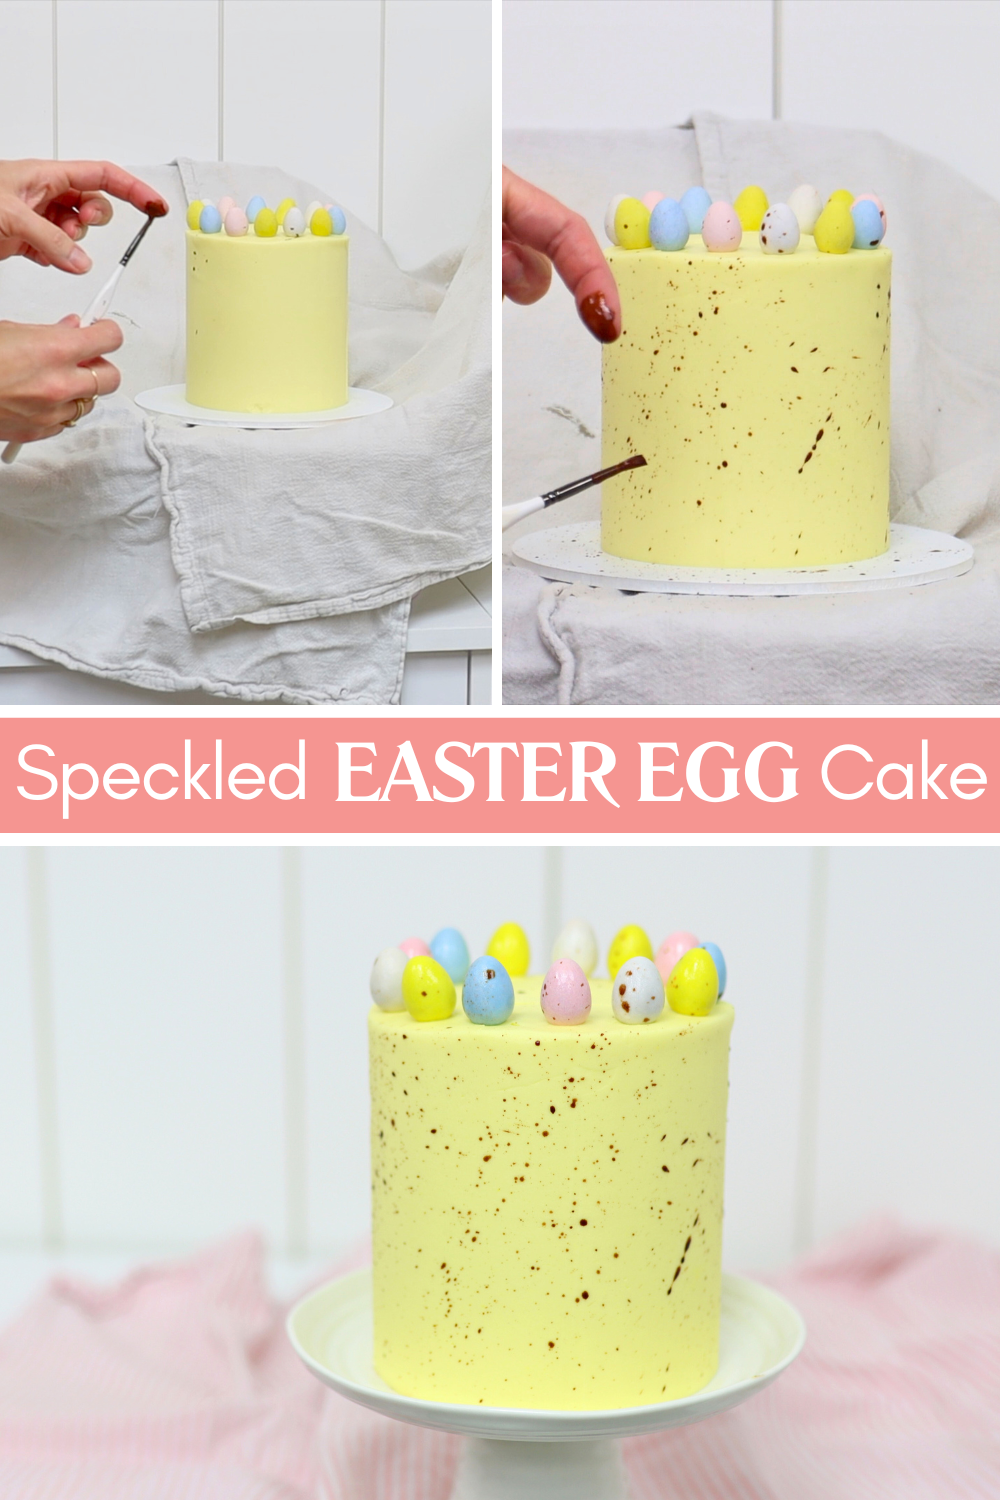
This cake is inspired by speckled chocolate eggs and is one of the easiest ideas for Easter cakes and cupcakes. After assembling your cake layers with filling and frosting, take your time smoothing the frosting because there won’t be many decorations covering the sides.
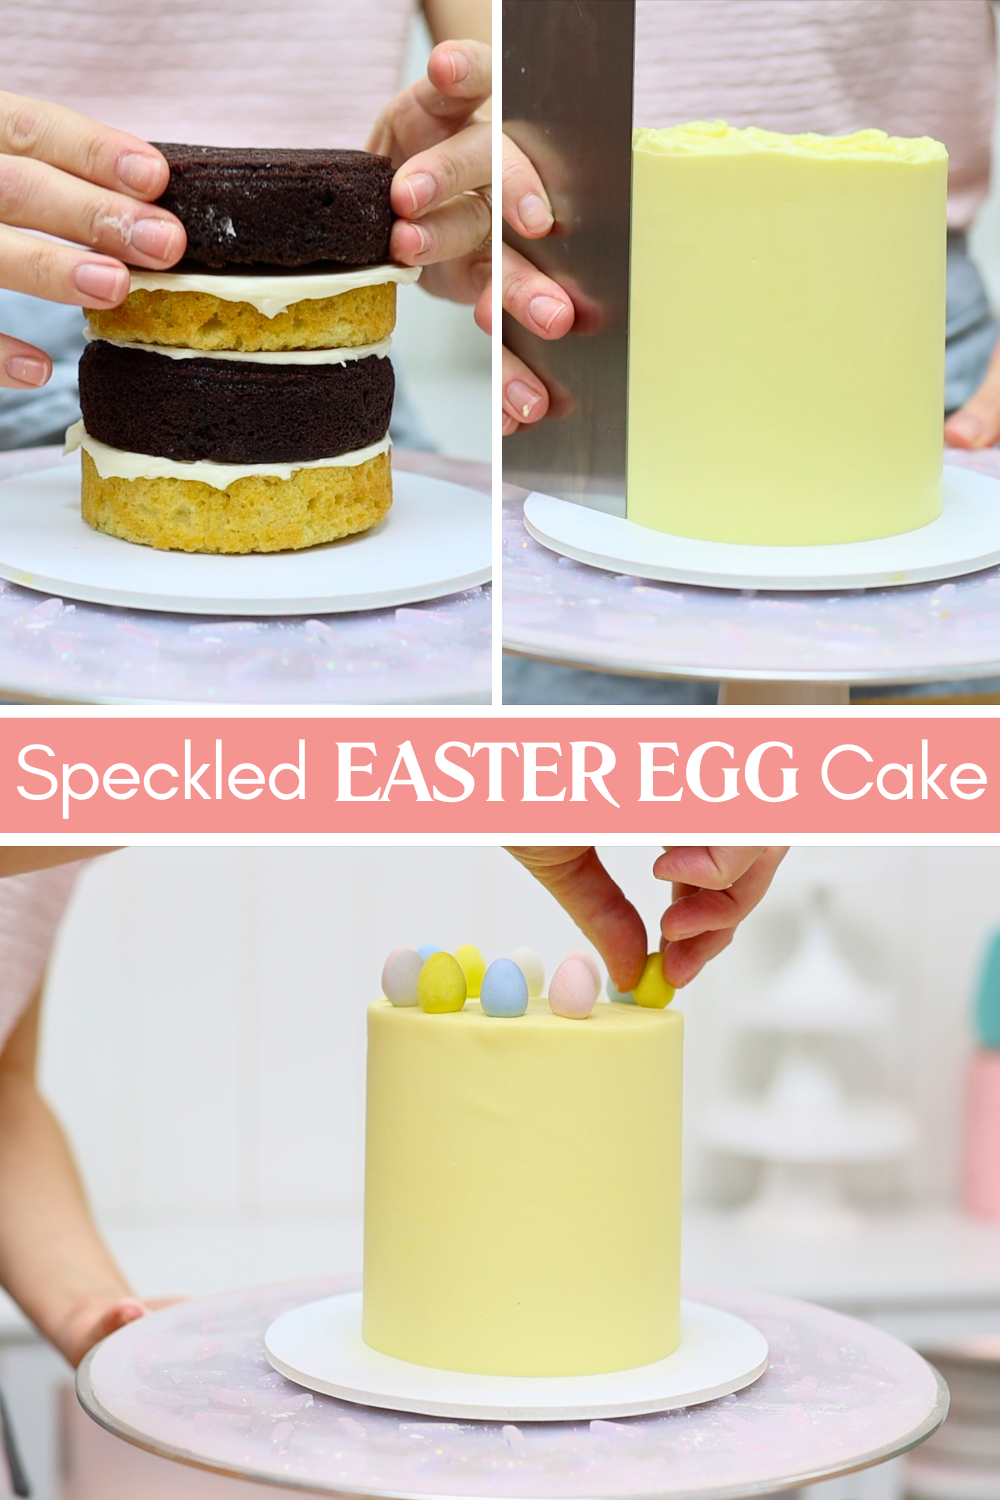
While the frosting is still soft and sticky, press colourful mini eggs onto the top in a ring.
For the speckled effect, mix one teaspoon of cocoa powder with one and a half teaspoons of hot water. Before splattering, protect your work surfaces with cloths or towels because this can get messy. Dip a paintbrush into the cocoa mixture, pull the bristles back with your finger, and let go so they snap forward and splatter onto the cake. This creates a realistic speckled egg effect. It’s fine if some of the splatter lands on the eggs because it helps bring the whole design together.
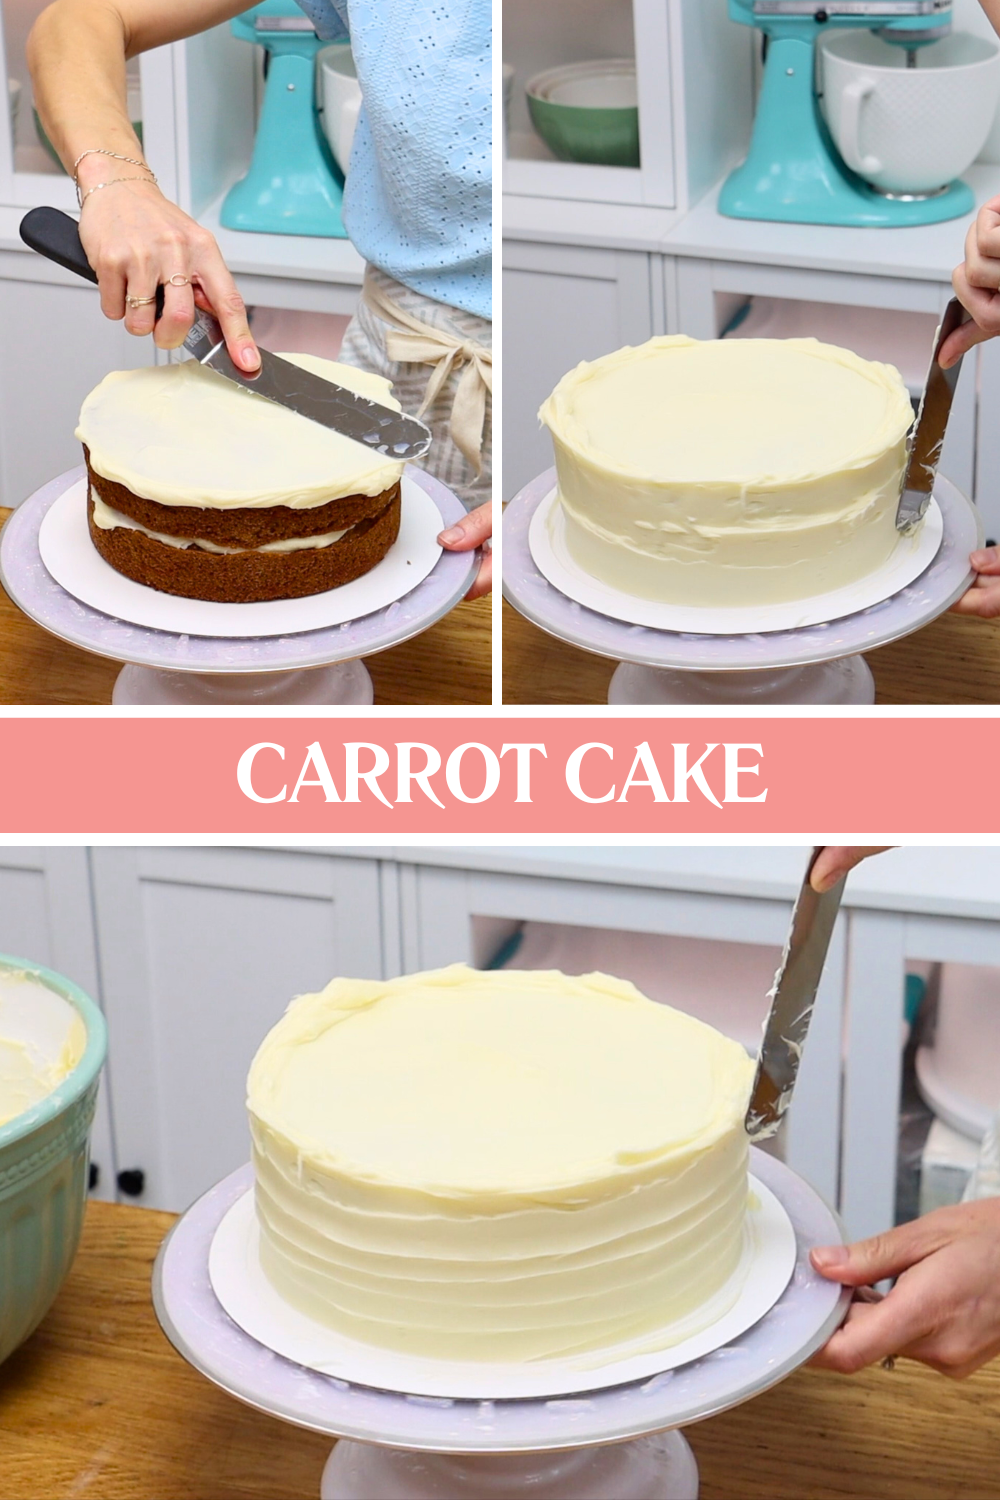
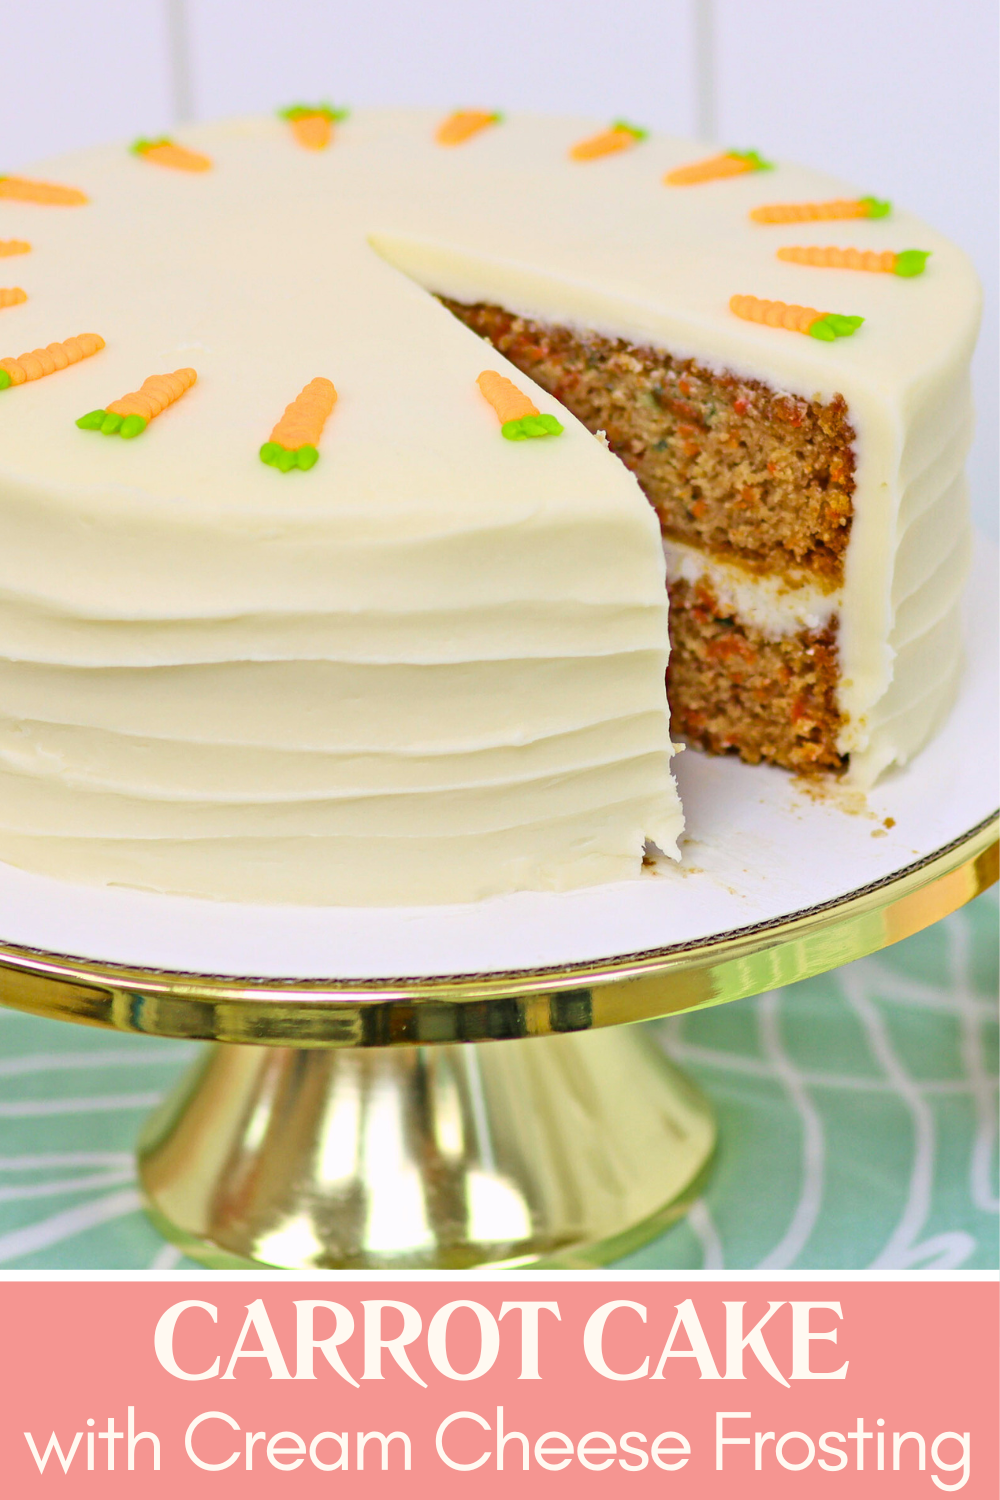
Carrot cake is perfect for Easter, and these buttercream carrots are simple and cute decorations. My carrot cake recipe pairs lightly spiced carrot cake layers with not-too-sweet cream cheese filling and frosting. Using a buttercream base for the frosting makes it easy to spread and smooth, and also works really well for these carrot decorations!
Before adding cream cheese to your frosting, set aside a few spoonfuls of the buttercream base because it’s stiffer and easier to pipe. Tint most of it orange and pipe zigzag shapes onto parchment paper to create the carrots.
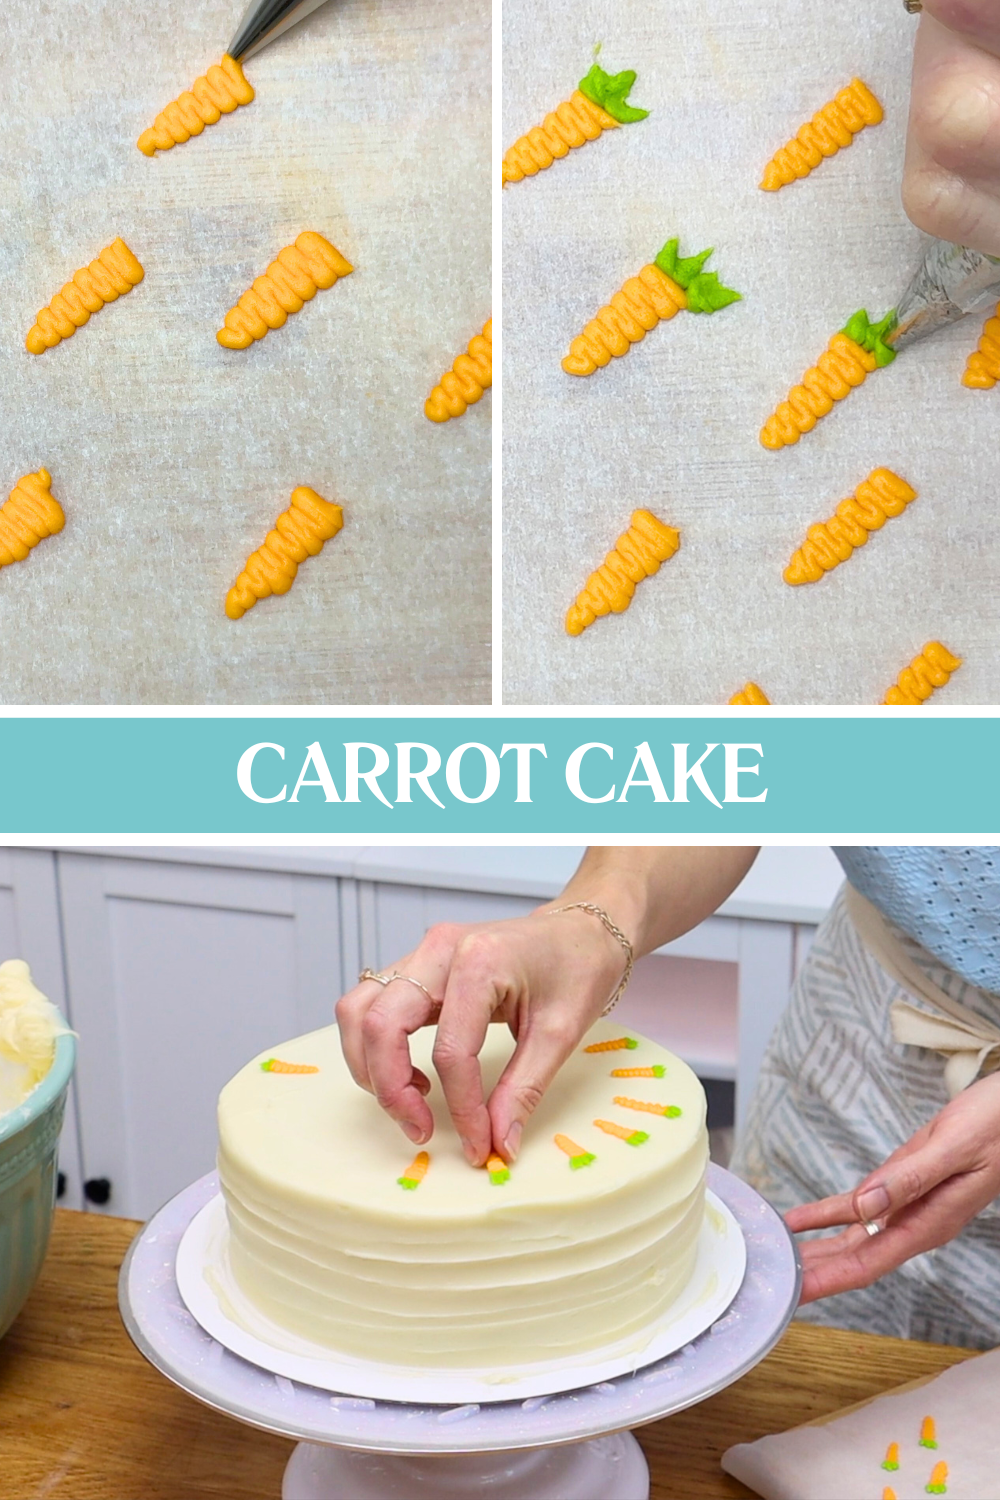
Add green food colouring to the remaining buttercream. The leftover orange in the bowl will slightly mute the green, which actually works well for carrot tops. Put this into a piping bag fitted with a small round tip, like a number 4, and pipe three small spikes at the top of each carrot. Freeze these for about 10 minutes so they firm up.
While they chill, assemble your carrot cake with cream cheese frosting. Smooth the frosting or add texture using the back of a spoon or an
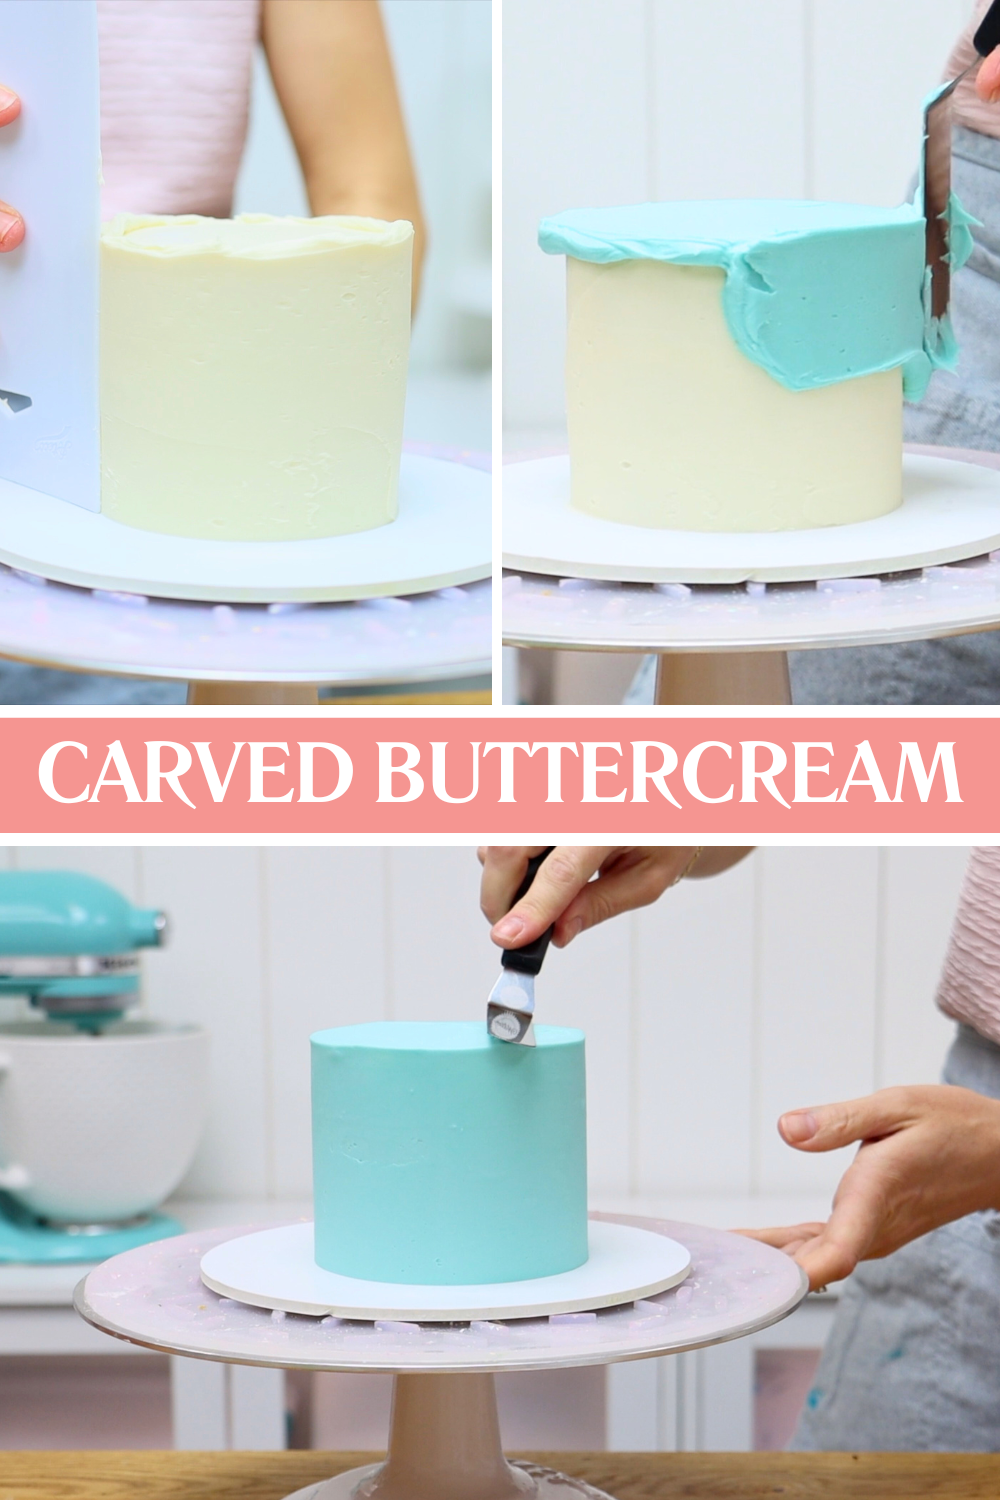
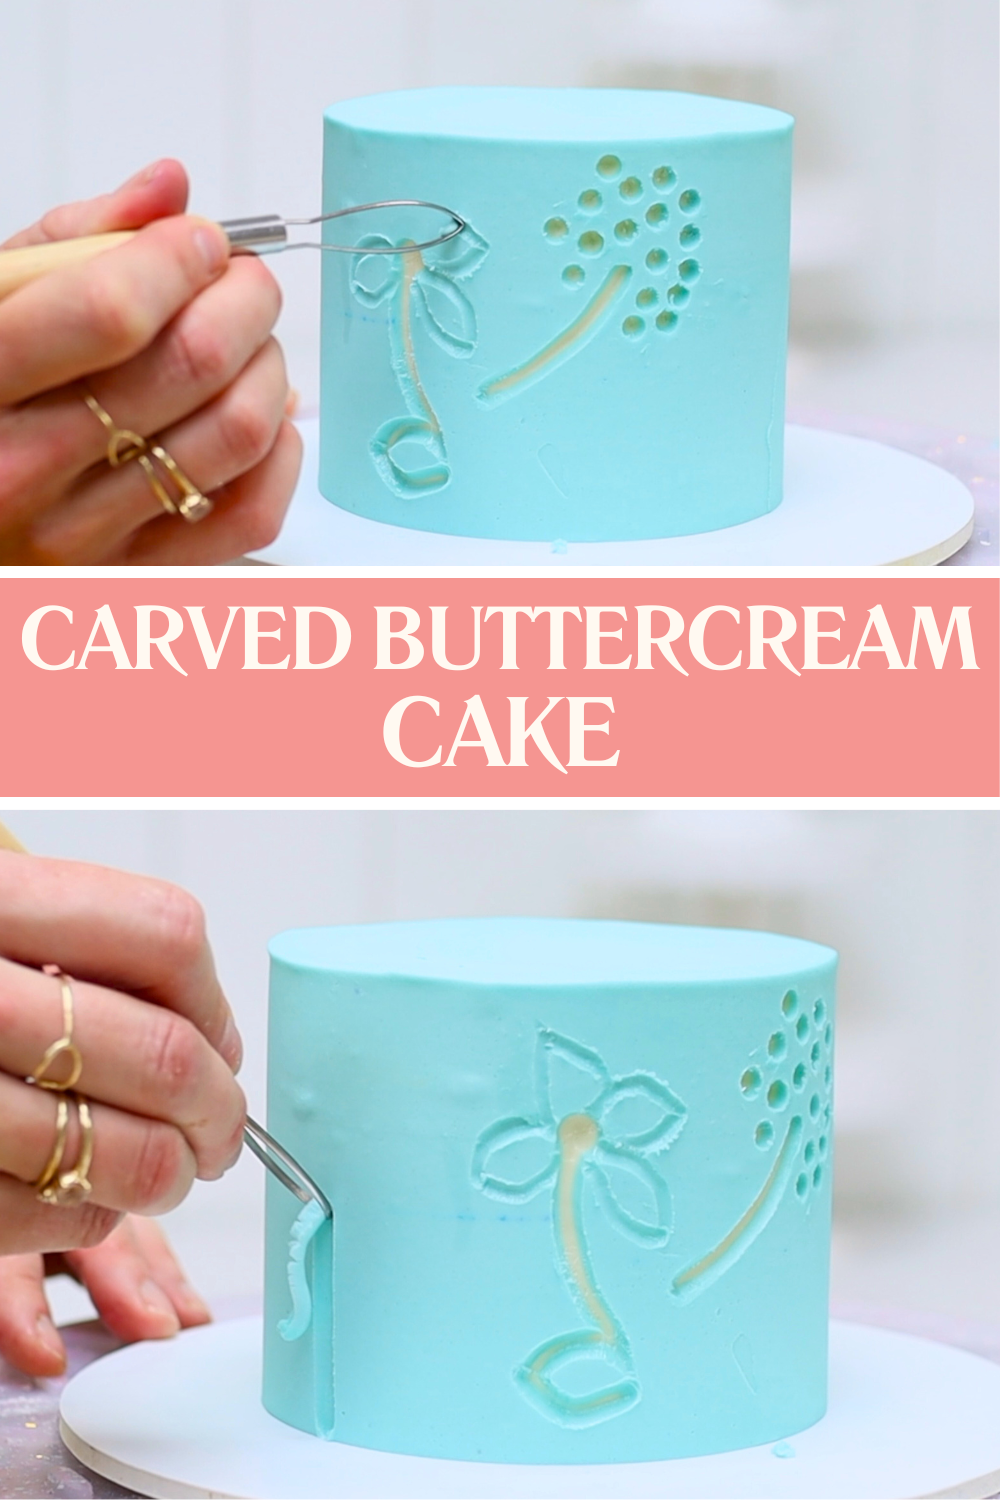
This carved buttercream technique creates a textured design using simple tools. Start by crumb coating your cake, then spread on a smooth layer of frosting and freeze it for about 15 minutes. Next, add a final layer of frosting in a different colour. Both layers should be smooth, and the top layer should be as thin as possible without exposing the colour underneath. Chill the cake again until the buttercream is firm.
Dip a clay modelling tool into warm water and start carving into the frosting. A hook-shaped tool works well for fine details like dandelion seeds, a round tool is useful for larger circular shapes, and a pointed tool is ideal for stems, leaves, or outlining petals. After each carve, dip the tool back into warm water to remove buttercream and keep it warm so it glides smoothly.
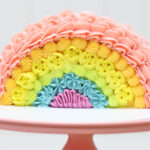
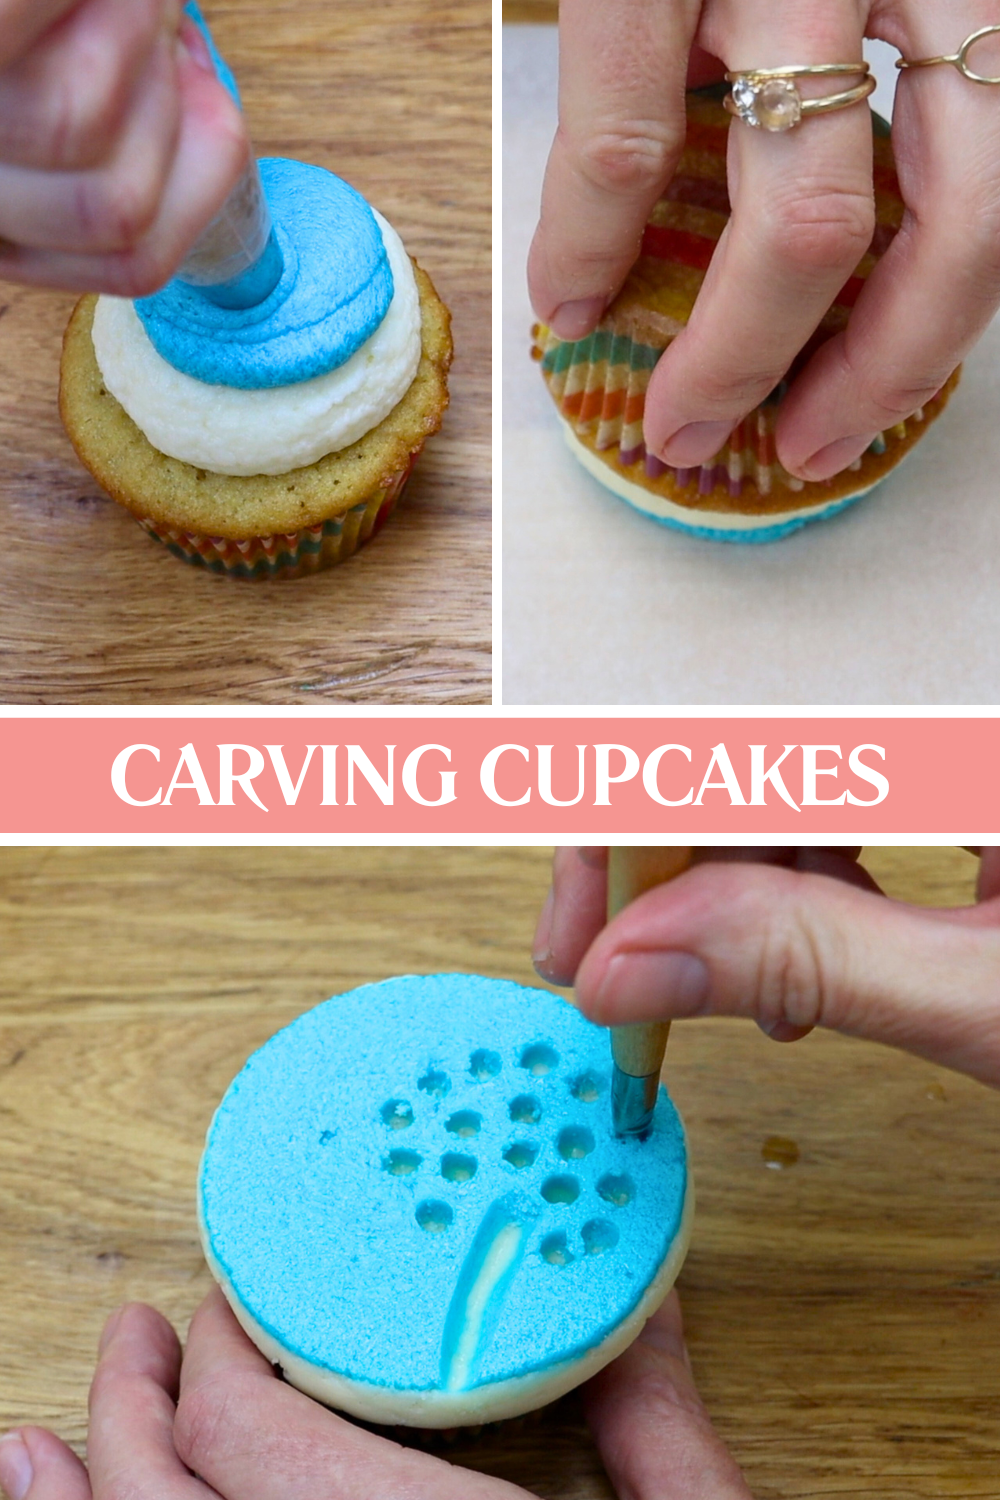
You can use this technique on cupcakes as well. Pipe two blobs of different coloured buttercream onto a cupcake using a large round tip, like a 1A. Flip the cupcake over onto parchment or wax paper and press down to flatten it, then freeze for about 30 minutes. Once firm, carve your design using modelling tools or even the pointed end of a petal piping tip.
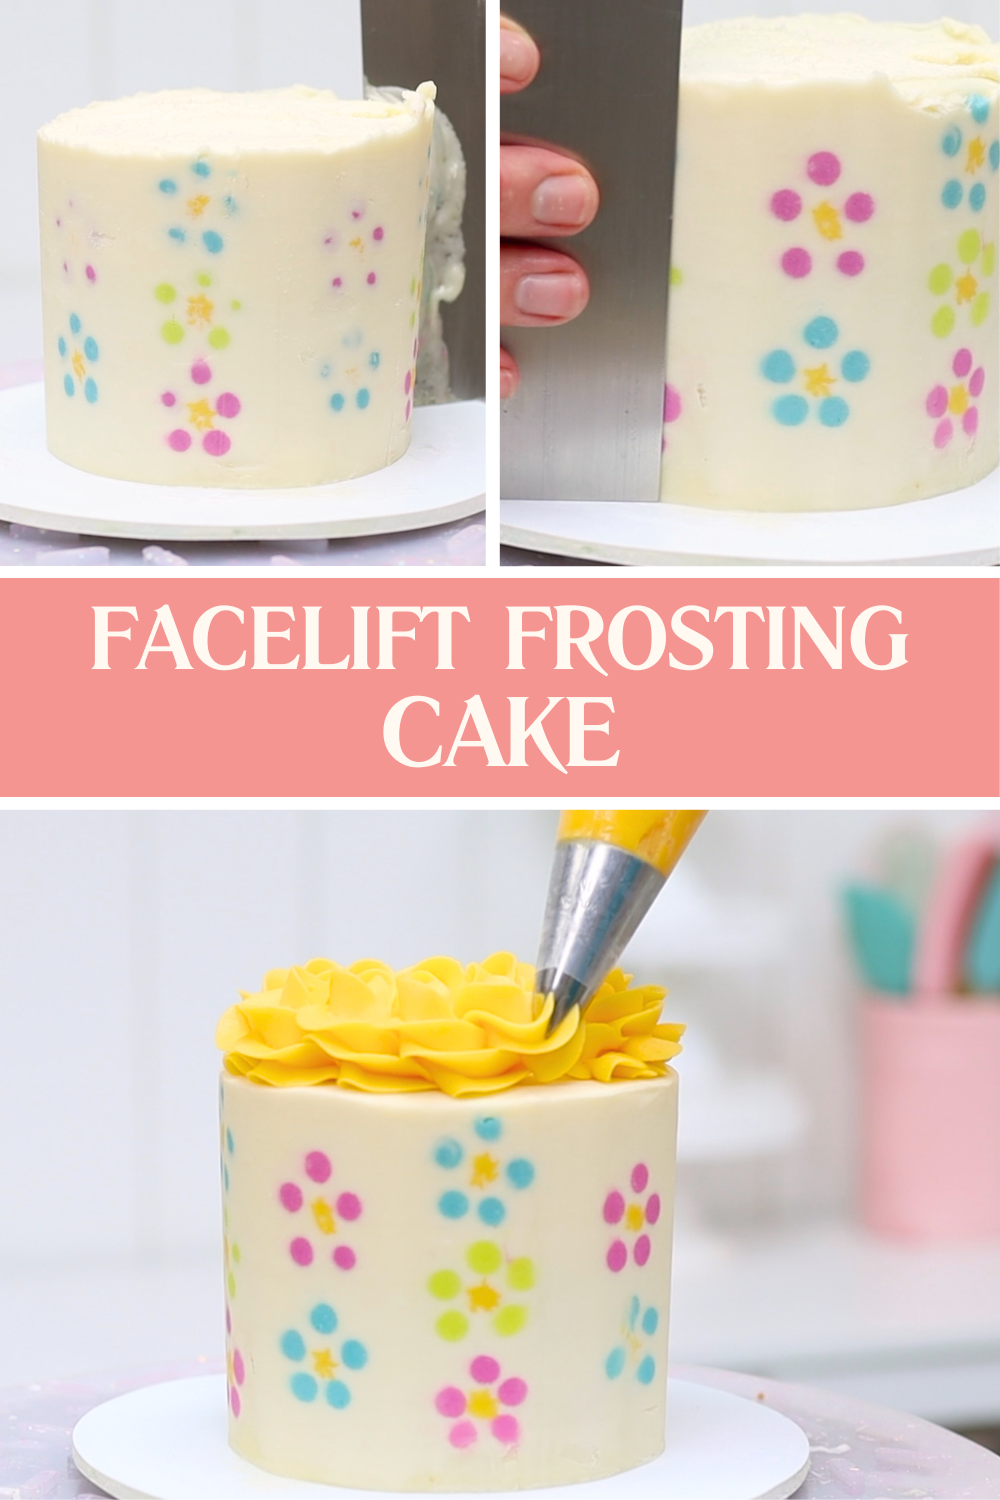
These buttercream rose cupcakes look elegant but are simple to pipe. Use a petal tip, like a number 104, and start by piping a blob of buttercream in the centre of the cupcake to give the rose height. Hold the piping tip with the narrow end pointing upwards and pipe a spiral around the centre while spinning the cupcake to form a rosebud.
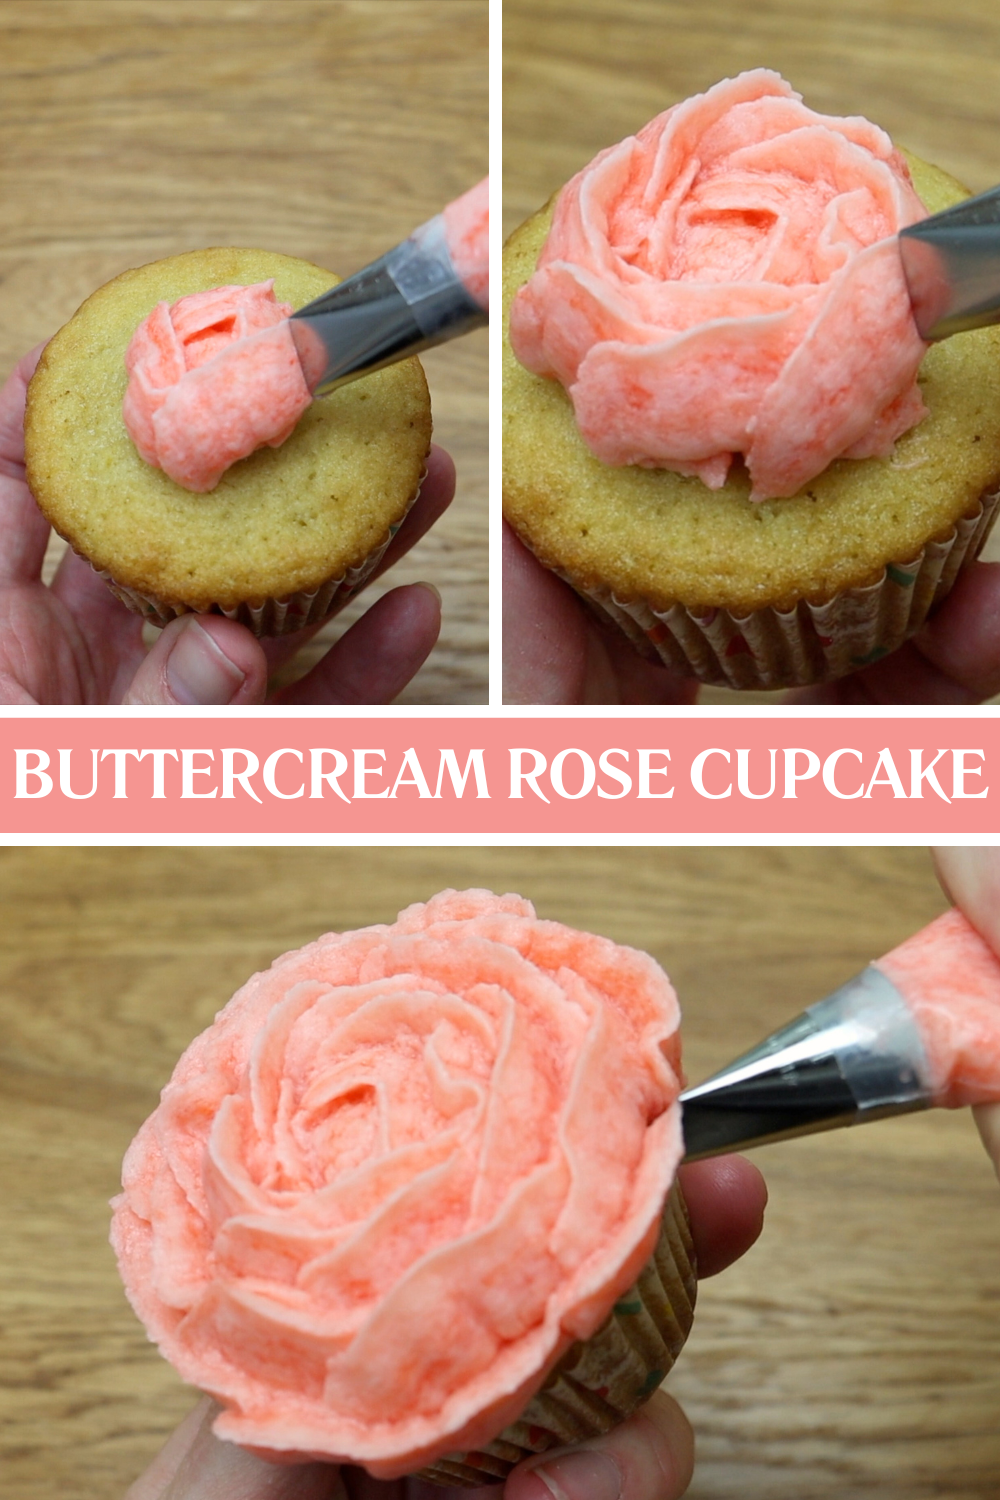
Next, pipe arcs around the rosebud, overlapping each one by about halfway. Angle the piping tip slightly inward at first so the petals wrap tightly, then gradually angle it outward as you move to the outer layers so the petals open up. This technique works beautifully for single cupcakes or grouped together as a bouquet.
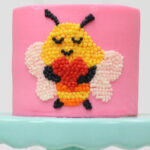
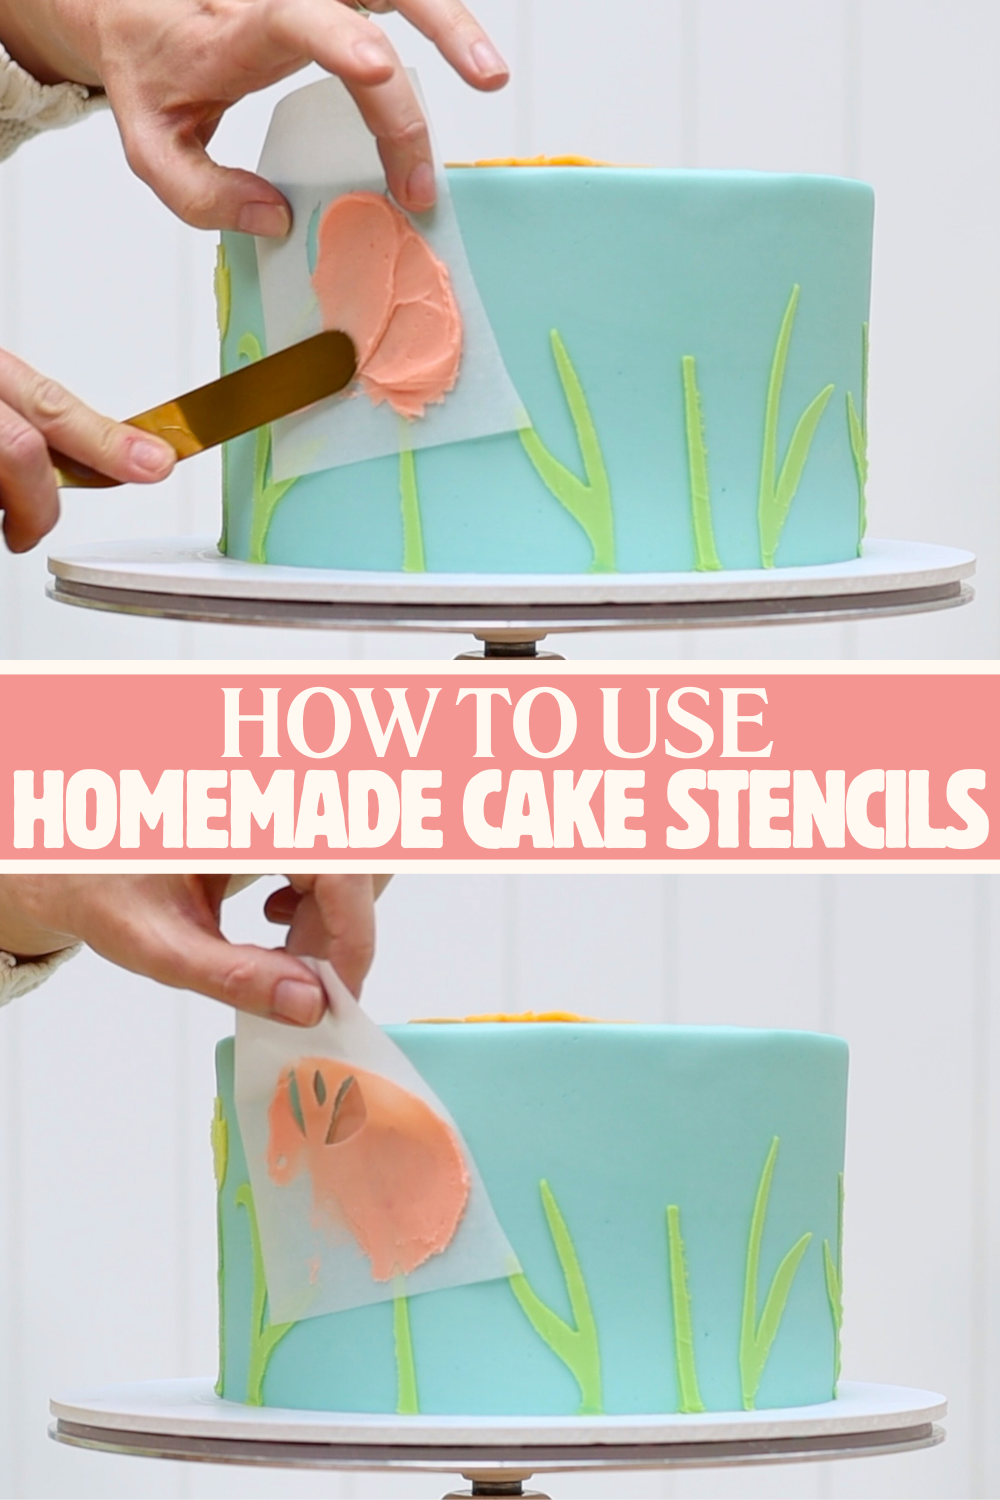
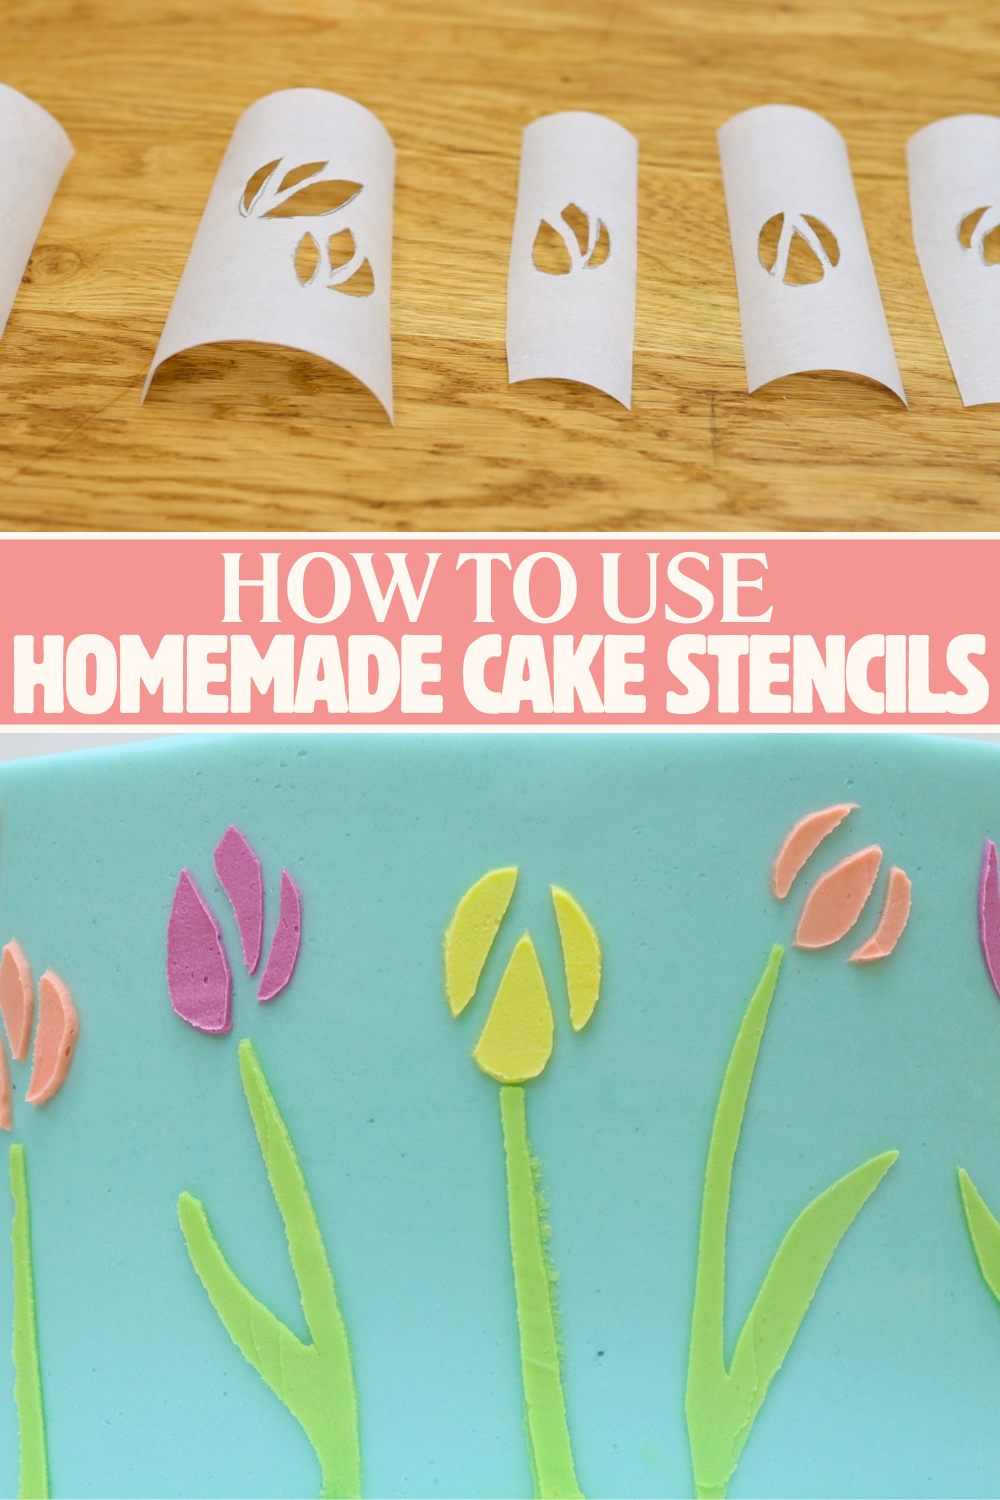
Instead of using stencils on top of a cake, like in the first cake design with the Easter bunny, you create stencil designs around the sides of a cake. Cut parchment or wax paper to be the same height as your cake and draw or trace your design onto it. Cut out the shapes while leaving the surrounding paper intact to use as a stencil.

Wrap the stencil around the cake and spread buttercream over the cutouts. For narrow shapes like stems, spread the frosting up and down rather than sideways to avoid pulling the stencil away. For larger shapes that are fully surrounded by paper, spread inward toward the centre for the same reason.
Peel the stencil away and clean up any smudges with a toothpick. Chill the cake before adding the next stencil so each section sets. If your design has elements close together, using separate stencils can prevent colours from smudging. Ideally, leave about an inch around each shape on the stencil to avoid spreading buttercream beyond the edges.
Place each stencil onto a cold cake, spread buttercream over it, scrape away the excess to leave a thin layer, and then peel it away. As long as your cake is cold, this technique is very forgiving. It allows you to replicate anything you can draw or trace, onto a cake!
This technique creates a completely flat cake with a hidden design revealed underneath. Pipe your design directly onto the cake and freeze it for about 20 minutes. Then cover the entire cake with buttercream so the design is fully hidden and freeze again for another 20 minutes.
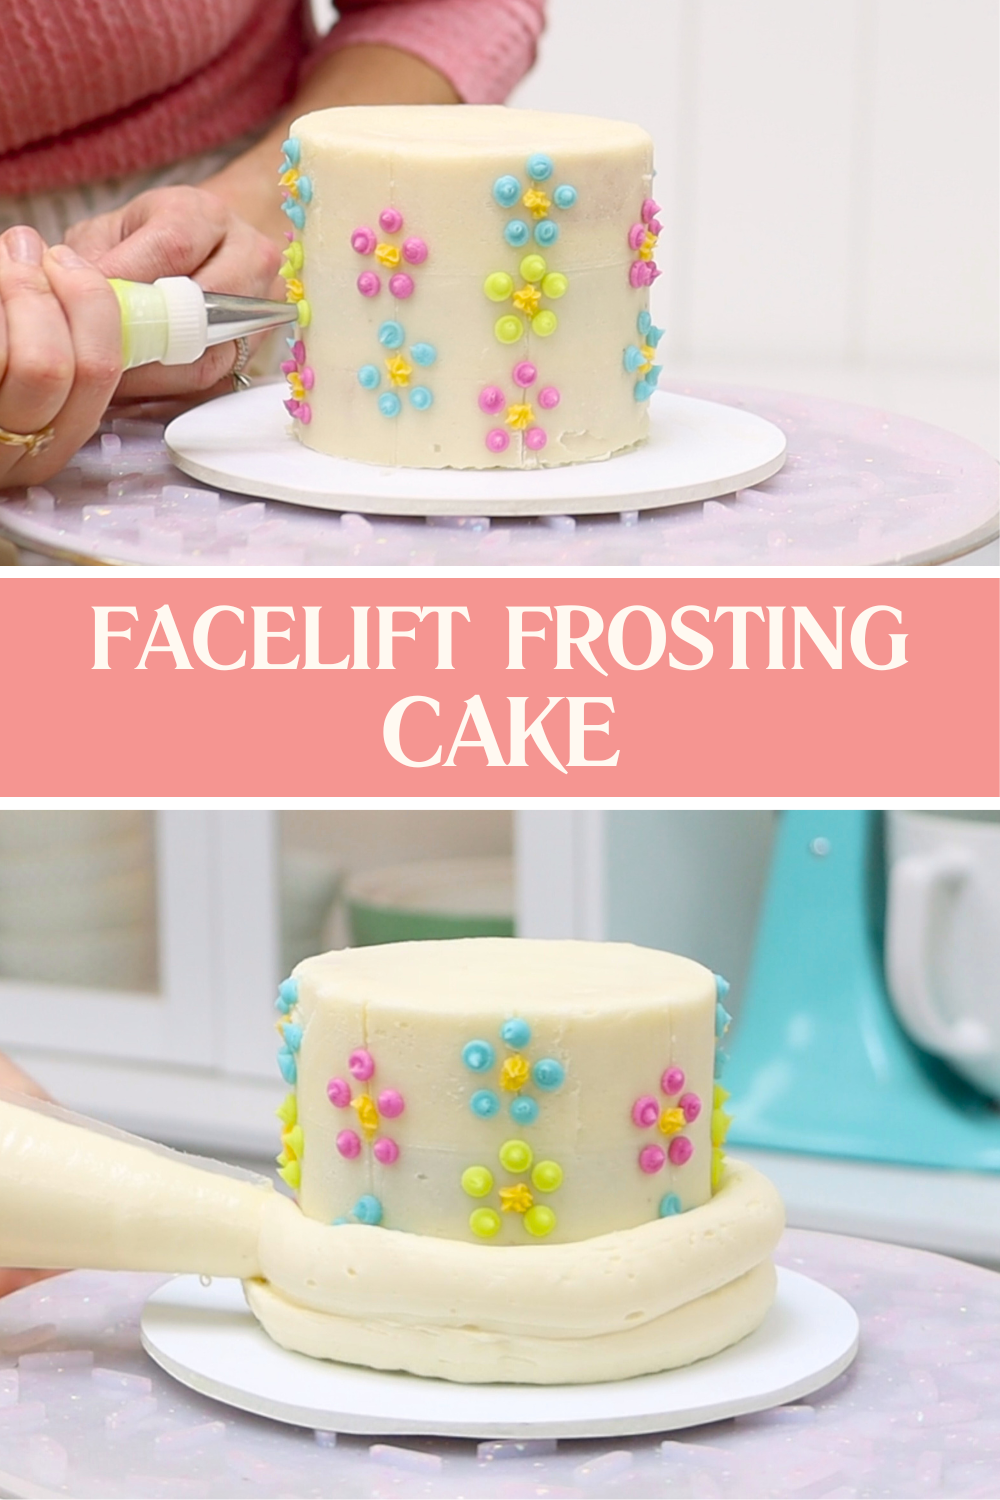
Warm a cake scraper by dipping it into hot water, running it under a hot tap, or warming it with a hair dryer or blowtorch. Then begin scraping around the cake. At first, it will feel like you’re removing frosting you just added, but as you continue, the hidden design will start to appear. The final result is a perfectly smooth cake with an embedded buttercream design.
As the weather gets warmer, remember that butter melts and so does buttercream. If you’re displaying your cakes outside for an Easter party or spring celebration, keep them in the shade rather than in direct sunlight, otherwise the buttercream can start melting very quickly.
Now you have seven ideas for Easter cakes and cupcakes, from simple designs to more detailed techniques. Tell me in the comments which one you’re going to try and for more cake decorating tutorials, visit my cake school to learn hundreds more techniques and designs.
You can also watch a video of this tutorial with 7 Ideas for Easter Cakes and Cupcakes: