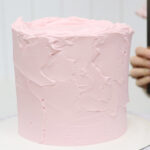
From making edible toppers to painting and stamping, there are so many creative things to do with buttercream! In this tutorial I’m sharing 10 fun and unexpected buttercream decorating techniques to inspire your next cake design. I'll be using my 4 Minute Buttercream for all of the techniques in this tutorial.
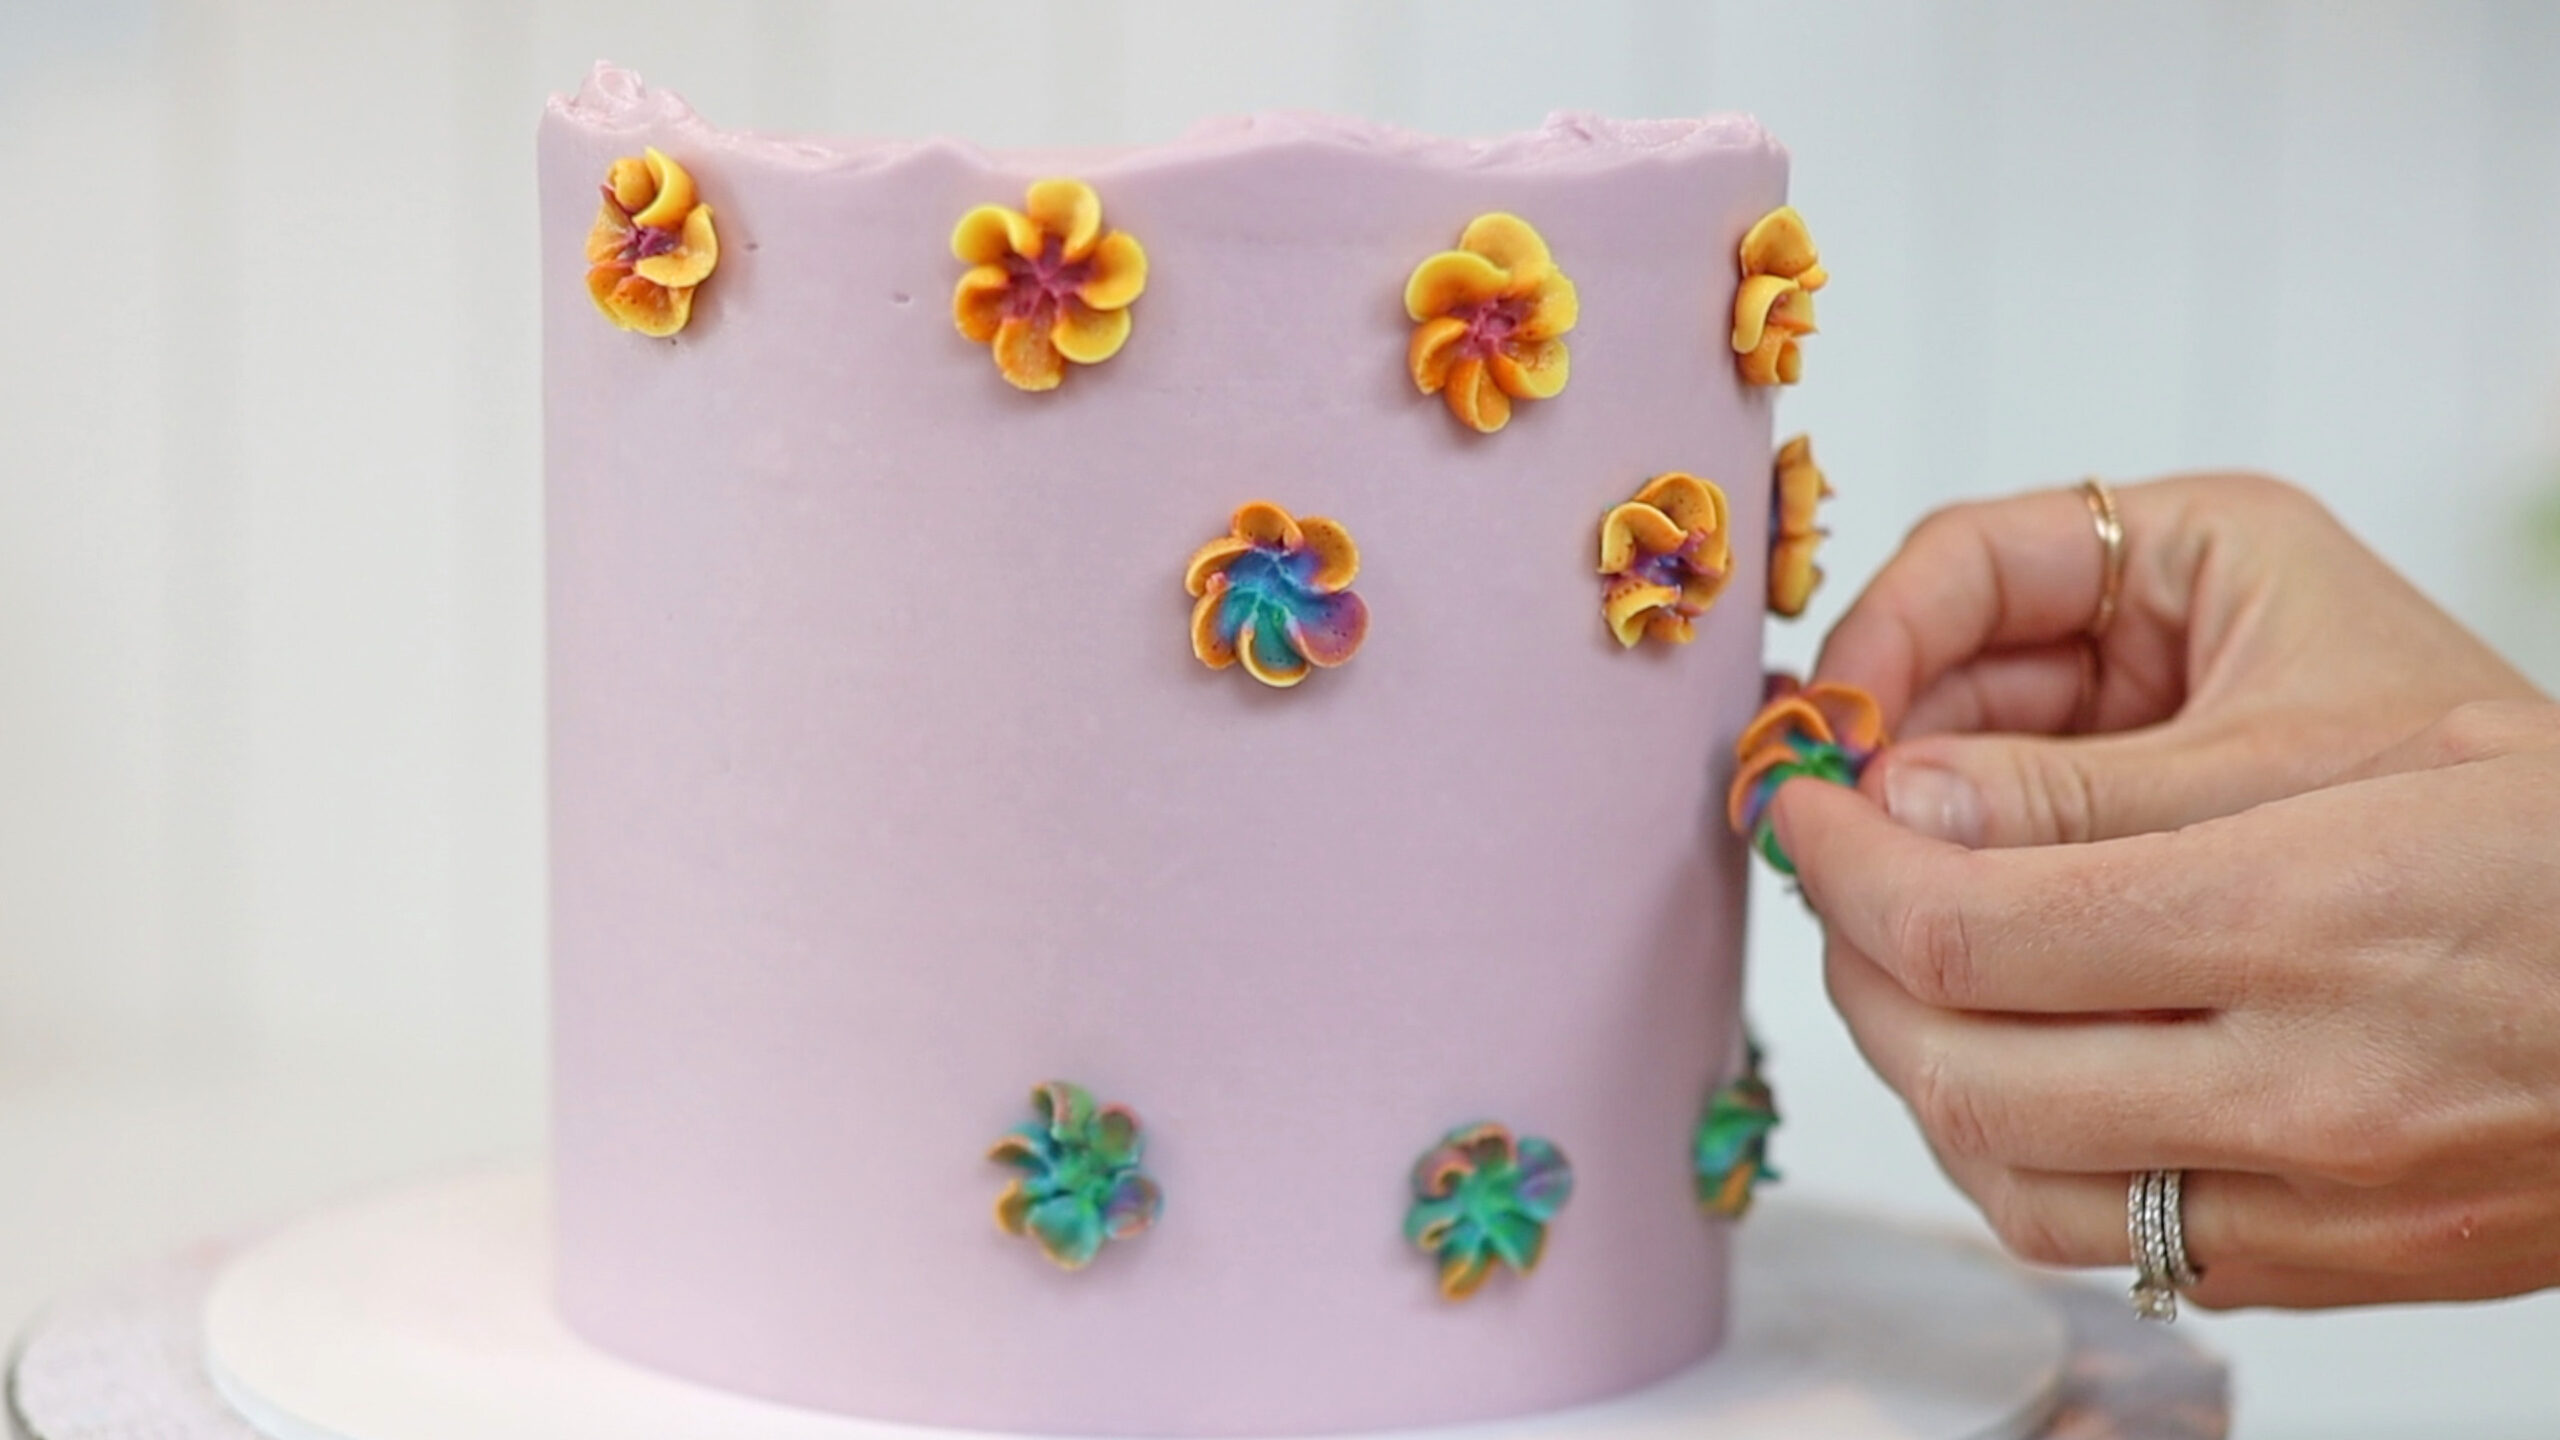
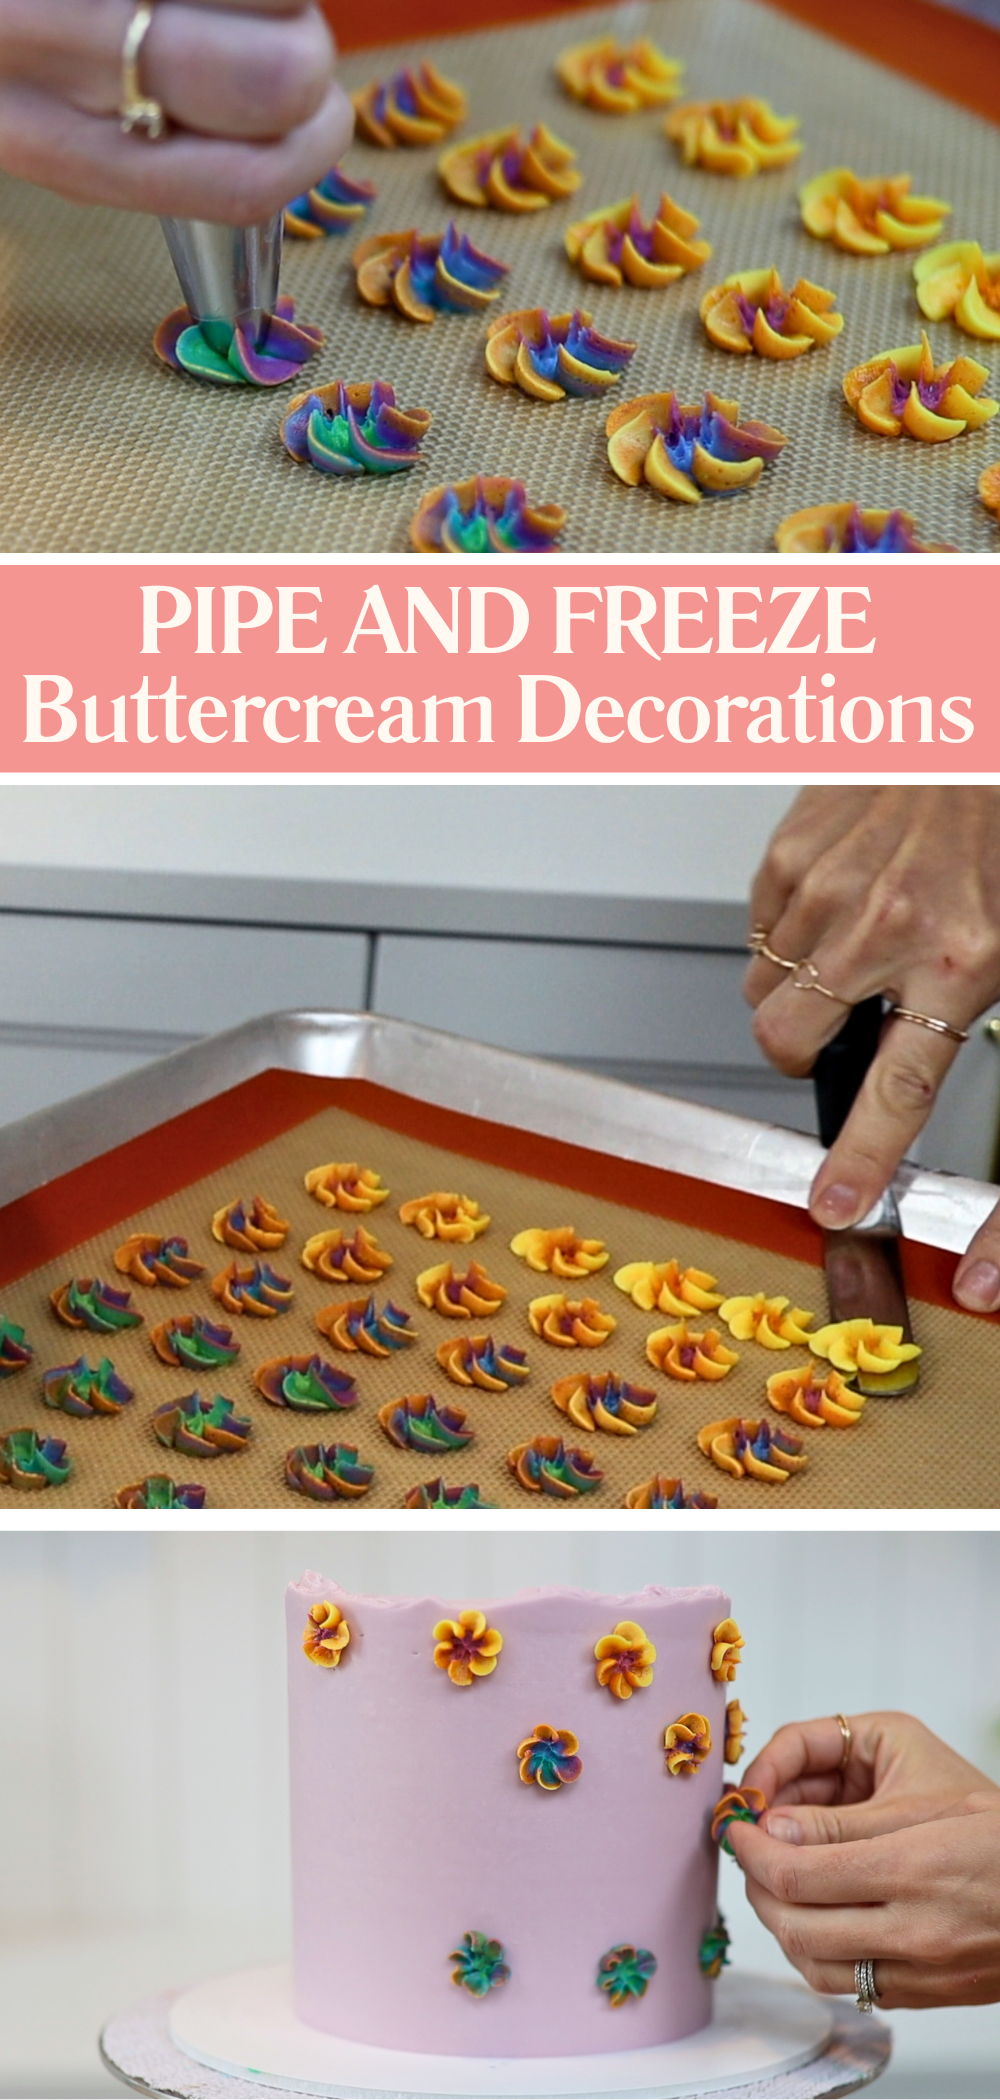
Buttercream has a unique quality that makes it perfect for this first trick. When it’s cold, it firms up enough to hold its shape. This means one of the things you can do with buttercream is pipe and then freeze it to create decorations you can handle like fondant. Pipe onto a tray lined with parchment paper or a silicone mat to make them easy to move later. Then pop the tray into the freezer for 10 minutes to freeze the buttercream. Once the shapes are frozen, you can pick them up and press them straight onto a cake. If your cake has already chilled and the frosting has set, use a dab of fresh buttercream as glue to attach the frozen pieces. This technique is much easier than working with fondant and it looks just as pretty.
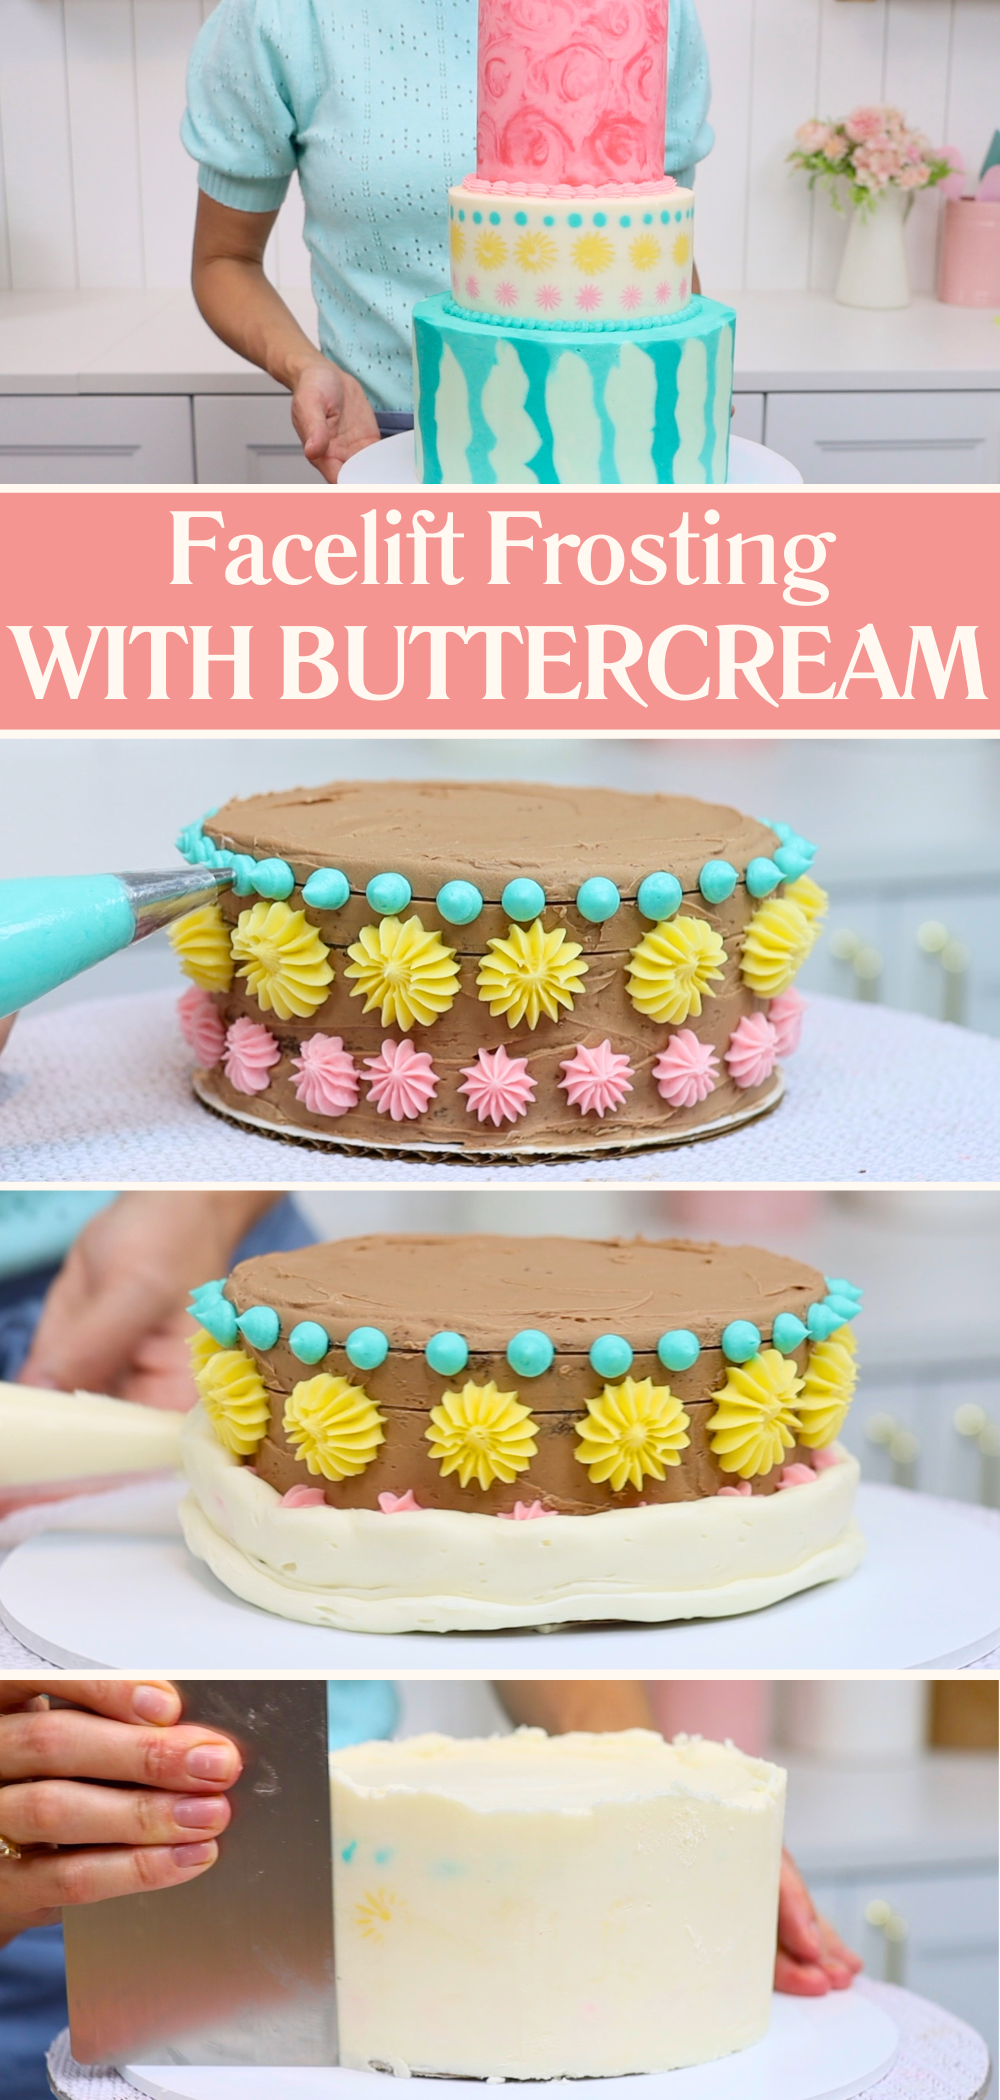
Another buttercream technique that’s fun to experiment with is facelift frosting. I came up with this a few years ago and it’s still one of my favourite ways to get a flat, colourful pattern on a buttercream cake.
You start by piping a design onto a crumb-coated cake and then freeze it so the piped buttercream sets firm. Frost over the top and freeze again for 20 minutes to firm up the outer layer. Then take a warm cake comb and scrape around the cake several times. You can warm the comb by holding it under running water or dip it into a pan of hot water. If you have a metal cake comb, use a blowtorch or a hair dryer to heat the edge of it.
As you scrape the top layers of frosting off, the colourful design underneath is revealed. Unlike typical piped buttercream decorations, the details will be completely flush with the surface of the cake. This technique creates such a unique effect!
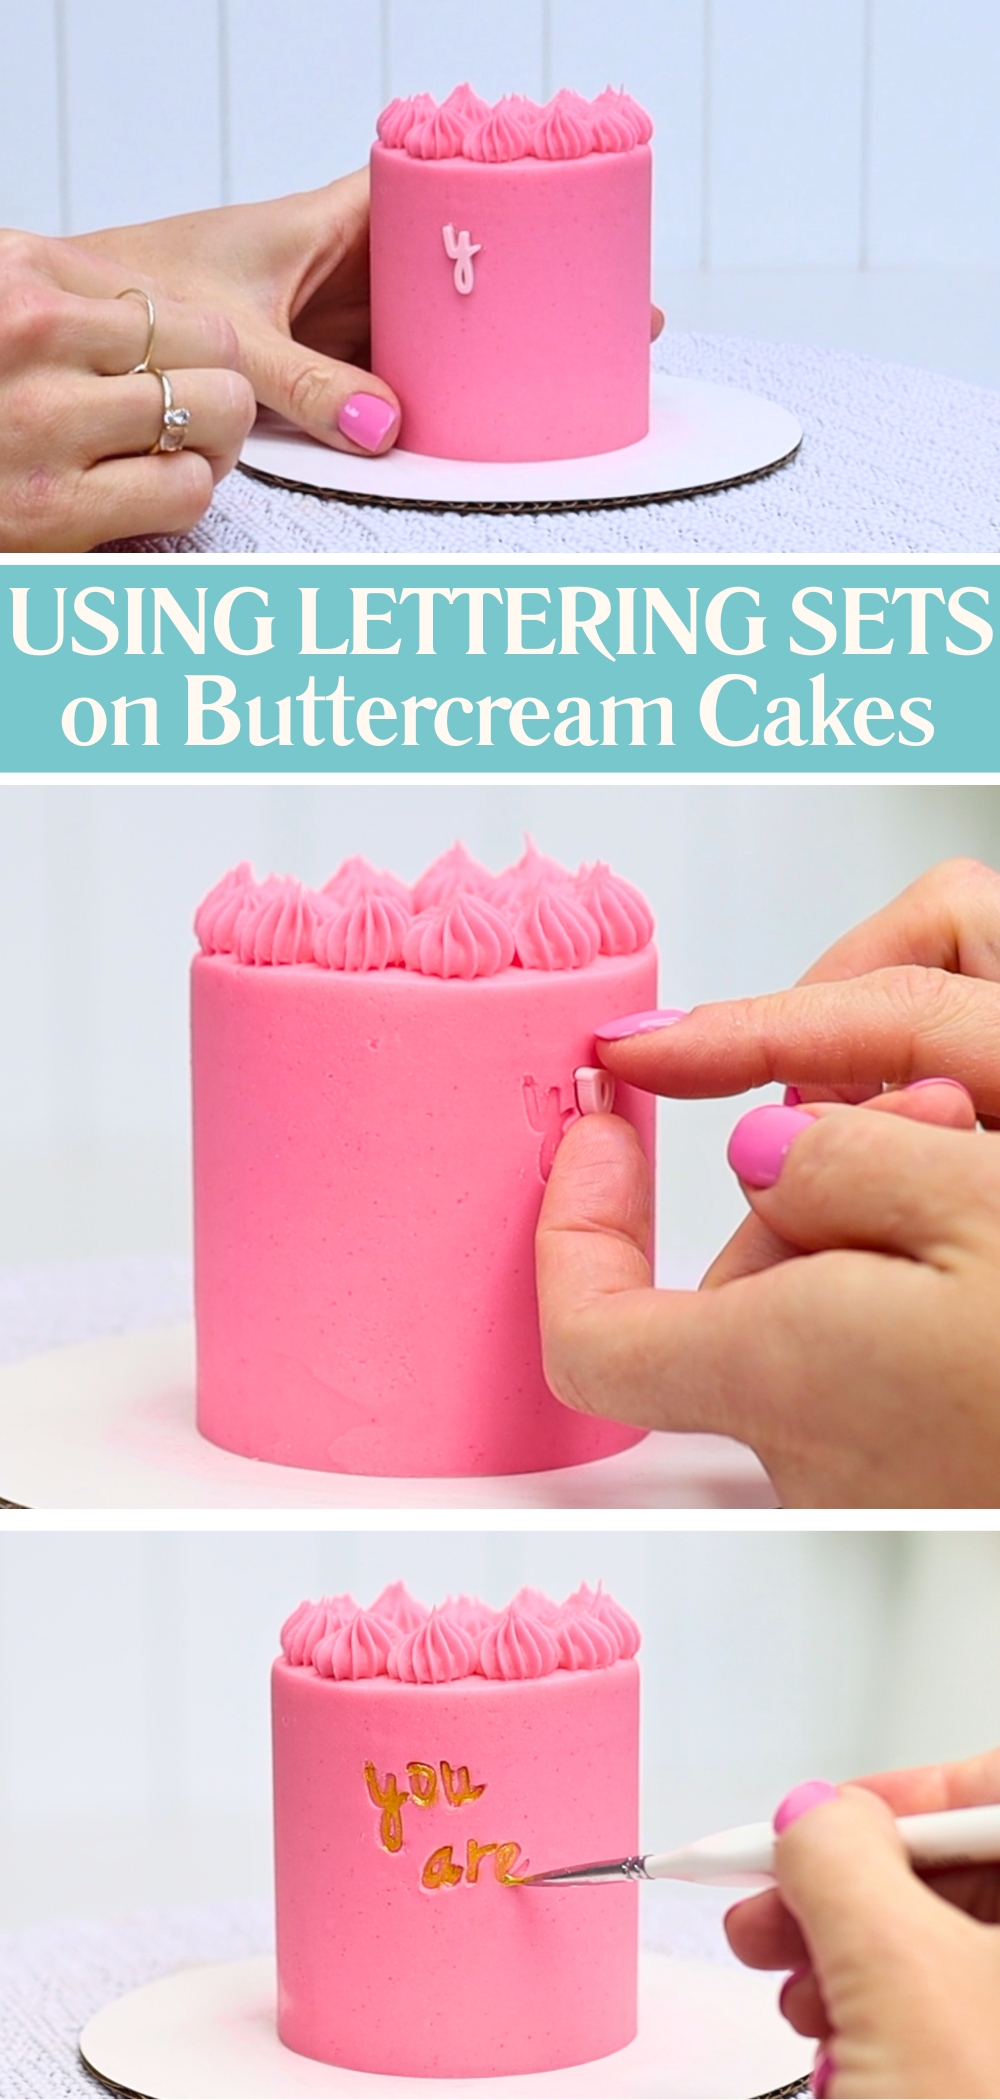
For messages on buttercream cakes, you can definitely pipe them but it takes practice to make them neat. Here’s a cleaner and more precise option: lettering sets. First, chill the cake for at least an hour and then let it sit at room temperature for 30 minutes. Now the buttercream frosting will be softened but still firm instead of sticky. Press each letter gently into the surface of the cake to leave an imprint. Make sure to press all over the letter so it stamps in evenly. Then lift the letters away to reveal a neat message. You can leave it as it is or paint inside the letters using edible metallic paint and a fine brush. If you don’t have store-bought paint, mix vodka with edible gold luster dust for a DIY version.
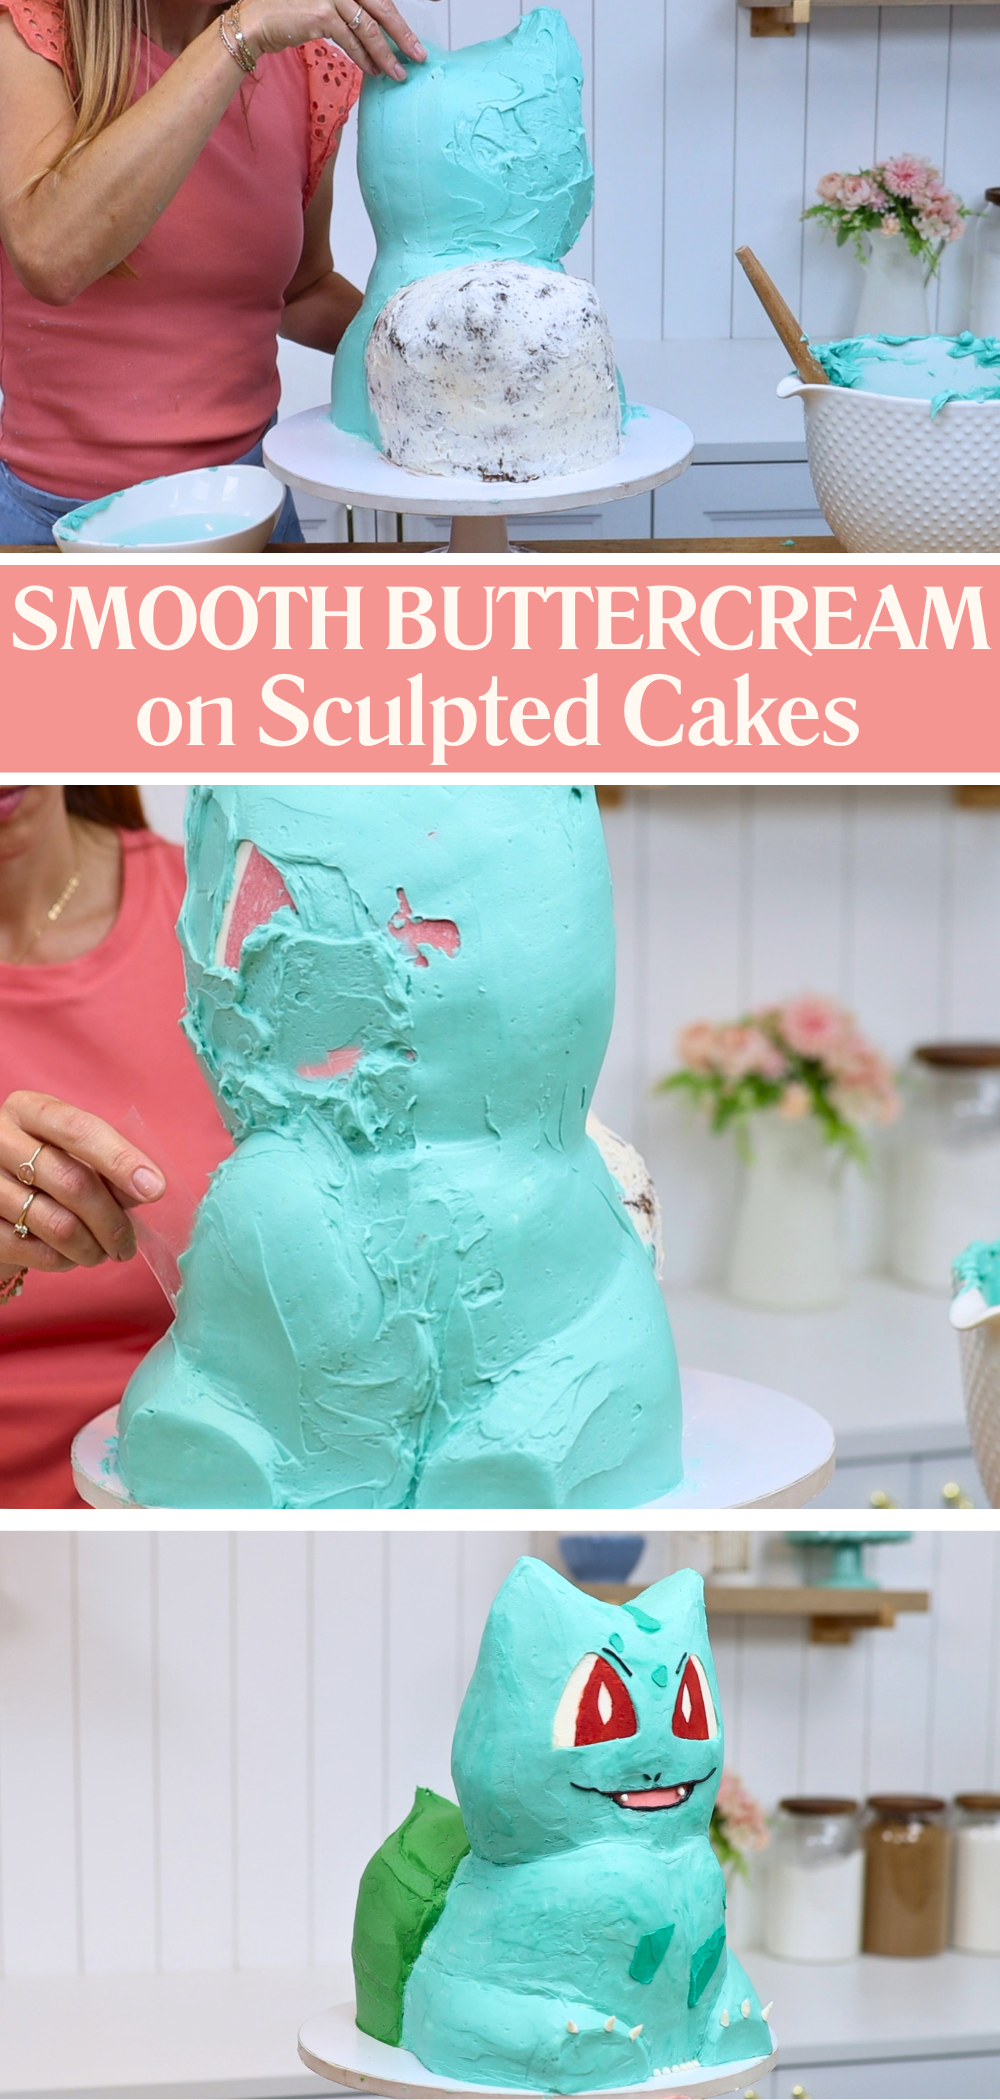
Buttercream can be used for sculpted cakes that look like they’re covered in fondant. The secret is acetate. This flexible plastic sheet wraps around curved edges to smooth buttercream without leaving lines behind like a regular scraper does. It’s especially helpful for shaping characters or rounded cakes, like this Bulbasaur cake! If your buttercream starts to set or show air bubbles as you work, dip the acetate in warm water. Dry it off and the warmth of the plastic will smooth the buttercream more easily.
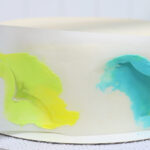
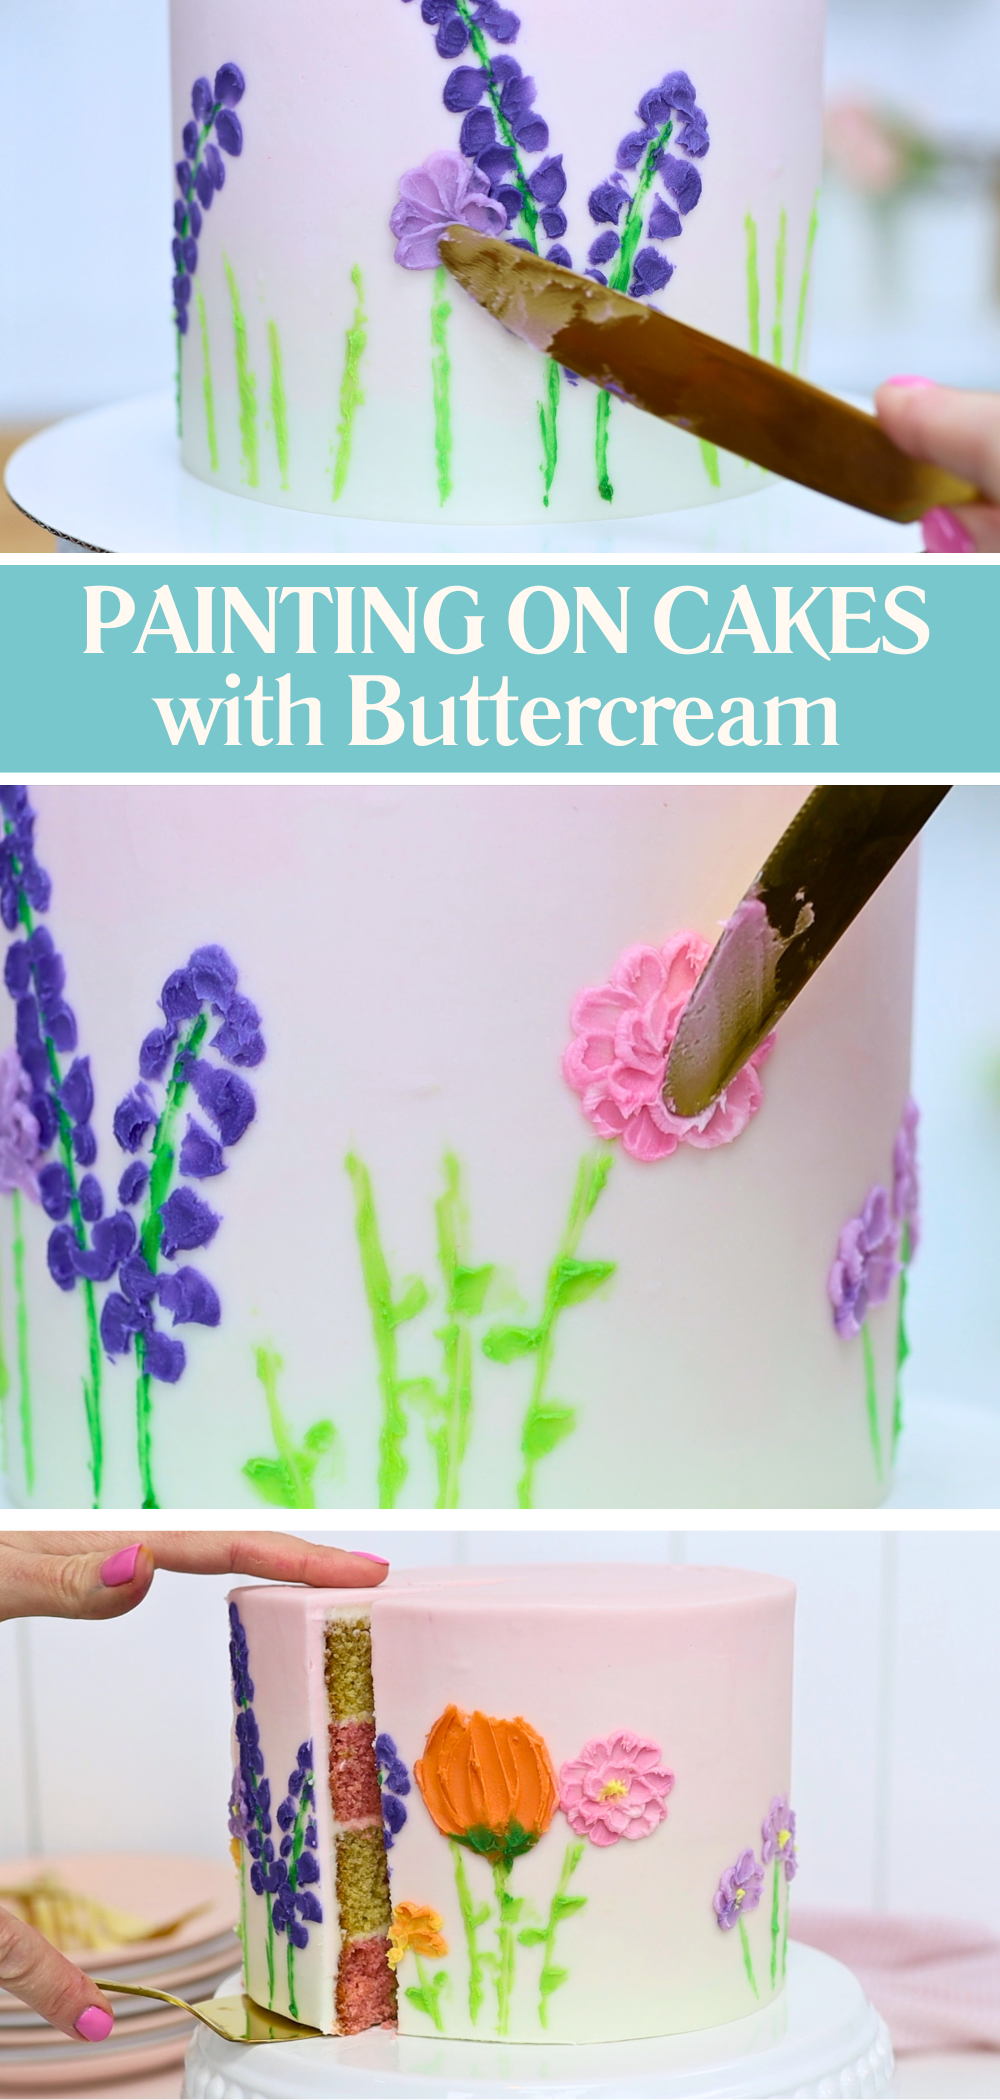
Painting is another creative thing to do with buttercream. Chill your cake first, so the frosting is firm and will hold its shape as you paint. Tint small amounts of buttercream with gel colours and use a utensil to apply it. A palette knife is a popular choice but you can even paint with a knife, fork, and spoon! The buttercream consistency needs to be quite runny or loose for this technique. I love painting flowers because the shapes are simple and easily recognizable, even if you haven't had much practice painting! You only need a small amount of buttercream on your utensil to paint each shape. Make sure the cake stays cold and firm and if it starts to soften, put it back into the fridge for 15 minutes.
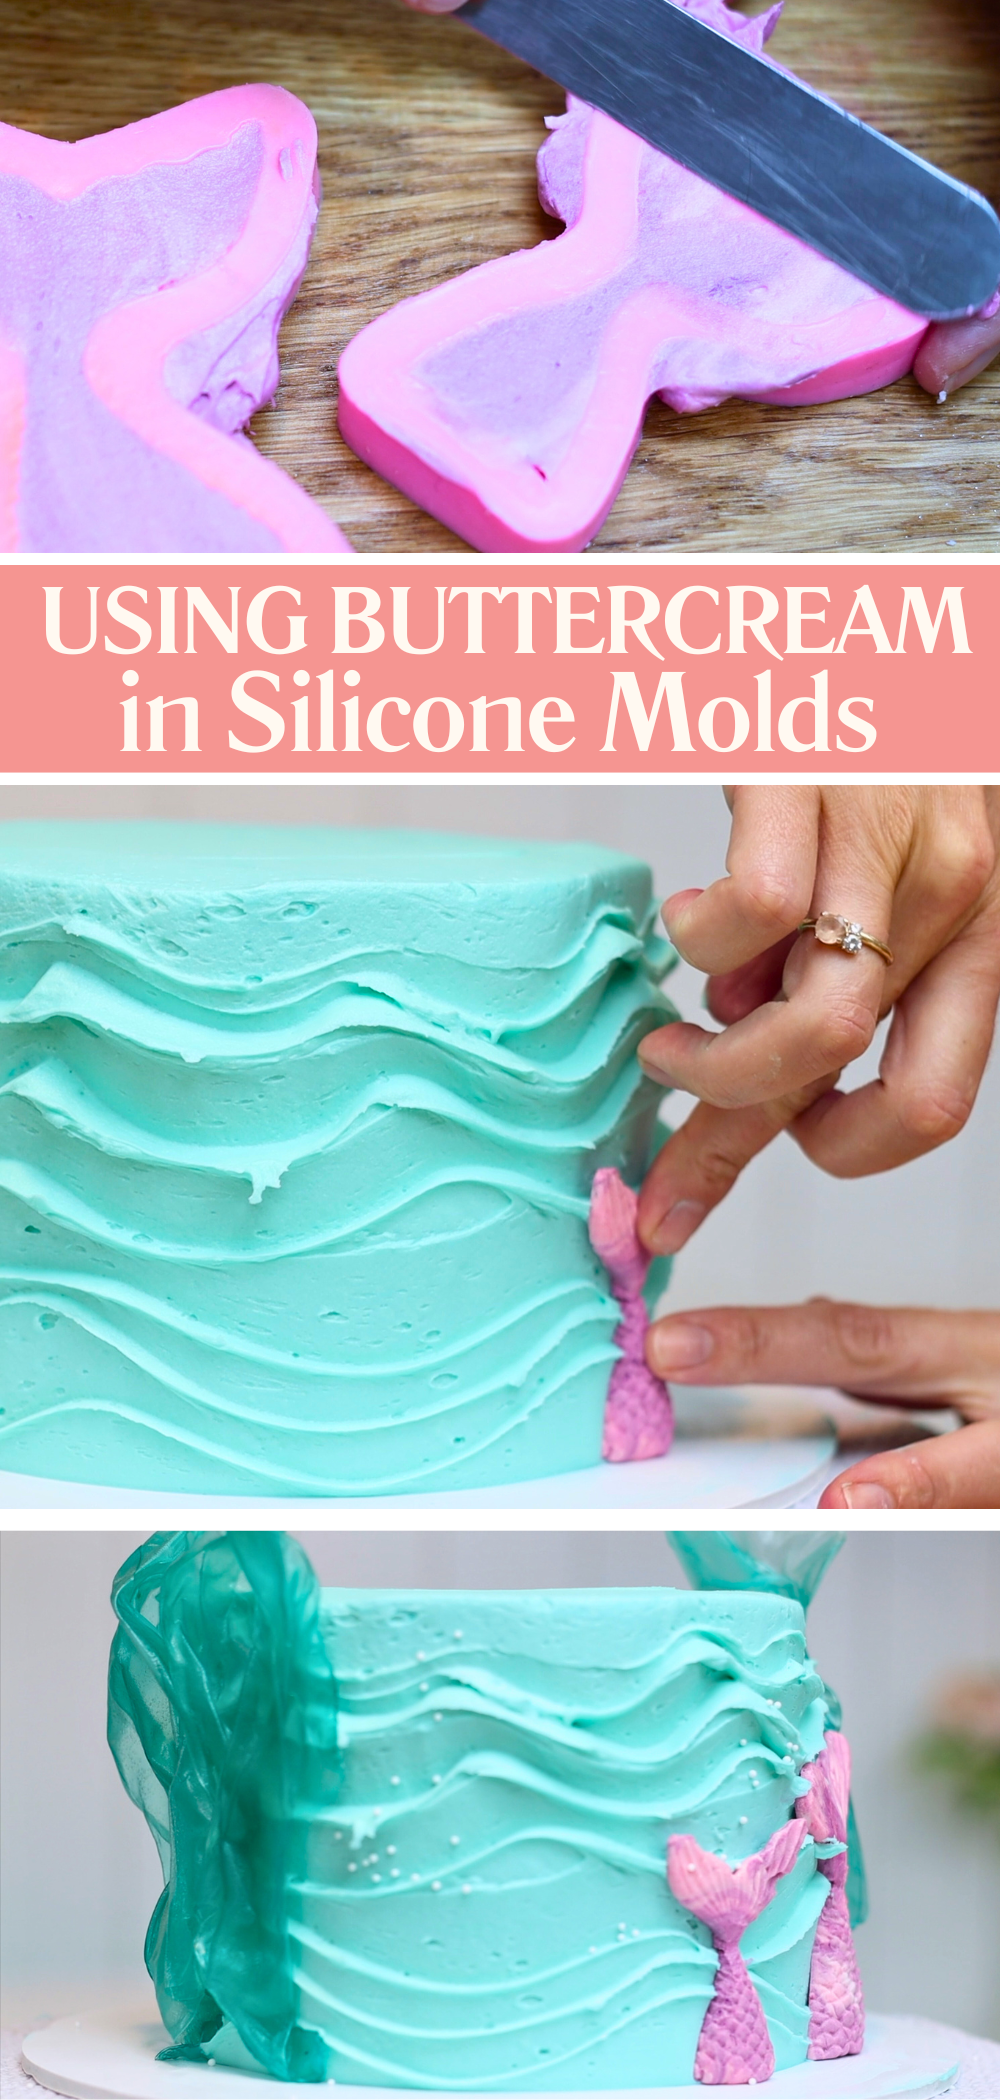
You can make beautiful cake toppers with buttercream using silicone molds. Instead of fondant or chocolate, spoon buttercream into your molds. Press it down firmly to fill every detail and smooth the surface flat. Freeze the molds for at least 30 minutes so the buttercream is completely solid and then gently peel the silicone away to release the shapes. Work quickly because they’ll soften fast as they warm up! If anything breaks, just press the pieces gently back together and they’ll stick as the buttercream warms up. Press them directly onto the cake for soft, colourful decorations that are completely edible.
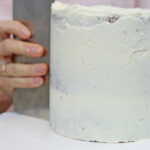
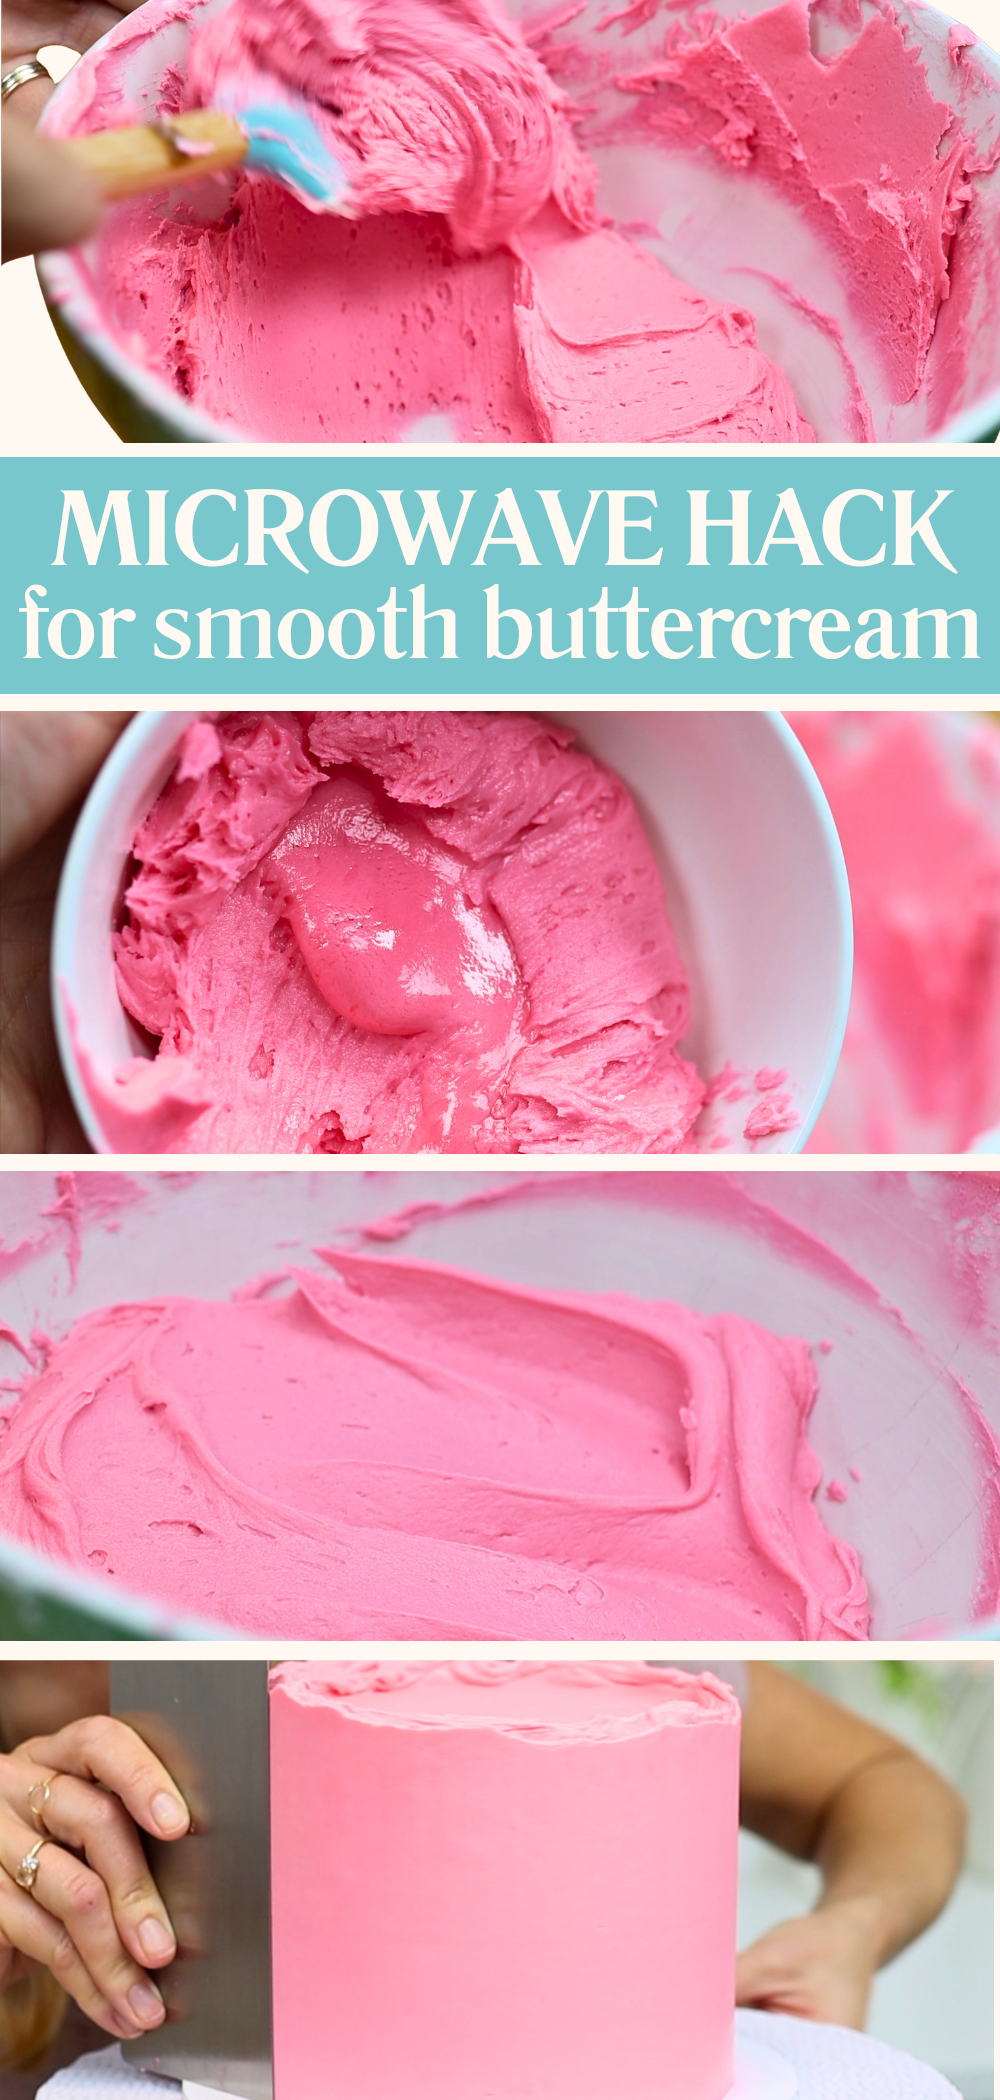
Buttercream melts when it’s warm, which might sound like a problem but actually makes it super useful for smoothing frosting. If your buttercream is too stiff or full of air bubbles, try this easy hack! Scoop out about a third and microwave it for 10 seconds. Then stir it back into the rest of the bowl. The melted buttercream will loosen the consistency and help knock out stubborn air bubbles. Now it will be easier to spread and smooth onto your cake!
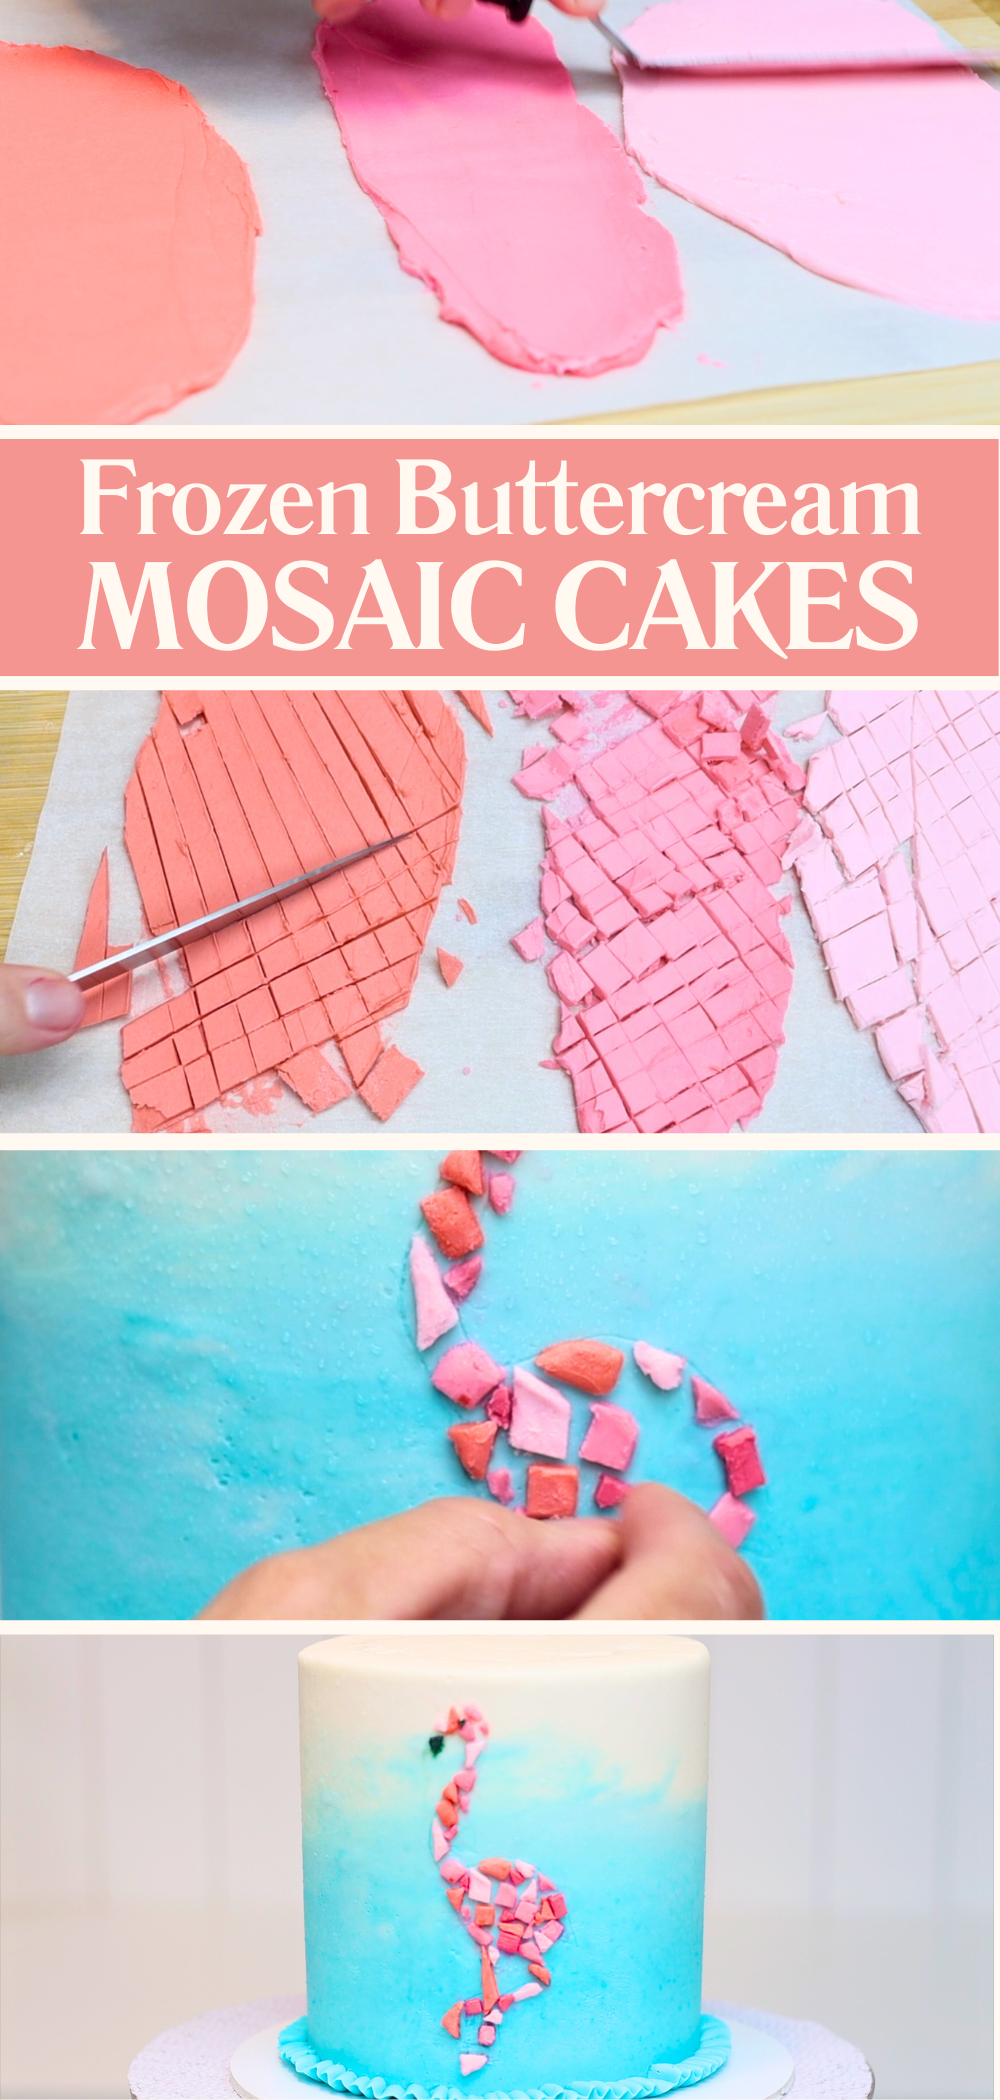
Another fun thing to do with buttercream is turn it into edible mosaic tiles. Spread different colours of buttercream onto a piece of parchment paper and freeze it until the buttercream is firm. Then use a sharp knife to cut it into small triangles. Draw a shape on your cake with a toothpick to use as a guide as you attach your buttercream tiles. Now press the frozen tiles onto the cake to fill in your shape like a mosaic. Decorating takes a while so it's best to freeze two trays of tiles and rotate them. This way you’re always working with cold, firm buttercream.
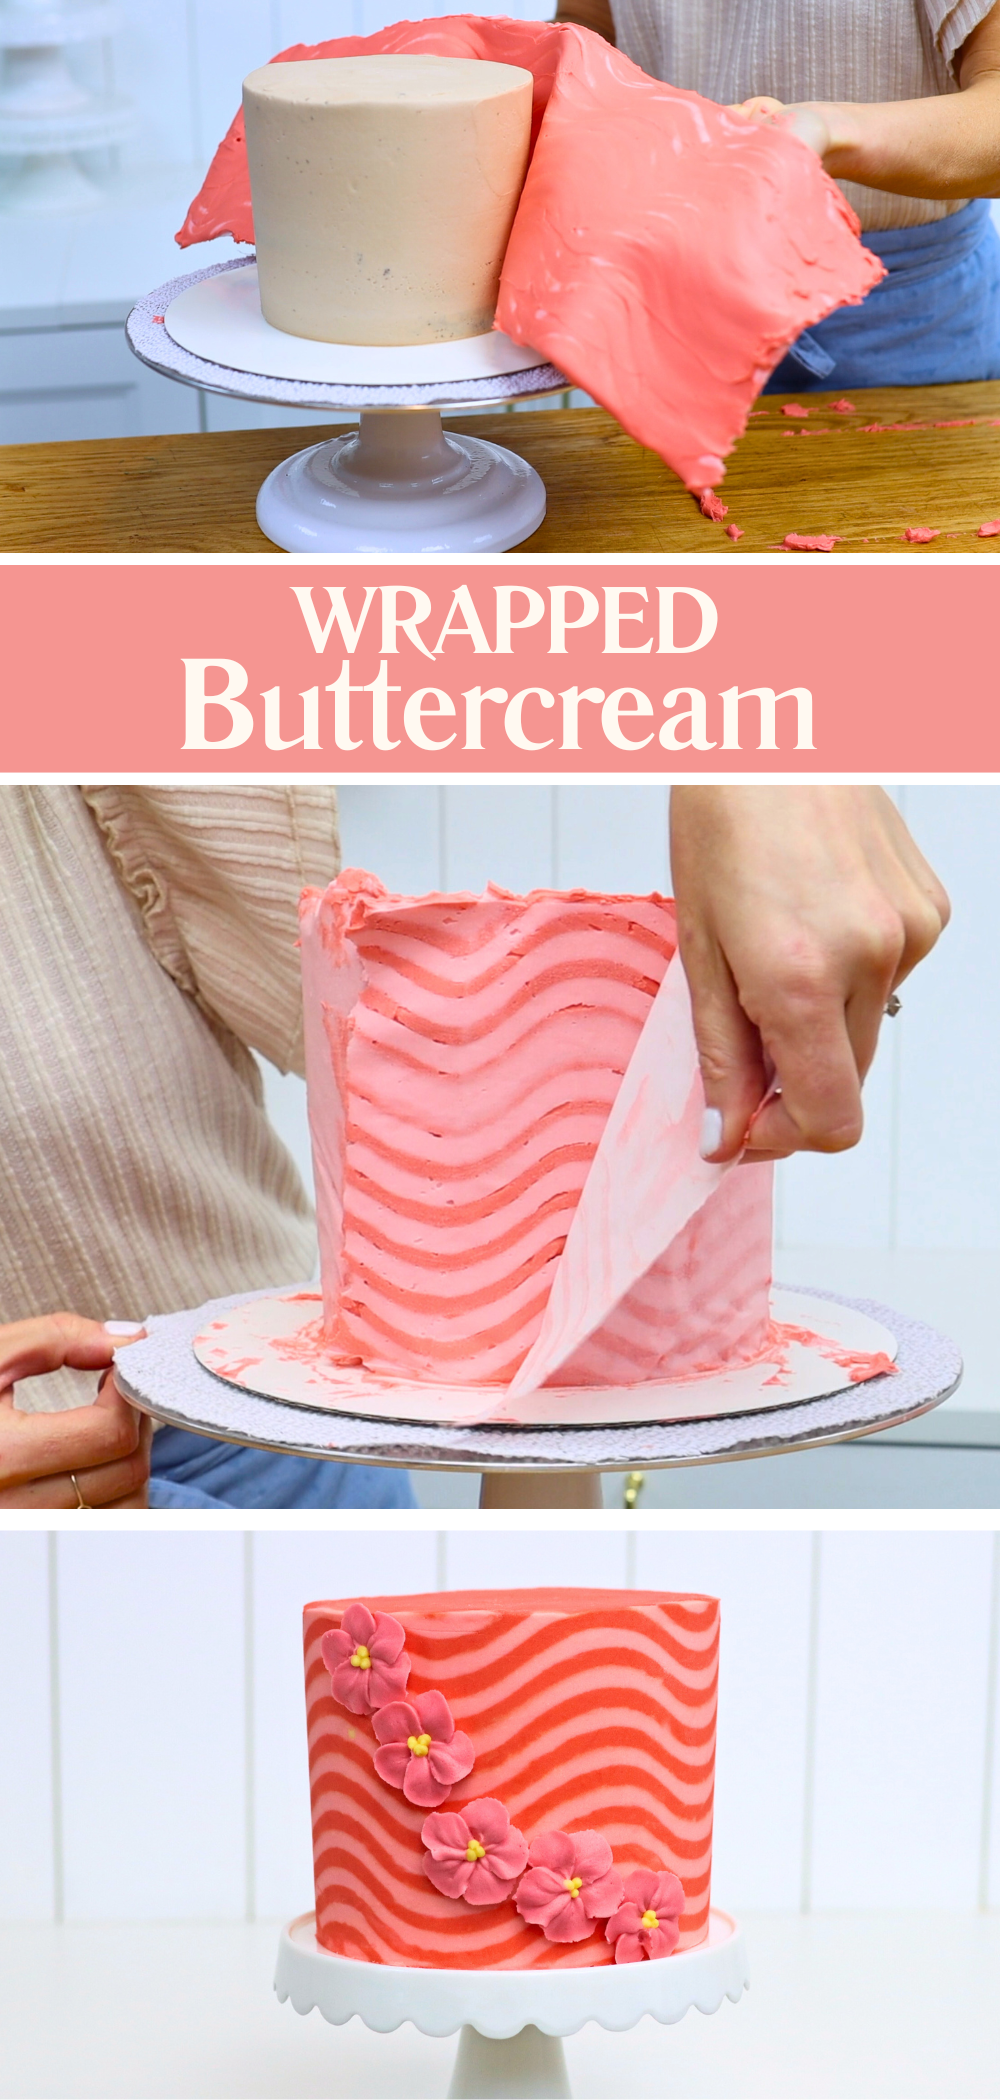
Buttercream wraps are a clever way to create patterns around a cake, like these wavy stripes. First, spread or pipe your coloured buttercream pattern onto parchment paper and wrap it around your cake. Then put the cake into the fridge for about an hour, until the buttercream is cold and firm. Peel the parchment paper off to reveal the design underneath, which will stay attached to the cake. You’ll probably need to do a few touch-ups to fix any gaps or smudges, by spreading more buttercream over those areas and scraping with a warm cake comb. I teach this full technique in detail in my online course on 10 Cake Decorating Techniques.
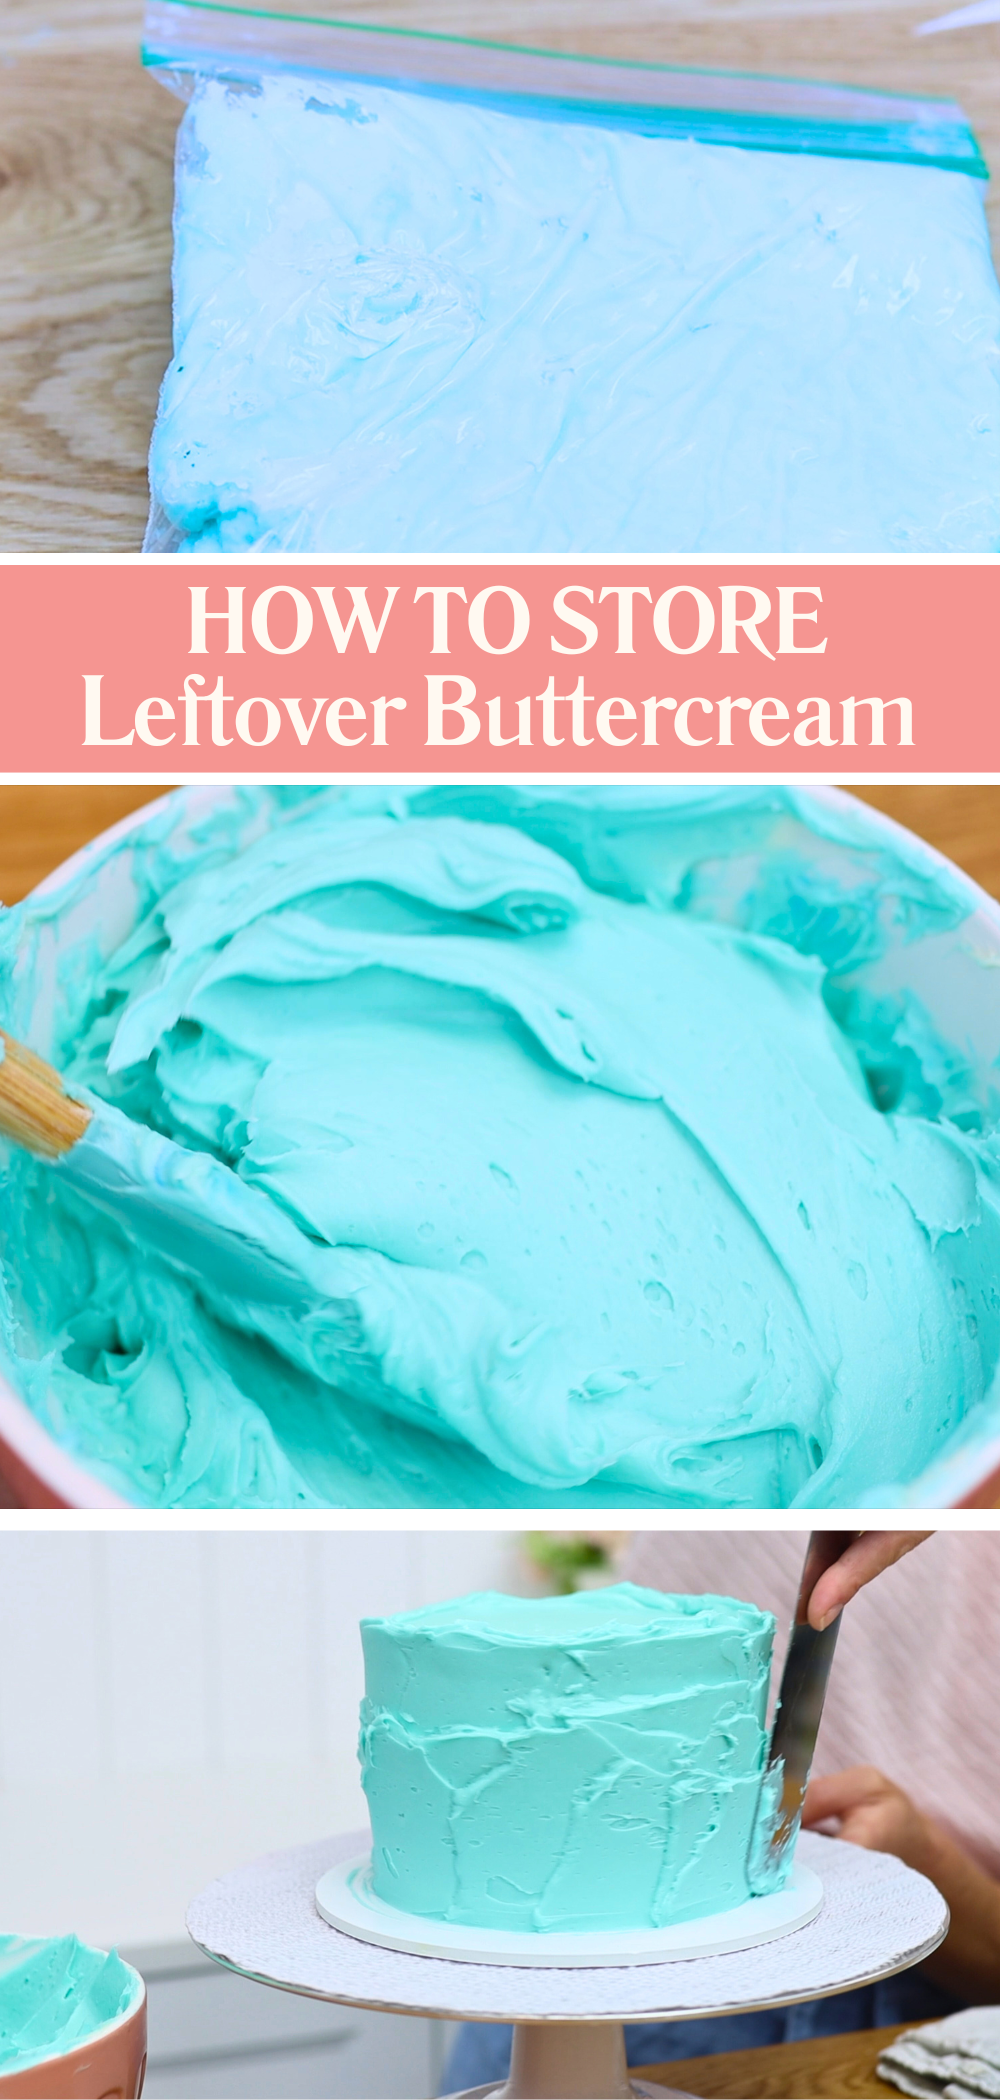
Finally, one of the most practical things to do with buttercream: freeze your leftovers. If you have extra buttercream in any colour, pop it into a ziplock bag or airtight container and freeze it for up to a month. To use it again, take it out the night before and let it come to room temperature. Once it’s soft you can re-tint it if needed and stir it well to knock out any air bubbles. This saves so much time on your next cake!
With all these fun and clever things to do with buttercream, it’s easy to see why it’s such a popular choice for cake decorating. What will you try next? Tell me in the comments! And visit my cake school to learn hundreds more cake decorating techniques and designs.
You can also watch a video of this tutorial on 10 things to do with buttercream: