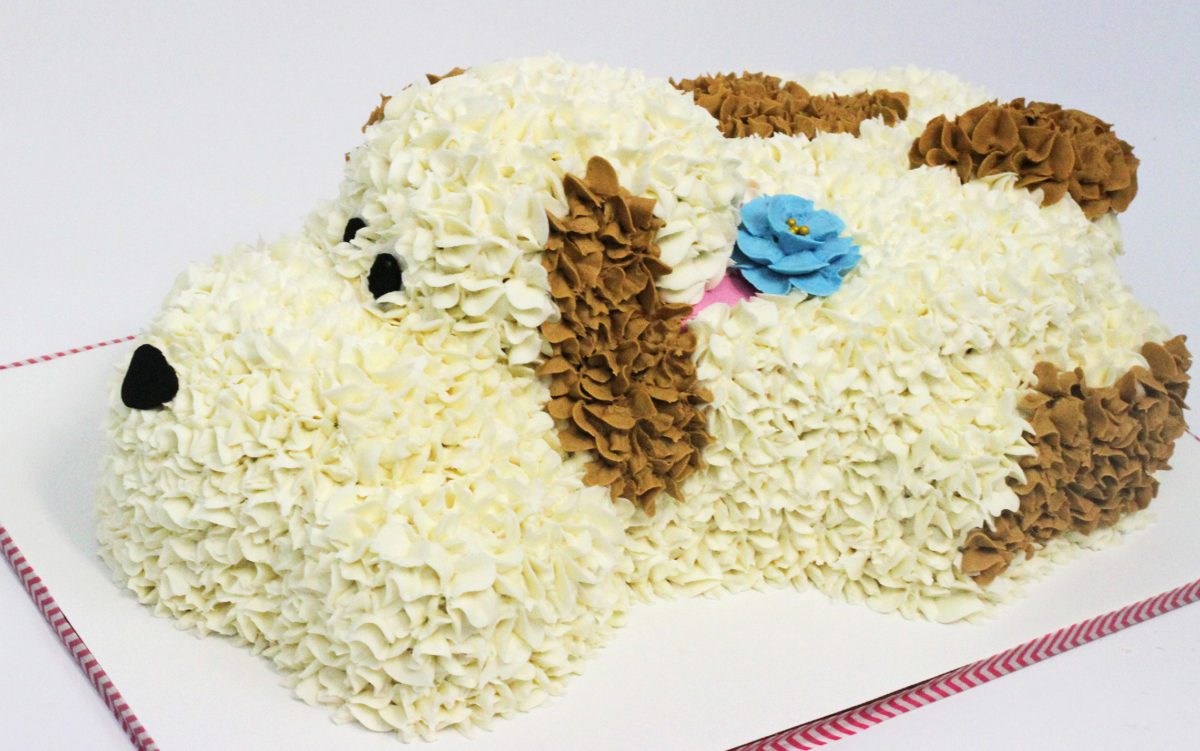
Here are 10 easy techniques to create adorable animal cakes with NO fondant!
If you prefer to watch a video of this tutorial, scroll to the bottom of the page.
1. Use gel food colours to paint an animal onto a cake. Use the same gels you would use to tint buttercream. They’re quick to use because all you have to do is squeeze a few drops onto a plate or palette and add a few drops of vodka, or any other clear alcohol or clear flavour extract. To make a pastel colour, add white icing colour to the gel.
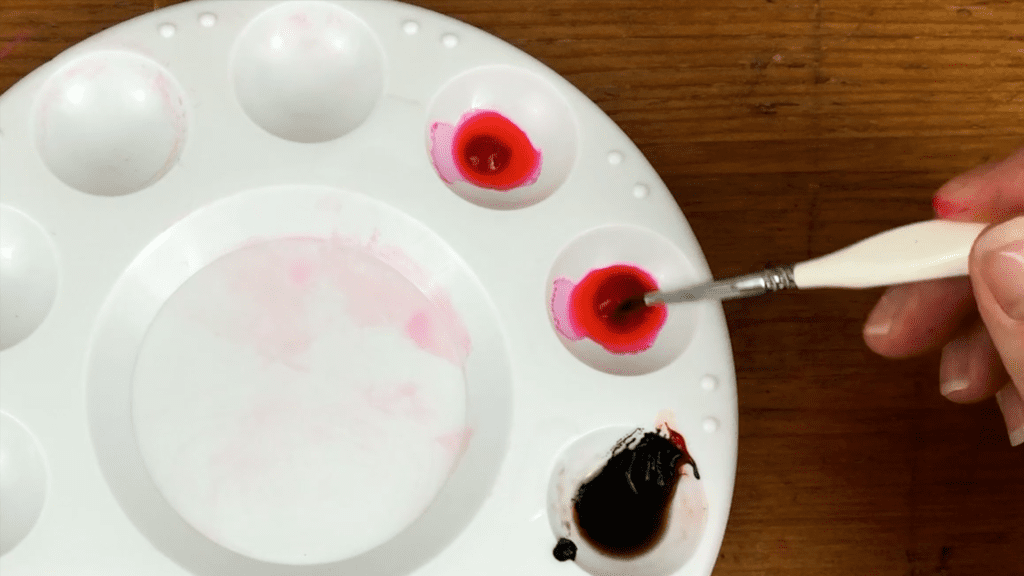
Chill your cake in the fridge first for at least an hour to set the frosting so it’s firm and then paint your animal onto the frosting. For very bold colours, like this brown, use mostly gel with just a tiny bit of vodka added, or for thinner coverage to make lighter shades just add more vodka to thin out the colour.
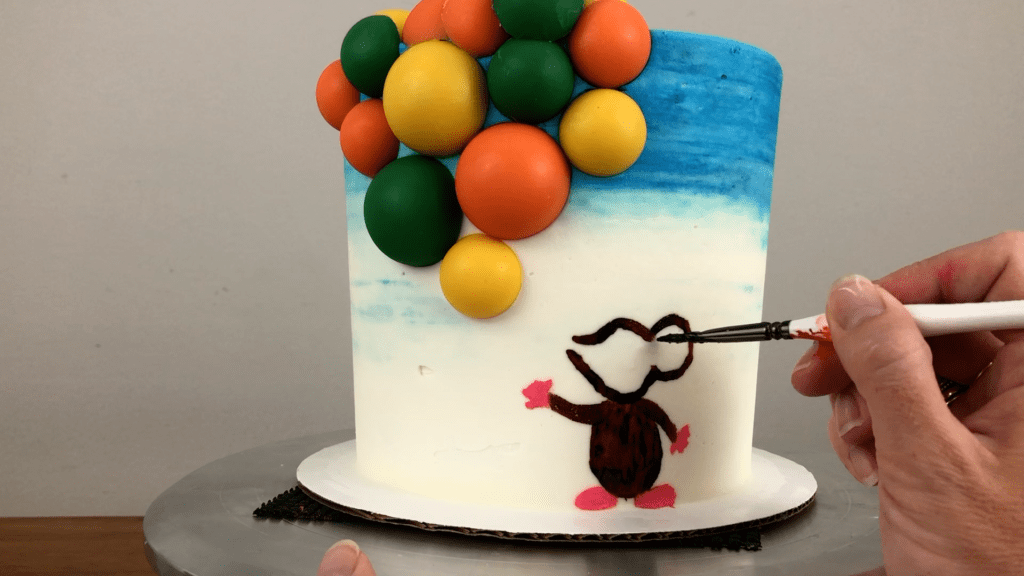
I like to start with an outline and then fill in the middle, just like you would if you were drawing a picture. It’s helpful to have a few different paintbrushes so that you don’t have to clean them as you switch back and forth between colours and it’s also much easier to do this if you have a picture to refer to. I use Google Images and choose a clip art image of whatever I want to paint, printing it out and referring to it while I’m painting.
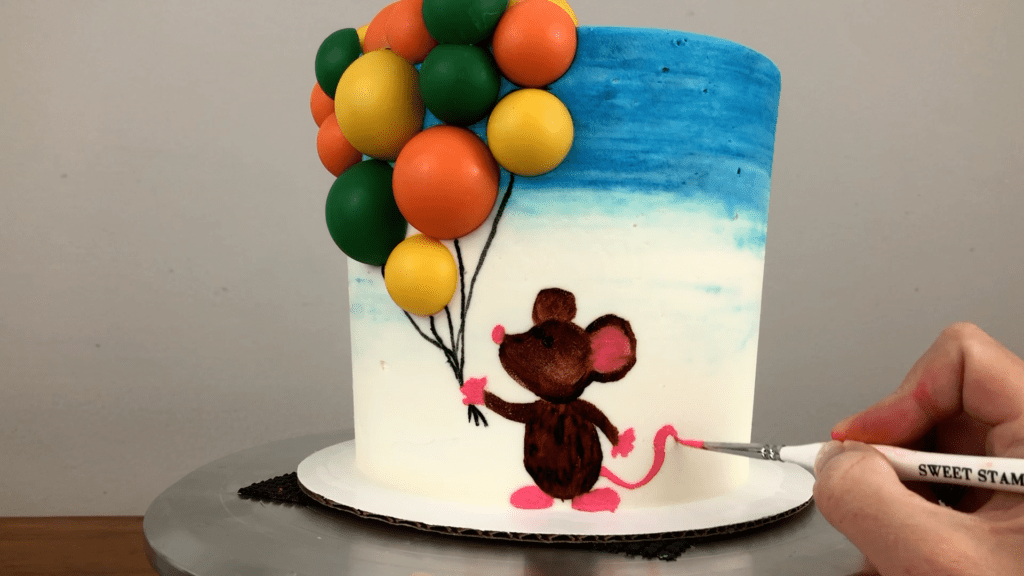
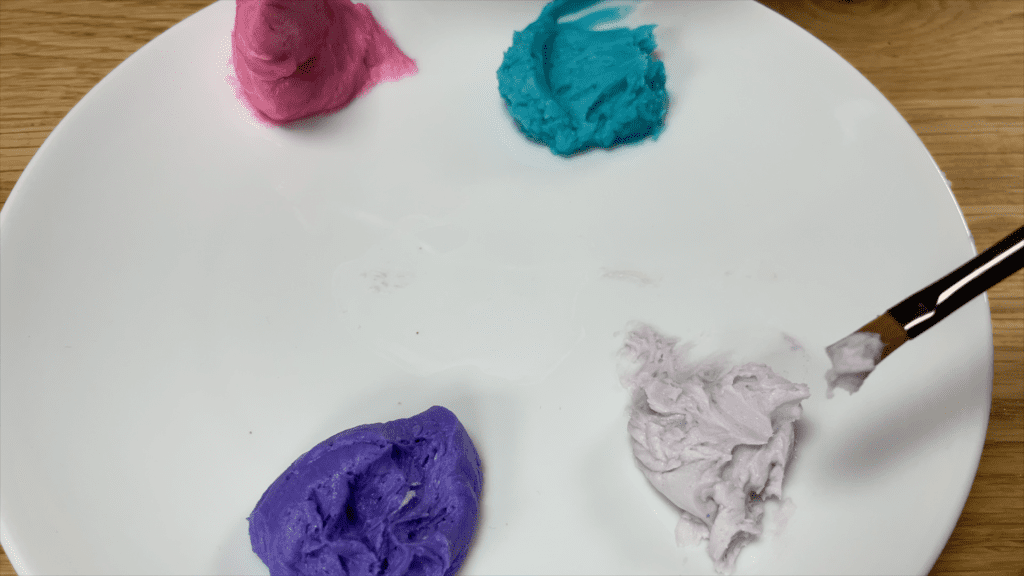
2. Use buttercream to paint an animal onto a cake. Put a few colours of buttercream onto a plate and you’ll need a paintbrush and an
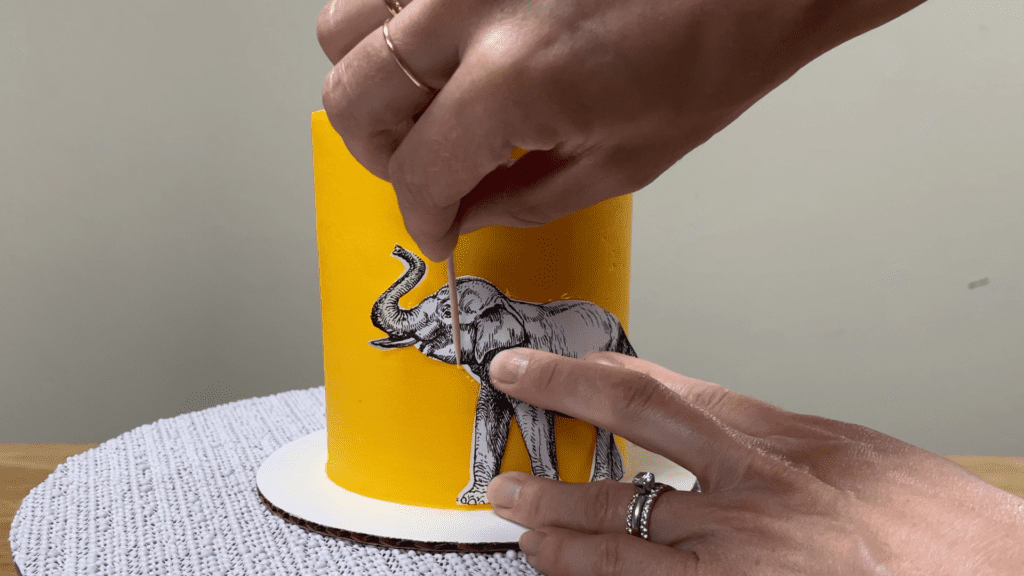
Chill your frosted cake for an hour in the fridge to set the frosting and then cut out the shape you want to paint onto your cake (either a sketch you’ve done or an image you’ve printed). Trace around the animal with a toothpick onto the frosted cake to outline it.
Then paint the shape with buttercream, just like you would paint with acrylic paints. Using a thin paintbrush is useful for details like a trunk or tail, to stay within the outline you traced.
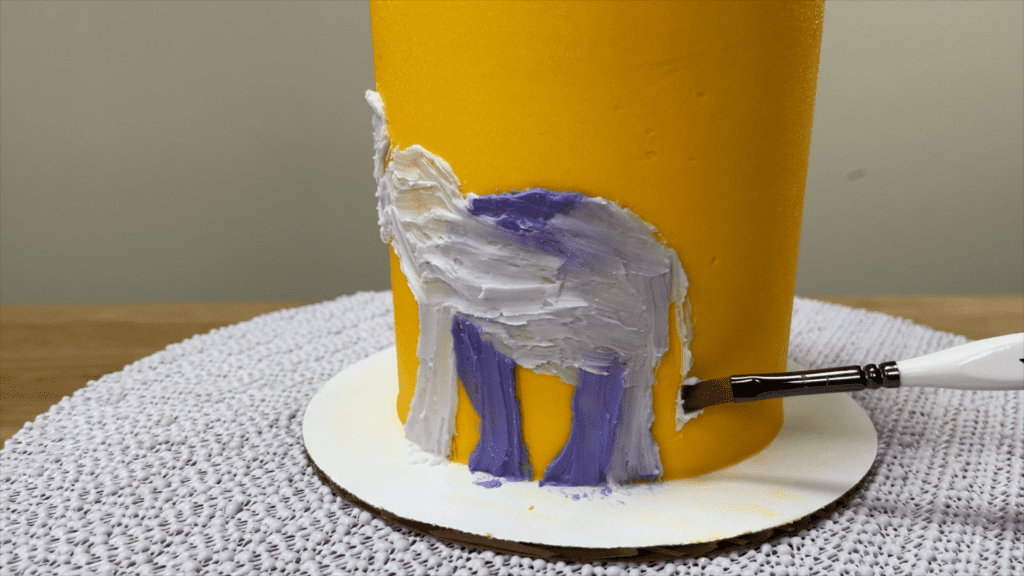
Brush on some shading with a darker shade of the same colour and add accents with different colours if you like. To add texture and to clarify which parts of the buttercream are which parts of the elephant, use your paintbrush or a toothpick to gently scratch lines where the elephant’s skin has creases or wrinkles. Buttercream is fun to play around with and it’s convenient because you already have it from frosting your cake, so you can tint the leftovers different colours to use for painting!
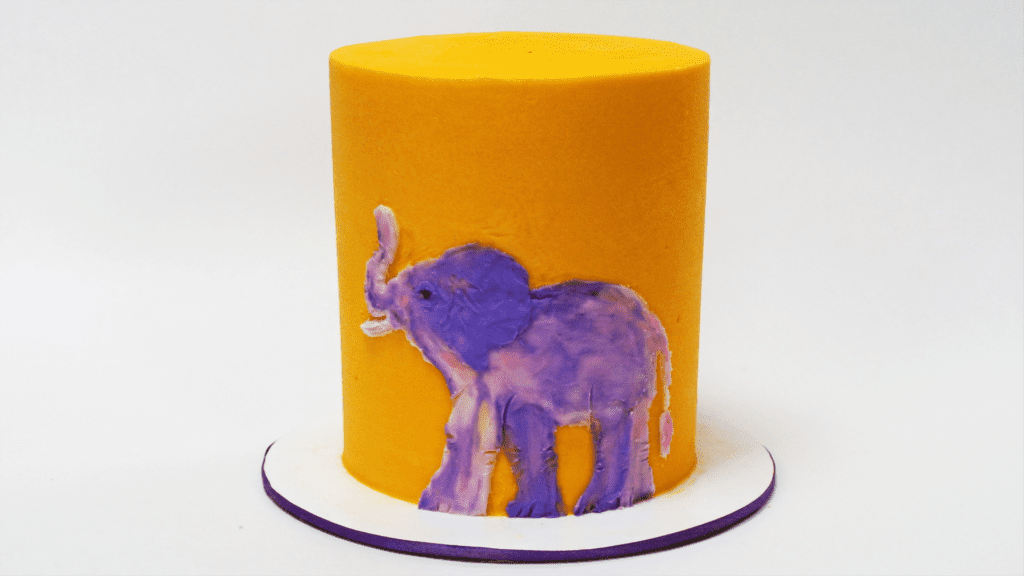
3. Pipe an animal onto a cake using any piping tip! Start by outlining you shape with a cookie cutter or use a toothpick to score the outline into the frosting like I did with the elephant in the previous technique.
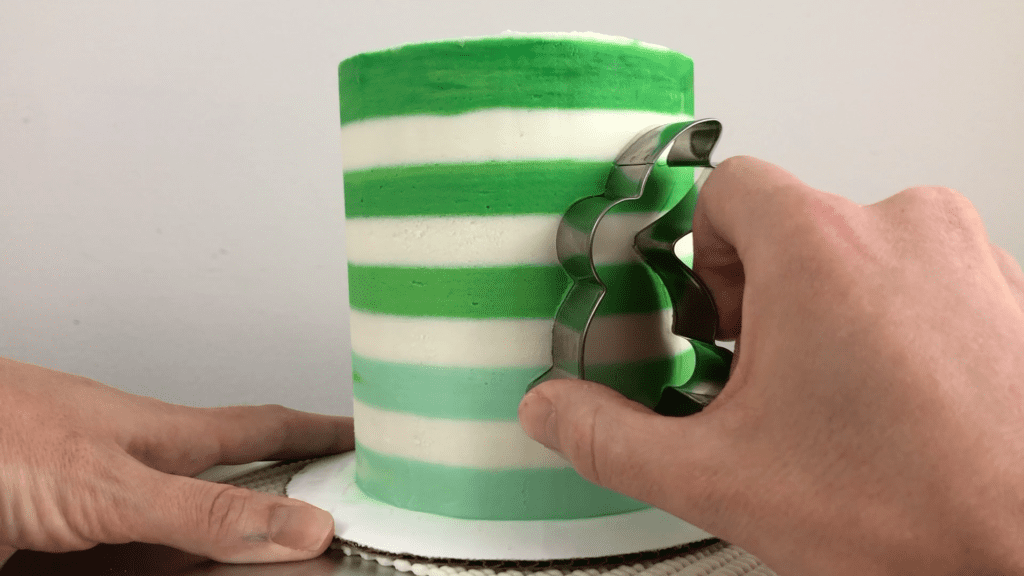
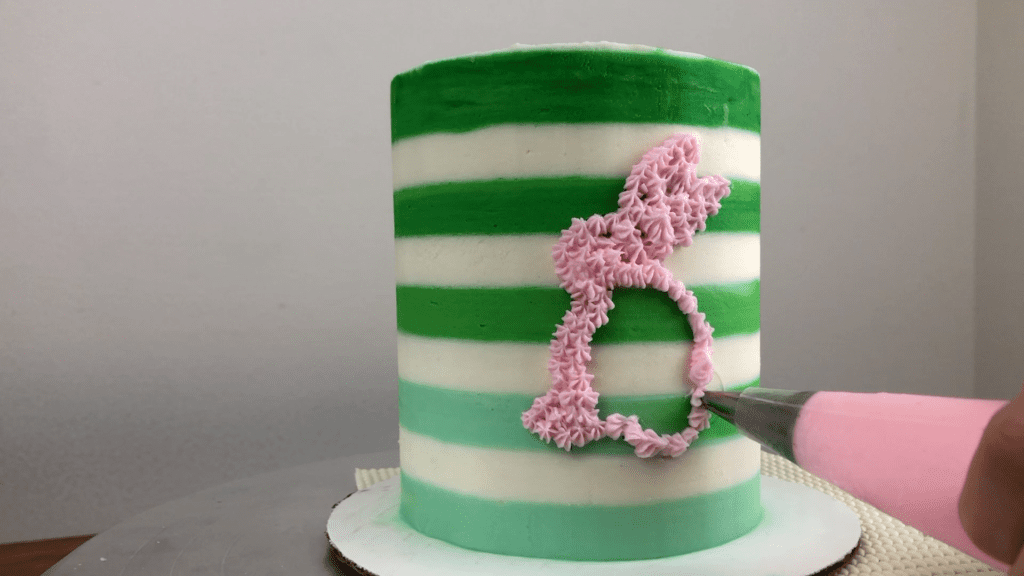
Then pipe frosting to fill the outline of the shape. Choose a piping tip small enough to be able to stay within the outline, especially around the smaller details like the feet and the ears, otherwise the outline of the animal won’t be clear and it might be difficult to tell which animal it is!
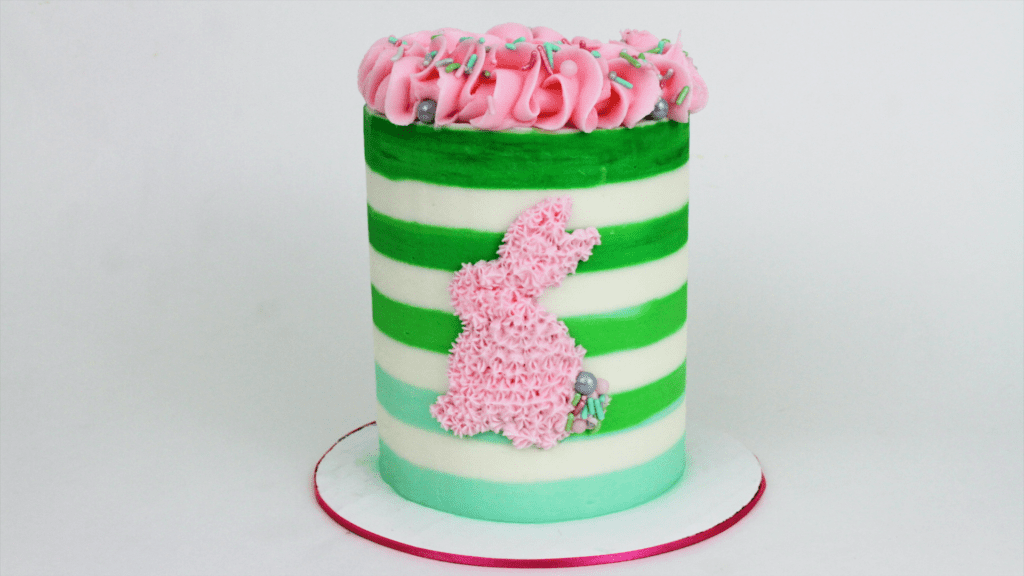
For more detail you can use sprinkles to highlight certain areas for a quick and colourful addition.
4. Spread, pipe, and paint an animal to add much more detail to your animal. Start by spreading on some frosting for the face to create a flat surface, even if the frosting on your cake is textured, like this pink frosting.
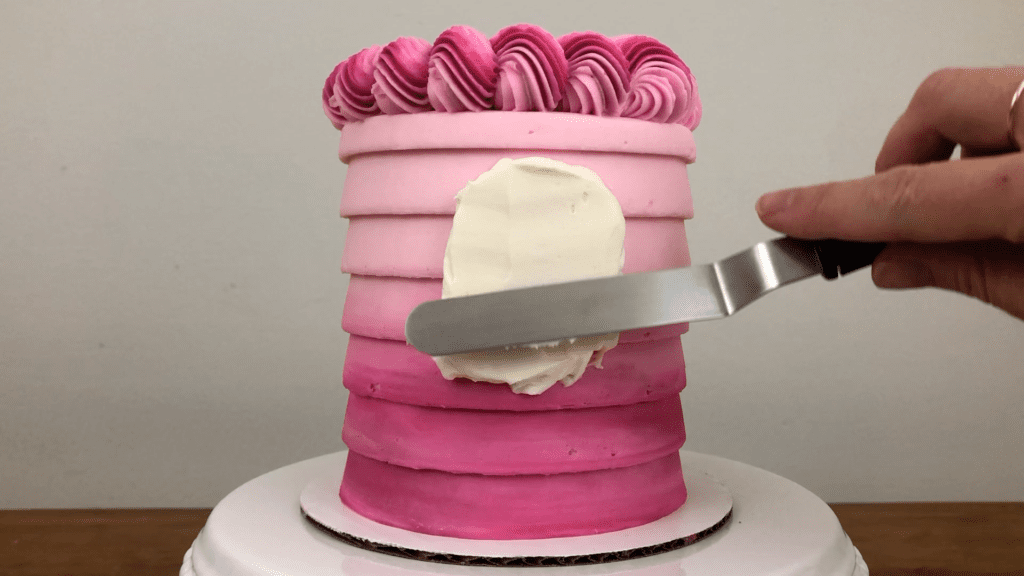
Pipe on the fur with any piping tip. You might choose a grass tip for long shaggy fur or for this llama I’m using a 1M star tip to pipe little stars and rosette swirls. The more colours and textures you add, the more detailed and interesting the design will be.
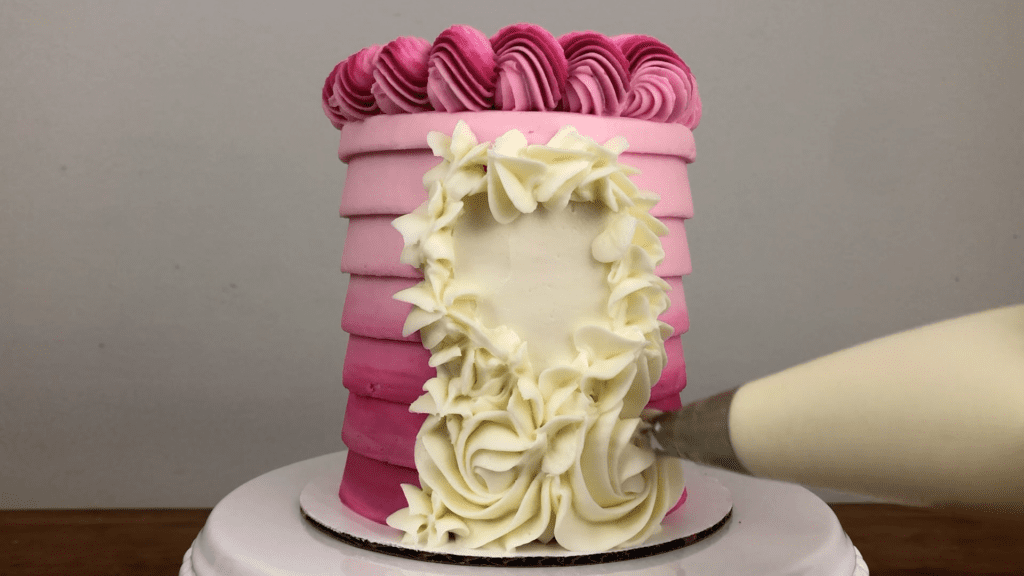
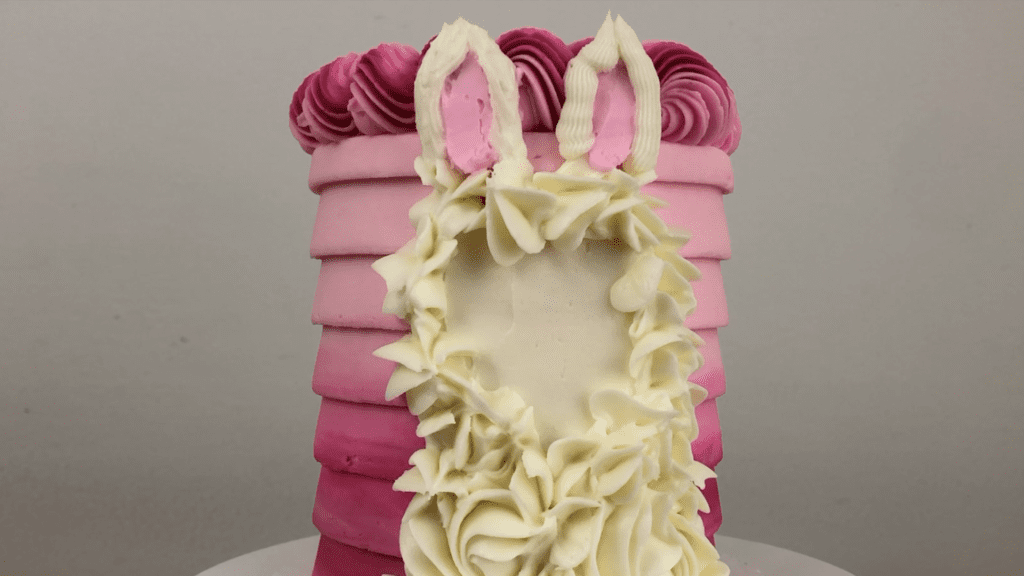
Add details like ears by piping or spreading frosting, or do both! I spread the pink frosting on first for these ears and then pipe on the white fur around them with a medium round tip, spreading it flat with a small palette knife (or you could use an
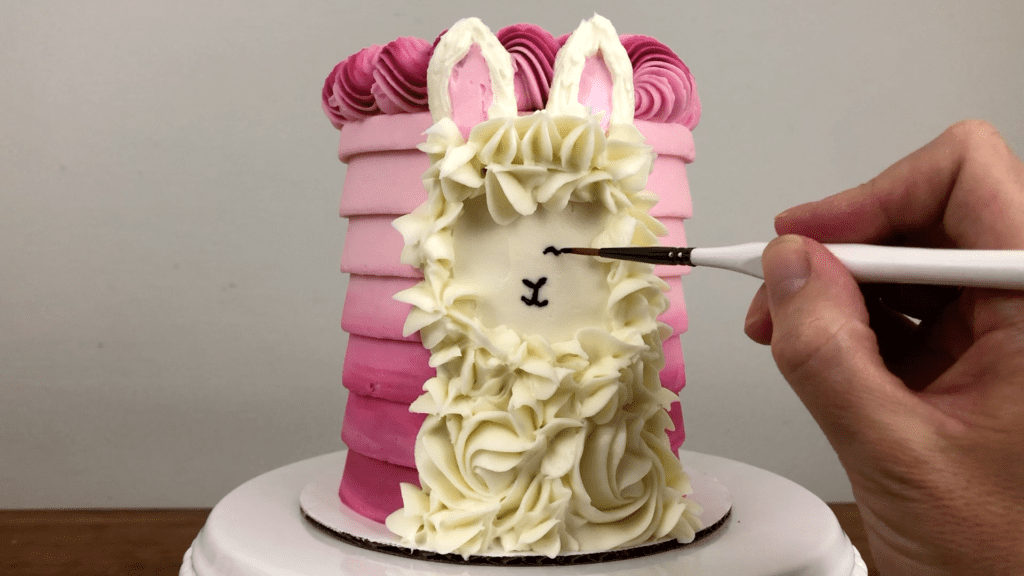
For the face, use gel food colour and a paintbrush to paint on a nose, mouth, and eyes. Using a small paintbrush will allow you to add really tiny details, like eyelashes!
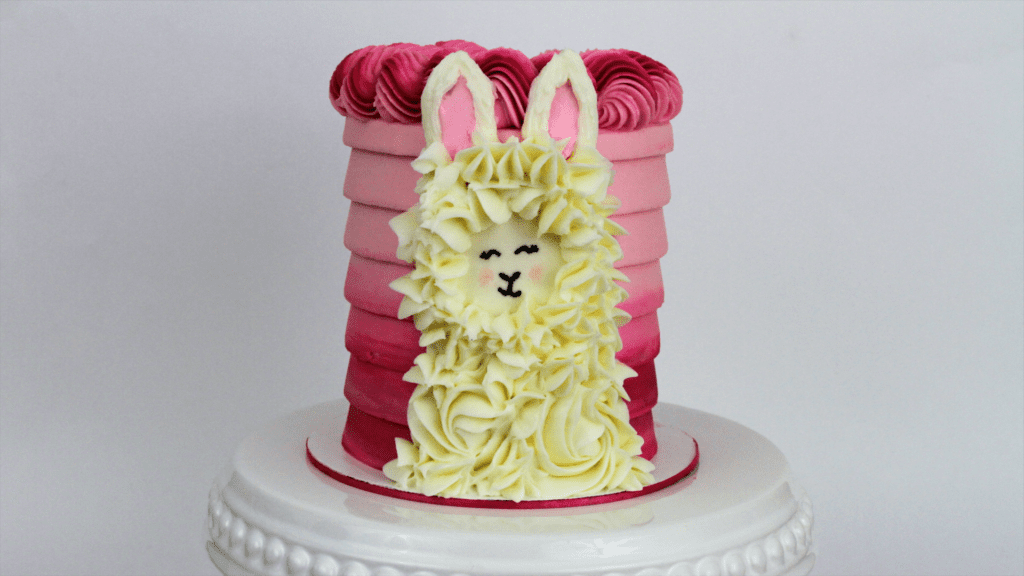
You can keep this as simple as you like. I added rosy pink cheeks to this llama by brushing on pink gel colour thinned out with vodka.
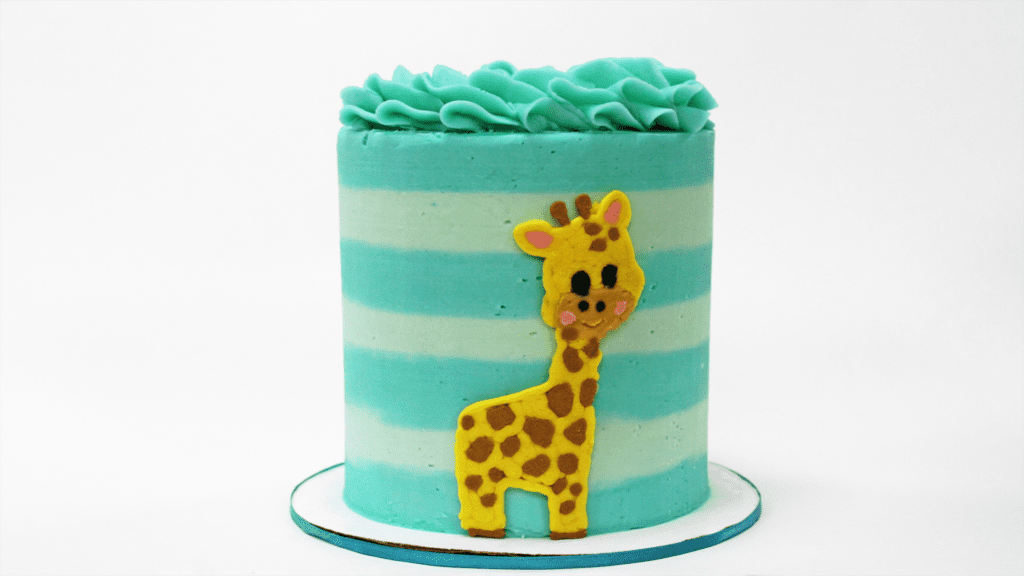
5. Pipe and transfer your animal onto a cake. By first piping it onto parchment paper you’ll create a perfectly flat shape AND it means you can trace a picture instead of drawing something free-hand. You’ll need a small round tip like a #3 or #4 to pipe the smaller details like this giraffe face, spots, and horns.
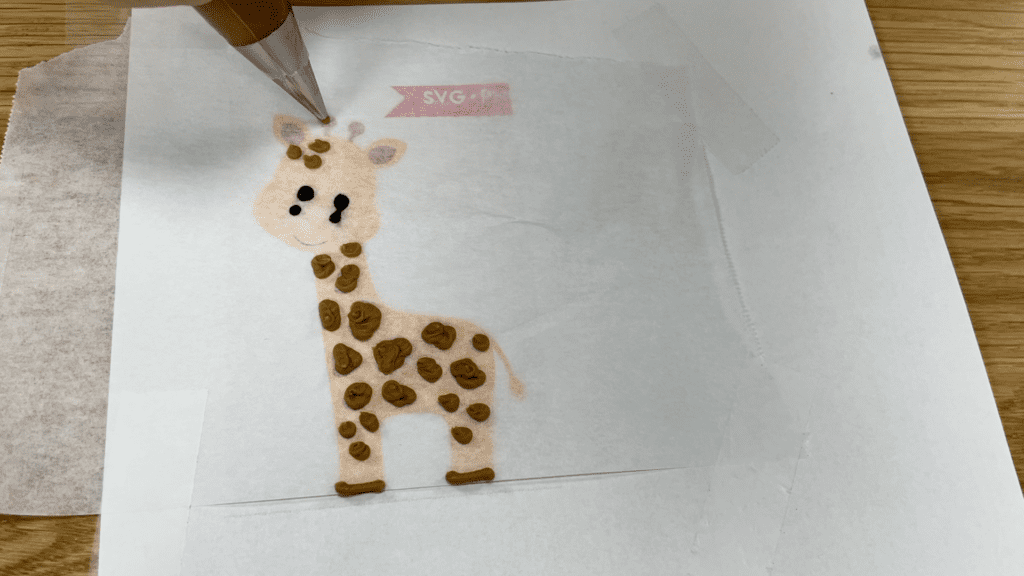
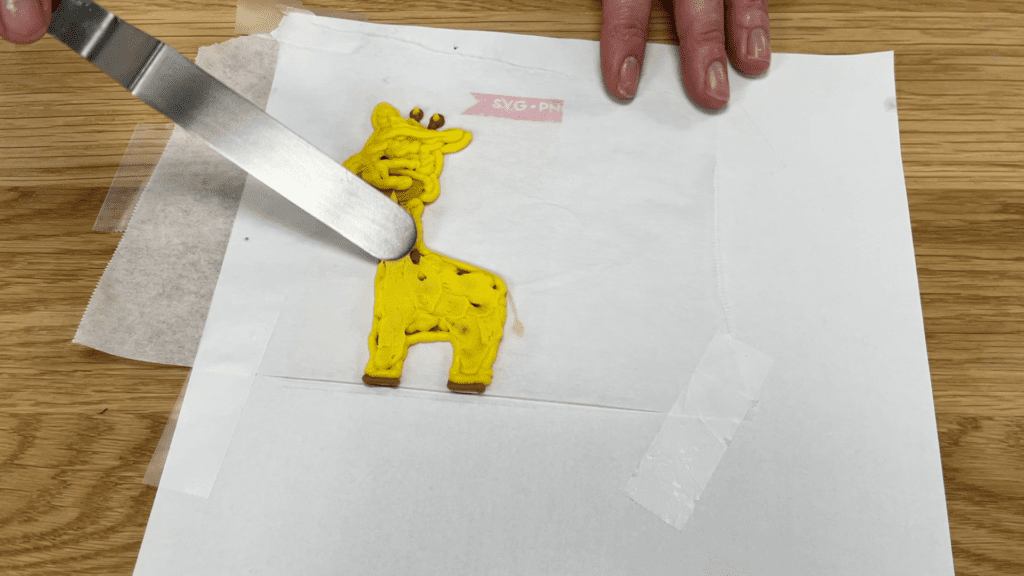
Put the parchment in the freezer for 5 minutes to set the small details and then pipe on the background colour, which is yellow for this giraffe. Spread the piping to flatten it and because the small details have frozen and hardened, you won’t blend the colours together as you spread this colour flat.
Pick the parchment up and press the piped animal against the frosting on your cake, pressing gently all over the animal and paying attention to outlying shapes like tails.
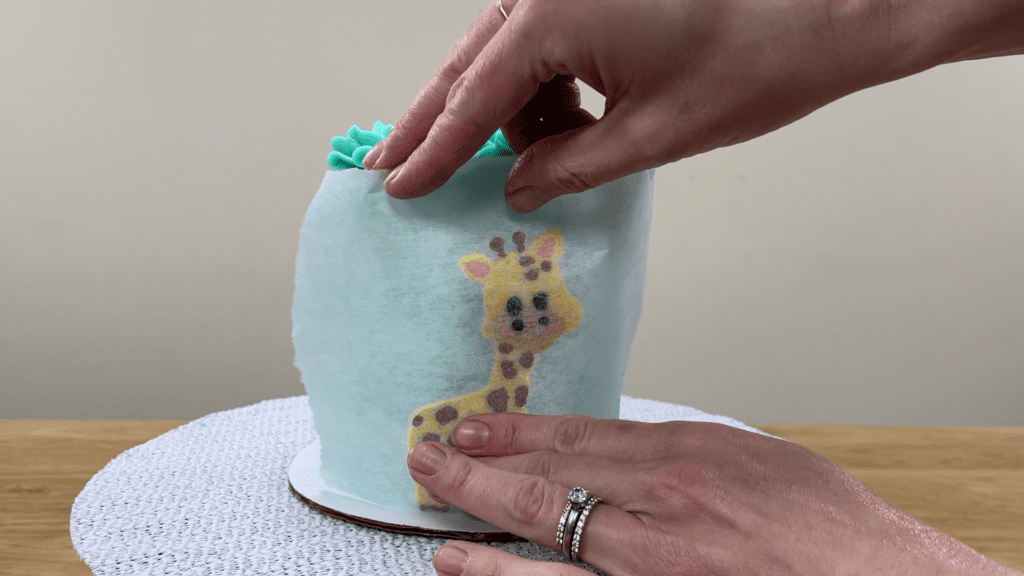
Put the cake in the fridge for an hour to set the animal. My 4 Minute Buttercream works really well for this because it gets very very firm when it’s cold. Peel the parchment off, leaving the animal behind on the cake!
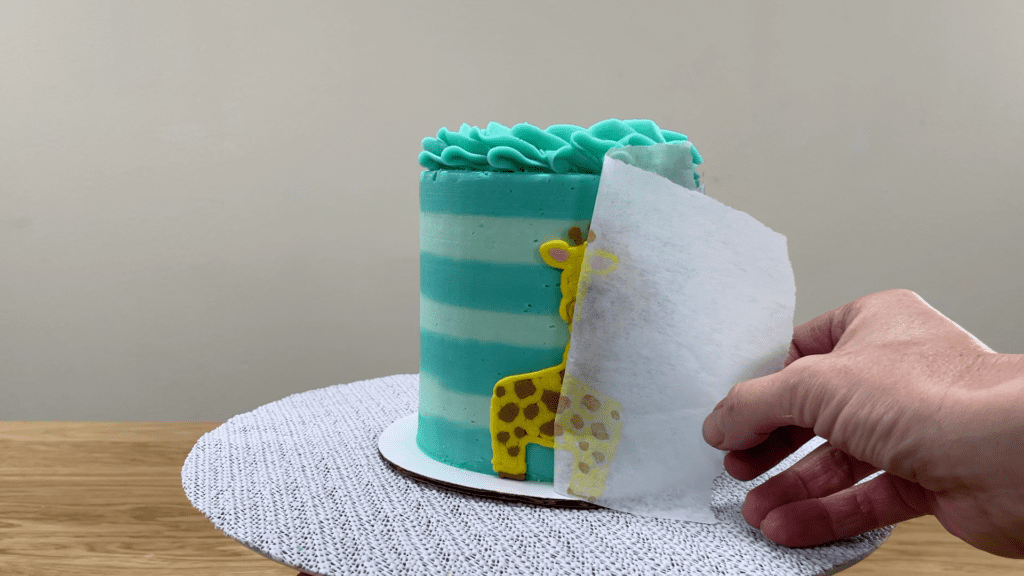
You can add more details now if you like, like painting or piping on eyebrows or other thin lines.
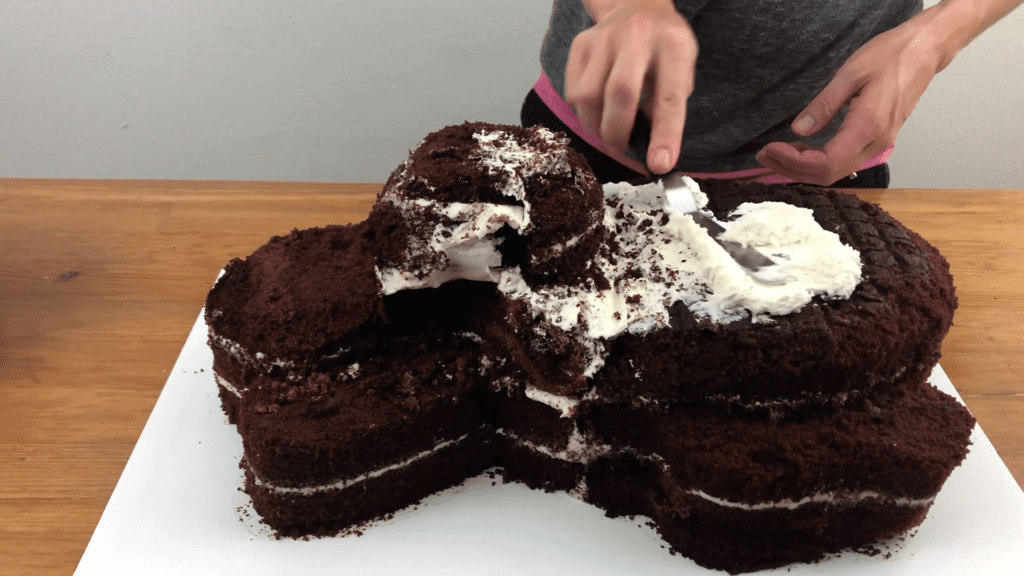
6. Sculpt a 3D animal and add buttercream fur and details. Sculpting a cake is much easier than you might think. Start by sketching your animal – either the top view, or the side view, or both for the most accuracy.
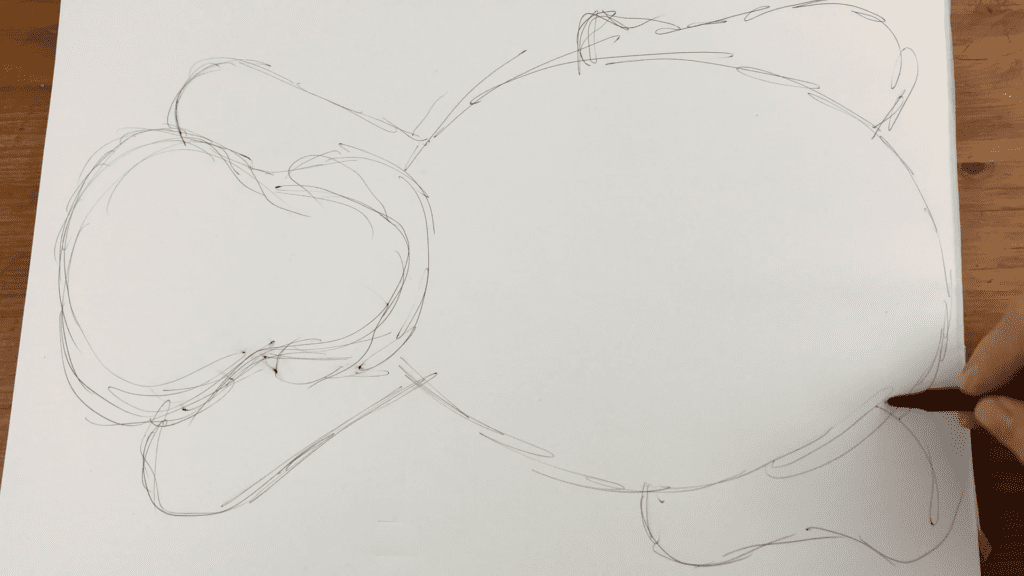
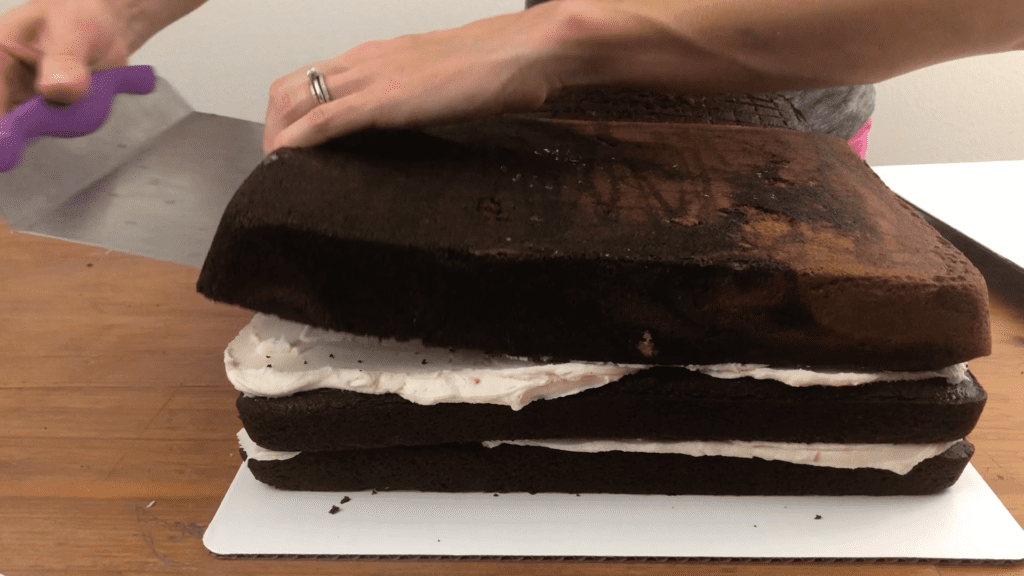
Cut the animal out and then assemble your cake by alternating cake and filling. To attach cake layers to each other, for example if you want to place them side by side, spread buttercream in between them to act as glue.
Place your sketch on the cake, either on top or hold it up against the side, and trim around it with a serrated knife like a bread knife. Save the trimmings because you’ll use them next to add the details.
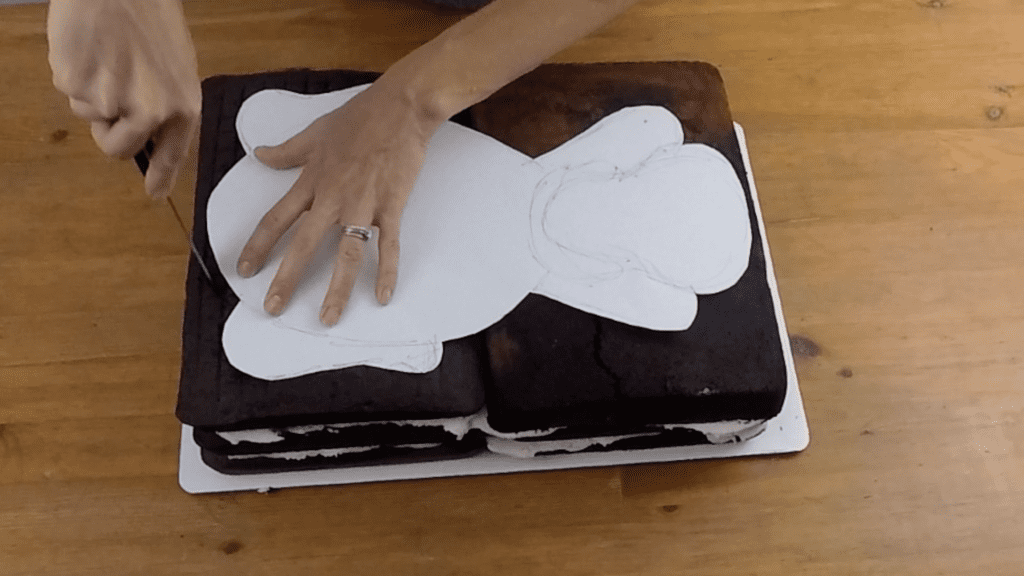
To create features like this dog’s head or hind legs, you can either use cake to add the feature or carve away some cake to leave the feature behind. For this dog, I’m adding cake to create the head but I’m carving away part of two of the corners of the cake to create the hind legs. When you’re happy with the shape, cover the whole thing in a thin layer of frosting, a crumb coat.
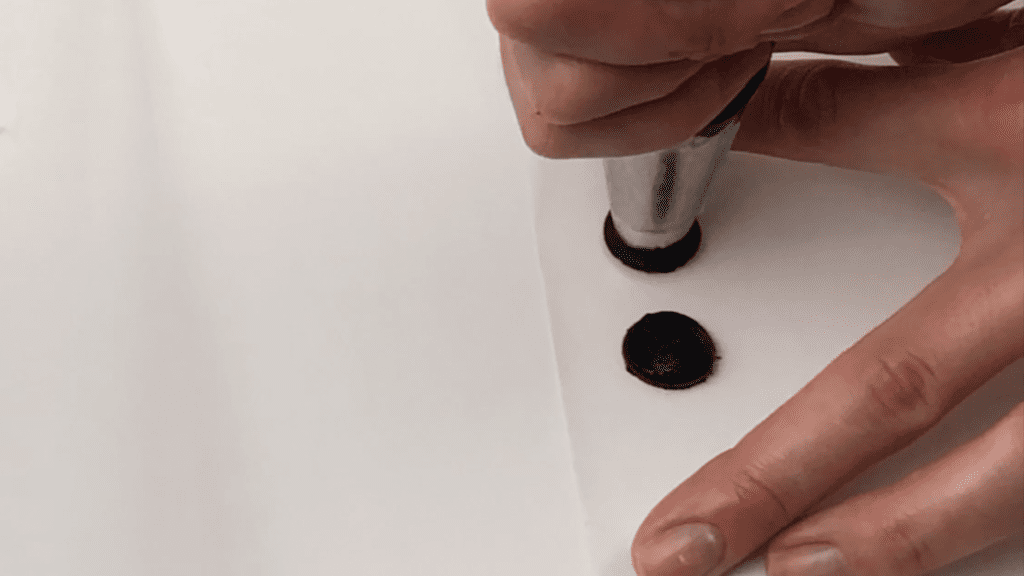
While the crumb coat sets, pipe details onto parchment paper like eyes and a nose with black buttercream. Put these in the freezer to chill and harden. You can pipe the white parts of the eyes and then attach the black pupils if you want to.
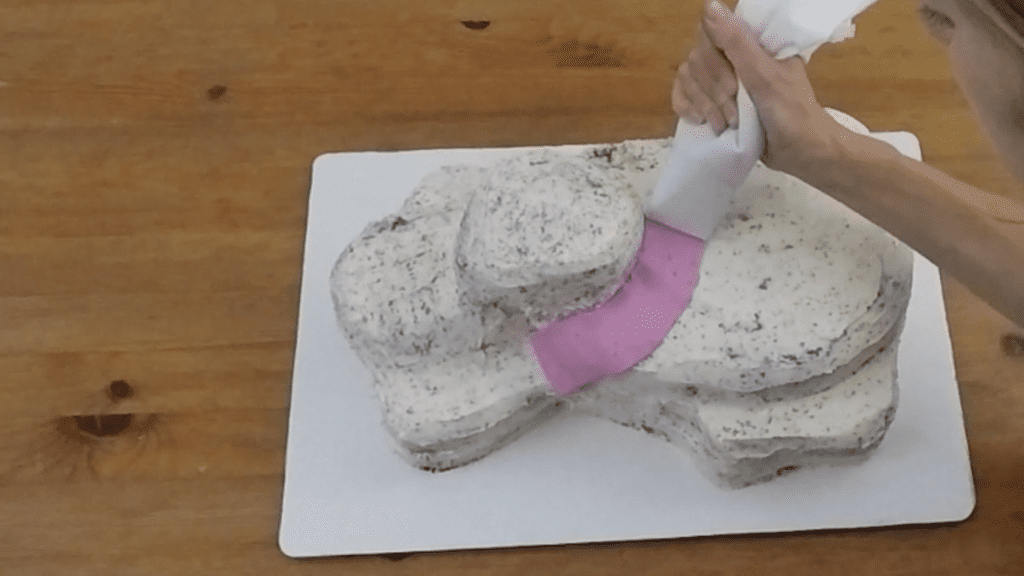
If your animal has a collar, add that before piping on the fur using a ribbon tip.
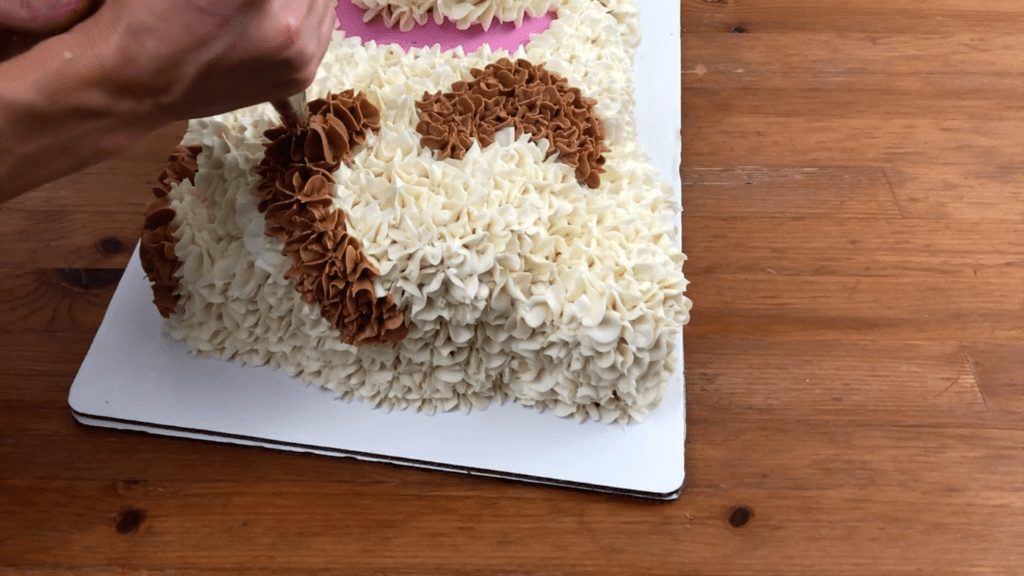
Attach the eyes once they’re frozen, sticking them onto the cake with a dot of fresh buttercream if the crumb coat has already set. Then pipe the fur on, starting at the bottom to make sure the fur goes all the way down to the cake board and then working your way up and across the animal.
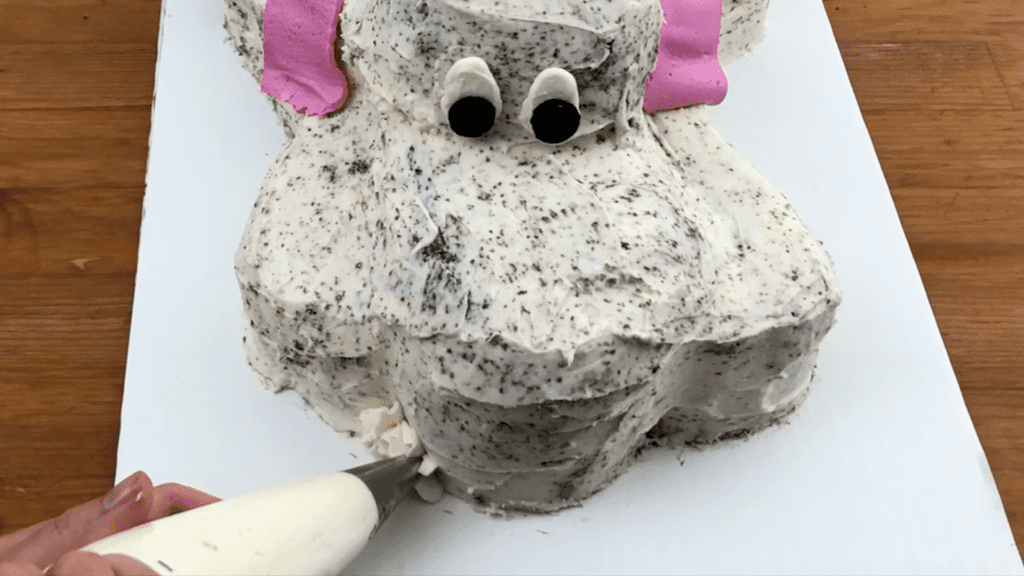
If you’re using more than one colour it’s helpful to have a piping bag and tip for each colour of frosting so you can switch between the colours easily.
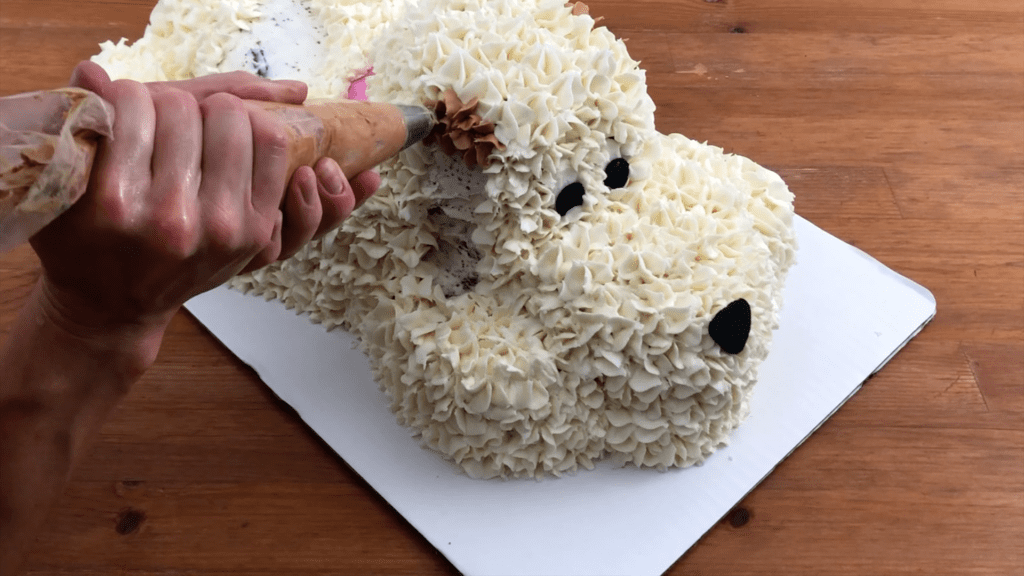
For details that you want to stick up, like the tail, pipe another layer on top to give it some height. Piping the fur is time consuming but it gives it a realistic shaggy texture.
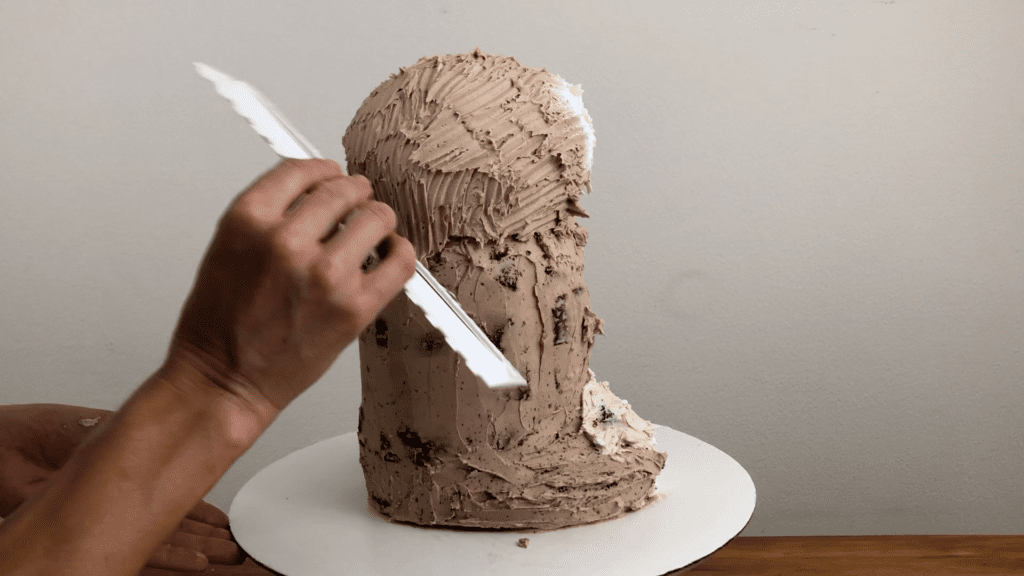
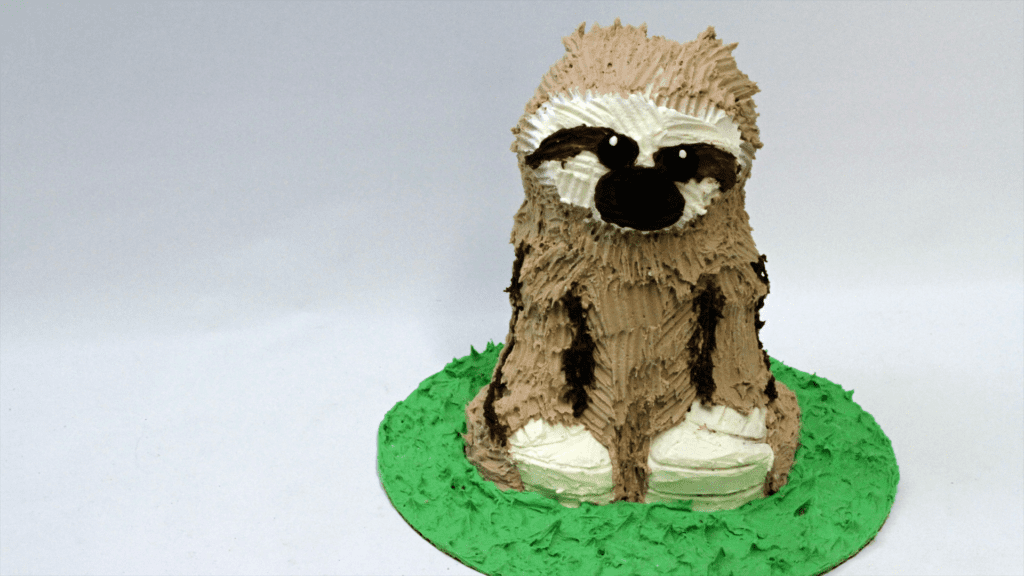
7. Sculpt a 3D animal and add textured fur with a cake comb. Using a cake comb is a quicker way to add texture to the fur than piping it. Start by sculpting your cake and then cover it with a crumb coat and a final coat of frosting.
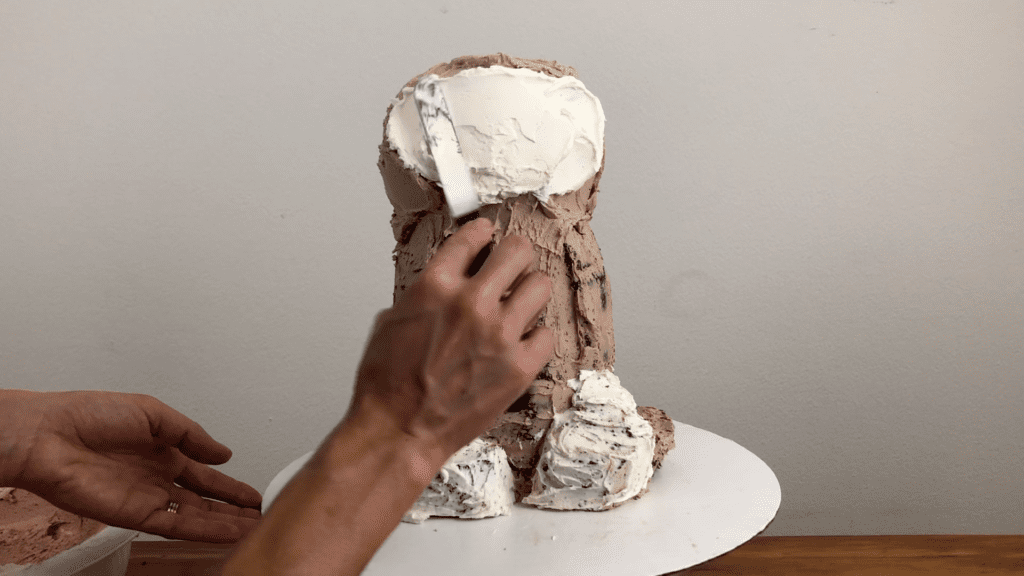
Then use a zig zag cake comb to imprint grooves in the frosting that look like fur. You could use a fork instead -iImprovise and use whatever tools you have available!
I used the same technique as I did for the dog to pipe and transfer the eyes and nose onto this sloth. I have a very detailed tutorial on how to make this sloth cake here.
8. Create an animal cake with cupcakes! If sculpting a cake looks like too big of a project, using cupcakes is a really quick and easy way to make ADORABLE little animals! Stack cupcakes to create a tall cake, piping or spreading a layer of filling in between them to attach them together.
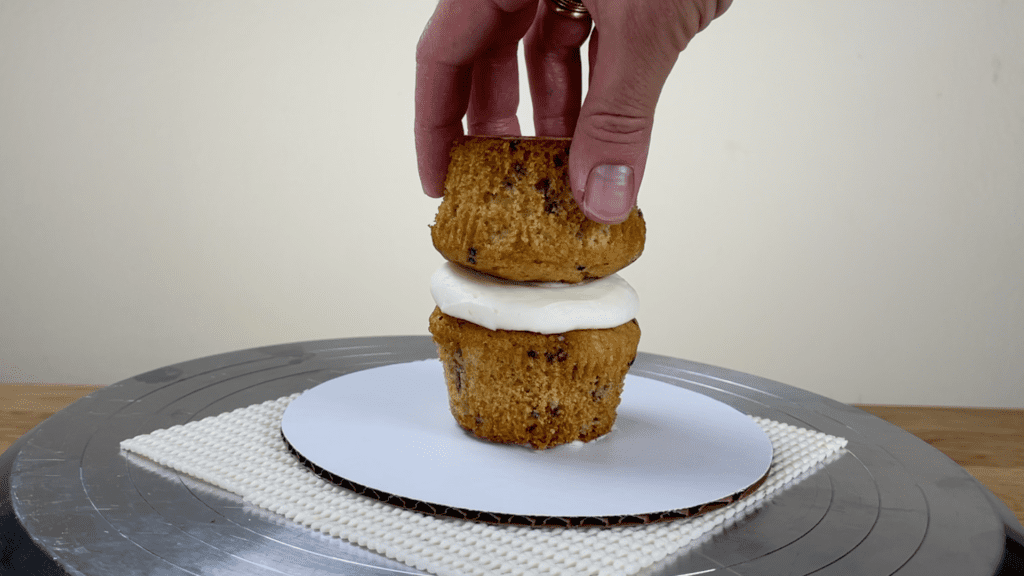
Cover the stacked cupcakes with a crumb coat of frosting to catch any crumbs and to lock the moisture into the cake.
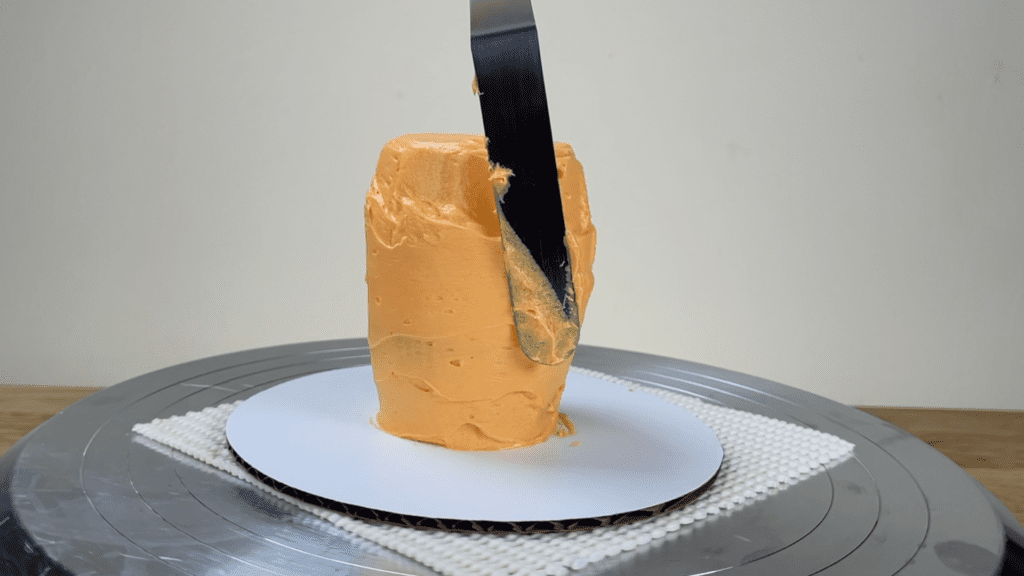
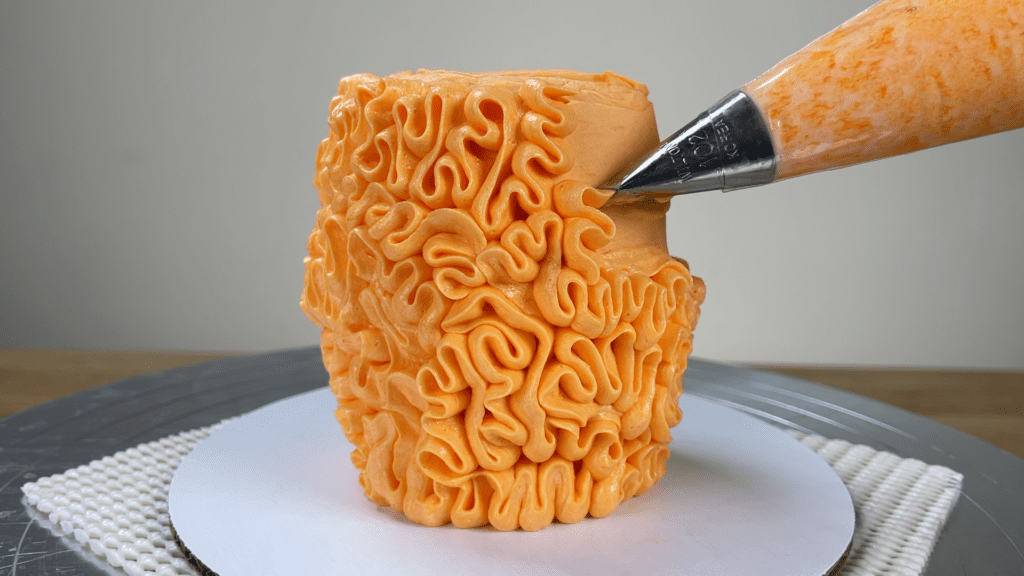
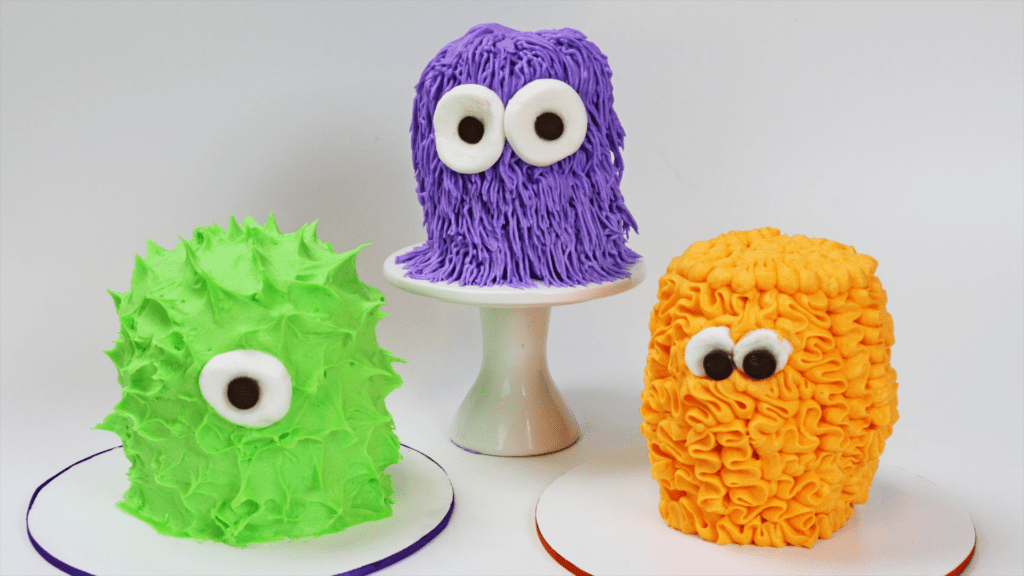
Then pipe fur onto your animal using whatever piping tip and technique you like. I’m piping these ribbons with a #104 petal tip, with the narrow end pointing outwards and the wider end pressed against the crumb coat.
Make easy eyes with marshmallows, cutting a thin piece off each end and to make it smaller, cut a circle out of it with the end of a piping tip.
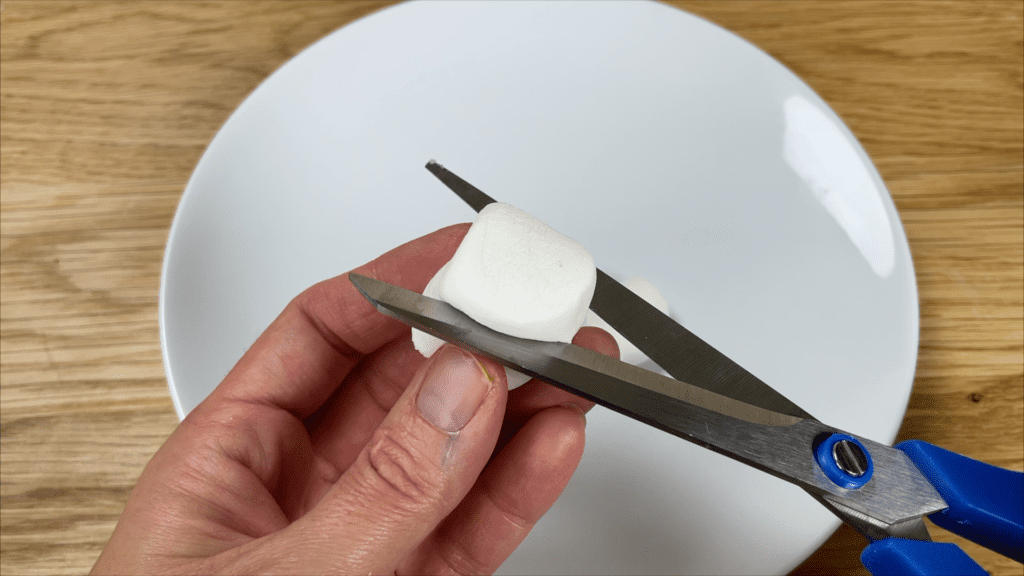
Poke a hole in the middle of each piece of marshmallow with the end of a pair of scissors and then press a chocolate chip into the hole, so that the flat base of the chocolate chip becomes the middle of the eye. Press these into the frosting fur on the cake and you have a little animal, or a monster in this case!
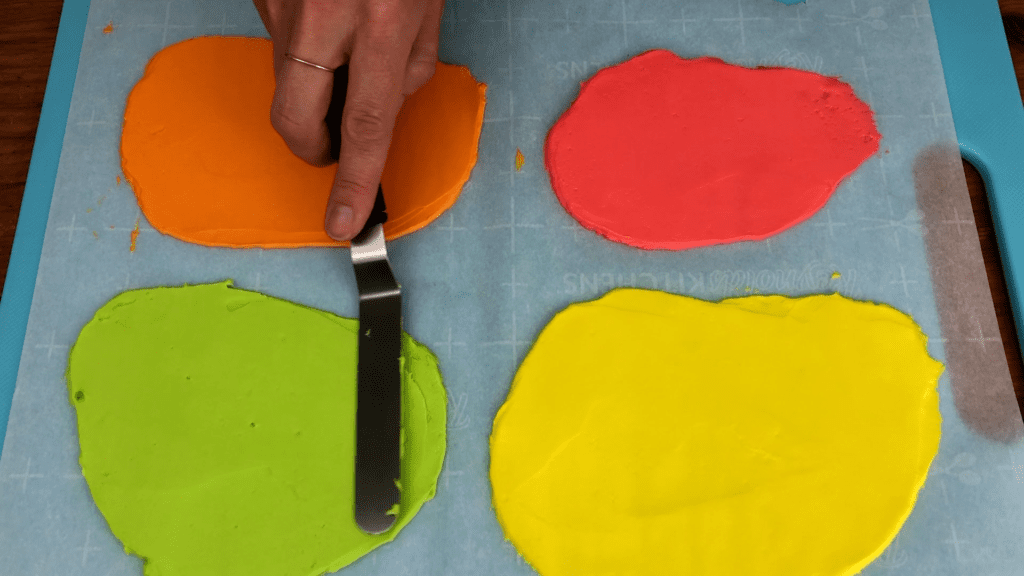
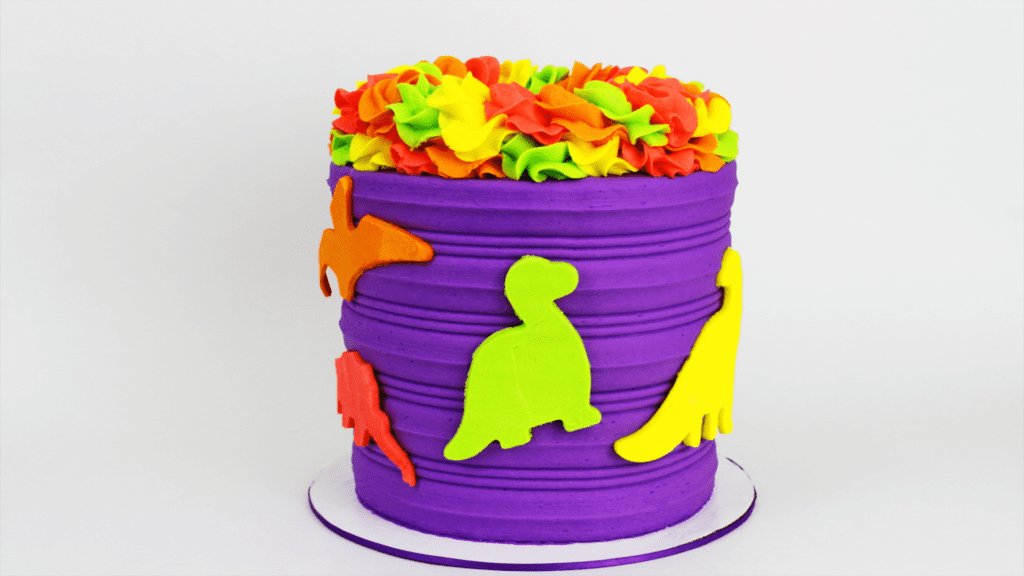
9. Cut your animals out of buttercream. Spread coloured buttercream onto parchment as thinly as you can and smooth it with your
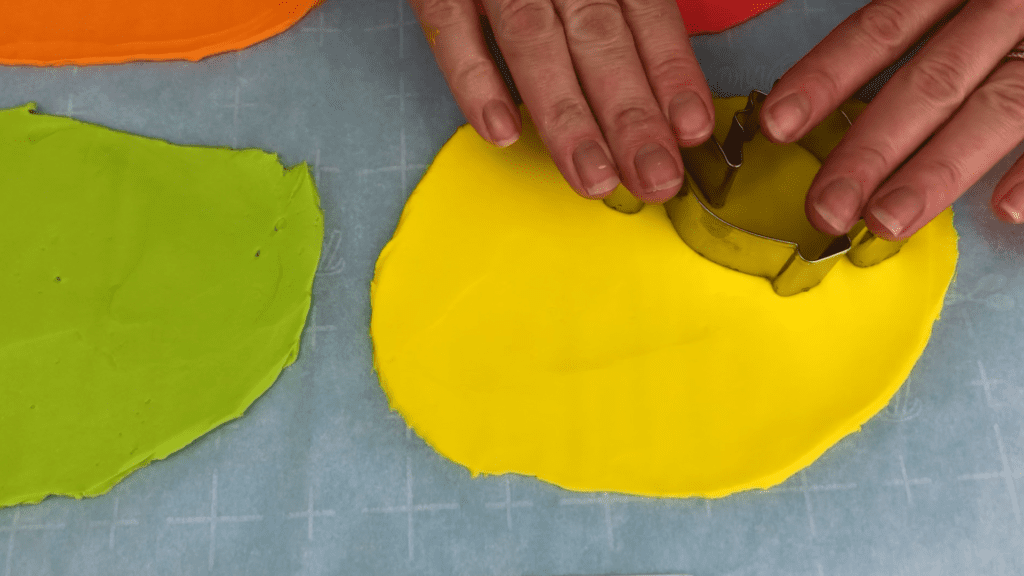
Use cookie cutters to cut shapes out of the frozen buttercream. You can cut simple, angular shapes out with a sharp knife but for more detailed outlines it’s much easier with a cookie cutter. .Pull away the surrounding buttercream, freeze the shapes for another 5 minutes so they get very hard again, and then lift them up and press them into the frosting on your cake
You can curve the shapes around the cake by wrapping them with parchment paper and then let the cake sit at room temperature for a few minutes so that the buttercream shapes start to warm up and soften, Then you can press them gently through the parchment paper to wrap them around the cake so that they sit flat against it.
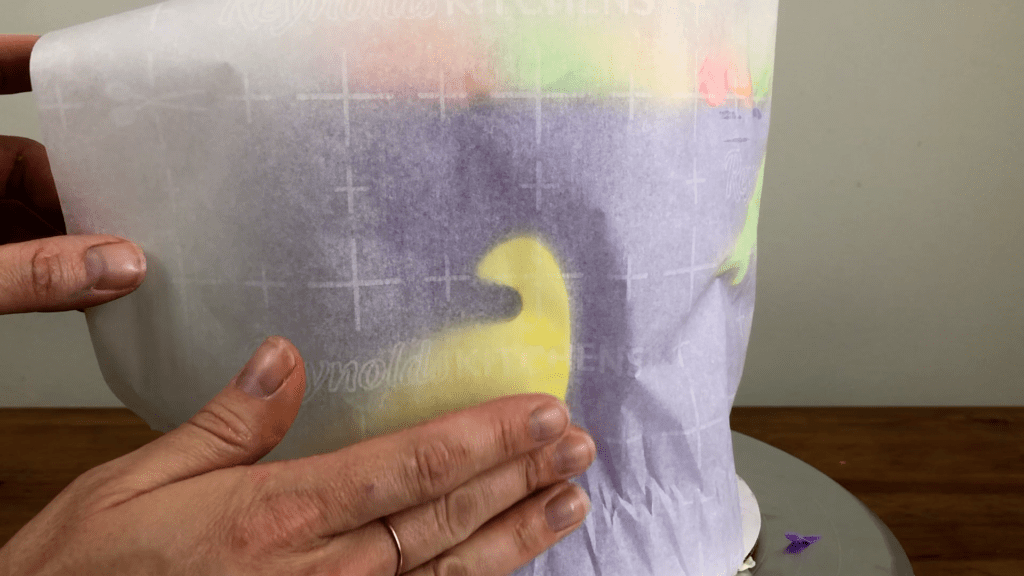
Put the cake in the fridge or freezer for a few minutes for the shapes to harden again and then peel the parchment paper off!
10. Add animal features to a cake using chocolate. To create an animal by adding its features to a plain round cake, melt candy melts and spread them onto parchment paper. You can use white chocolate instead, melting it and then addding oil based gel colours to tint it. Spread the chocolate onto parchment paper as thinly as you can and smooth it with your
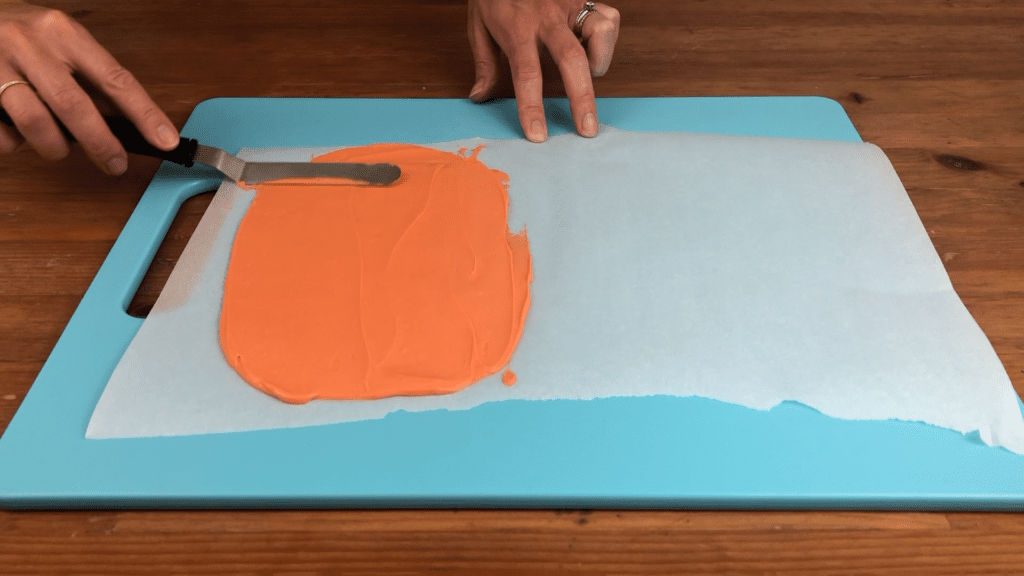
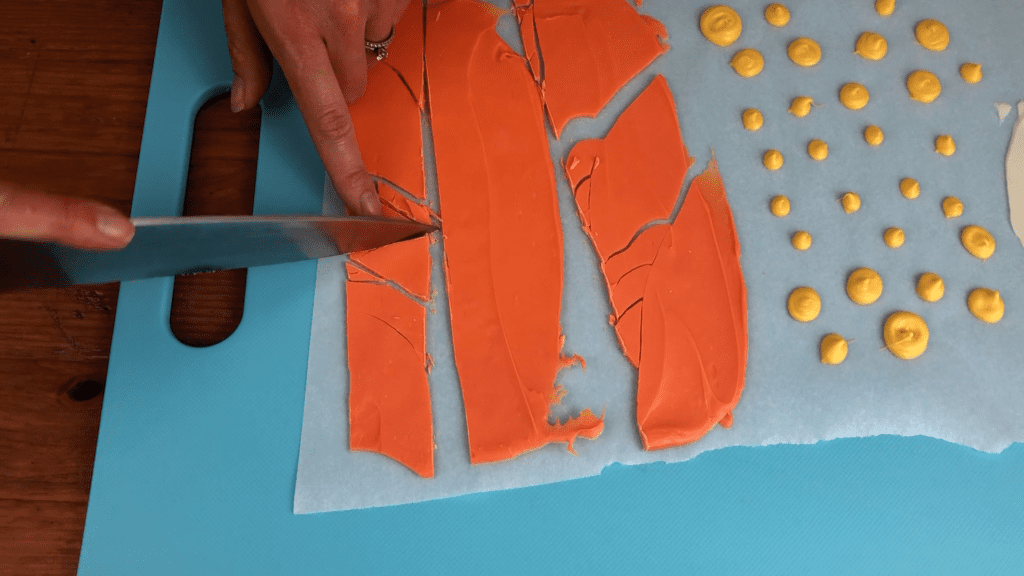
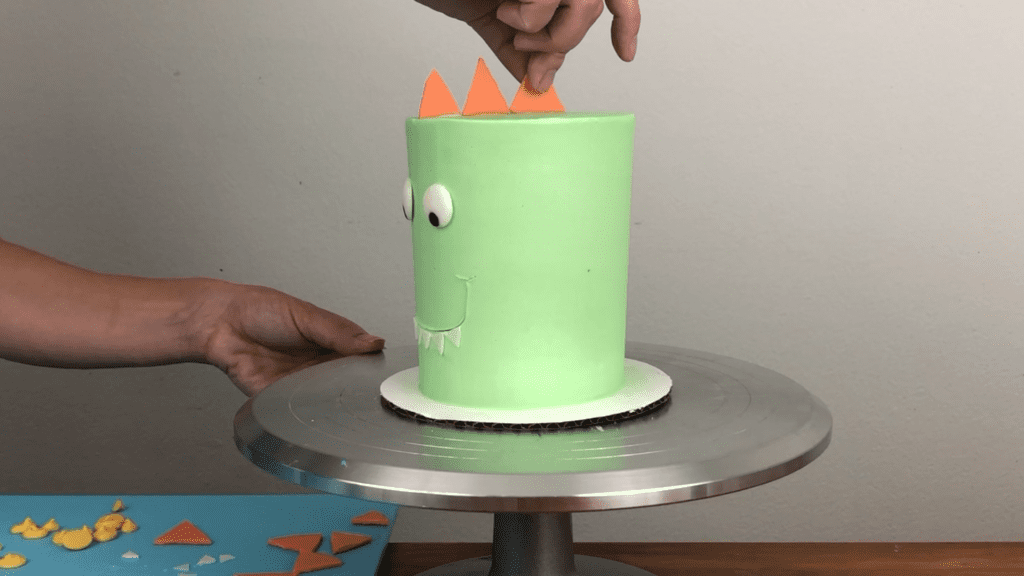
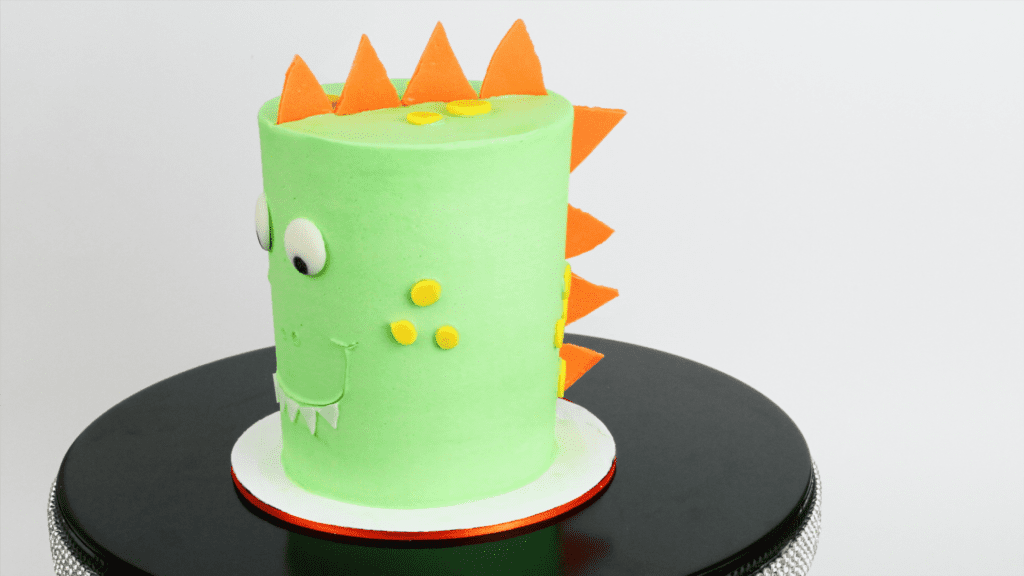
Freeze the chocolate for 5 minutes and then use a sharp knife to cut out the pieces you need. I’m cutting out large orange triangles to create dinosaur spikes and I’ll also cut out small white triangles to be teeth. I’ve piped yellow chocolate dots to make spots on the frosting of my cake, which will be the dinosaur’s skin.
To make eyes, pipe two white chocolate circles or use discs of Candy Melts. Use an edible black pen to draw on the pupils or use a paintbrush and some black gel colour.
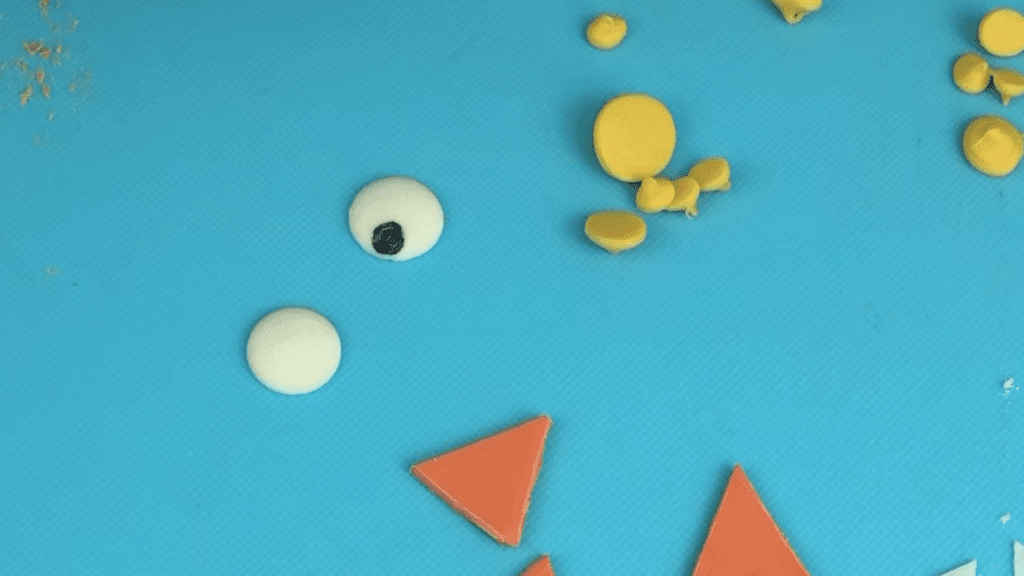
Frost your cake and immediately afterwards, while the frosting is still soft and sticky, press the features into the frosting. You can draw details like a smile with a sharp knife in the frosting.
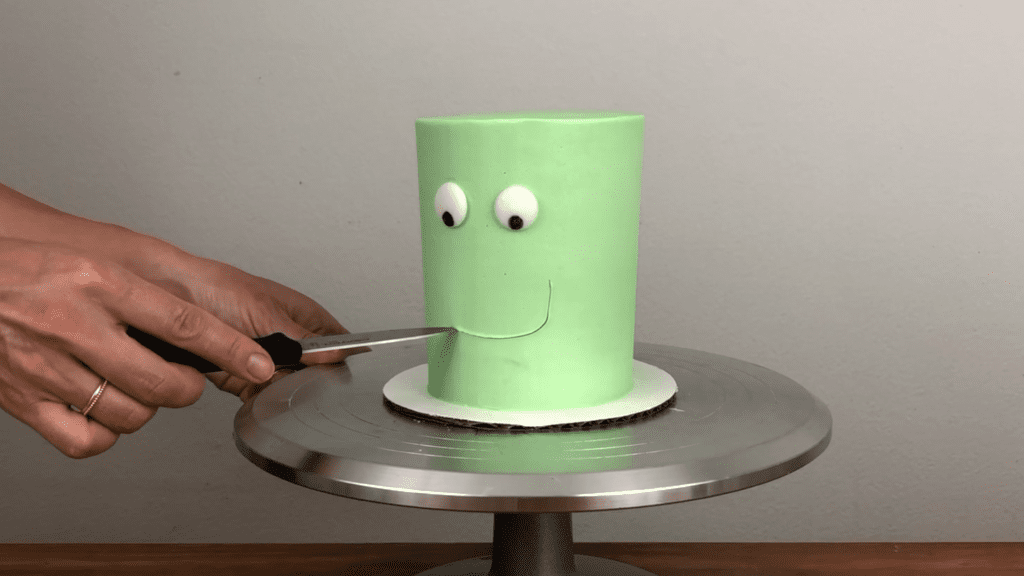
The chocolate details will stick to the fresh frosting and when the frosting sets, it will secure them in place. This technique is quicker and easier than sculpting a cake but it’s just as cute!
I hope this tutorial has given you some fun ideas to try! Please tag @britishgirlbakes in your photos on instagram so I can see your creations! If you’re looking for inspiration, join my Club+ for access to ALL of my online classes and courses as well as live online classes and Q&A sessions for members only!
Here’s the video version of this tutorial:

Excellent tutorial, love the purple cake with the cut out animals, will try this out.
Fantastic! I'm excited for you to try it out!
Which piping tip was used for the brown & white dog?
Any star tip would work but I used a Wilton 1M tip. The prongs are long and quite wide apart so it makes a very shaggy texture
The cake ideas are to hard for kids
They're not intended to be done by kids alone but I'm sure they'd enjoy making them together with you!