Everything on social media looks like it's an easy cake decorating idea but they’re usually trickier in reality. In this tutorial I’ll show you 10 techniques that really are easy no matter how much experience you have!
This first easy cake decorating technique uses a spoon and you could even do this without a
If you don’t have a
If you have a
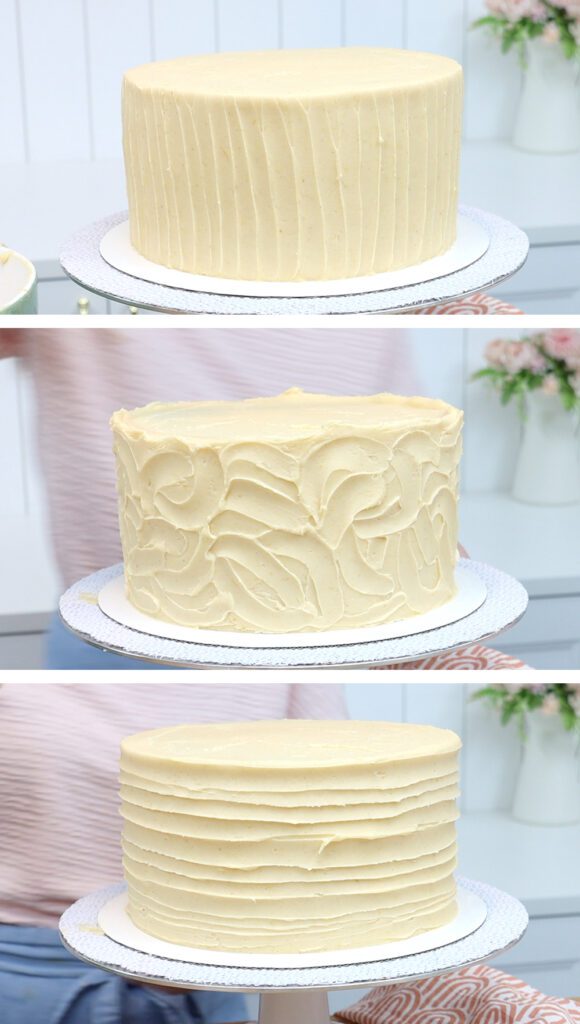
All of these textures make the cake look more interesting and mean that you don't need to perfect smooth fro
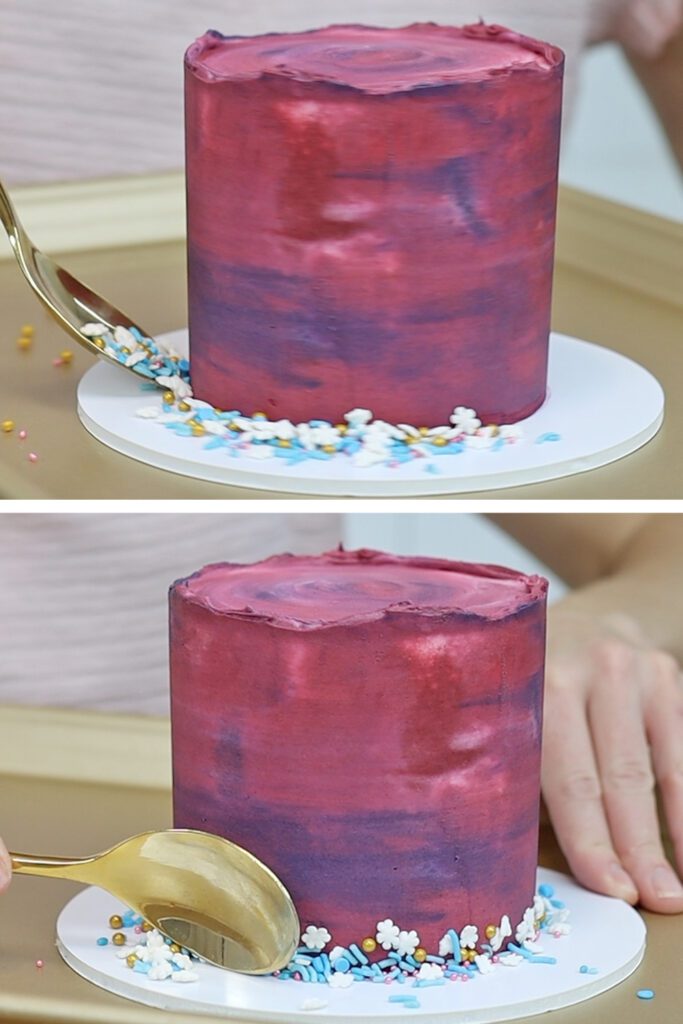
For quick and easy colour, choose a few different sprinkles: different shapes, colours, sizes… and mix them together. Put your frosted cake on a tray and spoon or pour your sprinkles around the cake. The ray will catch any sprinkles that roll off the cake board so they don't fall onto the floor. Push the sprinkles into the bottom of the cake with the back of your spoon to make a pretty border!
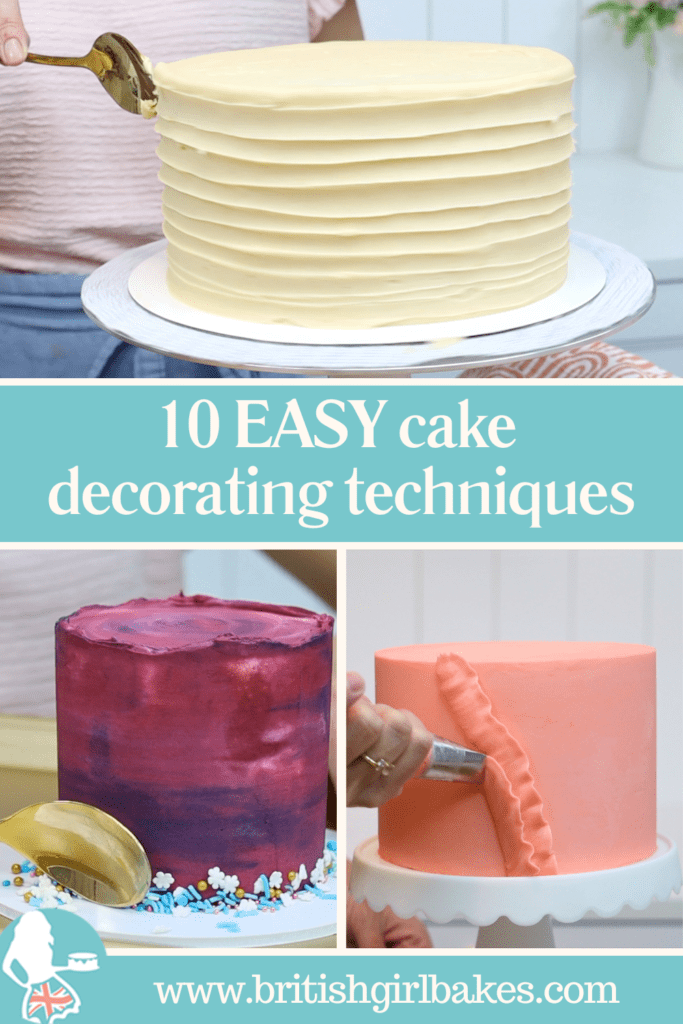
Here's the easiest way to pipe neat swirls onto the top of a cake! Drop a star shaped tip like a 1M or 2D into a piping bag and spoon buttercream into the bag. Twist the top of the bag so that it’s pushed tight against the buttercream. This means you don’t need to squeeze as hard to pipe so your hand won’t get tired or crampy! Pipe a ring of buttercream and then overlap that ring with another one right on top. Then stop squeezing the bag and pull away. Pipe the next swirl in the same direction (I always go anti-clockwise or counter-clockwise) and then pull away in the same direction as the previous swirl. This way all of your swirls will be uniform.
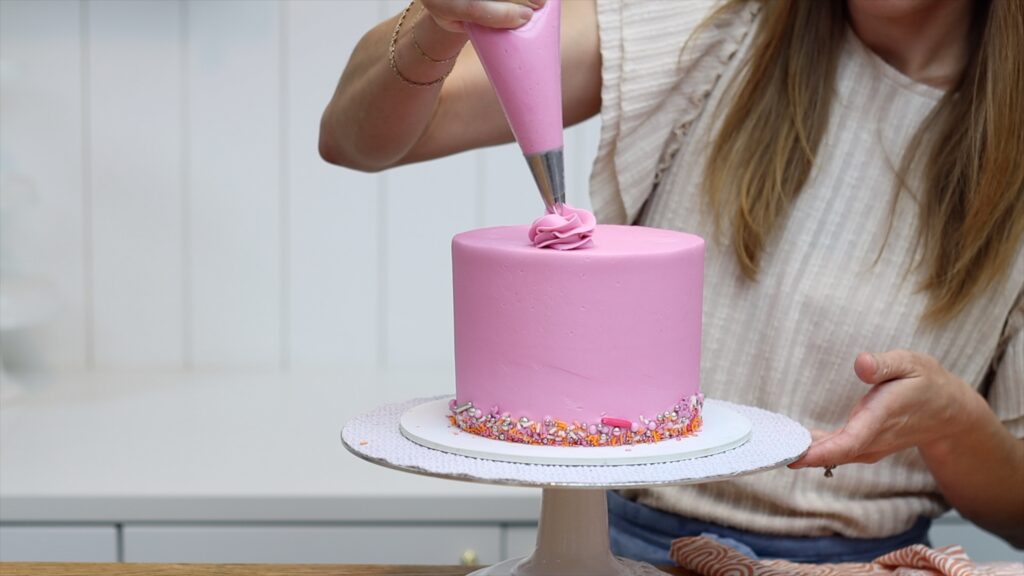
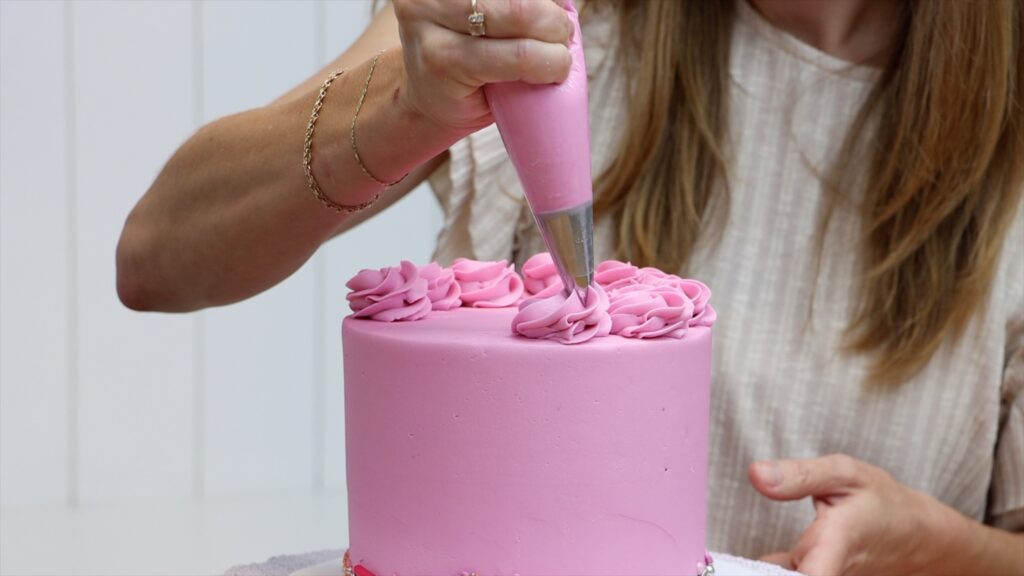
It’s much easier to make these short swirls look neat than taller swirls. Tall swirls tend to lean to one side and be different heights to each other. Also, these short swirls give the cake some height without adding a huge amount of buttercream to each slice!
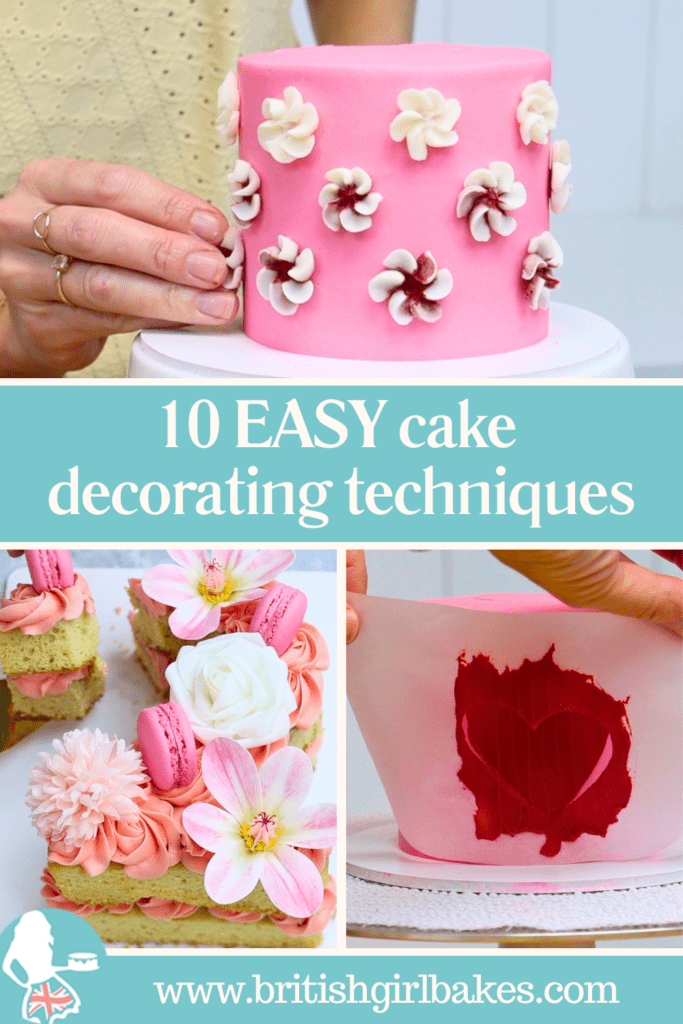
For the easiest flowers that also happen to be my favourite, use a closed star tip like a 2D. Layer different colours of buttercream in the piping bag to make multicolored flowers that will change colour. Line a cutting board with a piece of parchment or wax paper. Hold the piping bag down with the tip of the piping tip resting down on the paper. As you squeeze the bag to pipe, twist your wrist to make the buttercream fan out sideways to make petals. Piping down onto this flat surface is much easier than piping straight onto the curved side of a round cake.
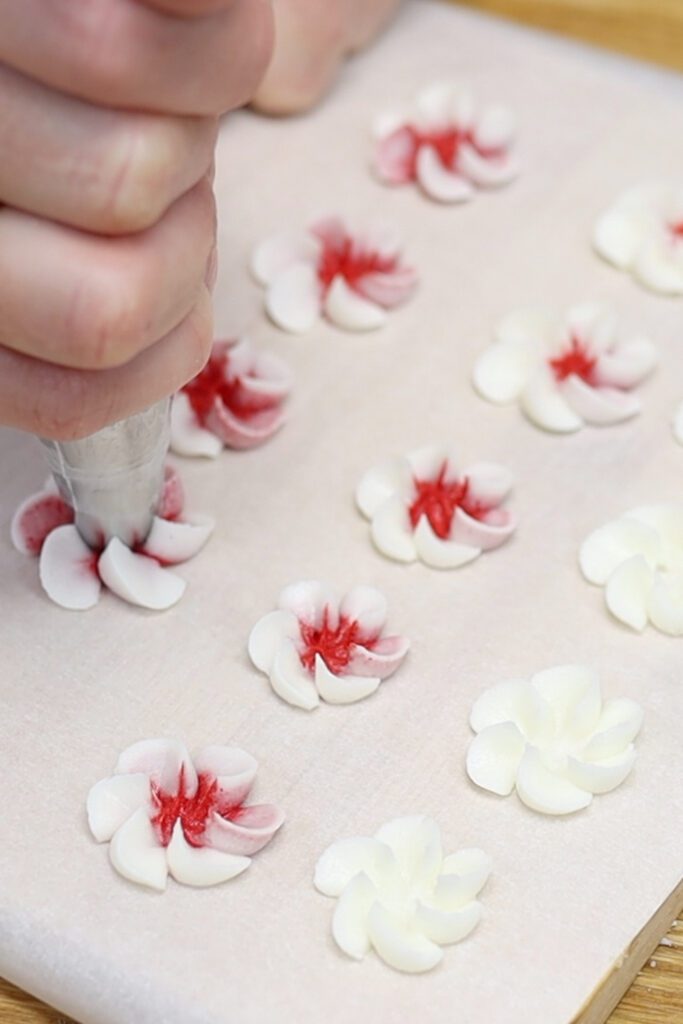
As you pipe, the higher up colours will push through the lower down colours in the piping bag. You’ll see the colours of your flowers gradually change!
Put the flowers into the freezer for 5 minutes to get cold and hard. Then pick them up and press them onto your cake. If the frosting on the cake has set, spread buttercream or melted chocolate as glue to attach the flowers.
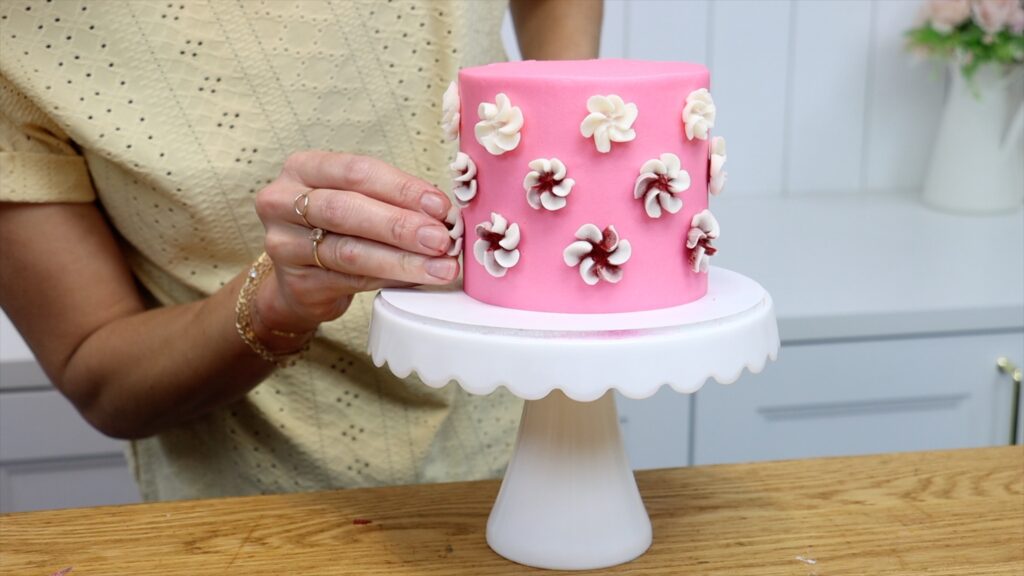
Since you’ve piped the flowers onto paper, you can choose only your favourites to add to your cake. I love the way the red comes through the flowers more and more as you go down the cake!
Ombre frosting starts with a single bowl of coloured buttercream. Add more colour or some plain white buttercream to make a few darker or lighter shades. You’ll blend these together on the cake. Spread the colours around the cake with the darkest on top and the lightest at the bottom, or the other way around. This is one of the techniques I teach in my FREE online course 10 Frosting Techniques.
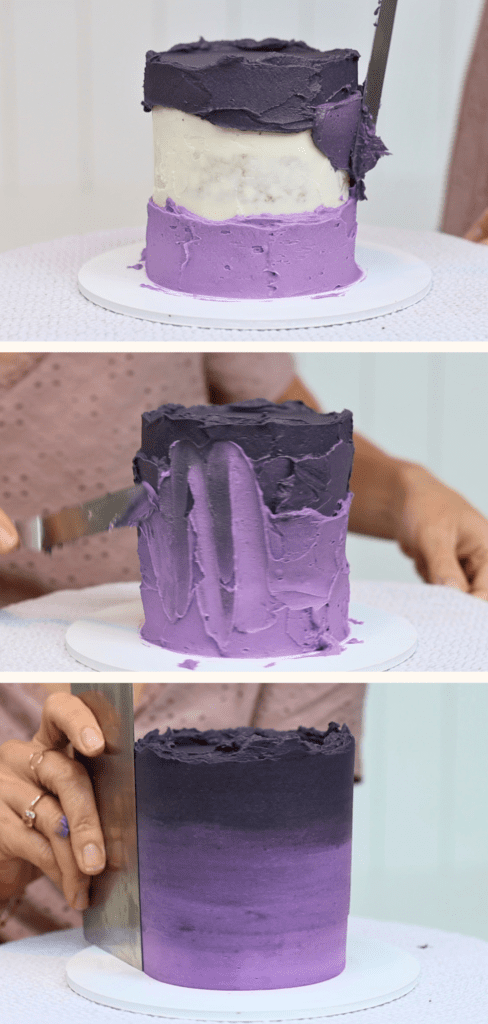
Wiggle your offset spatula to make zig zags in the frosting to blend the colours together slightly. This will create a gradual ombre instead of distinct bands of colour like stripes. There result is so simple but stunning!
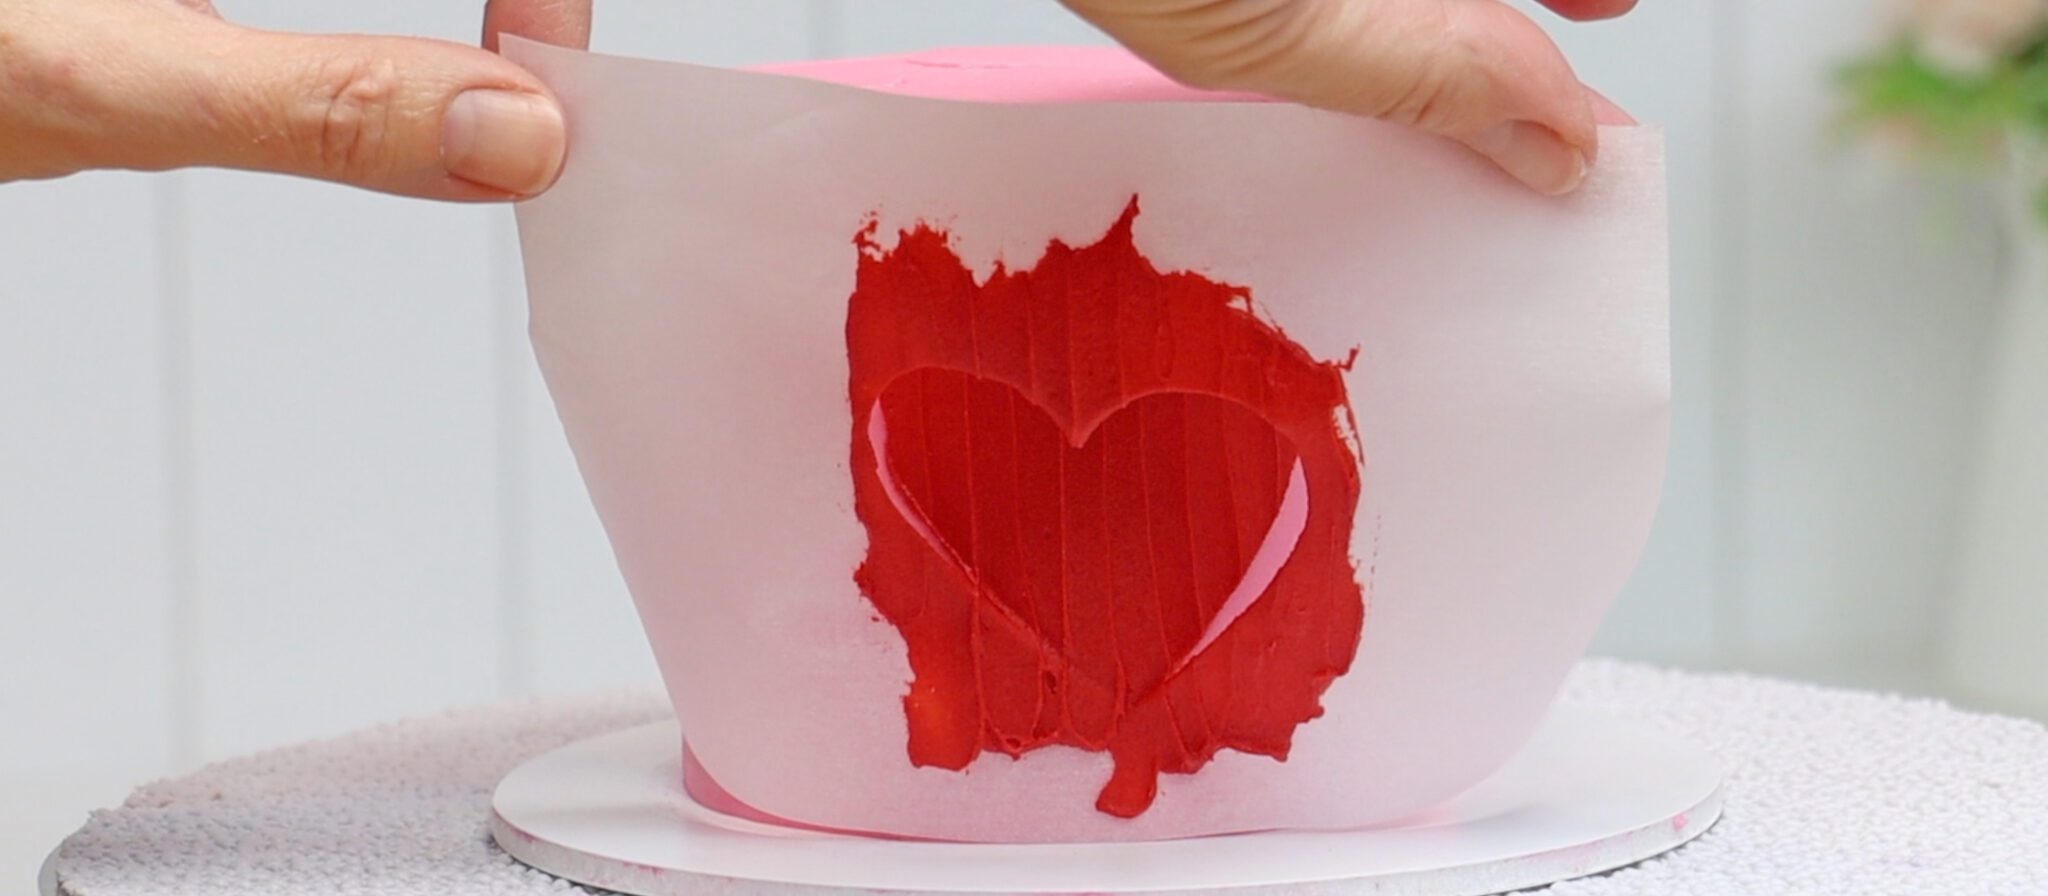
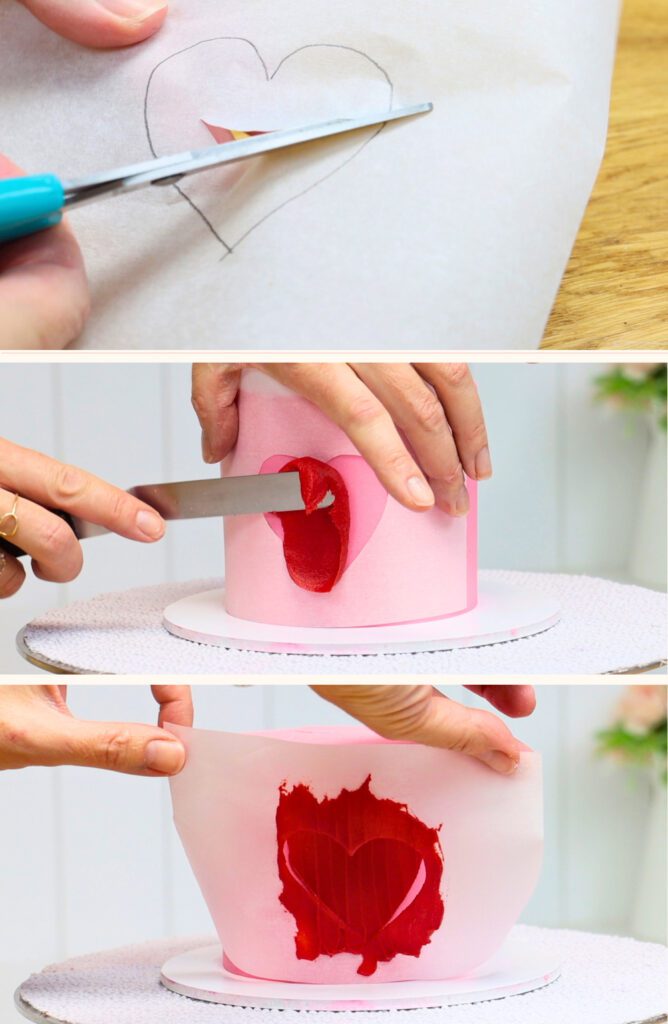
Make your own cake stencils by drawing a shape onto parchment or wax paper. Use a pencil because pen doesn’t write well on the surface of this paper. Cut the shape out by snipping the middle, poking one scissor blade through that hole and then cutting around the shape. Keep the paper around the shape intact because that will be your stencil.
Chill your cake in the fridge for at least an hour so that the frosting is cold and firm, not sticky. Then wrap the stencil around the cake. Spread buttercream over the stencil, pressing against the stencil to hold it in place. Smooth this frosting with your offset spatula or a cake comb. Or add some texture by pressing gently and dragging your spatula or a spoon upwards. Then peel the stencil off and voila!
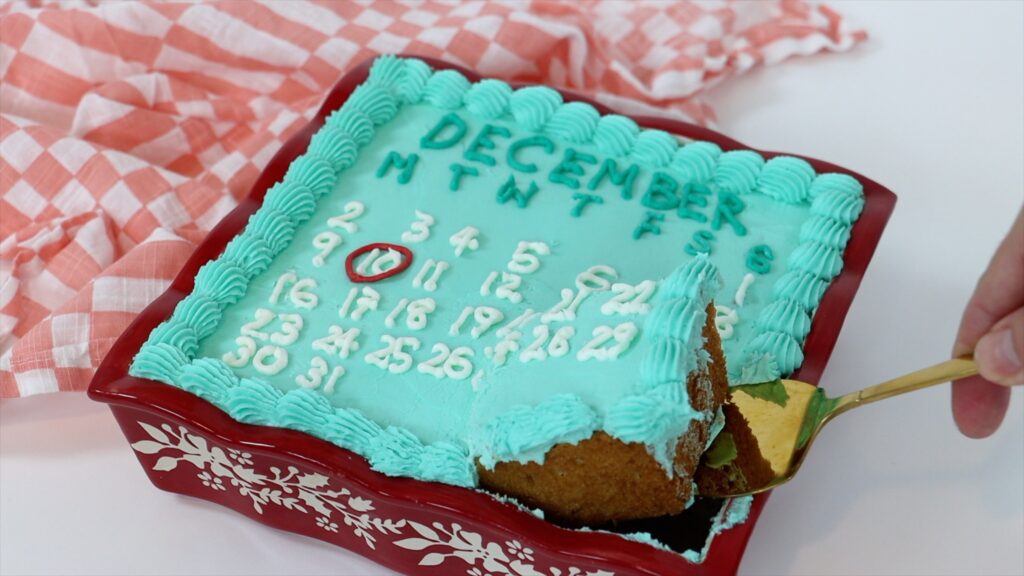
For the quickest cake, bake the cake in an ovenproof dish and then frost and decorate it in the dish. The easiest way to decorate these is to cover them with lots of texture using different piping tips and colours. If you don’t have piping tips you can just spread frosting onto the cake instead, smoothing it with the side of your
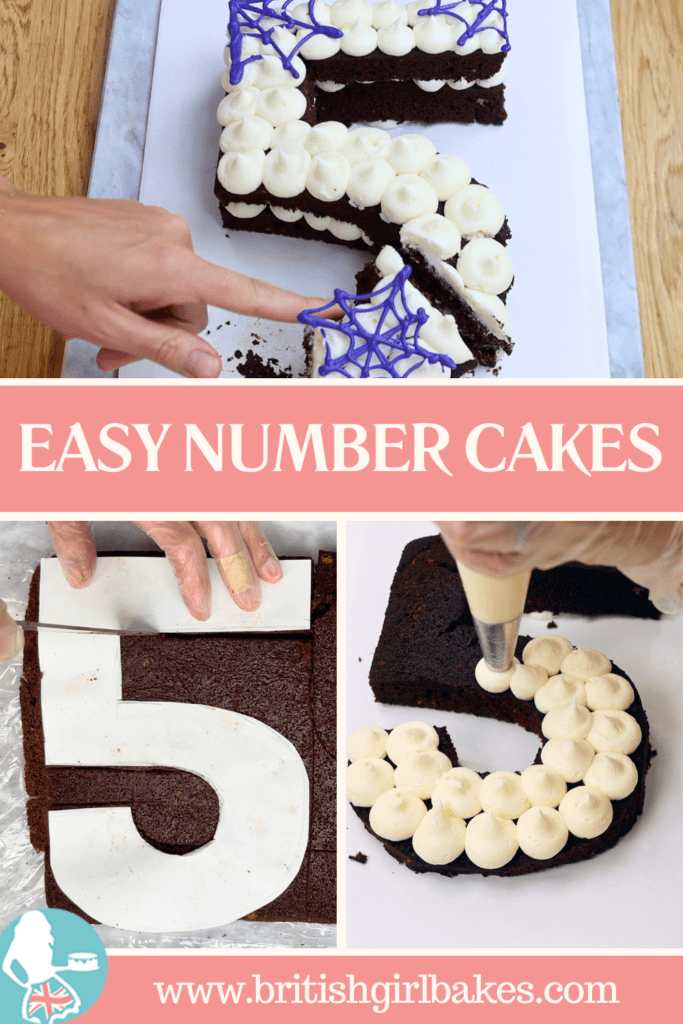
One of my favourite easy cake decorating ideas for a birthday cake is a number cake. Cut the birthday number out of a sheet cake twice so you have two identical numbers. Use blobs of buttercream to attach one of the numbers to a cake board or plate or platter. Then pipe buttercream on top. I'm using a 1A round tip for this cake but you could pipe rosettes or swirls using a star shaped tip instead. And of course you could use coloured buttercream instead of plain white.
Lower your next cake layer down, positioning it on top, and then add another layer of piping. Buttercream is best because softer frostings like whipped cream will get squashed by the top number cake. Decorate this with flowers or chocolates or candies or cookies or fruit or whatever you like!
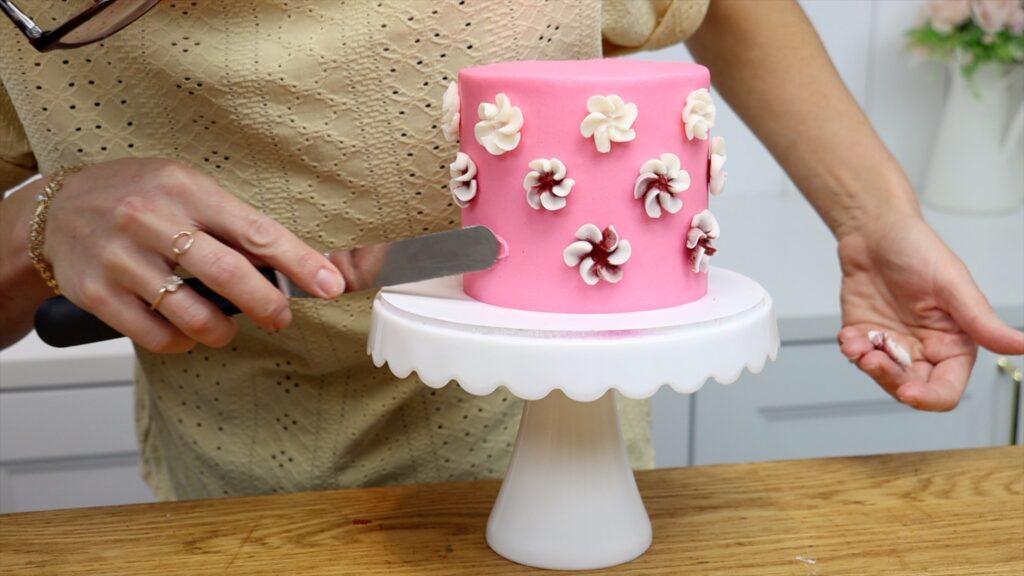
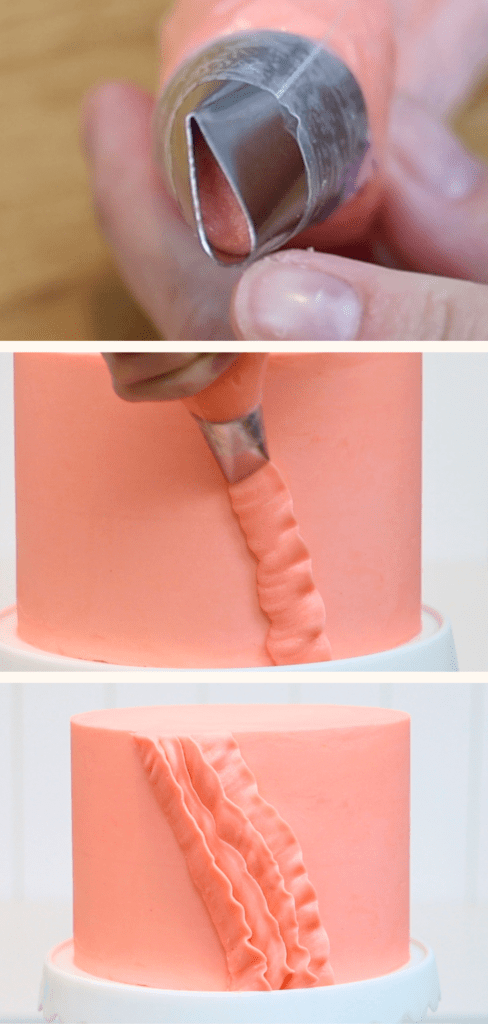
For pretty textured details in seconds, use a petal piping tip and any buttercream left after frosting your cake. Press the wide end of the piping tip against the cake with the pointed end facing away from the cake. Start at the bottom of the cake, squeezing the bag to push the buttercream out. Pull slowly upwards, wiggling a little bit to make these ruffles.
These ruffles are quick and easy and look so pretty. Overlap a few of these to make a little accent, or cover the whole cake with layers of ruffles! This is another technique I teach in more detail in my FREE online course 10 Frosting Techniques, which over 20,000 people have taken!
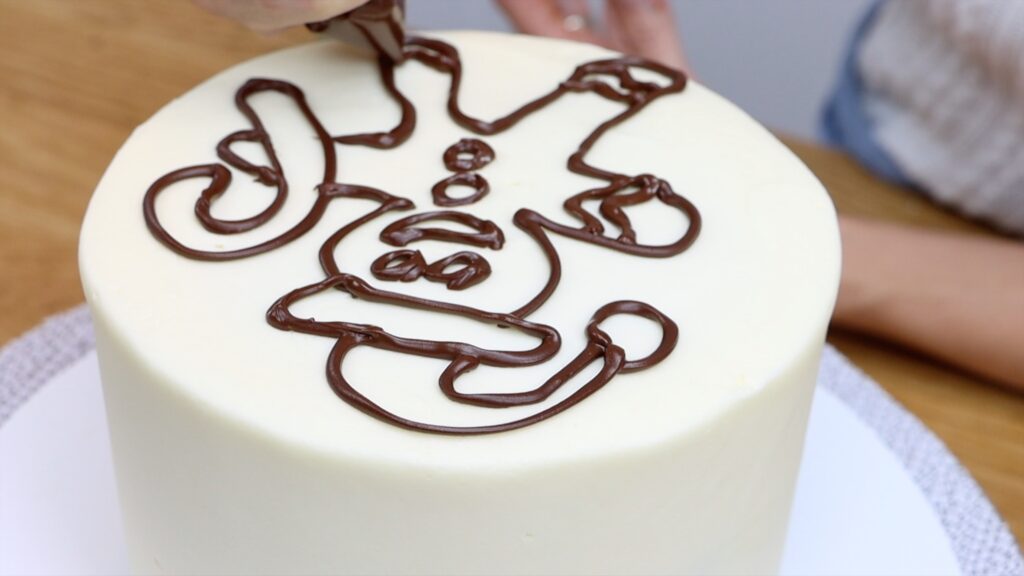
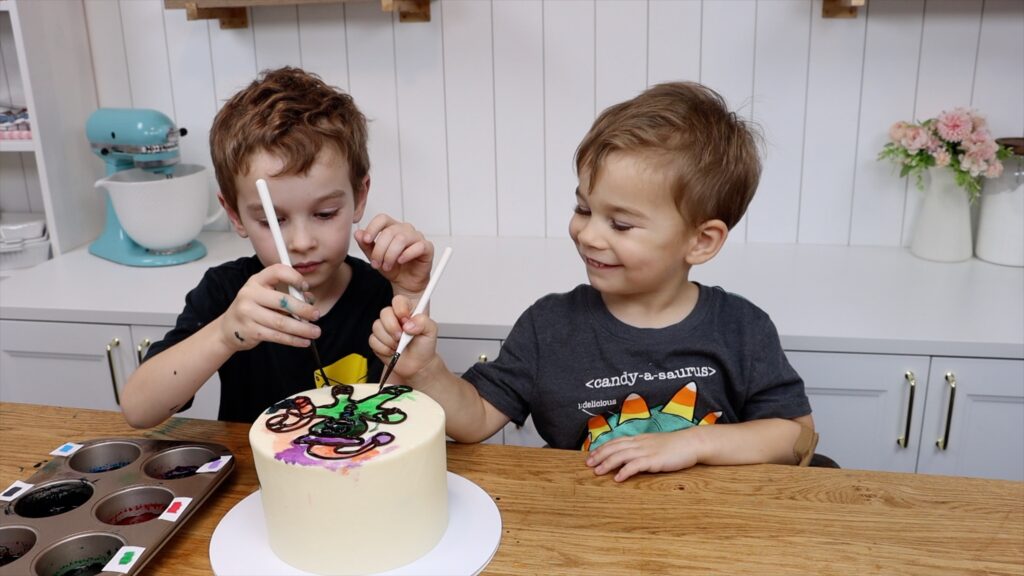
For the easiest cake decorating - Let your kids decorate the cake for you! Frost the cake and then optionally, melt some chocolate chips and spoon them into a ziplock bag and cut a little piece off one of the corners. Squeeze the bag to draw a simple design with the melted chocolate, like something you’d see in a children’s coloring book.
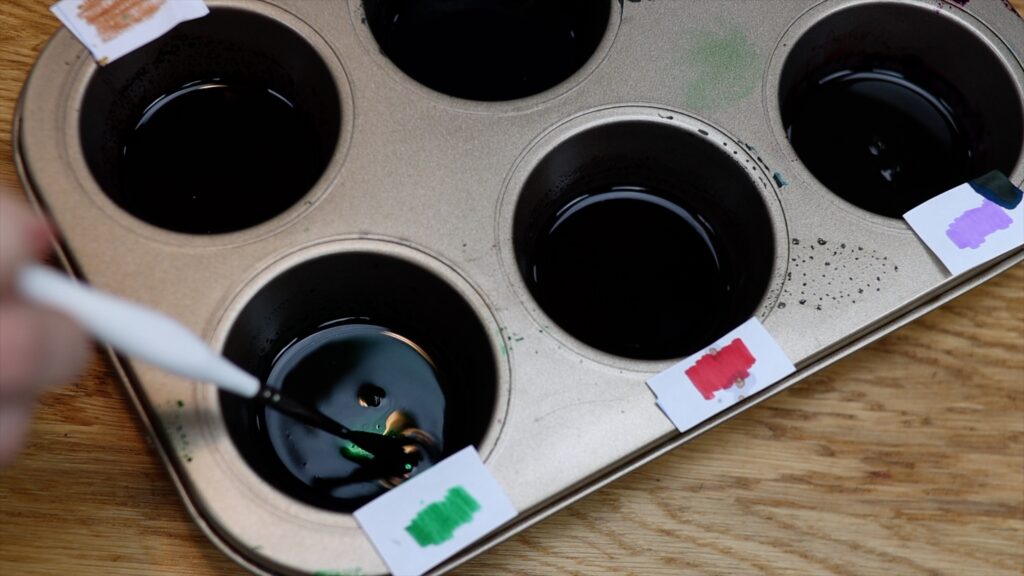
Make a colour palette in a cupcake pan, using labels because it’ll be difficult to see what the colours are in the dark pan. You can use liquid or gel colours but if you use gels you’ll need other water them down to make a liquid.
Give your kids a paintbrush and let them paint the cake! They’ll love the activity and have extra fun eating their masterpiece.
I hope you’ve seen some easy cake decorating ideas you’d like to try! Ask me any questions in the comments and remember to take my free course or check out my cake school to learn hundreds of cake decorating techniques and designs.
Watch a video of this tutorial on 10 easy cake decorating techniques:
Pin this tutorial to Pinterest to save it for later with one of these pins: