From the moment I got engaged I started thinking about how to make a wedding cake for my own wedding. It turns out there’s a lot more to making wedding cakes than you might expect! So here are 10 tips to help you successfully make a wedding cake.
Of course wedding cakes need to be beautiful but they also need to taste delicious! So before the big day it’s important that the couple taste different options of cakes, fillings and flavors.
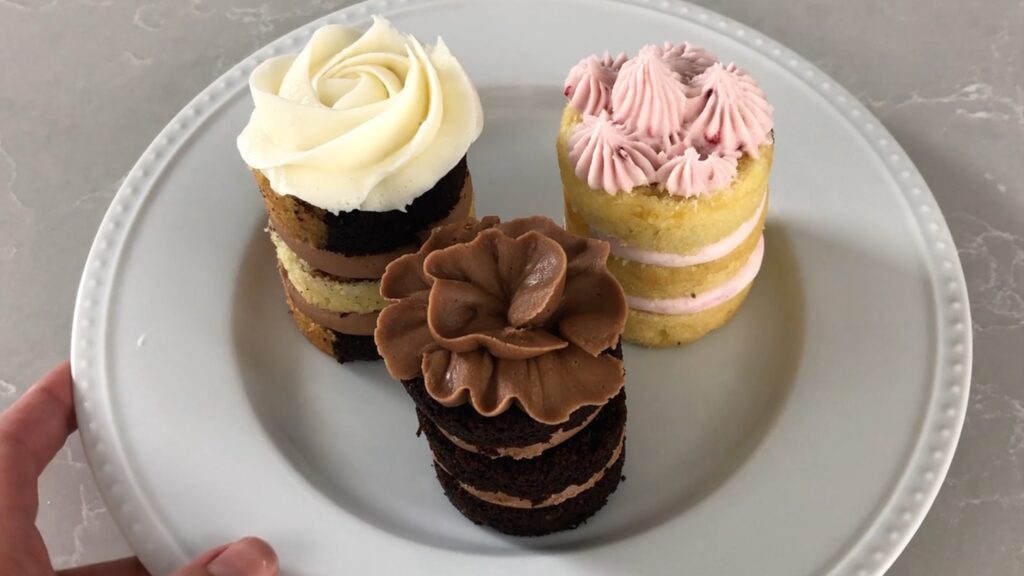
When I had a cake shop I offered cupcake versions of my cake menu for customers to try. For wedding cakes I made mini cakes of each flavour. They're more time consuming to make than cupcakes but I Leo them because they're more formal. They’re also a more accurate representation of the cake to filling to frosting ratio.
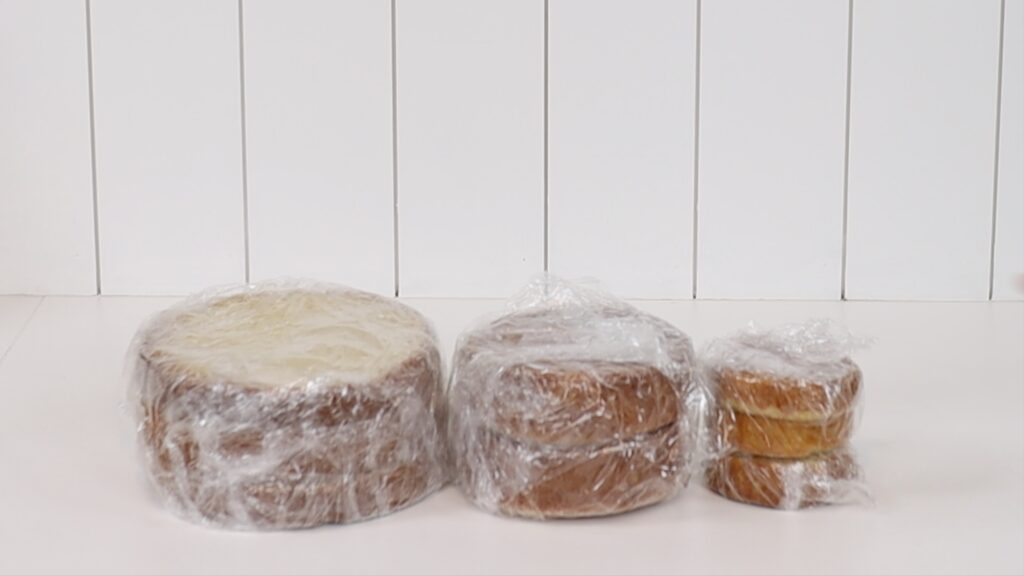
If you make lots of wedding cakes and do lots of tastings, you might choose to offer slices instead. To do this, bake a full cake of each flavour and slice those. You can give couples a slice of each flavour and then freeze the rest for the next tasting. To do this, wrap each slice in two layers of cling film or plastic wrap to protect them in the freezer. Move slices to the fridge 24 hours before serving and to room temperature an hour before.
Once you know the date of the wedding and the details of the cake, you’ll need to establish a timeline. Wedding cakes can take days to make depending on the flavours, size, and decorations!

You’ll need to shop for all of your ingredients to make your cakes, fillings and frostings. Then a few days before the wedding you might make your fillings and frostings. My 4 Minute Buttercream can be refrigerated for 2 weeks so you can make it earlier if you prefer.
Baking a tier cake can take several hours so you might set aside a full day for that. Assembling, frosting and stacking a tier cake might take a full day, too!
Include any cake decorating steps in your timeline as well. Some decorations can be added in advance, like stencil details or piping. Others are best added the day of the wedding, for example fresh flowers. More on decorations and fresh flowers later!
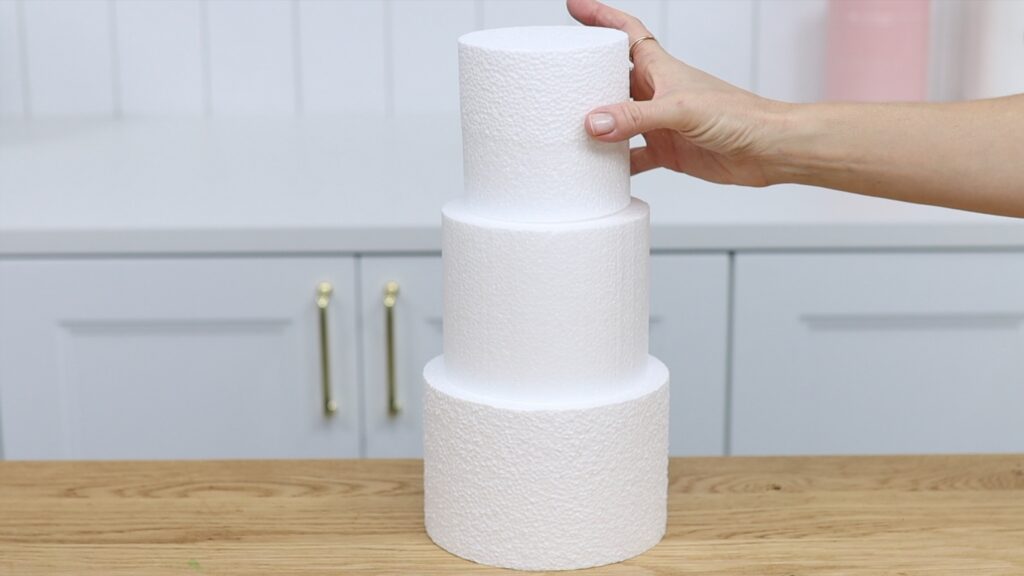
For tier cakes you’ll typically want every tier to be the same height. This is easiest to get right before you assemble the cakes. Stack the layers for each tier side by side to check they’re all the same height.
Of any of the tiers are taller than the others, trim those layers using a serrated knife. Then line them up again to check that they're all the same height.
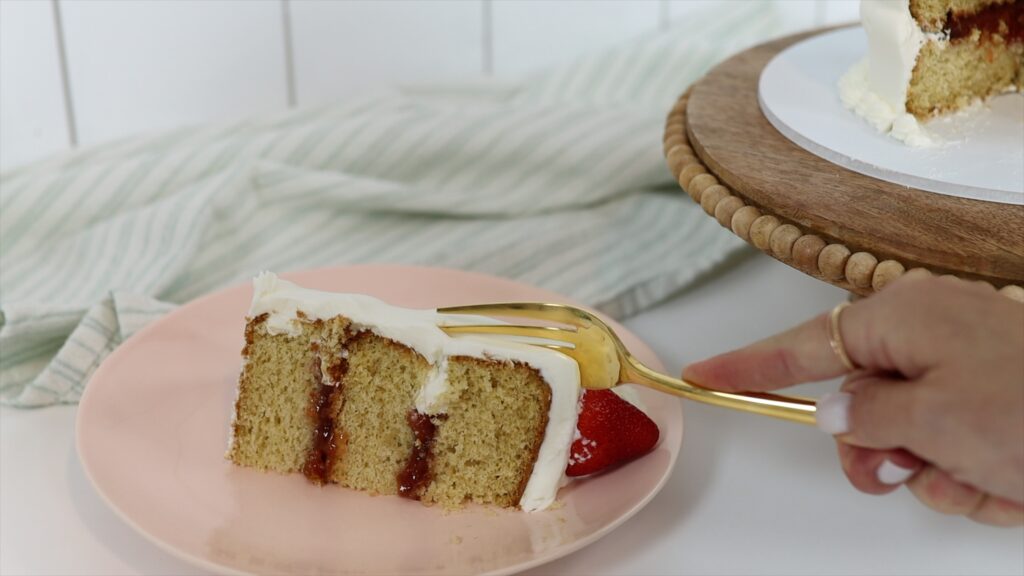
Wedding cakes are usually made several days before an event, since they take so long to make. For cakes served more than a day after baking I really recommend using simple syrup. This keeps cakes moist - it doesn’t make them soggy, and it also won’t make a dry cake moist! It just prolongs the fresh texture of a cake.
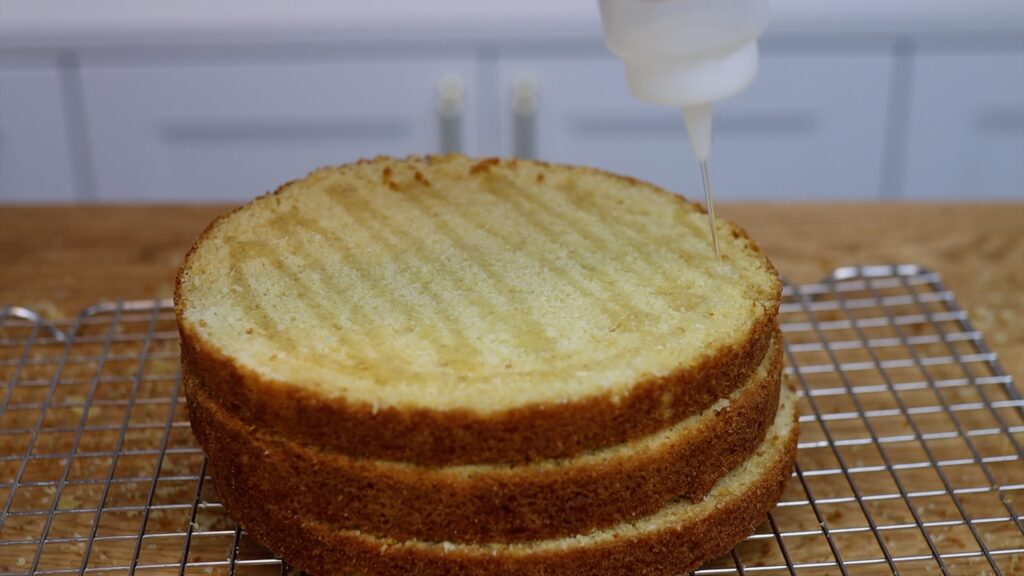
To make simple syrup you'll need equal parts of water and sugar. For a tier cake one or two cups of each should be enough. Bring the mixture to a simmer over medium heat to dissolve the sugar and then let it cool. That’s it! You can drizzle the syrup over your cake layers with a squeeze bottle or use a pastry brush. Pay special attention to the edges of the cakes because those will dry out the quickest.
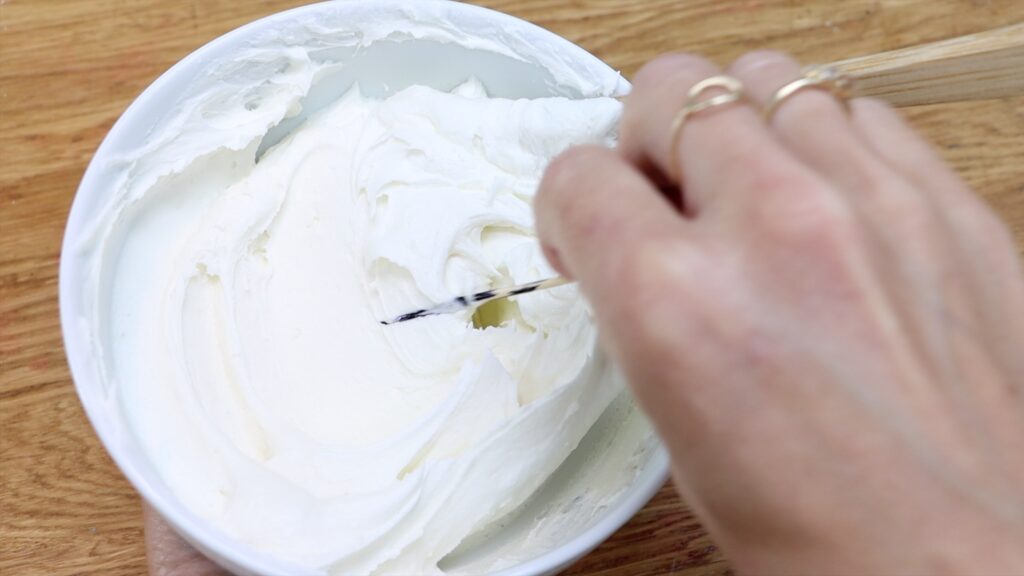
Wedding cakes are traditionally white, which can be problematic for buttercream made with butter, which is yellow! You have a few options to make buttercream white. Firstly, you can add violet gel, which will cancel out the yellow tint with just a tiny amount. Dipping a toothpick into the bottle is the safest choice and then drag the toothpick through your buttercream. I don't recommend trying to squeeze a small drop from a bottle of gel or liquid colour. If the drop is too big it can turn your whole batch of buttercream purple!
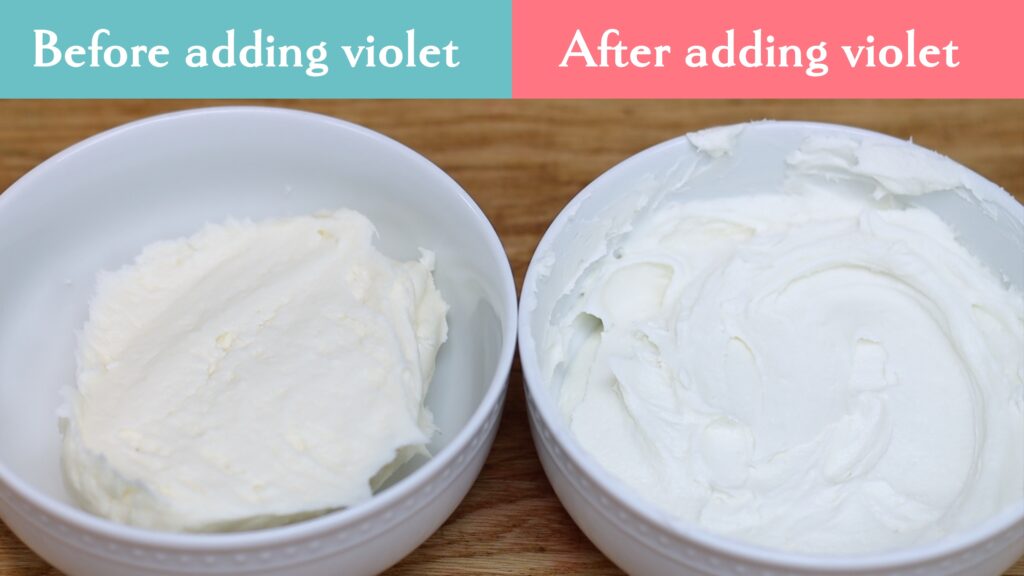
If the cake is going to be on a white tablecloth you'll need your buttercream to be even whiter. Even slightly off-white buttercream will look yellow compared to a bright white background:
For even whiter buttercream, use vegetable shortening like Crisco or Trex. You can substitute the butter with exactly the same amount of shortening.
As a bonus, using shortening in your buttercream will make it more stable than butter. This is helpful if the wedding is outside in warm weather and you don’t want your cake to melt.
A third option is to use half butter for its flavour and half shortening for its whiteness.
It’s definitely a good idea to practice any decorations before making the actual wedding cake. This doesn't mean you have to make an exact replica as a trial run. That would be a massive waste of time and ingredients. Instead, you can practice each element on different cakes, assuming you have months to prepare for the wedding cake!
Practice stacking another tier cake or ideally several until you feel really confident. Practice using cake stencils or any other techniques you'll use on your wedding cake. Piped details should be practiced too. You’ll learn the amount of pressure you need to use when you squeeze the piping bag, the wrist motion, the position that’s most comfortable for you, and so on. You don't want to try figuring these things out on the day you decorate your wedding cake!
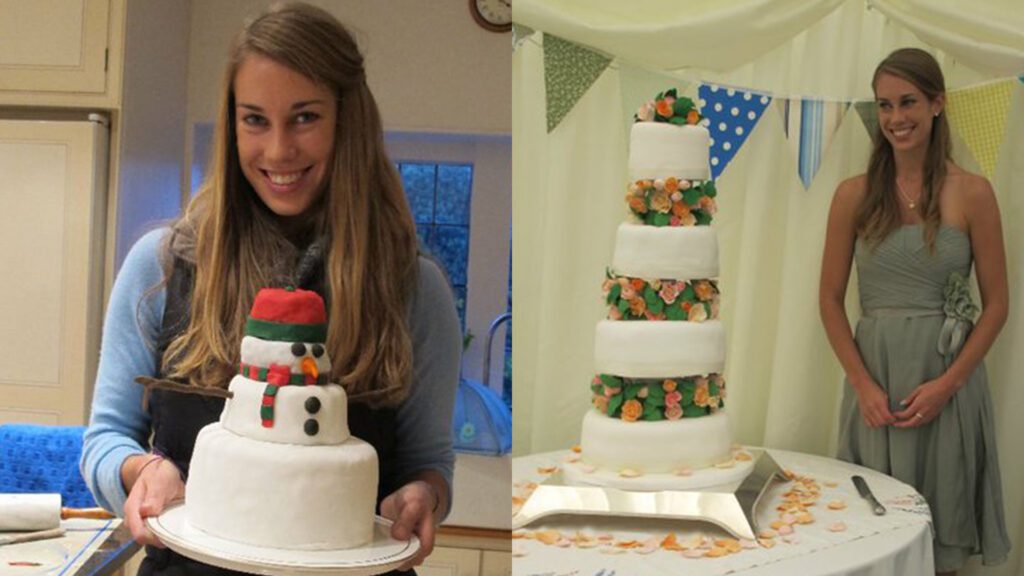
My very first wedding cake was for one of my best friends and I had never made a tier cake before. I practiced stacking on a tea party cake for another friend and this snowman cake:
Here's a solution for cakes that are too big. Sometimes people want a multiple tier cake for their very small wedding. In these situations cake dummies are really useful to prevent huge amounts of uneaten cake, and also to save money! Use these fake cakes for extra tiers, decorating them as if they were really cake. No one will ever know what’s really inside!
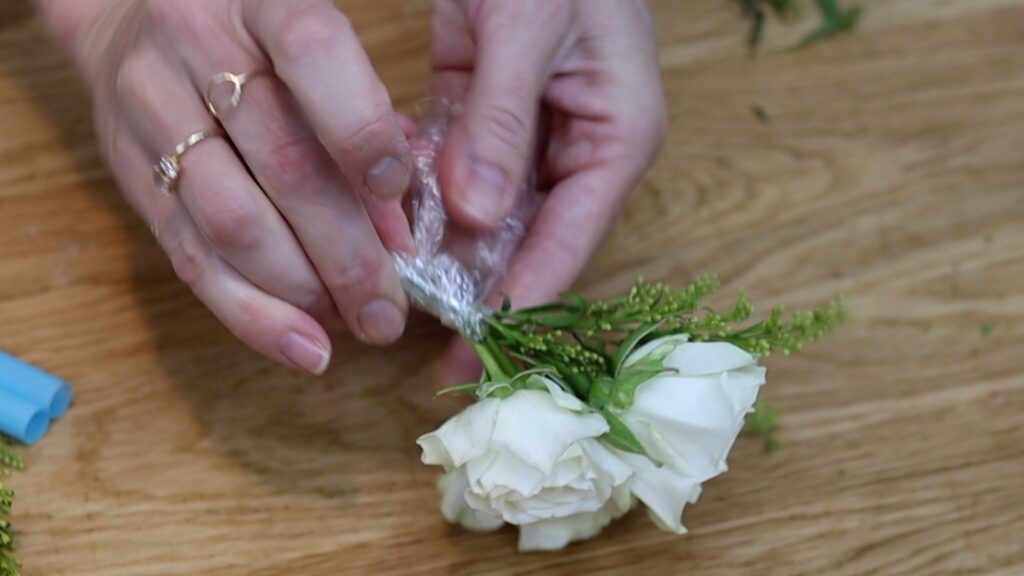
For fresh flowers, wait until the day of the wedding if possible so that the flowers don’t wilt. Trim the stems so they're one to two inches long for each flower. Group flowers together in little bunches and wrap the straws in plastic wrap or cling film. This will prevent floral juices leaking out into your cake.
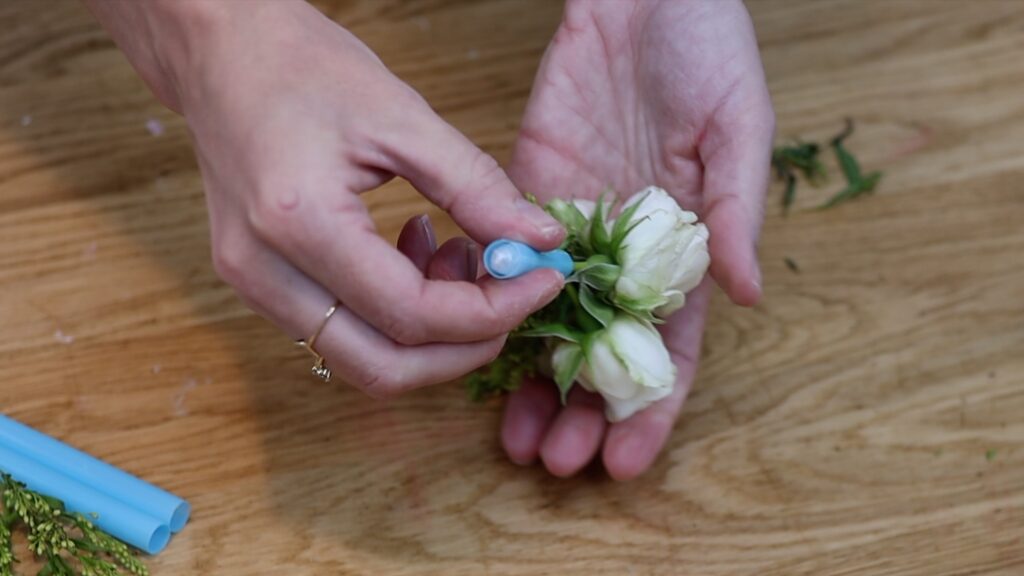

Poke them into straws like wide boba straws and then push them into the cake. Using scissors at the end will help you push them all the way into the cake. You can buy these flower cake spikes instead, for a shortcut!
Refrigerate cakes until you transport them to the wedding venue. This keeps the frosting firm and the tiers stable enough for the journey. When you transport the cake, choose a flat surface like the boot or trunk of the car. The footwell in front of the passenger seat is also a good option. Don't place the cake on any of the seats in the car because those are sloped at an incline. For tier cakes it’s especially important to be on a flat surface to avoid leaning or toppling over!
As you can see, making a wedding cake is a lot of work. If this isn’t a gift, make sure you price your wedding cakes to make a profit instead of losing money! I have a very detailed FREE tutorial on how to price your cakes with all of the information you’ll need. I also have a free cost calculator to help you set your prices to make a profit.
I’ve helped over 20,000 people improve their cake decorating skills on my cake school and lots of them have made wedding cakes for themselves, their friends and family members, or for customers. If you would like to improve your cake decorating skills, join my All You Can Cake membership to access all of my online courses and to ask me any questions you have, directly.
If you’re interested in seeing how I made this video, watch the behind the scenes footage in the video version of this tutorial, below. And if you want to create content yourself, join the waitlist for my content creator course!


