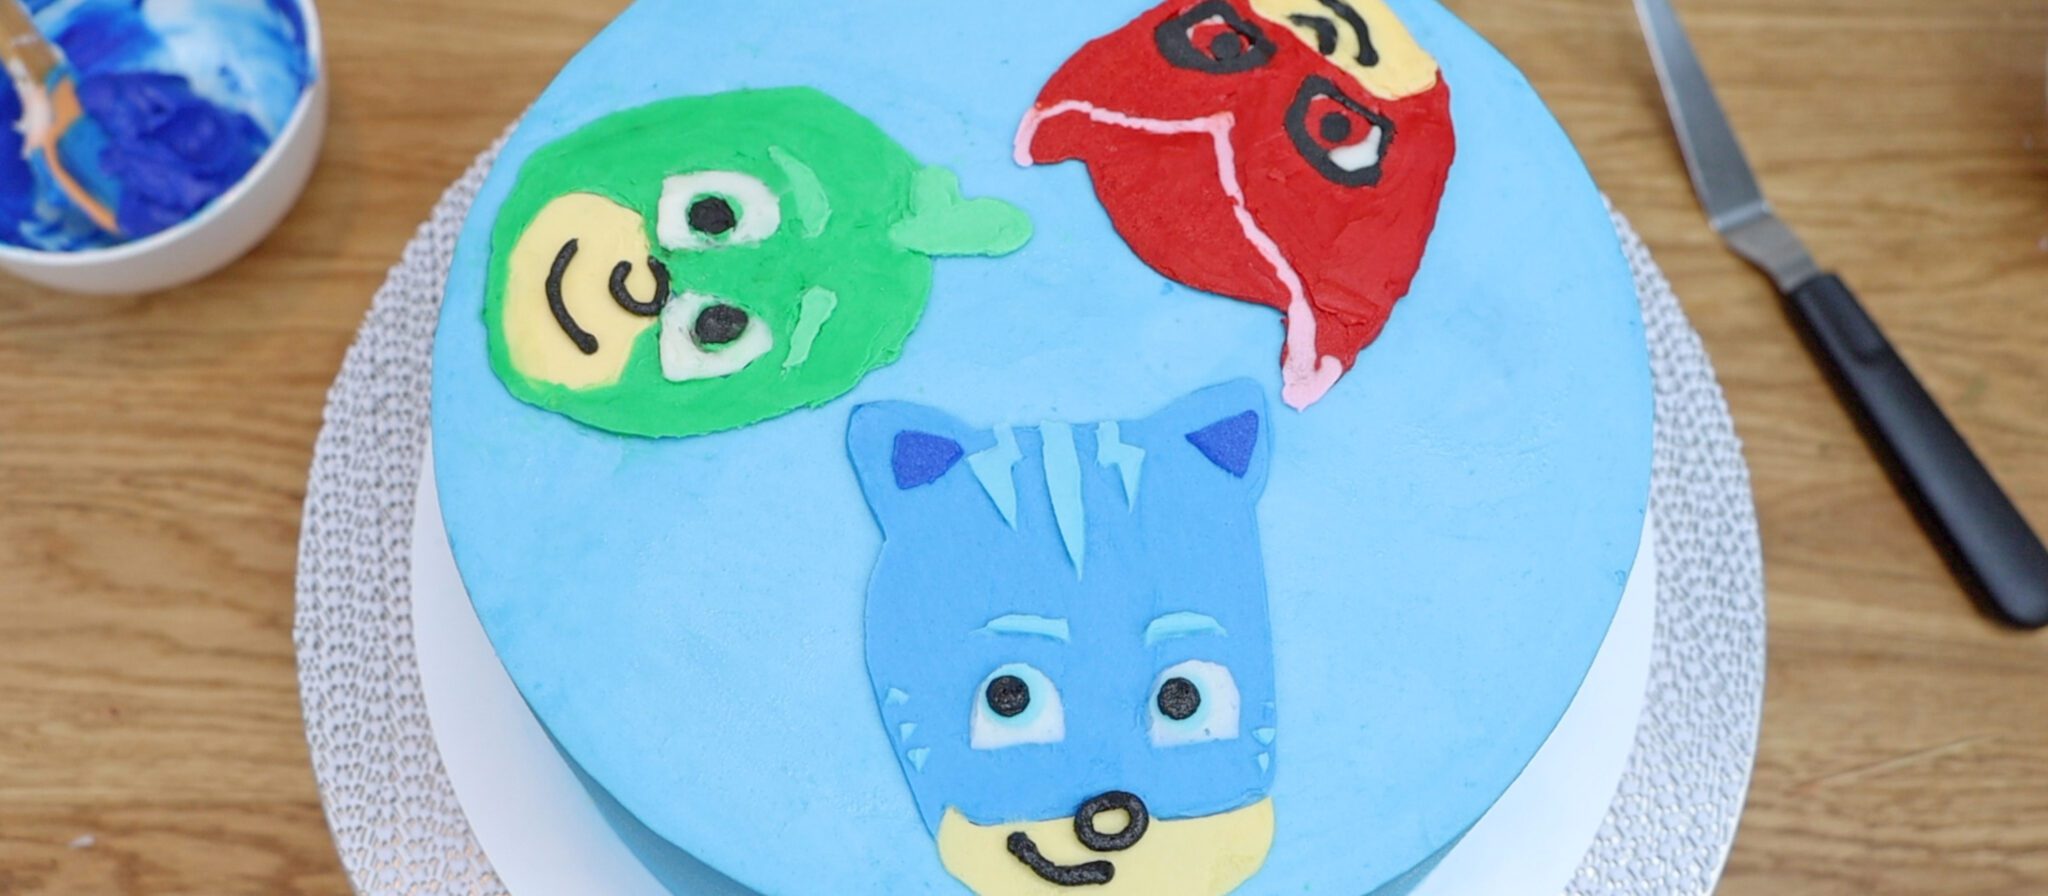
I’m going to show you three techniques to make character cakes with buttercream, without fondant, to make detailed and delicious cakes!
For all of these techniques you’ll need the frosting on your cake to set so it’s firm. This way it won't get damaged when you add the characters. After layering your cake and filling and giving it a crumb coat, frost your cake and put it into the fridge for at least an hour.
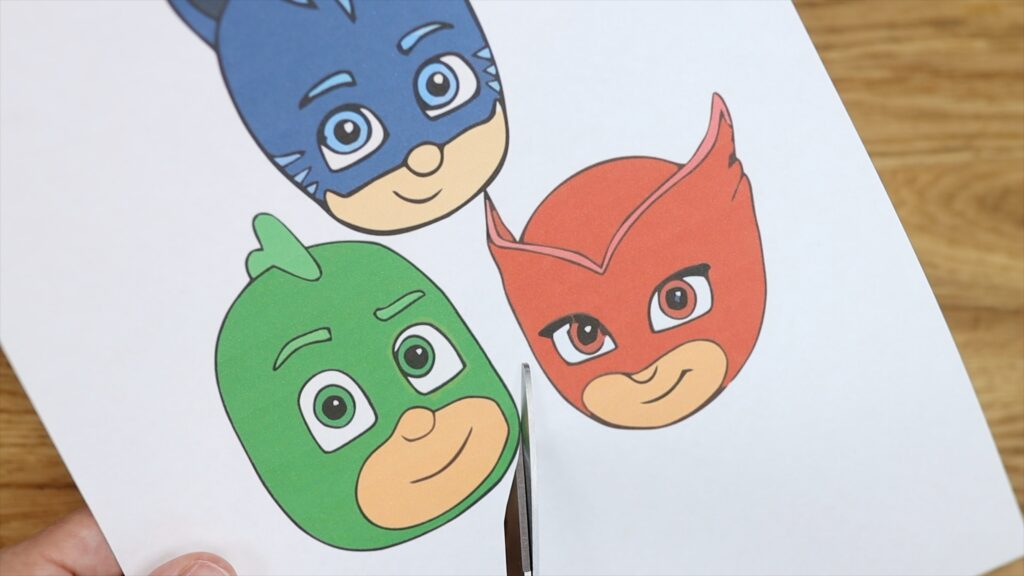
Find a picture of your character or characters. I like to use Google Images for this. The bigger the images, the easier it is to recreate the details on the cake so print the image as large as possible. I enlarged mine to almost fill a piece of A4 or Letter sized paper. This way, they will cover almost the entire surface of my 8 inch cake.
Next I'll show you the three techniques I like to use for character cakes. We’ll do "pipe and spread" for Gecko, a homemade stencil technique for Catboy, and a buttercream transfer for Owlette.
Cut your printed character out of the paper by following the outline exactly. Then trace around the edge with a toothpick to make an outline on the cake. Cut out the individual features of the character like the face and eyes and position them within the outline on the cake. Trace around those with your toothpick too. These outlines will guide you when you fill in the colours.
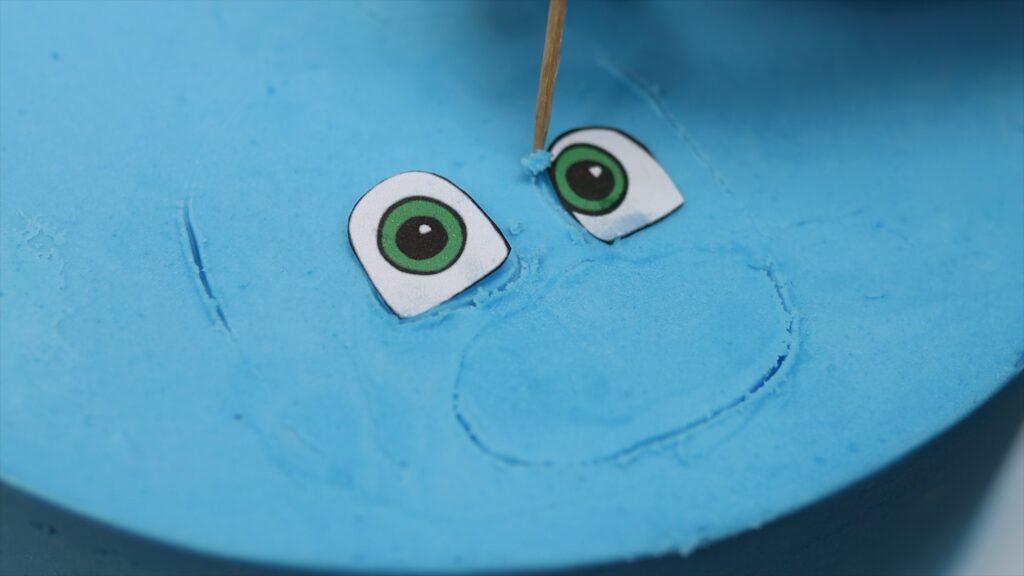
Cutting these parts out and tracing around them is the most accurate way to add details to your character. If you prefer you can simply refer to your image and draw the features on with your toothpick.
Now mix your colours of buttercream. This is my 4 Minute Buttercream, which I use for character cakes and almost every other cake I make! Put your colours in piping bags fitted with small round piping tips. I'm using a #3 by Wilton. I’ll show you how to do this without piping tips in a moment.
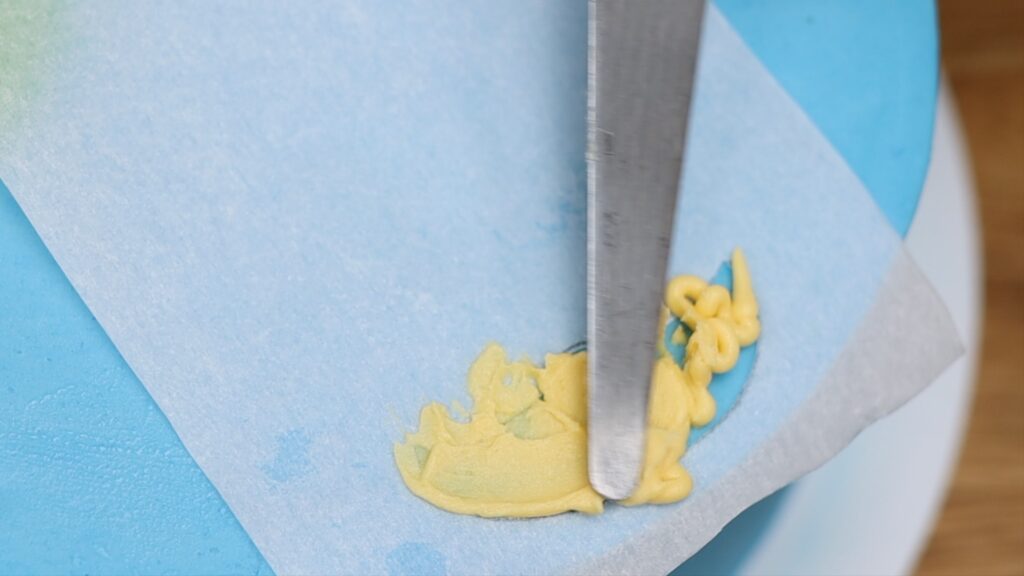
Choose one of the large areas of the design to start with. Outline it and then fill it in by zig zagging with your buttercream.
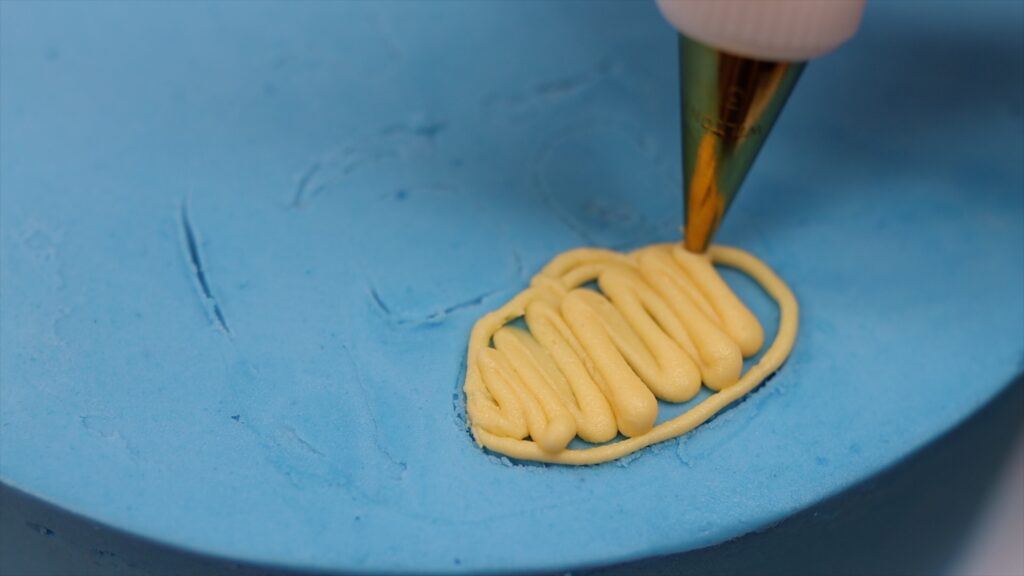
Spread this with a tapered
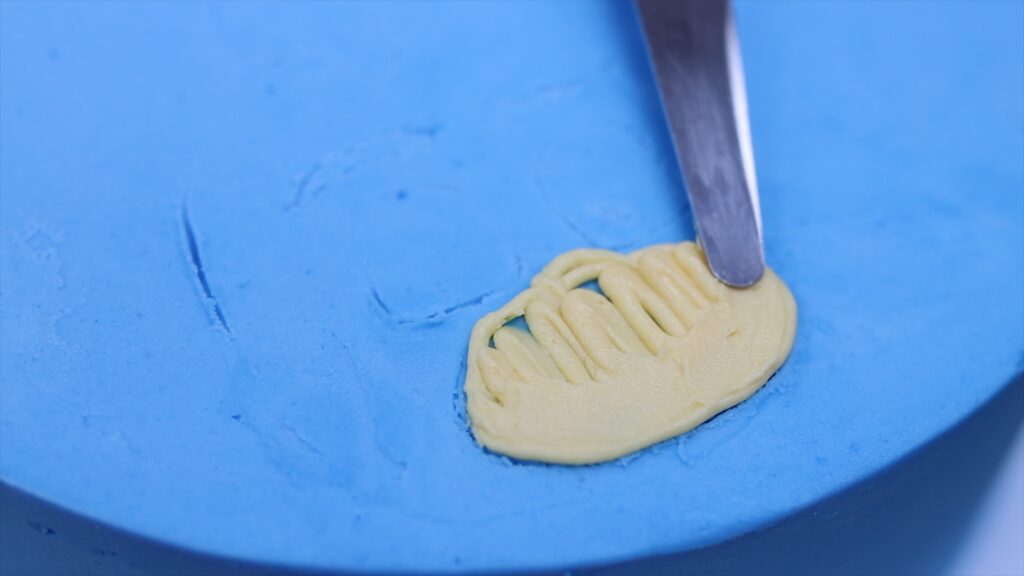
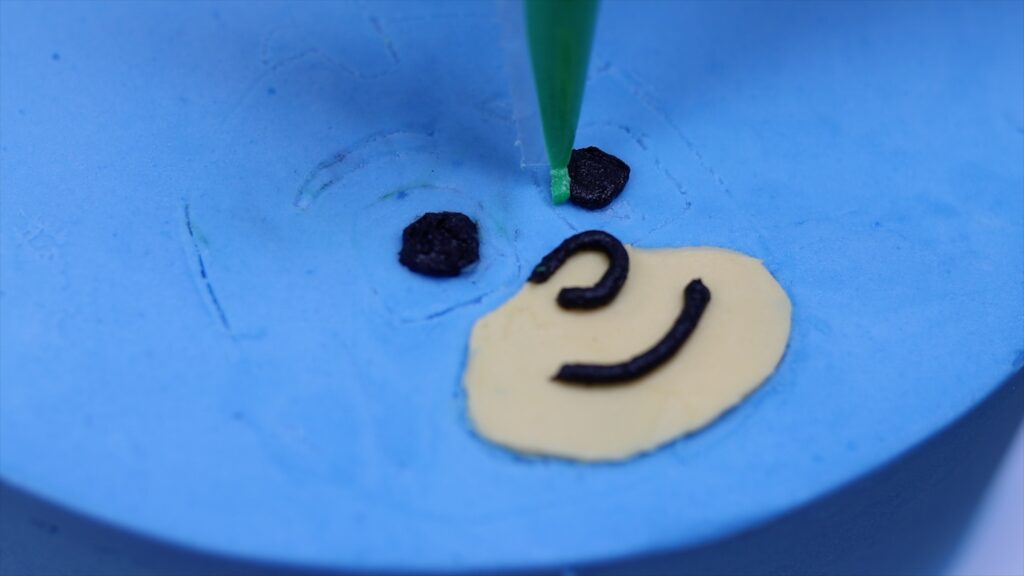
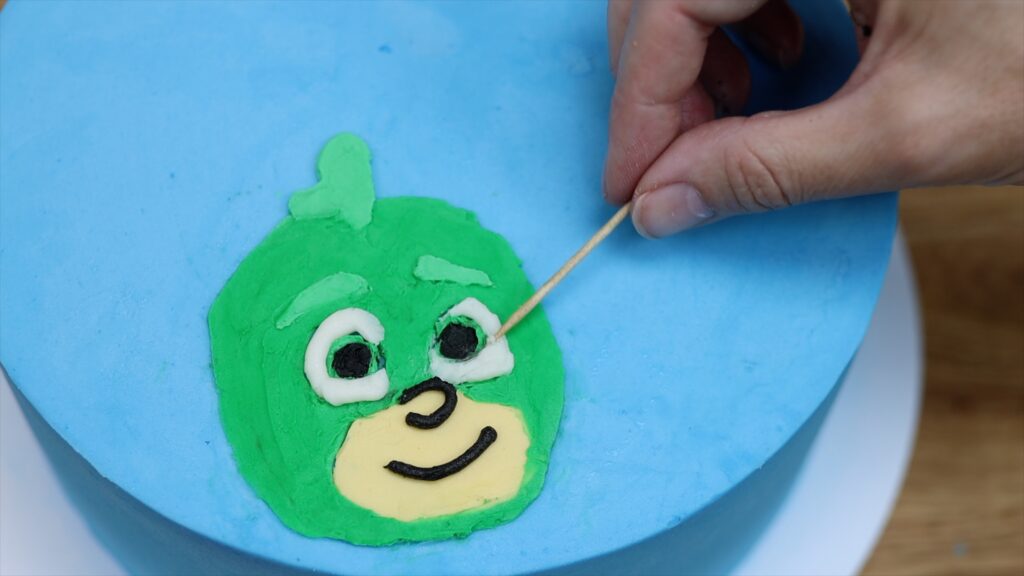
You don’t have to outline every single detail on the character before you pipe it. For example, I piped the black circles into the eyes just by looking at the image to see where and how big to make them.
It’s also not necessary to draw lines like the nose and mouth before piping. They’re simple details that are easy to freestyle by looking at your image.
If you don’t have small round piping tips you can use a piping bag with a tiny piece cut off the end. Then pipe through the very small hole you cut. Your lines won’t be as neat as if you use a round piping tip but you can using a toothpick to make them neater. Straight after piping, the buttercream is soft so you can nudge a line sideways or smooth out an edge.
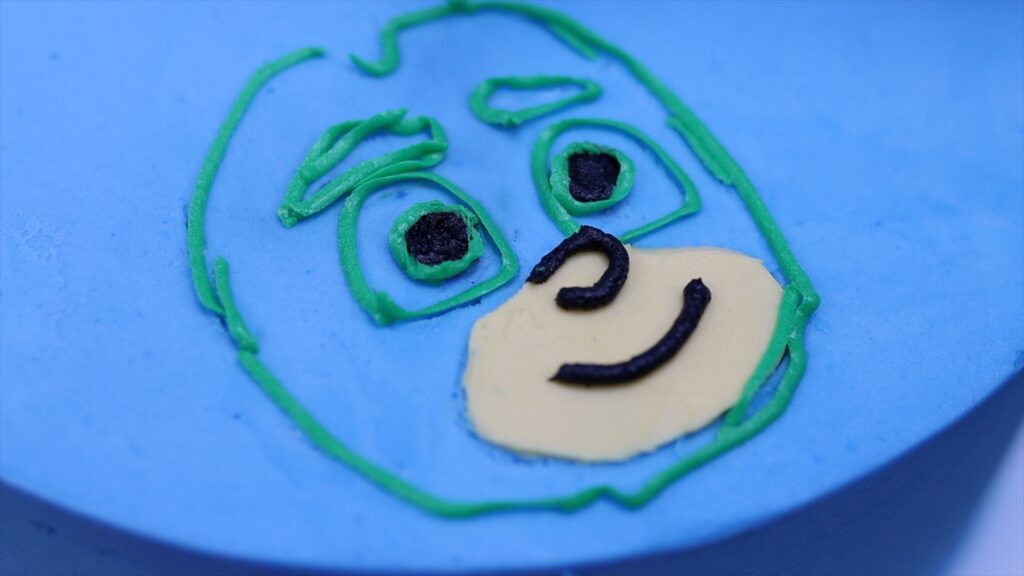
I recommend leaving the white details until last, and I’ll show you why after this. For the face, outline the details that will eventually go onto it - the eyes and eyebrows, and then fill in the rest of it with zigzags.

Smooth the frosting with your spatula or palette knife. The narrower the tip, the easier this is for detailed characters, especially if they’re small.
It's best to do this technique on a cold cake because the buttercream you pipe and spread will chill quickly and become smoother than when it’s at room temperature. If you’re struggling to get a smooth surface you can heat your spatula or palette knife by dipping it in hot water and drying it off. The hot metal will work well to smooth the buttercream.
You can do all of your details straight after each other if your cake is cold because the buttercream of each detail will chill on the surface of the cold cake. When butterceam gets cold it gets firm so it won’t blend into the next colour you add. If your cake isn’t already cold you’ll need to put it in the fridge or freezer for 5-10 minutes between each detail you add.
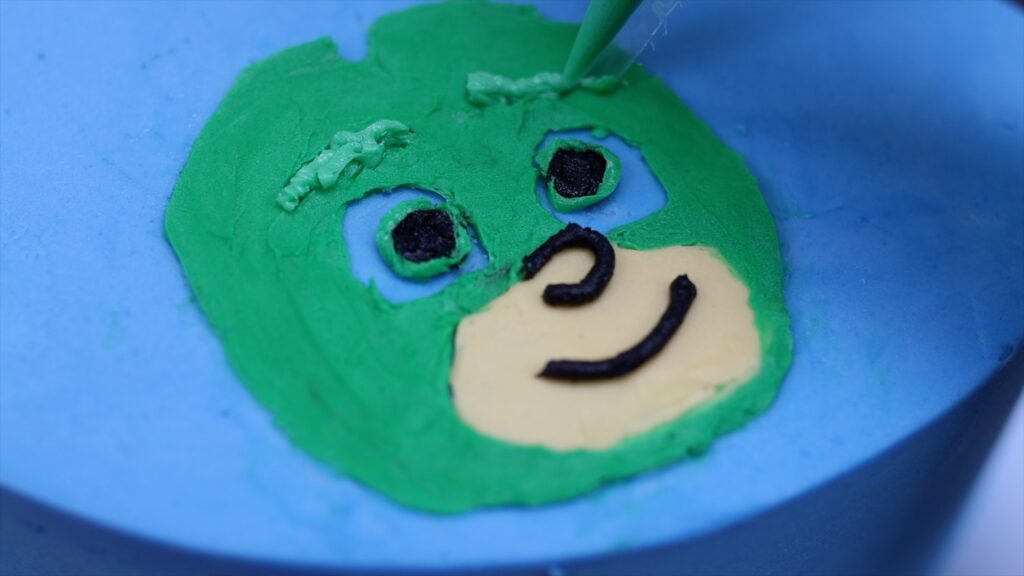
Always chill the cake before adding any white details because white picks up other colours so easily. If the other colours haven’t chilled and set they’ll make visible smudges within the white details.
I used a #8 piping tip for the white parts of the eyes and you can see it’s way too big! A #3 or #4 tip is ideal for little details like this. I only suggest using a larger round piping tip for very large areas of colour. But here’s another example of where a toothpick comes in handy to tidy up piped buttercream!
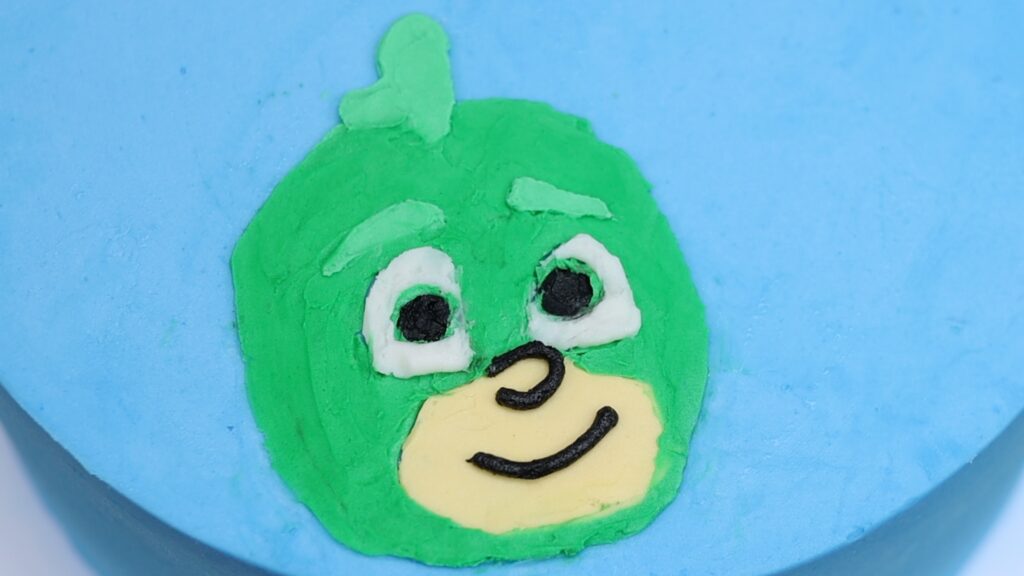
So, that’s the first technique. It’s the fastest BUT I’d also say the trickiest to do and the messiest result of the three techniques I’m going to show you.
Tint your buttercream colours and put them into piping bags fitted with small round piping tips. If you don't have enough, cut a small piece off the end of each bag to pipe through. Just like with the previous technique, a #3 or #4 will give you the neatest results.
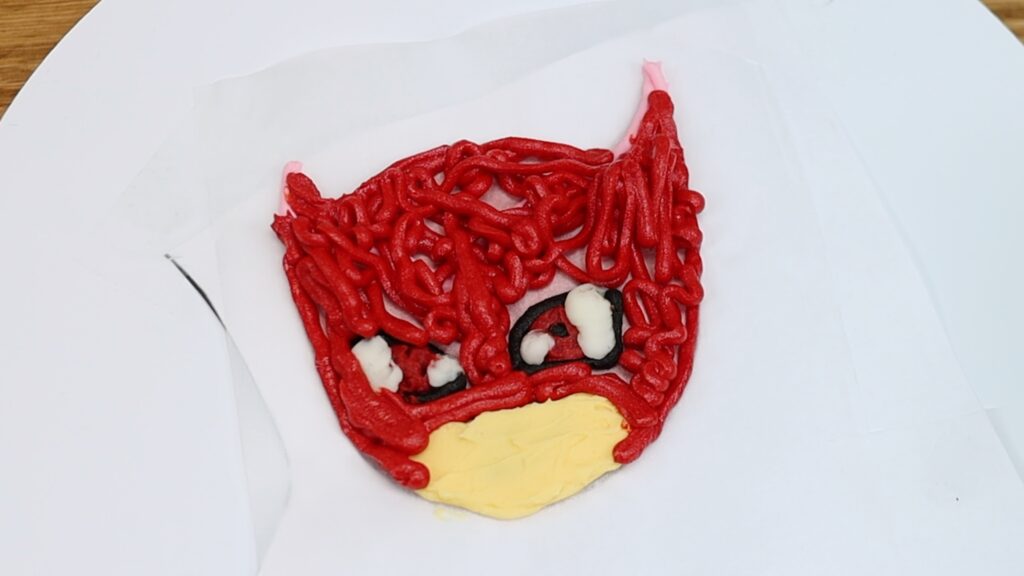
You’ll need a small flat surface like a cake board or a cutting board. Place your image on this with a piece of parchment paper on top so you can see the image underneath. Tape it in place and then pipe the smaller details onto it first.
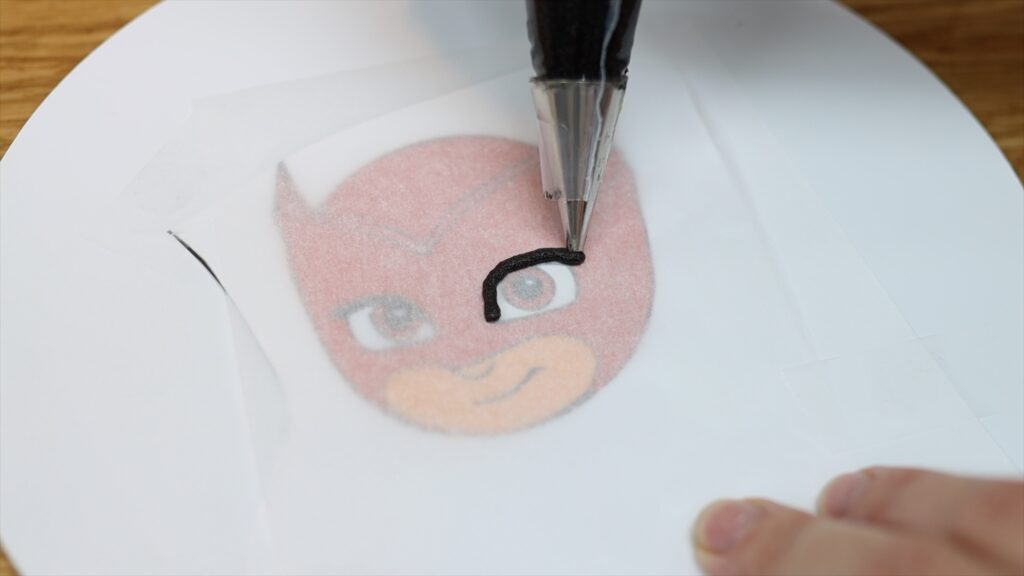
Piping one detail straight after the other is fine for any details that don’t touch each other. Then put the board with the image into the freezer for 5 minutes before adding the next details on top.
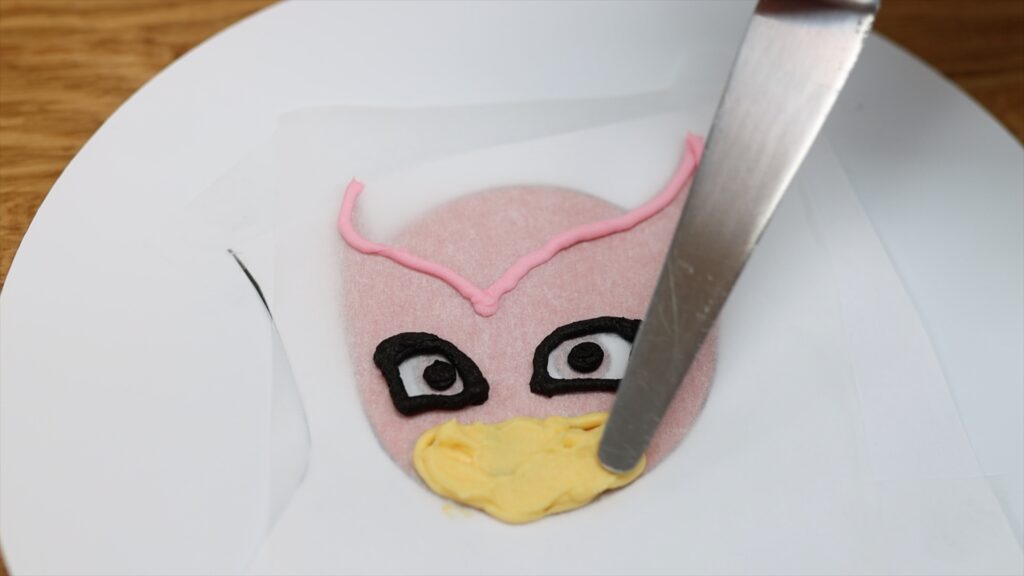
To fill in an area, spread the piping with a spatula or palette knife to push the buttercream down to the parchment paper. This side is not going to be visible because it's going to be pressed against the cake. The side facing down against the parchment is the side you'll see.
Don’t worry about making this upward facing side smooth or neat. I know these eyes look demonic but from the other side, the side we’ll see when its on the cake, it won’t look so creepy!

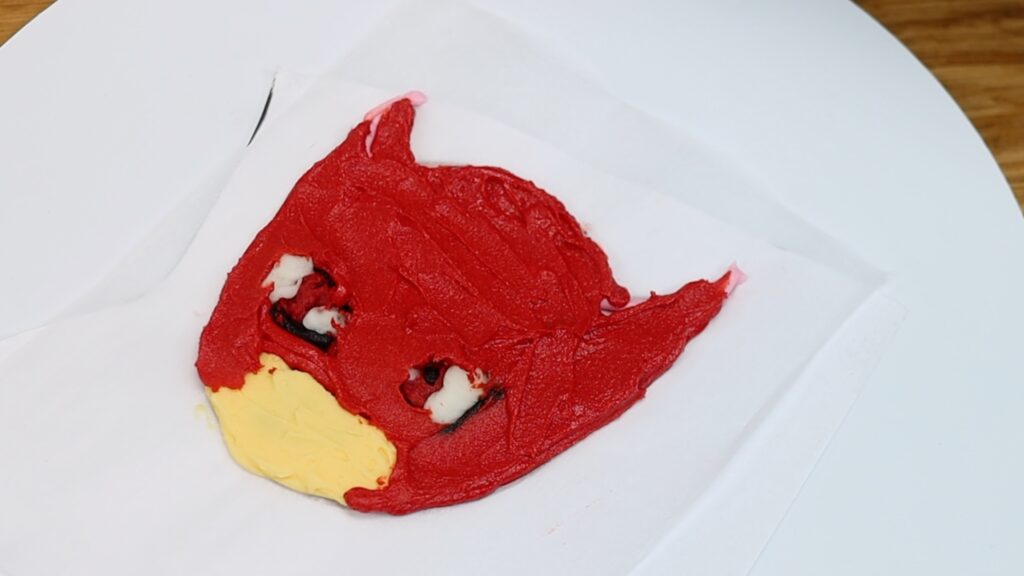
Before adding any details that touch these colours you’ve just piped, put the board back into the freezer for 5 minutes. This will chill and set the buttercream so it doesn't smudge. Then add the next details, leaving the background colour until last.
Chill the final details for 5 minutes in the freezer. Then outline and fill the rest of the design. It's fine to spread over all of the details for two reasons. First, it’s quicker than trying to pipe and spread around them. Second, the chilled buttercream has set so it’s not sticky anymore and you want to make the entire design sticky so that it attach to the cake. Scrape across to flatten and level the buttercream design.
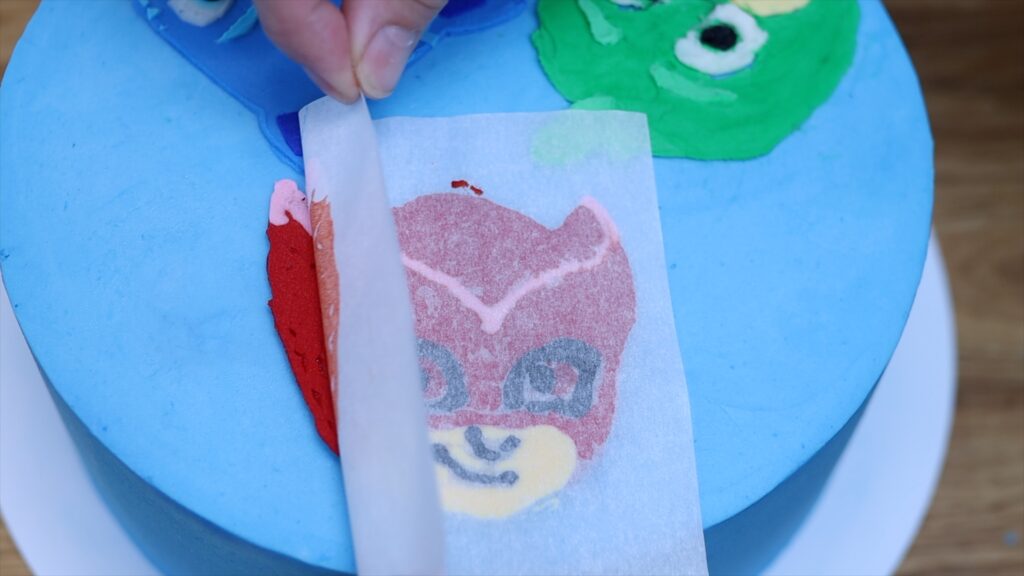
Straight after piping and spreading your character design, while the buttercream is still sticky, peel off the tape attaching the parchment to the board. Pick up the parchment and flip it over onto your cake. Press it down very gently to attach it to the cake. If you push too hard you’ll make the buttercream warp and bulge and you’ll change the shape of the details.
Now put the whole cake in the fridge for 30 minutes or the freezer for 10 minutes and then peel the parchment off to reveal your character!
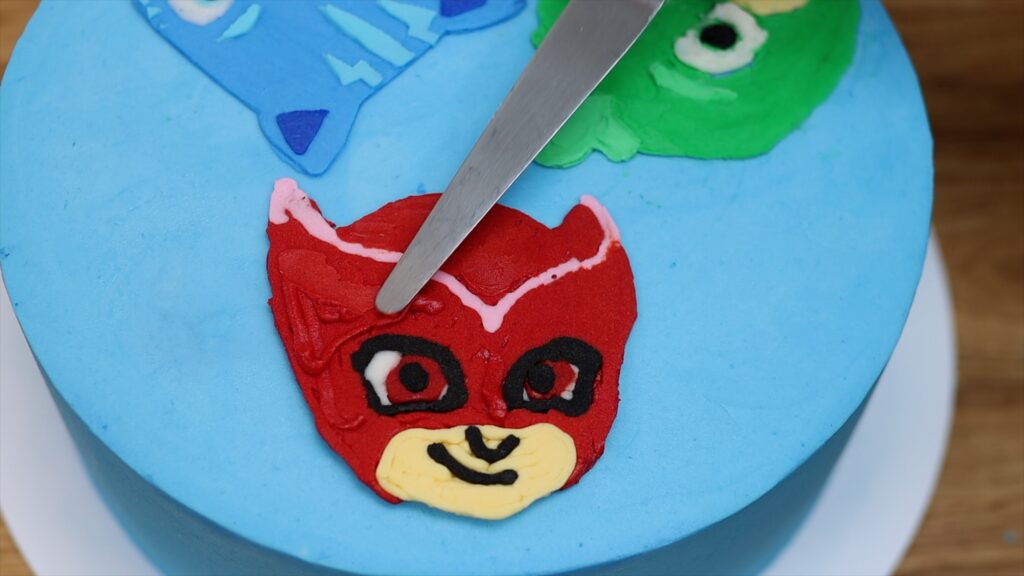
You’ll have lots of little indents where the buttercream didn’t push all the way down to the parchment. Fill those in now by piping more buttercream of that colour over the gaps. Spread it to push it down into the indents. Then scrape off any excess so that it doesn’t cover up any of the other details. Since the rest of the design is cold and hard, spreading this fresh buttercream over it won’t blend with or stain those other colours.

And that’s the second technique: a buttercream transfer. It’s an easy way to trace a very detailed character design but it’s not as neat as the next technique I’ll show you.
For Catboy I’ll use my favourite technique: layered homemade stencils. All you need for this is parchment paper or wax paper. Cut several pieces of parchment the same size as your character, one piece for every colour of details. I’m cutting 5 pieces for 5 colours. Place one over the image and trace the outline of one colour. I'm starting with the blue mask.
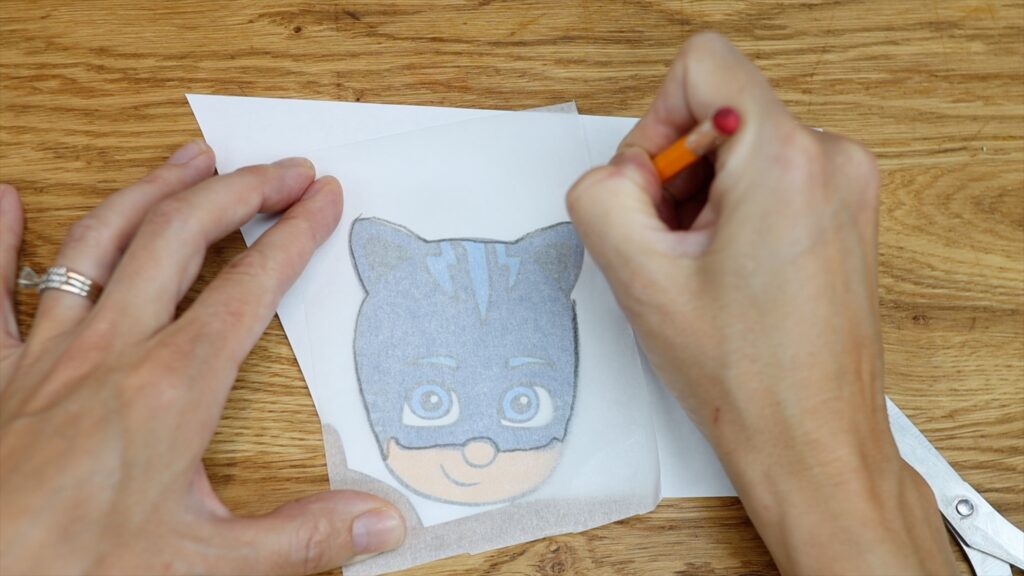
Then on the next piece of parchment trace the next colour. I'm doing the mouth and nose under the mask. Draw the outline only, none of the details within it. Continue with one piece of parchment for each colour. It’s fine to have several details on one piece of parchment as long as they’re all the same colour. I'm doing the dark blue inner parts of the ear on one piece and then the light blue (eyes, eyebrows, mask details) on another piece and the whites of the eyes on another piece.
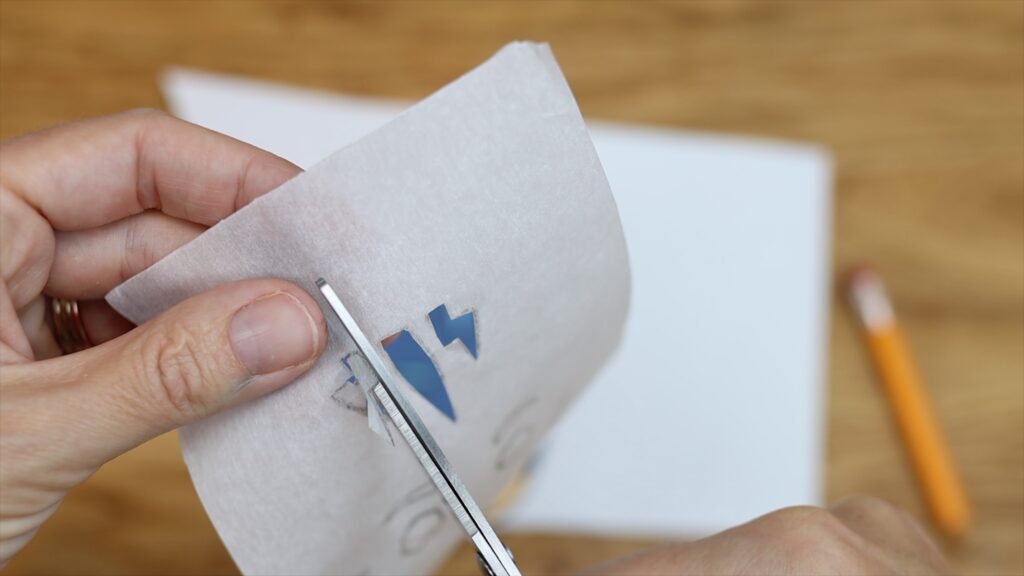
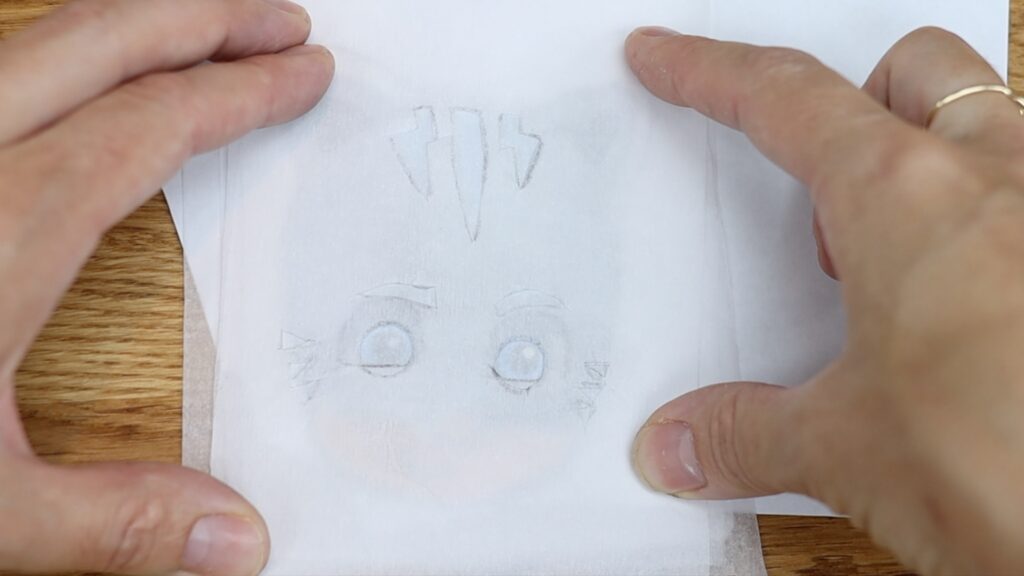
Cut out all of the details, leaving the parchment paper around them intact. These will be your stencils. Small scissors are ideal for cutting out the very small details like the markings on the mask. When you layer the stencils on top of the image, you should have all of the details of the character.
Now layer these stencils on the cake to re-create the entire character. Start with the background colour and position your first stencil on the cake. Spread coloured buttercream over it and scrape off the excess to flatten and smooth it. Leave a thin layer of buttercream and then peel off the parchment stencil.
Put the cake in the freezer for 5 minutes or the fridge for 15 minutes to set this colour. Then take the cake out and line up your next stencil on top of the chilled buttercream. Spread the next colour over it.

Since you’re layering details one over the other, start with the background colours and then add the smaller details on top, getting smaller as you go.
The cake needs to be chilled before doing this so that your stencils don’t damage the frosting on the cake. Since the cake is cold, the buttercream details will chill and set in just 5 minutes in the freezer, so this is quite a quick technique.

A toothpick is useful to smooth any uneven edges, where the buttercream pulls up slightly as you peel the stencil off.
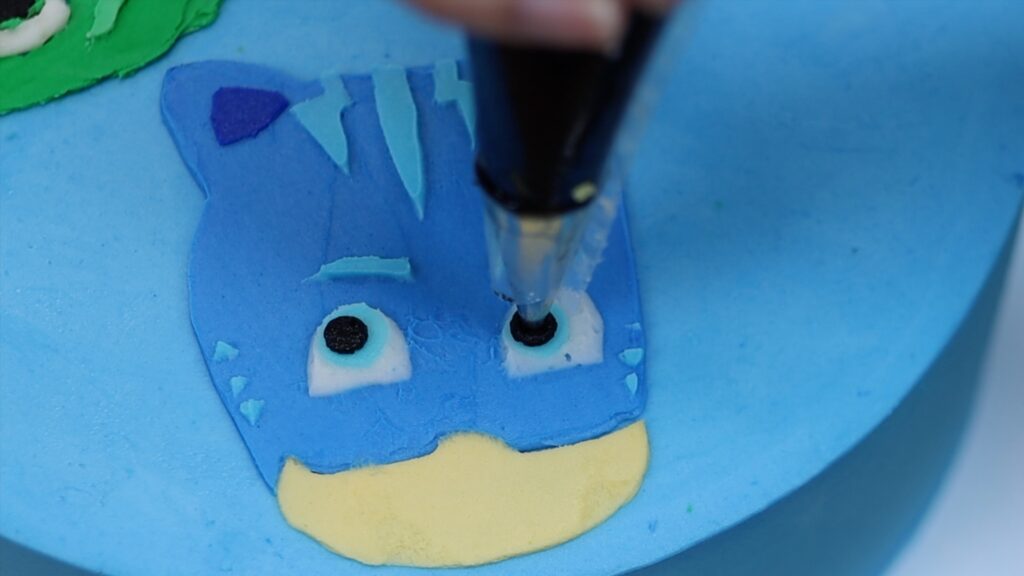
Even though this is relatively detailed design, I only need 5 stencils to create all of the features. I’m piping the black eyeballs since I happen to have black buttercream in a piping bag with a small round piping tip. A stencil would work just as well if not better because piping creates an eye that sticks out quite a bit, whereas stenciling it would make it lie flat against the cake.
You can pipe the smile and nose or draw them with a toothpick. In hindsight I think drawing them with a toothpick would have looked better because the lines would be more subtle.
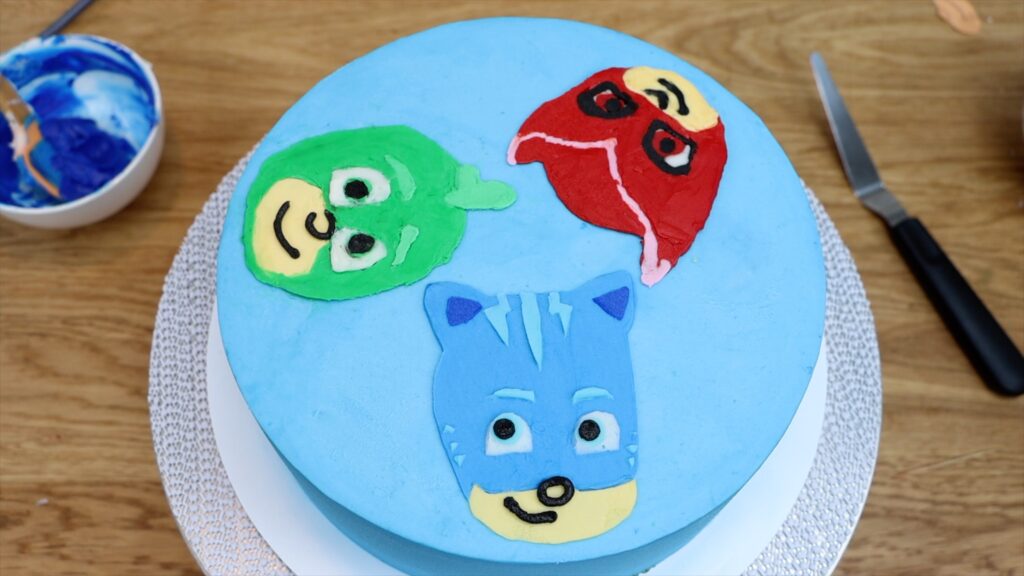
This last technique of layered parchment stencils is my favourite. I think it creates the flattest, smoothest, most accurate details and looks the neatest.
And those are the three techniques for character cakes! I hope this tutorial has been useful! Subscribe to my YouTube channel below for a new cake decorating video every week and visit my cake school for online courses on baking and cake decorating!
You can also watch a video on this tutorial for 3 techniques for character cakes:


