
Looking for ways to create detailed designs on cakes without using fondant? You’re in the right place! I’m going to show you 5 buttercream techniques better than fondant for creating designs that are easy, beautiful, and delicious! And if you're just getting into cake decorating, good news: no fancy tools are necessary for these techniques 🙂 For all of these techniques I'm using my 4 Minute Buttercream.
To create a perfectly flat design, make your own stencils using parchment paper. Parchment is one of the cheapest buttercream techniques and can be used to create infinite designs on cakes, in seconds! Draw or trace the outline of your image and cut that out, leaving the surrounding parchment intact. Place this homemade stencil onto a chilled cake, after the frosting has set.
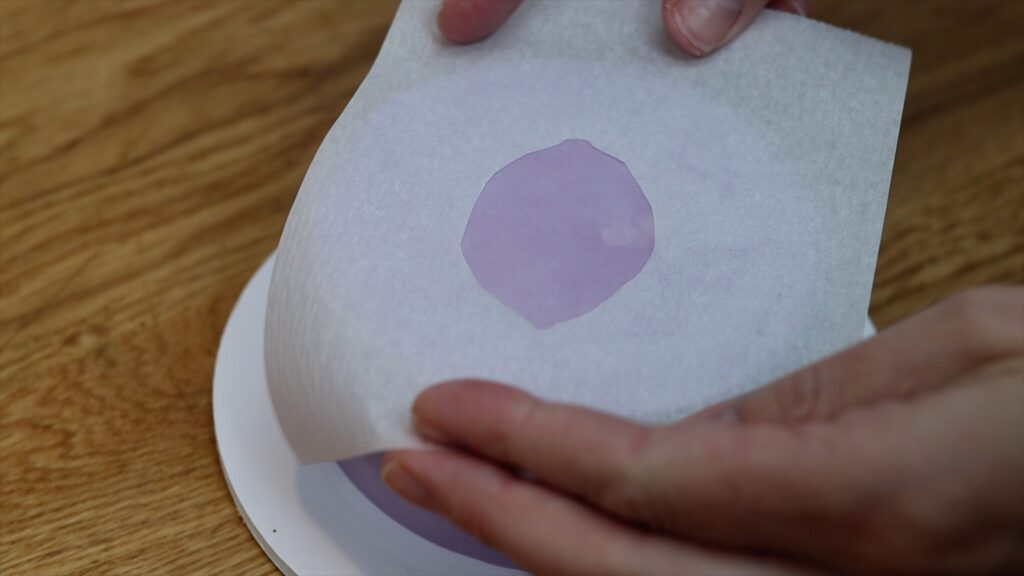
You can position it on the top or the side of the cake. Since the frosting on the cake is cold and film, the stencil won't damage it. Spread buttercream over the stencil to cover the shape you cut out. Spread towards the middle of the shape rather than outwards so that you don't accidentally push buttercream underneath the stencil.
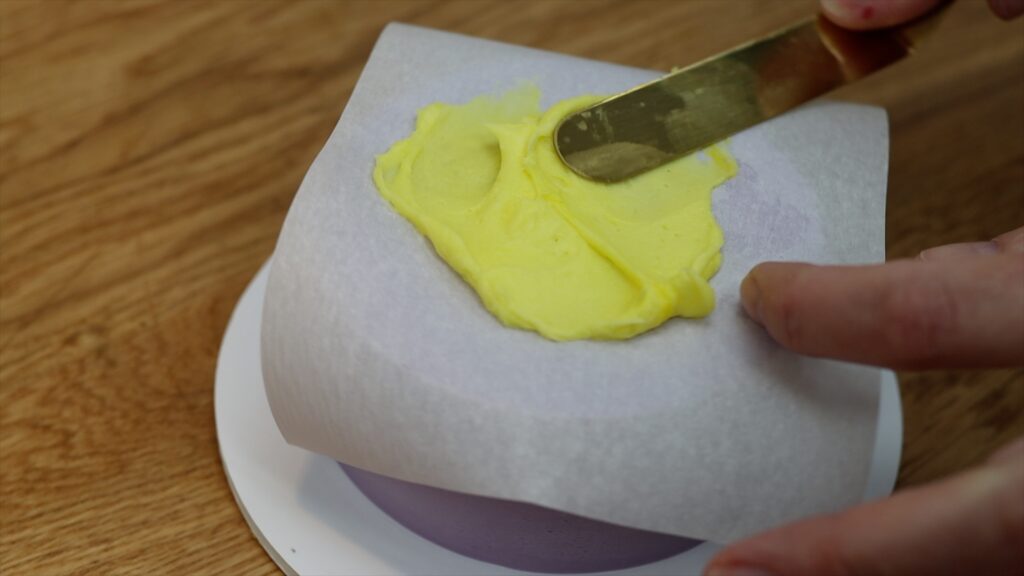
Scrape the excess buttercream off the stencil with your
To add more details and colours you can layer stencils. Chill the cake for 5 minutes in the freezer or 15 minutes in the fridge to set the first part of the design. Once it’s firm, place another parchment stencil on top. Spread buttercream over it, scraping off the excess before peeling the parchment off.
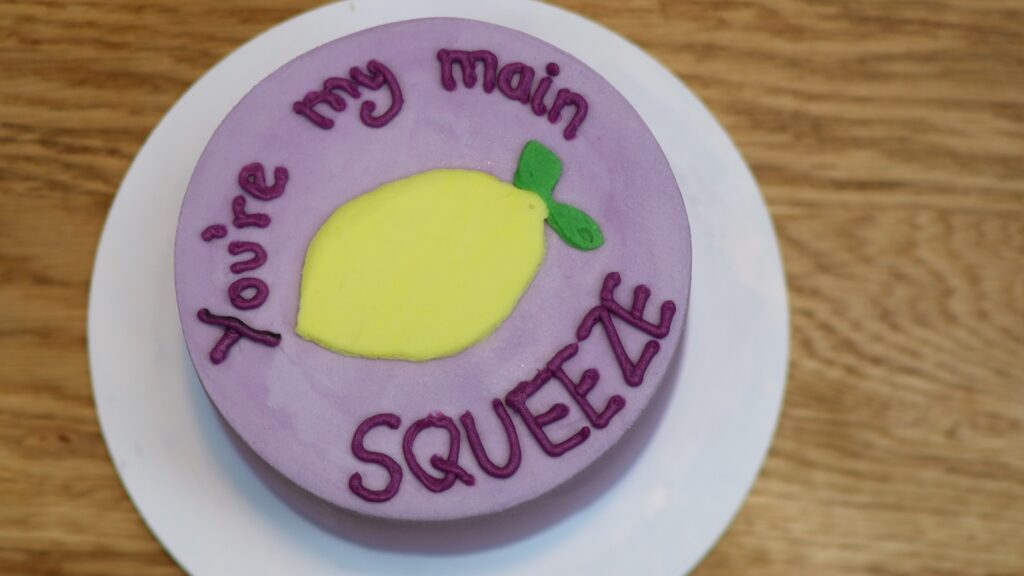
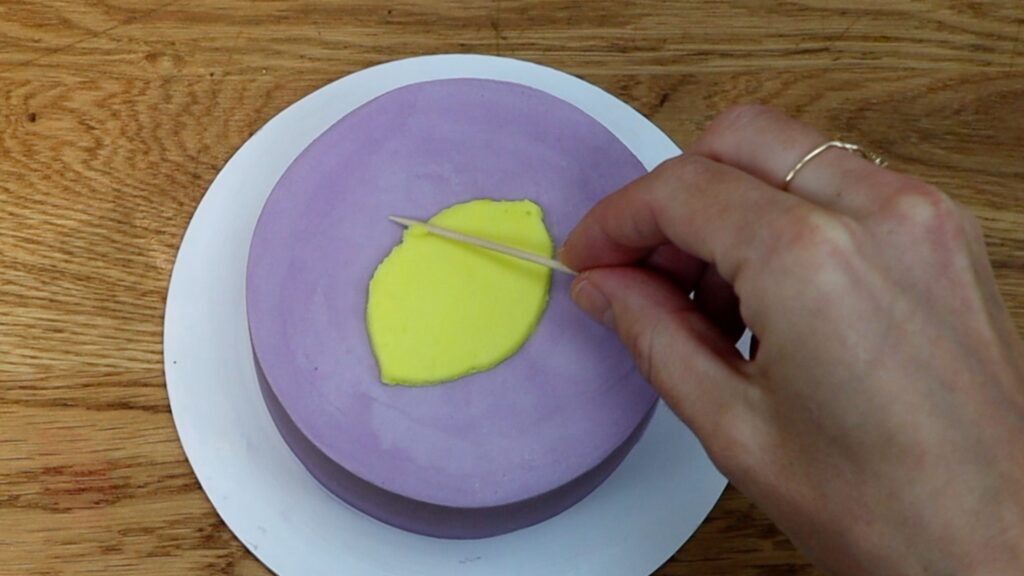
Another way to create a flat design on a cake is by piping and spreading buttercream. The trick here is to chill the cake after each colour you add to your design. That way, you can pipe the next colour onto the design without smudging or blending into the first colour. Outline your shape and then pipe back and forth to fill in the outline.
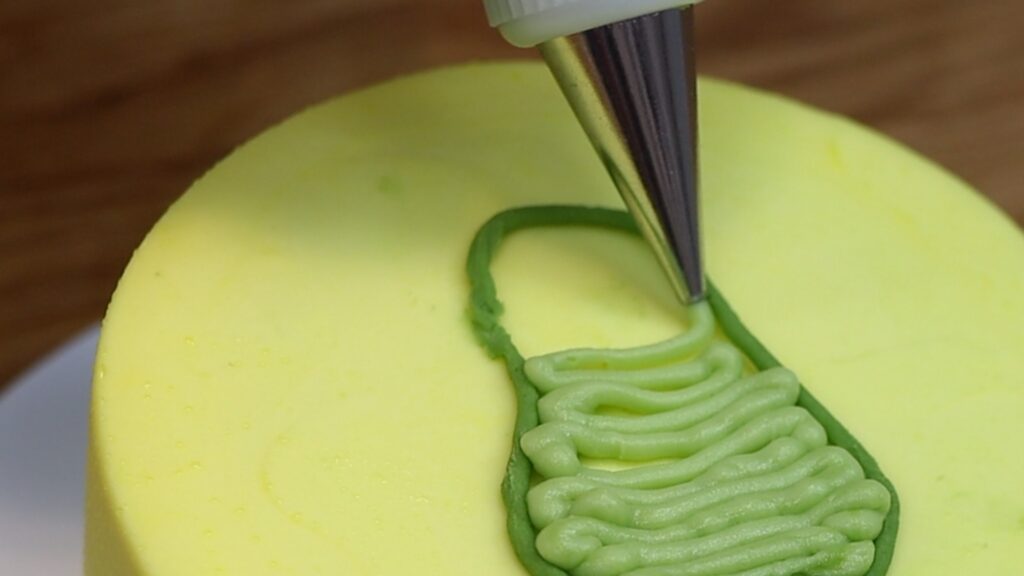
Spread the buttercream to flatten and smooth it. Use a toothpick to take off any buttercream that got outside of the outline. This is the beauty of cold buttercream - you can touch it up by scraping without damaging either the frosted cake or the rest of the design because buttercream gets so firm when it’s cold that it holds its shape.
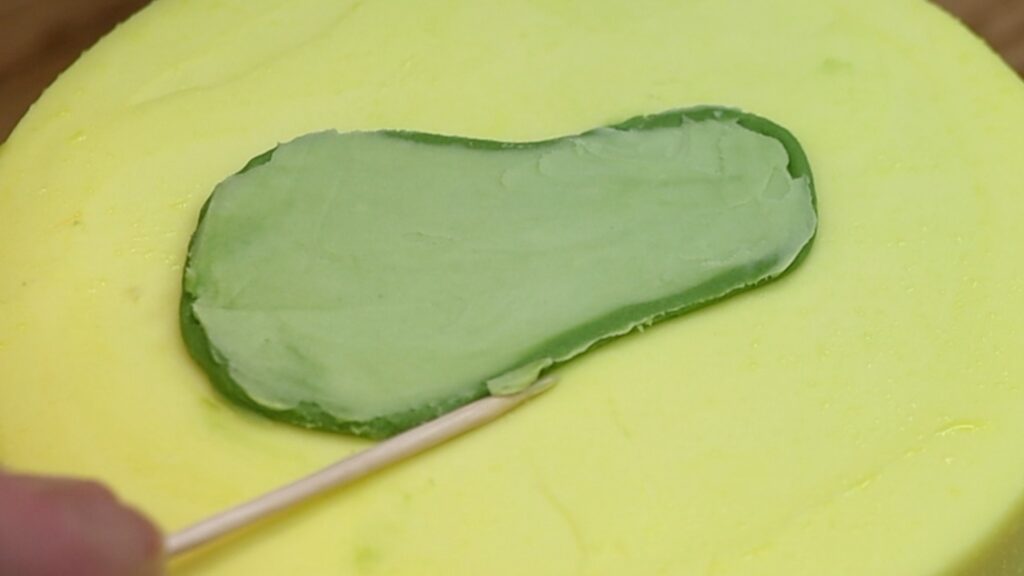
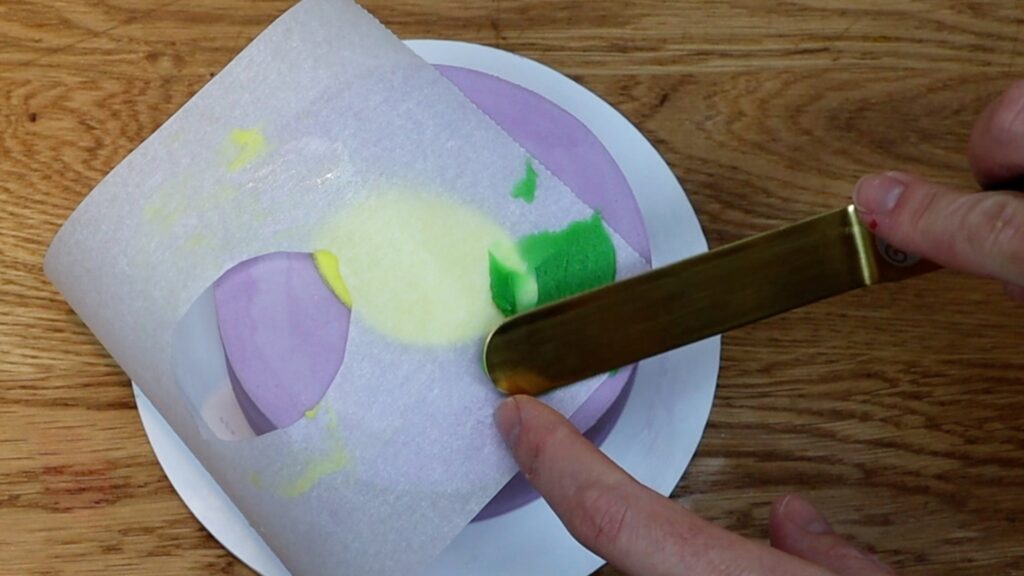
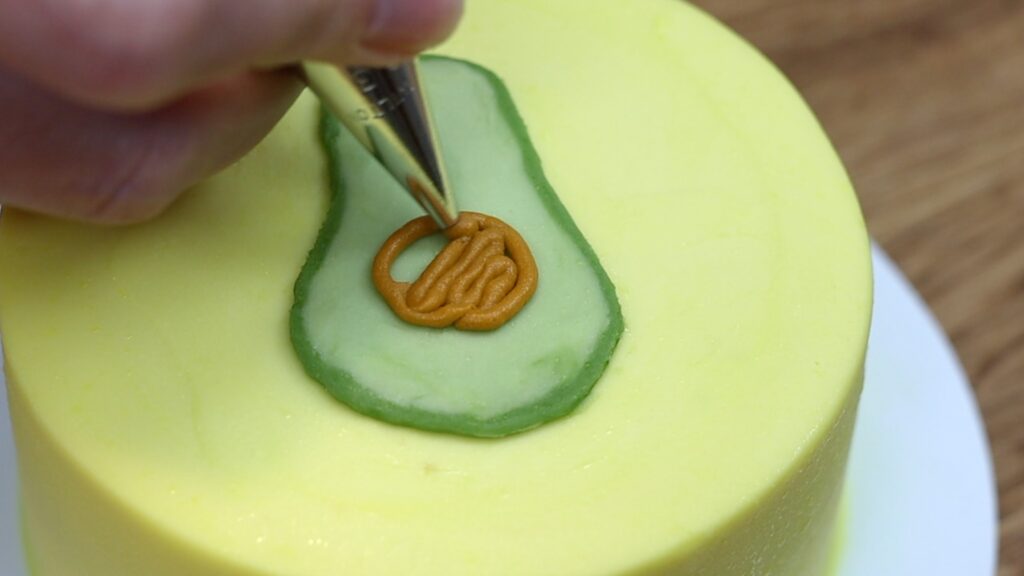
After each colour, chill the cake in the freezer for 5 minutes or in the fridge for 30 minutes. Then outline, fill and spread the next colour onto your design. By chilling each colour, you can create a neat, flat buttercream design on a cake.
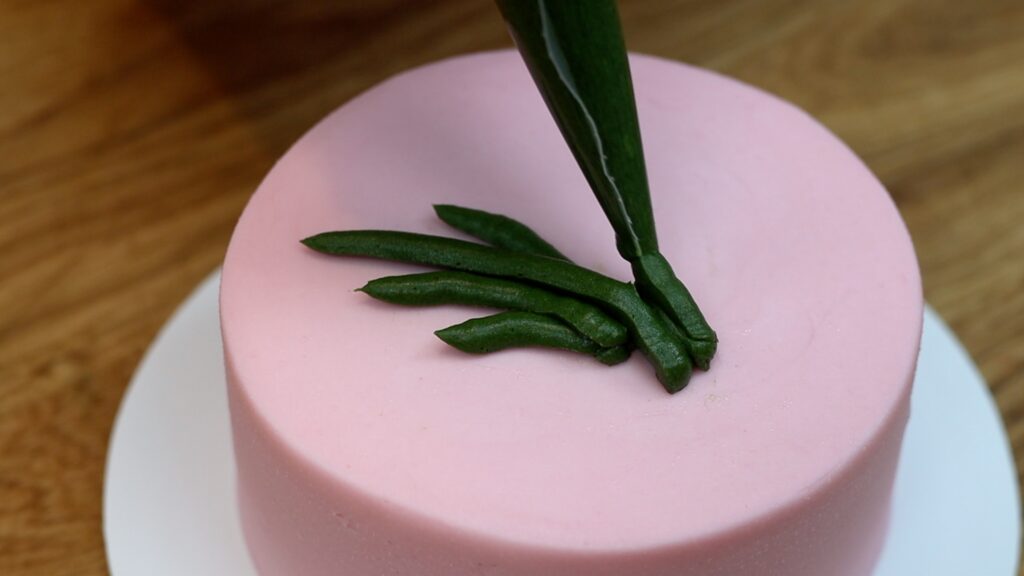
To create 3D designs you can pipe shapes onto your cake. There are lots of buttercream techniques that use piping tips but you can also pipe without piping tips! Just cut the end off the piping bag to make a hole to pipe through. Piping creates depth and texture but of course, buttercream doesn’t harden to the extent fondant can. This means your texture can’t stand up or come too far away from the cake or it will droop. However, you can still create 3D designs that stick out from the cake like this aloe vera plant:
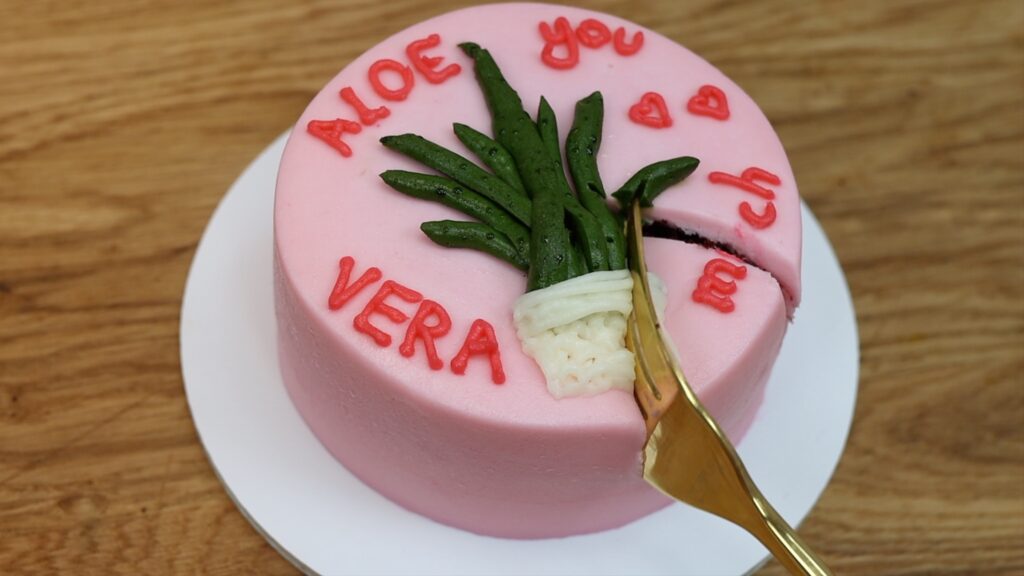
You can also pipe all sorts of textured patterns like this woven basket. Do this with a small round piping tip or cut a tiny hole off the end of a piping bag.

The best bit about piping 3D designs is that instead of hard and super sweet fondant, which you typically pick off your slice of cake, you have a deliciously soft buttercream accent to enjoy!
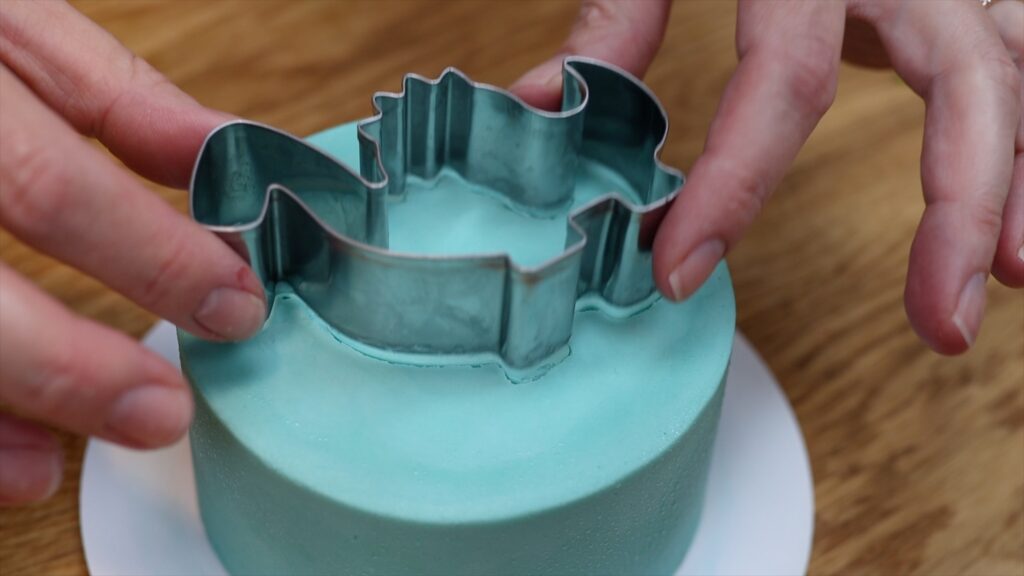
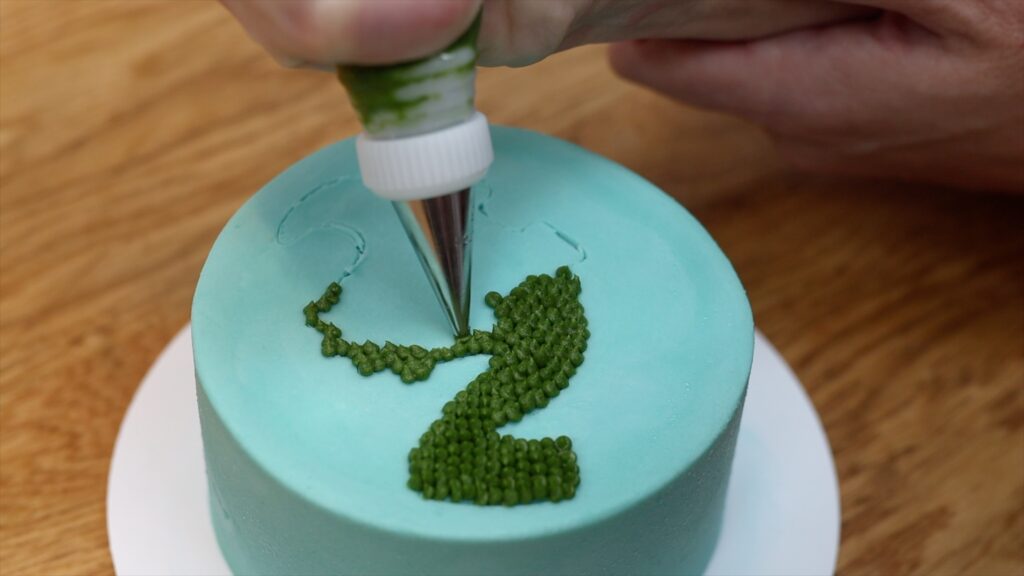
For this next technique, start by outlining your design onto a frosted cake. You can do this by drawing or tracing the outline with a toothpick or press a cookie cutter into the frosting. Cookie cutters are another tool that is useful for all sorts of buttercream techniques!
For the neatest pointillist design, use a piping bag with a small round tip like a #2, #3 or #4. This is a #3. Pipe tiny dots to fill in the outline of the shape, creating a textured silhouette. For each dot, squeeze the piping bag to let the buttercream bulge out. Then release your pressure on the bag as you lift it up to leave a neat peak on each dot.

I have few tips for pointillist designs on cakes. Make sure your buttercream is a nice soft consistency because it’s difficult to pipe if it’s too stiff. Also, piping in rows makes the neatest coverage but for intricate parts like these spikes, it’s best to outline the area first to make sure the details are clear.
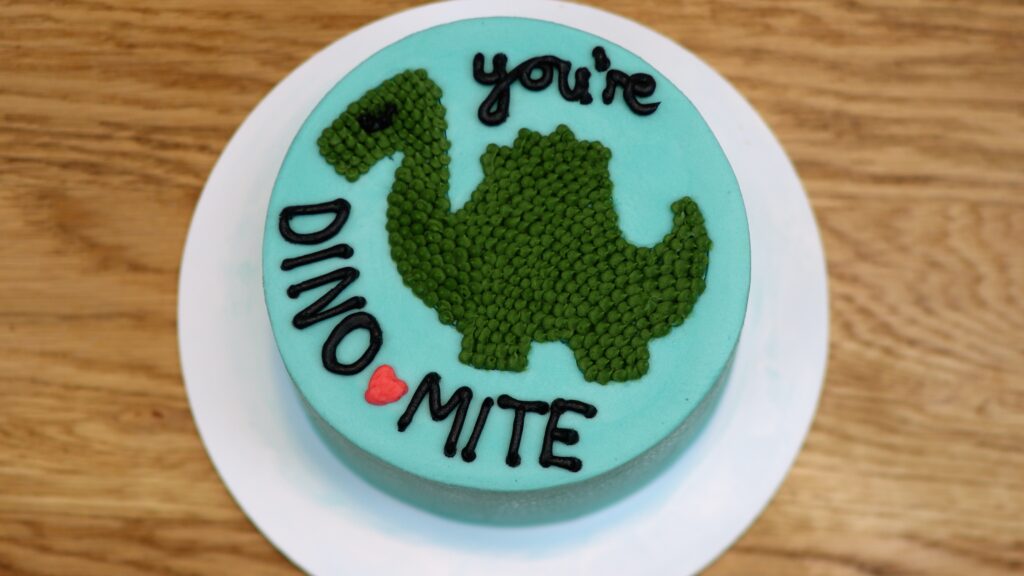
Holding the piping bag at the same angle for the whole shape will make the peaks of the dots all point in the same direction, which also makes the design neater. You can use more colours and add details like eyes by piping more dots on top of the base colour.
This is such a simple way to fill in a shape, using just one piping tip and one colour, but the texture of the dots makes the design really eye-catching! You could cut a shape out of fondant using this cookie cutter but then you wouldn’t have any of this fabulous texture.
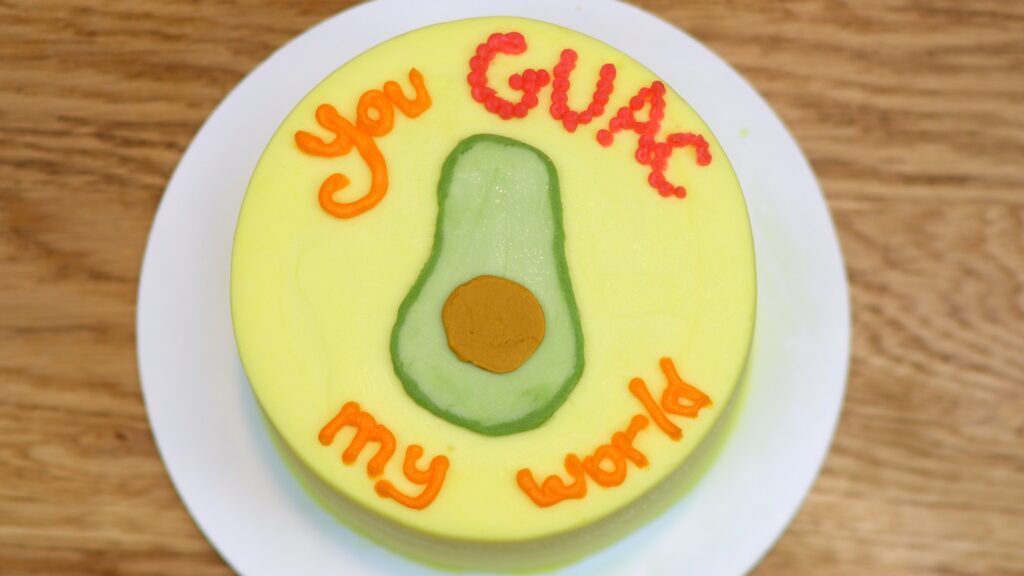
This is one of the easiest buttercream techniques for creating character cakes. For a buttercream transfer, trace detailed designs with buttercream and transfer them onto your cake. Parchment paper is ideal for this because it’s nonstick and you can see the design through it while you trace.

Pipe and spread one colour at a time, freeze for five minutes, and then repeat. By chilling the design you’ll set each colour so that you don’t damage it with the next colour.
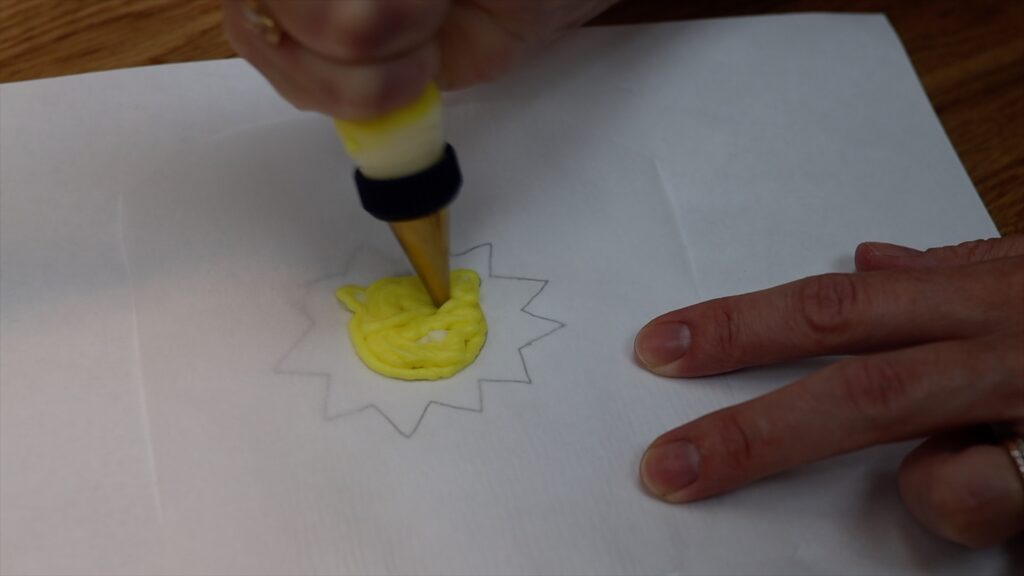
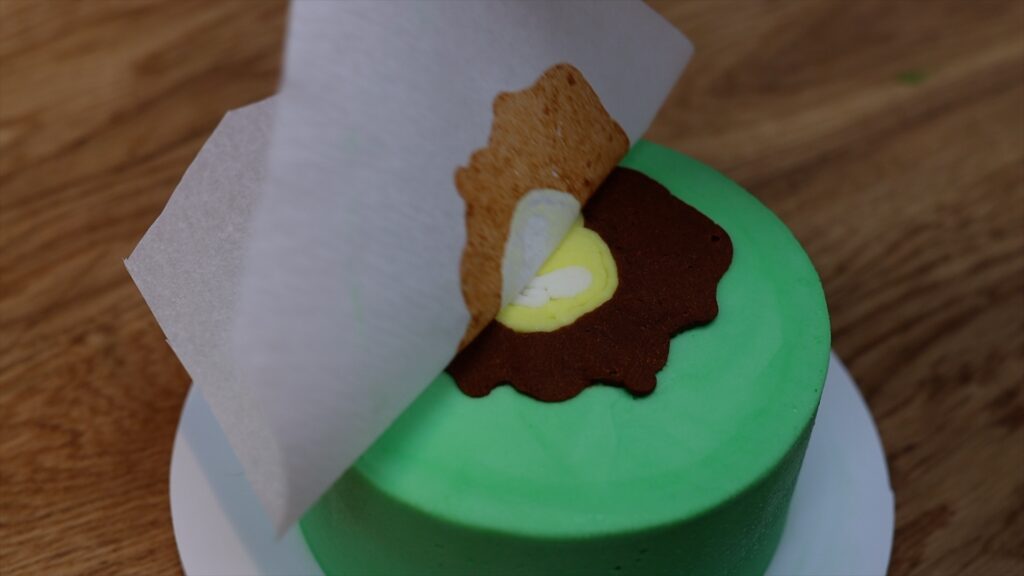
For each colour, outline the area and then fill it in with squiggles of buttercream. I like to use a small round piping tip like a #3. You can use a piping bag without a tip if you cut a small hole at the end instead. Spread the buttercream to push it down against the parchment. This prevents air pockets and also flattens the buttercream to level it so that your entire design will be the same thickness. Save the biggest block of colour until the end, piping the buttercream to outline and then fill that section. Spread this last colour over the rest of the design too. This makes it sticky, which is important because it will have set in the freezer and lost its stickiness.
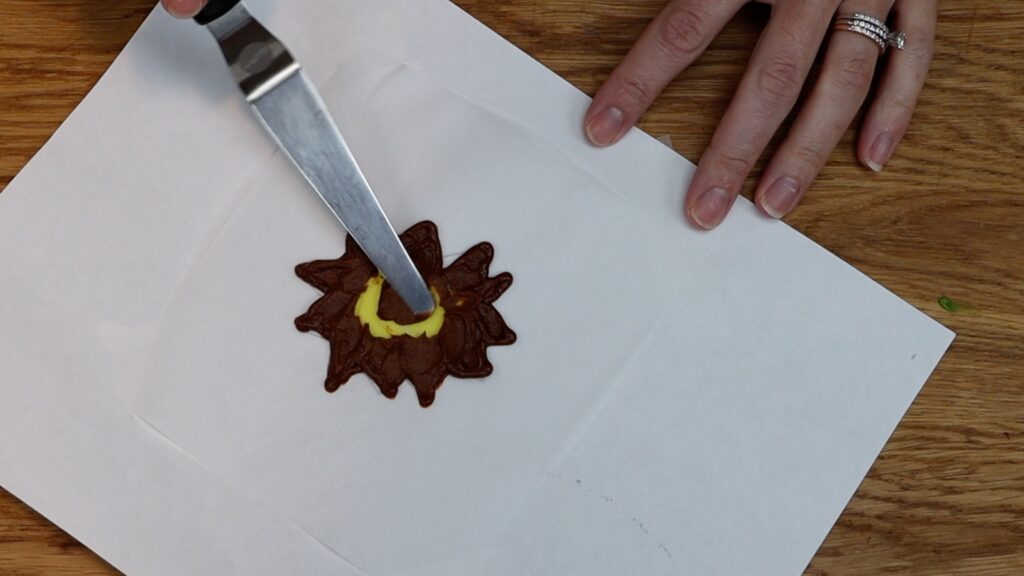
As soon as you finish piping and spreading your last colour, flip the design over and press it onto your cake. Chill it in the fridge or freezer to set the design and then peel the parchment off and voila!
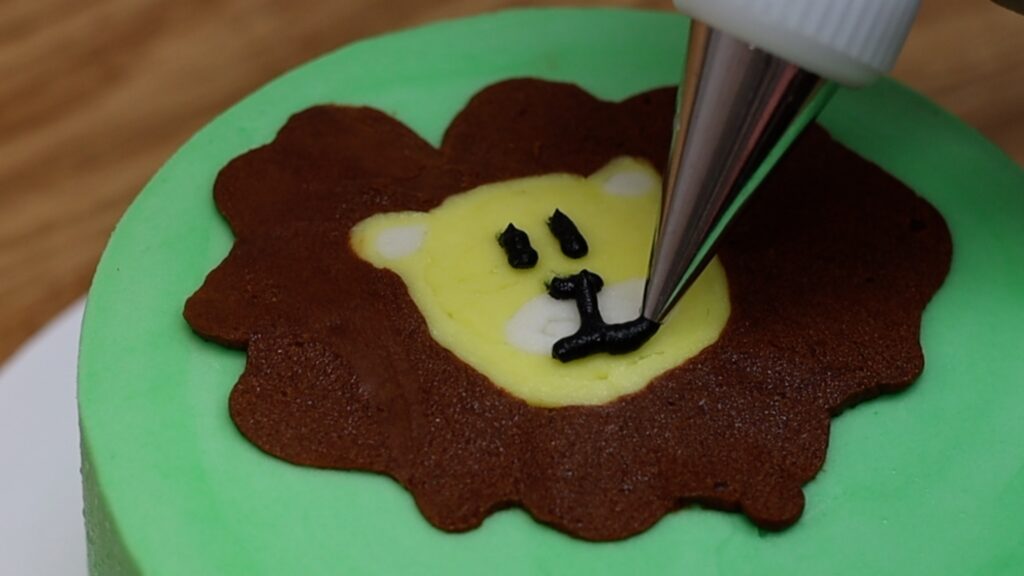
You can fill in any air pockets with more buttercream. I suggest saving the tiny details like facial expression until now, piping them straight onto the design so that they don’t warp and change shape at all during the transfer process.
With this transfer method you can trace super detailed images like characters to create precise and recognizable designs on cakes.
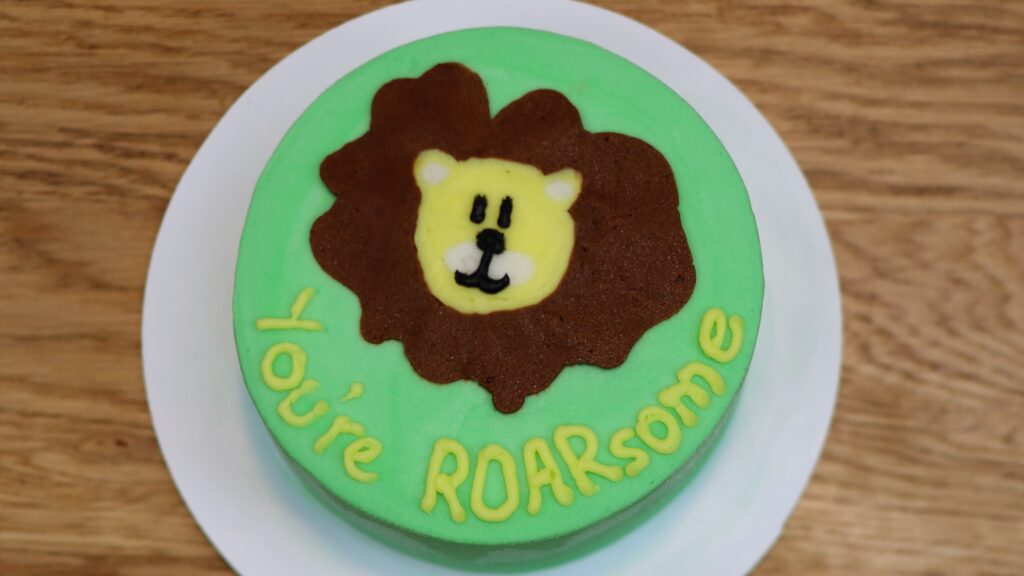
If you've noticed the Valentine's Day puns on these cakes, tell me in the comments which is your favourite! Or which is your favourite of these buttercream techniques. And if you struggle with writing messages on cakes, check out my tutorial on 12 Tips for Writing on Cakes.
Full disclosure: when I first started decorating cakes I used fondant almost exclusively. I loved making figures with it and there are definitely things you can do with fondant that you can’t do with buttercream. But as I started to experiment with buttercream, I loved the challenge of finding ways to use buttercream to do things that are usually done with fondant. Marbled frosting, perfect stripes, mosaics, animal cakes, cartoon cakes… you’ll find these and hundreds of other cake decorating techniques and designs on my online cake school. You can take individual courses or join my ClubPLUS membership for access to every MiniCourse, MasterCourse, Live Workshop and 5 Minute Fridays. I hope to see you there!


