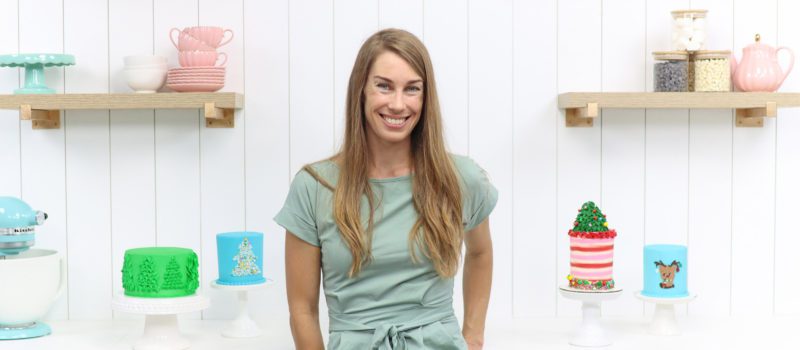
There are SO many fun way to decorate cakes at Christmas and I’m going to share 5 fun ideas with you, showing the steps to decorate each one!
If you prefer to watch a video of this tutorial, scroll to the bottom of the page.
To make a cute reindeer or snowman or any other character, print or draw the character and tape a piece of parchment paper or wax paper on top. Tint buttercream to make a spoonful of each colour you need and put the colours in piping bags with small round tips, or use ziplock bags and cut a small piece of one of the bottom corners to make your own piping bags!
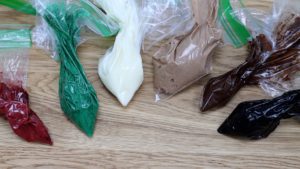
Start with the small details, piping the colored buttercream to trace the design, skipping any complicated details if you want to simplify the design. This side of the design isn’t going to be visible so don’t worry about messy textured piping. Save the largest colour section until the very end and when you finish all of the other colours, put the design in the freezer for 5 minutes to chill and set those colours.
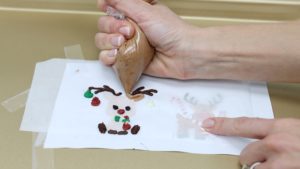
Then pipe the final colour on top of the frozen details, spreading it with an
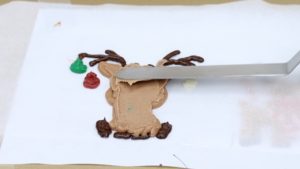
Straight away, pick up the parchment and gently press it against a cake. Push the parchment paper gently all over the design so that it sticks to the frosting on the cake. The frosting on the cake should have already set, so I put this cake in the fridge for an hour before doing this. Put the cake with the parchment transfer back in the fridge for another hour, or in the freezer for 15 minutes, to set the design so that it attaches to the cake.
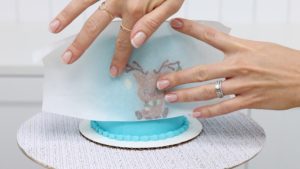
Then peel the parchment off to reveal your design!
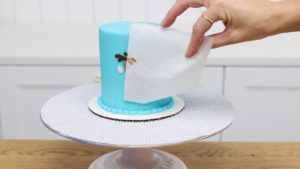
To make your own cake stencil, cut a piece of parchment or wax paper so that it’s as tall as your cake and wide enough to wrap around half the cake. Draw or trace a design onto it and then cut it out with scissors, poking the shape in the middle and cutting around the outline without damaging the parchment paper that surrounds it.
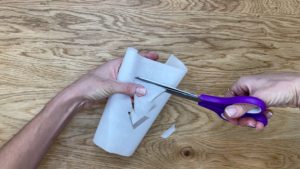
Make sure the shape fits within the height of the cake. If the parchment paper was on a roll, it will curve, and you can use the curve to help you wrap the stencil around your cake.
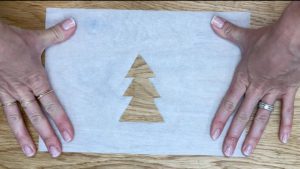
You can use coloured buttercream on your stencil or add sprinkles, too. I’ll show you how to do both. If you’re going to use sprinkles, put your cake on a tray or baking sheet to catch falling sprinkles to make cleanup easier, and a non-slip mat will stop the cake from sliding around.

Wrap your stencil around your cake after the frosting has set in the fridge for at least an hour, so that it’s firm and the stencil won’t damage it. If the parchment paper is from a roll, follow the curve of the parchment paper so that it wraps easily around your cake.
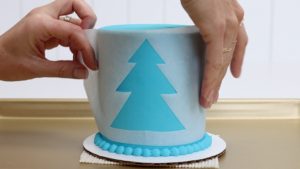
Pipe or spread buttercream over the stencil to cover the shape. Parchment is delicate and flimsy so as you’re spreading, spread from the outside of the shape towards the middle and that way you won’t push buttercream underneath the stencil, which will smudge the outline of your design.
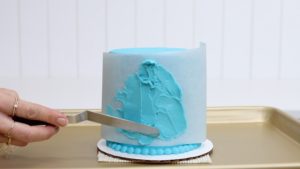
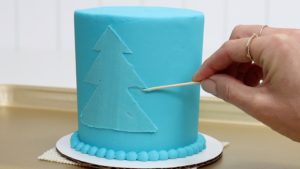
When the buttercream covers the whole stencil design, scrape off the excess with your
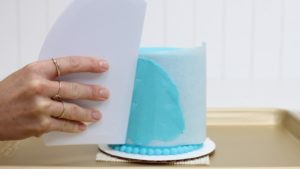
Peel the stencil off straight away, while the buttercream you just spread on is still soft and this will give you a neat edge on your shape.
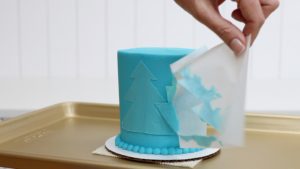
You can touch up any smudges with a toothpick, since the frosting on the cake has set so you won’t damage it.
If you want to add sprinkles, do that now while the stencil frosting is still soft and sticky. Scoop up some sprinkles in your hand and angle your hand towards the cake so that the sprinkles press against the stencil design. The sprinkles will stick to the fresh frosting of the stencil, but not the frosting around the rest of the cake because that frosting has set.
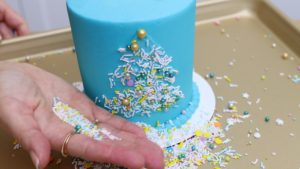
Use your finger or a toothpick or a paintbrush to tidy up the edges of the design, so that the sprinkles go just up to the outline of the design and make the shape really clear and recognizable.

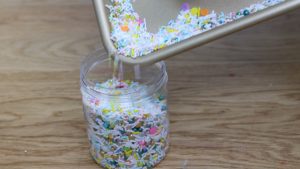
By doing this on a tray, when you’ve finished you can tilt the tray to collect the leftover sprinkles and then pour them back into the jar or packet and save them for another project!
Cookies are a fantastic way to make a really unique cake topper yourself! I keep raw cookie dough in the freezer to pull out whenever I want to make a topper like this. Roll the dough and press a cookie cutter into it to cut out your shape.
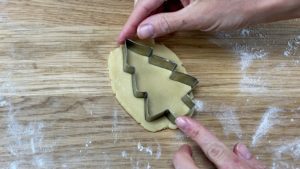
Push a paper straw into one side of the cookie, which you’ll use to attach the cookie to your cake. Freeze the shape for 5 minutes before baking to help it hold its shape better, so it doesn’t spread out into a shapeless blob in the oven.
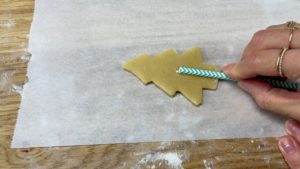
Now decorate the cookie with buttercream using piping bags or a ziplock bag with a corner cut off to pipe through. You can spread the frosting with an
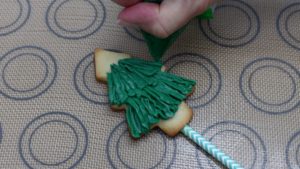
To attach this to a cake, start with a plain straw and push it into your cake. You’ll have to push quite hard if your cake has been in the fridge and that’s the reason for using this test straw first. Pull it out and this makes a pathway for your cookie topper.
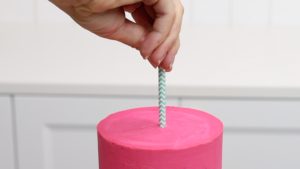
Push your cookie on its straw into the hole and it will slide in easily without breaking the cookie in the process!
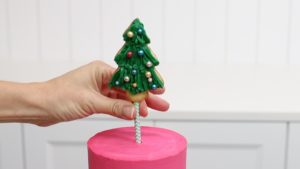
Instead of a cookie, you can make a Christmas tree with cupcakes! Peel the wrappers off and layer the cupcakes like a little cake, with frosting in between to attach them together.
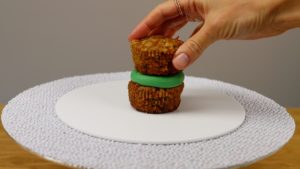
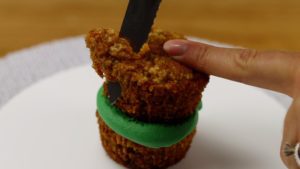
Carve the cupcakes to make a point at the top to make a Christmas tree shape. This is easiest to do with a serrated knife when the cake is cold because cold cakes are less crumbly and wobbly than when they’re at room temperature.
Now cover the cupcake tree with green frosting. This is my 4 Minute Buttercream, which I use for all of my cakes. This is a crumb coat so it doesn’t have to be neat, it just seals in the moisture and traps the crumbs.
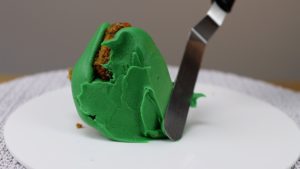
Use a leaf shaped piping tip like this #352 to pipe leaves to cover the cupcake Christmas tree. The teeth of the leaf tip should be above each other and the leaf will fan out from the sides of the piping tip. When you pull the tip away and stop squeezing the piping bag, the buttercream will make a point which looks like the spikes of a Christmas tree.
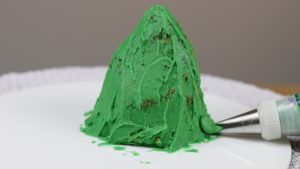
Start at the bottom of the tree, piping in a ring that goes all the way around the tree. Then pipe another ring above that, with each leaf overlapping the leaf below to cover up the base of that leaf.
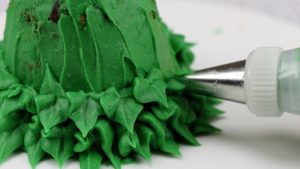
Work your way up to the top of the tree and then chill the cupcake in the fridge for an hour to set the frosting so that the piped details won’t get damaged when you move the tree onto the top of a cake. Alternatively, you could place the crumb coated Christmas tree on top of the cake before piping the leaves around it.
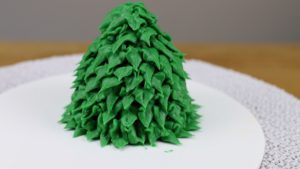
When the tree has set, take it out of the fridge or freezer and lift it up and lower it onto a cake.
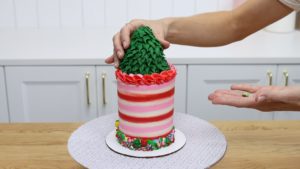
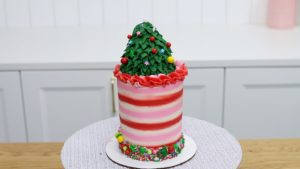
To make Christmas decorations, choose a fun sprinkle mix and press the sprinkles one by one into the frosting. You can do this immediately after piping the frosting, while it’s still soft and sticky, or if you wait until the frosting has set, like I did, you’ll need to spread or pipe a tiny dot of frosting onto each sprinkle to act as glue to attach it to the cupcake Christmas tree.

Don’t forget the top of the tree! If you don’t have a golden star sprinkle you can get creative with a gold ball or even a snowflake!

This festive cupcake Christmas tree makes a delicious addition to any cake!
Now let’s pipe some Christmas trees straight onto a cake! There are loads of different piping tips you can use for this and I’ll show you my favorites now.

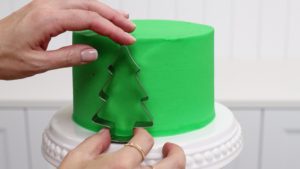
I like to press a cookie cutter into a frosted cake to give myself an outline to follow and here’s a crash course on Christmas tree piping:
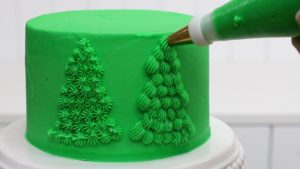
Use an open star tip like a #32 to pipe rosettes or spikes to fill in the outline like on the tree on the left. You can use the same tip a bit differently, starting with a dot and after it bulges out, pull the tip upwards to fork a peak, which you’ll cover up with the next row of piping.
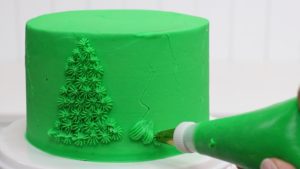
Both of these create texture similar to on a Christmas tree, with multiple ridges of texture in each piped detail.
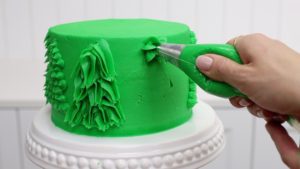
Next up, a petal tip. This is a #104 and there are two ways you can use it for Christmas trees. First, you can pipe ruffles like this if you keep the narrow end of the piping tip pointing down and the wide end pointing up. Create layers of ruffles that overlap each other to fill in the tree outline.
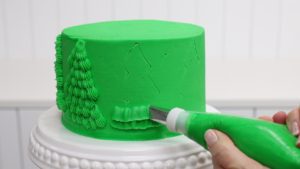
Holding the same piping tip in the same way, with the narrow part pointing down, pipe these little petals along the tree, starting at the bottom and overlapping each row as you work up the tree.
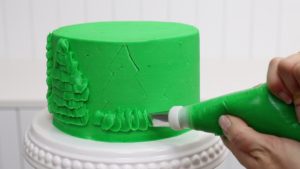
With a leaf tip like this #352 you can make spikier shapes, holding the tip with the two little teeth above each other.
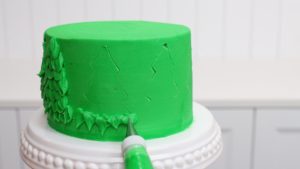
This is what the finished Christmas tree looks like when you pipe it with a leaf tip!
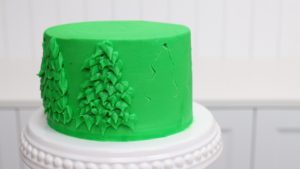
Use a medium round piping tip like a #12 to pipe dots and as you pull away after each dot you’ll leave a point behind, which give the Christmas tree that branch texture.
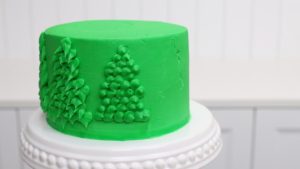
Almost everyone has a 1M tip, a star tip, and that works too, piping little lines downwards to resemble the branches.
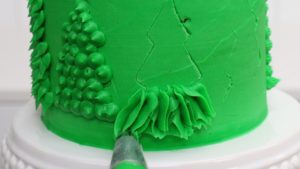
Instead of dragging the tip downwards, squeeze a bit out to make these spiky star dots!
I hope you’ve seen a fun idea you’d like to try! Visit my online cake school for LOTS of courses teaching hundreds of cake designs and techniques and join my ClubPLUS for access to them all!

Here’s the video version of this tutorial:
