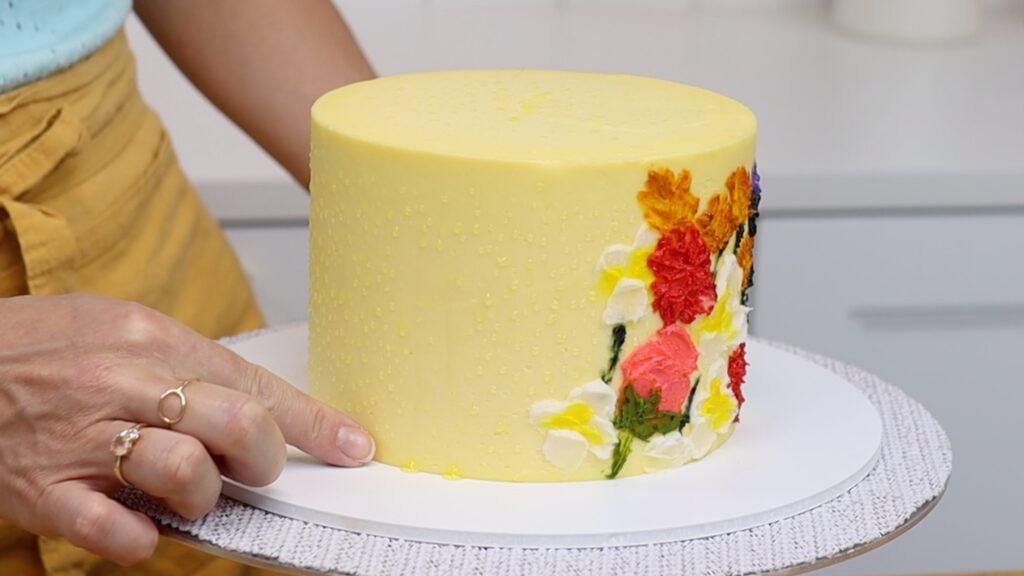
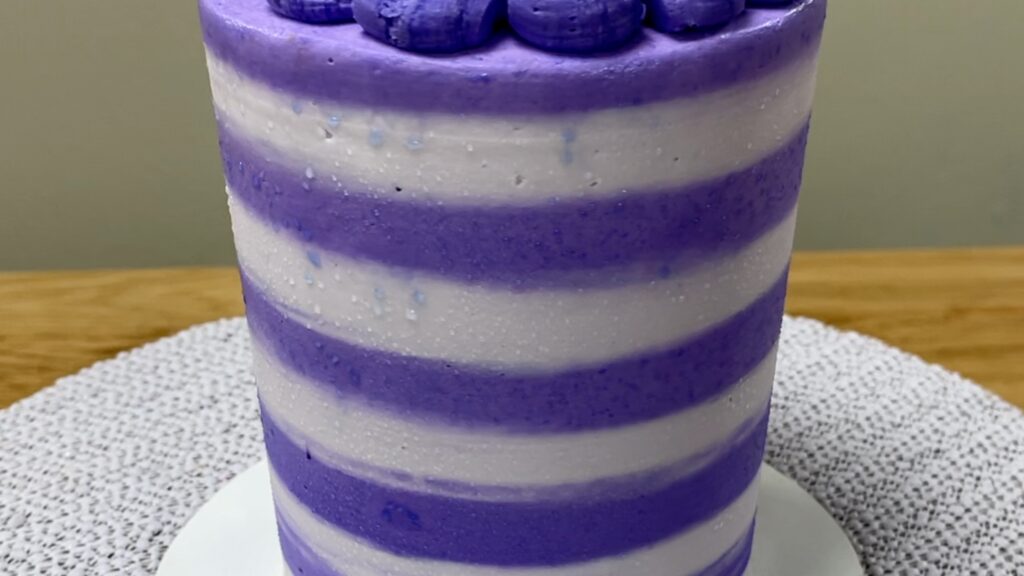
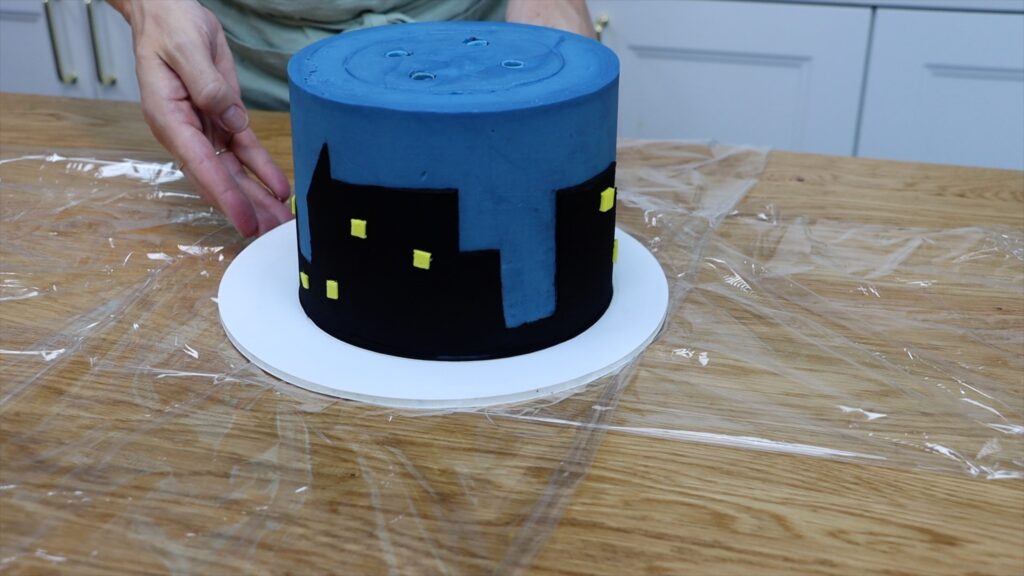
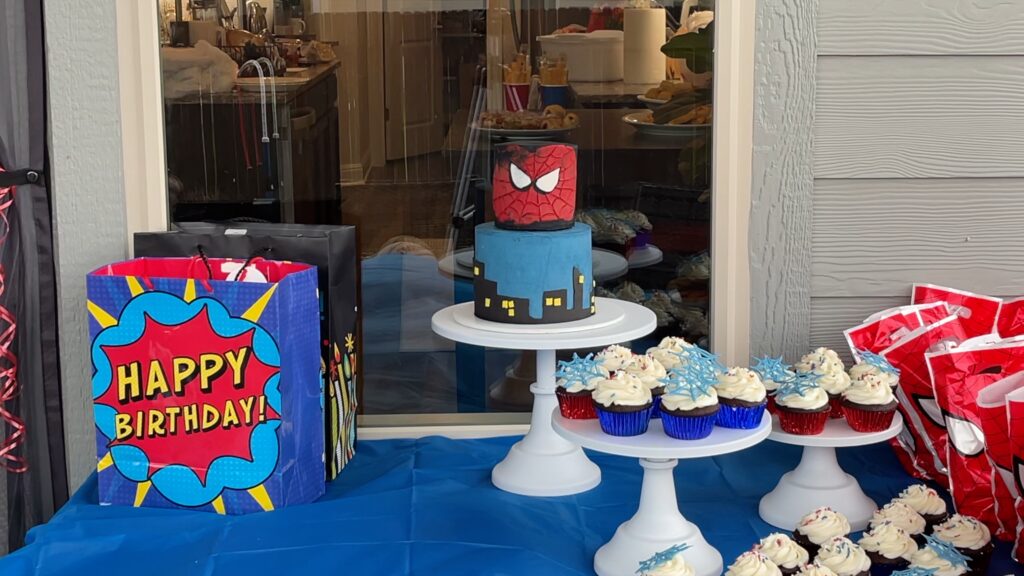
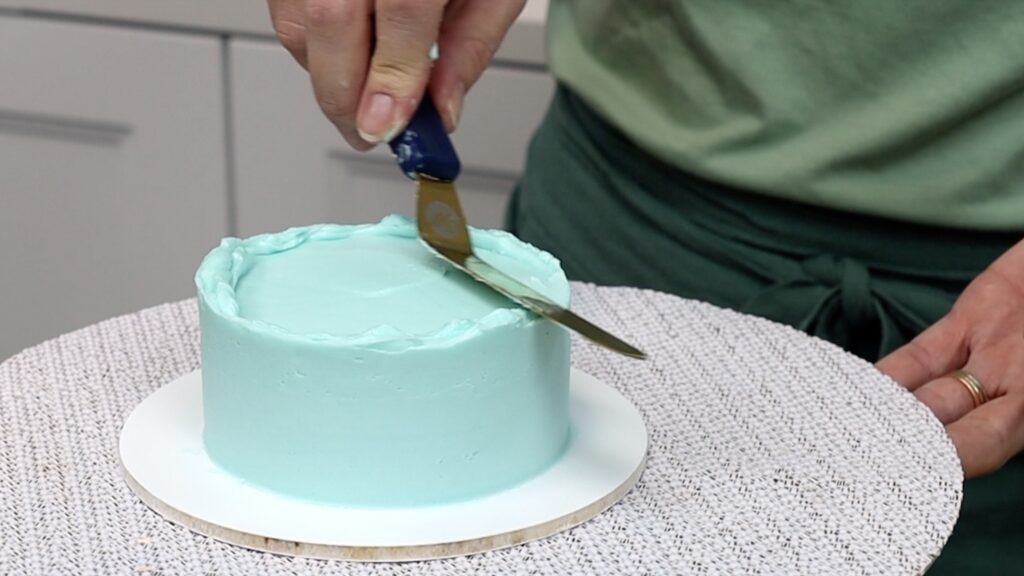
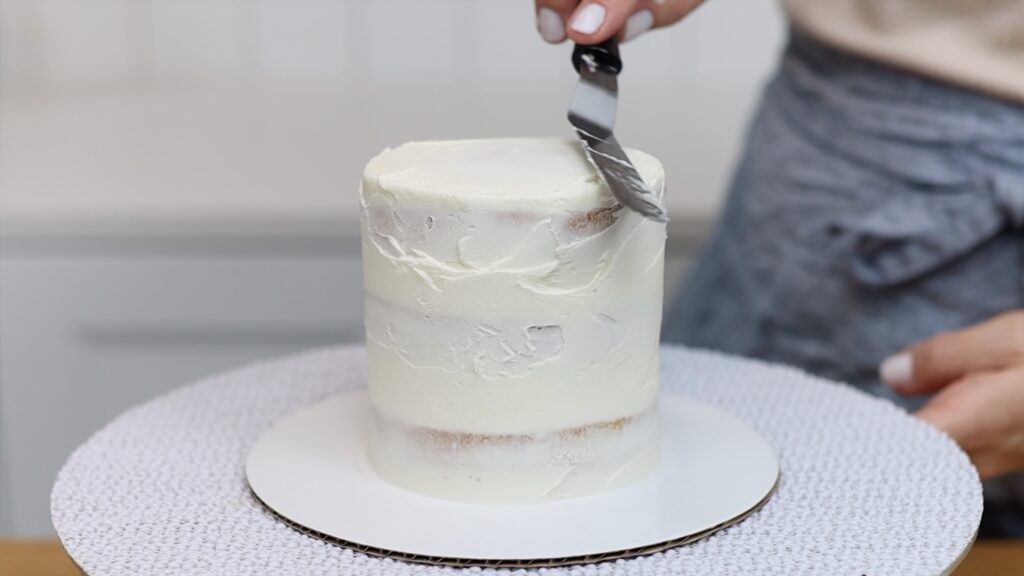
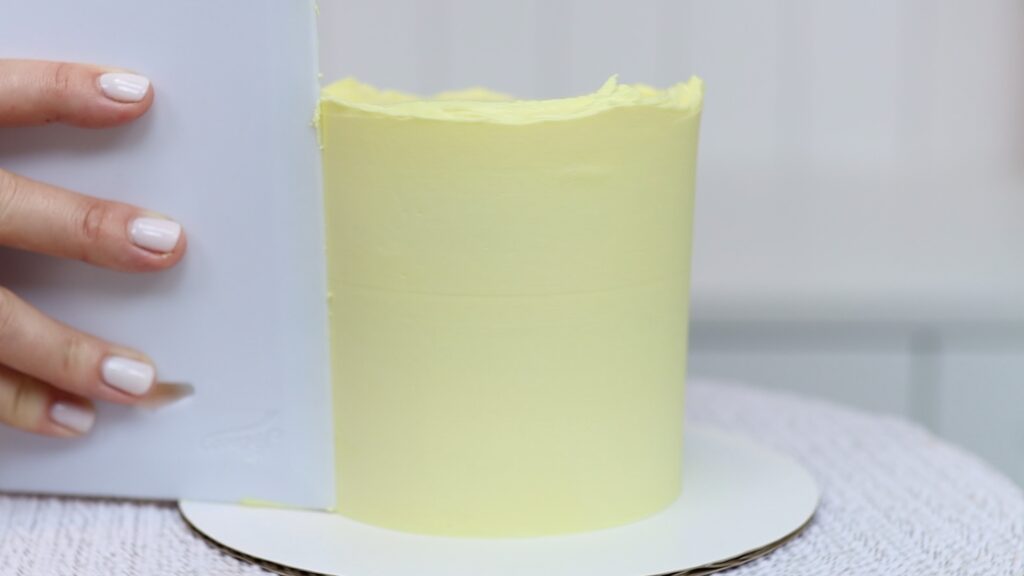
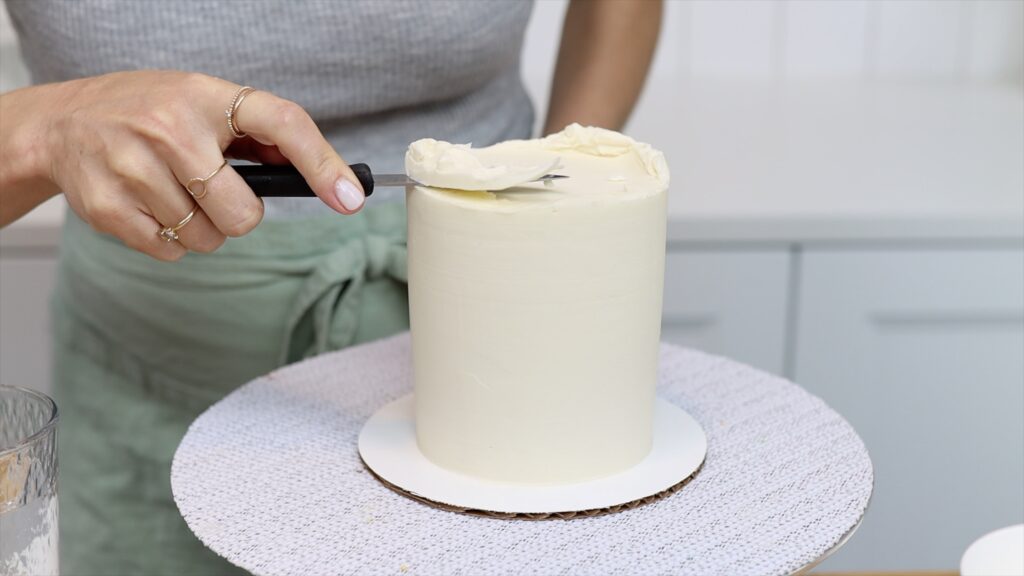
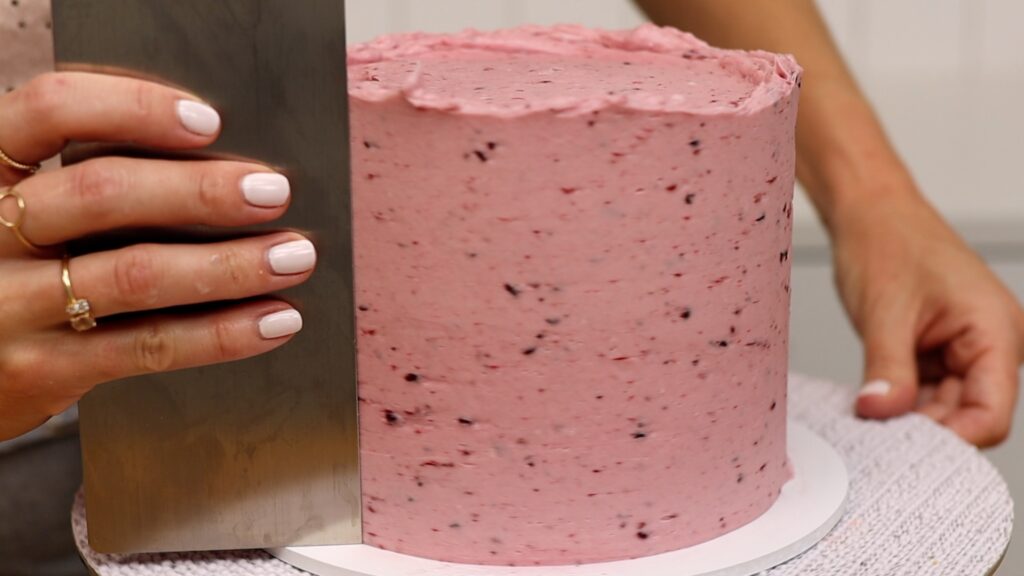
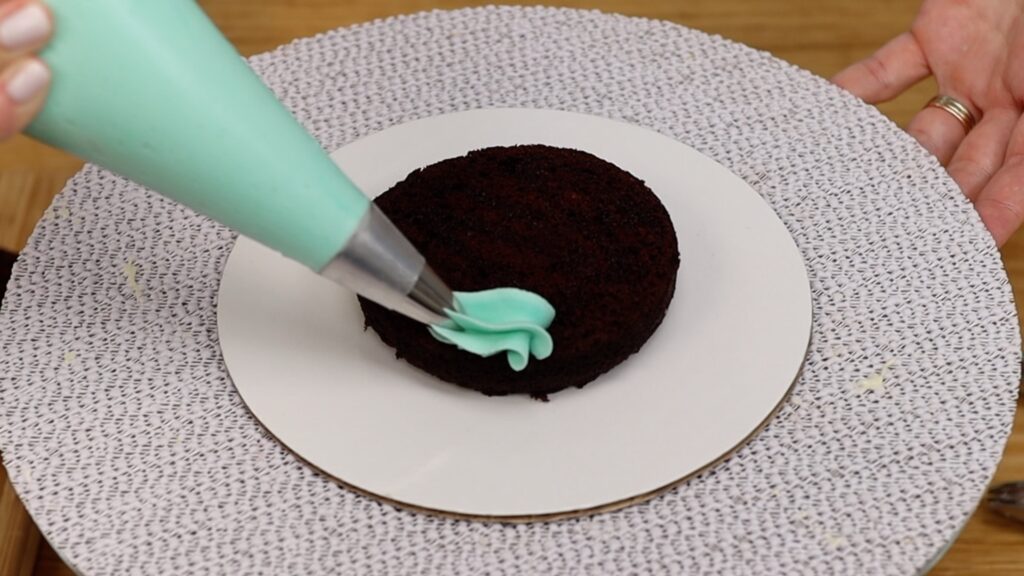
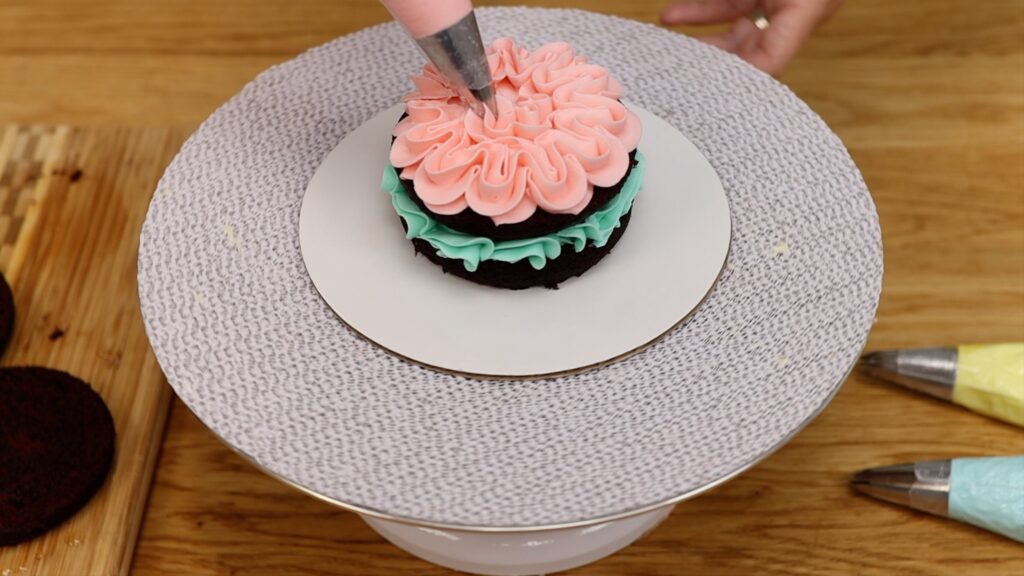
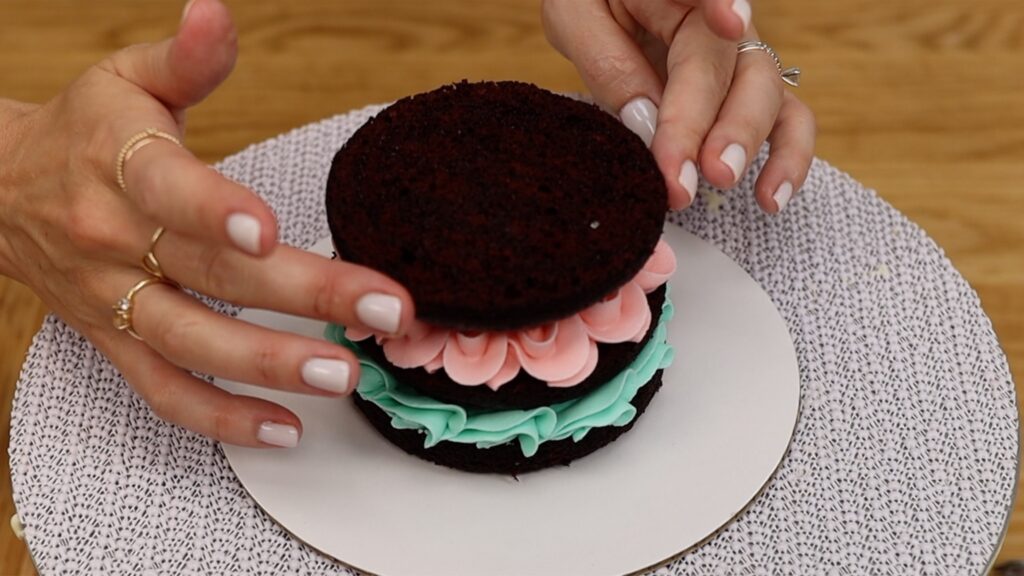
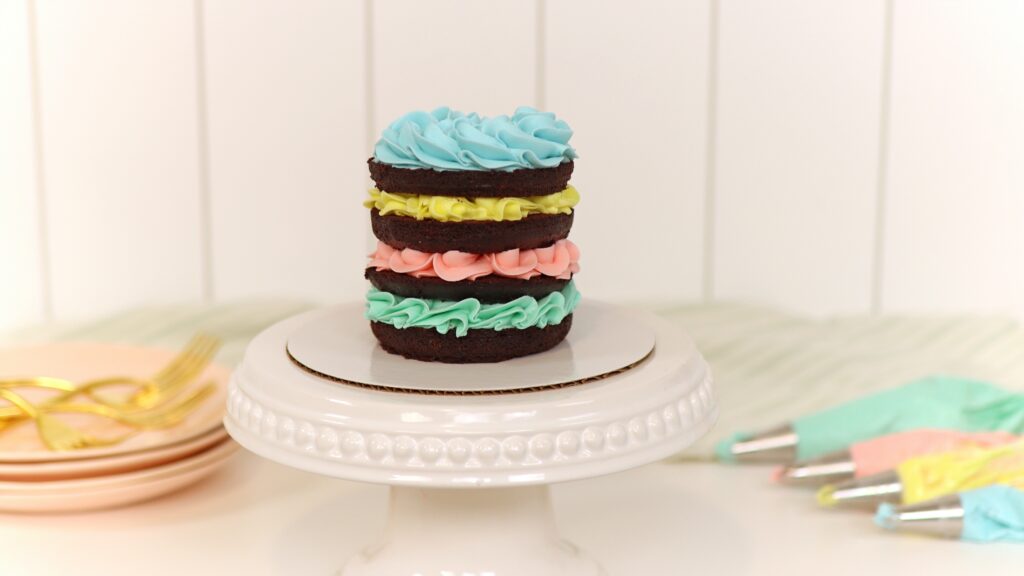
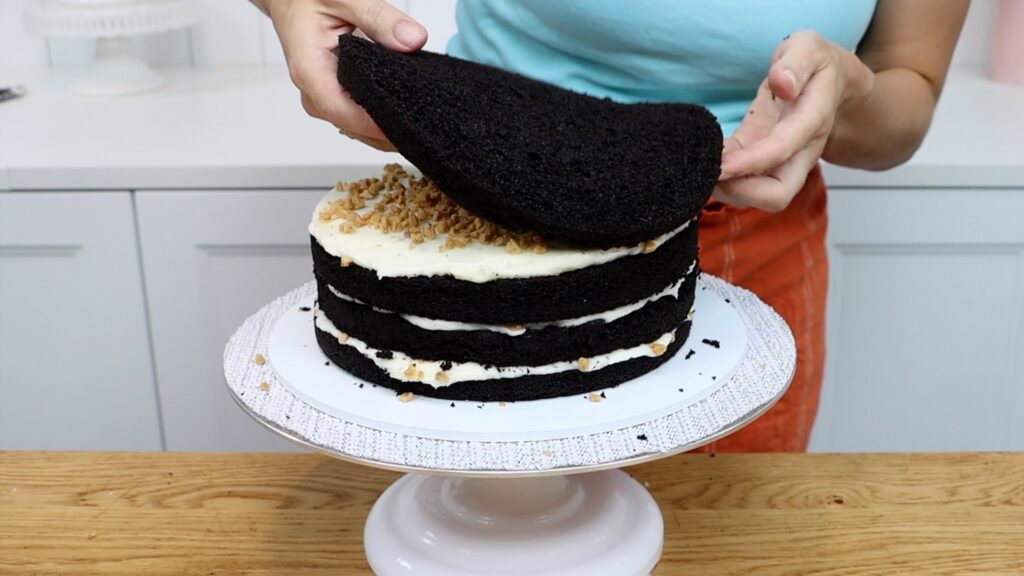
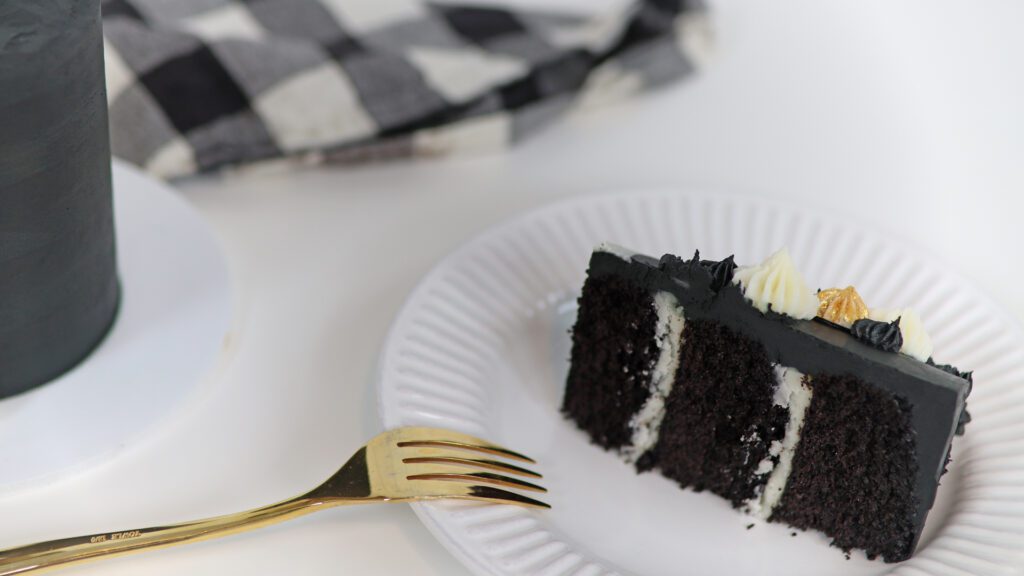
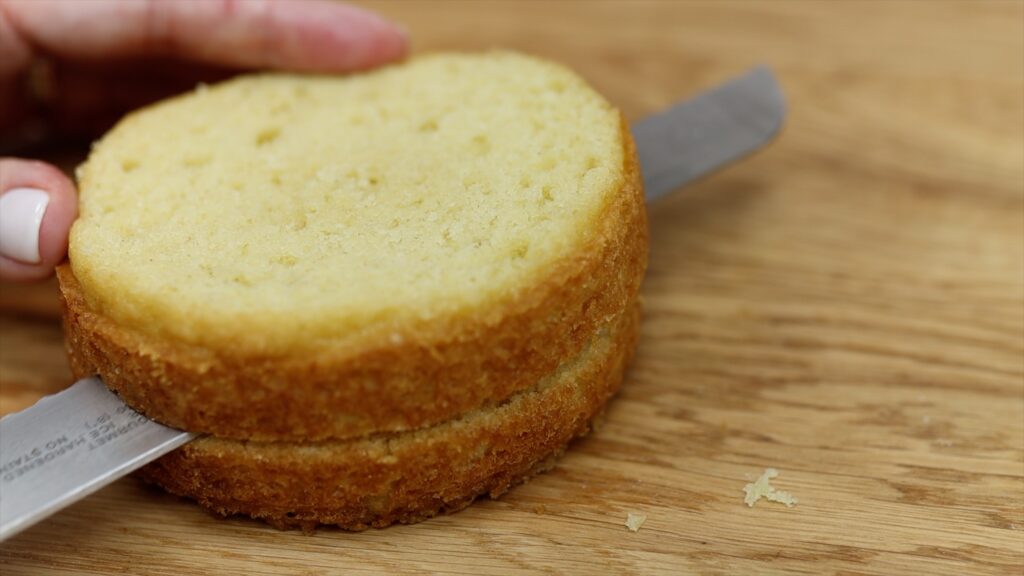
Condensation on cakes, also known as cake sweat, is one of the most frustrating parts of cake decorating. I’m going to show you two reasons why condensation happens, two ways to prevent it, and how to fix it.
Condensation is not pretty. You've probably seen it in the form of ugly droplets on the sides of a cake. Even worse, it can make coloured decorations run and also cause pools of coloured liquid on the cake board.
Why does condensation happen?
The first reason is a change or difference in temperature. This happens when the temperature of the cake within the frosting is colder than the air outside the frosting. Condensation (or cake sweat) will happen with any big change in temperature. For example, moving a cake or cake layers from the fridge or freezer to a warm room.
I always recommend chilling cake layers before frosting because they get firmer and less crumbly. This means your cake won’t wobble on the turntable as you spread the frosting on and while you smooth it. But if it’s hot in the room, after about 15 minutes you’ll see droplets of condensation forming on the frosting.
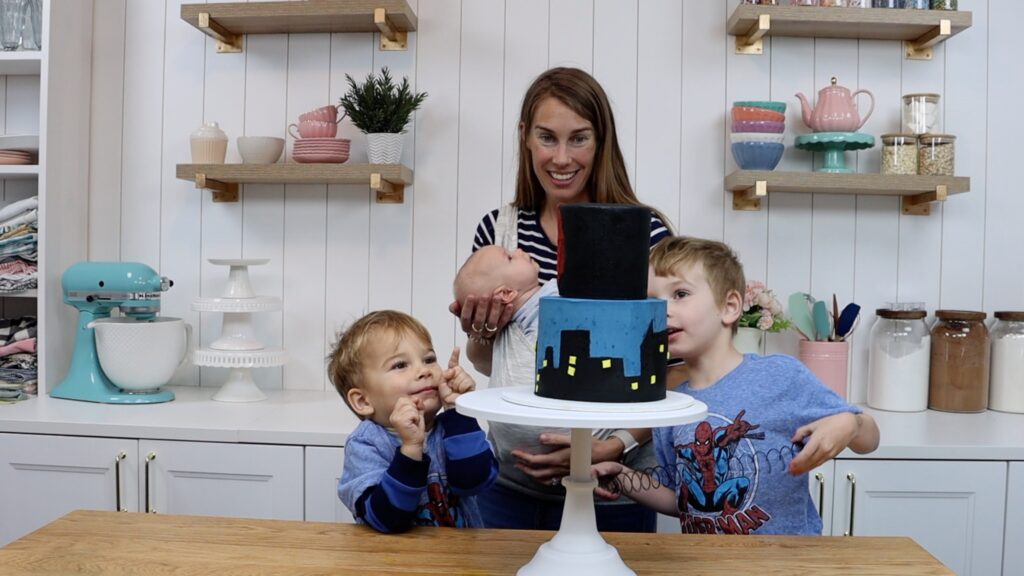
Let’s talk about the other reason condensation happens: moisture in the air. As I mentioned, I’m a big fan of chilling cakes before frosting them and also after decorating. This keeps the frosting and decorations stable and makes cakes more stable for transporting, too. I also love being able to freeze cakes so that I can make them in advance for an event or occasion. This gives me the flexibility I need since I have three little ones.
The challenge with fridges and freezers is that there’s a lot of moisture in that cold air inside them. This is caused in part by opening and closing the fridge or freezer door, which lets warm air in.
So, condensation is caused by: 1) differences in temperature of the cake and the air around it 2) moisture within a fridge or freezer.
How to avoid condensation on cakes
Good news! You can avoid both of those types of condensation.
First, minimize changes in temperature. So if you chill your cake layers, frost them in a cool room. If you freeze an entire cake, put it in the fridge for 24 hours to defrost before moving it to a cool room.
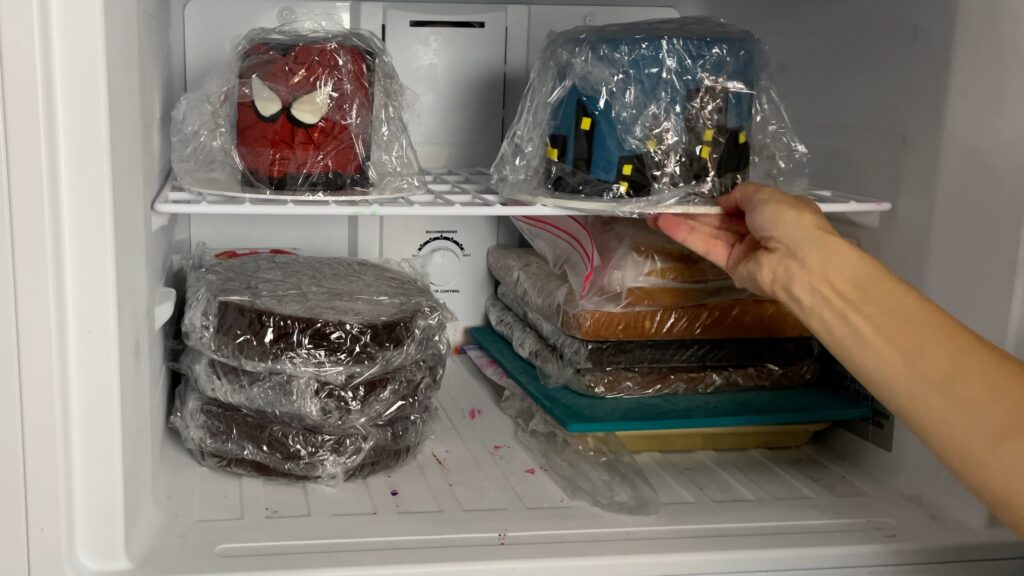
The second way to avoid condensation on cakes is to wrap cakes in plastic before chilling in the fridge or freezer. If you put a cake in the fridge or freezer for an hour it won’t pick up any moisture. But it you’re leaving it there for several hours you'll need to protect it from moisture. Use two layers of plastic wrap so that the cake is sealed and protected.
Yes, these are buttercream cakes! If you’re wondering how to wrap them without damaging the frosting, here’s the trick. After frosting the cake, put it in the freezer for an hour. An hour isn’t long enough to develop condensation from the moisture in the freezer but it is long enough to set the frosting. Once the frosting is cold and firm, take the cake out and wrap it in plastic. The frosting will hold its shape even when plastic wrap brushes against it or rests on it.
When the cake goes back into the fridge or freezer it will be sealed and protected from any moisture. When you take the cake out of the fridge, unwrap it before the frosting on the cake warms up and softens. This way the plastic wrap won't damage it.
How can you prevent condensation if the cake is being served outside?
Ideally, the cake will be at room temperature and the temperature outside will be the same as the temperature inside, but that’s hardly ever the case.
Take the cake outside at the last possible moment and find a spot for it in the shade. If possible, position a fan to blow onto it. These will all limit the amount of condensation caused by the change in temperature.
How to fix condensation on cakes
Sometimes it's not possible to avoid condensation on cakes. If you live somewhere hot and don’t have air conditioning you'll experience it if you chill cakes between decorating steps. If you forget to wrap a cake in plastic before chilling it you'll also notice condensation droplets. Don't panic! It's possible to remove condensation from cakes.
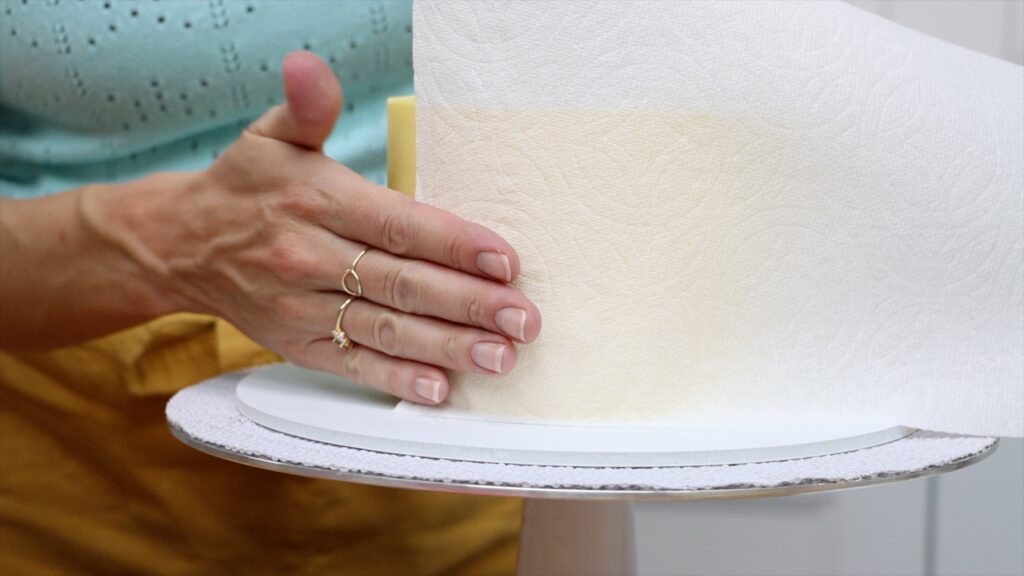
After a cake comes out of the fridge it will take a few minutes before condensation droplets start to appear. The hotter the room, the sooner you’ll see the droplets. Take a paper towel and gently press it against the cake and it will absorb the condensation.
This works because my 4 Minute Buttercream frosting sets in the fridge, meaning it gets firm. Once this happens you won’t indent it or leave texture or pull it away with your paper towel. You might have to dab the cake a few different times while you’re decorating as the temperature of the cake slowly warms up to match the temperature of the room.
I hope this has been helpful! I share everything I know about cakes and buttercream in my online courses The Basics of Cake and The Basics of Buttercream. You’ll get access to these and every other MasterCourse and MiniCourse on my cake school if you join my ClubPLUS!
Here are six festive Christmas cake designs to make your season jolly and bright! I’ll show you step by step how to decorate each of these without fancy tools so anyone can make these.
For all of these designs I recommend letting the frosting set before decorating. I put these cakes in the freezer for 15 minutes, until the frosting was firm. If you prefer you can put them in the fridge for an hour.
Christmas Tree Cake
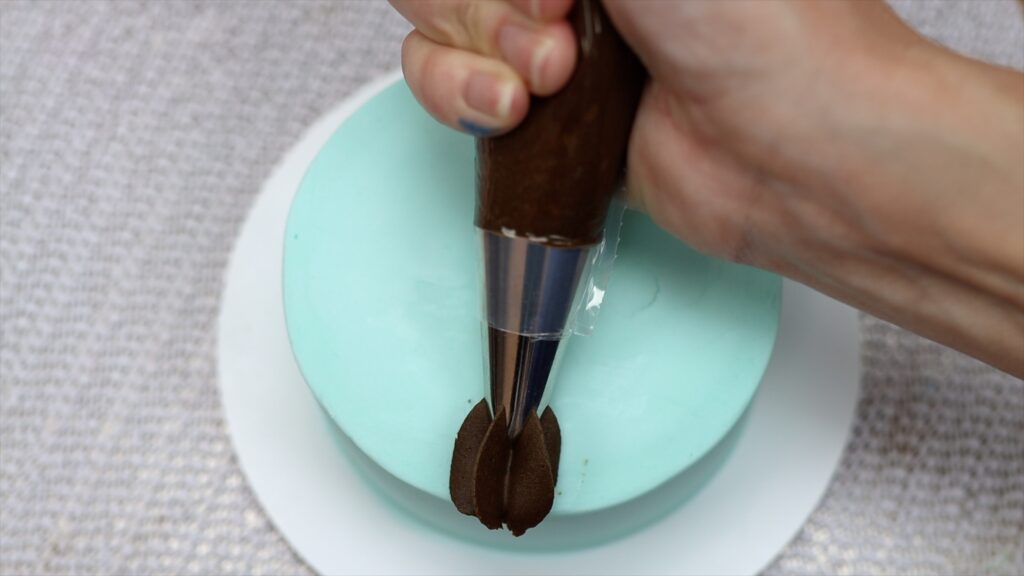
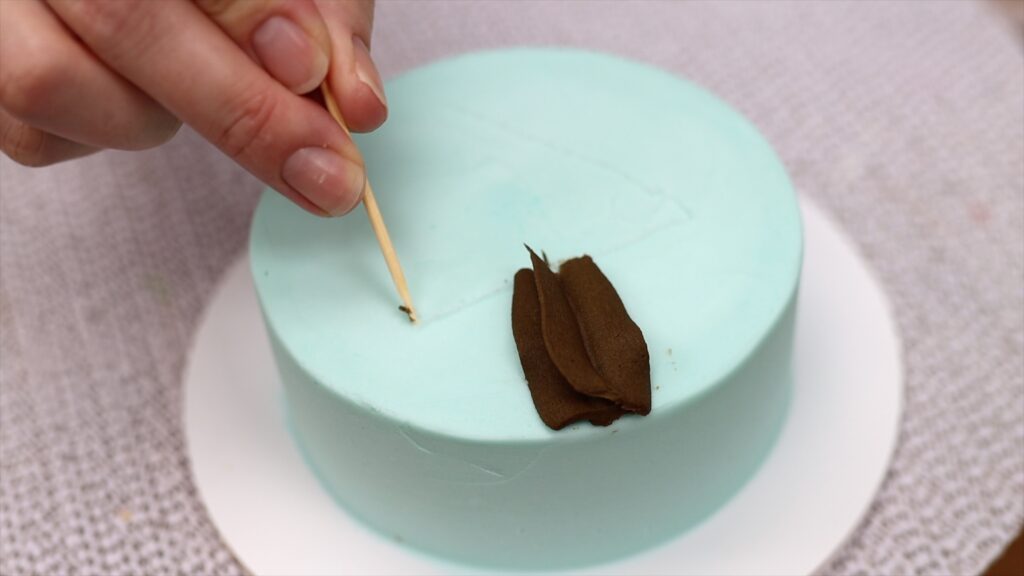
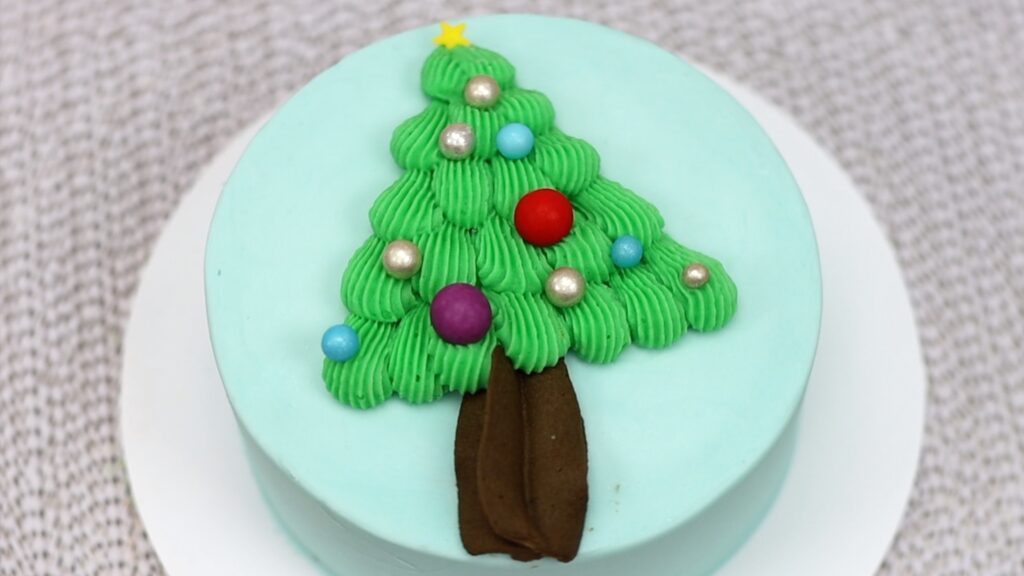
For this first Christmas cake design we'll pipe an easy Christmas tree. Use a star shaped piping tip like a 1M to pipe a tree trunk with brown frosting. I'm using my 4 Minute Buttercream for all of these Christmas cake designs. Then outline a triangle with a toothpick to guide you for the rest of the tree.
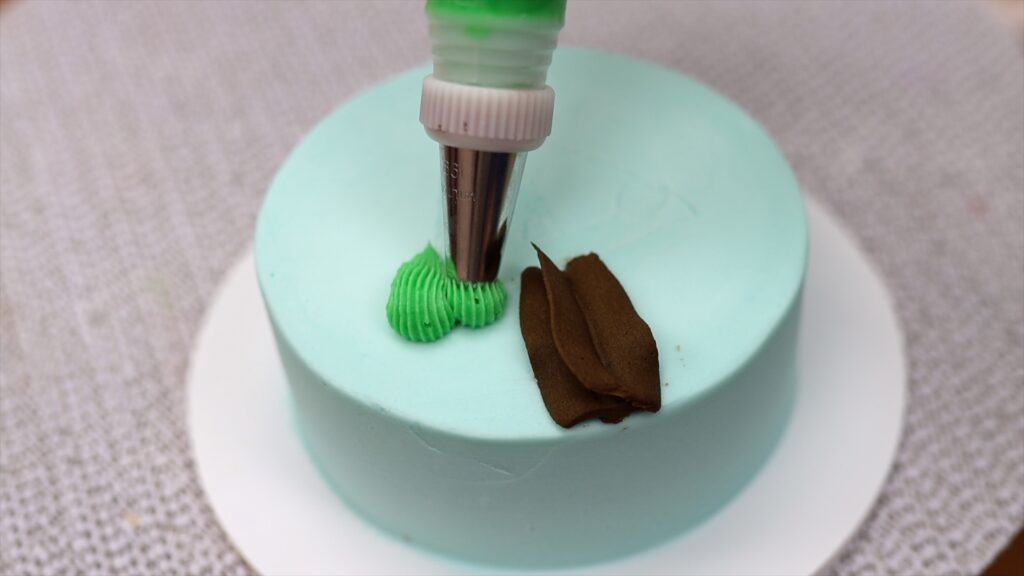
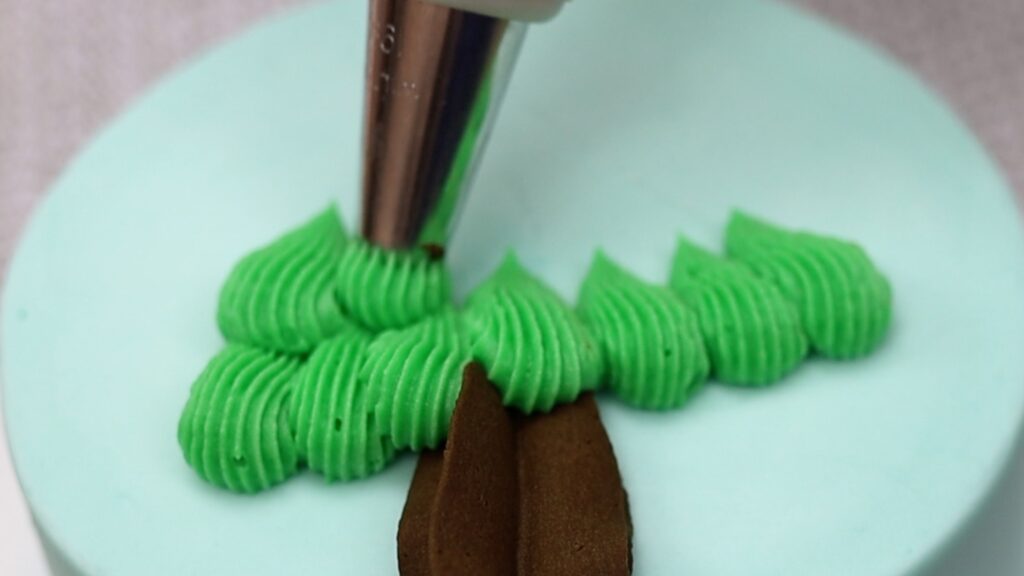
Now use green frosting with an open star tip like this #199. Start at the bottom of the tree, squeezing the piping bag to make the frosting bulge out into a dot. Then pull away as you release your pressure on the bag to make these little wave shapes.
After each row, move up to pipe another row, piping in the gap between the two waves below. Overlap the tips of the waves from the previous row to cover them up.
Straight away, while the green frosting is still soft and sticky, push sprinkles into the tree to decorate it. Super simple but very Christmassy!
I teach everything about piping in my online course, The Basics of Buttercream. If you’re struggling with buttercream consistency, how to use piping bags, getting smooth frosting and sharp edges on cakes, or how to colour and flavour buttercream, the course will help you perfect your buttercream skills.
Reindeer Cake
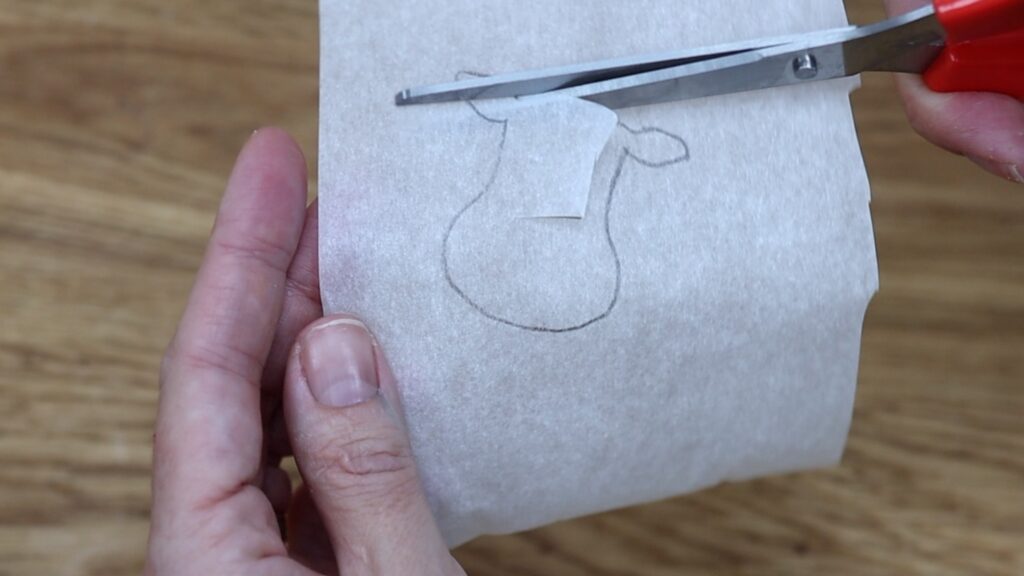
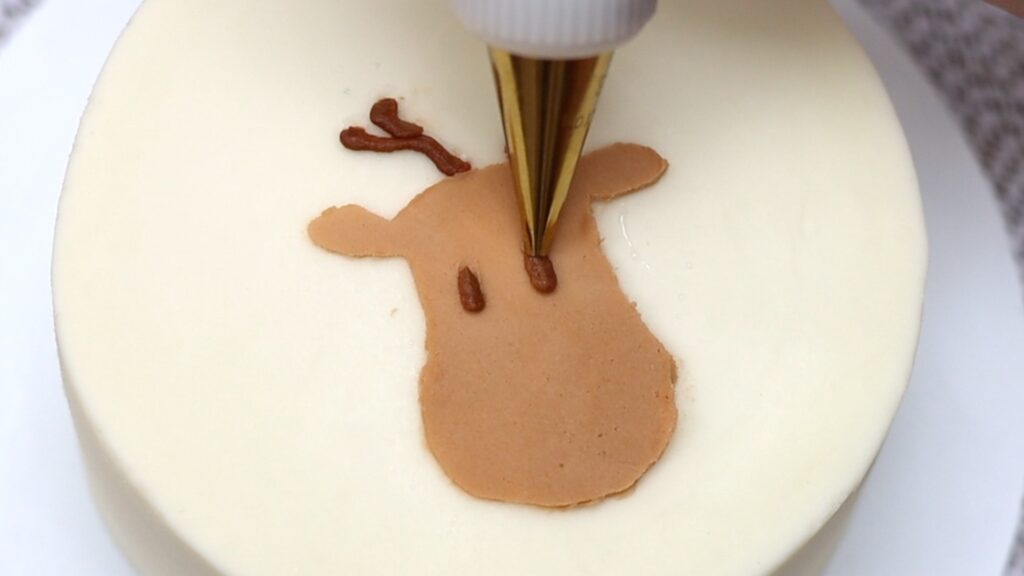
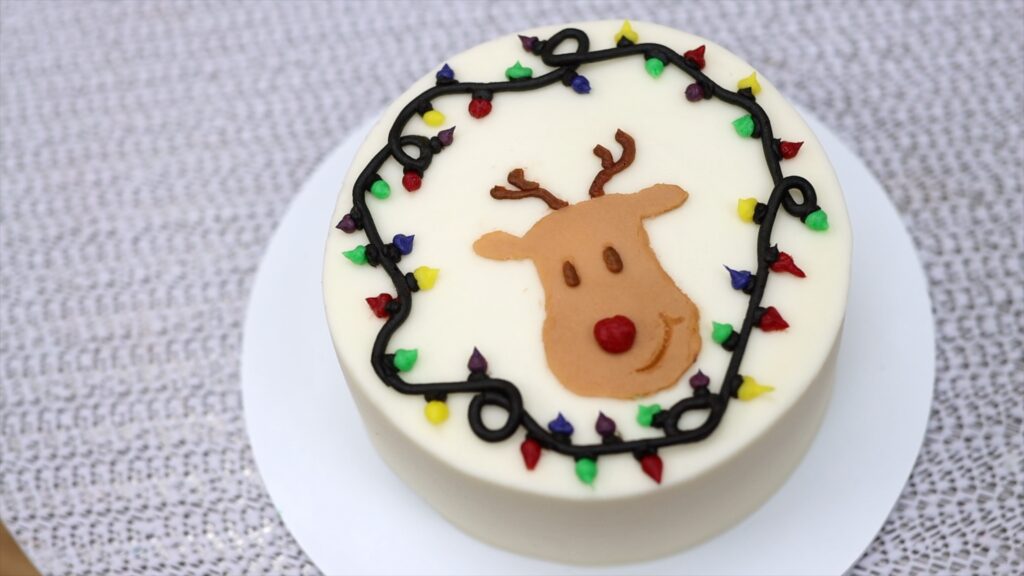
By making your own stencil you cake make a very easy reindeer. Draw a simple outline onto parchment paper or trace a picture if you prefer. Cut it out, leaving the rest of the parchment intact to use as a stencil.
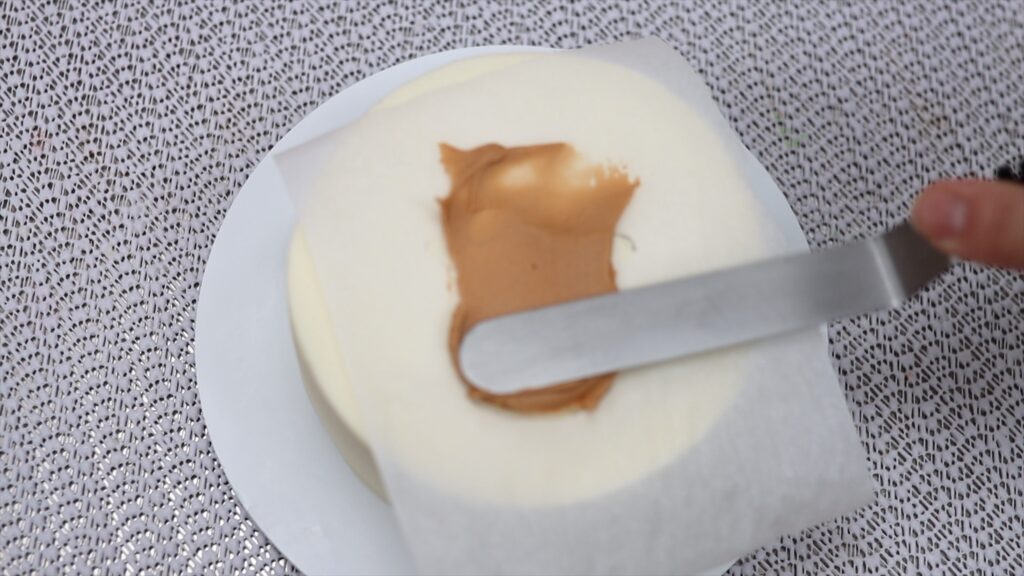
Press the stencil onto a cake after chilling the cake to set the frosting. Spread light brown frosting on top, peel the stencil off and voila! You can tidy up any smudges with a toothpick.
This cake has been in the freezer for 30 minutes so the frosting has set and it’s firm. That way it won’t be damaged by the pressure of the parchment paper on it. Using parchment paper is a cheap and easy way to make your own stencils like this reindeer.
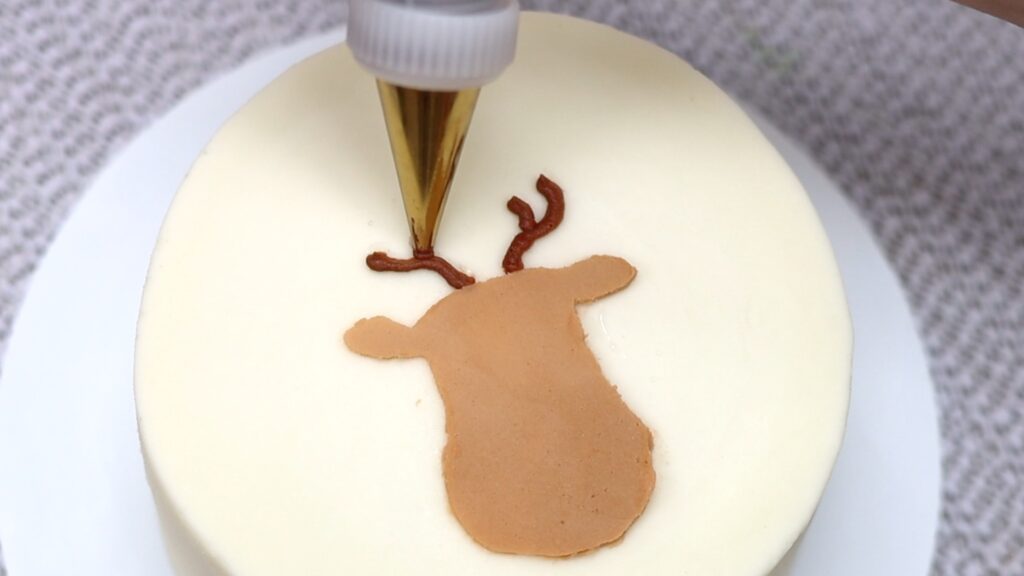
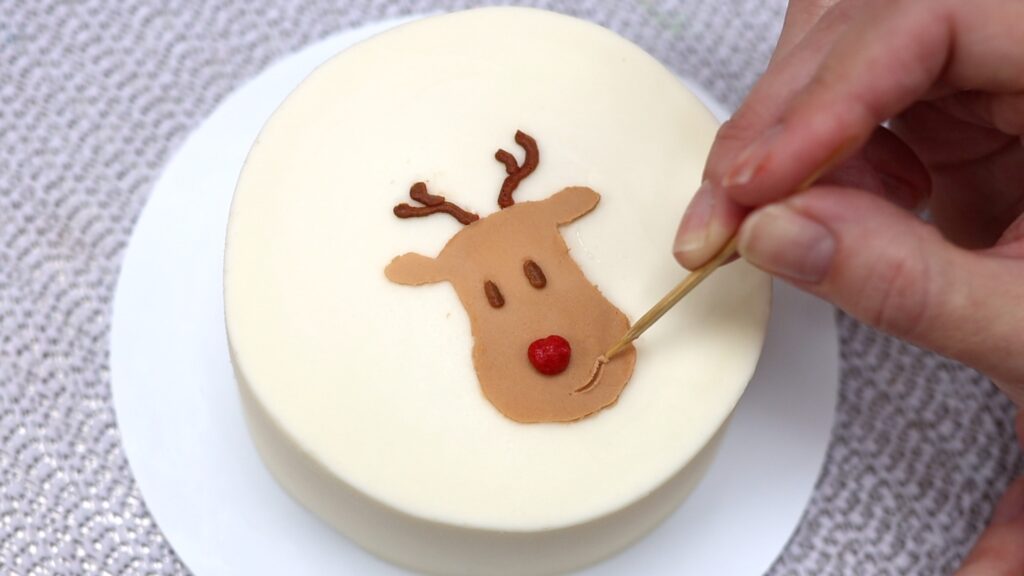
Now use darker brown frosting to pipe antlers and two eyes. This is a small #3 round tip. You can use the same tip or a slightly larger round tip with red frosting to pipe the nose. Then use a toothpick to score the lines for a smiling mouth.
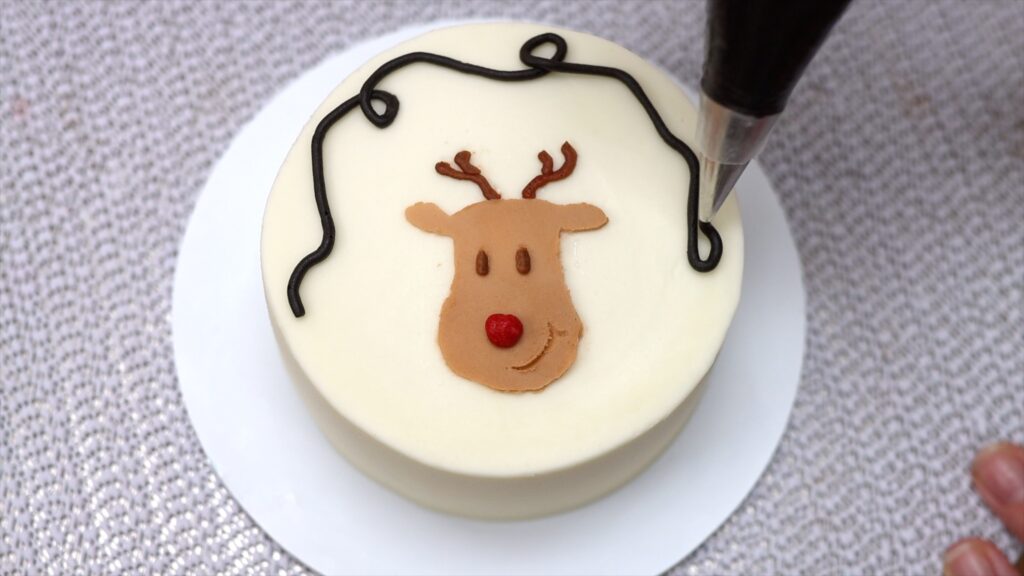
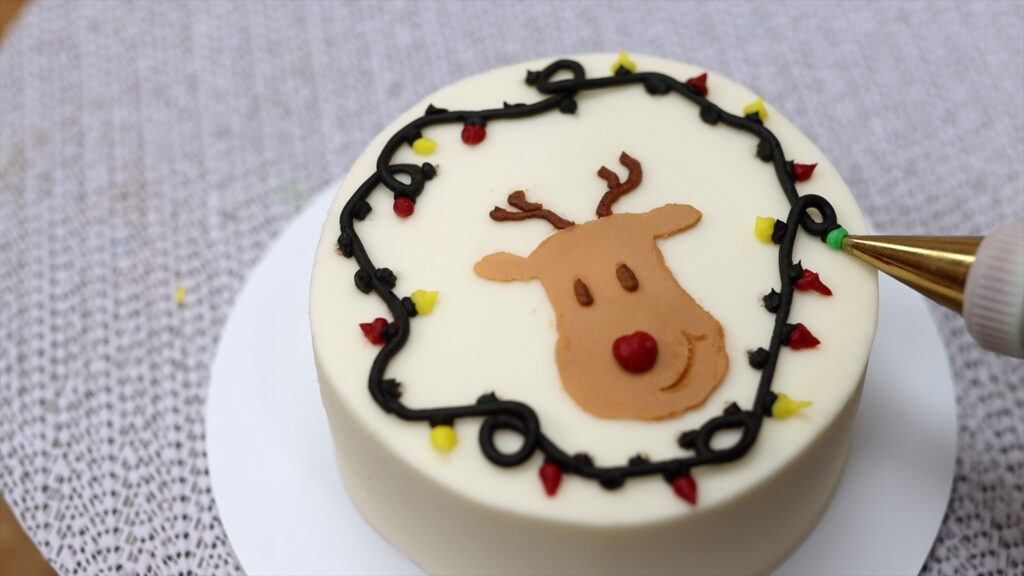
To make this more festive, pipe a black squiggle all around the cake. This will be a string of Christmas lights. I looped mine around a few times to fill in the available space around the reindeer. Pipe little black dots along it which will be the base of the coloured lights.
For the lights, squeeze the piping bag while holding the tip still for a moment. That makes a bulge at the base of the light. As you pull the tip away, stop squeezing the bag and that makes a neat point at the tip of each light.
I used the same small round piping tip for the lights as I did for the eyes, nose and antlers. Check out my tutorial on couplers to learn how to pipe quickly with lots of colours AND three other reasons to use couplers!
This design is so cute and colourful!
Christmas Present Cake
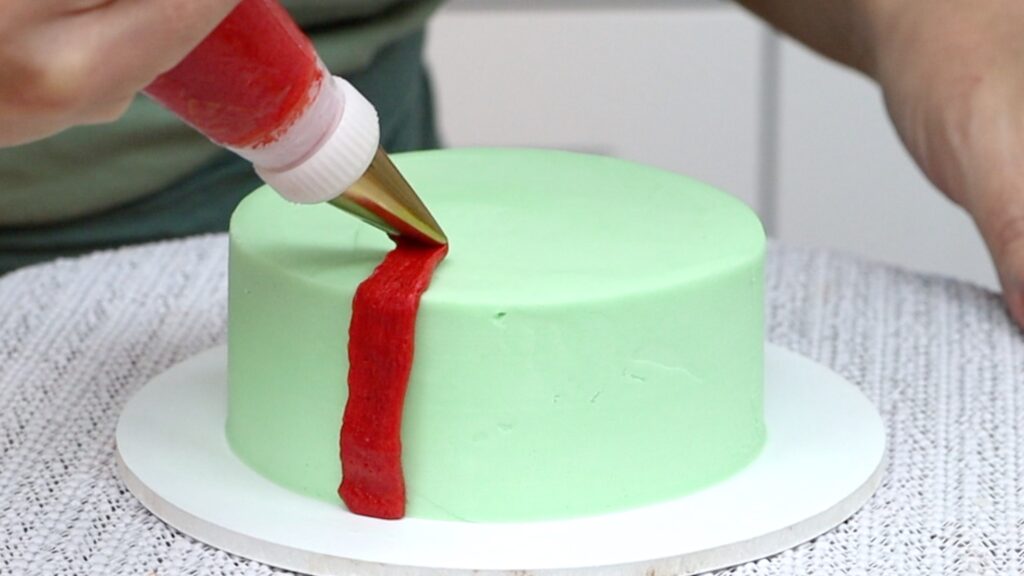
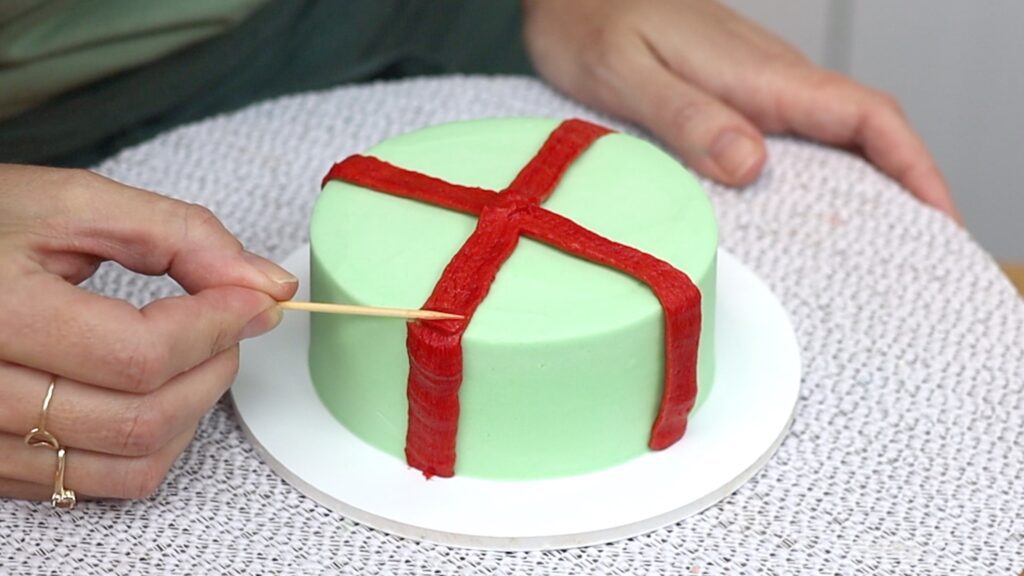
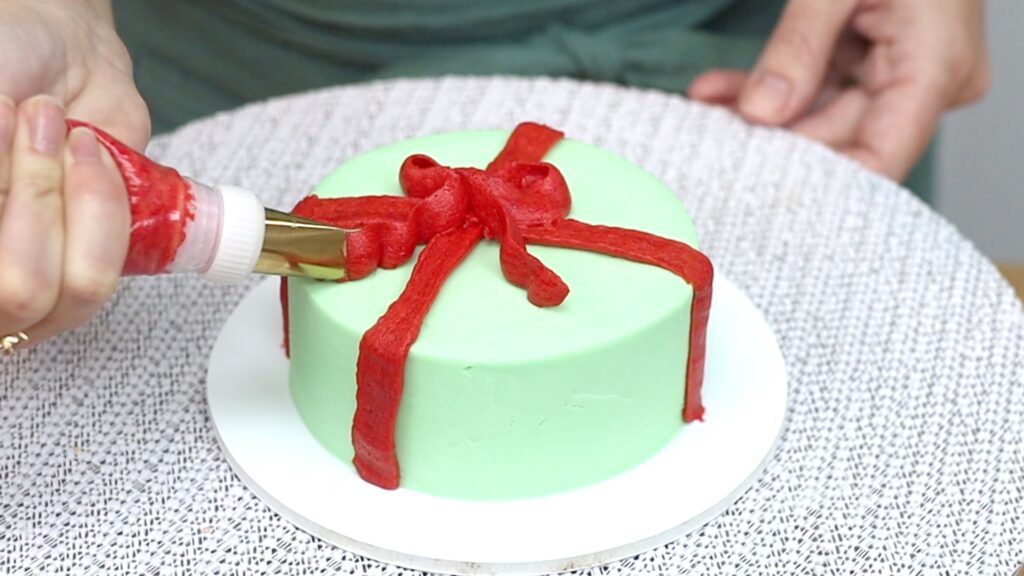
For one of the quickest Christmas cake designs, turn a cake into a present in less than a minute! You’ll need a petal piping tip like a #125 or #104. Squeeze the piping bag and pull the tip slowly up the side of the cake. Pull it over the top edge and pipe across to the middle of the cake.
I have super shaky hands so I find it easiest to rest the edge of the tip against the frosting. This holds the tip steady and it's the reason I chill cakes before decorating. By chilling the cake, the frosting gets firm and I won’t damage it with the piping tip.
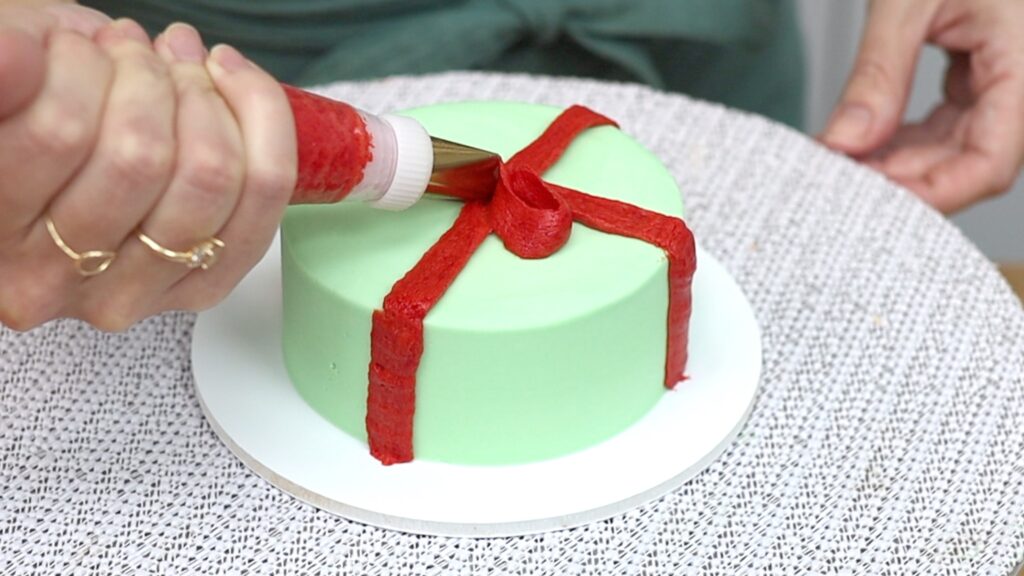
You can use a toothpick to smooth the frosting if it’s uneven anywhere. Do this straight away, before this frosting sets. Now use the same piping tip with the narrow part pointing upwards to make a bow. Squeeze the bag and pipe a loop that joins in the center of the cake. Then pipe another loop to meet it.
Keep the narrow part of the teardrop shape of the piping tip pointing up and pipe two squiggly lines for the ribbons of the bow.
Going back to a trusty toothpick, you can manipulate the bow to make it wider or tidy up any messy parts. I love how quick and simple this design is!
Snowflake Cake
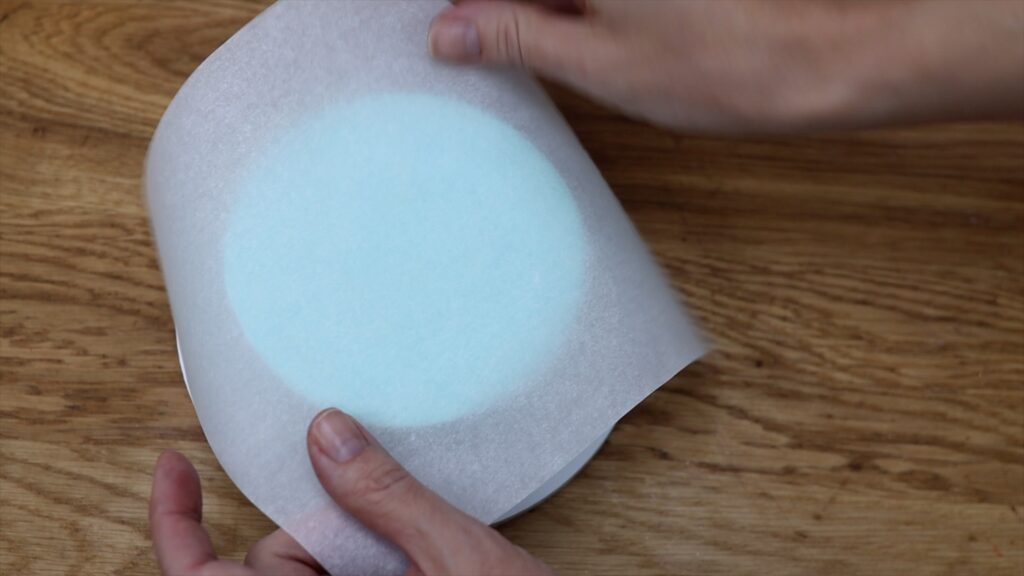
Now for a wintery design with a sparkly snowflake. Hold a piece of parchment paper over the cake and mark the edges of the cake on it. Now you know how much space you have to work with.
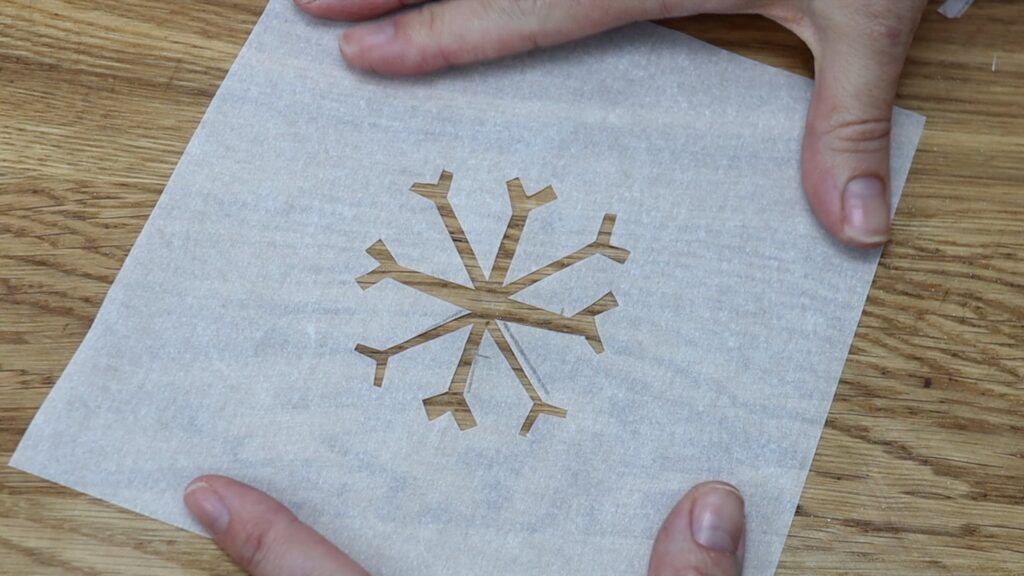
Draw a simple snowflake within those markings. You can trace a picture instead if you like, but something fairly simple works best for this. Cut the snowflake out to leave the rest of the parchment intact to use as a stencil.
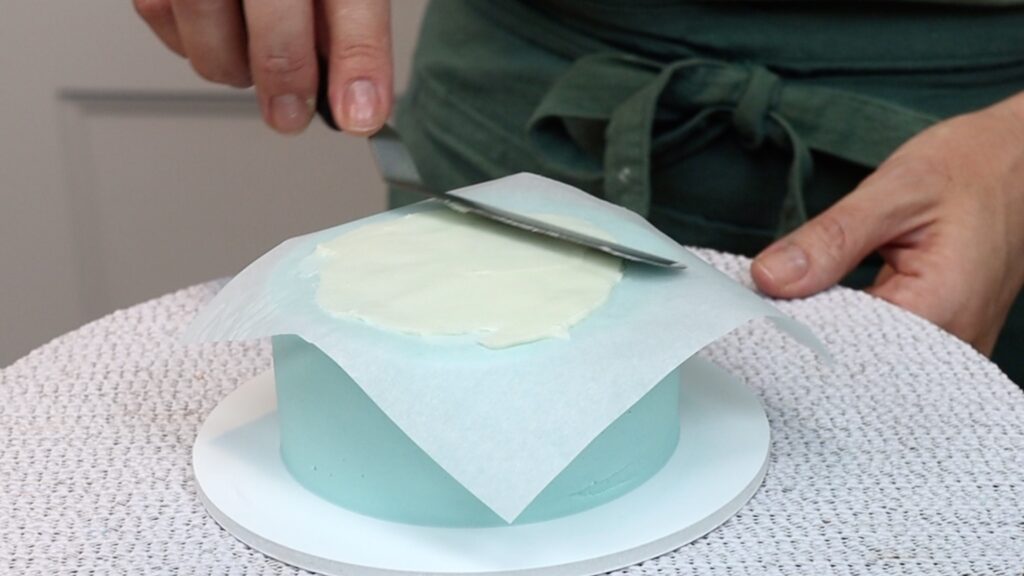
Place the stencil on a cake after the frosting has set and spread more frosting on top. Use back and forth circular motions so that you don’t pull the parchment up with your offset spatula. Scrape off the excess frosting to flatten and smooth it.
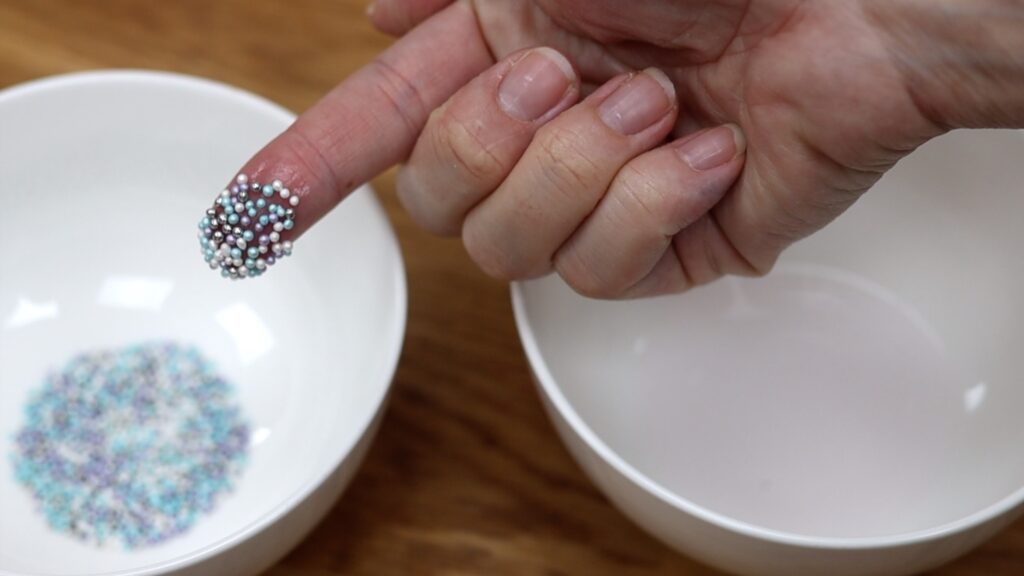
Then peel the parchment off to leave a snowflake outline behind. Optionally, pour sprinkles into a bowl to decorate the snowflake. Nonpareils work best, or hundreds and thousands as they’re called in the UK. Pour a bit of water into another bowl and dip your finger into the water. Tap off the excess and then press it into the sprinkles and the sprinkles will stick to your finger.
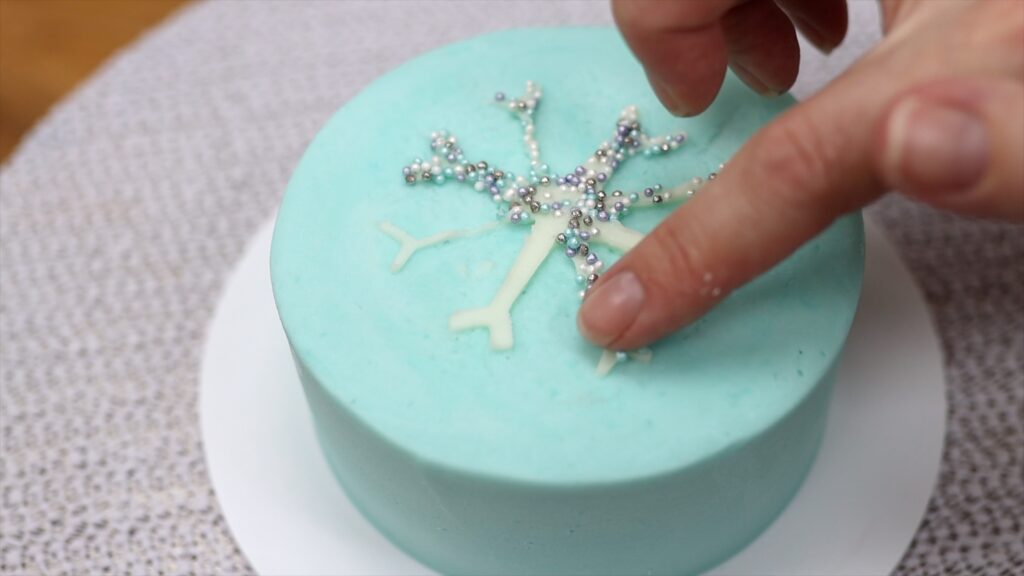
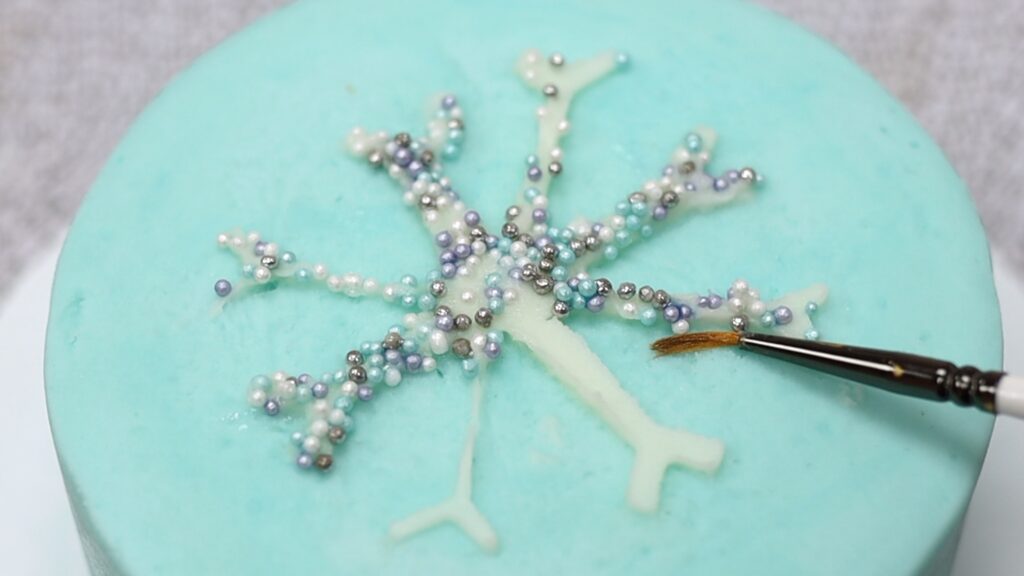
Then push your finger gently into the snowflake and the sprinkles will stick to the frosting. Even after chilling the cake, the sprinkles may still stick to the frosting if condensation has formed. (For help with this, check out my tutorial on everything you need to know about condensation!) So after pressing the sprinkles onto the snowflake, use a toothpick or a paintbrush to nudge the sprinkles onto the stenciled frosting. This makes a neat, sparkly snowflake!
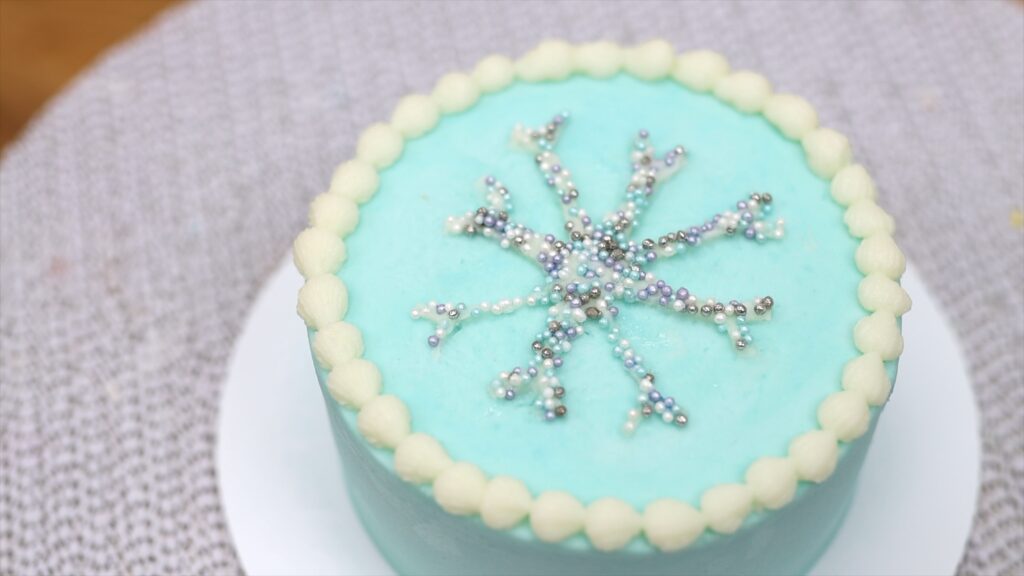
You can add a border if you like, like I’m doing with this open star tip. I'm using the same technique as I did for the Christmas tree, squeezing the piping bag while holding it still to allow the frosting to bulge out and then as you pull the bag away, stop squeezing to leave a little tail. You’ll overlap the tail with the next dot.
Poinsettia Cake
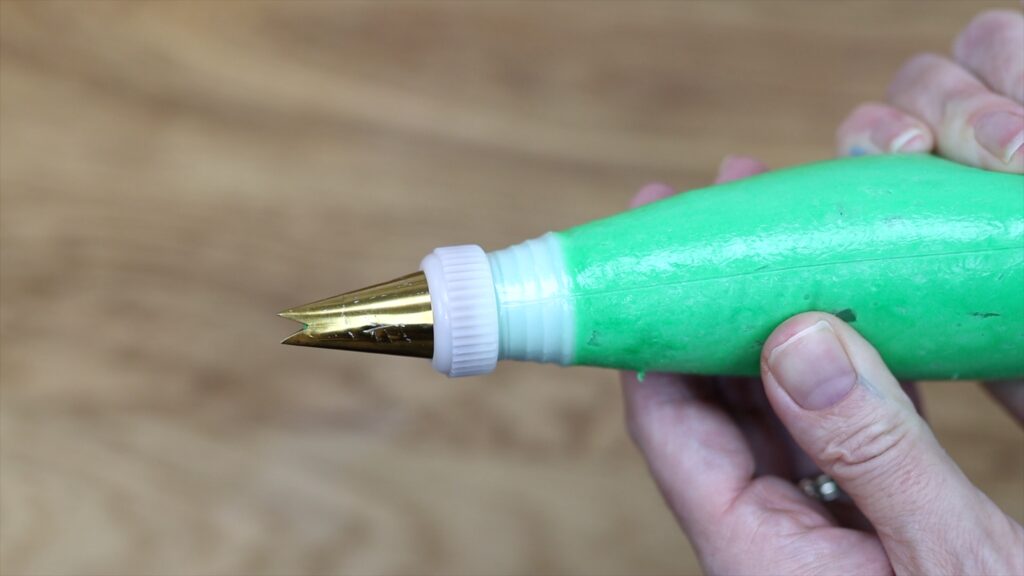
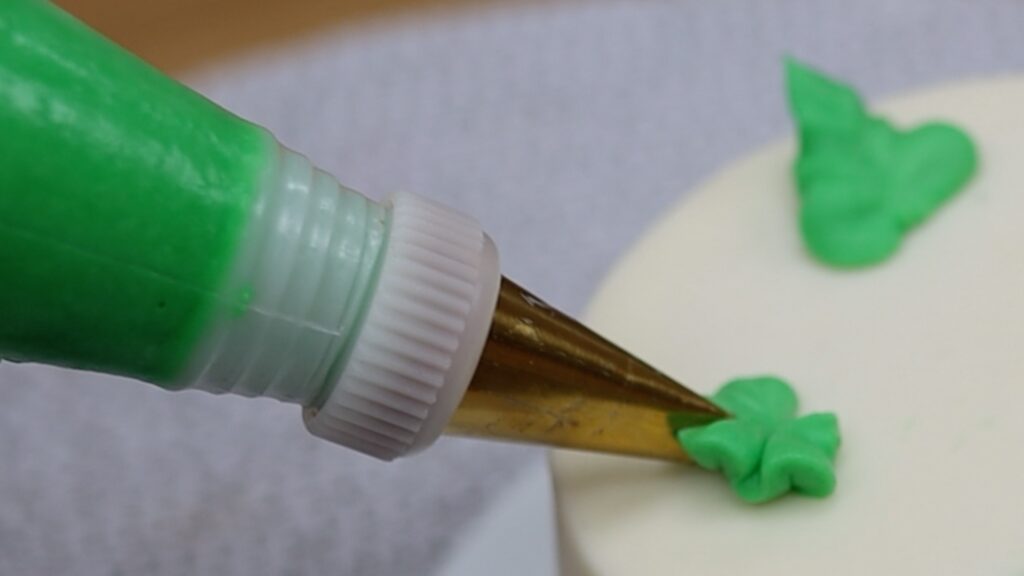
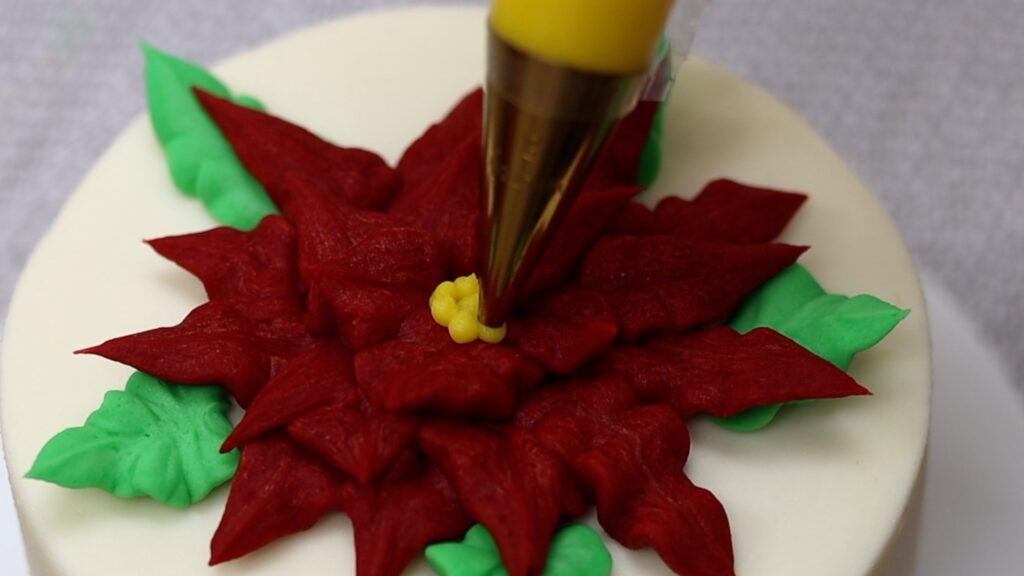
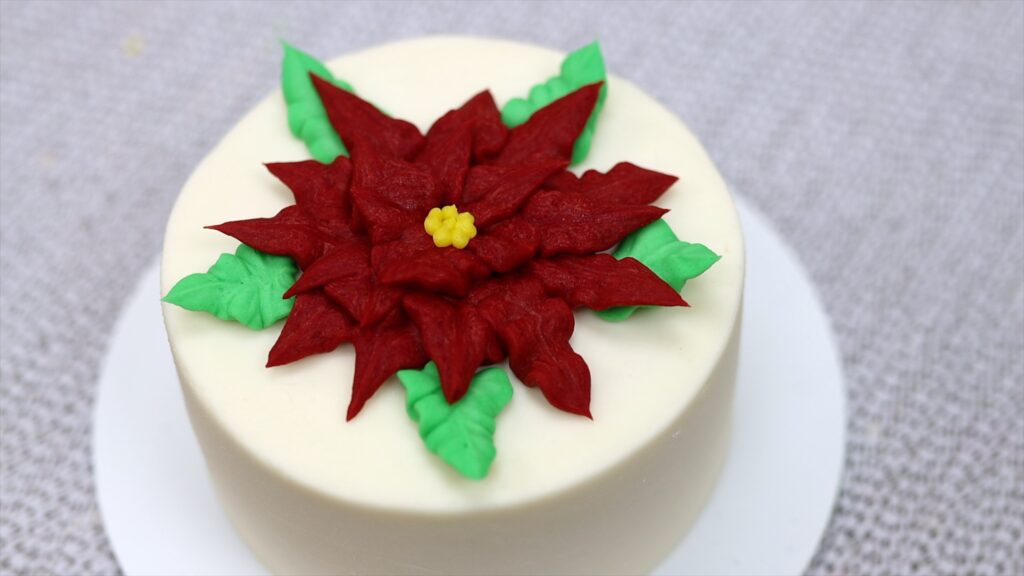
Poinsettias are gorgeous red Christmas flowers and you can make them with buttercream frosting. You’ll need a leaf tip for this like a #352. Hold the tip so that it looks like an open Pacman mouth, with the two points above each other.
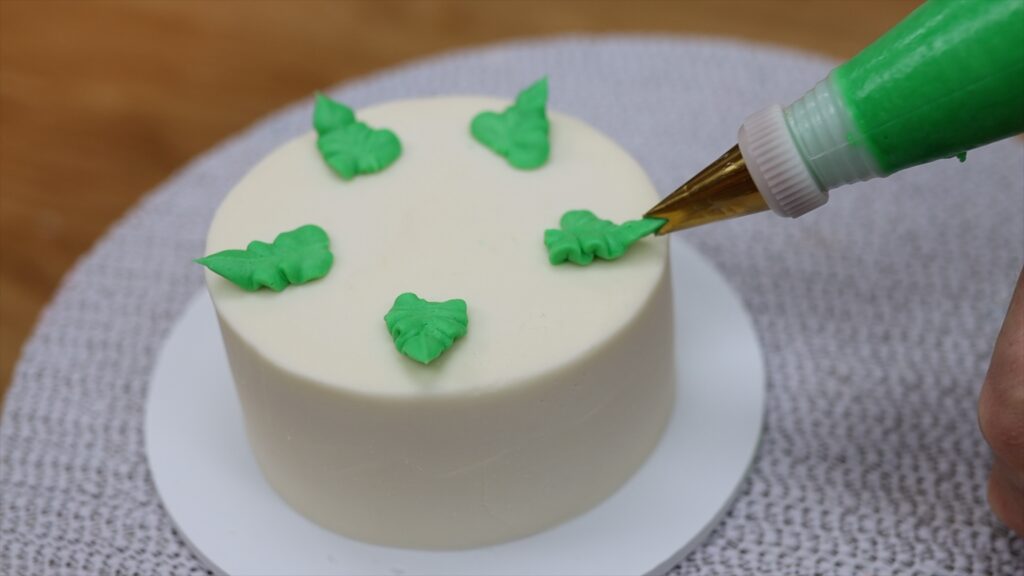
Squeeze the piping bag and wiggle it from side to side and up and down to make a ruffled leaf. Pipe a few of these around the outer edge of the cake.
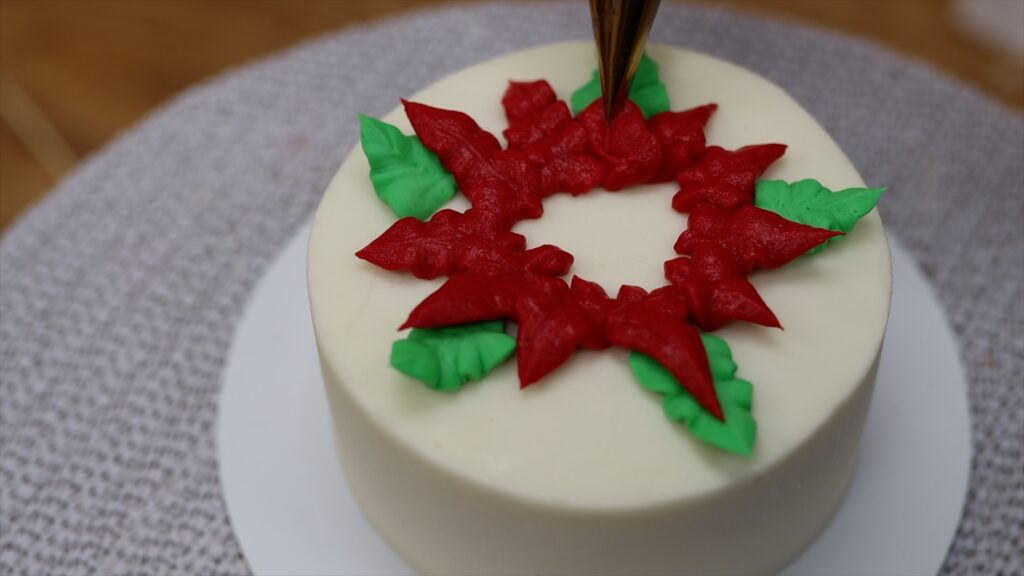
Then switch the tip to a piping bag with red frosting to pipe the petals of the flower, making a ring of them to overlap the leaves you piped. The petals will look really long and skinny at this point but you’re going to cover the bases up in a minute.
Pipe another ring of petals inside the first ring, overlapping the first ring of petals. If there are any gaps in the flower you can add more petals to fill those in. For the middle of the flower, pipe a few yellow dots using a small round tip.
You can make these flowers much smaller if you want to pipe several of them onto the cake instead of one large one, which in hindsight I think would have looked even prettier.
Christmas Cake Designs with Messages
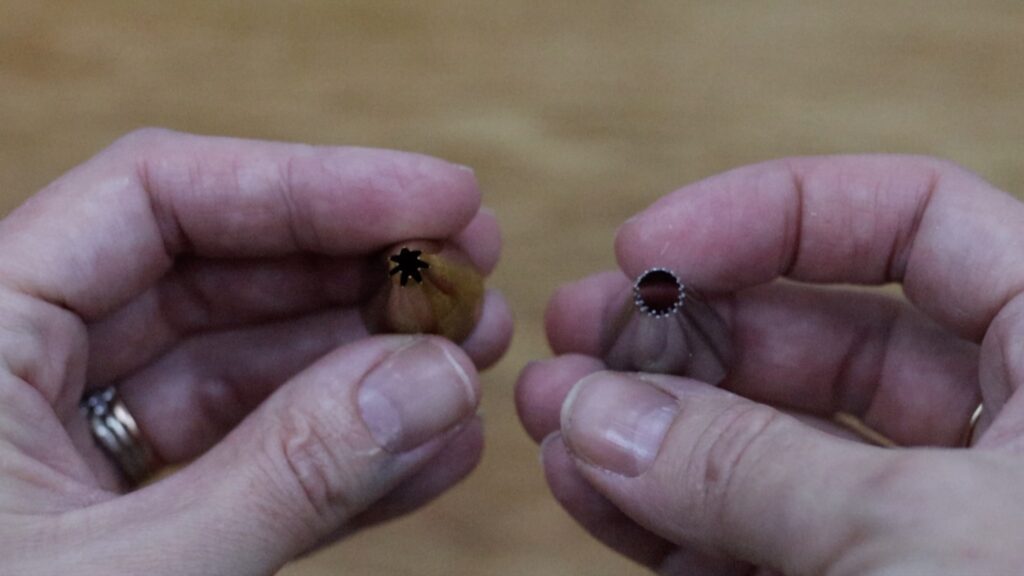
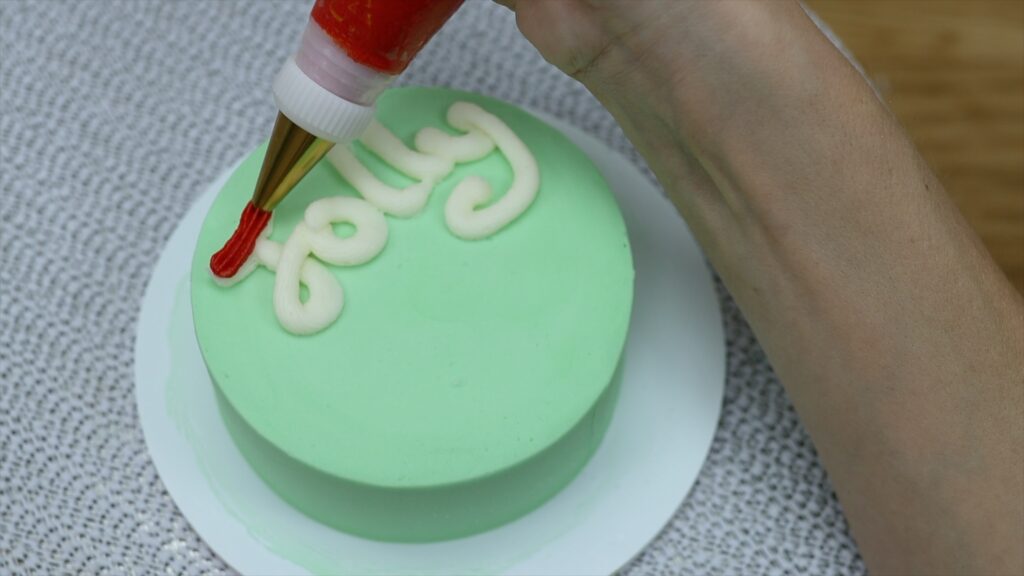
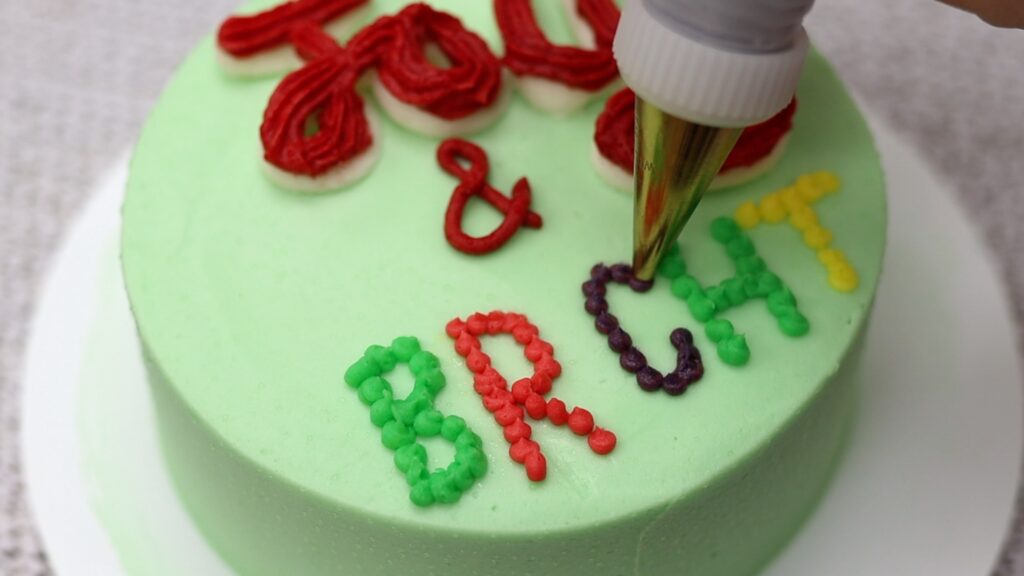
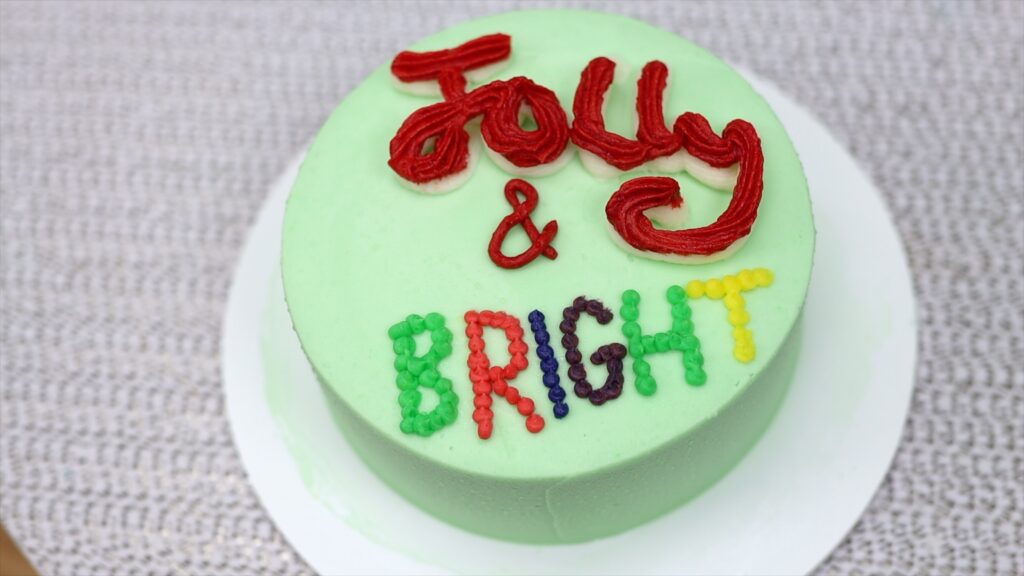
Writing on cakes can be tricky but here are two easy ways to make lettering neat. First, layer your letters. Choose two star shaped tips, one wider than the other. This is a #32 on the left and a #199 on the right.
I like to outline my word with toothpick first, to check that it fits. Start with your larger tip and write your word. The smaller your cake is, the smaller your piping tips will need to be so that the letters aren’t so thick and close together that they’re impossible to read. Now switch to your smaller tip and a different colour and pipe over the top of these letters.
Cursive is a great option for lettering because it’s very forgiving. By layering the letters you’re creating more texture and colour and detail.
Using an '&' instead of writing out the letters is a quicker and way to write the word 'and'. It looks fancier, too!
The second easy way to write neatly on cakes is to use dots instead of lines. Again, you can outline the letters with a toothpick first if you like. I like to start with the first and last letter and work my way to the middle. This makes spacing them easier because you can make the final letter, the one in the middle, as wide or narrow as necessary to fill in the space that’s left.
If your hands are shaky it’s much easier to pipe neat dots than neat lines!
Which of these six easy Christmas cake designs is your favourite? Tell me in the comments below! You can watch a video version of this tutorial on 6 Christmas cake designs here:
Cake shooters are a fun and easy way to serve cake and they’re a unique way to toast to any celebration! In this tutorial I'll share everything you need to know to bake, assemble, store and transport cake shooters.
What are cake shooters?
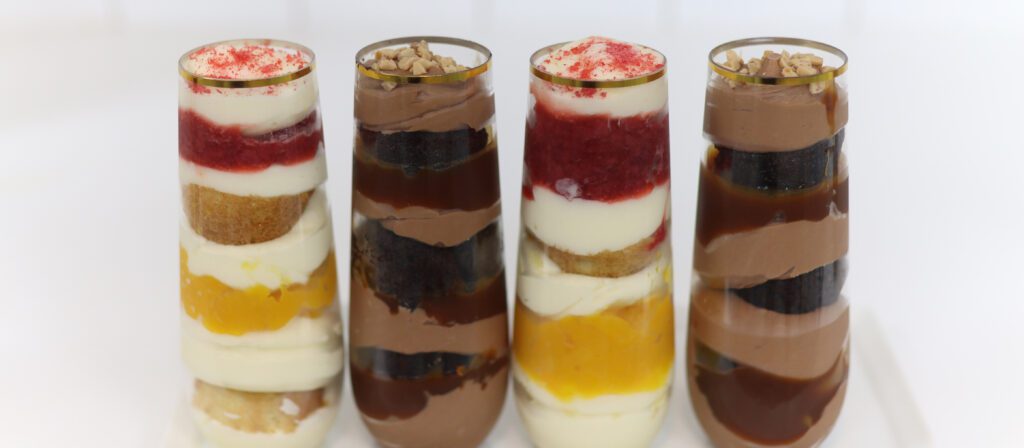
Cake shooters are made up of cake and filling and frosting. They're layered and served in shot glasses, disposable cups, or even champagne flutes! Choose something transparent so you can see the gorgeous layers of cake and filling and frosting inside.
How do you make cake for cake shooters?
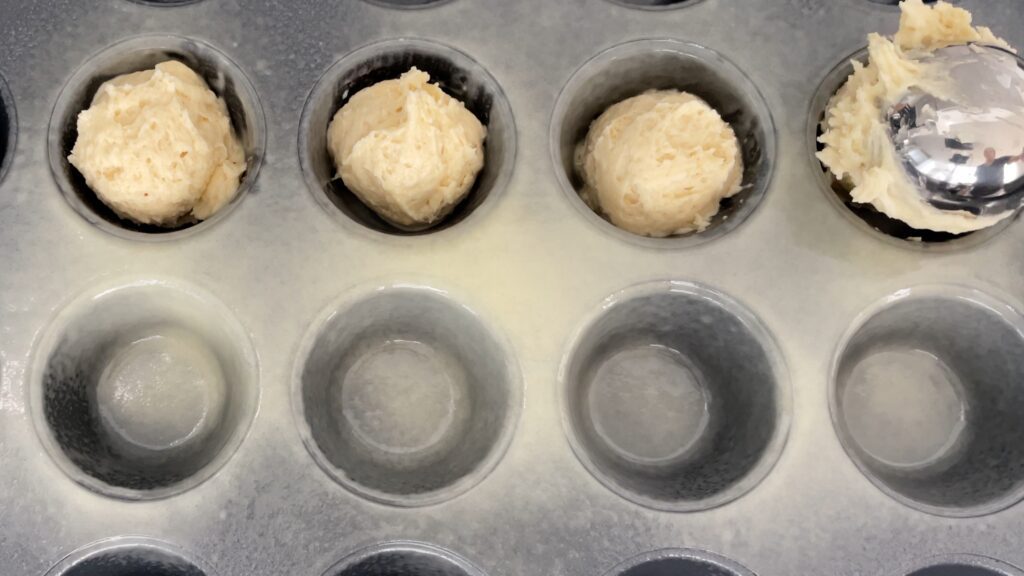
Use any recipe to bake your cake. For my cake shooters I’m using my Very Vanilla and my Perfect Chocolate Cake. You can bake the batter in mini cupcake pans or in larger cake pans.
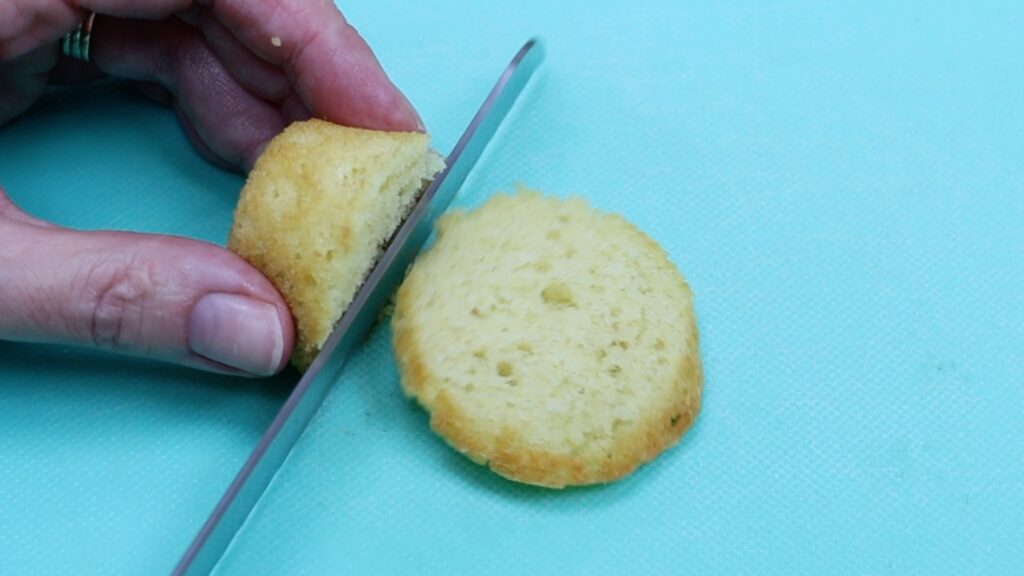
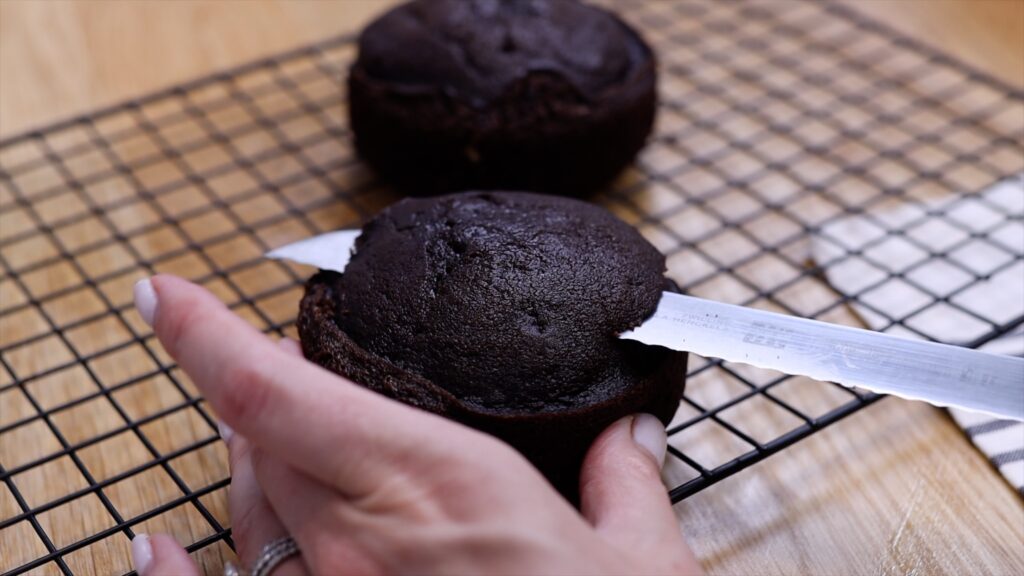
For mini cupcakes, I cover the pan with non-stick spray instead of using wrappers. That way I can skip the step of unwrapping them. Optionally, for the neatest and most tender tasting results, use a serrated knife to cut off any bulging tops.
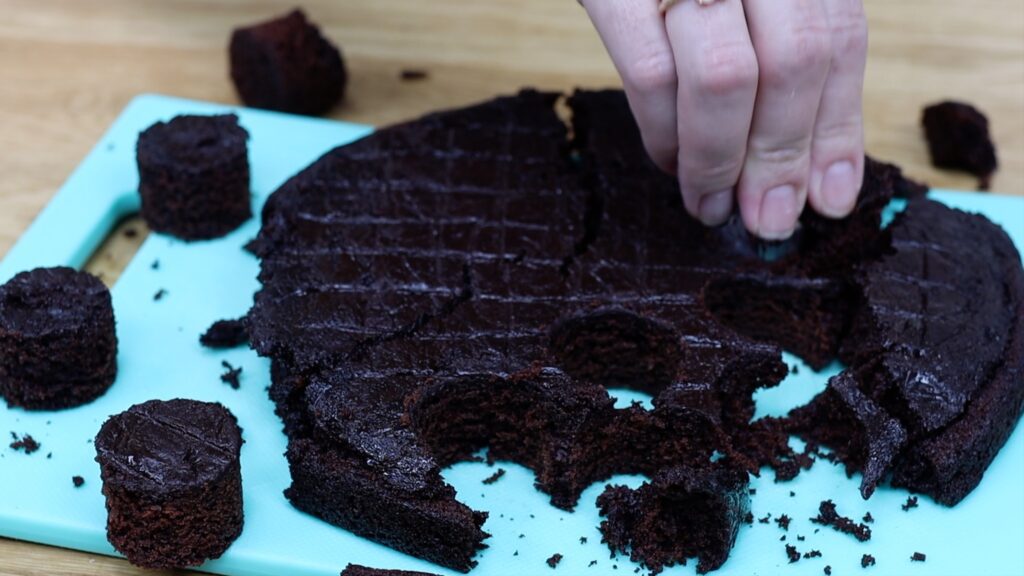
What if you don’t have mini cupcake pans or your shot glasses aren’t the same width as mini cupcakes? Bake your cake in any larger pan like a sheet cake or a round cake pan. Fairly thin layers work best. If a cake breaks when you turn it out of the pan don't throw it away! Those layers are perfect for cake shooters. After the cake cools, cut discs out of your cake. If you have one, you can use a small round cookie cutter the same width as your shot glasses. Or just use the glass you're going to make the cake shooters in.
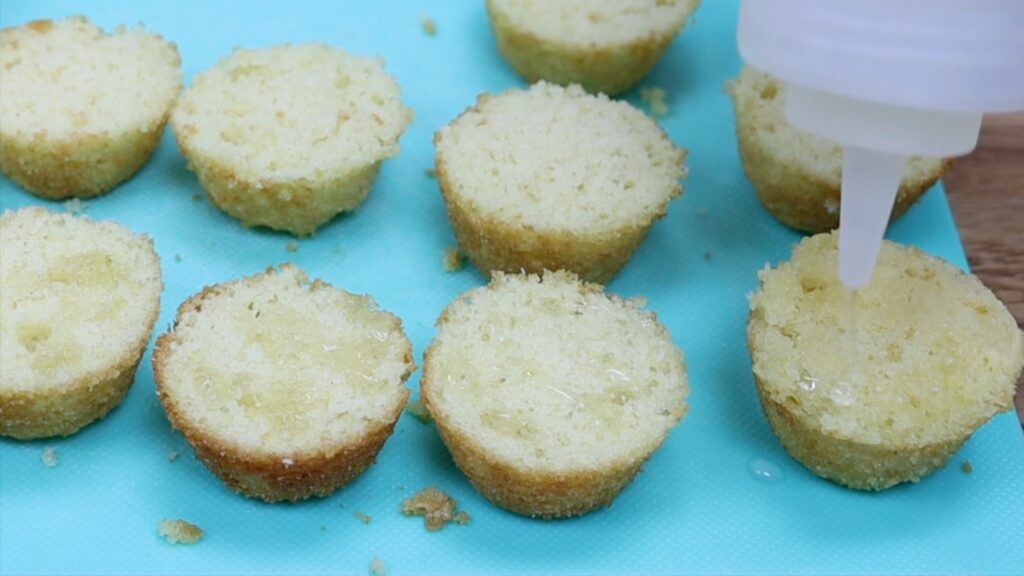
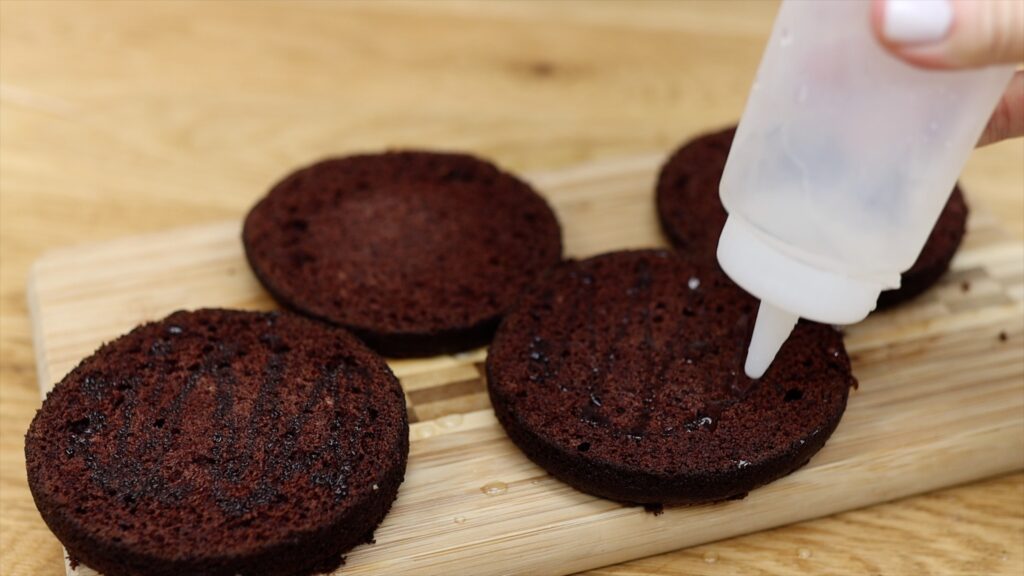
Optionally, you can drizzle your cake with simple syrup. Simple syrup is equal parts of water and sugar, brought to a simmer in a pan. Once the sugar dissolves, leave it to cool before you use it. This will keep the cake moist if you’re not serving it until the next day.
I'll show you later in this tutorial how to transport cake shooters across the country or even internationally!
What fillings and frostings can you use for cake shooters?
The answer is easy: any! I’m using my 4 Minute Buttercream frosting but you can use meringue frostings, ganache, and even whipped cream.
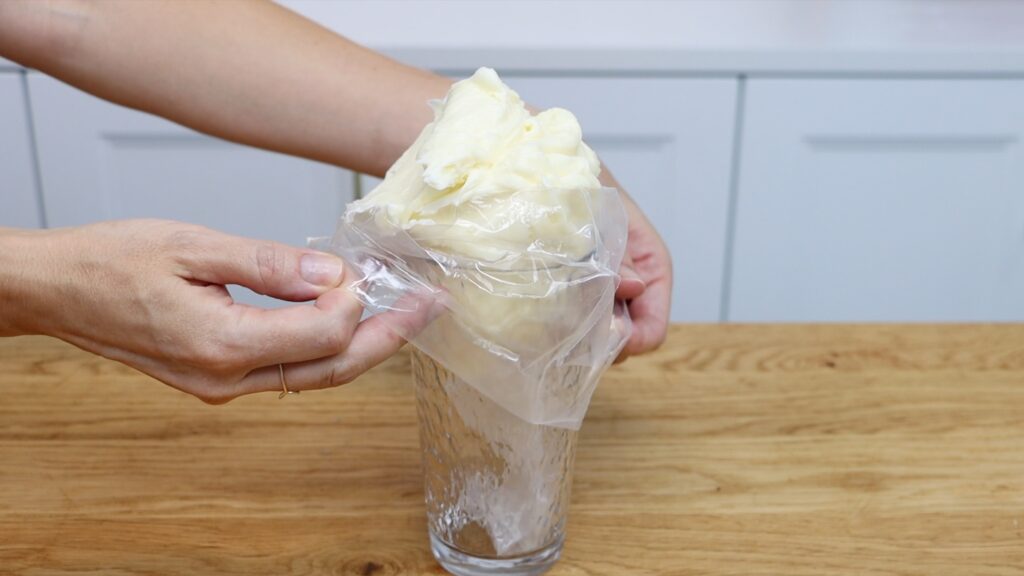
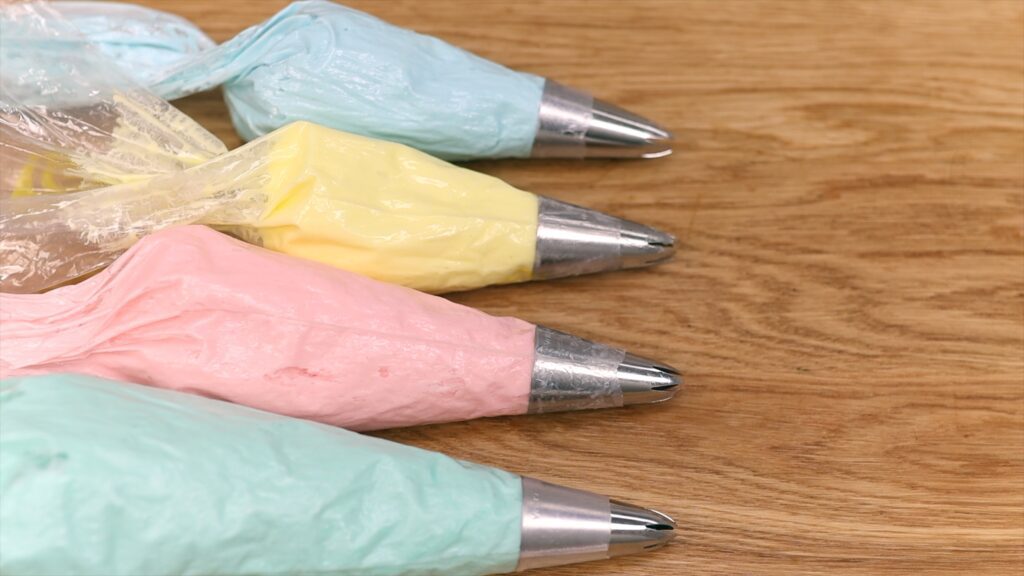
For fillings try fruit purees, caramel, Nutella, lemon curd, or any other fillings you like in cakes. It’s easiest to put frostings and fillings in piping bags before making the cake shooters.
How do you make cake shooters?
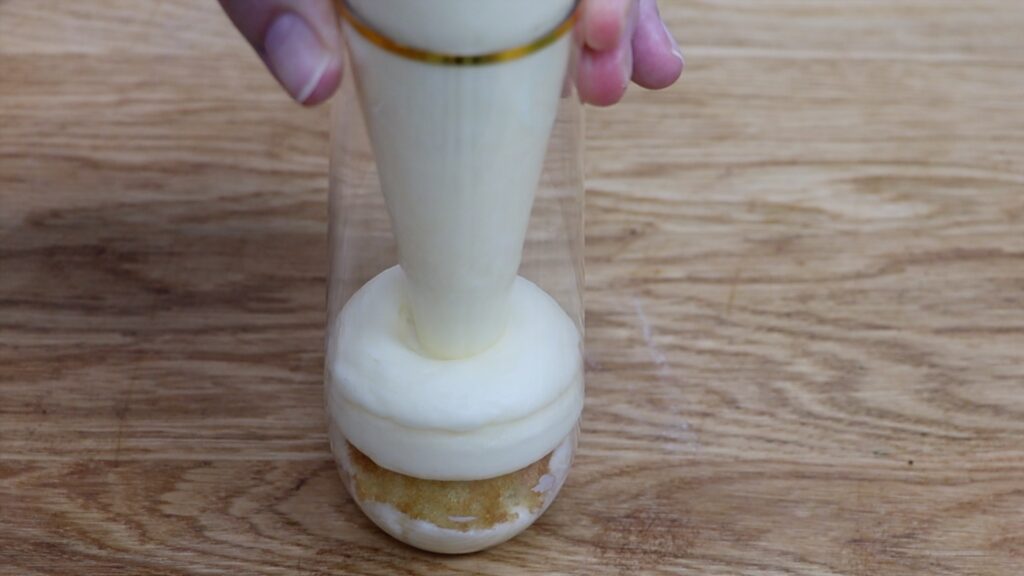
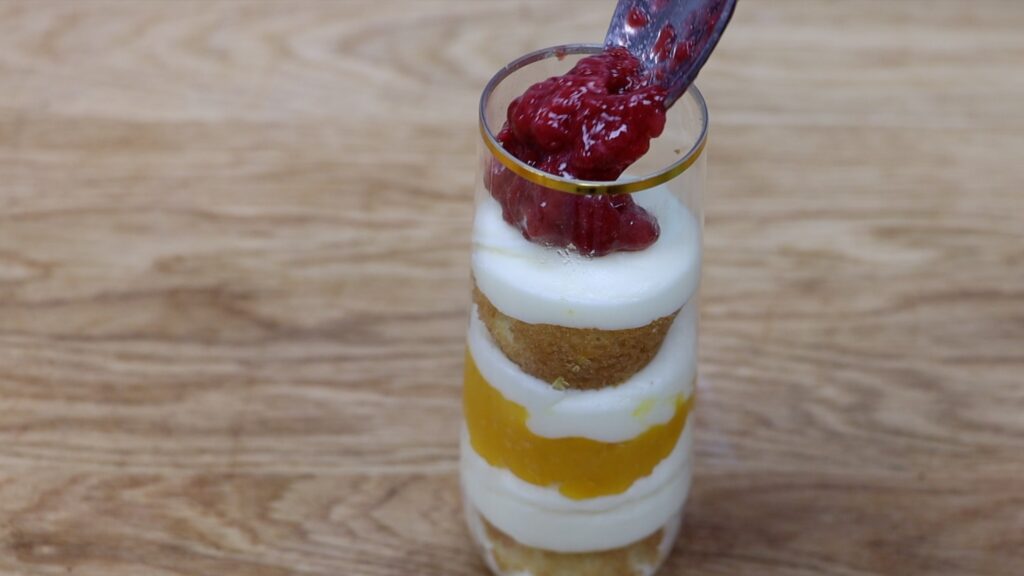
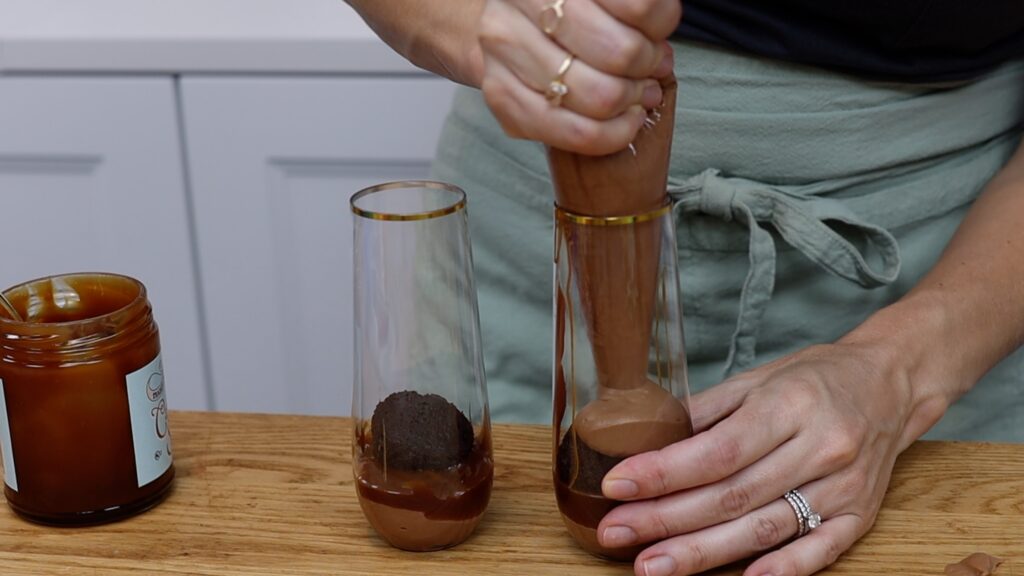
Grab your glass and pipe some frosting into the very bottom. You can level it with a spoon if your piping bag doesn’t reach all the way down. Then layer your cake and fillings and frosting all the way up the glass.
I recommend layering frosting above and below each cake layer if you're using fillings like fruit purees. If you don't, the puree will absorb into the cake and stain it, which won’t look as pretty.
I teach how to make all sorts of fillings in my online course The Basics of Cake.
You can finish off each cake shooert with a swirl of frosting or spoon some filling on top, or even a dollop of whipped cream. Try a garnish like these crumbled dried strawberries or toffee crunch pieces, or sprinkles are always fun!
If these are for a birthday celebration you can of course add a candle for the birthday boy or girl, too.
Tips for making cake shooters
The challenge with tall glasses like these champagne flutes is that it’s tricky to reach down to the bottom. You can spoon fillings and frostings into the glass but they’re likely to smudge the sides of the glass. Using a piping bag helps you get lower down into the glass. You can use a piping bag with the end cut off, like I'm doing in the photo above. A long thin pastry tip, called a Bismarck Tip, is ideal because you can pipe down to the bottom of the glass without touching the sides.
It’s much easier to get your cake and fillings into shorter glasses like shot glasses without making a mess! If you can, choose a cup that’s a similar width all the way up and down. This was, you can cut your cake into the same size pieces and they’ll all fit neatly into it, whether they’re at the top or bottom of the cup.
How do you serve cake shooters?
With a spoon! I love long gold spoons but if the cake shooters are an order you can include plastic spoons.
How far in advance can you make cake shooters? How do you store cake shooters?
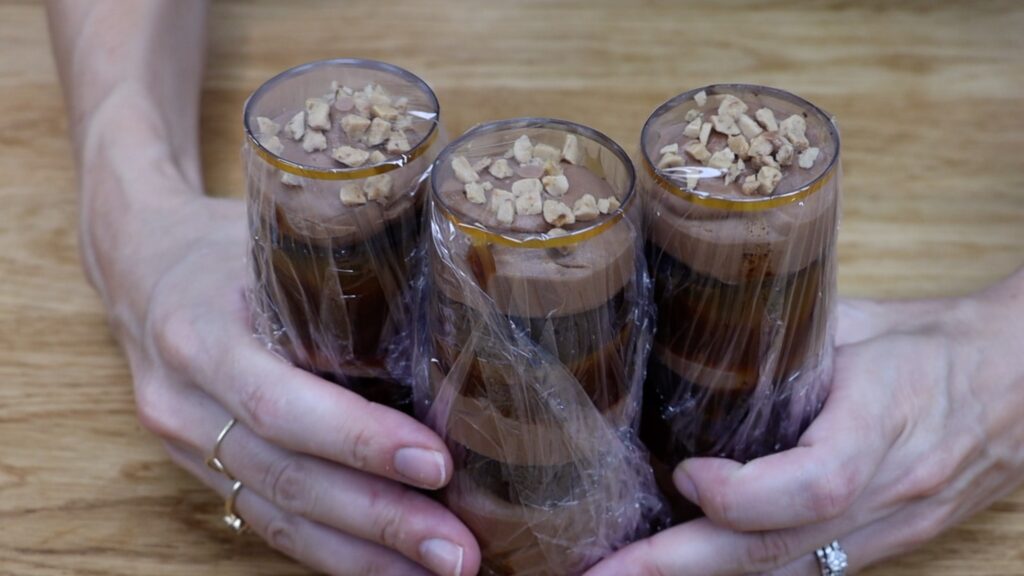
Like with any cake, these will taste best if you bake them as close to serving as possible. You can cover them with plastic wrap and store them in the fridge for a day or two. You can even freeze them if you want to make them in advance. But cake, fillings and frostings taste best at room temperature so take them out several hours before serving to warm up.
How can you transport cake shooters? Can you travel on an airplane with them?
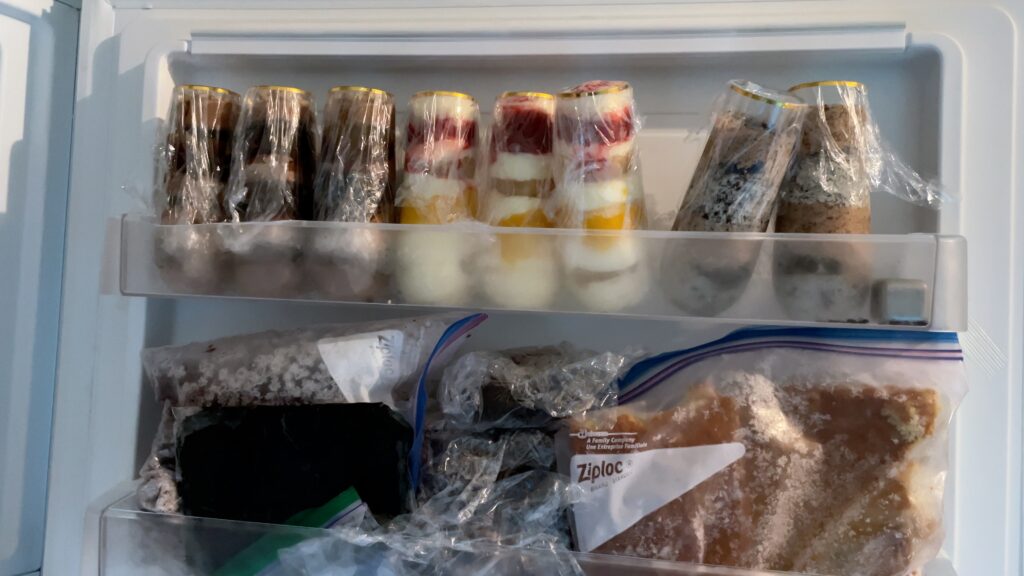
Yes, you can fly with cake shooters in your suitcase! I recommend using buttercream rather than whipped cream because of its stability. First, cover each cake shooter with plastic wrap to prevent moisture from the freezer getting into them. Then place them upright in the freezer. The door of the freezer is perfect for this.
Once they’re frozen, arrange them in a cooler with ice packs. Just before you leave home, put the cooler in your suitcase. By the time you get to your destination the cake shots will probably have thawed. Since buttercream is quite stiff, it will have held the cake and fillings in place within the glasses.
Enjoy! I hope this tutorial has been useful. Tell me in the comments if you’re going to make some!
You don’t have to be a professional cake decorator to make cakes that look professional! In this tutorial I'll share cake decorating tips that:
give your cake a stable structure and neat outline
make cakes look professional
ensure transporting and serving professional-looking cakes
#1 Buttercream dams
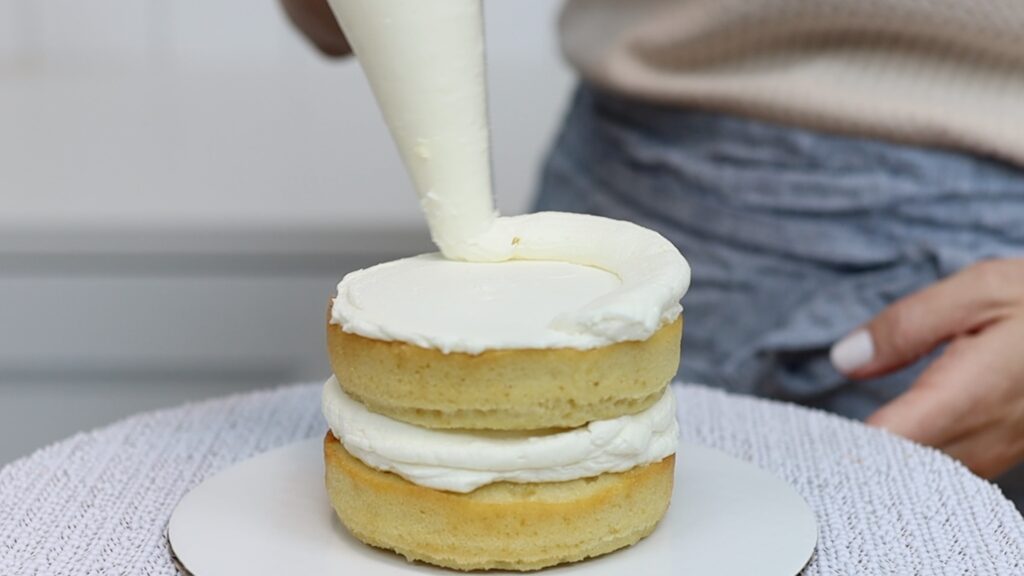
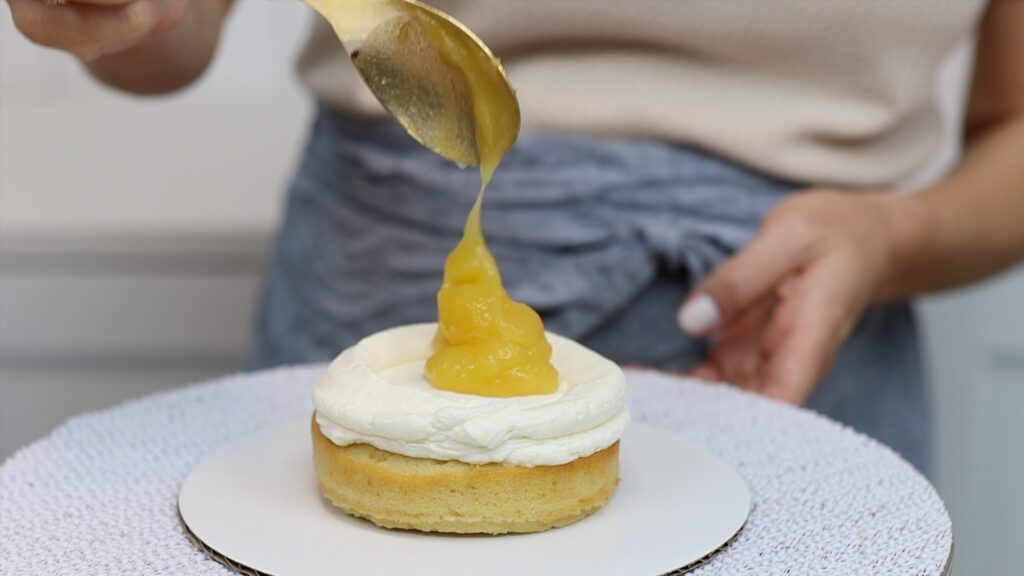
Firstly, prevent bulges in the sides of your cake. As you’re assembling your cake, pipe a ring of frosting around the edge of each layer and spoon your filling into the middle.
This is called a buttercream dam. It works well for lemon curd, caramel, jams… anything that’s runnier than frosting. The dam will hold the filling in so it doesn’t ooze out the sides. No cake decorating tips will fix a cake with bulges!
If you skip the dam you'll see bulges in the sides of the cake. Why? As you add cake layers and then frost the cake, the weight of the layers and frosting push down on the filling. As it squeezes out, it causes bulges under the frosting on the sides of the cake. Don’t worry about the dams sticking out - those will become part of the crumb coat, which is the next hack for making cakes look professional.
#2 Crumb coat
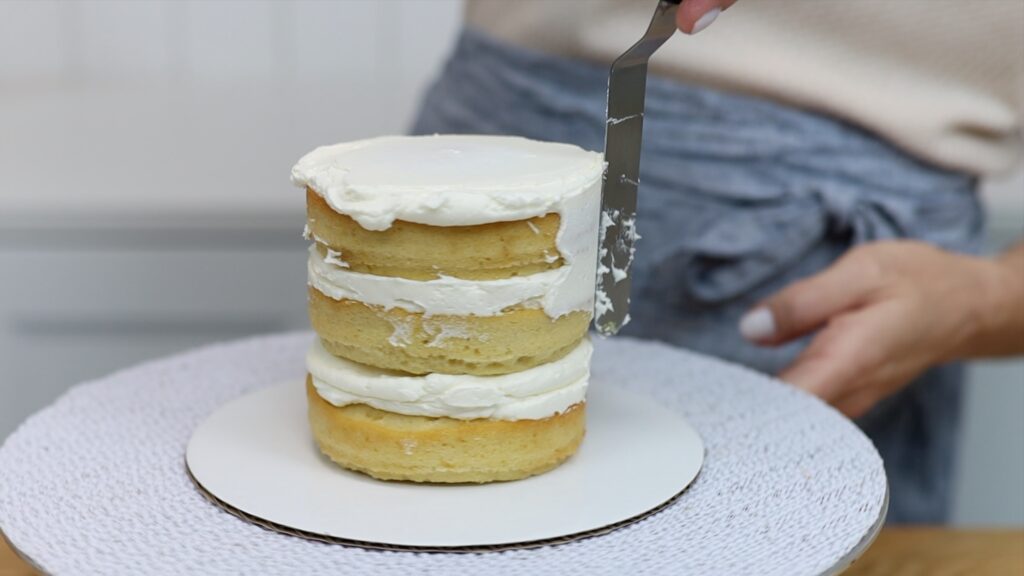
For super smooth frosting with no crumbs in it, take a few minutes to create a crumb coat. Spread frosting to cover the top and the sides of the cake and smooth it a little bit. You want fairly straight sides and a level top.
The purpose of this first layer, the crumb coat, is to trap any crumbs that come off the cake. Let the crumb coat set, which takes about 30 minutes in the fridge if you’re using my 4 Minute Buttercream. You want the crumb coat to completely cover the entire cake so that there’s no naked cake exposed.
Now when you spread on your final layer, none of the crumbs that came off the cake will get into it. The frosted cake will be smooth, with no visible crumbs.
#3 Super sharp edges
This is one of my favourite cake decorating tips or hacks! It's simple but really takes cakes to the next level. For a super sharp top edge around the cake, pour boiling water into a glass or cup. Dip a sharp knife into it to heat it.
Then take your chilled cake out of the fridge or freezer. Dry the knife off and cut around the top edge of the cake. The hot knife will slice easily through the frosting.
The cake only needs about 30 minutes in the freezer for the frosting to get very firm. If you prefer, put it in the fridge for an hour instead. After cutting off most of the excess, rest the knife on the top of the cake and spin the cake. This will trim off any more lumps and bumps.
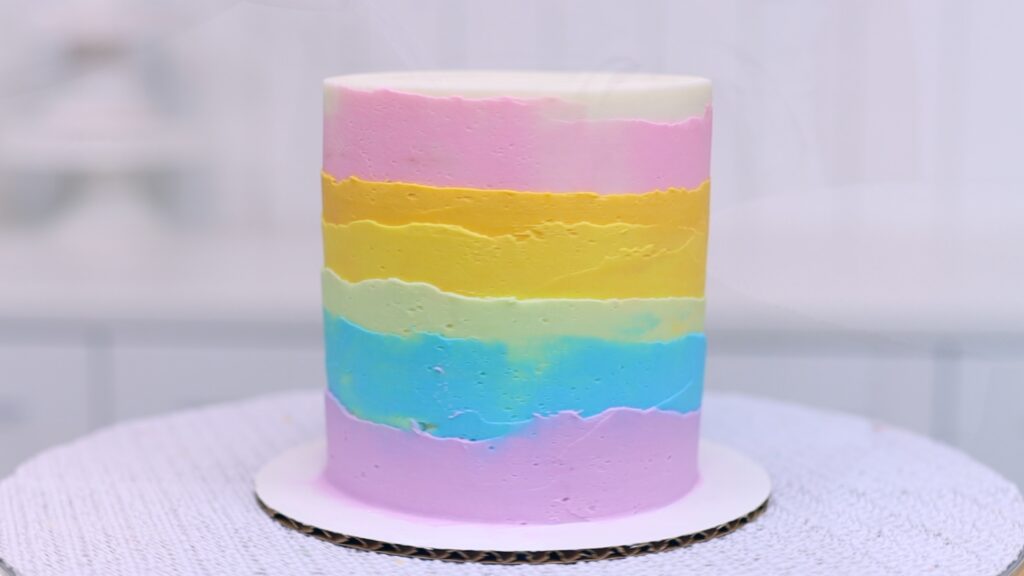
You'll leave a perfectly flat top with a sharp angle down to the sides of the cake. Look how effective these rainbow layers look on a cake with sharp edges!
#4 Piped bottom border
However you decide to decorate a cake, a neatly piped border will make a cake look professional. A border covers the bottom edge of the cake where it meets the cake board, adding detail and texture too.
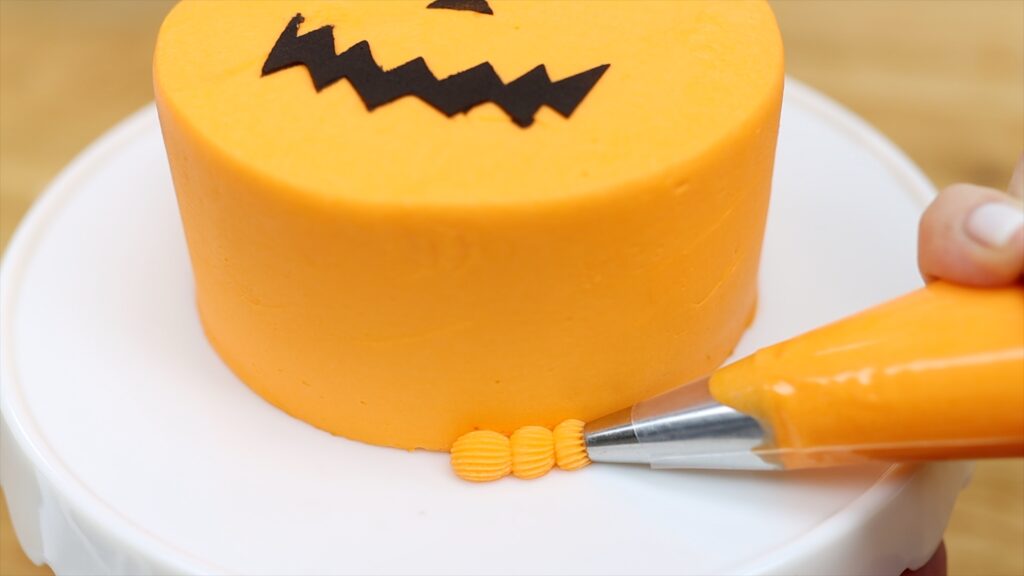
Expert cake decorating tips: Let your frosting set before piping your border to prevent any damage to the frosting. Then, choose an appropriately sized piping tip. Small cakes look silly with huge borders! For example this #199 tip is perfect for this tiny 4 inch cake.
#5 Get your colours right
For bright red frosting rather than pinkish red or true black instead of gray I recommend using gel colours. They’re much more concentrated than liquid colours so you’ll need to use less to achieve the colours you want.
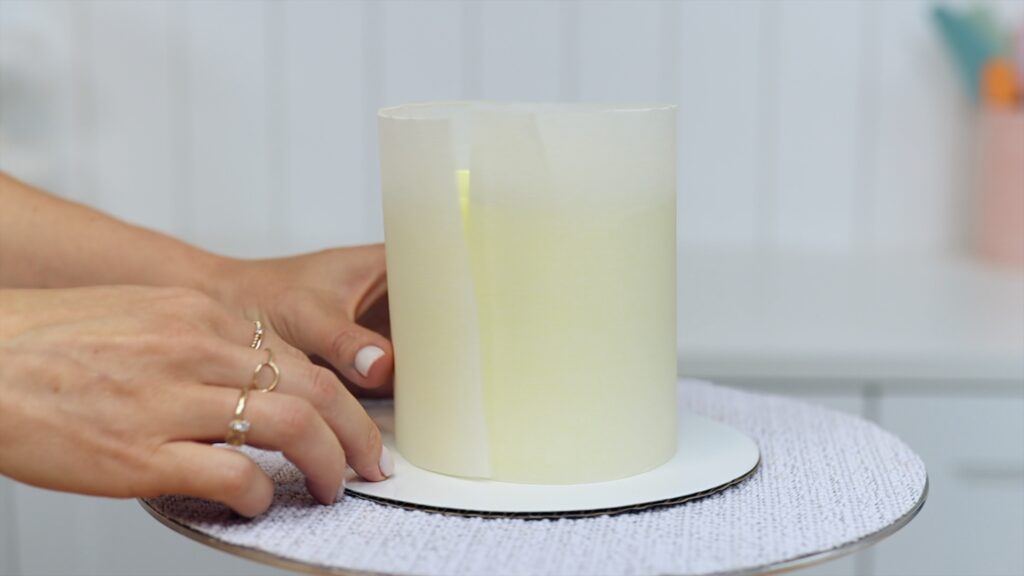
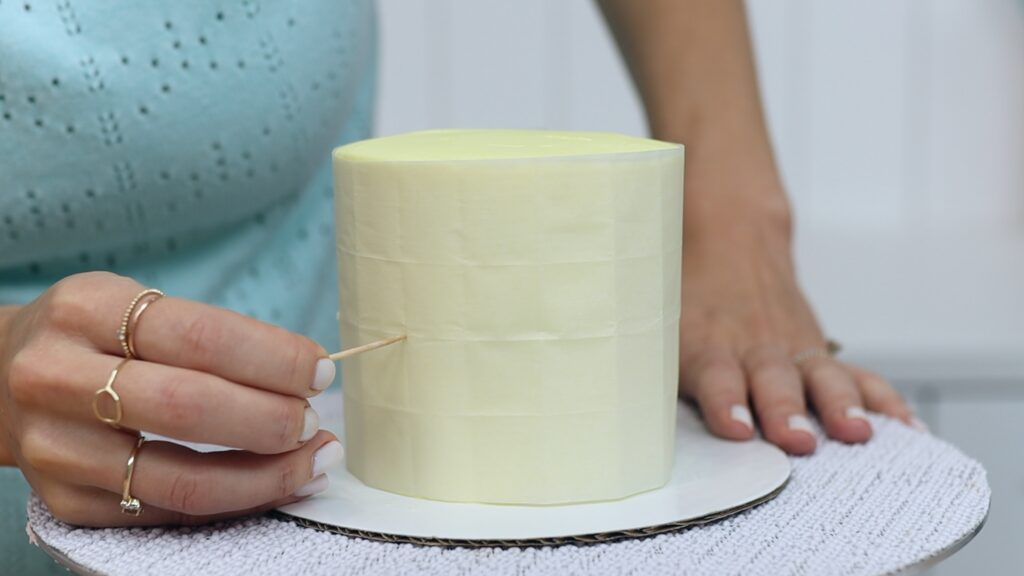
Very simple patterns can look stunning on cakes if the patterns are symmetrical. The easiest way to ensure this is to use a stencil. As with any stencil, first chill your cake to set the frosting. Then use this method to save money on expensive stencils! Wrap a piece of parchment paper around your cake. Mark the top the cake and also where the ends overlap each other.
Fold the parchment in half and half again, horizontally and vertically. You'll make equally spaced creases to guide your pattern.
Wrap this homemade stencil around the chilled cake again and poke a pin or a toothpick through the points where the creases meet. When you peel the parchment off you'll have a perfectly symmetrical pattern to pipe onto! I love cake decorating tips like these, which don't require buying expensive tools.
#7 Cake toppers
Make your own personalized and affordable cake toppers with just chocolate and sprinkles! Melt some white or semi-sweet chocolate chips and then spoon them into a sandwich bag. Cut off a little piece from one corner to pipe through.
Draw your shape or number or design and tape put a piece of parchment on top. Then trace over it with the melted chocolate. It doesn't need to be perfectly neat and smooth but try to stay within the outline. Then pour sprinkles on top and they’ll stick to the melted chocolate. Chill it in the fridge or freezer for a few minutes and then peel it off the parchment!
To turn this into a topper, squeeze some more melted chocolate onto the back and press a paper straw into it. When the chocolate sets it will be firm so you can push the straw into a cake to make a fun, colourful cake topper!
#8 Professional packaging
Cake decorating tips aside, let's talk about presentation. To make cakes look professional, instead of transporting your cakes in cake caddies, deliver them in pretty boxes. Choose a box with the same width as your cake board so that the cake doesn’t slide around within the box. Make sure the sides are taller than your cake so that you can fit the lid on! Wrapping a piece of colourful ribbon around the box adds a nice finishing touch. If you buy boxes in bulk they’re very affordable and really make your cakes look more professional.
#9 Trimming cake layers
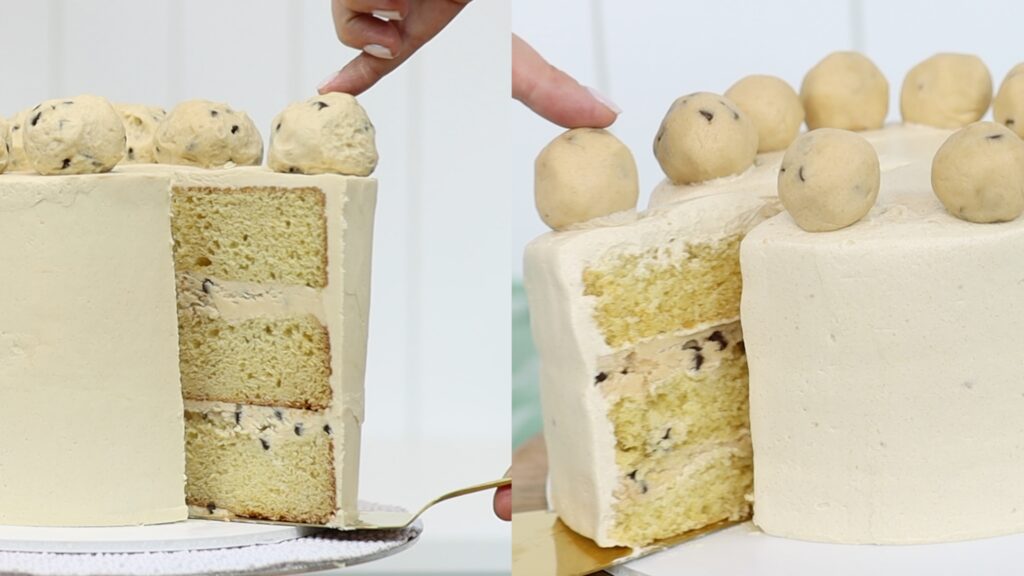
Let’s compare two apparently identical cakes to demonstrate this next hack. As I’m assembling these cookie dough cakes, you can see that the layers look very different. On the left, I’ve leveled the layers so that they’re flat but I’ve left the caramelized edges on each layer. On the right I’ve trimmed the top and bottom and the edges of each layer.
Before frosting the cake, the cake layers I didn't trim look neater. However, trimming the edges of the cake layers on the right makes a more tender cake to bite into. Also, the slices look much prettier without the darker edges around each layer.
#10 How big should your cake board be?
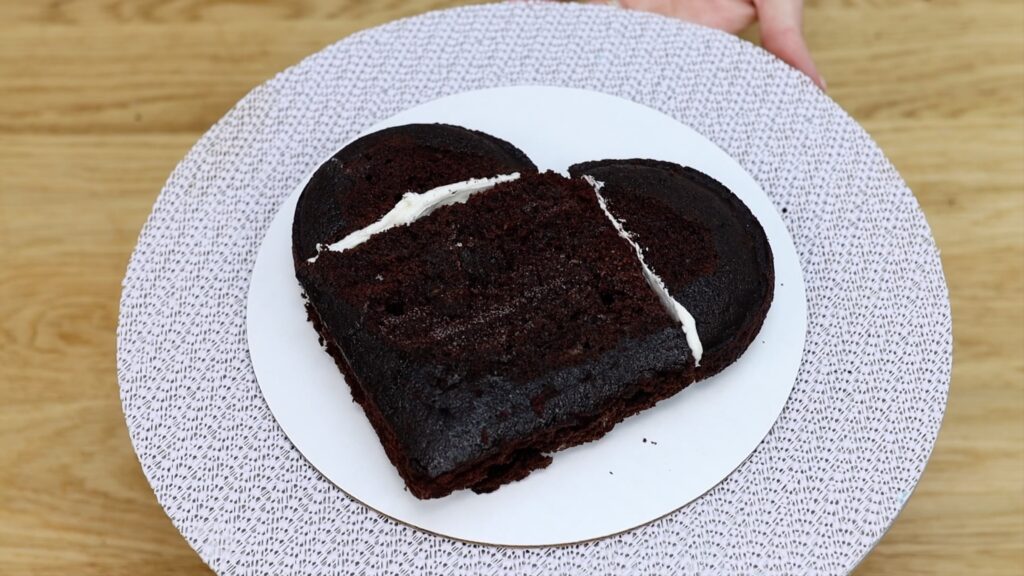
The cake board is a very important part of your cake! Choose a cake board at least two inches bigger than the cake. This leaves space for frosting and decorations. The board in the photo below looks big enough at first...
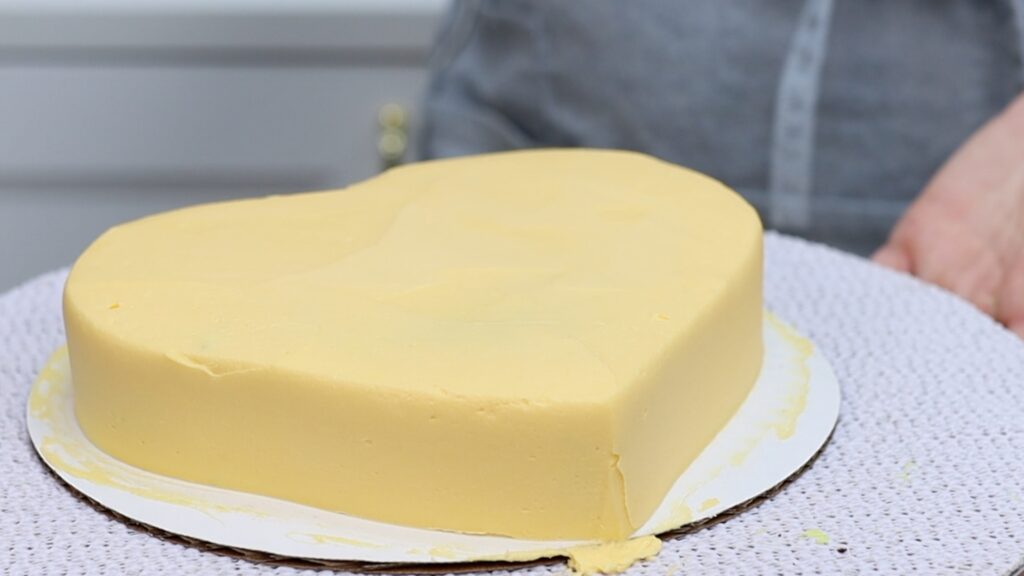
...but after frosting the cakes, the bottom tip of the heart is almost poking over the edge of the board!
#11 What material is best for cake boards?
Cardboard cake boards are strong enough for small 6 inch cakes or for single-layer cakes. For larger and taller cakes, use a sturdier material like foam core or acrylic to support the weight. Thinner boards will buckle under the weight of the cake and cause your frosting to crack.
So, those are 11 cake decorating tips to make a cakes look professional. Check out my online courses for hundreds of cake designs and decorating techniques to take your cakes to the next level!
Don’t have all day to make a cake? Try these quick frosting techniques for effortlessly stunning cakes!
#1 Diagonal texture
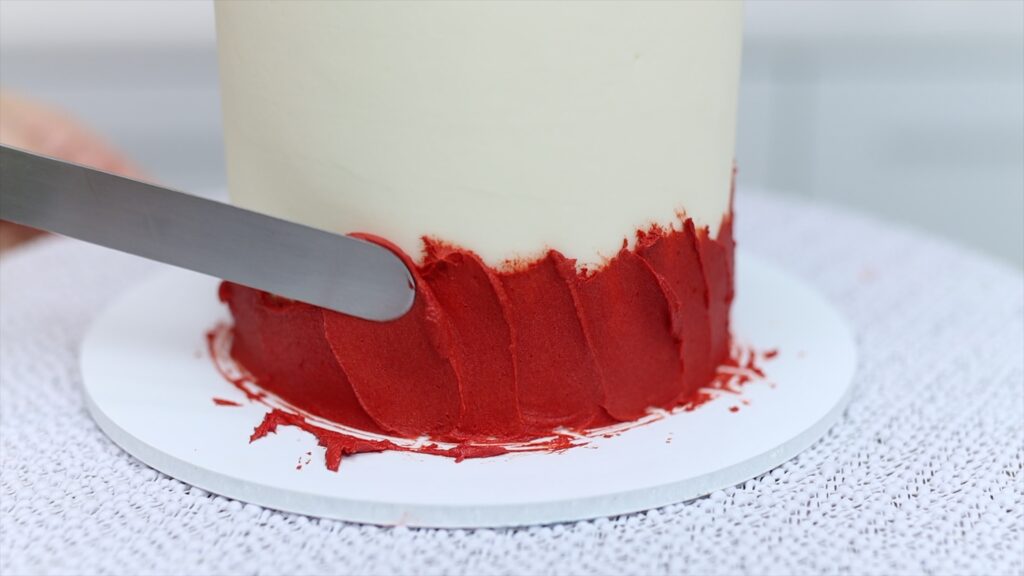
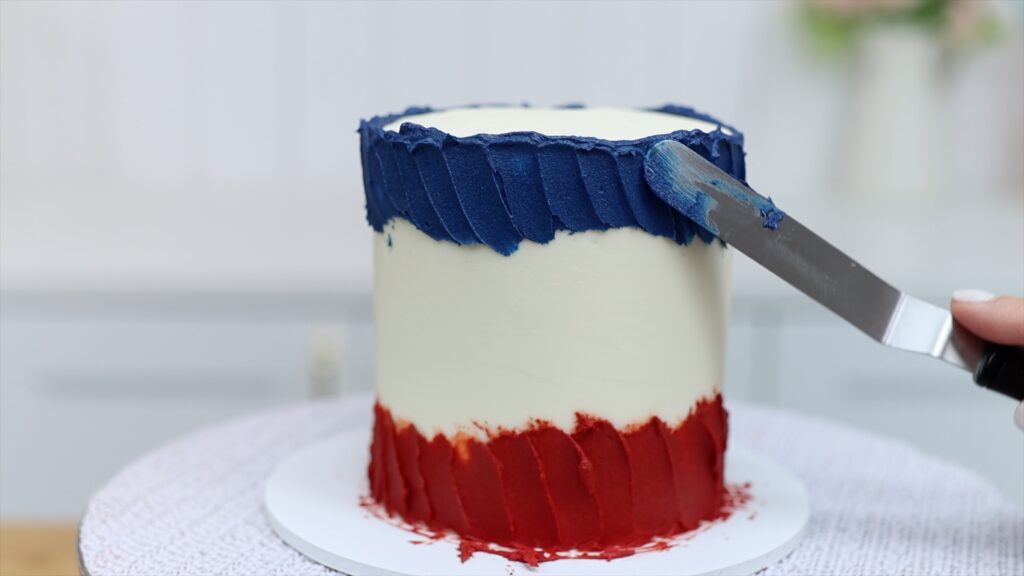
Add colour and texture in less than a minute with these diagonal swooshes. First, spread a thin strip of coloured frosting around the bottom of a cake. Don't worry about the top edge because the unevenness of this adds to its beauty. Wipe your spatula clean and press the tip into the bottom of the frosting. Drag it diagonally upwards to leave swooshes in the coloured frosting.
When frosting starts to build up on your spatula, scrape it off into a bowl. Overlap each swoosh and try to keep your pressure the same each time. You can do this around the bottom of the cake or the top, or both!
#2 Rustic texture
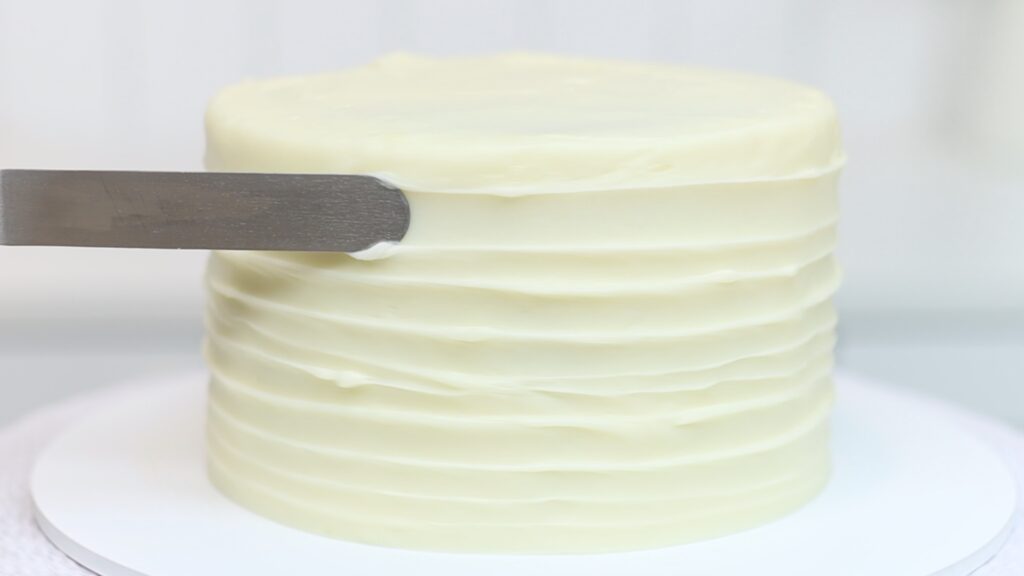
Here’s an even more rustic look, before we move on to some more polished, elegant-looking techniques. Smooth the frosting on your cake and then press the tip of your offset spatula into the frosting. Spin the cake, holding your offset spatula still to create a groove around the bottom of the cake. Pull the spatula slowly upwards to continue the grooves all the way up the sides of the cake.
This is a fun technique to do because you’re not aiming for precision. Instead, have fun with it! Create a rustic textured effect that adds some pretty detail to your frosting.
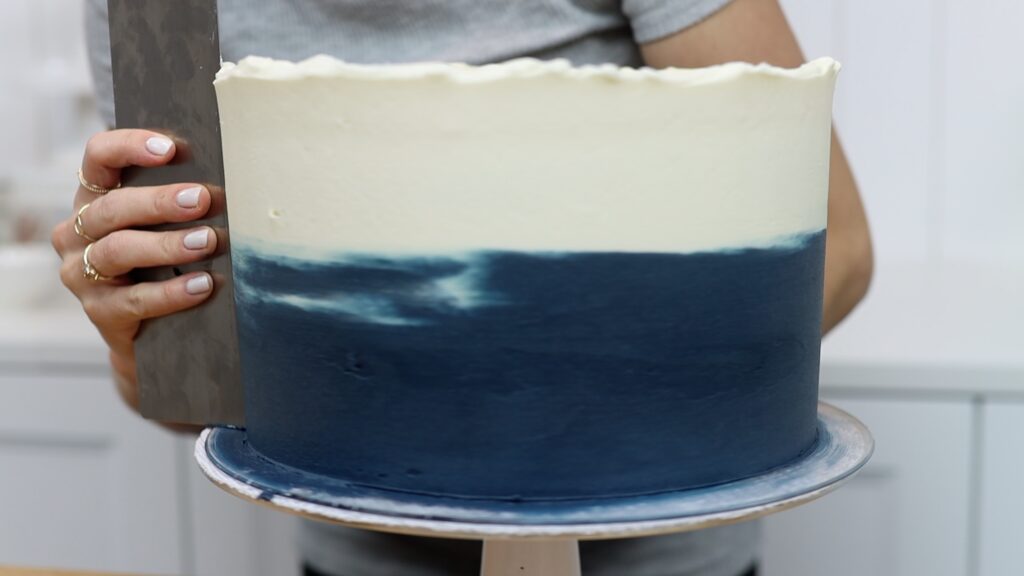
#3 Two-tone frosting
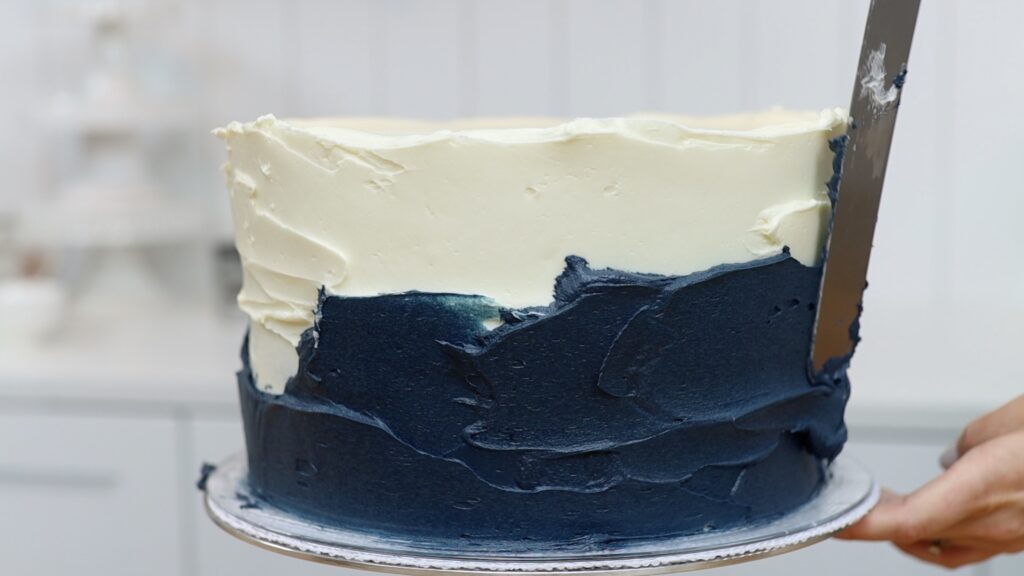
Now for super quick two-tone frosting! Frost the top of your cake as normal, and the top of the sides. Then switch colours to cover up the rest of the sides of the cake. Don’t worry if smudges of this colour get onto the top half because those smudges will help with the blending effect next.
Scrape around the cake a few times with a frosting smoother or cake comb. Do any touch-ups to fill in gaps or indents until the frosting is smooth. This two-tone frosting is dramatic but SO quick and easy to achieve!
#4 Naked kisses
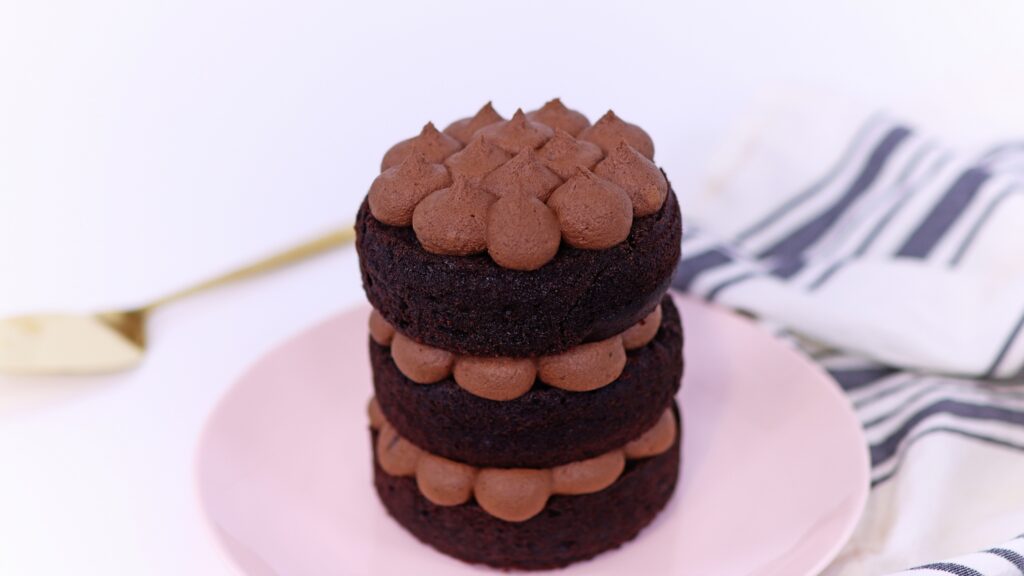
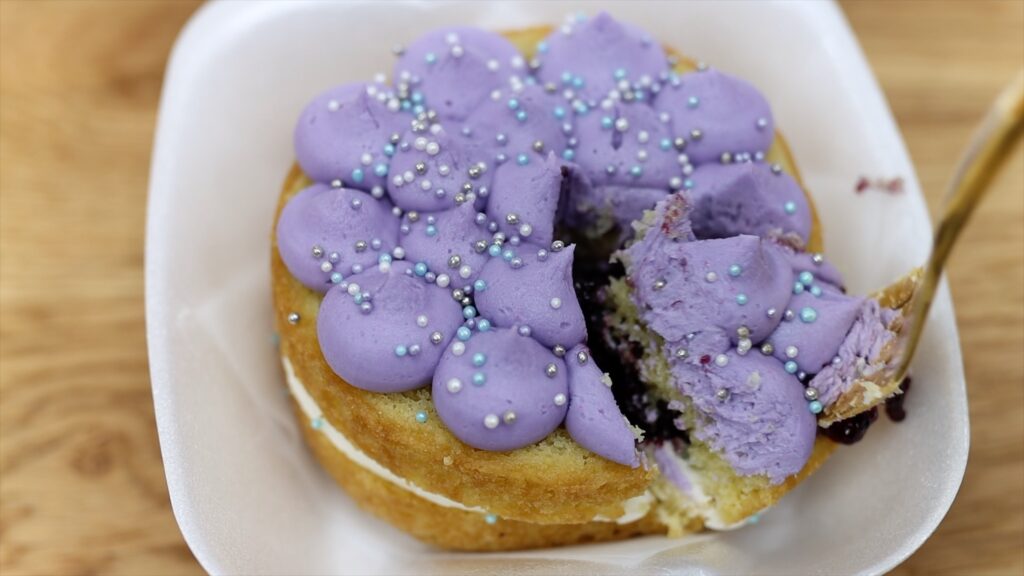
Naked cakes aren’t covered with frosting so any naked design is a big time-saver. Frosting kisses are a quick way to apply the filling and to decorate the top of the cake. You can pipe these with any round tip and of course, the bigger the piping tip, the bigger the kisses! I piped these with a 1A tip.
If you want to add sprinkles you can do that straight after piping, while the frosting is still soft, so that the sprinkles stick. Check out my Lunchbox Cakes tutorial for more ideas on making these adorable treats!
If you’re enjoying these ideas, visit my cake school for hundreds of cake designs and techniques and join my ClubPLUS for access to EVERY MasterCourse, MiniCourse and Live Workshop!
#5 Piped filling on naked cakes
You can get much more elaborate with piped filling on naked cakes, but it doesn’t need to take any longer. 1M piping tips are star-shaped and they’re very versatile, with loads of options for piped designs.
For the neatest results, start at the outer edges of each cake layer and work your way in. This way, the outer ring of frosting lines up perfectly with the outer edge of the cake. That’s the most important piping since that’s the part that will be visible once you’ve layered your cake.
For the top of the cake I like to start in the middle instead, since the whole top of the cake will be visible. Colourful piped filling looks gorgeous between naked cake layers.
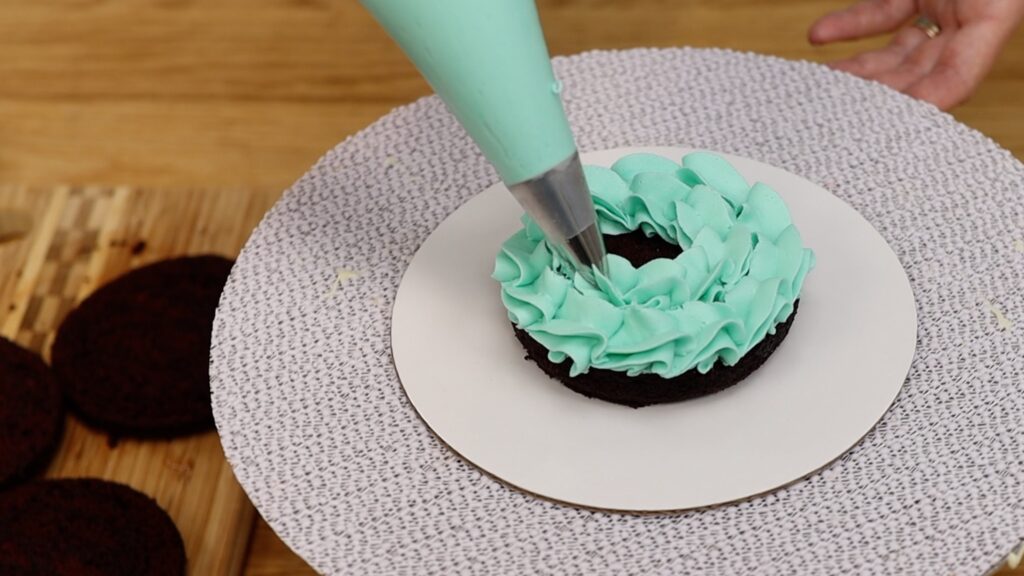
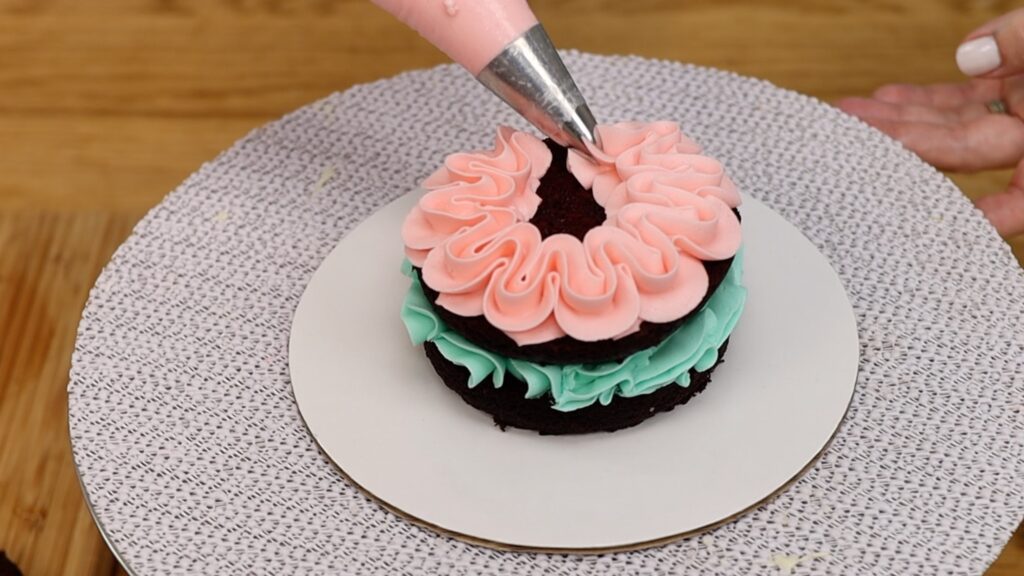
#6 Frosting ruffles
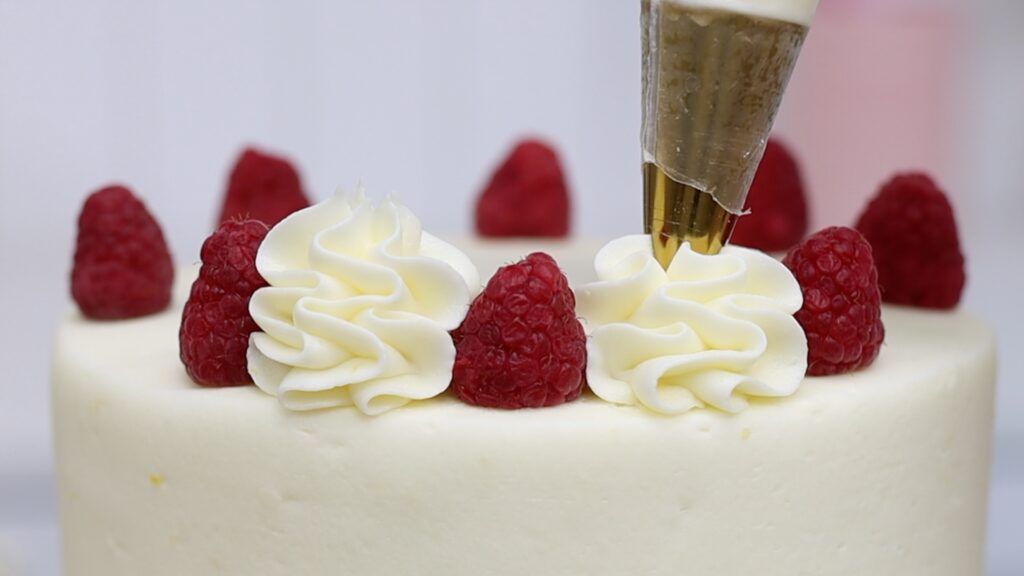
Turn a plain frosted cake into an eye-catching centerpiece in seconds with this next technique. Arrange berries or chocolates or place cookies standing up around a cake. Space them evenly by moving from one, towards the opposite side of the cake.
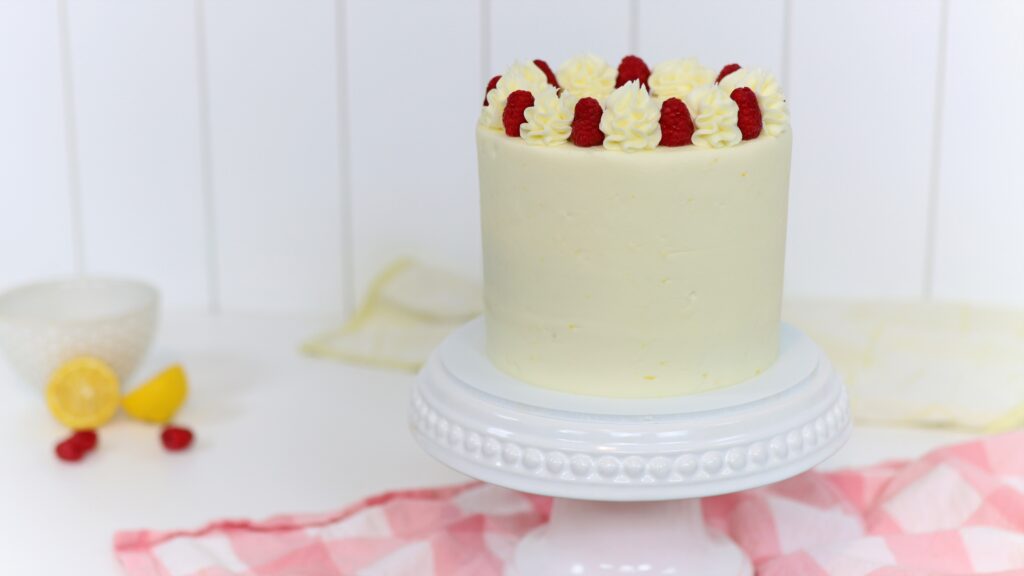
Then use a piping bag fitted with a 1M or 2D tip to pipe spiral swirls or ruffles. Use your berries as a guide, piping up to the edge of them and also up to their height. This frosted Lemon and Raspberry Cake doesn’t look so plain anymore!
#7 Loaded cakes
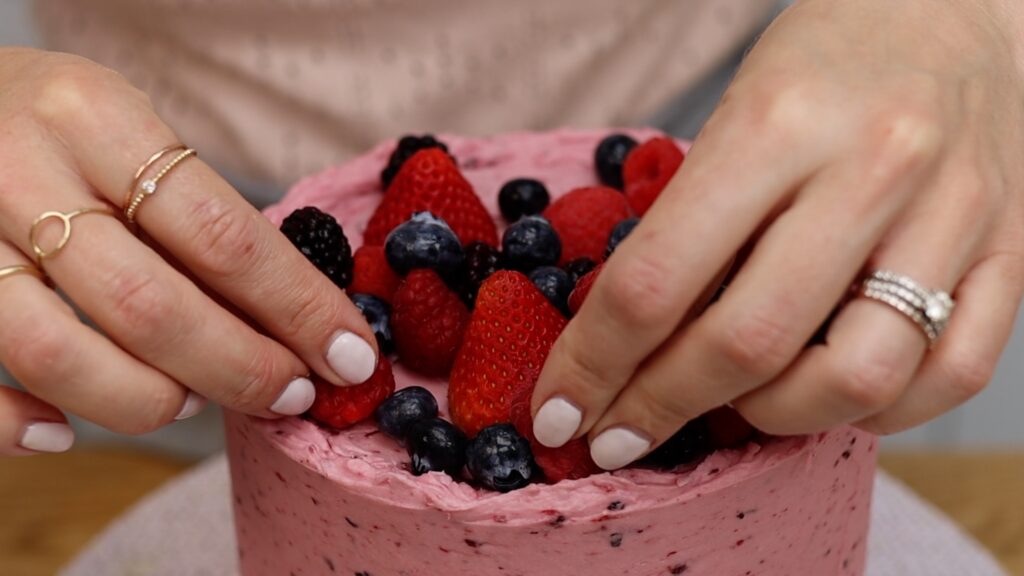
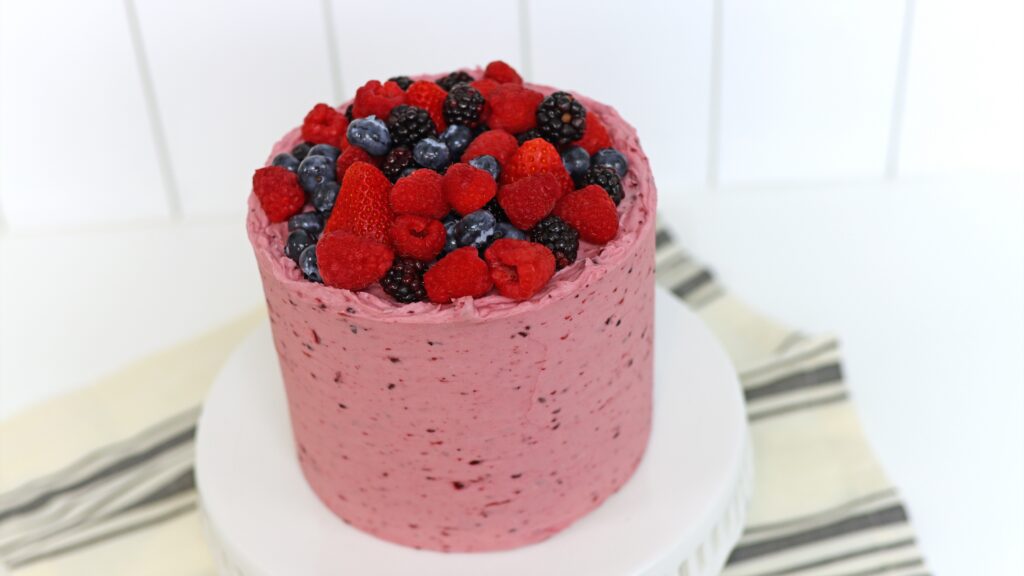
For a very quick loaded cake effect, don’t tidy up the top edge of the cake when you frost it. Leave the frosting sticking up around the top to form a wall to hold in any toppings on the cake.
Here’s a quick practical tip: chill the cake to set the frosting so that the wall firms up. Now it won't bulge when you add your toppings. You’ll need to spread a thin layer of frosting on top after it sets to act as glue. This will attach your toppings so they stay in place.
Fresh berries are perfect in summer or use chocolates, candies, flowers… there are so many options!
#8 Sprinkle borders
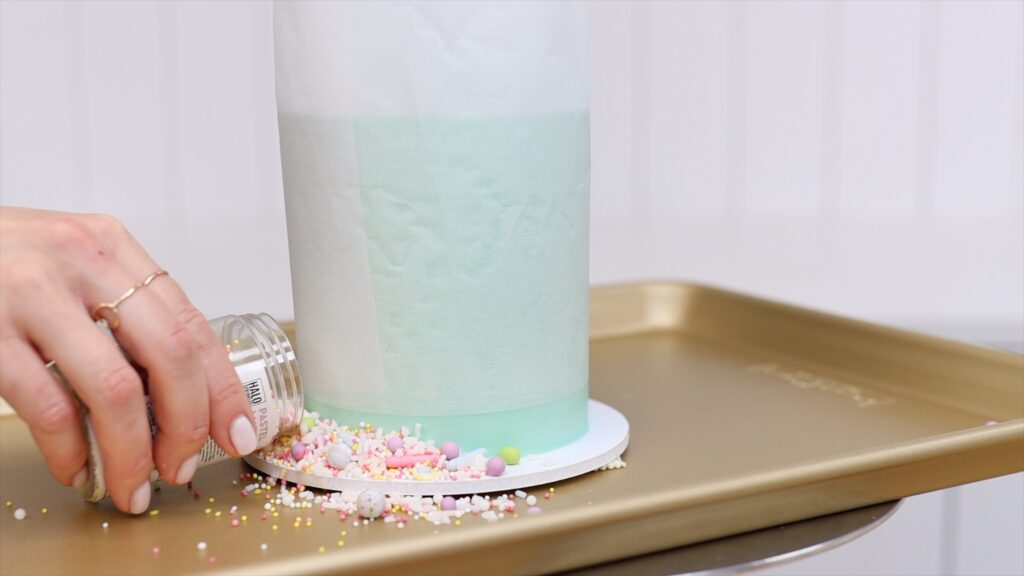
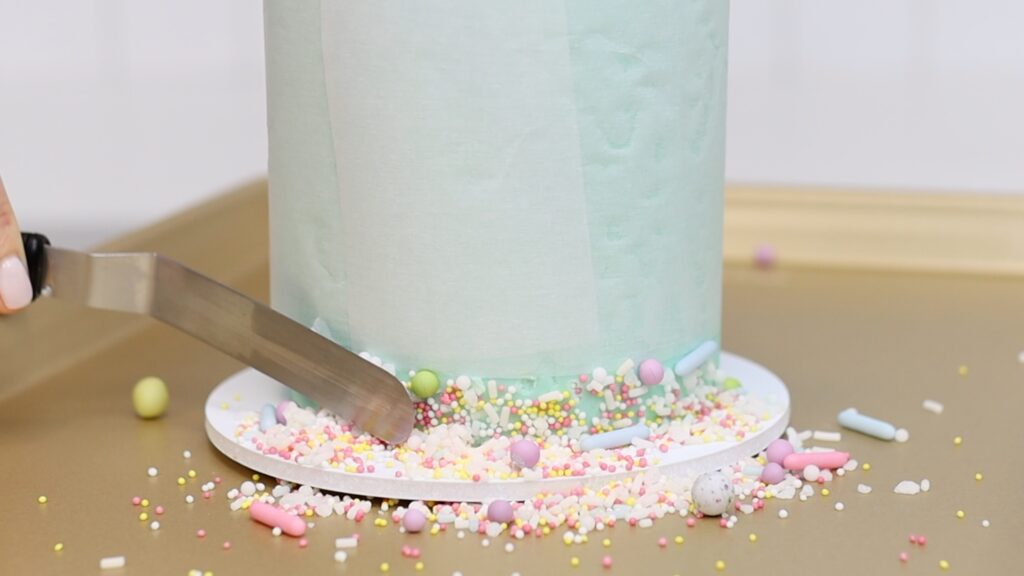
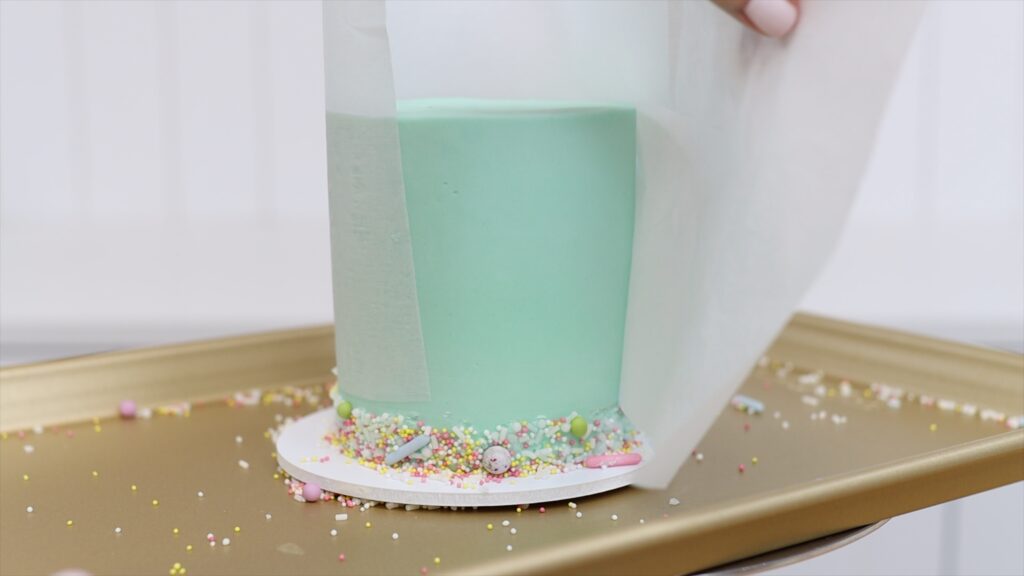
To make a neat sprinkle border around your cake, wrap the cake in parchment paper. Leave an inch or two of frosting sticking out at the bottom. Pour sprinkles around the cake, onto the cake board. I recommend putting your cake on a tray or rimmed baking sheet for this because it will catch any sprinkles that roll off the board, and LOTS of sprinkles will do just that!
Push the sprinkles into the frosted cake with an offset spatula or a spoon or your fingers. The frosting on the cake needs to have set before you do this so that the parchment doesn’t damage it. That means the frosting will be firm so you’ll need to push the sprinkles in quite hard to attach them. Another option is to spread some fresh frosting around the bottom of the cake after wrapping it in parchment paper. That fresh frosting will be like glue for the sprinkles.
Peel the parchment off and voila! Then just lift the tray up and pour the sprinkles back into the jar for super quick cleanup!
Tell me in the comments: which if these quick frosting techniques is your favourite?
Naked cakes are a great way to really show off beautiful cake layers and delicious fillings. Added bonus: they’re really quick to put together! In this tutorial I'll show you how to make a naked cake with various ideas for fillings and decorations.
How to prepare naked cake layers
Let’s start with how to prepare and assemble a naked cake and then I’ll show you different decorating techniques.
After baking your cakes, trim the tops with a serrated knife like a bread knife to level them. Flat cake layers will make a neat, straight cake.
You can divide your layers in half if you want to make them thinner or if you want to have more layers of cake and filling.
I like to chill my layers in the fridge or freezer before assembling a cake so that they’re firm and easier to handle. They’re also less crumbly when they're cold. If you leave them in the fridge or freezer overnight, wrap them in plastic wrap so they don’t dry out.
I highly recommend drizzling or brushing your layers with simple syrup to keep the cakes moist. Without frosting to cover the cakes, they dry out quickly. To make simple syrup, heat equal parts of water and sugar together until the sugar dissolves.
How to assemble a naked cake
Now it’s time to assemble the cake. I think piped filling looks the prettiest because it adds texture andit’s neater than spreading it.
Choose your piping tips and fill your piping bag or bags. I'm using 1M tips for several piping techniques for this first cake.
To assemble your cake, attach first layer with a dot to a plate or cake stand or cake board. This holds it in place so it doesn’t slide around as you’re piping.
Start piping at the outer edge of each cake layer and work your way in towards the middle. Only the outer edge will be visible after you assemble the cake and by starting your piping with that outer edge, you’ll make sure that that piping lines up perfectly.
Lower the next layer of cake down onto the piping gently and adjust it. Check the cake from different angles to make sure it’s lined up on top of the previous layer. Then push down to attach it to the piping.
If any crumbs fall down onto the piping you can nudge them off with a toothpick without damaging the piping.
You don’t need a turntable for naked cakes but it does make the assembly and piping much quicker. Take your time to check each layer is straight and level before piping the next layer of filling.
Tricks for piping on naked cakes
You can use coloured buttercream or flavoured buttercream for piping. If there are any chunks of ingredients like pieces of fruit, those will clog your piping tip. Blend and strain any ingredients like fruit or Oreo crumbs to make smooth buttercream that pipes beautifully. This is an open star tip, an 8B, for these piped rosettes.
Unlike for most cakes, you don’t need a cake board for naked cakes. You won’t be resting a cake comb on it to smooth any frosting, which means the cake doesn’t need to be on a completely flat surface. Instead, you can assemble it on a plate or on a cake stand.
The dot of buttercream on your cake board, plate, or cake stand is essential. This will attach the bottom cake layer so that your cake doesn’t slide off as you carry it to the table!
If you’re in a rush, pipe a swirl of frosting with a 1M star tip. Between the bottom layers of cake I like to start at the outside of the cake and work my way in. That way you know the outer ring is going to be really neat and that’s what’s visible after you place the next cake layer on top.
For the top of the cake I start in the middle and spiral outwards because I find that doing it this way makes for the neatest swirl overall. Tadaa! A cake that’s put together in less than a minute!
How to make a naked cake with different fillings
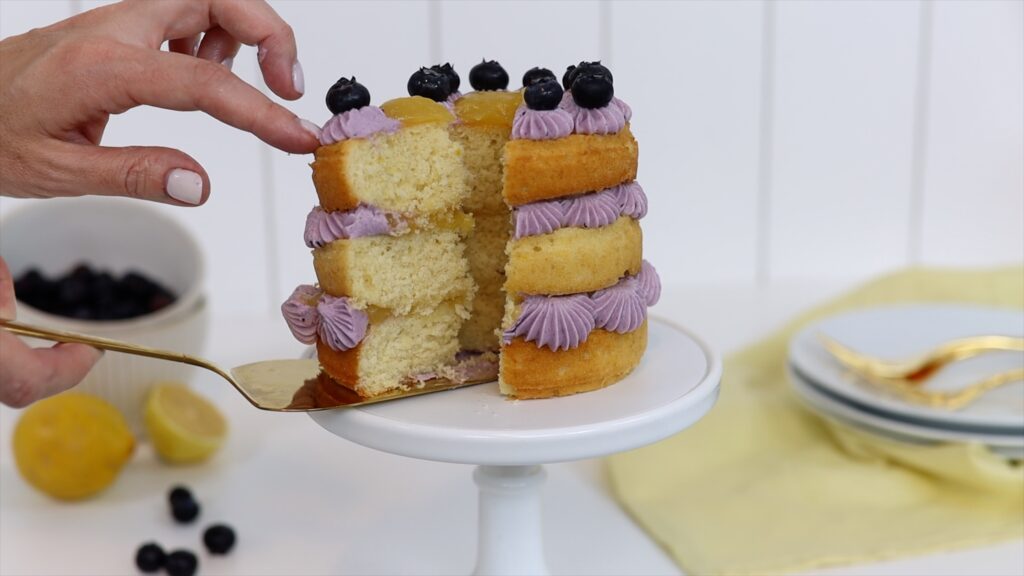
You can use lots of different fillings other than buttercream for naked cakes. If they’re runny, like caramel or lemon curd, they’ll ooze out from between the layers. The solution? Build a dam first. Pipe all around the outer edge of each cake layer to make a dam or a wall so that when you spoon your lemon curd or any other filling within that buttercream, it will stay in place. This deliciousness is my Lemon and Blueberry Cake.
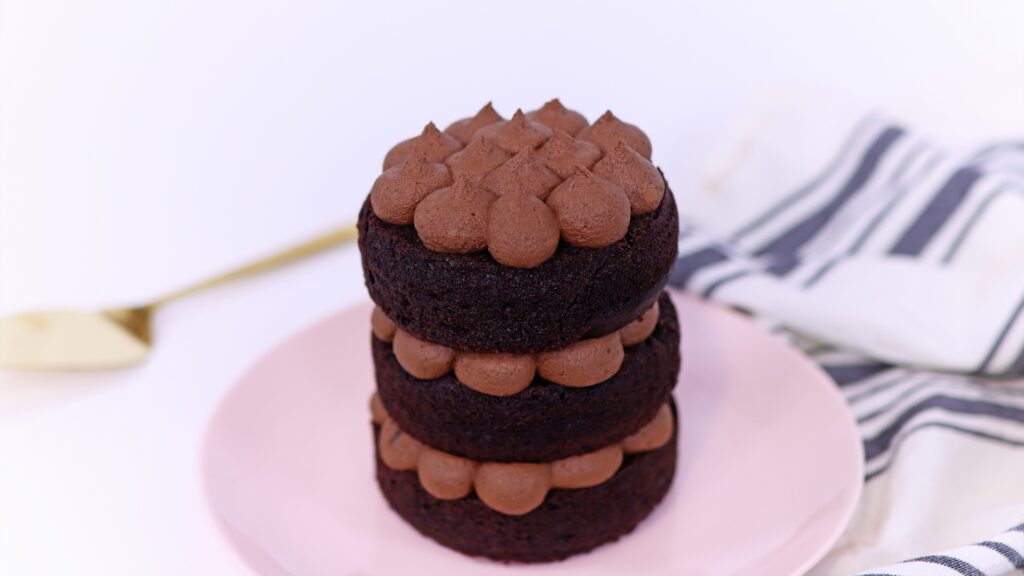
When you’re choosing a filling, consider the consistency of the filling and the weight of the cake layers. Dense cakes weigh more than light cakes and the more layers you use, the more weight there will be on the filling. The filling for the cake below is chocolate ganache piped with a 1A tip. Ganache isn’t as stiff as buttercream but these are my Perfect Chocolate Cake layers and they’re really light compared to denser cakes like carrot cake, so the ganache can support them.
Cream cheese frosting is much softer than buttercream and so is whipped cream. If you’re using one of these, consider leaving a slight dome on your cake layers. Then flip each layer upside down so that the middle of the cake rests on the middle of the filling but the edges of the cake are raised. This way you won’t crush the piped filling. The cake below is my Banana Layer Cake with cream cheese frosting.
I hope you’re confident to make your own naked cakes! Check out my cake school for online courses on hundreds of cake designs and techniques and join my ClubPLUS for access to every MiniCourse, MasterCourse and Live Workshop!
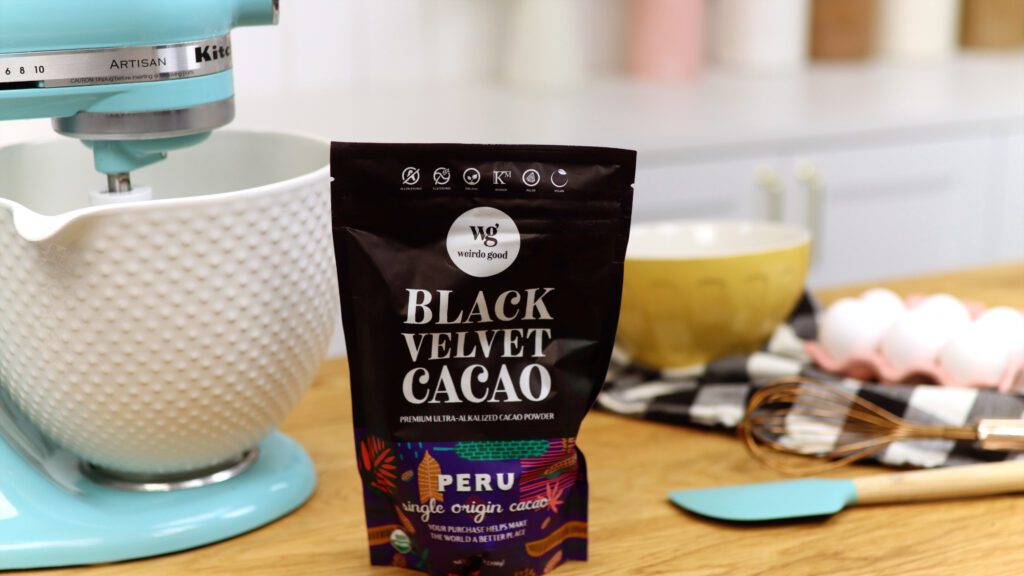
There's an easy trick to make a cake black without using any food colouring: black cocoa. Available to buy on Amazon, it's a natural way to turn this moist chocolate cake into a stunning black creation, perfect for Halloween! The chocolate flavour provided by black cocoa powder is similar to an Oreo cookie.
How to use black cocoa powder
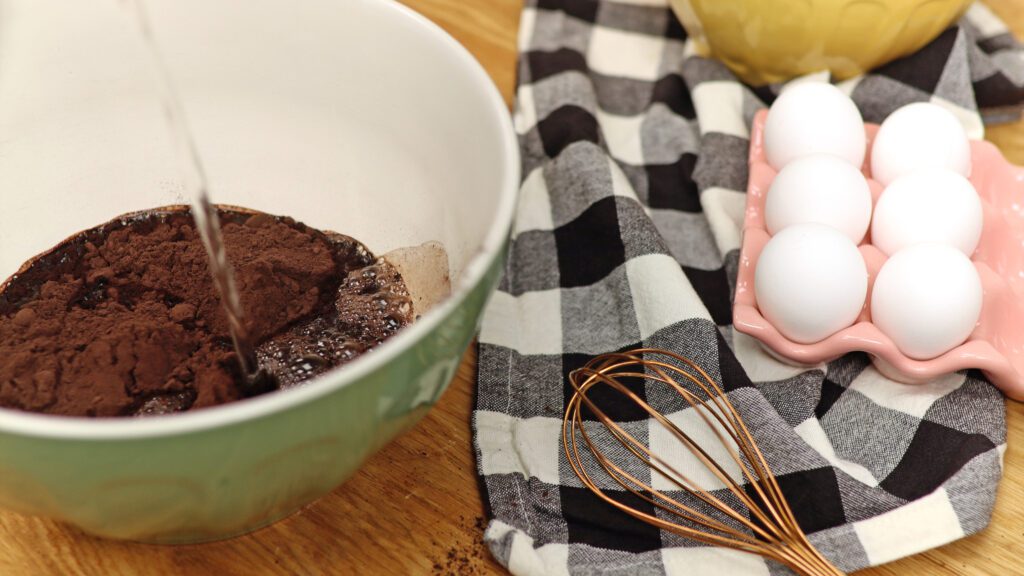
Black cocoa incorporates best into cake batter when it's in liquid form. By using a black cocoa and water mixture you'll avoid flecks of black, creating a solid, bold black batter instead. Measure the black cocoa powder into a bowl and add twice the amount of hot water and whisk together. Using hot water helps the black cocoa powder dissolves when you whisk it.
Since everything should be at room temperature when you add it to the cake batter, this will then need time to cool. That's why you should prepare the cocoa powder mixture first. While it cools, start preparing the cake batter.
How to make black cake batter
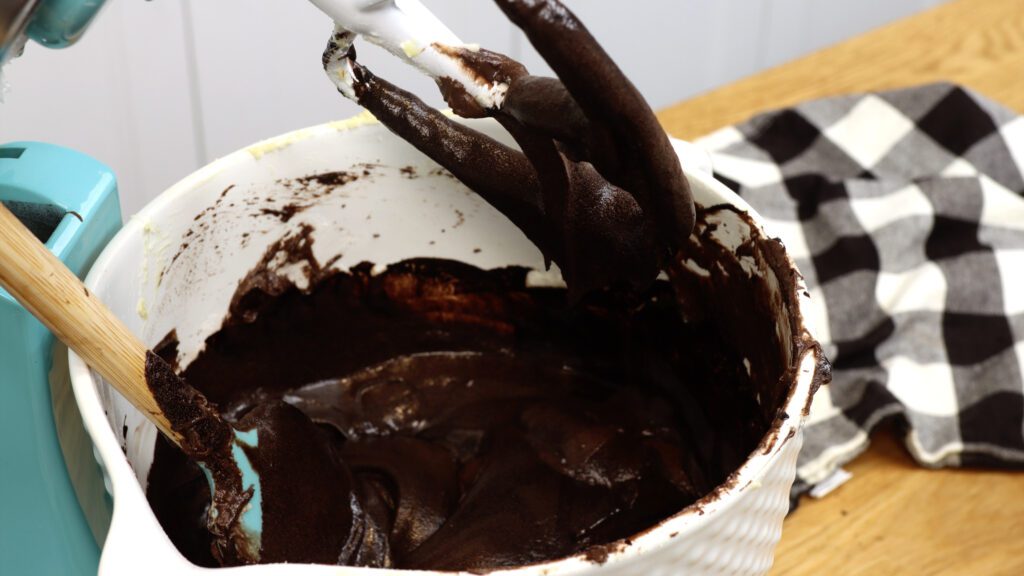
In a mixer with a beater or paddle attachment, mix butter and sugar on medium speed until pale and creamy. It will take about 2 minutes of your butter is at room temperature. You'll notice the mixture get lighter in colour and also fluffier. Scrape down to the bottom of the bowl once or twice during mixing to make sure no butter is stuck at the bottom.
Add the eggs one at a time, mixing on the lowest speed after each one until it's incorporated into the batter, which will take about 30 seconds. Next, add the vanilla and mix on lowest speed for about another 30 seconds.
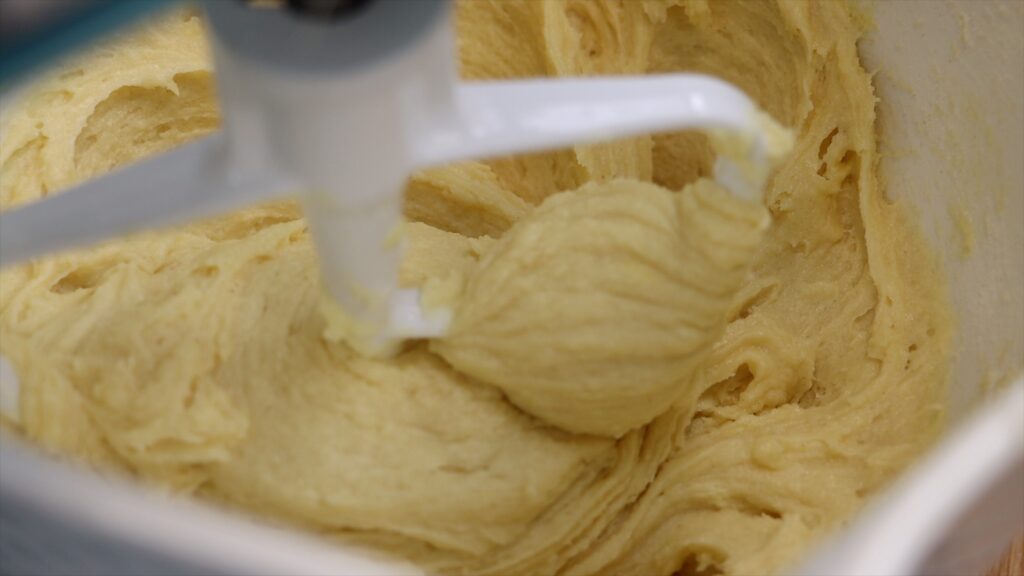
In a bowl sift the flour, baking soda, baking powder and salt. Add a third of the flour mixture to the mixing bowl and mix on lowest speed until you can't see any clumps of flour in the batter. The batter will be quite thick and will look like this:
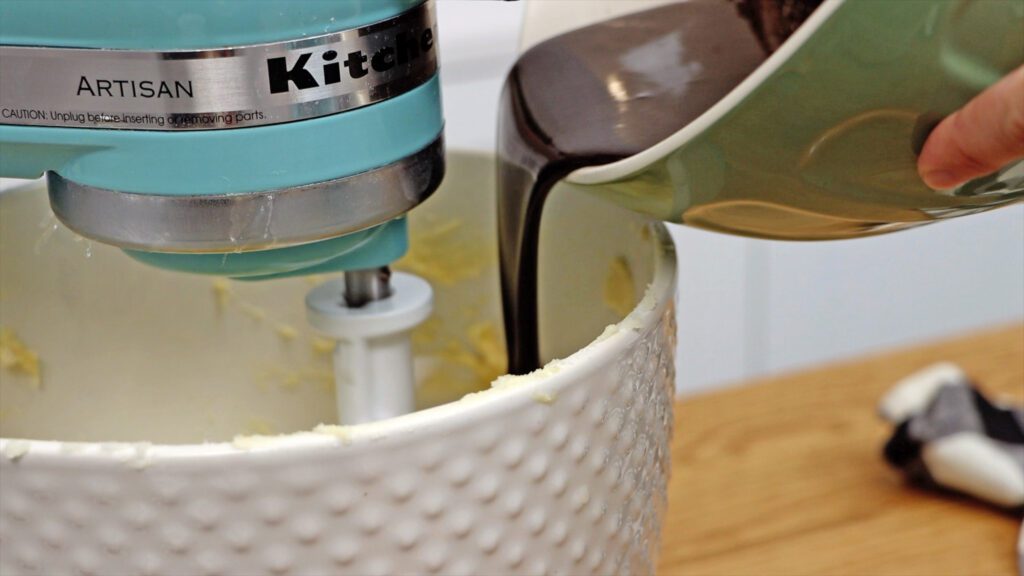
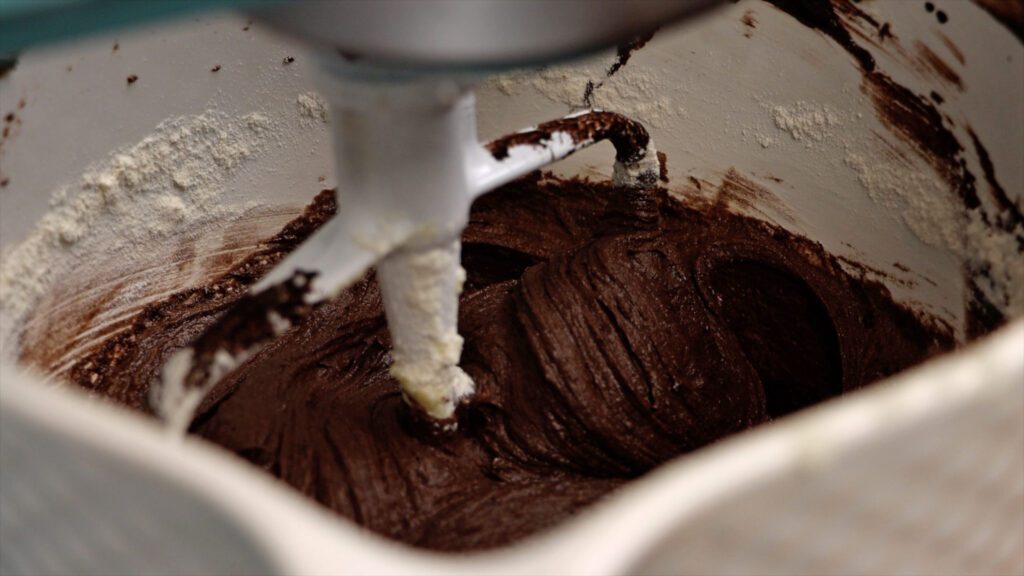
Add half of the black cocoa mixture to the mixing bowl and mix on lowest speed to incorporate. Turn the mixer off and scrape down to the bottom of the bowl to mix in any batter that the paddle attachment hasn't reached. Mix again until you don't see streaks of the black cocoa powder mixture.
Add the remaining flour mixture and mix to combine. Make sure you scrape any flour from the sides if t mixing bowl into the batter. Then add the rest of the black cocoa powder mixture, mixing until the batter is smooth.
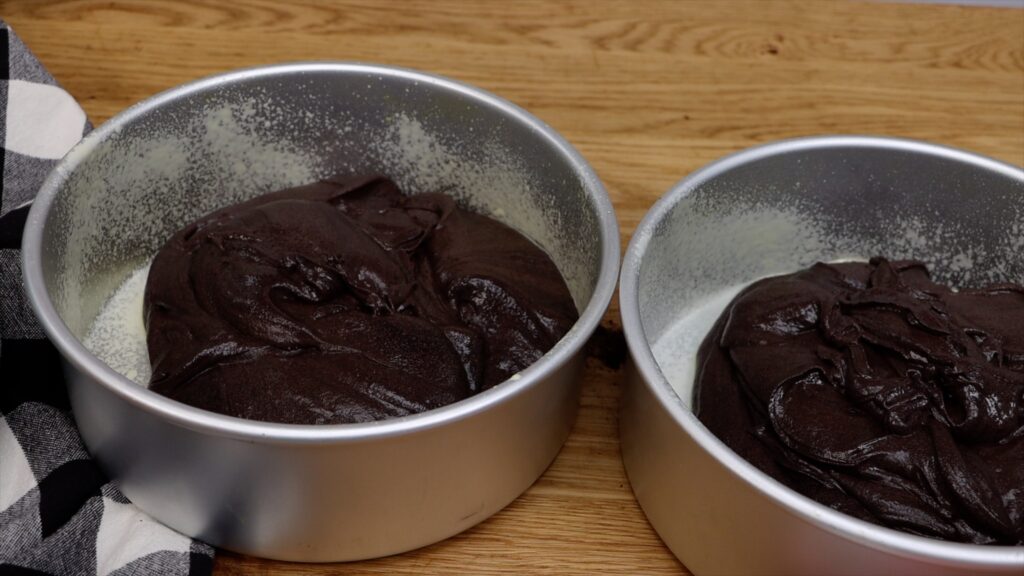
This is a runny batter, which makes it easy to pour or spoon into pans to bake. The recipe (listed in a printable and Pinnable format below) is for an 8" cake with two layers. If you prefer, after baking and cooling you can divide the cake layers in half horizontally to make four layers.
Bake the black cake layers
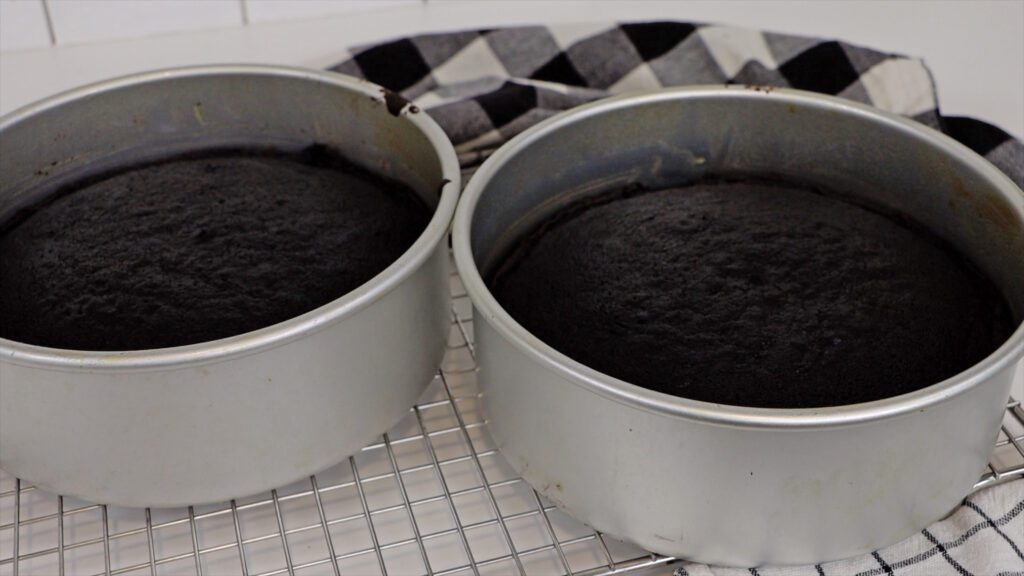
Grease the inside base and sides of two 8" pans with butter, oil, or non-stick spray. Divide the batter between the cake pans and bake at 175ºC or 350ºF for 30 minutes or until a toothpick inserted into the middle of the cake comes out clean.
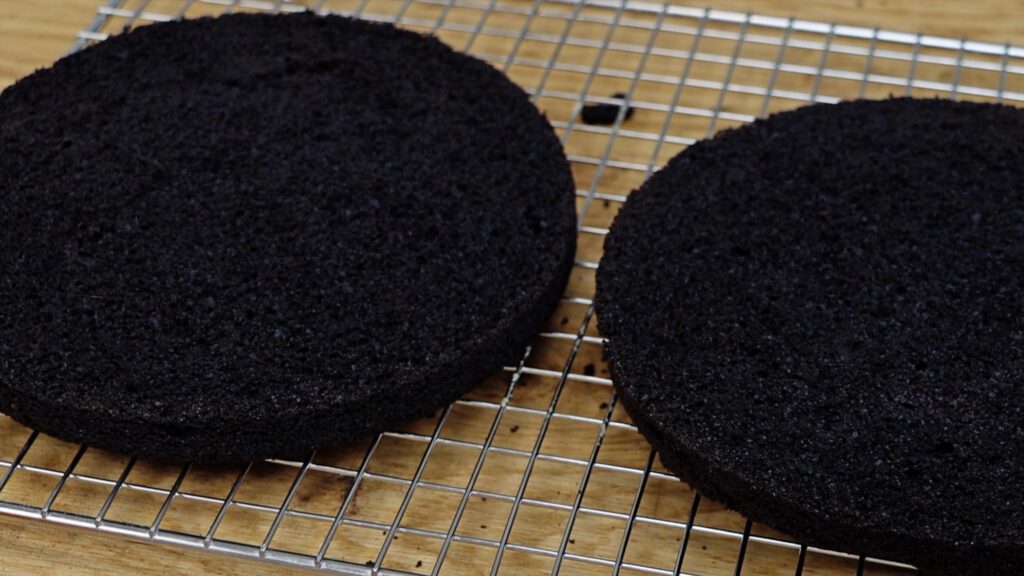
Leave the cakes to cool in their pans for ten minutes. Then use a spatula to loosen cake from the edges of the cake pan and turn the cakes onto a wire cooling rack. Leave them to cool completely before assembling your cake. If you want to make four cake layers, use a serrated knife like a bread knife to divide the layers horizontally.
Make a cake with these black cake layers
Since this cake isn't very sweet it pairs perfectly with my 4 Minute Buttercream. The flavour of the black cocoa cake with vanilla buttercream filling and frosting is similar to an Oreo cookie!
After assembling and frosting this cake you can leave it at room temperature for 3 days or in the fridge for up to a week. If you do refrigerate the cake, leave it at room temperature for at least 2 hours before serving it so that it comes to room temperature, when it tastes the best!
After slicing it, to prevent the cake drying out you can cover the cut side of the cake tightly with cling film or Saran Wrap.
Print or pin the recipe below and when you try it, please leave a review to tell me what you think!
Black cocoa gives these moist cake layers a rich chocolate flavour similar to an Oreo cookie!
Ingredients
UnitsScale
1 1/2cups hot water
3/4cupsblack cocoa powder
3/4cupsunsalted butter
1 3/4cupswhite sugar
3 eggs
1 1/2 teaspoons vanilla extract
2cupsplain flour
1/4 teaspoon baking powder
1 1/2 teaspoons baking soda
1/8 teaspoon salt
Instructions
1. In a bowl, whisk together hot water and black cocoa powder until the cocoa has dissolved. Set aside to come to room temperature.
2. In a mixer with a beater attachment, mix butter with sugar on medium speed until pale and creamy, about two minutes. Scrape down to the bottom of the bowl once during mixing to make sure no butter is stuck at the bottom.
3. Add eggs one at a time, mixing on the lowest speed after each addition until incorporated, about 30 seconds.
4. Add vanilla and mix on lowest speed for about 30 seconds to combine.
5. In a bowl sift flour, baking soda, baking powder and salt. Add a third of the flour mixture to the mixing bowl and mix on lowest speed to incorporate.
6. Add half of the black cocoa mixture to the mixing bowl and mix on lowest speed to incorporate. Repeat with another third of the flour mixture, then the remaining black cocoa powder mixture, and then the remaining flour mixture. Mix just until the ingredients are combined.
7. Grease the inside (base and sides) of two 8" pans with non-stick spray, butter or oil. Divide batter between the cake pans.
8. Bake at 175ºC or 350ºF for 30 minutes, or until a toothpick inserted into the middle of the cake comes out clean.
9. Let cakes cool in their pans for 10 minutes. Use a spatula to loosen cake from the edges of the cake pan and then turn onto a wire cooling rack. Leave to cool completely.
Notes
You can use salted instead of unsalted butter but if you do, omit the salt.
This recipe works best with plain flour, also called all-purpose flour.
Can I use this recipe for bigger or smaller cakes?
Absolutely! The recipe as written will make two 8" layers, which you can divide in half horizontally to make four layers. You can use the same recipe to bake three or four 6" layers. Adjust the ingredient quantities using the tables below to make different sizes of cakes.
Standard Height Cakes
For standard height cakes of about 4 inches tall, use the ingredients in the quantities listed below and divide the batter into two cake pans.
Ingredients
2-layer 6" cake
2-layer 8" cake
2-layer 10" cake
Hot water
1 cup 235ml
2 cups 475ml
3 cups 710ml
Black cocoa powder
1/2 cup 45g
1 cup 85g
1 1/2 cups 130g
Unsalted butter
1/2 cup 114g
1 cup 227g
1 1/2 cups 341g
Sugar (white, granulated or caster)
1 cup and 2 tablespoons 225g
2 1/4 cups 450g
3 1/2 cups 675g
Eggs
2
4
6
Vanilla extract
1 teaspoon
2 teaspoons
1 tablespoon
All purpose flour (plain flour)
1 1/3 cups 167g
2 2/3 cups 333g
4 cups 500g
Baking soda
1 teaspoon
2 teaspoons
1 tablespoon
Baking powder
1/8 teaspoon
1/4 teaspoon
1/2 teaspoon
Total weight of batter
924g
1848g
2776g
Weight of batter per pan for 2 pans
462g
924g
1338g
Baking time
38 minutes
50 minutes
48 minutes
Tall Cakes
For tall cakes of about 6 inches tall, use the ingredients in the quantities listed below and divide the batter into three cake pans. I find that this makes for the perfect ratio of cake to filling and frosting and it also provides lots of space on the sides of the cake for decorations.
Ingredients
3-layer 6" cake
3-layer 8" cake
3-layer 10" cake
Hot water
1 1/2 cups 355ml
3 cups 710ml
4 1/2 cups 1065g
Black cocoa powder
3/4 cup 65g
1 1/2 cups 130g
2 1/4 cups 195g
Unsalted butter
3/4 cup 170g
1 1/2 cups 341g
2 1/4 cups 511g
Sugar (white, granulated or caster)
1 3/4 cups 338g
3 1/2 cups 675g
5 1/4 cups 1013g
Eggs
3
6
9
Vanilla extract
1 1/2 teaspoons
1 tablespoon
1 tablespoon and 1 teaspoon
All purpose flour (plain flour)
2 cups 250g
4 cups 500g
6 cups 750g
Baking soda
1 1/2 teaspoons
1 tablespoon
1 tablespoon and 1 1/2 teaspoons
Baking powder
1/4 teaspoon
1/2 teaspoon
3/4 teaspoon
Total weight of batter
1388g
2776g
4164g
Weight of batter per pan for 3 pans
462g
925g
1388g
Baking timeat 350F
38 minutes
50 minutes
48 minutes
I'll have a step-by-step video of how to make my Black Cocoa Cake soon! Subscribe to my YouTube channel so you don't miss it!
I’m going to show you three fun Halloween cake ideas for mini cakes but any of these designs will work on bigger cakes, too!
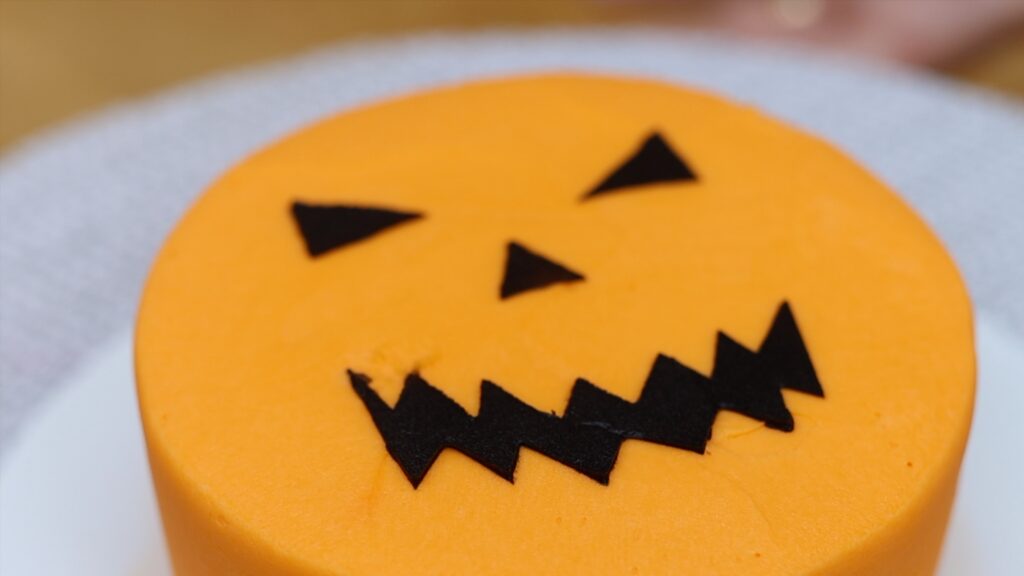
Jack-o-lantern Halloween cake
To assemble a mini cake you’ll need mini cake layers. I'm using my Very Vanilla 4 inch cakes. Level them using a serrated knife like a bread knife so that your cake will be straight. Divide your cake layers in half horizontally if you want to add filling to the middle. Then assemble the cake on a cake board so it’s on a flat surface. I’ll show you how to transfer the cake to a cake stand or platter later.
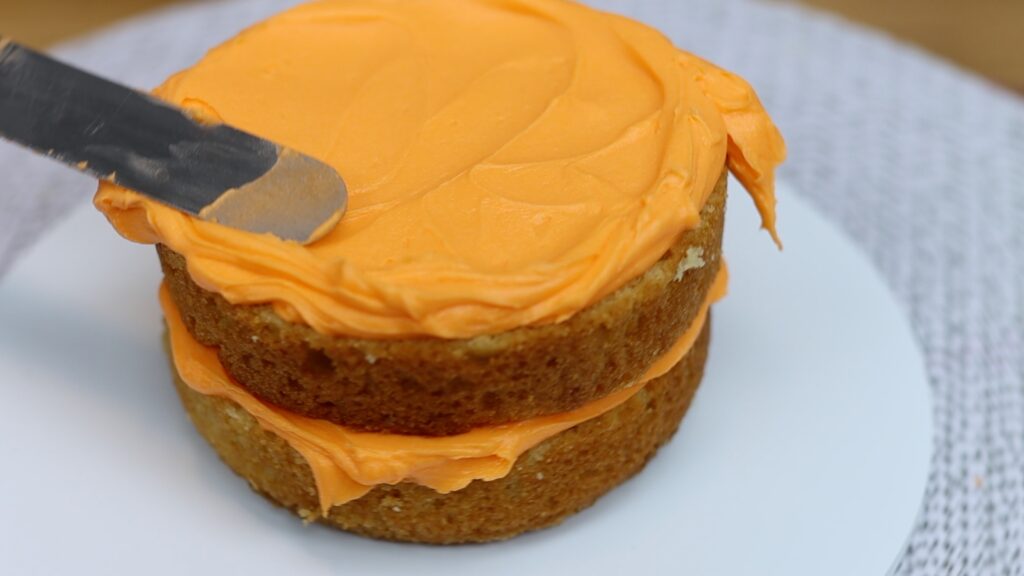
You can use whatever fillings you like for these. I’m using my 4 Minute Buttercream tinted with orange gel for this cake because it’s going to be a jack-o-lantern.
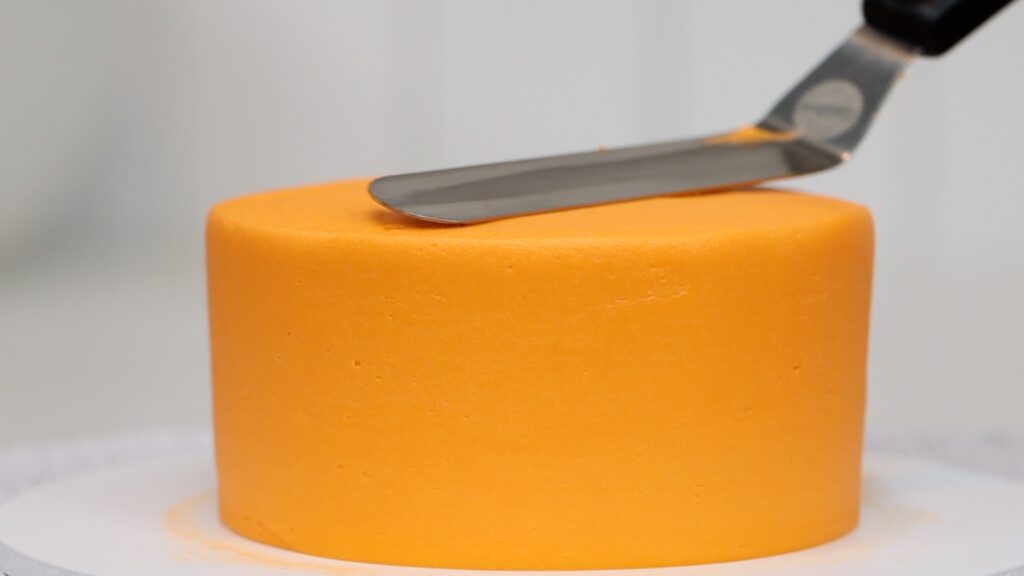
It’s always a good idea to apply a crumb coat of frosting to the top and sides of the cake. This is a thin layer of frosting to trap any crumbs that come off the cake. Let that set for 30 minutes in the fridge or 15 minutes in the freezer before applying your final coat of frosting. Once it’s nice and smooth, put the cake in the fridge for an hour or the freezer for 30 minutes. This chills the frosting and makes it firm, which is essential for decorating it next.
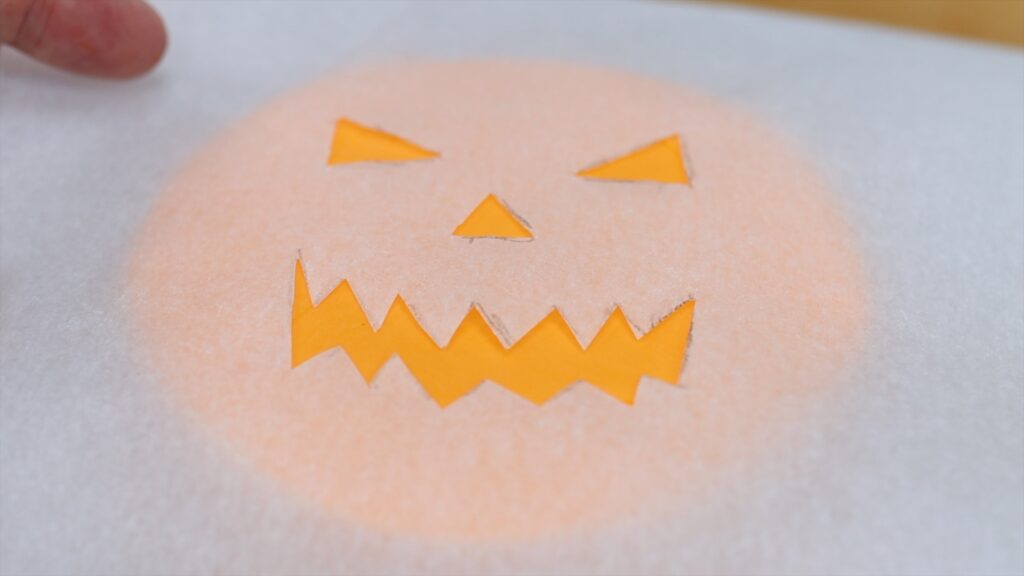
Meanwhile, make your own cake stencil using a piece of parchment paper or wax paper or baking paper. Draw a jack-o-lantern face with a pencil, referring to your cake or cake pans to check the size. Pencil is the easiest to use on parchment paper because pen doesn’t work very well on the coating on the paper. Cut the design out and when the frosting on the cake is firm, place the stencil on top.
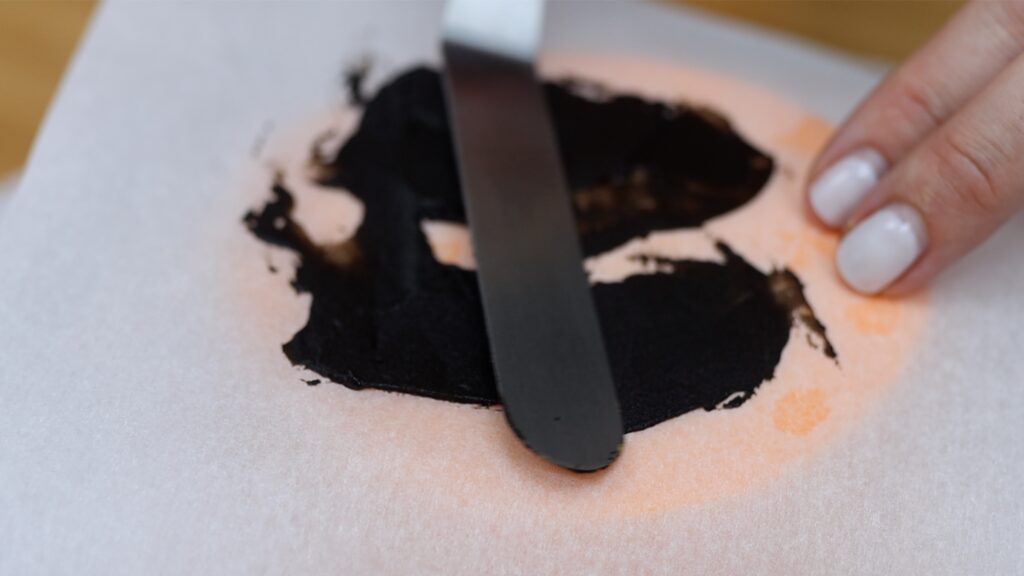
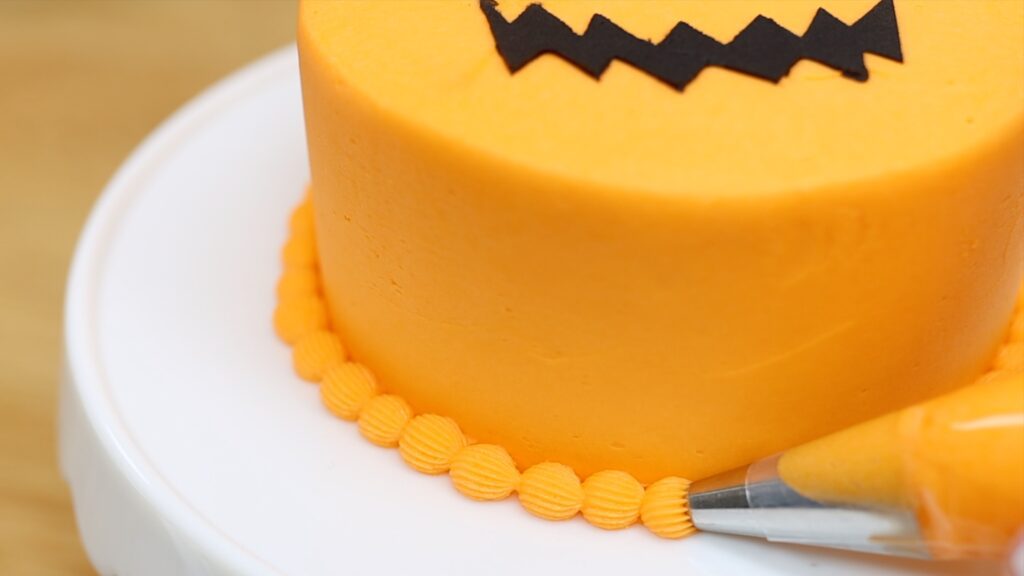
Spread black frosting over it. I share all of my tips for tricky frosting colours like black frosting in this tutorial. Cover the whole design and then scrape off the excess to smooth it. You want a really thin layer so it doesn’t bulge up from the cake.
Peel the stencil off straight away and voila! A creepy jack-o-lantern!
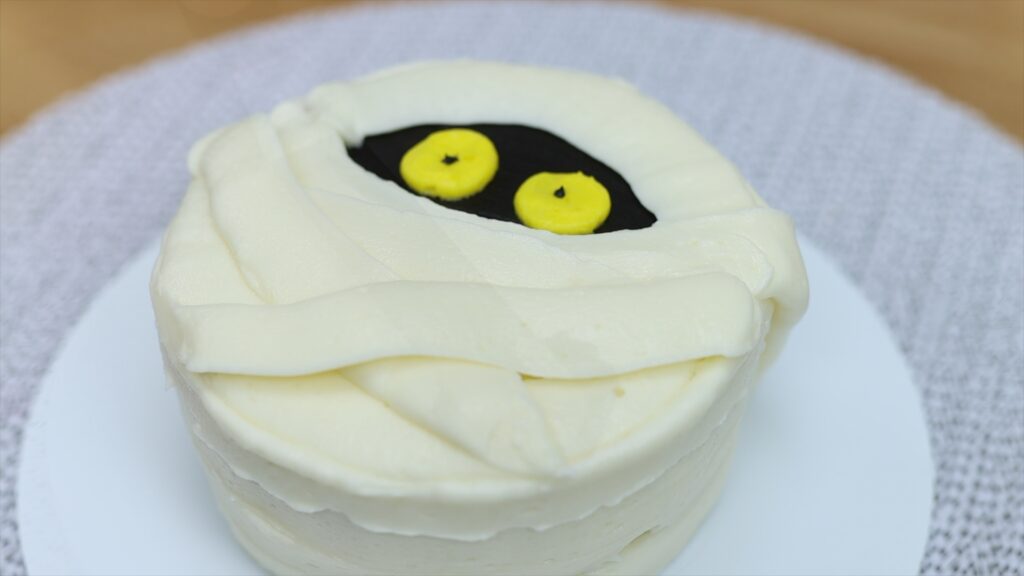
Mummy mini cake
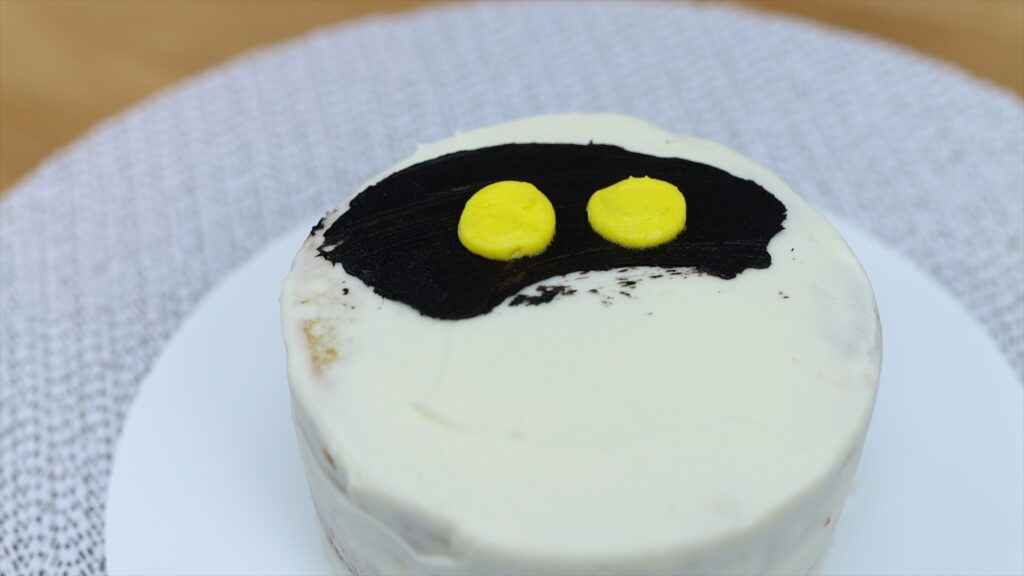
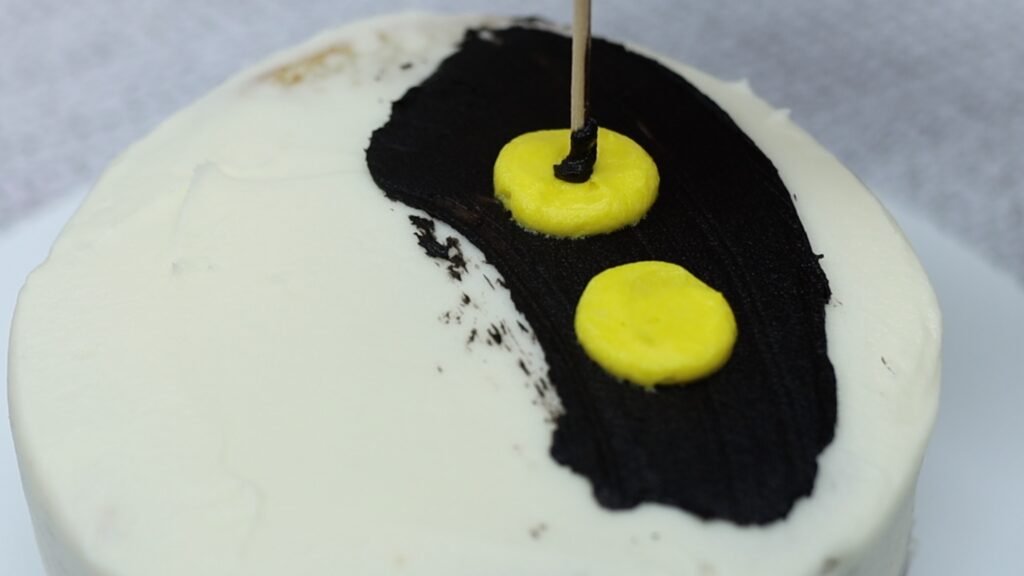
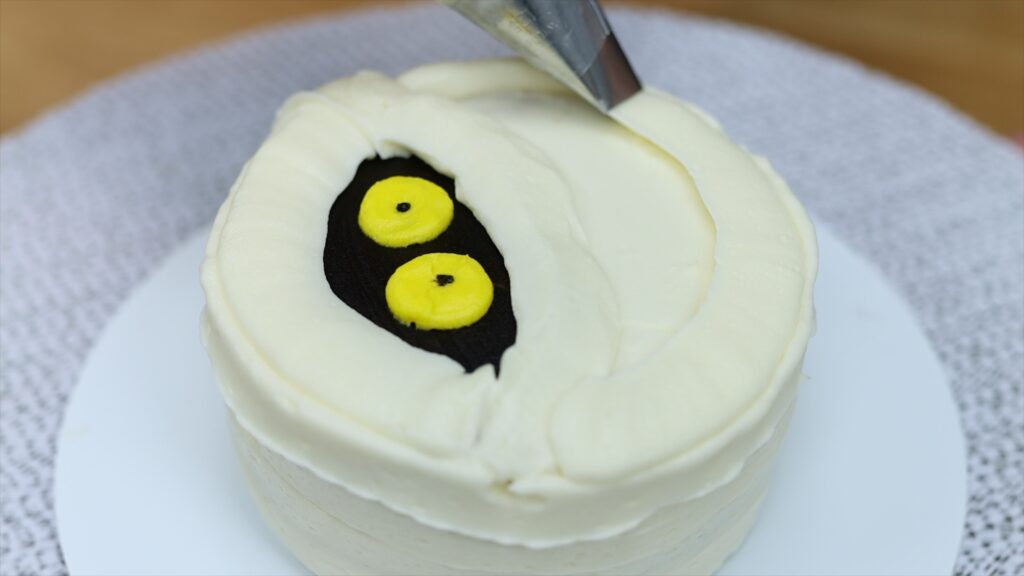
Next up: a mummy cake. Spread or pipe a dot of frosting on the middle of the cake board and press the first cake layer into that. The dot will set and hold the cake in place while you frost it. This is especially important for mini cakes because they weigh so little that with just a bit of pressure from your offset spatula or cake comb, they’ll slip and slide all over the cake board if you don’t attach them with something. Cover the cake with a crumb coat and let it set. You can speed up the process by chilling it. Then spread a smear of black frosting over the top of the cake. This will stick out from between the mummy’s bandages. Pipe two big dots of frosting for the eyes using a round tip like a 1A or 2A. I used yellow but you could choose green or red or whatever colour you like.
Smooth the dots with an offset spatula. Then dip a toothpick into the black frosting and poke it into each dot. This makes the black centers of the eyes.
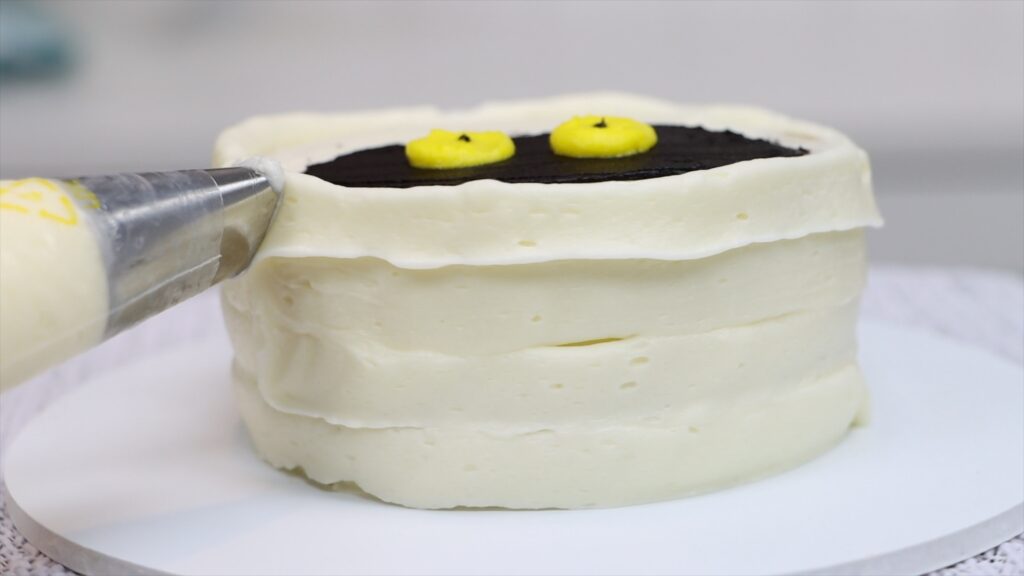
I think it’s easiest to pipe bandages around the sides of the cake first. Use a petal tip or a flat petal tip or a ribbon tip. You can hold a petal tip either way around for these, with the narrow part of the teardrop shape facing upwards or downwards. The wide end makes a thicker bandage and the narrow end gives the bandage a more ruffly edge. You can criss cross these if you want to.
For the top of the cake I like to outline the eyes first. You can touch up the lines with an offset spatula to nudge them or smooth them. Then I like to pipe a ribbon around the curve at the bottom of the mummy to create a neat edge.
Fill in the rest of the top of the cake with piped bandages. This is a fun design because it doesn’t need to be perfectly neat, which takes the pressure off as you’re decorating!
Spiderweb Halloween cake
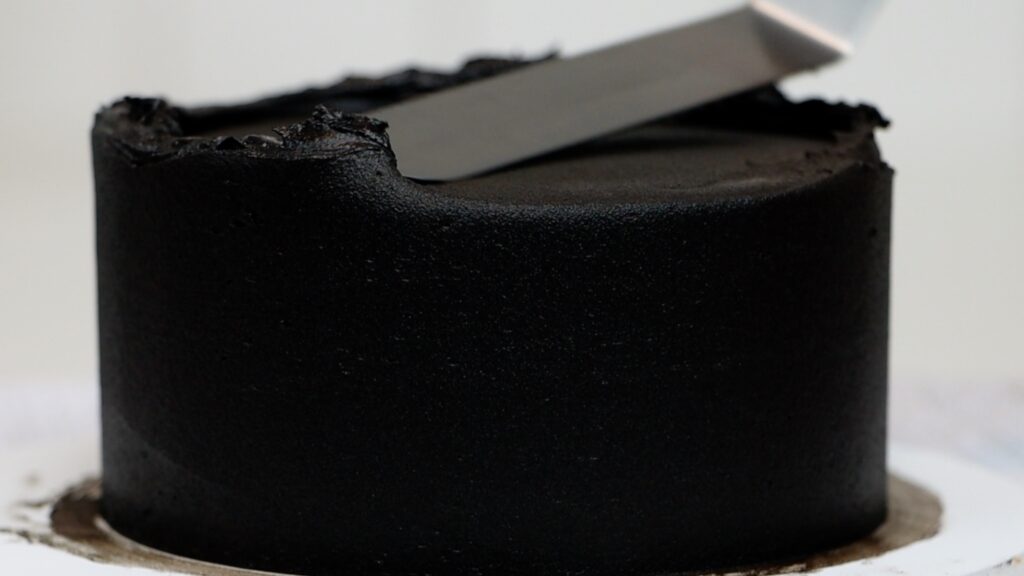
The next of these Halloween cake ideas is a spiderweb cake! Cover a cake with black frosting or dark purple would look great too. Check out this tutorial for black frosting that won’t stain your teeth.
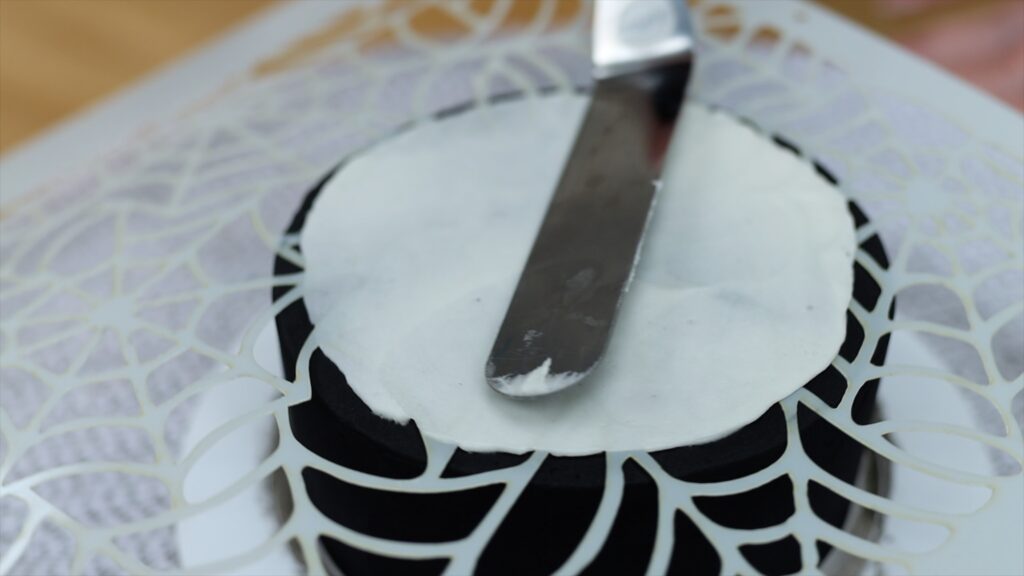
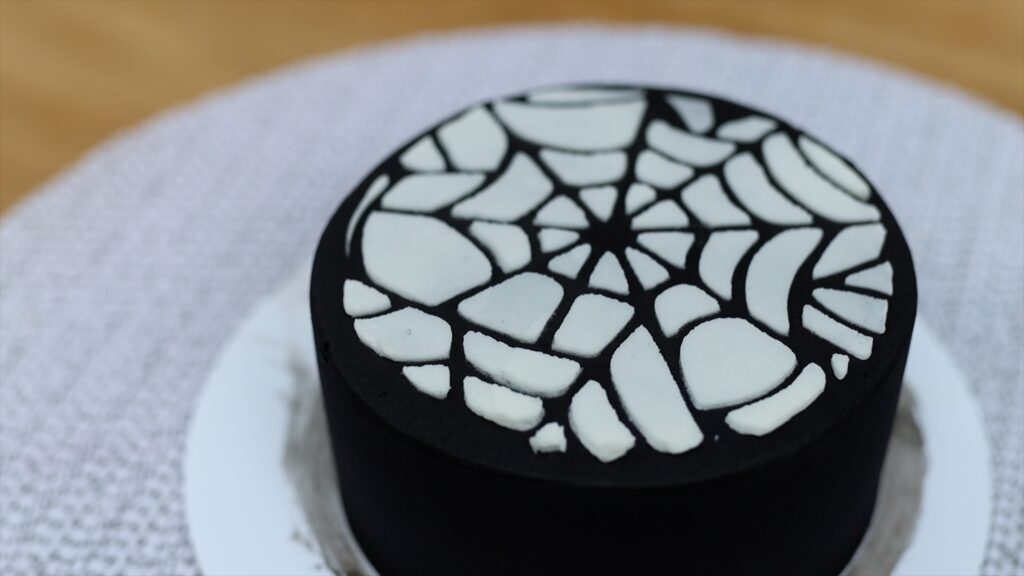
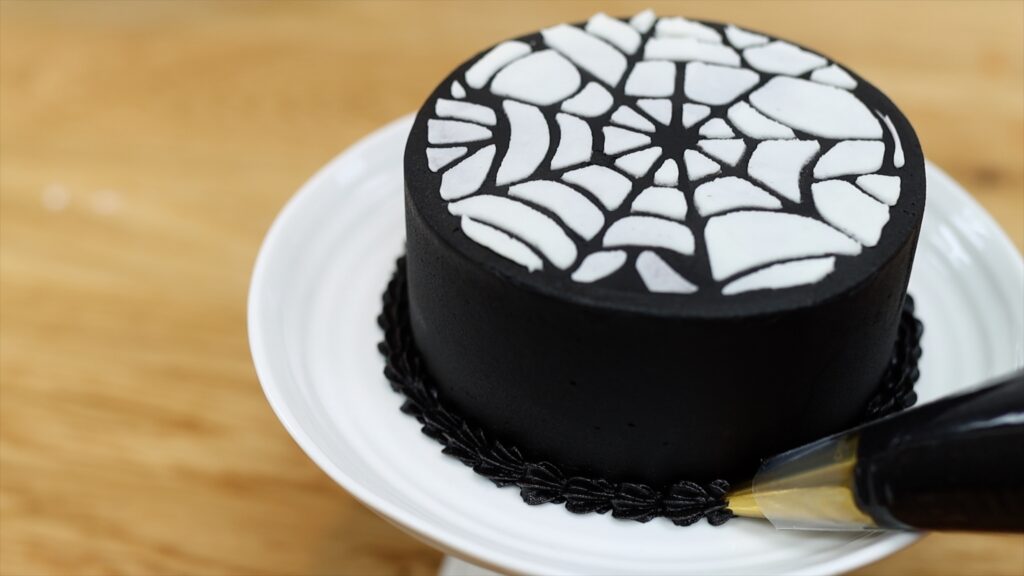
Chill the cake in the fridge for an hour or the freezer for 30 minutes. The frosting will get very firm, which is perfect for this technique. Place a spiderweb stencil on top of the cake. Intricate stencils like this are too detailed to make with parchment paper but you can buy them online. This one is made by Sweet Stamp and you can use my code BGB10 for a discount! Spread plain white frosting on top of the stencil and scrape off the excess with an offset spatula.
Then peel the stencil off to leave a perfectly detailed spiderweb behind!
Now I’ll show you how to add finishing touches and how to transfer these cakes to cake stands.
How to move a cake to a cake stand or platter
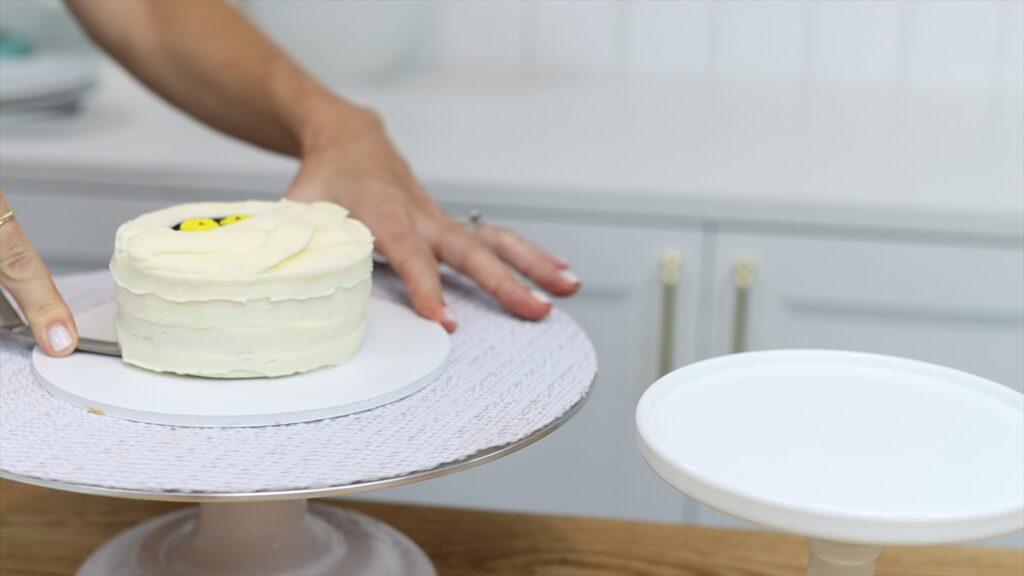
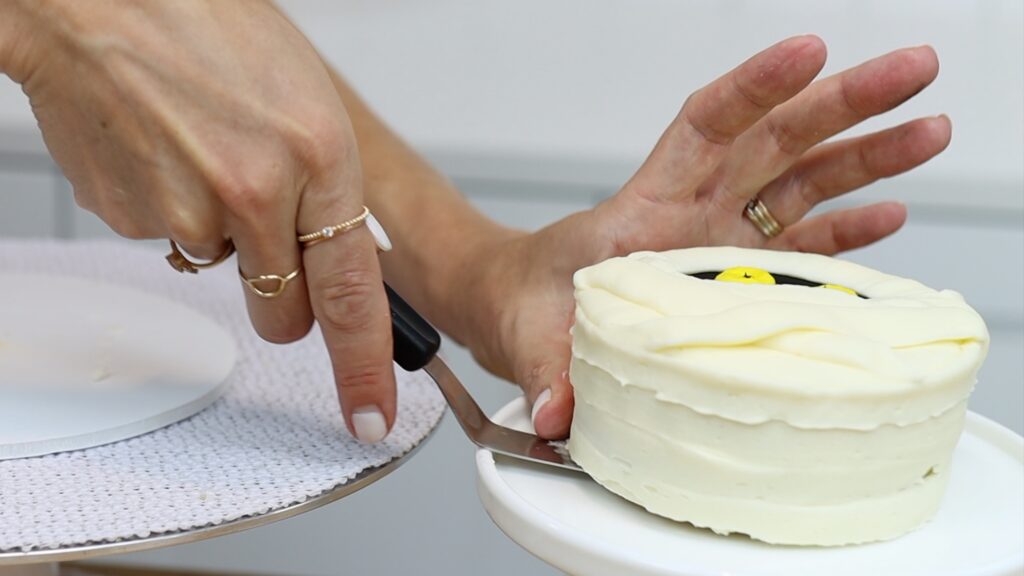
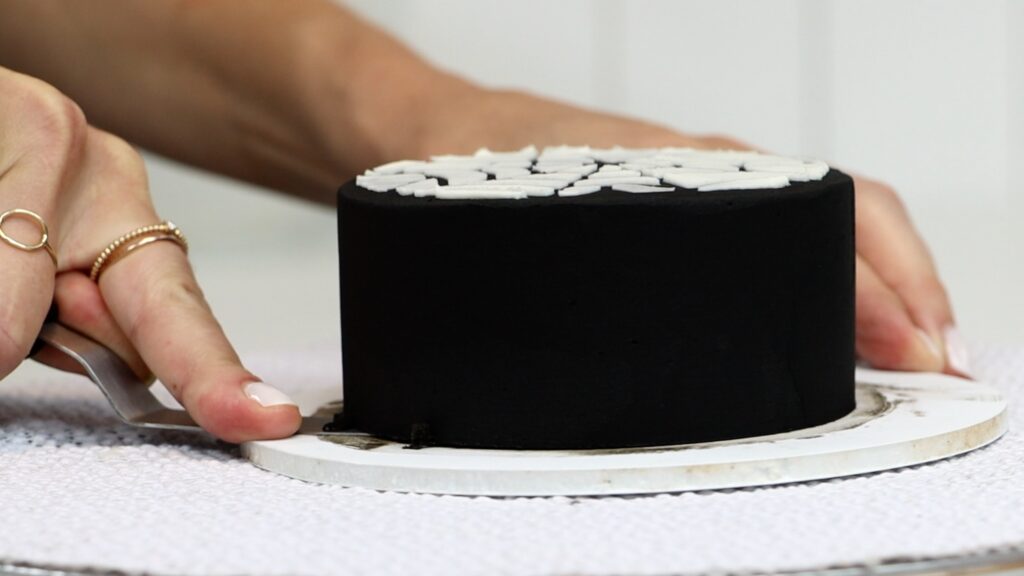
For any of these Halloween cake ideas, it's easiest to frost the cake on a cake board. After chilling the cakes so the frosting is very firm you can move it to a cake stand or platter. Slide an offset spatula underneath the cake and all the way around. This loosens the bottom of the frosting from the cake board. Make sure you slice through the dot of buttercream in the middle of the cake board too, since that’s holding the cake in place. Then lift the cake up and move it onto a cake stand!
Here are a few tips for this. Have your cake stand or platter ready, right next to the cake, before you move it. This way you'll have the shortest distance to travel with the cake! After you push your offset spatula underneath the cake, hold it still as your spin your turntable. Push down to make sure the bottom edge of the frosting on the cake stays straight.
You'll need to balance the cake with your fingers as you lift or lower it and that's fine! If you’ve chilled your cake properly, the frosting will be very firm and pressure from your fingers won't damage it.
Add any borders around the bottom of the cake after transferring the cake onto the cake stand. This is a tiny #18 tip for this spiderweb cake:
For this jack-o-lantern cake I’m using a slightly bigger #199 open star tip:
I hope this tutorial has been useful! Tell me in the comments which mini Halloween cake is your favourite! Check out my cake school for online courses on hundreds of cake designs and techniques.
I’m going to share my most useful hacks for tinting black frosting and other tricky colours like red and navy.
How to make black frosting
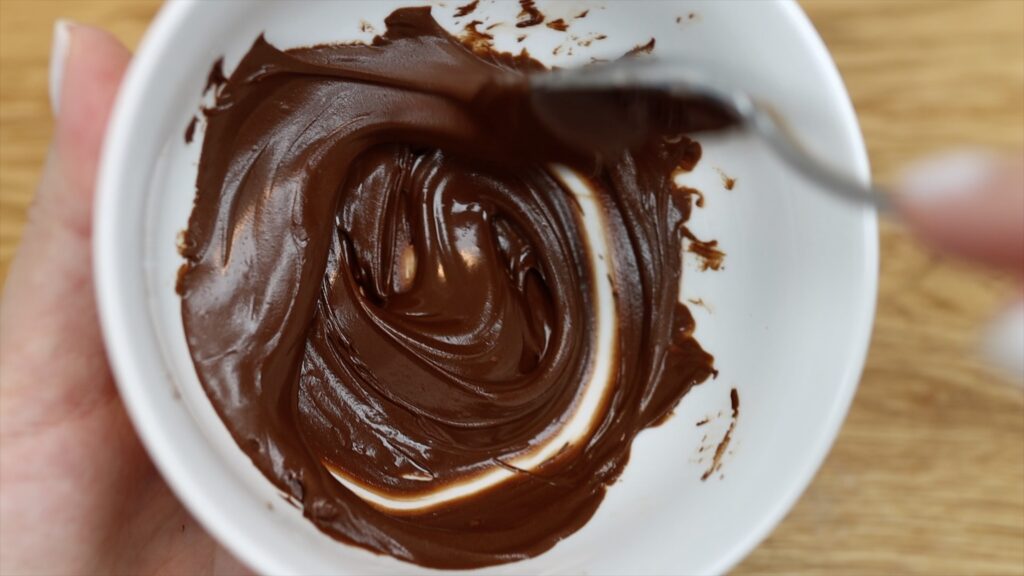
Black frosting is the most common struggle so let’s start with that! There are two secret ingredients here: chocolate chips and cocoa powder. Put the chocolate chips in the microwave for 30 seconds at 70% power. This way they won’t overheat and seize. Then stir the chocolate until it’s smooth with no lumps. Leave it to cool to room temperature.
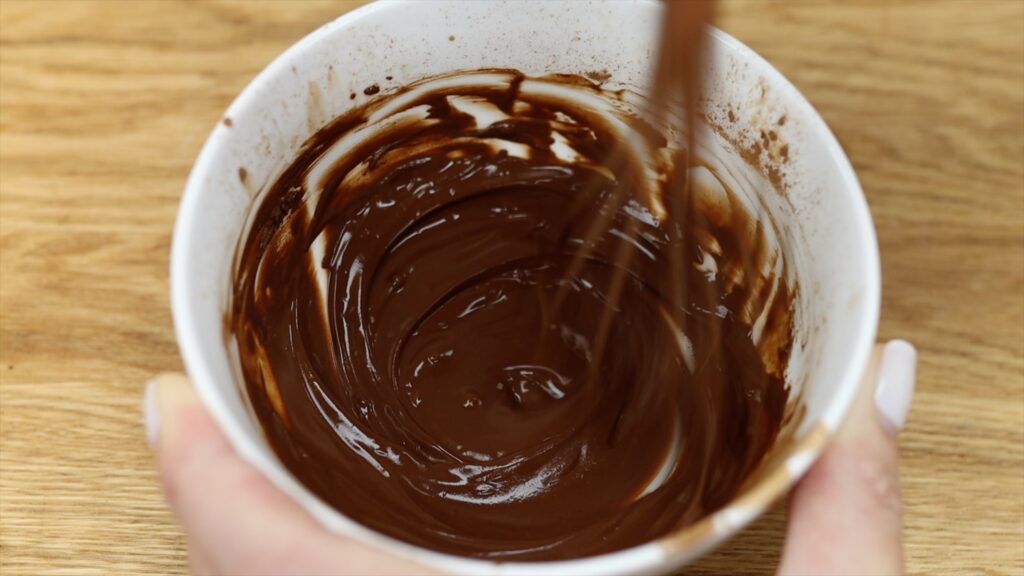
In a small bowl, add hot water to cocoa powder a little bit at a time. Stir or whisk it until it makes a thin paste with no lumps. I use about 2 tablespoons of cocoa powder and 1 tablespoon of water for every cup of buttercream.
When the chocolate and cocoa are at room temperature, add them to your frosting. I like to do this before adding the milk or cream in my 4 Minute Buttercream recipe. Buttercream made without liquid is much stiffer than it would normally be. The liquid cocoa powder and melted chocolate will thin it out, making it silky smooth and easy to spread or pipe.
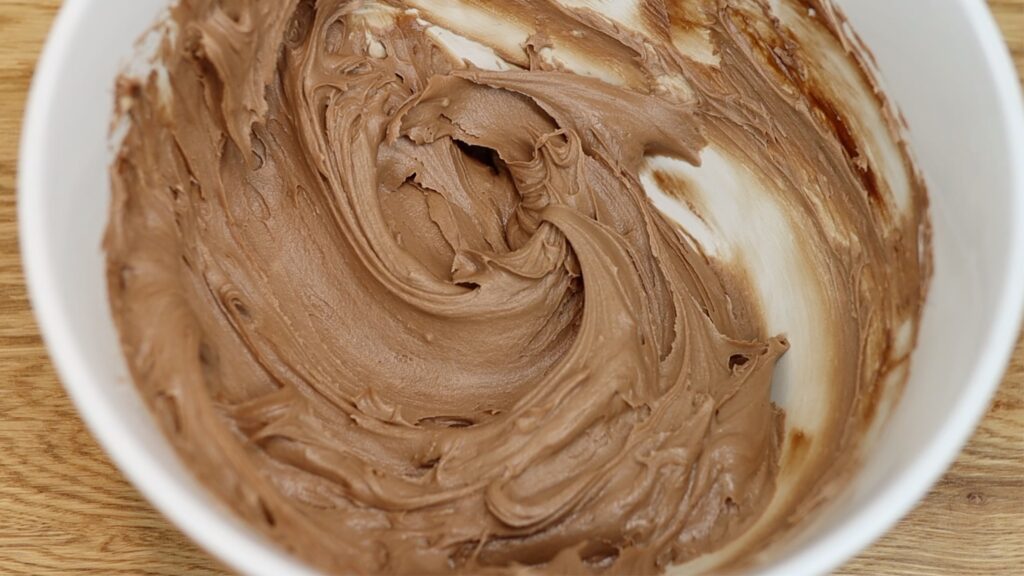
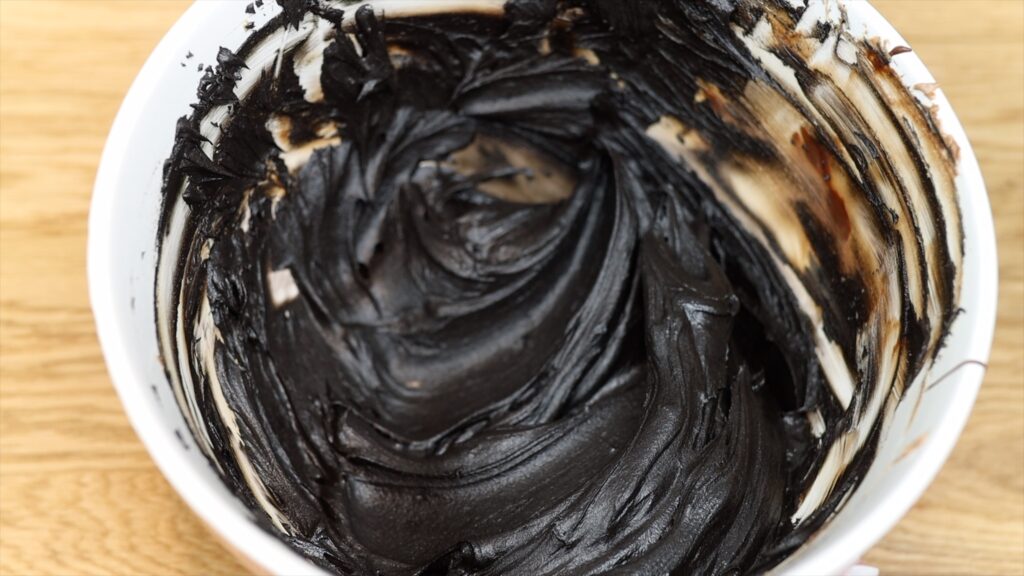
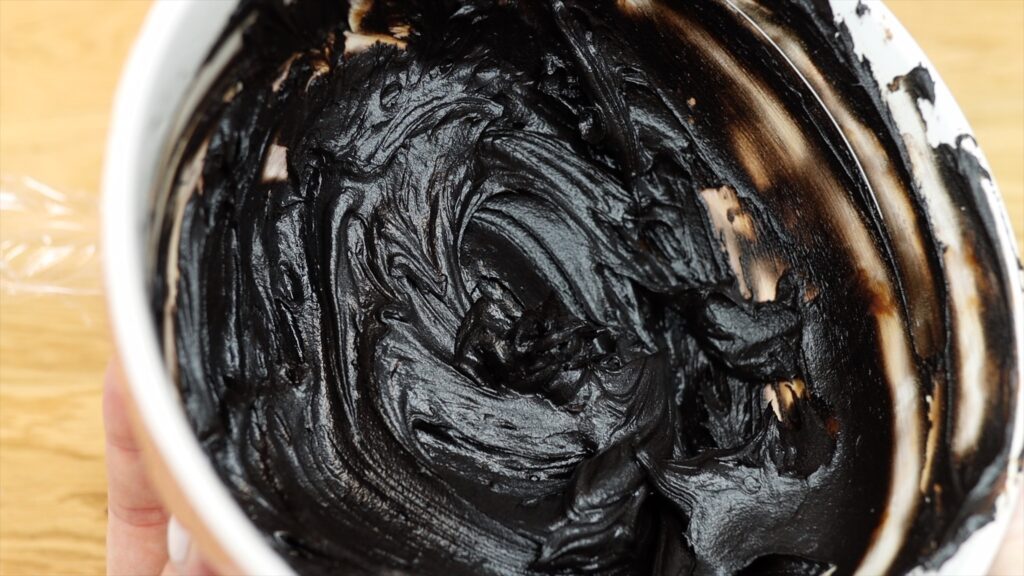
Now add black food colouring. I recommend gel colours over liquid colours because they’re much more concentrated. You’ll need a generous squirt of gel but not nearly as much as you’d need if you were using liquid colours. Stir it in and add more if necessary. You’re aiming for a colour that’s darker than grey but not a true jet black.
Cover the bowl with plastic wrap and leave it for an hour for the colour to develop and darken. Tadaa! A true black frosting!
How to make dark frosting colours like navy frosting
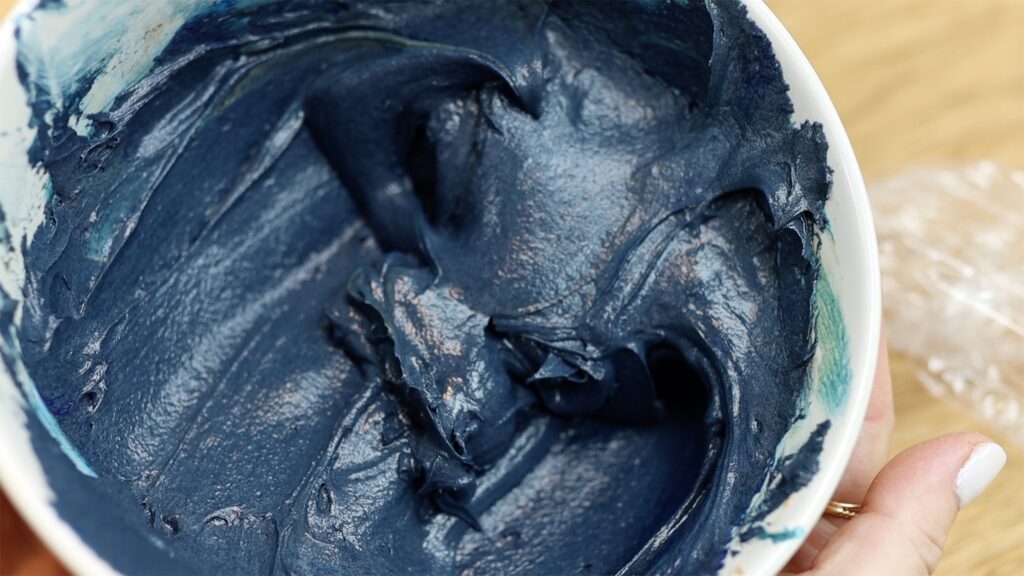
The two hacks for black frosting work for any dark colour of buttercream, like navy blue. Start by adding chocolate to your frosting to darken it. Ideally add melted chocoalte and cocoa powder but you can use one or the other if you don’t have both. The darker the brown you start with, the less colour you’ll need to add later.
Adding just blue to brown will make a fairly dark blue but to make navy, add some black as well. Alternate between adding blue and black until the colour is almost as dark as you want it to be. Cover the bowl with plastic wrap, leave it for an hour and voila! A beautiful deep navy buttercream!
How to make bright frosting colours
If you're struggling to achieve the colour shown on a bottle of gel, you're probably not using enough gel. Gels are concentrated but you do need to use a generous amount for really bright and bold colours, juts like you do for black frosting.
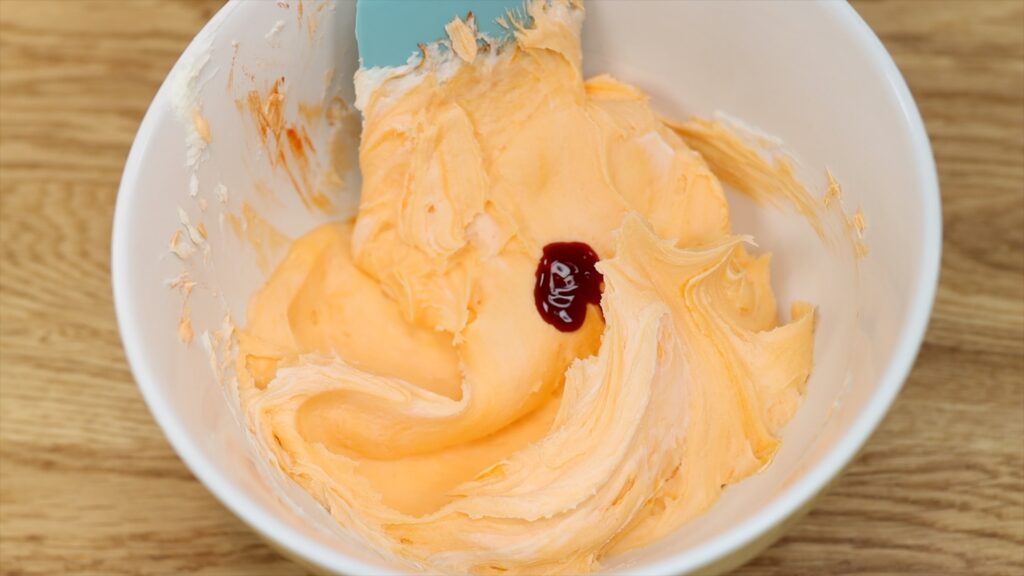
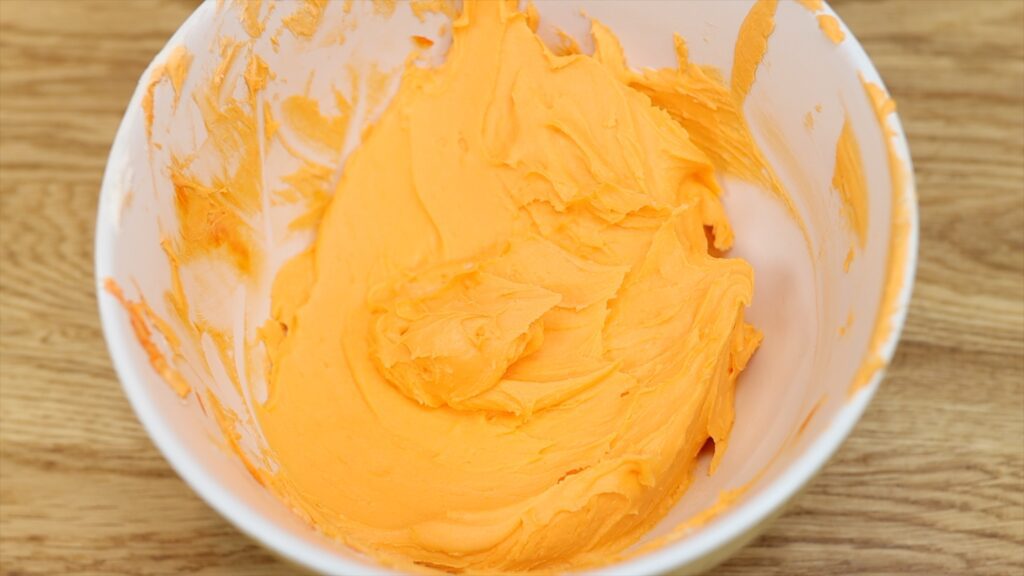
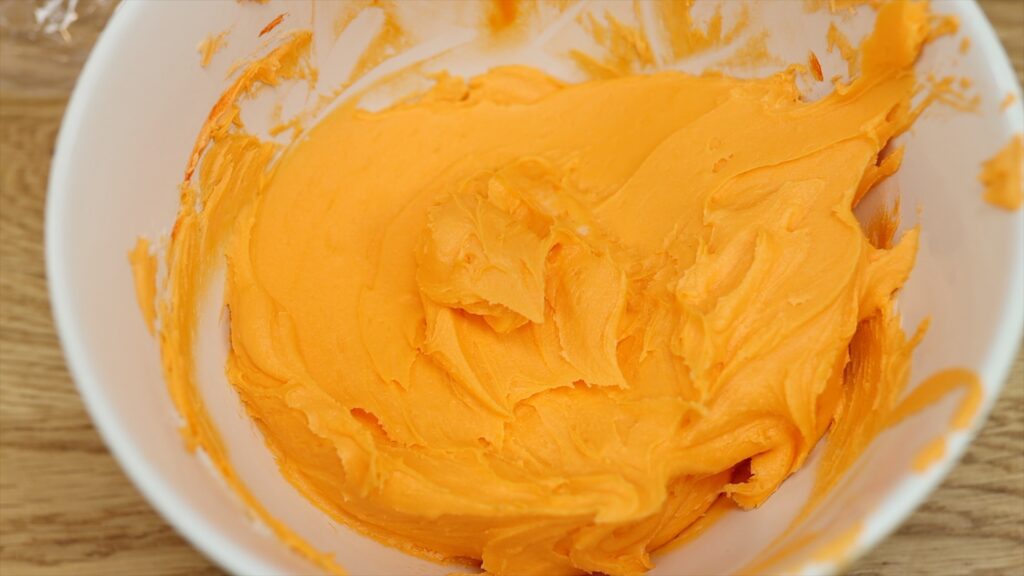
Covering the bowl and letting the frosting rest gives any gel colour a chance to develop. This will make your colours brighter and bolder within about an hour. Look at the difference between this frosting immediately after adding colour and after an hour of resting:
How to make red frosting
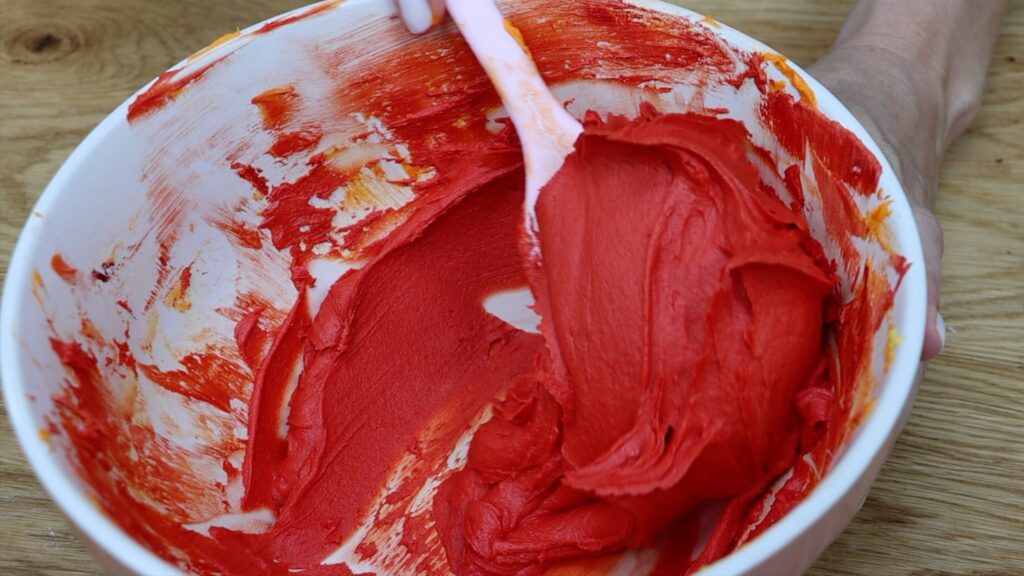
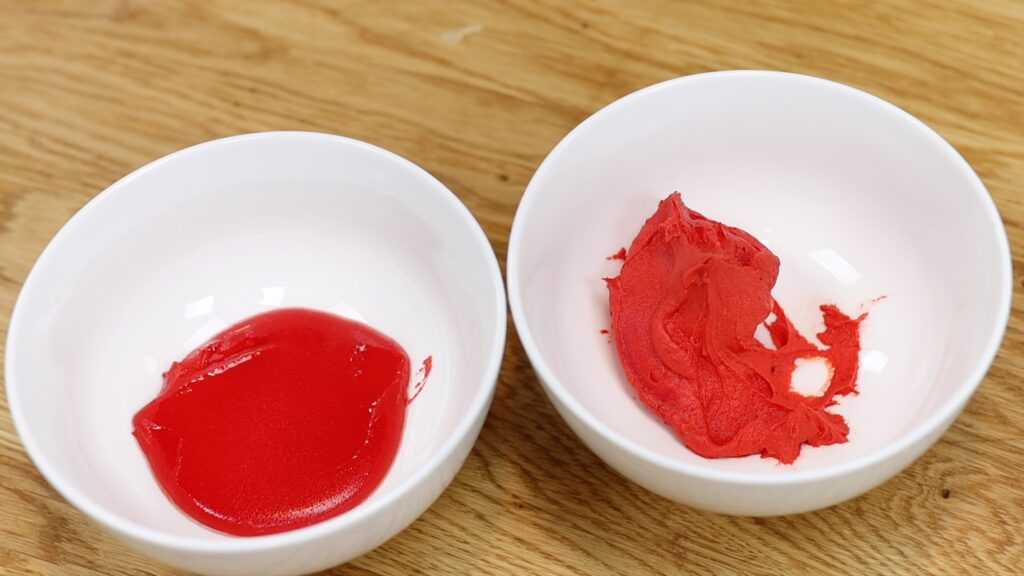
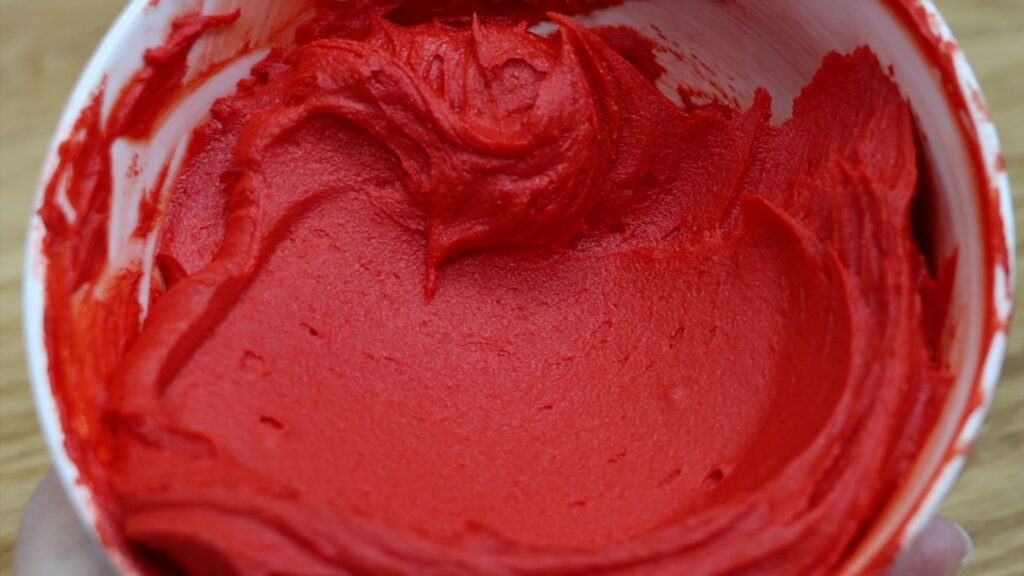
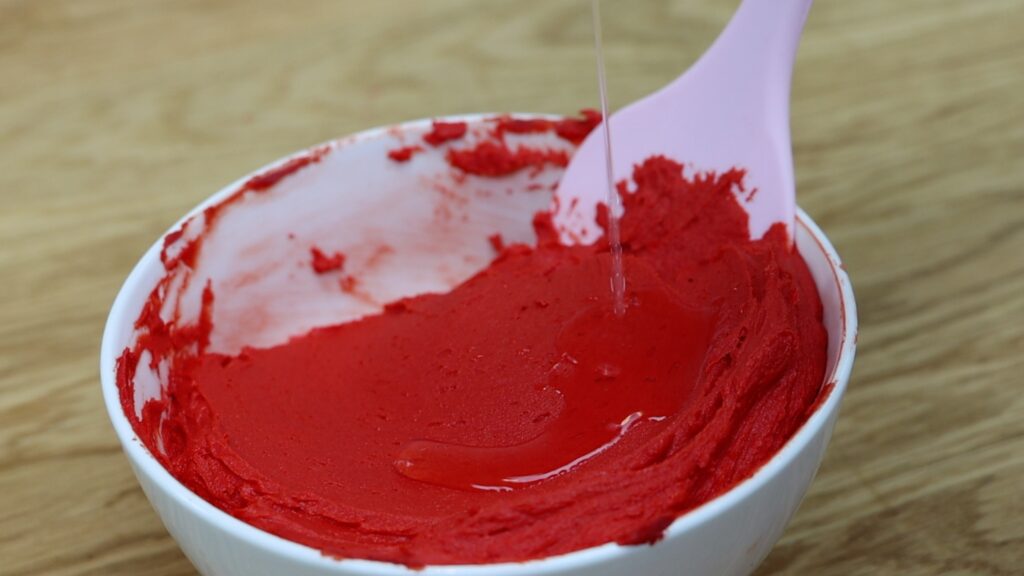
Red frosting can be tricky but just like any other colour, start by using a good amount of gel. Then you can make red frosting brighter by covering the bowl to let it rest for an hour. Another hack that works really well with red buttercream is to heat it. This works for other colours like black frosting but I find it the most effective with red frosting. Scoop up no more than a third of the buttercream and microwave it for 10 seconds. It will melt and get much darker.
Add the melted buttercream to the rest of the red buttercream and mix it together. It will look grainy at first because of the melted butter. Leave it to come to room temperature or speed up the process by putting it in the freezer for 5 minutes. The result will be a beautiful deep red frosting that’s silky smooth.
Why does my frosting taste bitter?
A common question is how avoid the bitter taste caused by using lots of gel. As well as limiting the amount of gel you use by using these methods, here's another trick. After tinting your frosting, add clear-coloured flavour to it. You can use clear vanilla or almond extract or even other flavours like lemon or mint (depending on the flavour of your cake of course!) The flavour will disguise any taste of the gel in the buttercream.
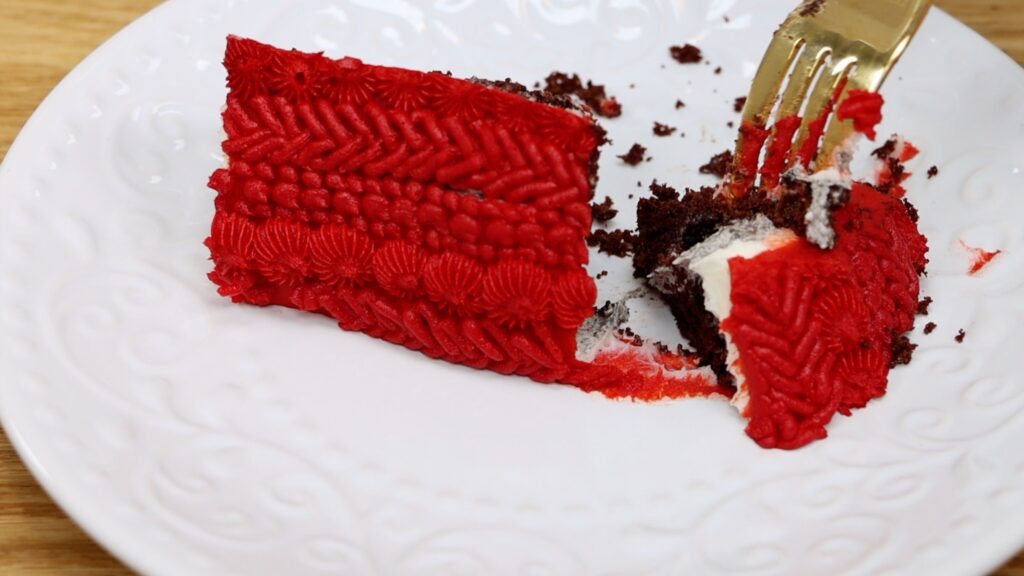
All I taste in this cake is almond flavoured red frosting and my deliciously moist Perfect Chocolate Cake!
I hope this tutorial has been useful! I share everything I know about buttercream in my online MasterCourse, The Basics of Buttercream, including how to:
make it
flavour it
colour it
troubleshoot issues like air bubbles and graininess and yellow buttercream
check and adjust the consistency for piping and frosting
frost a cake with super smooth frosting and sharp edges
store buttercream and cakes frosted and decorated with buttercream
use it for lots of stunning, unique cake decorating techniques.
Make a heart shaped cake with or without a heart shaped pan using this technique!
How to prepare cake layers to make a heart shaped cake
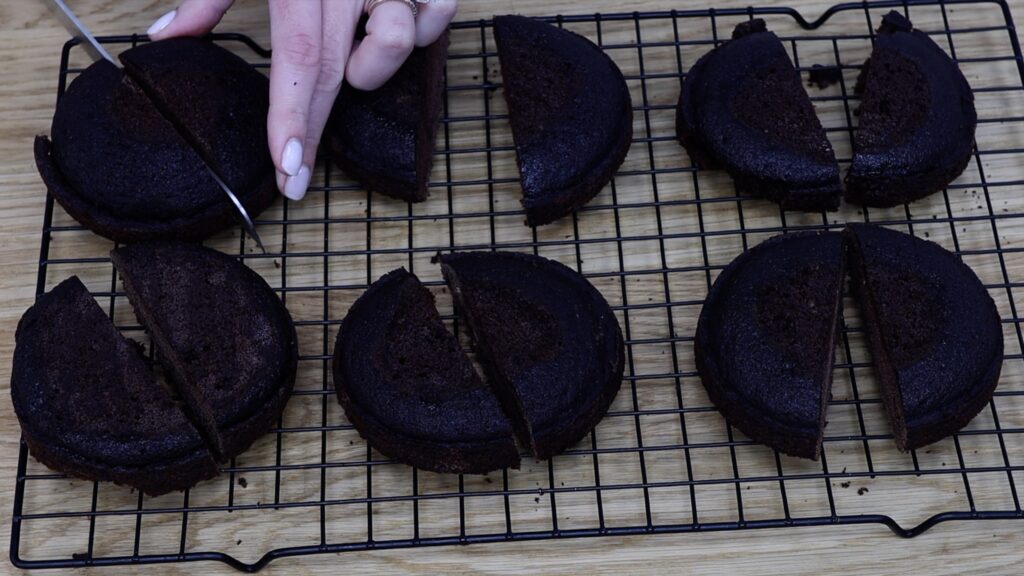
You can make a heart cake using a round pan and a square or rectangular pan. Notice that your cake layers don't have to be perfect! You’re going to cover them up with frosting so if your cakes crack or crumble, it’s fine!
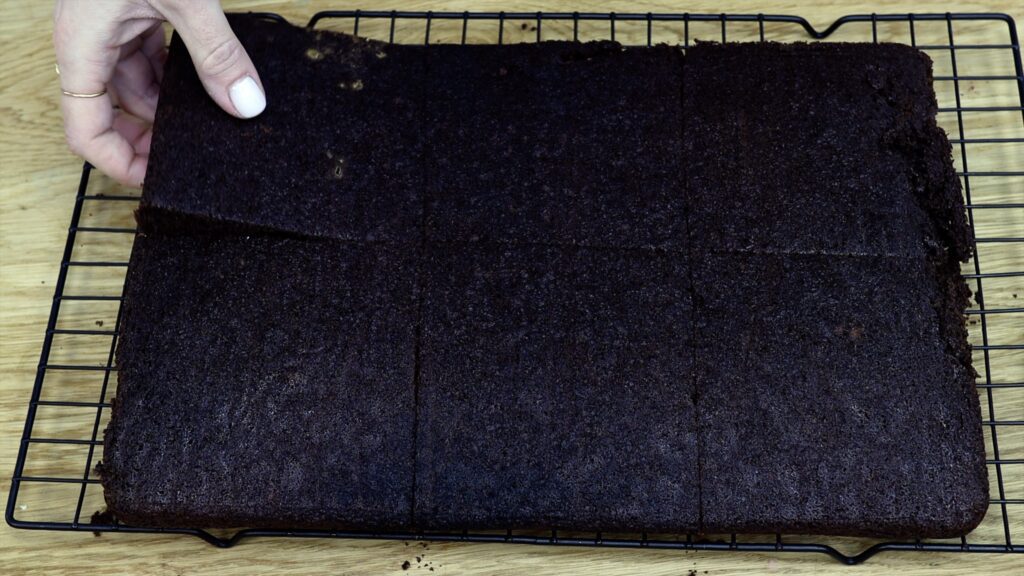
This is my 6” perfect chocolate cake batter, which also makes a 9x13” sheet cake. I cut it into 6 squares to make 6 heart cakes of one layer each.
Pro tip: chill your cake layers before assembling and frosting the cake. I put my layers in large ziplock bags in the freezer for 15 -30 minutes. You can do this before or after cutting the cakes. It makes them firmer and less crumbly and easier to handle.
You’ll also need 1 round cake for each heart. It should be the same width and height as the square cake. Cut this in half and these will make the two bulges on the top of the heart.
You can use any filling and frosting for a heart cake. I’m using my 4 Minute Buttercream.
How to assemble a heart shaped cake
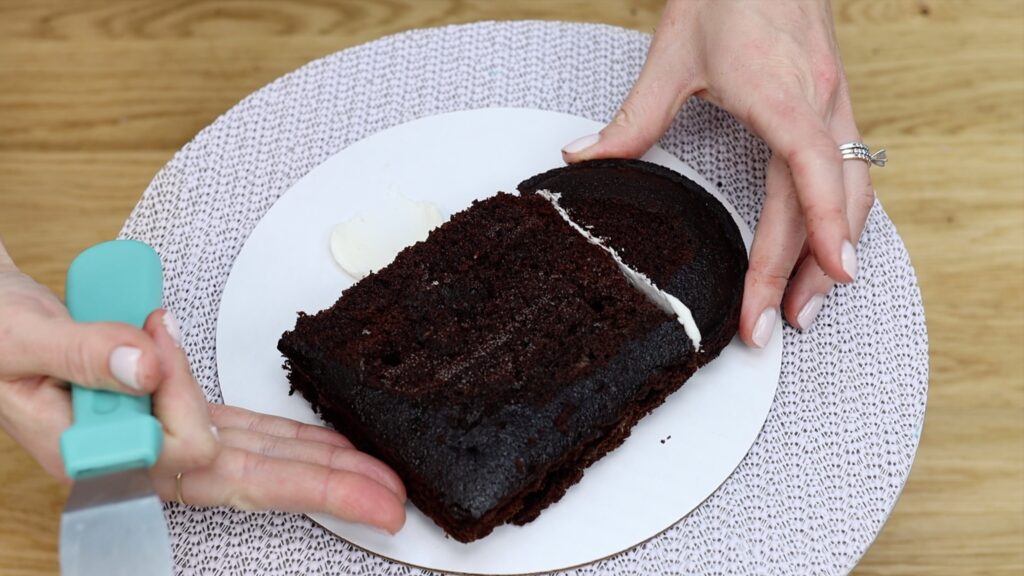
Pipe three dots of frosting onto a cake board and press the square cake into one dot.
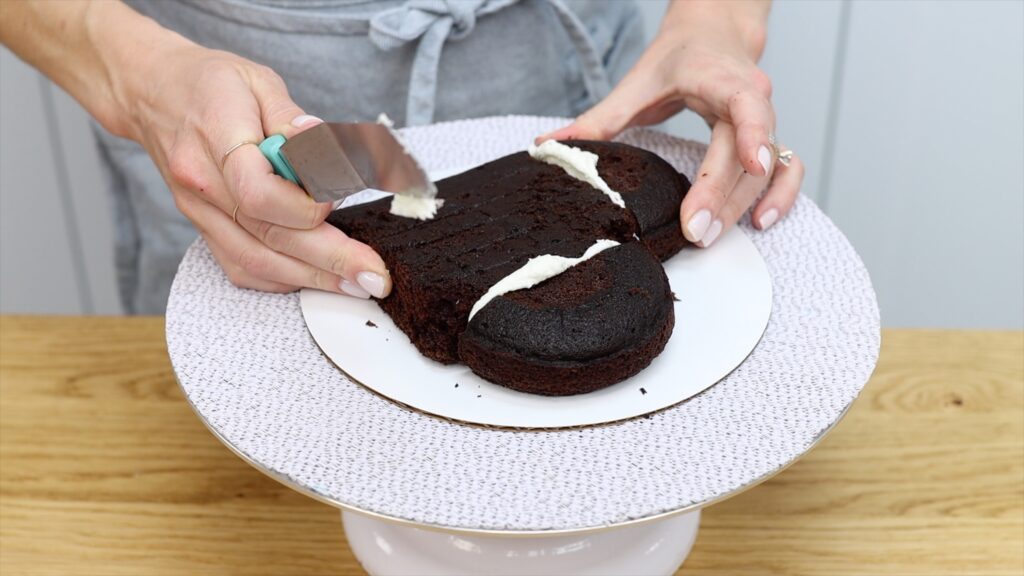
Spread or pipe frosting along the cut side of the two semi-circles. Then press those into the other two dots on the cake board, pushing them against the square cake to attach them. Voila! A heart shaped cake!
Now cover the cake with a thin layer of frosting, which is called a crumb coat. This will trap all of the crumbs that come off the cake. It prevents crumbs getting into your final layer of frosting. Don’t worry about making it super neat because it’s going to be covered up with more frosting soon. Make sure it completely covers the top and sides of the cake, right down to the cake board. If there is any exposed cake there will be exposed crumbs, which would get into the final layer of frosting.
Put the heart shaped cake in the freezer for 15 minutes or the fridge for 30 minutes. This sets the crumb coat. Meanwhile, tint the frosting for your final layer if you haven’t already done that. You can use the same colour of frosting for the crumb coat and final coat. If you’re frosting several cakes at once like I am, it’s quicker to do a plain white crumb coat and then tint the frosting for each cake after that.
How to frost a heart cake
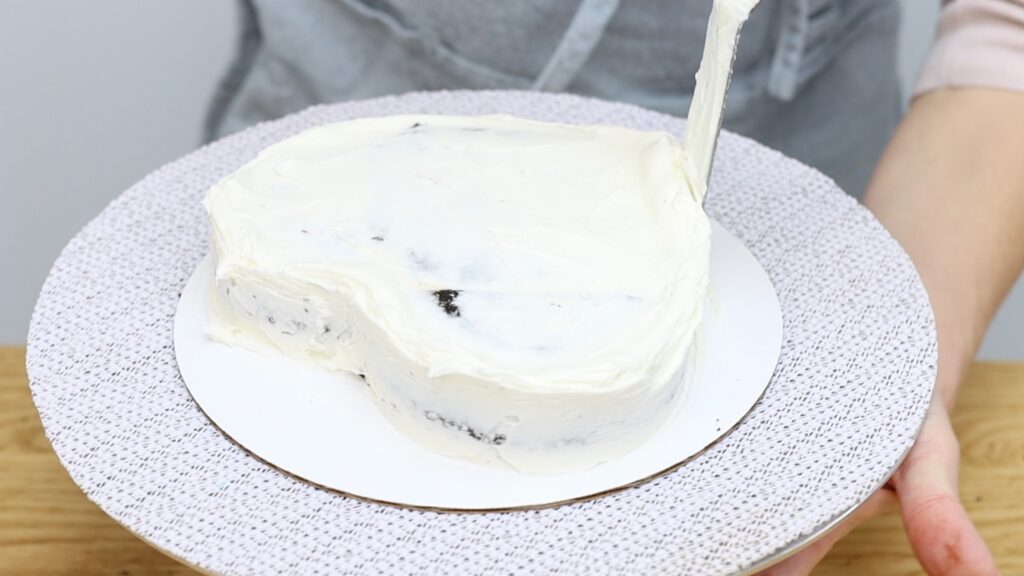
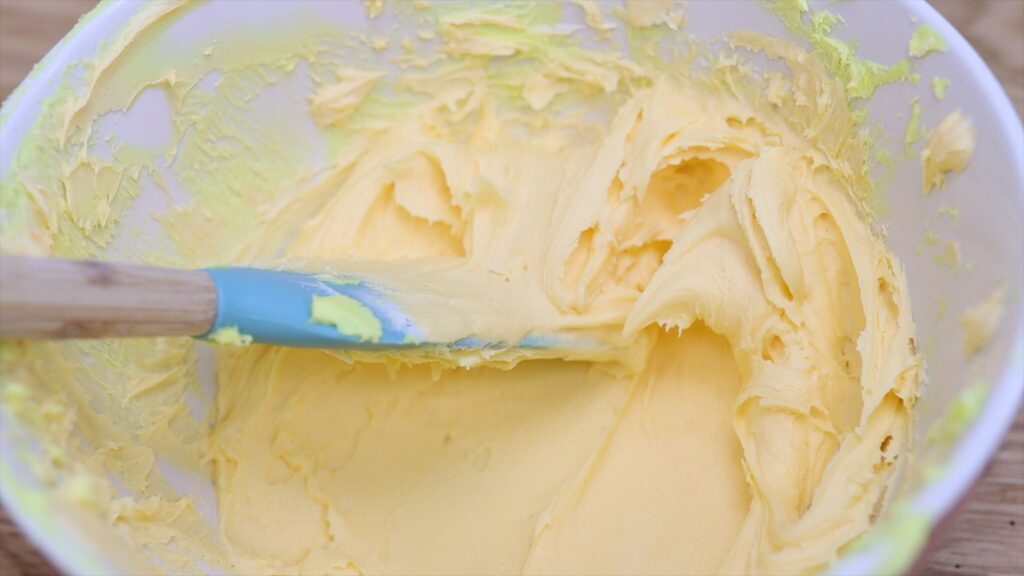
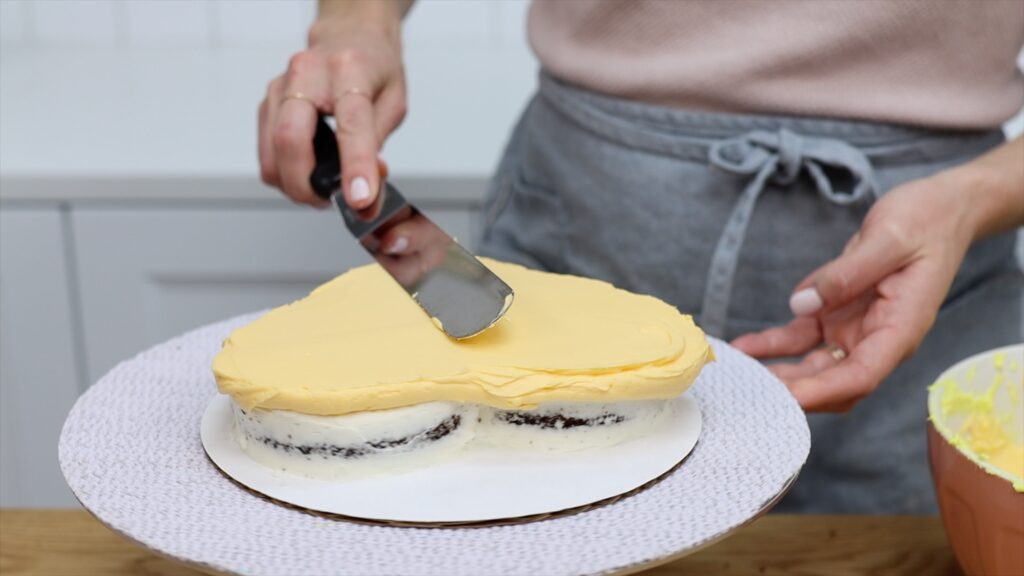
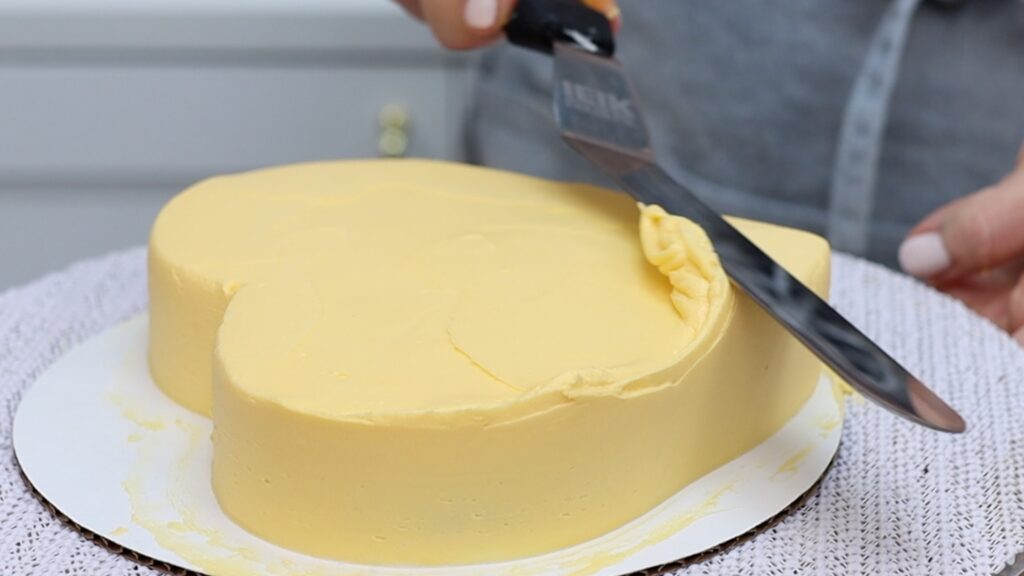
For the final layer I like to start with the top of the cake. Spread the frosting over the top and over the edges of the cake so that it sticks out. This prevents air gaps later. Spinning your cake on the turntable while holding your offset spatula at an angle will smooth the frosting beautifully.
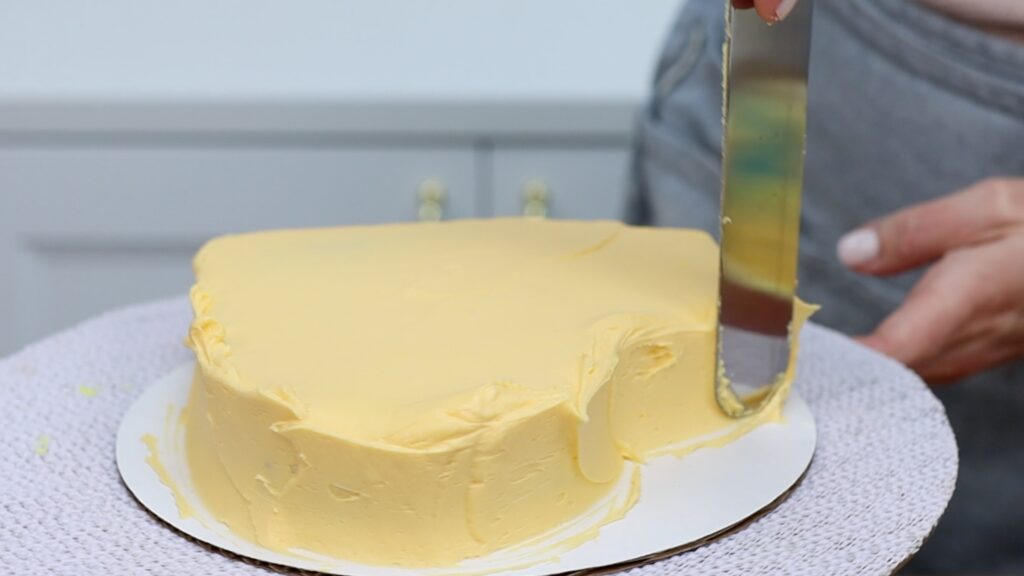
Now spread frosting onto the sides of the cake. Push the frosting up above the top edge of the cake, making and lip around the top edge of the cake. This will prevent air gaps and give you a super sharp angle around that top edge.
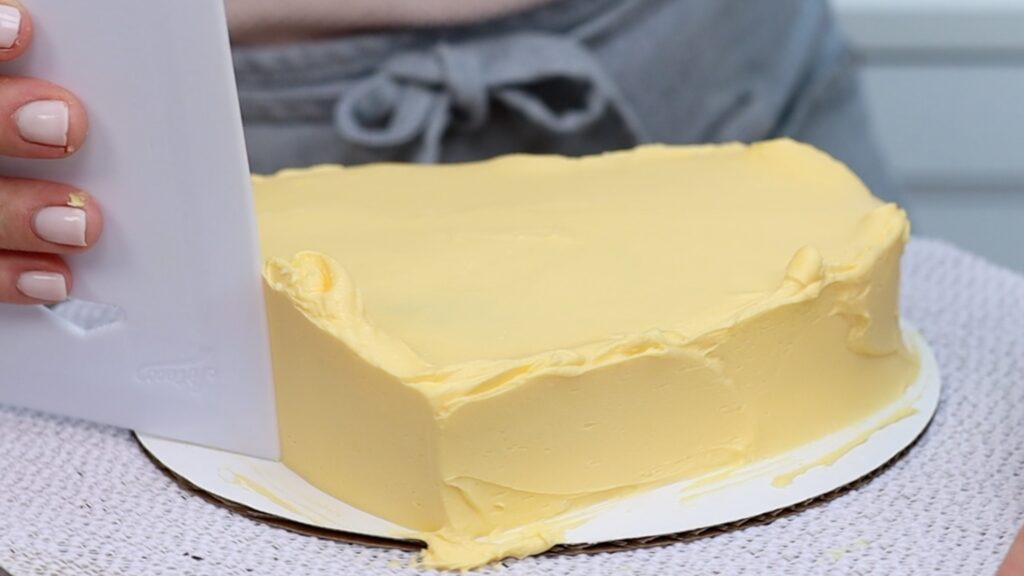
Now scrape around the heart cake with a cake comb. Start at either the tip of the heart or the indent between the two bulges and spin the cake to smooth the frosting. Make sure you push the comb into the indent between the bulges to really define that part of the heart. If there are any air pockets or indents in your frosting, spread some more frosting over those areas. Then scrape again with your cake comb until the sides of the cake are nice and smooth.
For the top of the cake, push sideways with a clean offset spatula. This pushes that lip of frosting over the edge and then lift it off on your offset spatula. Scrape it into a bowl and wipe your offset spatula clean on a towel or paper towel. Then repeat all the way around the cake.
By applying a crumb coat of frosting first and letting that set before spreading on this final layer of frosting, you’ll notice that there are no crumbs visible in the frosting.
The technique I’m using in this tutorial is the same technique I would use for any shape of cake. The key points are:
attach each section of the cake to the cake board and to each other using frosting as glue
chill your cake layers before frosting them so that they’re firmer and less wobbly
apply a crumb coat and let it set before applying a final coat
spread the frosting on the top of the cake so that it goes over the edges
spread the frosting on the sides of the cake so that it goes up above the top edge
clean your offset spatula or cake comb after each use
Shaped cakes only take a few minutes longer to assemble and frost than a regular round cake. The result is stunning even before adding any decorations!
I hope this tutorial has been useful! Ask me any questions in the comments and visit my cake school for hundreds of cake designs and techniques!