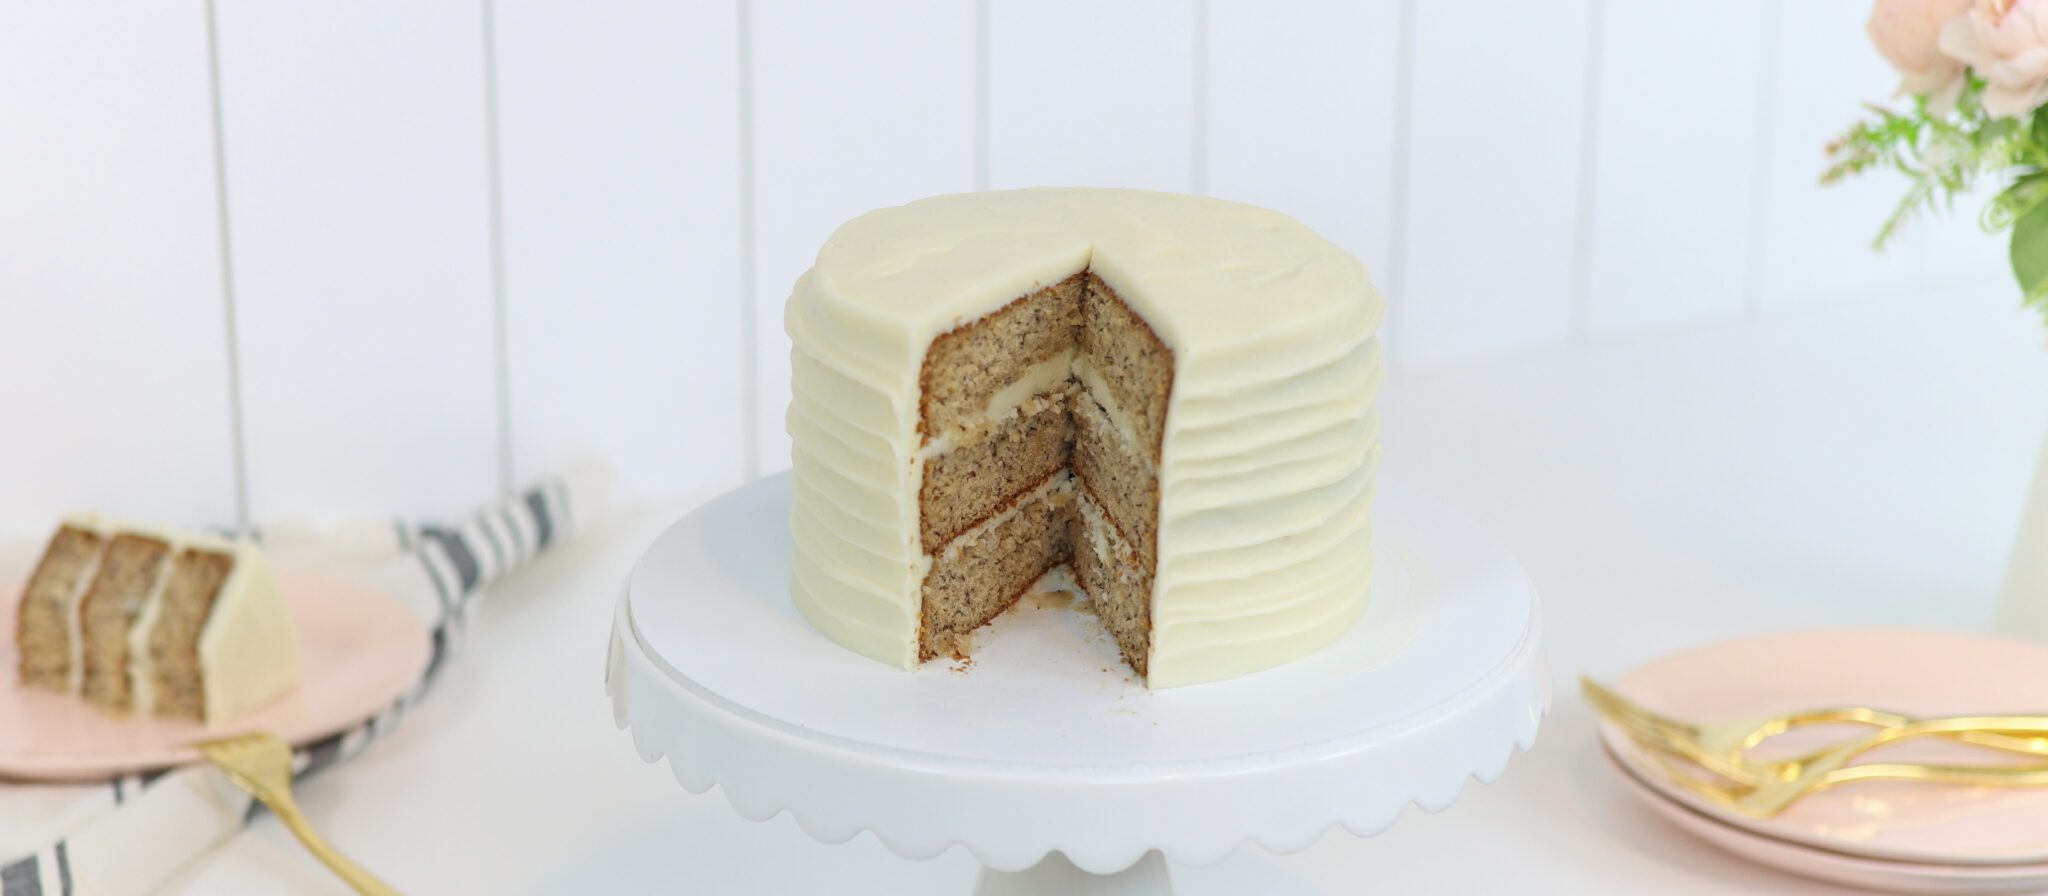
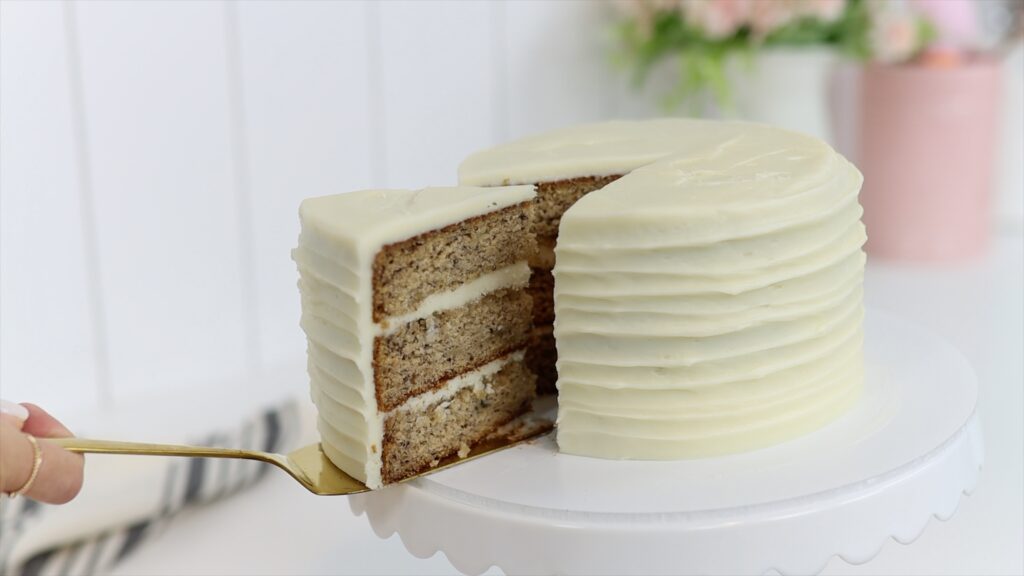
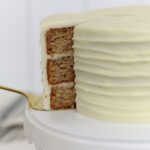
This banana layer cake is full of banana flavour and it’s incredibly moist without being overly sweet.
How to make this banana layer cake
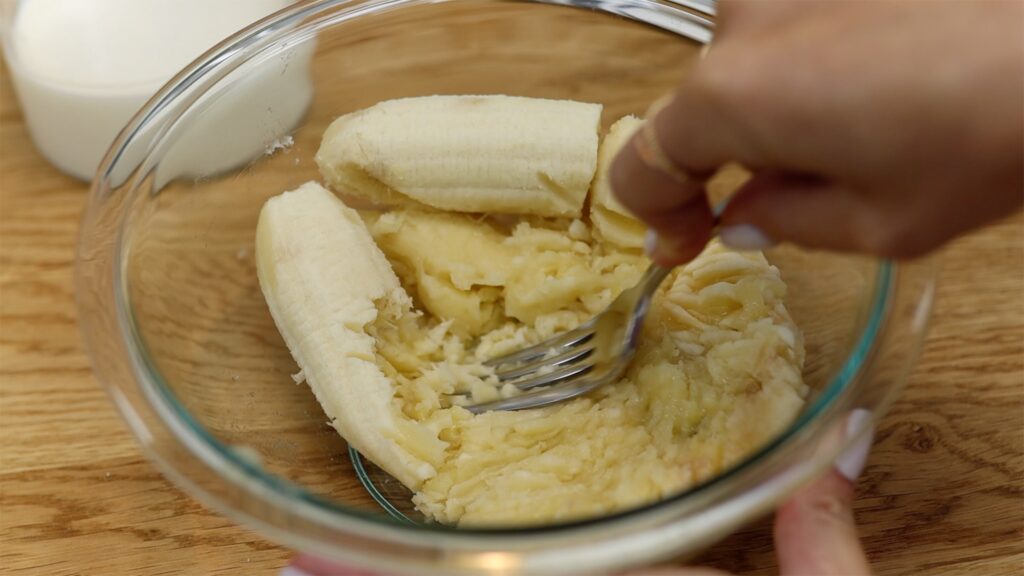
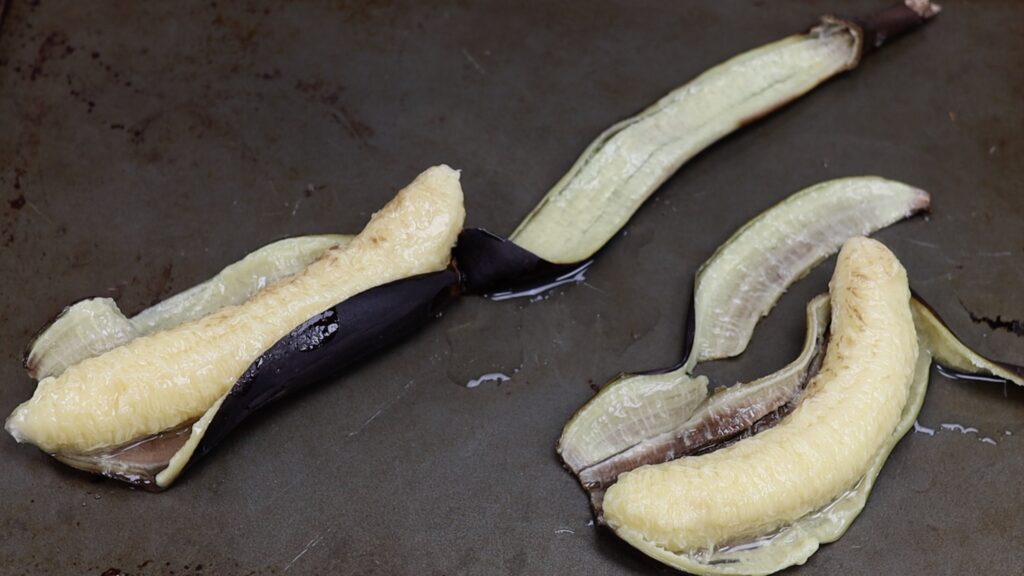
To make this banana layer cake you'll need... bananas! Mash two bananas or use a blender or food processor to blitz them. Use very ripe bananas for the most flavour and sweetness. If the skins don't have brown specks on yet, they're not ripe enough. Try this hack below to ripen them in ten minutes!
Put the bananas on a baking tray in the oven at 350F or 190C for 10 minutes. You’ll see the skins turn black but don't worry! They're still edible! Leave them to cool and then peel them over the tray to catch any liquid that oozes out. The bananas will be soft and you’ll notice their sweet smell straight away. Now they're ready for this banana layer cake recipe!
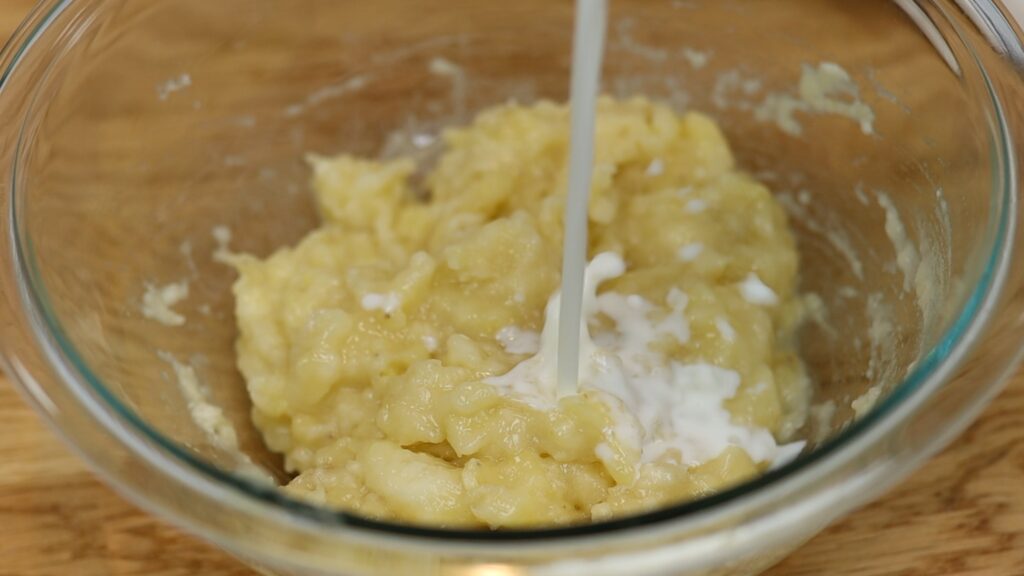
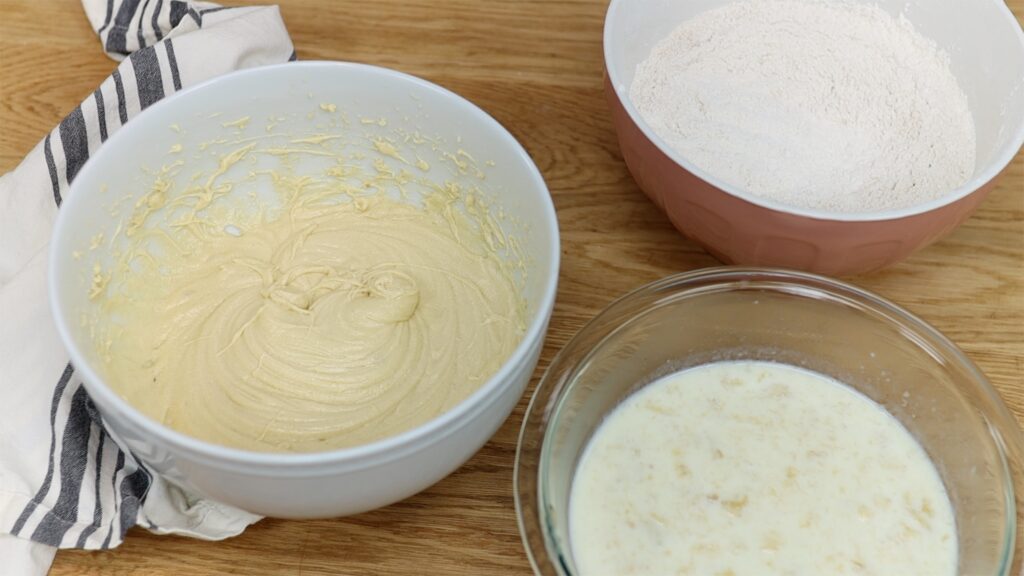
Once the bananas are mashed, add milk that’s been out of the fridge for at least 2 hours. All of your ingredients need to be at room temperature for your cake to rise properly. If you've used a blender or food processor you can just add the milk to that. Set these liquid ingredients aside for later.
The other ingredients to prepare for this banana layer cake are your dry ingredients: all purpose or plain flour, cinnamon, and baking soda. Whisk these together so that they’ll all mix evenly into the cake batter later.
Your eggs should should also be at room temperature so take these out of the fridge at least two hours before baking, too. Now you’re ready to mix the batter!
Mix butter, brown sugar, white sugar and vanilla with an electric mixer. This can be either handheld or a stand mixer. You can do this by hand but to make a light cake that rises well you need to really cream the butter and sugars together. This takes about three minutes with an electric mixer but a lot longer if you’re using a spoon or spatula.
When the butter and sugar mixture gets lighter in colour and looks creamy instead of chunky or grainy, add the eggs. Mix them in until the batter becomes smooth and now we’re going to alternate between the dry and wet ingredients.
Start by adding about half of the dry ingredients and mixing those into the batter just until you can’t see any flour anymore. Then add the wet ingredients. Only mix until everything is incorporated because over-mixing will make the cake tough and dense. Add the rest of the dry ingredients and mix to combine. I like to use a spatula to scrape down to the bottom of the mixing bowl to check that everything has mixed together and there aren’t any clumps of flour stuck down there.
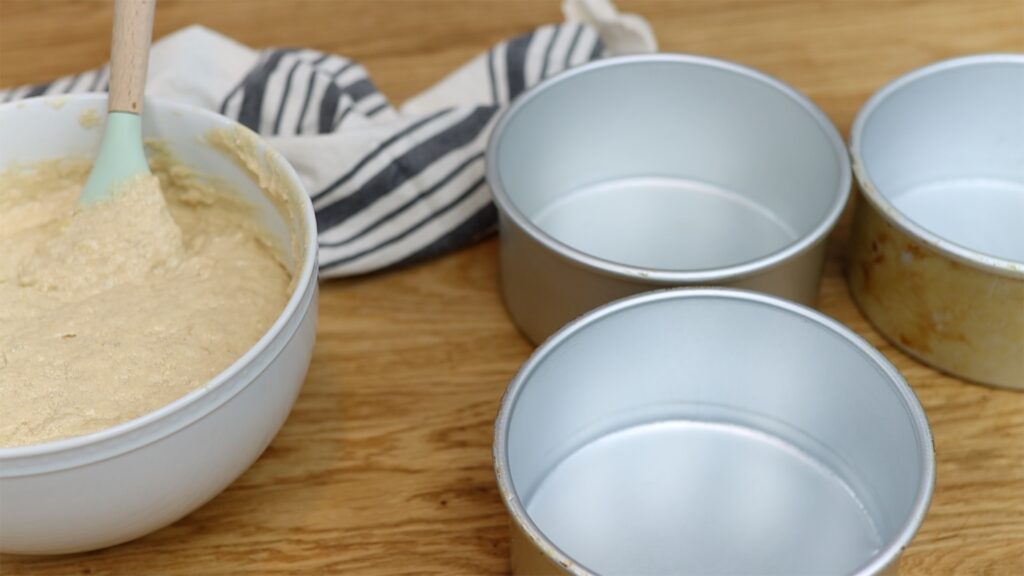
Now it's time to prepare the layers for this banana layer cake! Divide the batter between three greased pans. The recipe listed below is for a three-layer 6" cake but you can click the "X2" button to double it and make a three-layer 8" cake.
Bake the cakes at 325F or 160C for 35 minutes. Tryto resist that rich banana scent when they come out of the oven! Let the cakes cool slightly in the pans for five minutes before you turn them over onto a wire rack. This gives them a chance to firm up slightly so they don’t crumble. When they’ve cooled completely you can trim any domes with a serrated knife to make perfectly flat cake layers. Then assemble your cake!
How to assemble this banana layer cake
My favourite filling and frosting for this banana layer cake is my cream cheese frosting. My 4 Minute Buttercream pairs well with it too, either plain or after adding caramel or melted chocolate.
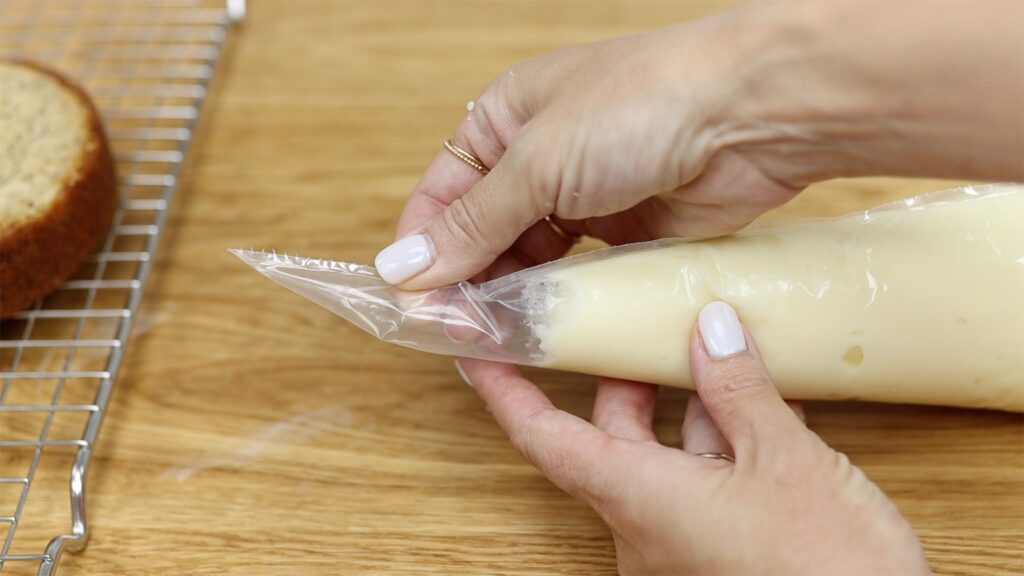
I like to pipe filling and frosting to save time. You don't need a piping tip to do this, just spoon the frosting into a piping bag and cut the tip off.
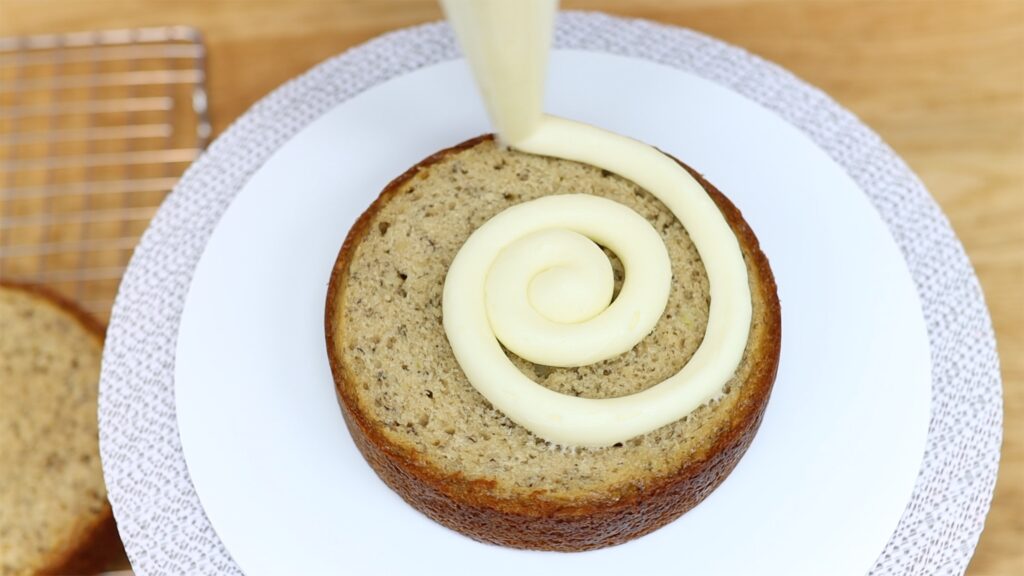
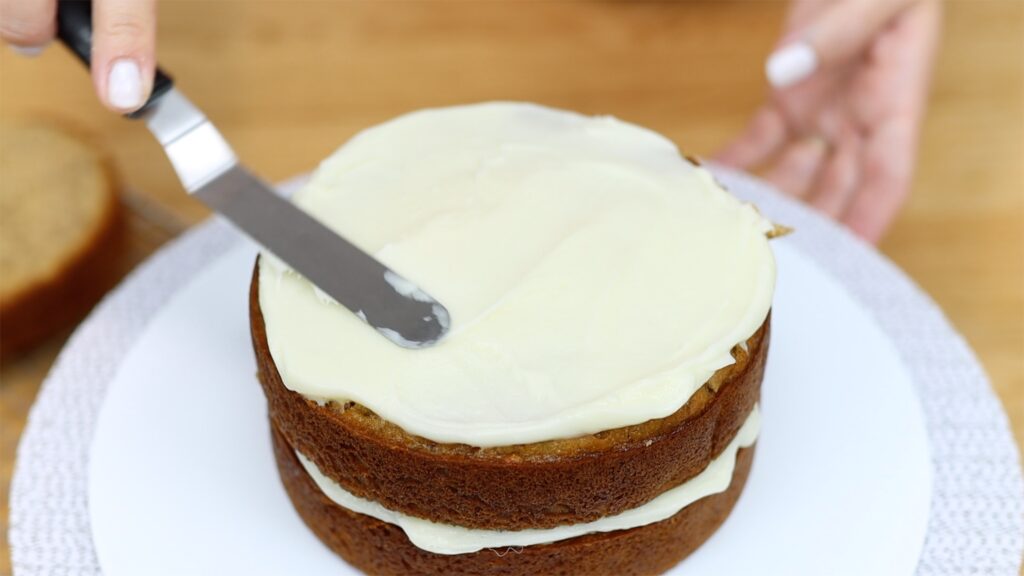
Pipe a dot of frosting onto a cake board and press the first layer of cake onto it. Pipe or spread filling onto it and then place another cake layer on top.
For the neatest frosting chill your cake in the freezer for 15 minutes before frosting it. This will make it less wobbly so you can spread and smooth the frosting more easily.
How to frost this banana layer cake
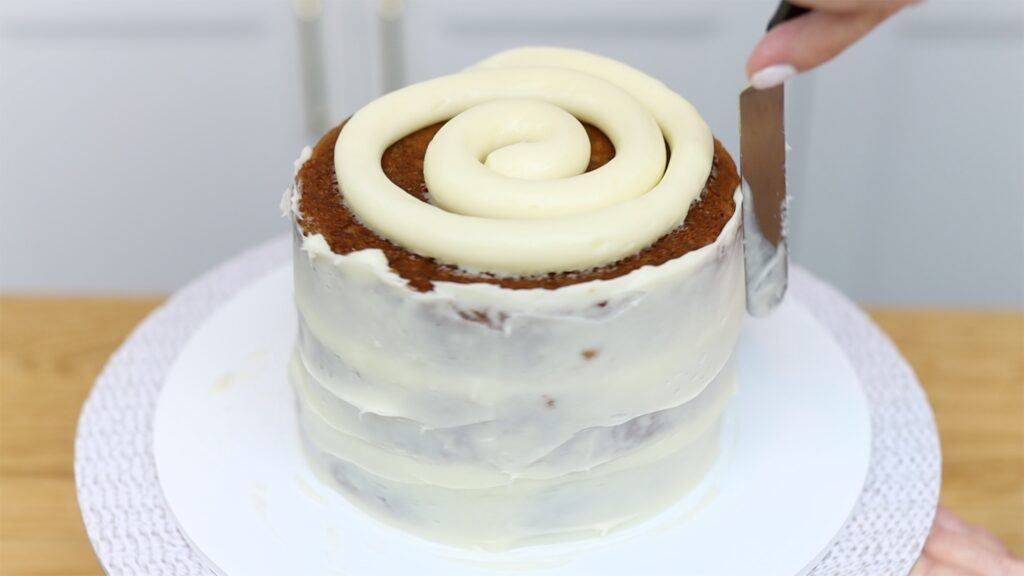
I always recommend doing two layers of frosting. Start with a very thin layer called a crumb coat, which traps any crumbs that come off the cake.
Then spread on a final coat, which sits on top of the crumb coat so no crumbs get into it. This layer of frosting will be thicker and since it will be visible, it’s worth taking the time to get the frosting smooth. I share all of my tips and tricks for frosting and piping with cream cheese in my cream cheese frosting recipe.
How to decorate this banana layer cake
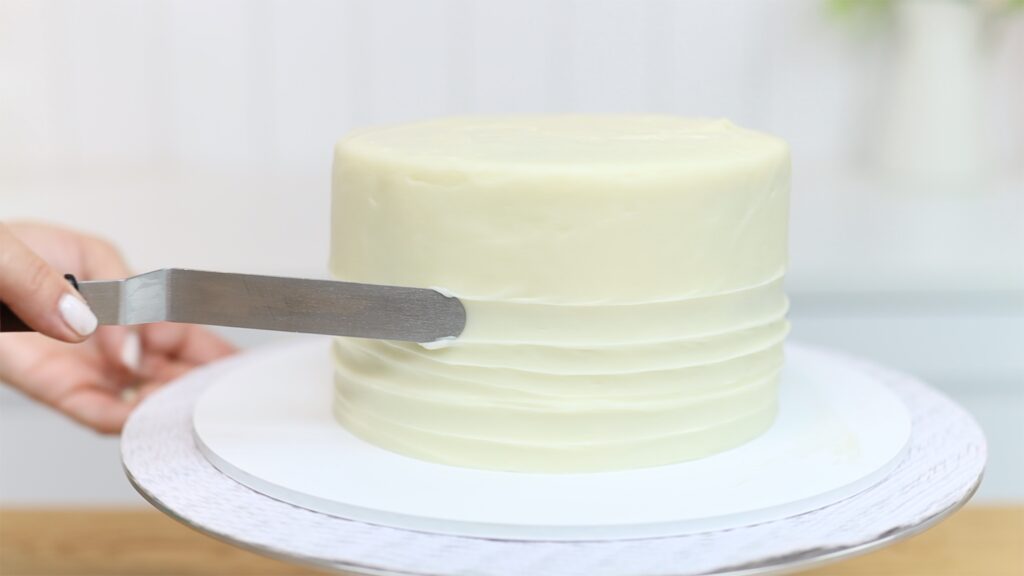
To decorate this cake really quickly I like to add texture. Spin the cake on a turntable as you slowly drag an offset spatula or the back of a spoon up the sides of the cake. You'll leave grooves in the frosting that look simple but stunning!
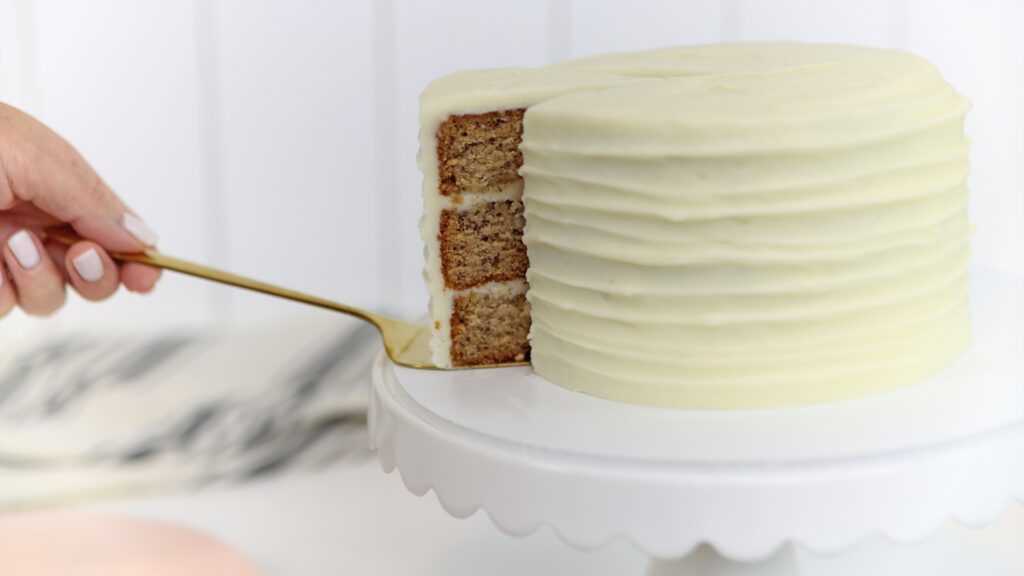
This banana cake can be stored in the fridge for a week. It tastes best at room temperature so take it out 2-4 hours before you serve it so the cake and frosting warm up and soften. For the neatest slices, run your knife under hot water before cutting into this. Yum yum yum!
This banana layer cake is full of banana flavour and it’s incredibly moist without being overly sweet.
Ingredients
UnitsScale
1/2cupunsalted butter at room temperature
1/2cupwhite sugar
1/2cupbrown sugar
1 teaspoon vanilla
2 eggs at room temperature
2cupsflour
1 teaspoon baking soda
1/2 teaspoon cinnamon
1/4 teaspoon salt
1cupmashed bananas (about 2 bananas)
1cupmilk at room temperature
Instructions
Take all of the refrigerated ingredients out of the fridge two hours before baking. Ingredients will mix together best at room temperature, preventing the cake from being dense and dry.
Mix the butter, sugars and vanilla at medium speed until light and creamy. This will take about three minutes with an electric mixer.
Add the eggs and mix until combined.
In a large bowl, whisk the flour, baking soda, cinnamon and salt together. Add half of this mixture to the batter and mix to combine, only until the flour is no longer visible.
In another bowl, mash the bananas and add the milk. Pour into the batter and mix to combine.
Add the rest of the flour mixture to the batter and mix to combine.
Divide the batter between three greased pans and bake at 325F or 160C for 35 minutes, until you can poke the cakes without leaving an imprint in the top.
Leave to cool and then assemble with the filling and frosting of your choice!
Notes
To make a three-layer 8" cake, double the recipe by clicking "X2" at the top right of this printable recipe
If you use salted butter, leave out the salt in the recipe
Tasty but incredibly stodgy the quantities seem really off. That’s a huge amount of milk for the recipe and no instructions given such as to keep the milk at room temperature to stop the mix curdling. Will definitely not use again.
Sad to hear you didn’t enjoy this! It does say in the blog post that refrigerated ingredients need to be at room temperature before mixing so you need to take them out at least two hours before but I’ve added that to the recipe card as well to make it clearer. If you use cold ingredients they won’t mix together well so your cake will be dense and dry. Thanks for pointing this out!
Absolutely! The flavour is a little bit different so if you have it, you can add 1 tablespoon of maple syrup or molasses but if not, it will still be delicious!
I'm so glad you're signing up for my newsletter! You're sure to find loads of caking inspiration and learn from the tips and tricks I've discovered throughout my career!
Want to learn more?
Get immediate access to my FREE course on 10 Frosting Techniques and my newsletter with loads of caking inspiration, tips and tricks!


Vanilla is listed in the instructions but not the ingredients. How much vanilla should we add?
Thank you for pointing that out! Updated: 1 teaspoon of vanilla!
Tasty but incredibly stodgy the quantities seem really off. That’s a huge amount of milk for the recipe and no instructions given such as to keep the milk at room temperature to stop the mix curdling. Will definitely not use again.
Sad to hear you didn’t enjoy this! It does say in the blog post that refrigerated ingredients need to be at room temperature before mixing so you need to take them out at least two hours before but I’ve added that to the recipe card as well to make it clearer. If you use cold ingredients they won’t mix together well so your cake will be dense and dry. Thanks for pointing this out!
Hello,
It's hard to get brown sugar in my city.
Can I use only white sugar? If so, please let me know how to use it best to make a wonderful cake.
Absolutely! The flavour is a little bit different so if you have it, you can add 1 tablespoon of maple syrup or molasses but if not, it will still be delicious!