If you want to make your cakes gold, you have different options and I’m going to walk you through three ways in this tutorial.
If you prefer to watch a video of this tutorial, scroll to the bottom of the page.
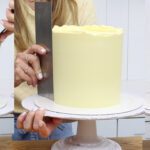
What all of these cakes have in common is that it’s really important to get your frosting as smooth as you can before you start. The gold will form a thin layer over whatever shape you create for your cake, so it won’t disguise messy frosting. Chill the cake for at least 2 hours in the fridge before you use any of these techniques, so that the frosting is firm.

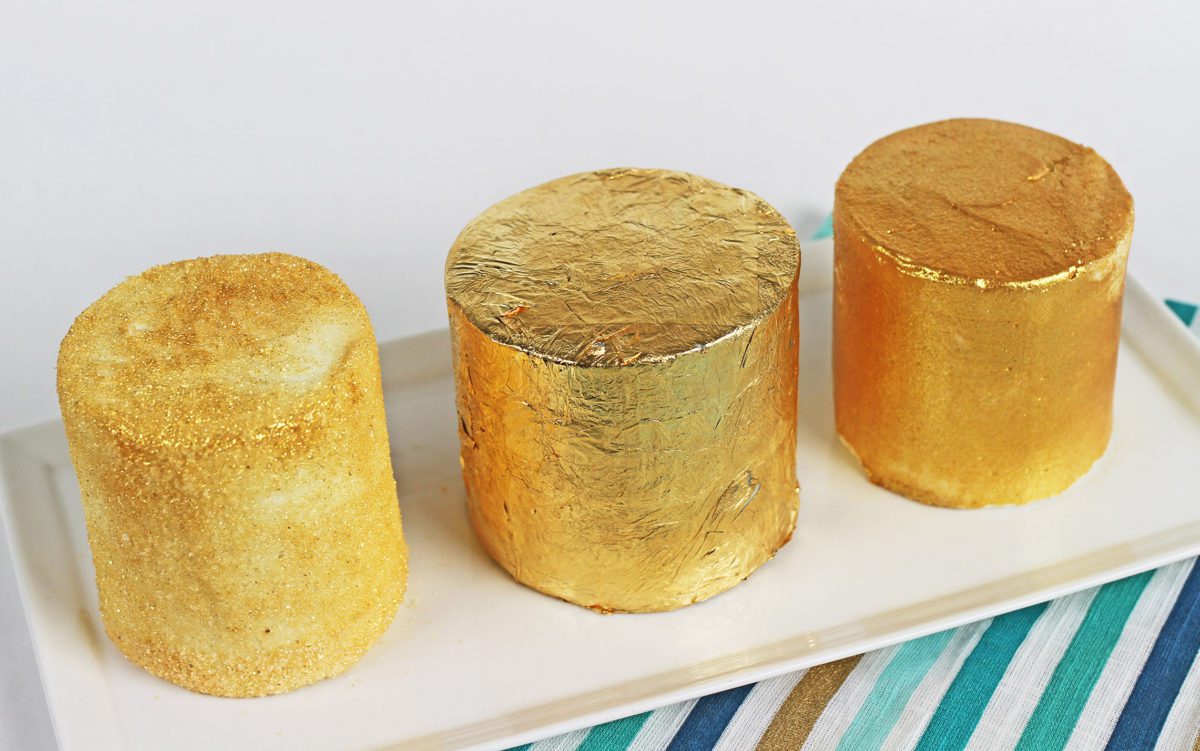
Gold powder is my favourite way to achieve gold cakes. This is Prism Powder by Fancy Sprinkles (use the code BRITISHGIRL15 for 15% off) or you can use gold luster dust instead.

Use a powder brush for the quickest and gentlest application and brush the cake all over to cover it in gold.

The frosting really needs to be firm before you do this, so that the gold sits on top instead of mixing into sticky frosting. You can use a small paintbrush instead but it will take much longer and compared to a wide, soft, powder brush, a smaller and stiffer paintbrush will be more likely to indent the frosting as you brush.

You will get gold powder all over your cake board as you brush the powder onto the cake and I’ll show you at the end how to transfer these cake from their boards onto a cake stand or platter.

The next way to make a cake gold is by making glitter! This is really easy – mix sugar with gold luster dust or prism powder in a bowl or on a baking tray.

The more gold you use with your sugar, the more metallic and bold the gold will be. I’m using a bowl to mix my glitter because my cake is tiny so it will fit inside this bowl, but for bigger cakes you’ll need a bigger bowl or a tray.

Slide an

Lift the cake up, balancing it with your hand if you need to, and lower the cake into the glitter in your bowl on your tray. I’m using cupcake cakes for these examples and I have an online class on everything you need to know to assemble, frost and decorating gorgeous mini cakes!

Roll your cake in the bowl of gold sugar glitter, holding onto the top and bottom of the cake and spinning it between your fingers to roll it back and forth and totally coat the sides of the cake in gold sugar.

For the top of the cake you can flip the cake upside down and the glitter will stick to the frosting. It’s worth mentioning again that your cake needs to be cold with firm frosting for this to work!

Instead of flipping the cake over, you can use a spoon or your fingers to press the gold glitter against the top of the cake. I’ll show you the final step for this cake in a moment!

#3 The third way to make a cake gold is the most gold and that’s by using gold leaf. Make sure it’s edible gold leaf because you can buy non-edible versions for other crafts.

Gold leaf is very delicate and will attach to any moisture so don’t touch it with your fingers! Use the backing paper it comes in, to press the gold leaf against the frosting and it will stick easily.

To do this, peel one side of the paper back, tilt the gold leaf so it’s facing the cake and then push gently through the paper. This will only work if your cake has been chilled and the frosting is firm.

For frosting that doesn’t get firm when it’s cold, like whipped cream, you can apply gold leaf with a paintbrush to create gold accents rather than complete coverage.

For buttercream cakes, as you apply sheet after sheet of gold leaf, you’ll cover the cake with gold and where the sheets overlap, the join will disappear since the gold leaf is so thin so you’ll end up with a seamless, totally gold cake!

To transfer your gold cakes (or any cakes!) from their cake boards onto a cake stand or platter, after chilling the cakes spread or pipe a dot of buttercream wherever you want to place a cake.

Slide an

If the cakes have been chilled for at least 2 hours you’ll be able to lift them with your hands and adjust them on the platter because the frosting will be so firm.

I teach an online course on Cake Photography Like A Pro sharing how to create gorgeous backgrounds, excellent natural and artificial light, staging with props, how to adjust the focus and lighting in photos taken with your phone or camera, taking and using photos for social media and video, editing… everything you need to know to take amazing cake photos! If you join my ClubPLUS you’ll get access to every course and class on my cake school

Here’s the video version of this tutorial: