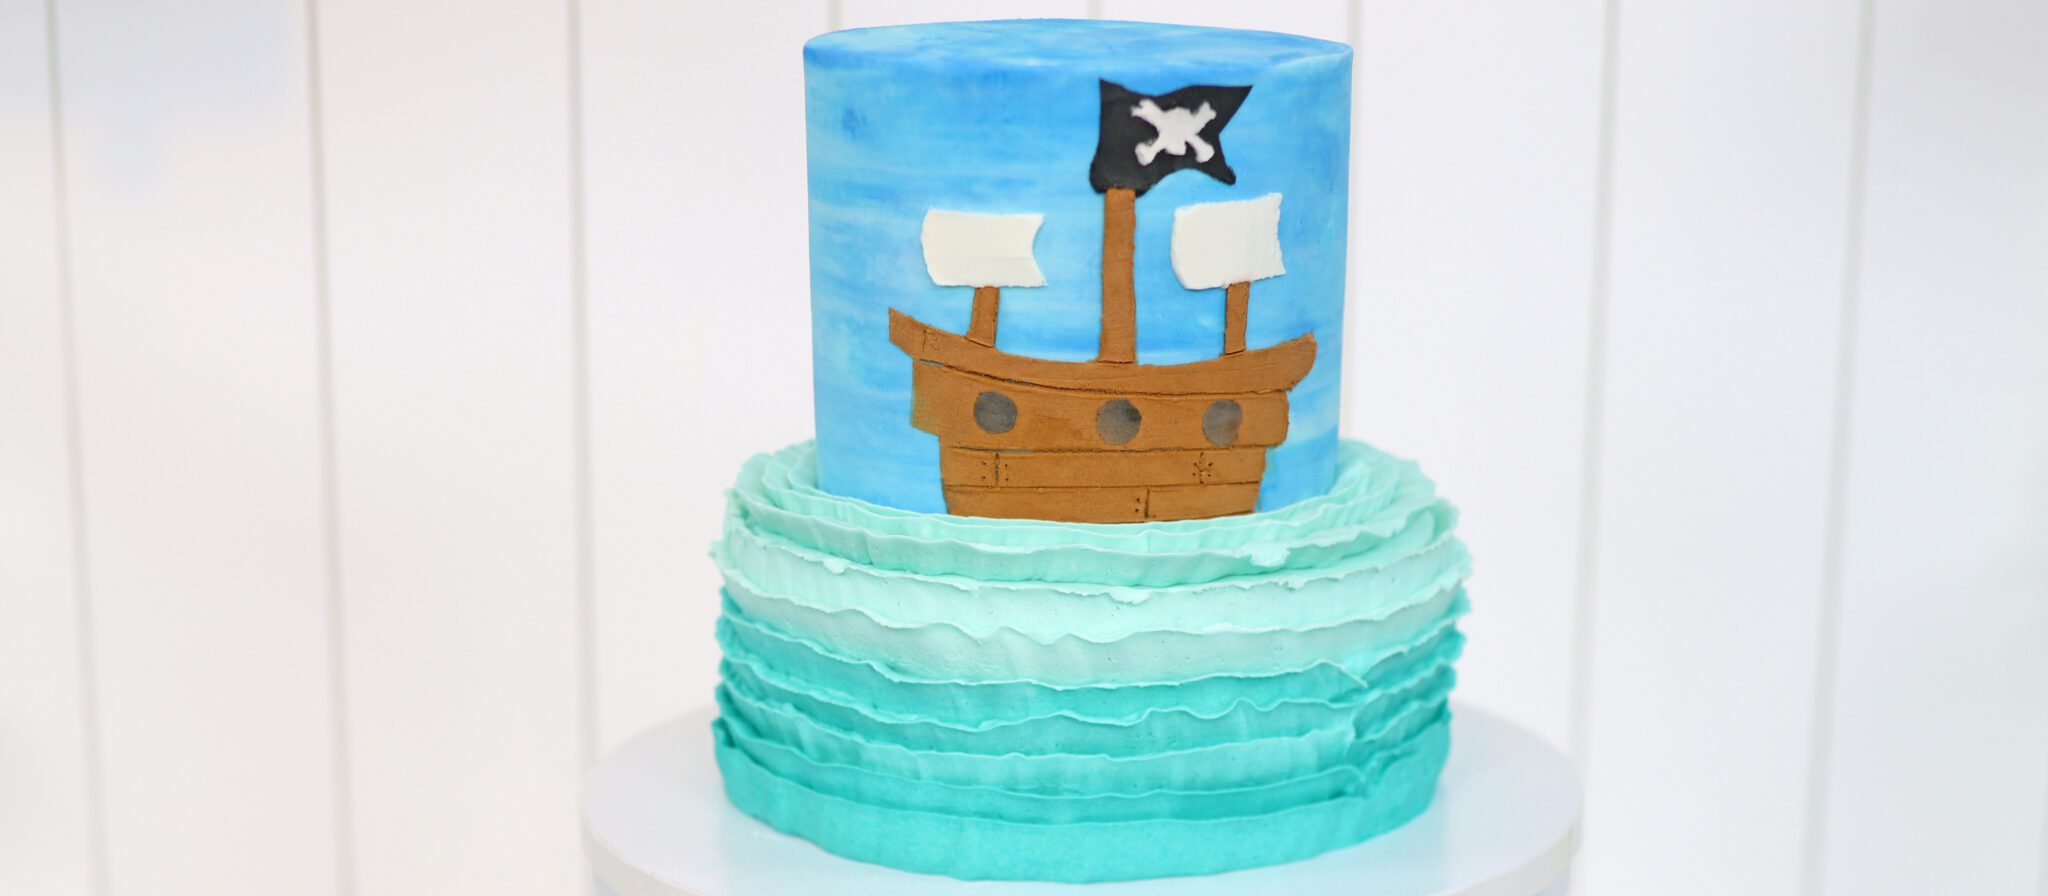
Let's make a buttercream pirate ship cake with no special tools!
You can make this pirate ship design on a single cake or on a two-tier cake. I'm alternating layers of my Very Vanilla and Perfect Chocolate Cake for a two tier cake. The bottom tier is an 8 inch cake and then on top is a six inch cake.
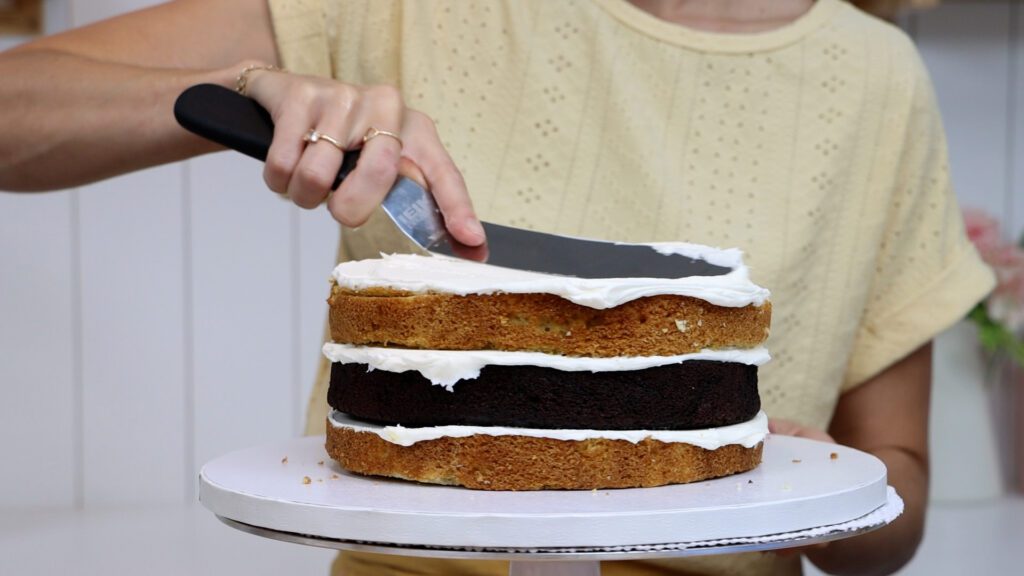
For a tier cake, the top cake needs to be on a cake board the same size as that cake. The purpose of this is to support the cake so it doesn't sink into the bottom cake. The reason for it being the same size is so that it's invisible after you frost the cake.
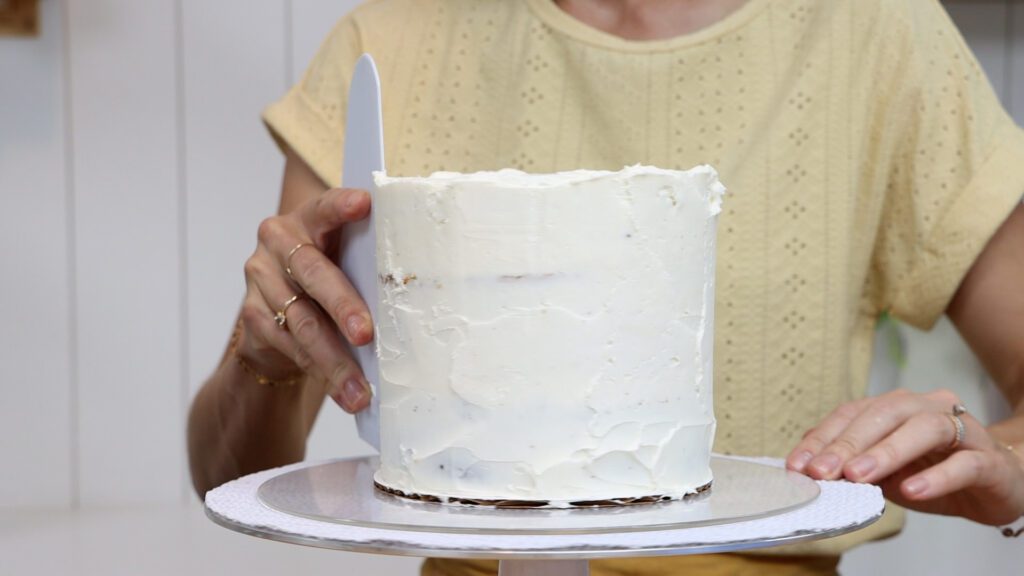
The taller this cake is the more room you'll have so the bigger you can make your pirate ship. Start by covering both cakes with a crumb coat. This is a thin layer of frosting to trap any crumbs that come off the cake so that they don't get into your final layer of frosting. I'm using my 4 Minute Buttercream to fill and frost these cakes.
I'm turning the bottom cake into an ocean with a very easy and very quick technique. Frost the top of the cake with a light shade of teal or turquoise. To tint buttercream I use gels, which are very concentrated so you only need a drop to make bold colours.
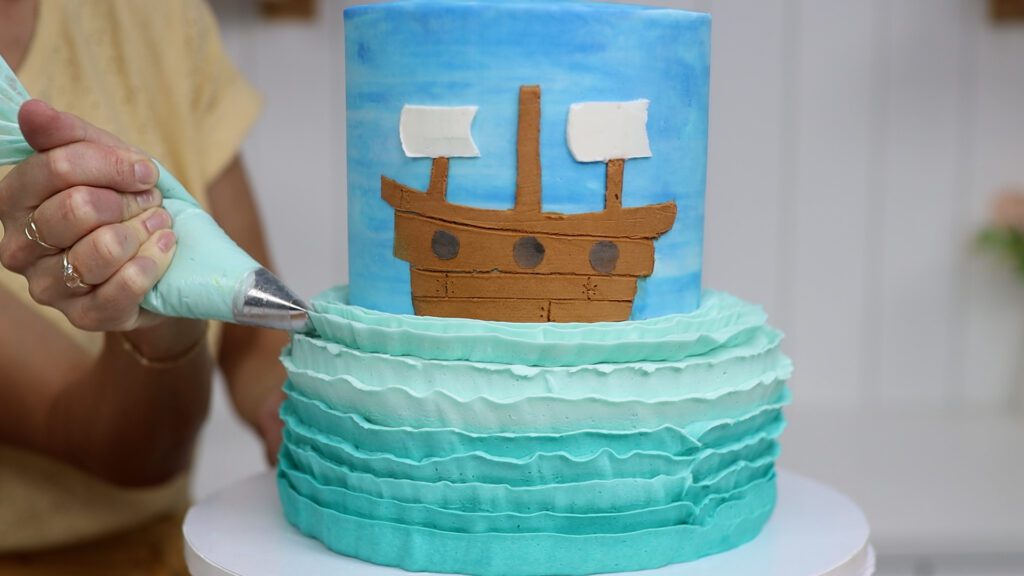
Put this same colour into a piping bag with a petal piping tip. Pipe a ruffle around the top of the cake so that it sticks up above the tope edge. If you don't have a petal piping tip you can just spread this colour straight onto the cake. You'll get all of the beautiful ocean colours, just without the texture.
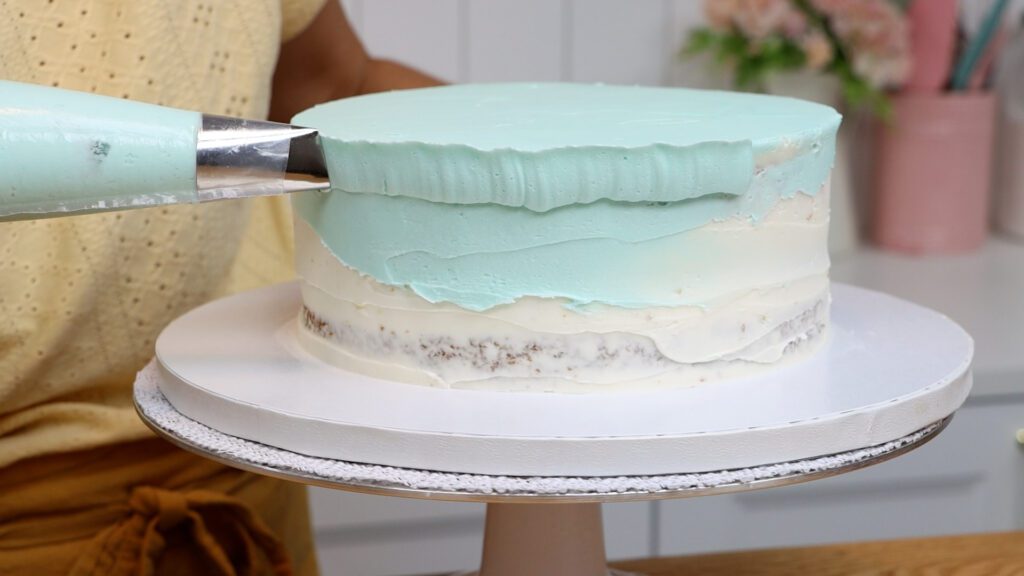
Petal tips look like teardrops and when you pipe through them. The narrow part makes ruffles but the wider part doesn't. For this cake you'll want the wide part of the petal tip or teardrop to point downwards, angled slightly towards the cake. This way, the wider piping will stick to the cake. Point the narrow part upwards and slightly away from the cake, which makes ruffles that look like waves.
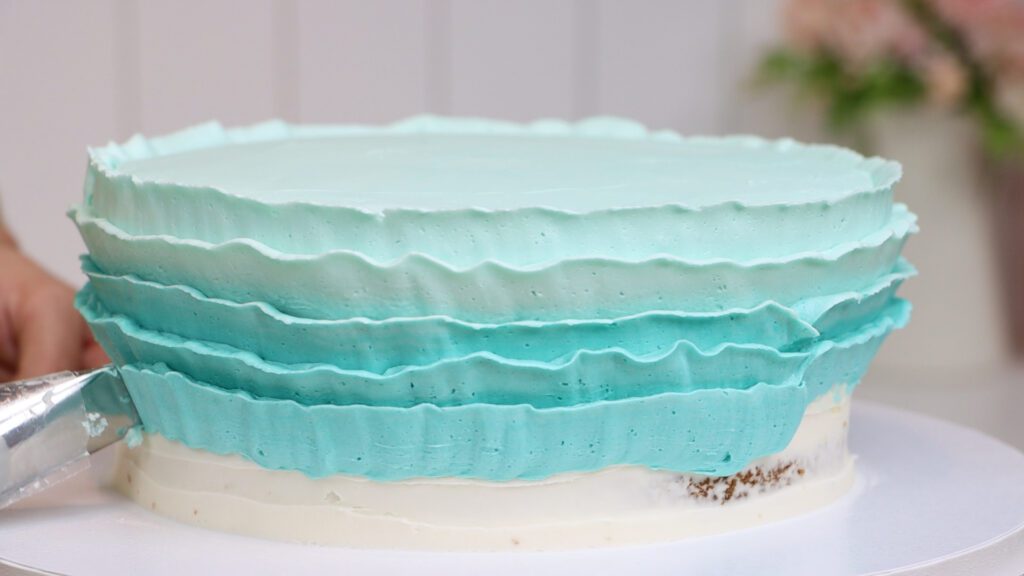
I'm adding another drop of gel to my bowl of buttercream and putting that darker colour into the piping bag. Now the waves get darker as the ocean gets deeper, lower down on the cake. The slower you pull the bag and the more you wiggle your wrist, the wavier the piping will be.
This technique is very forgiving! If you need to pause to push the buttercream lower down into the piping bag, when you start piping again the join of the ruffles will disappear into the texture on the cake. It's not a precise technique so have fun with it to create this whimsical effect. You can smooth any messy parts of the piping with an
To hold up the next cake tier you'll need some supports. Use a cake board the same size as the next cake to draw around. This circle will show you where the next cake will sit eventually. Then poke boba straws or dowels into the bottom cake, cutting them to be the same height as that cake. I'm using four straws for this eight inch cake, spaced equally around the cake. Make sure they're at least an inch within the circle you drew so that they're underneath the top cake.
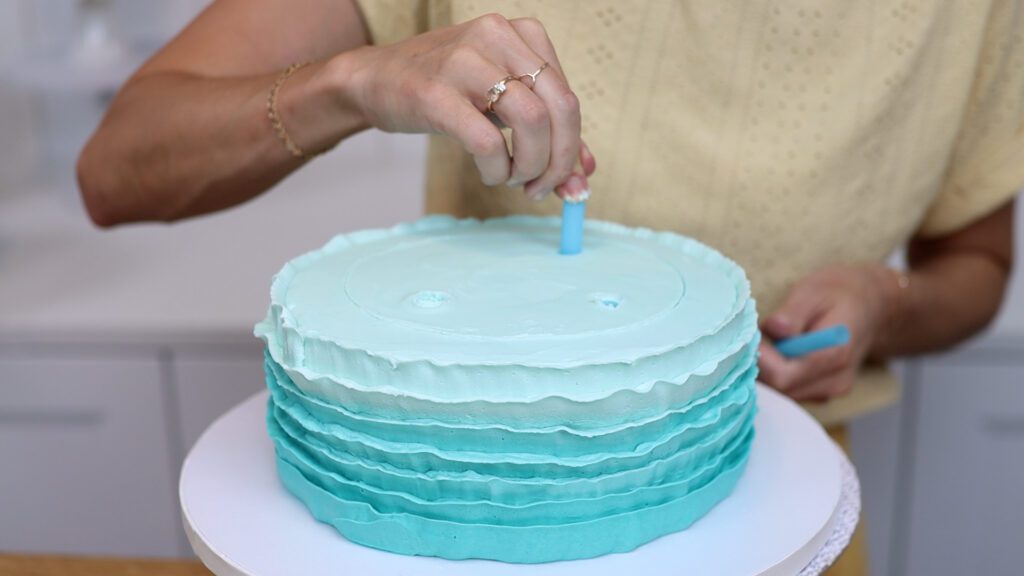
Put this cake in the fridge while you frost the top cake, the one that will have the pirate ship on it.
To create a sky effect use white and blue buttercream. Ideally, you'll have three shades. Spread dollops of those colours onto the cake to almost cover the sides.
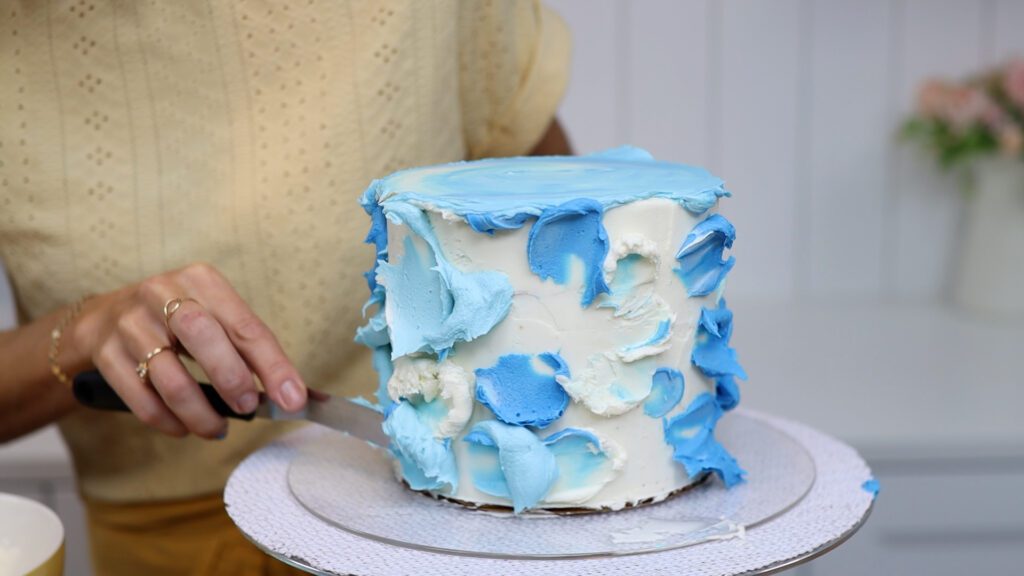
The crumb coat needs to have set so that these colours don't mix into it. I set my crumb coats by putting the cake into the fridge for 30 minutes. Keep in mind that if the cake is cold from the fridge, you'll need to frost it quite quickly. Otherwise, these blobs of buttercream will chill and set and be difficult to spread. Scrape around the cake with a cake comb or frosting smoother or icing scraper. The colours will blend together and look like a cloudy sky.
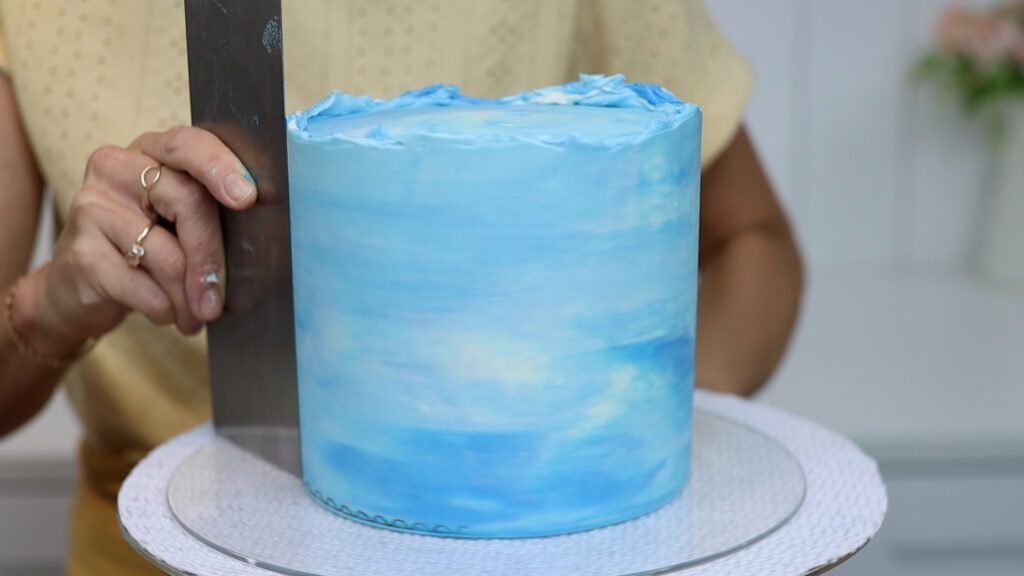
After a few scrapes, spread more buttercream to fill in any indents, where the frosting isn't as thick as on the rest of the cake. Then scrape again until the frosting is smooth. You can leave the top edge uneven or level it with your
Draw or trace or print out a pirate ship on a piece of paper. Keep it to a simple outline for the best results. Then put a piece of parchment or wax paper on top and trace the brown details only. This will be the hull (the curved part at the bottom!) and the masts. Pencil works best for drawing onto parchment paper because of the non-stick surface.
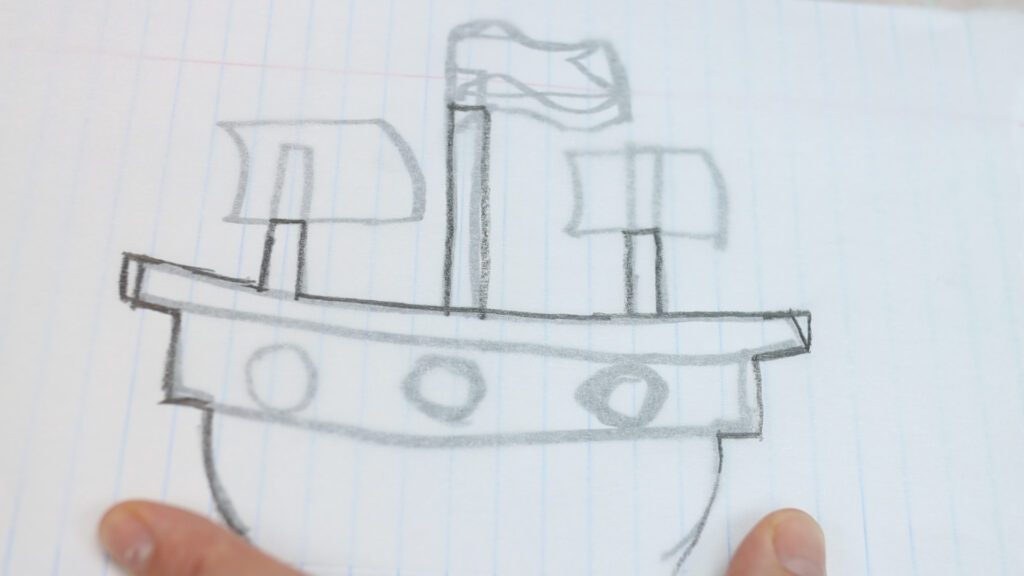
Then on another piece trace the white details, which are the sails. Onto another piece, trace the black details, which are the pirate flag and the porthole. Finally, trace the skull and crossbones onto another piece.
Now cut out the shapes from each of your pieces of parchment paper. Cut along the outline to leave the outer part intact, which you'll use as a stencil next. Take your time to cut a neat outline because if you cut a jagged line or a wonky shape, that's what you'll end up with on your pirate ship cake.
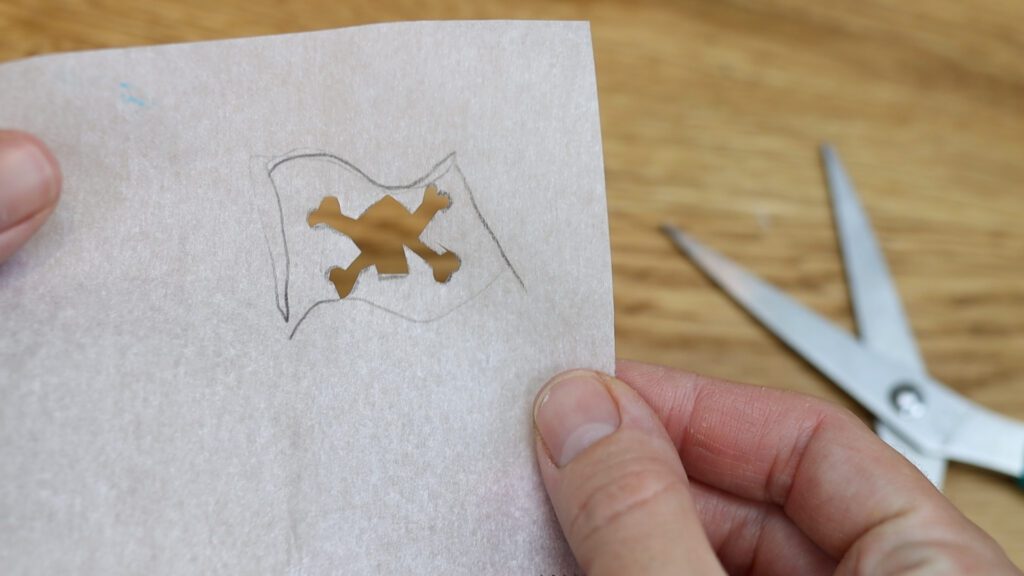
Each piece of parchment should have an inch or two of paper all around the cut out part of the design. This border will protect the rest of the cake from unwanted smudges of buttercream. The exception is the pirate ship because the boat will sit right at the bottom of the cake so you don't need any paper below it.
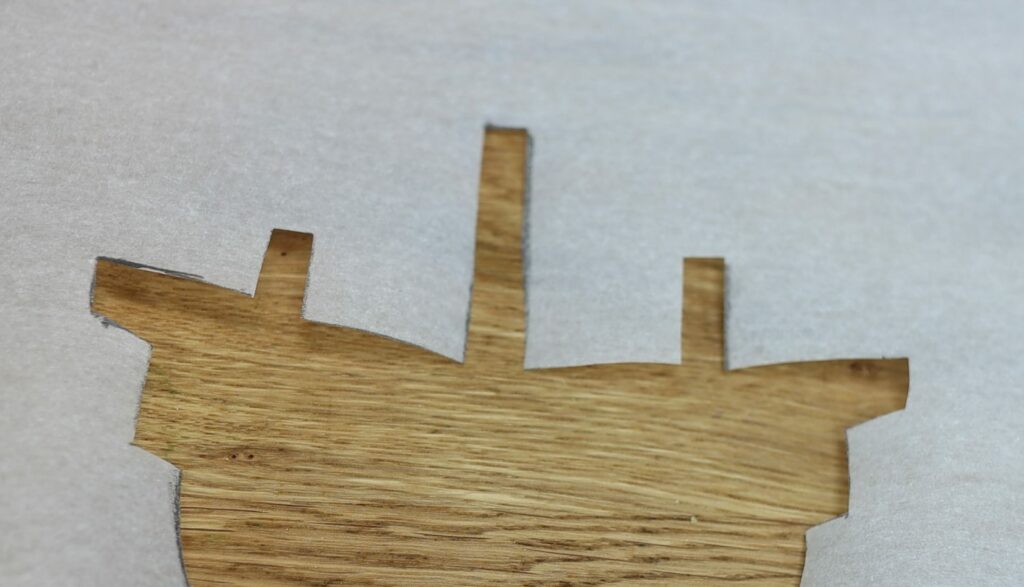
Take your cake out of the fridge or freezer and press the biggest boat stencil against it. After about a minute some tiny drops of condensation will form on the cake because it's warmer out of the fridge or freezer. Those droplets will help the stencil to stick to the cake. Spread brown buttercream all over the boat shape that you cut out. Spread inwards towards the middle of the cutout shape rather than outwards because that might spread buttercream underneath the parchment paper, causing smudges around the outside of the outline of the shape.
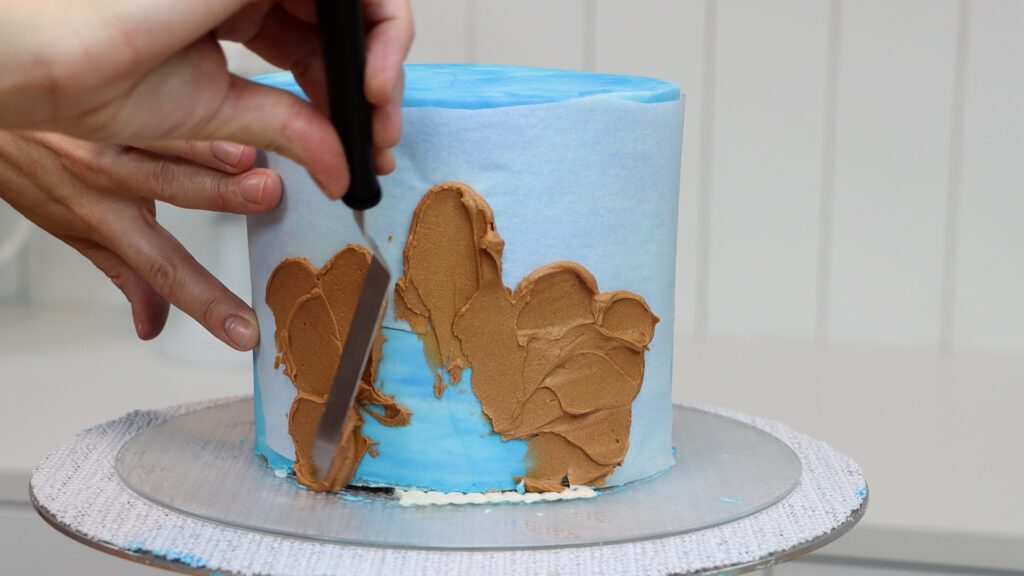
Smooth the brown frosting with an
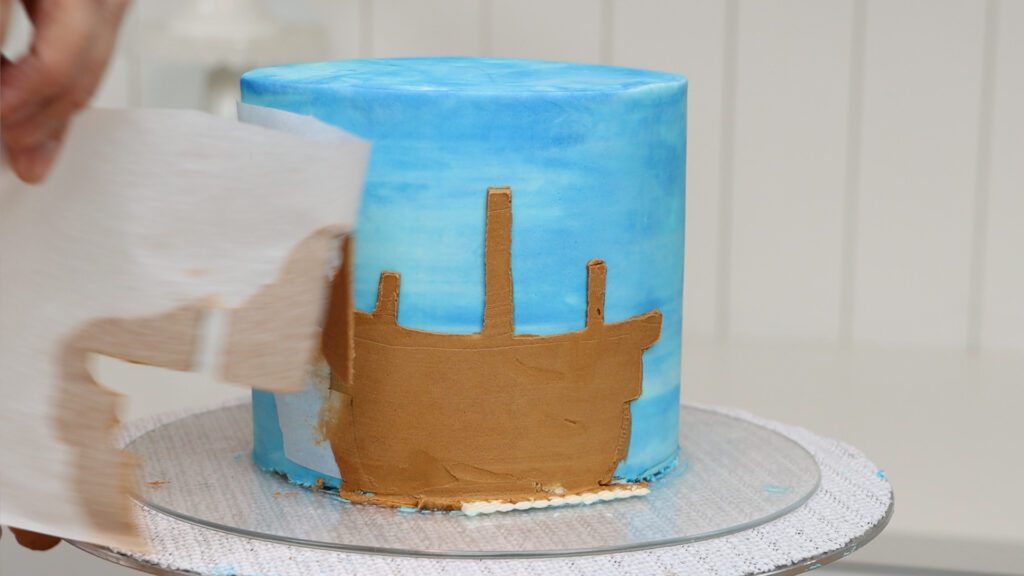
Peel the stencil off to leave your shape behind. Use a toothpick to gently scrape off any smudges, which works because the blue frosting on the cake has chilled and set so you won't damage it.
Use the edge of your cake comb to score some lines in the buttercream to mark out different sections of the boat and planks of wood. A toothpick is a great tool to mark the shorter ends of the planks and to draw little nails that you see in shiplap. Now put the cake into the fridge for 30 minutes or the freezer for 15 minutes to set this brown frosting.
Press another stencil onto the cake and spread buttercream over that, scraping off the excess to leave a thin layer behind. For portholes, a thin layer looks best because you don't want the windows to look like they're sticking out from the wooden boat. For some shapes like the sails, a thicker layer of buttercream is better because the blue frosting underneath would show through a thin layer of such a light colour of frosting.
Keep your toothpick handy for touch-ups after each stencil.
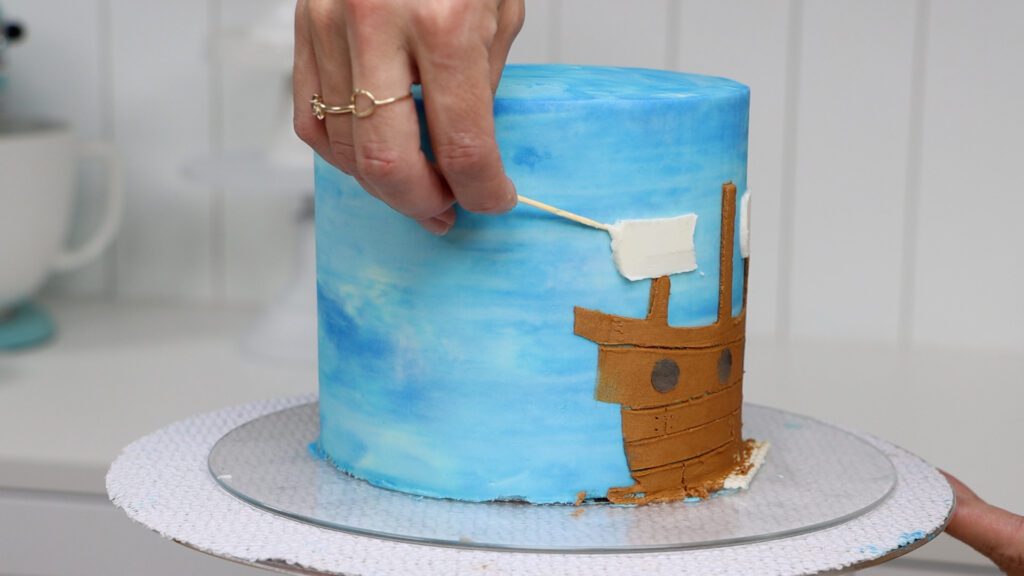
Put the cake back into the fridge or freezer after each stencil to set that colour before pressing on the next stencil.
Any time after stenciling on the big brown boat you can stack your cakes if you're making a tier cake. Both cakes need to be cold so that the frosting is firm. Spread some fresh frosting onto the bottom cake within the circle you drew. Then slide an
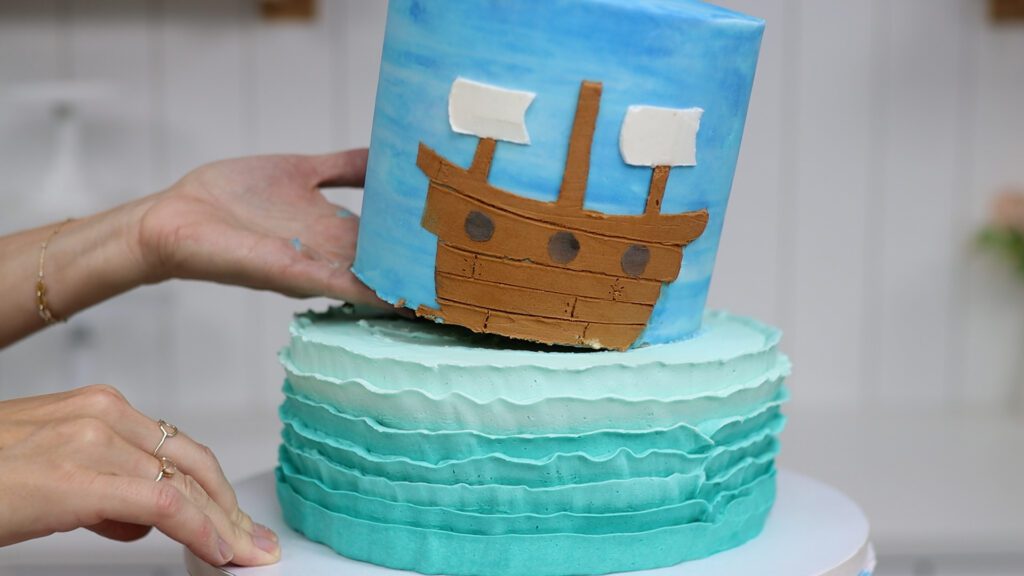
The cakes need to be cold so that you can touch the frosting without damaging it. Now it's time to cover up the join between the two tiers. Use some of that lightest shade of turquoise from the ocean part of the cake with your petal tip. Hold the wider part of the tip against the bottom of the cake to pipe a wave. You can pipe a few more if there's space on top of the bottom cake.
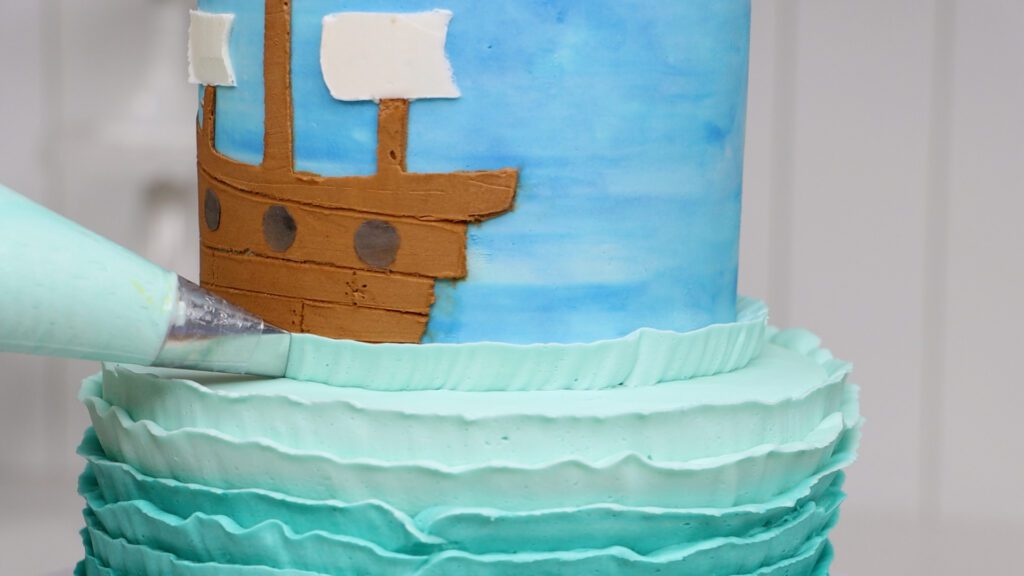
Just like with the other ruffles, the more you wiggle your wrist, the wavier your piping will be. I like to start piping at the side of the cake because that's typically the most subtle place to hide the start and finish of each row of piping. Everyone looks at the front of the cake and if you're singing happy birthday and letting someone blow out a candle on the cake, everyone gathered around will be looking at the back of the cake but no one really stares at the side side of a cake!
You only need a tiny bit of buttercream for the pirate flag and a few drops of black gel. Making a dark gray is fine because the gel will develop and the colour will darken a few shades. Let that set in the fridge before using your final stencil, the skull and crossbones.
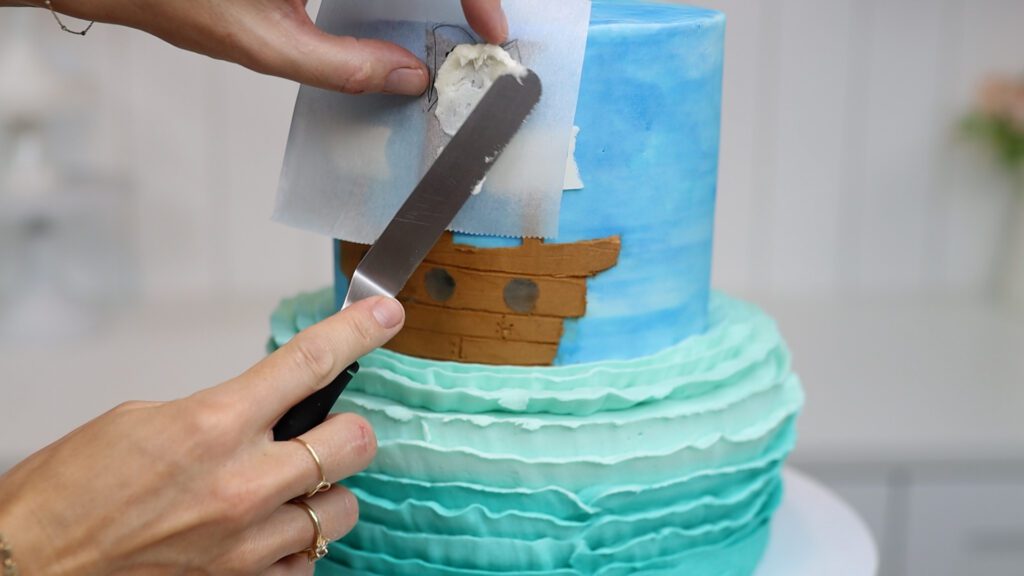
Just like with the white sails, it's a good idea to spread this thickly so it doesn't end up looking gray over the black buttercream underneath. With a thicker layer of frosting the stencil edges do tend to be messier so smooth them with a toothpick.
I forgot to mark the masts on the ship but it's fine to do this either immediately after stenciling, while the buttercream is still soft or after chilling the cake, when the buttercream has set.
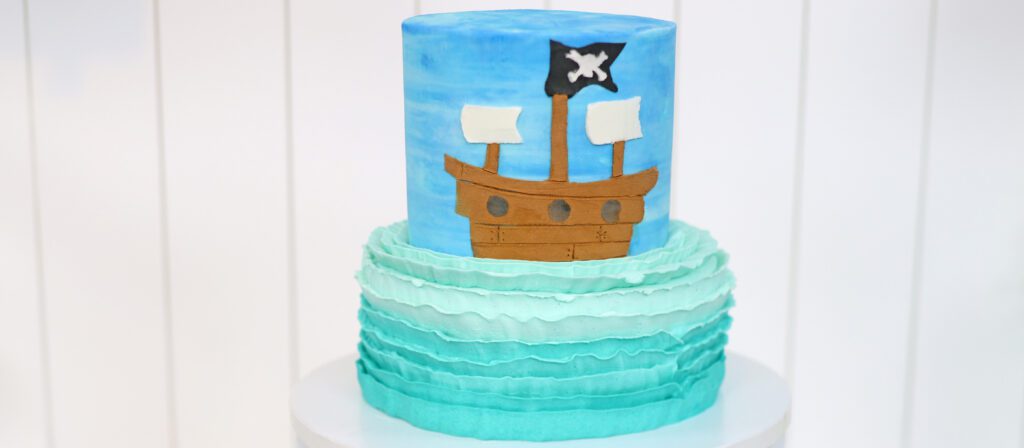
And there it is! A pirate cake made with no fancy cake tools, just some paper stencils that you can make yourself very easily quickly and affordably.
I hope this tutorial has been useful. Visit my cake school to learn hundreds more cake decorating techniques and designs.
You can also watch a video of this pirate ship cake tutorial:
