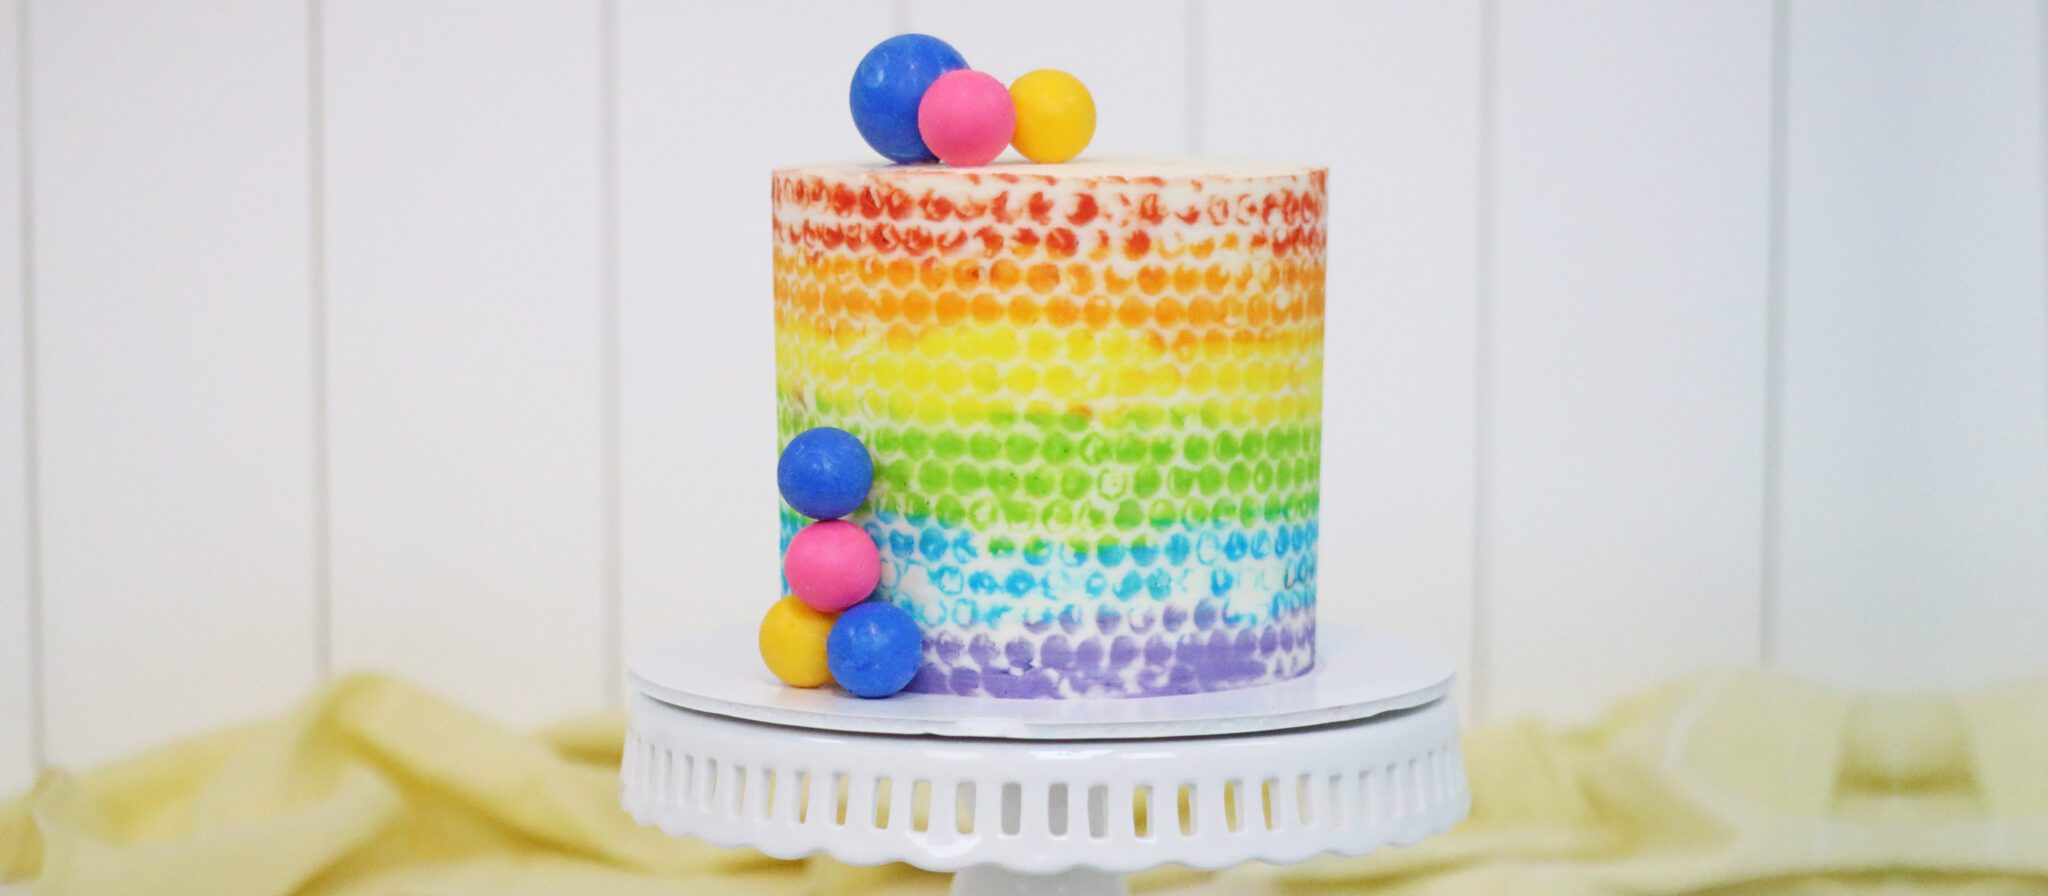
In this bubble wrap cake tutorial I'll show you how to make bubble wrap frosting and how to fill the dots with rainbow colours.
To make rainbow cake layers, weigh the cake batter to divide it into six equal portions. Then add gel colours to each one. To use just one bowl, mix the colours in this order: yellow, orange, red, purple, blue, green. This way you don't need to wash the bowl in between colours.
After baking and cooling the cake layers, make a checkerboard pattern by cutting discs out of each layer. Choose objects with the same difference in size, for example for these 6 inch cake layers I'm using a 4 inch plastic cup and a 2 inch cookie cutter.
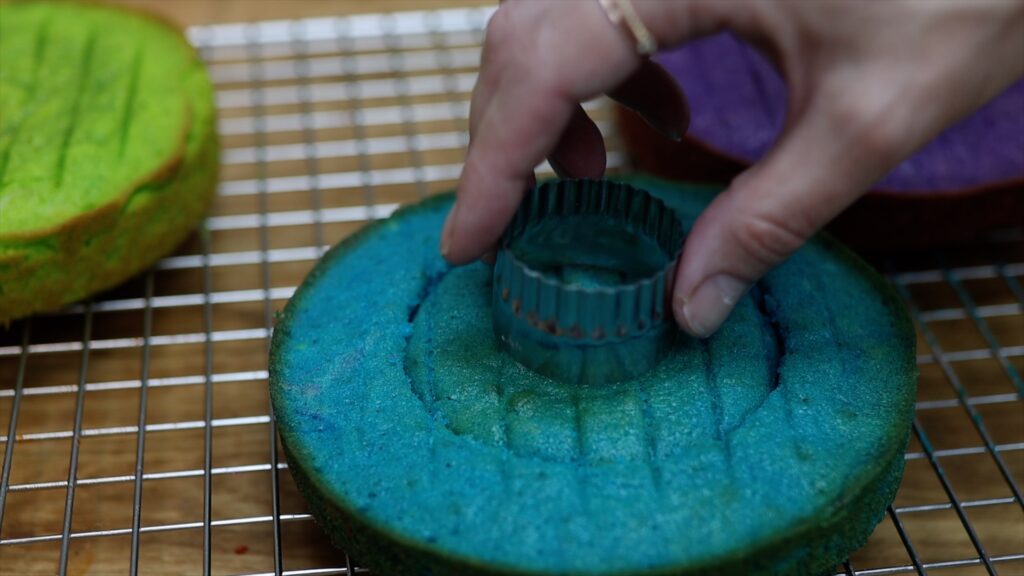
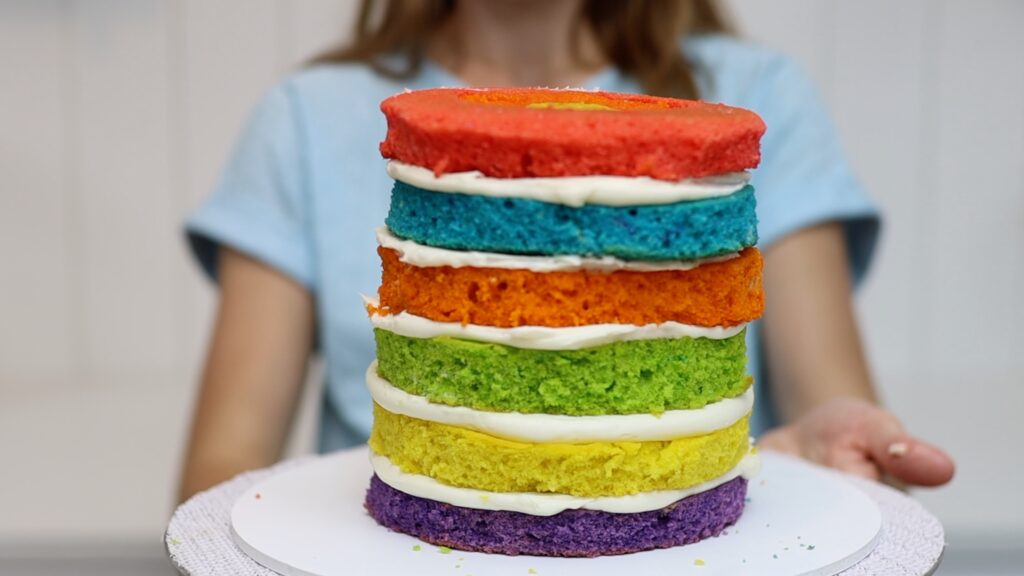
Since the cakes darken around the edges I'm trimming those parts off. Now mix and match to make colourful rings of cake and layer the cake with filling.
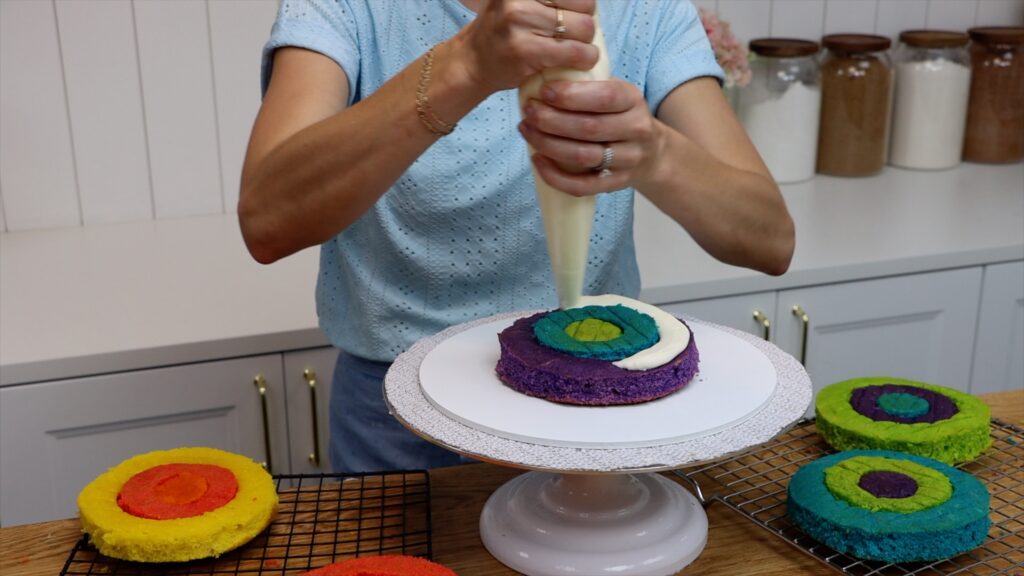
This is going to be so much fun to cut into later. I'm using my Very Vanilla cake and my 4 Minute Buttercream.
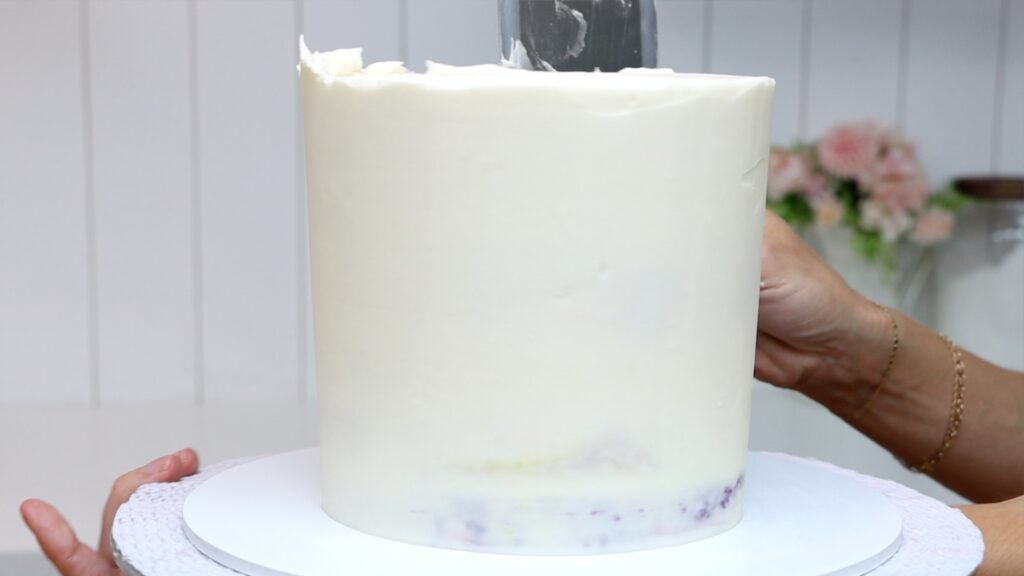
The bubble wrap design needs a smooth surface to attach to so start by frosting the cake. If you'll have white frosting in the design, cover the cake in two layers of frosting. Otherwise, you might see the colored cake layers through the white parts of the design.
Now spread frosting onto a piece of bubble wrap that you've washed and dried so it's clean. You'll need a piece at least as tall as the cake and wide enough to wrap around it. You can tape separate pieces together if you don't have a piece big enough. I'm spreading the frosting about a centimeter higher than the cake and a few centimeters wider to make sure it completely covers the cake.
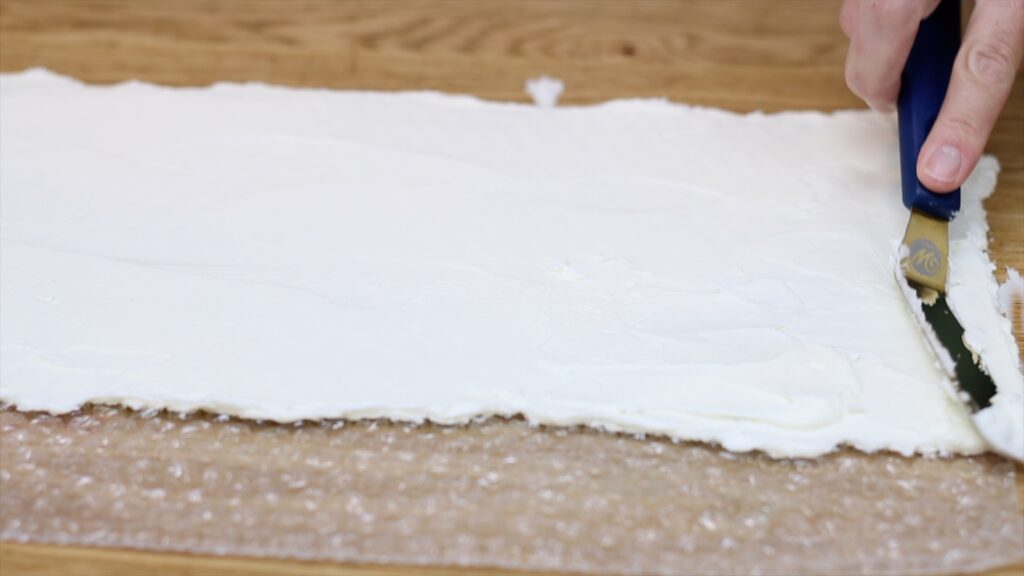
If you can see any shadowing of the bubble wrap through the frosting, that means the frosting is too thin. Smooth it a few times to make it flat and level. Then pick it up and wrap it around your cake. It's best to chill the cake in the fridge for about an hour first so the cake and frosting are firm. This way they'll hold their shape even as you push the bubble wrap against the cake.
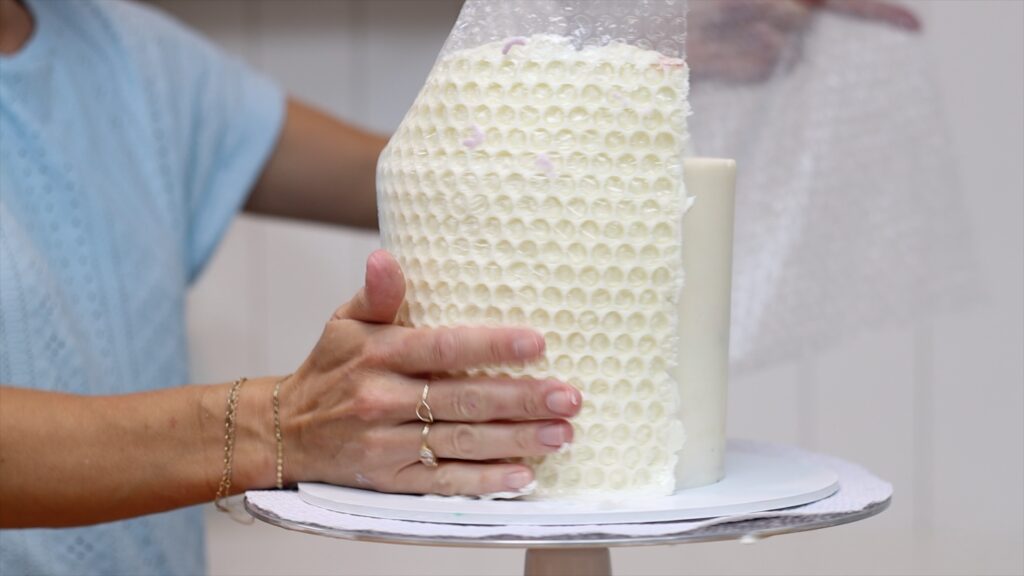
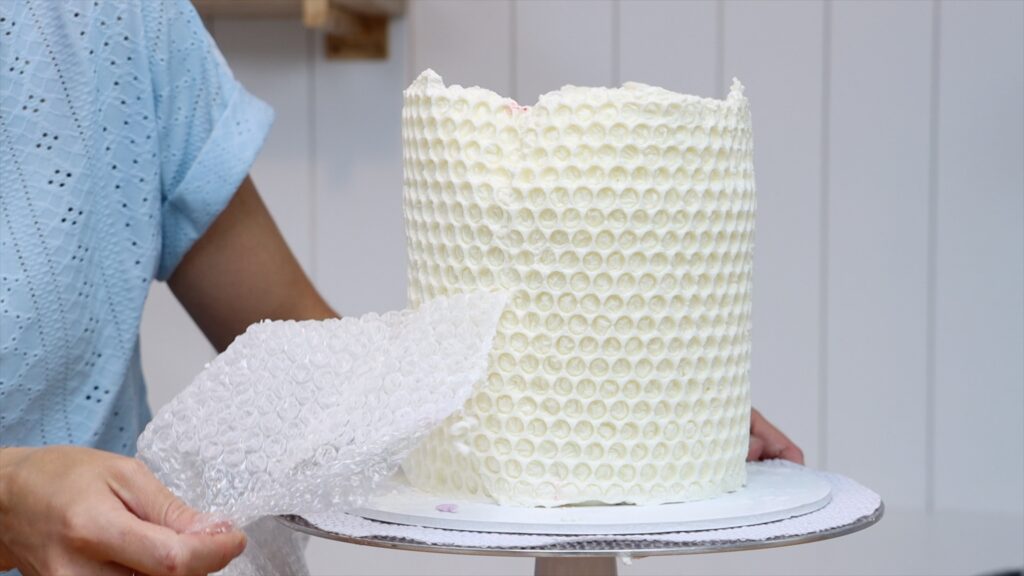
Push along the join where the bubble wrap overlaps and then put the cake in the fridge for an hour. When you peel the bubble wrap off you'll have this gorgeous unique bubble wrap texture in the frosting!

Use a sharp knife to trim off the extra buttercream from the seam to leave it smooth. Also trim off the frosting that's sticking up above the top edge of the cake.
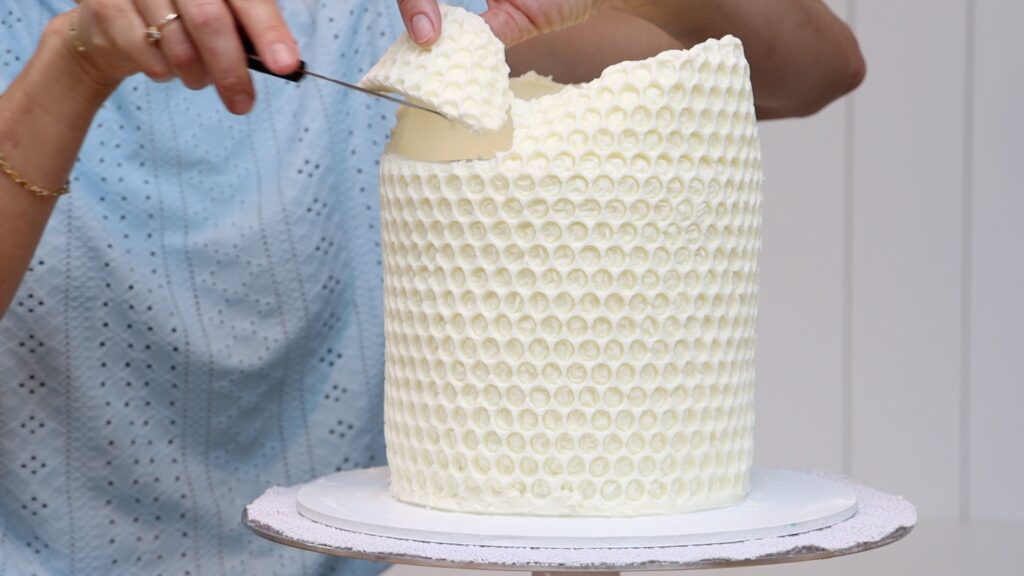
I'm using the end of a paintbrush to push in some bubble wrap holes that haven't imprinted the frosting properly. You could leave the cake like this or fill in the bubble wrap holes with colour. Put the cake into the fridge until you're ready to add more decorations.
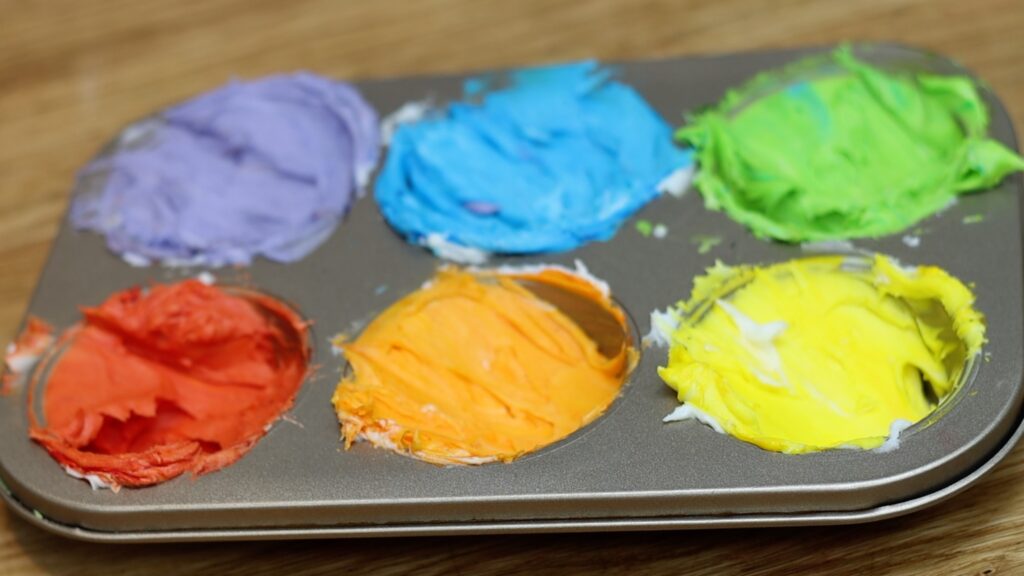
For these small amounts of frosting I like to mix the colours in a cupcake or muffin pan. It's an easy way to make cleanup time quicker instead of washing lots of little bowls. Tint the frosting in the same order as the cake batter: yellow, orange, red, purple, blue, green. This way you don't have to wash your spatula in between colours.
When you're ready to add the colours to the cake, take the cake out of the fridge. Count the number of rows of bubble wrap dots and divide that by your number of colours. This way you'll cover the same number of rows for each colour to space them evenly down the cake.
The cake will warm up after a few minutes out of the fridge so the bubble wrap pattern will get softer. But you need it to be firm so that these colours fill the holes instead of squashing them. So spread the colours over the bubble wrap frosting as quickly as you can. I've overlapped the colours to make a rainbow gradient rather than distinct stripes of colour.
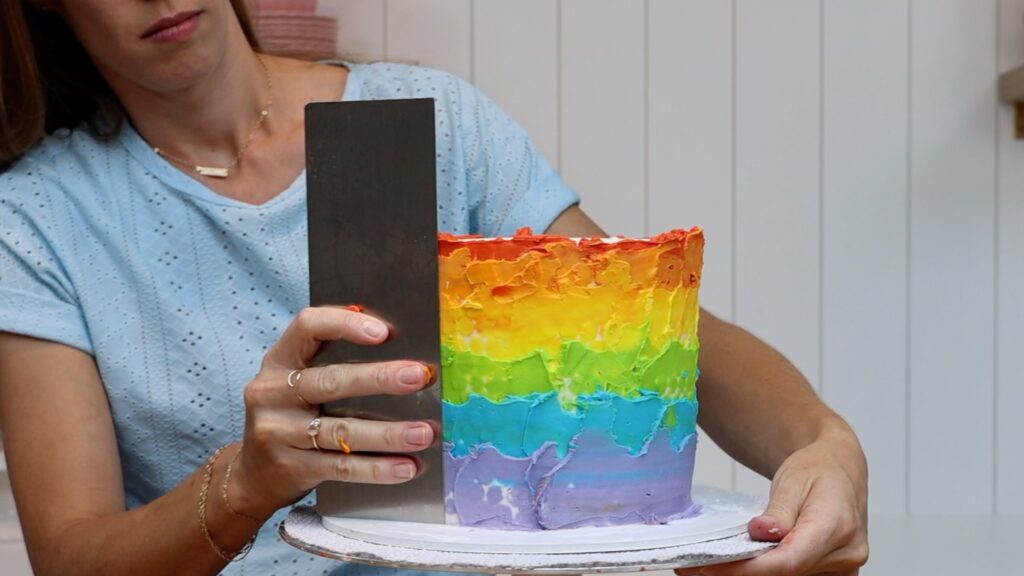
Scrape around the cake with a cake comb until you like the effect. I love the way the colours look on my cake comb as I scrape them off!
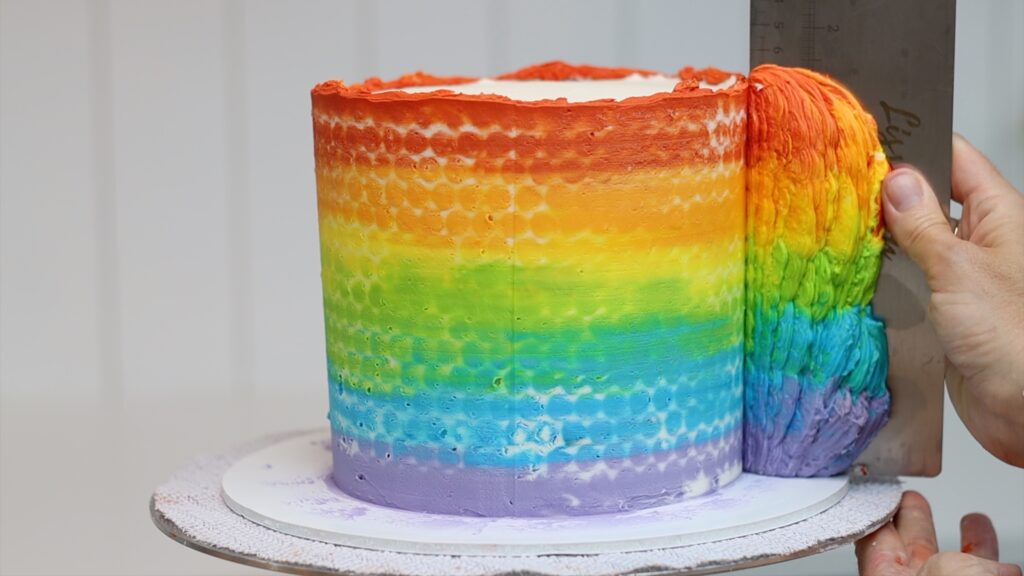
A metal cake comb is ideal because you can heat it with hot water or a blow torch. Then it will scrape off the excess buttercream really easily without needing to use much pressure. The more you scrape the colours off, the more white you'll have in the design.

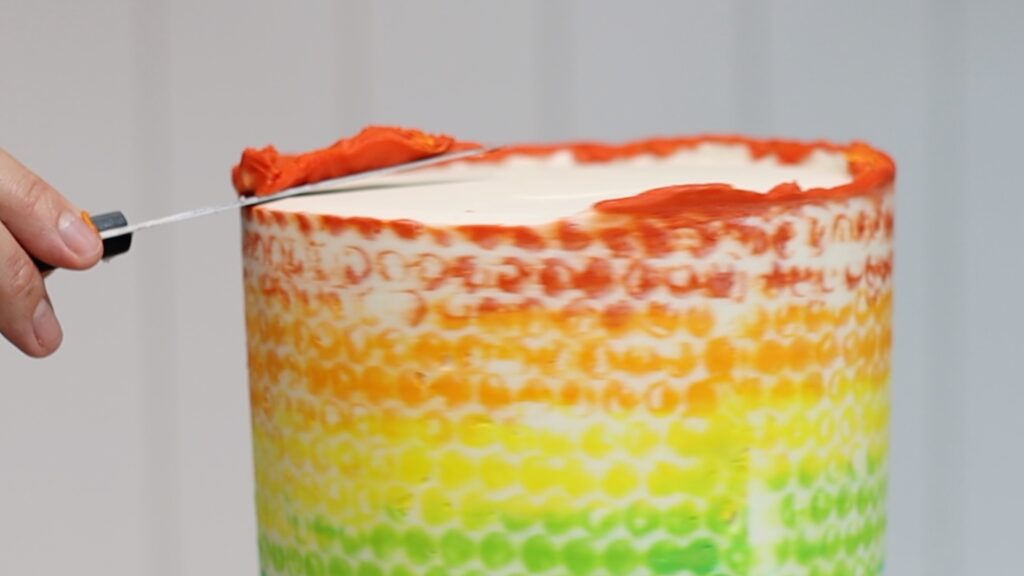
To get the top edge of the cake sharp use a knife to cut off any frosting that's sticking up. This way you won't smear streaks of red onto the top of the cake.
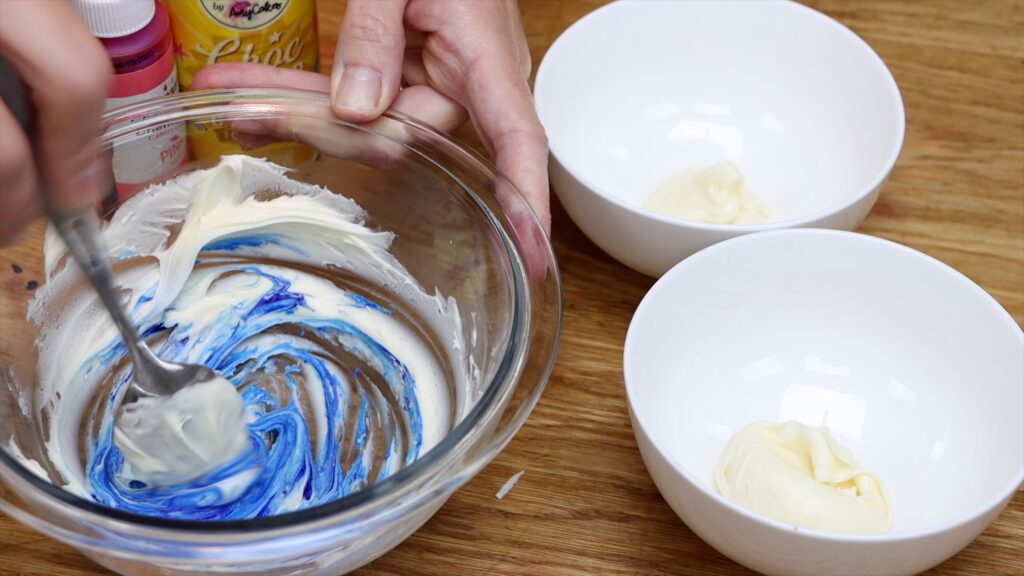
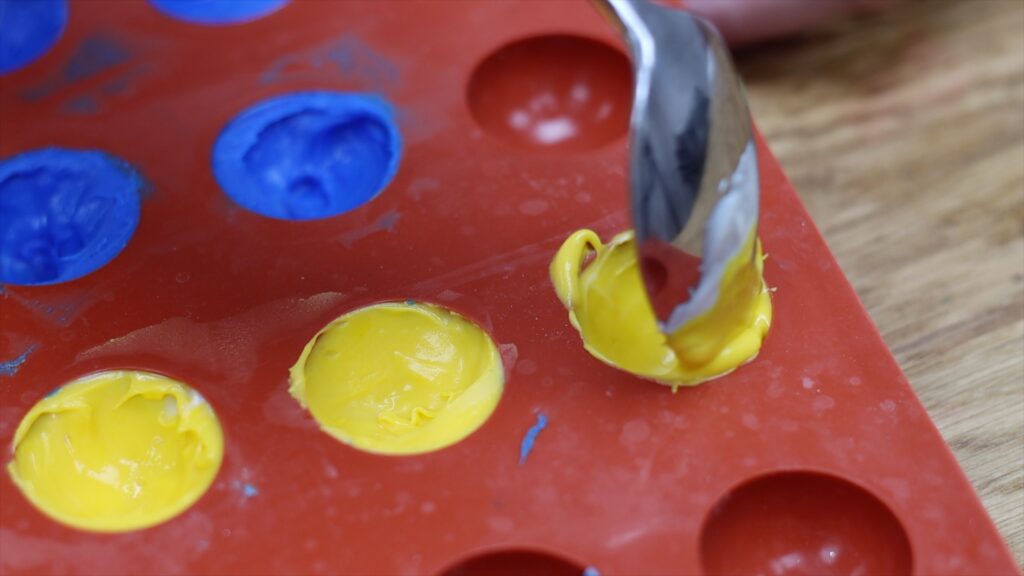
To make colourful spheres to decorate this cake, use white chocolate. Heat it in a microwave safe bowl for 1 minute at 50% power so that it doesn't seize. Divide it into bowls and tint each one using oil-based colours. Buttercream colours won't work because the water in them will make the chocolate stiff and grainy.
Use the back of your spoon to coat a silicon mold with the coloured chocolate. Of course, you'll need two hemispheres for each sphere. Try to nudge the chocolate up to the top edge so it's thick there, which will help you attach them together next.
Use an offset spatula or cake comb to scrape any chocolate off the rest of the mold.

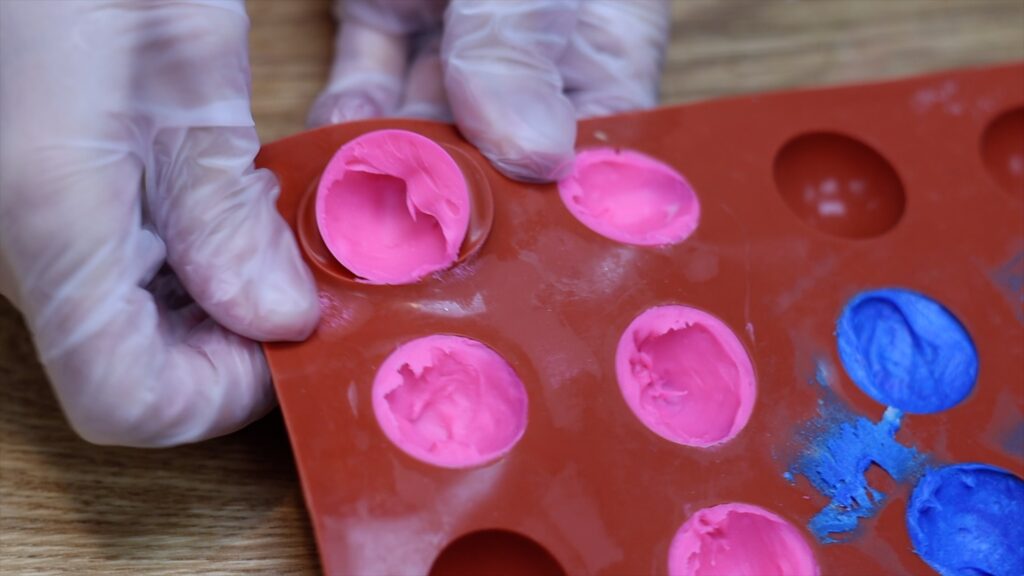
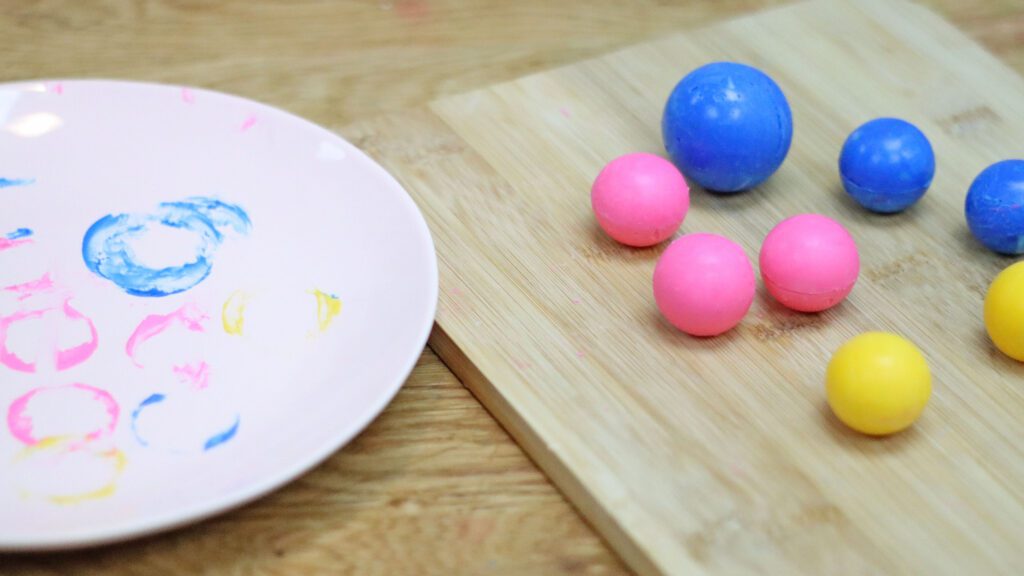
Put the molds in the fridge to chill the chocolate so that it hardens. Then pop the chocolate out of the mold by pulling the sides away from each hemisphere.
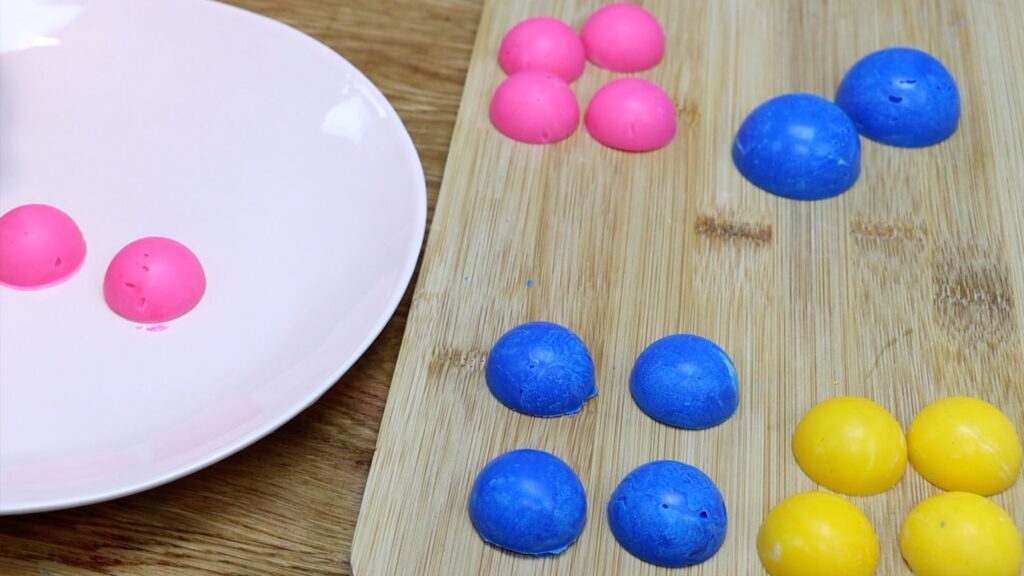
Hold a plate under hot running water to heat it and then dry it off. Place the chocolates on the plate to melt the edges.
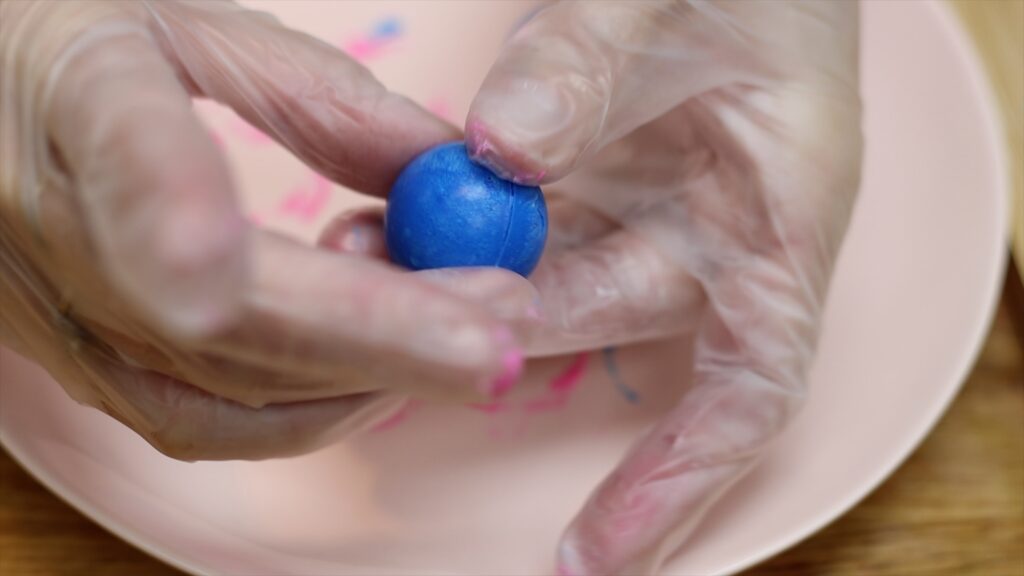
Then press them together to make spheres. It's best to wear gloves for this so that you don't leave fingerprints on the chocolate, which will dull it.
To attach the chocolates to the cake you can either use a dot of buttercream or melted chocolate. Both will set onto the cold cake and act as glue to stick the chocolates in place. Buttercream will be the most secure when it's cold so if the cake is going to be out of the fridge for more than 1 or 2 hours I would use chocolate instead.
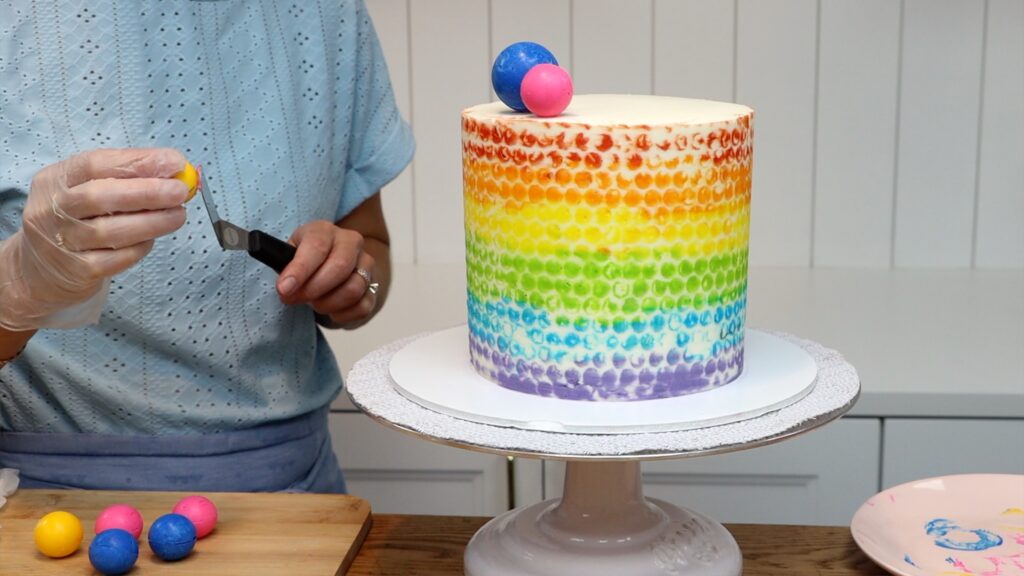
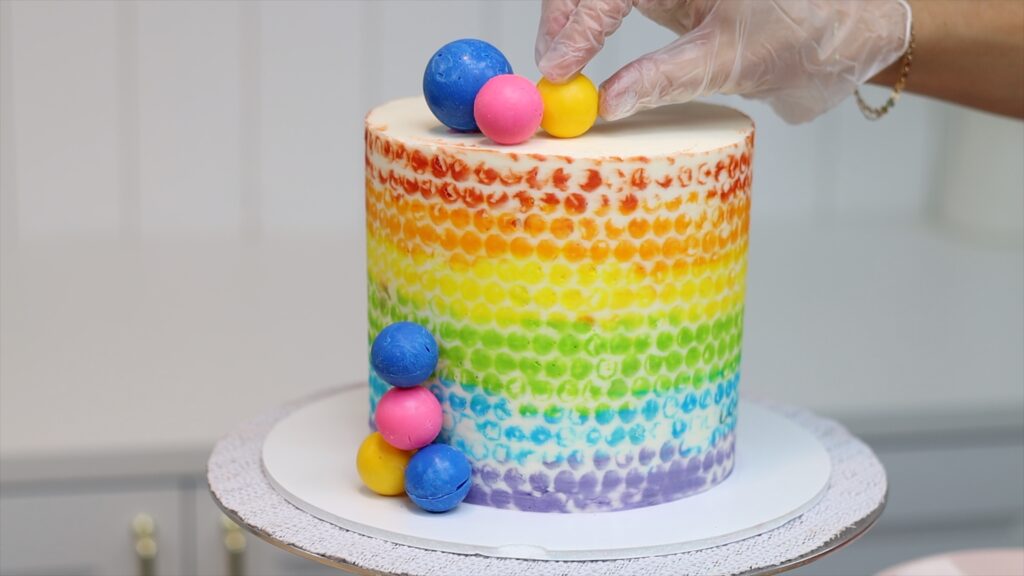
This would look great with the chocolate spheres in all of the colours of the rainbow frosting. I only have these oil-based colours so here they are!
This cake is so colourful and unique, both on the outside and the inside.

I hope you've learned some tips and techniques. Visit my cake school to learn more with courses and memberships to take your cakes to the next level.
You can also watch a video of this rainbow bubble wrap cake tutorial: