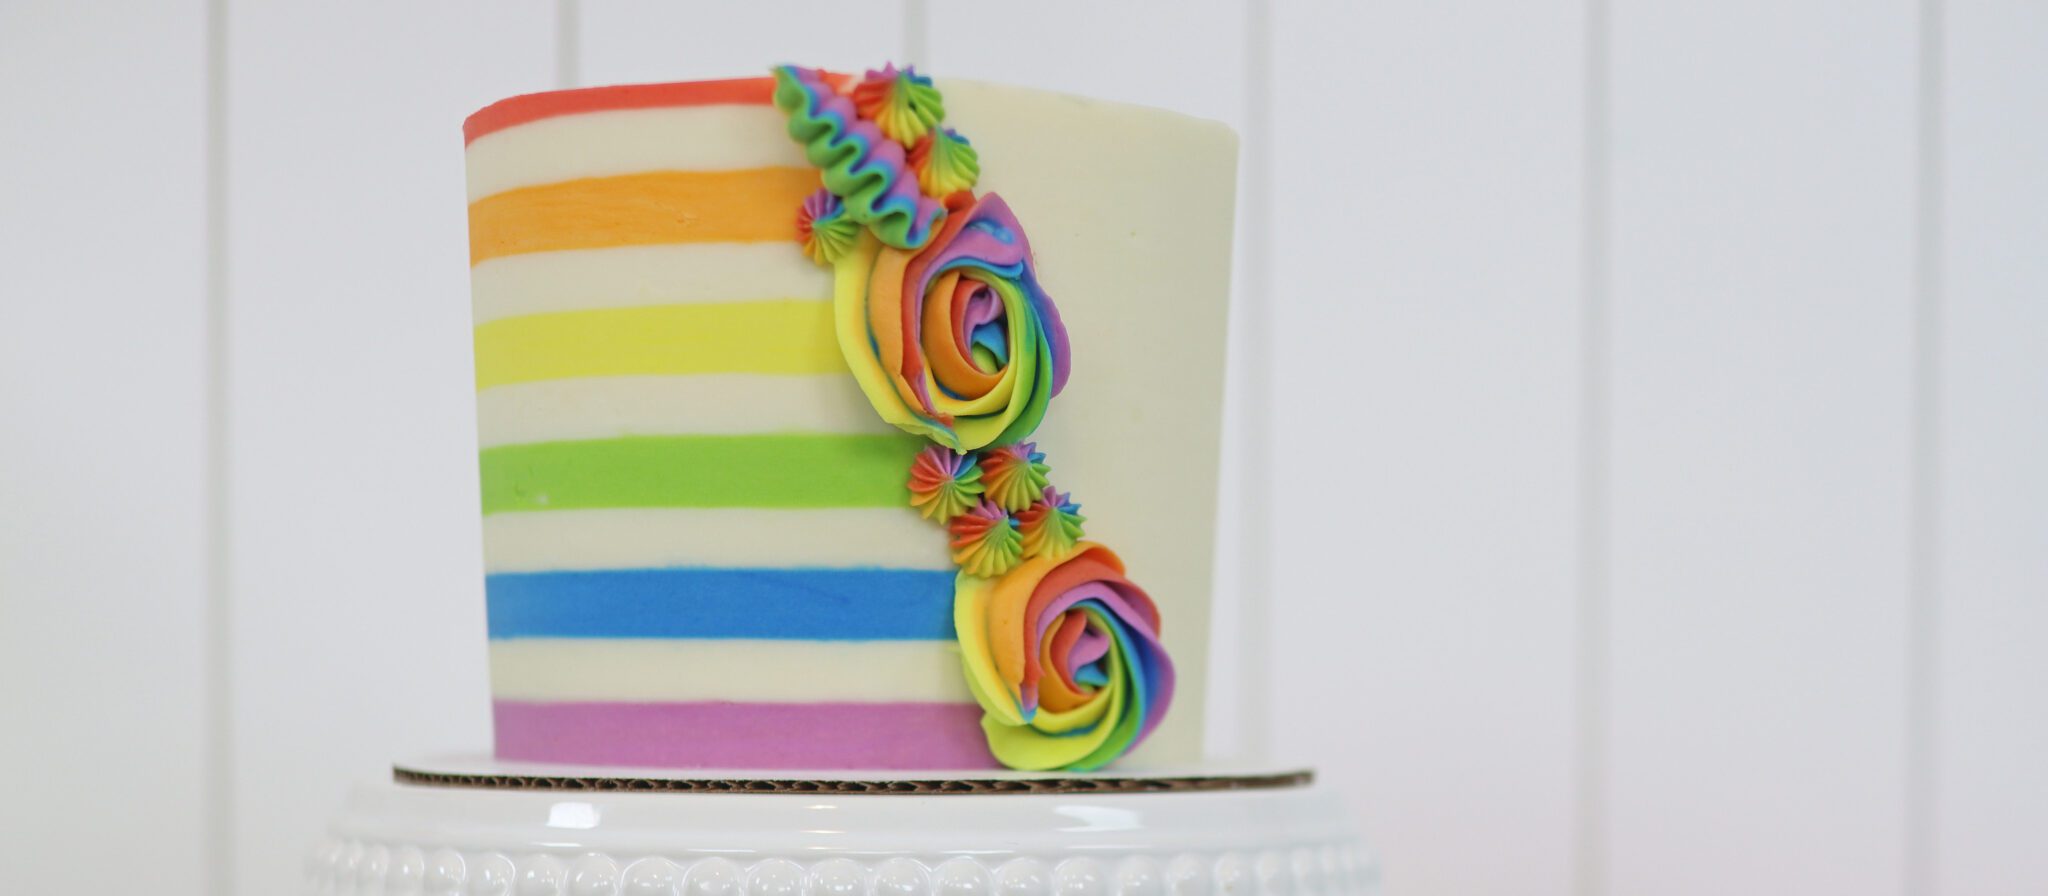
Let's decorate a half stripe cake with rainbow colours and optional gold and green shamrocks! This is a unique, eye-catching cake perfect for St Patrick’s day or any other rainbow themed celebration.
You can use any flavour for the cake layers but rainbow colours makes them more fun to cut into! To do that, I divided my Very Vanilla cake batter between five bowls. Add a drop of gel color to four of them, leaving the last bowl plain. Cut the ends off 5 piping bags and spoon the batter into them.
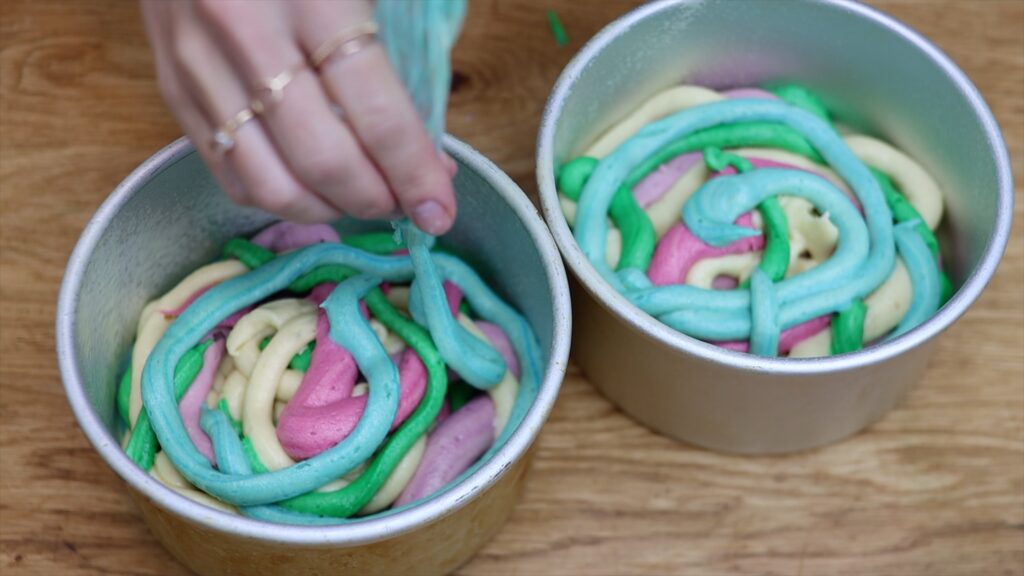
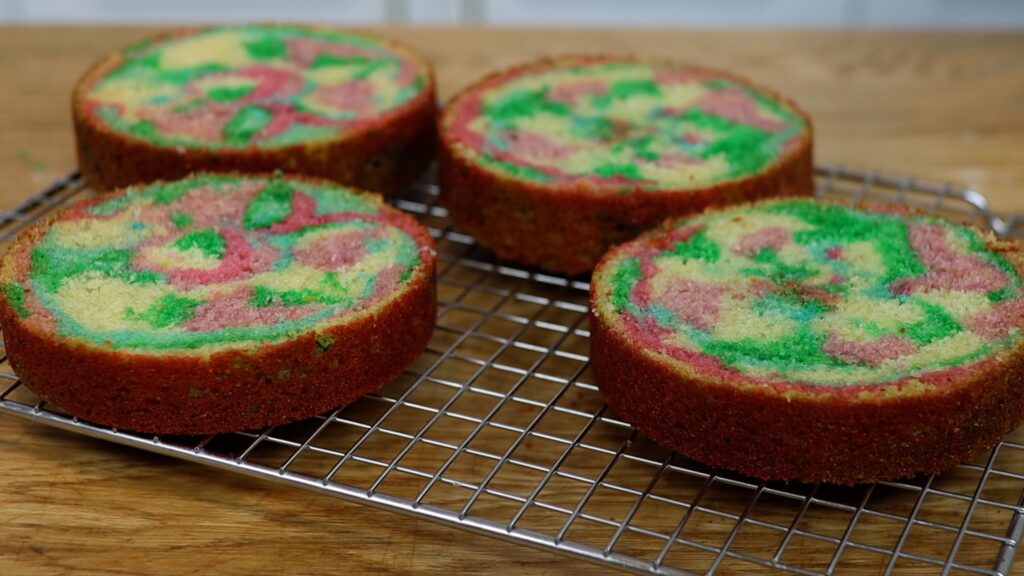
Then you can pipe the batter in squiggles to make a random, colourful pattern. Tap the pans so that the cakes are level before putting them in the oven. As they bake, the edges will darken like they always do but the insides will be bright and beautiful!
I like to chill my cake layers after they cool so that they’re less crumbly. This makes the next few steps much easier and neater. Thirty minutes in the freezer is enough time for them to firm up but they’ll come back to room temperature and get nice and soft again before you eat the cake.
Assemble your cake by alternating the cake layers with whatever filling you choose. Next, cover the cake in a crumb coat, which traps any crumbs that come off the cake. This is my 4 Minute Buttercream.

Piping the frosting onto the cake is quicker than spreading it straight on. Then spread the piped frosting around the cake and you’ll pull off fewer crumbs this way. Chill the crumb coated cake in the fridge for 30 minutes or the freezer for 15 minutes. This will set the crumb coat before adding your next layer of frosting.
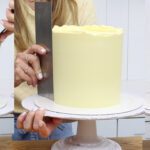
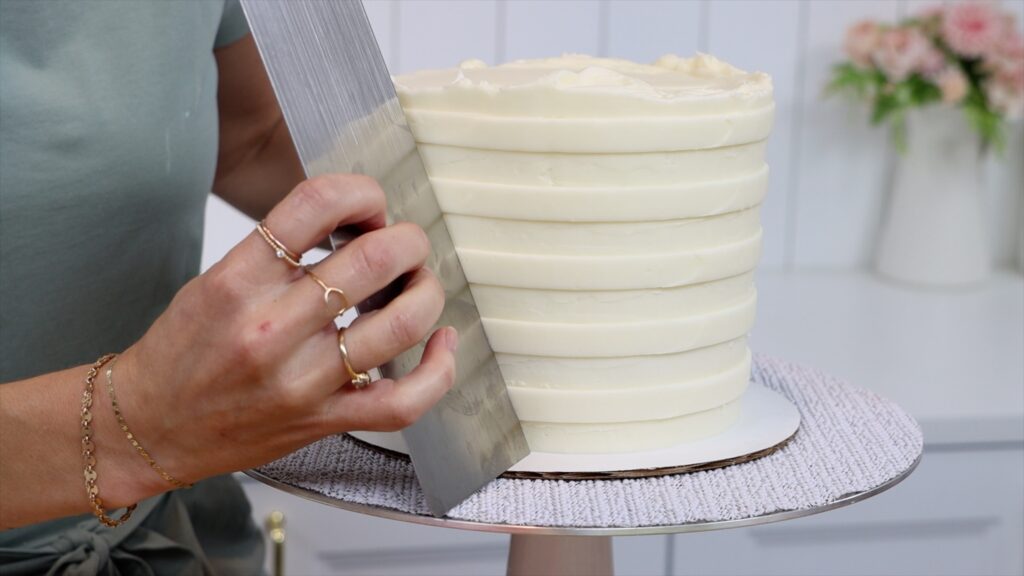
Spread another layer of frosting generously onto your cake. Scrape around the cake a few times with a cake comb so that the sides are straight and fairly smooth. Then switch to a striped cake comb. You need quite a thick layer of frosting for stripes, at least as thick as the grooves of your striped cake comb. If your frosting is too thin, the grooves on the comb will dig through this frosting and into the crumb coat.

Keep scraping until your stripe grooves are very neat, with smooth edges. Don’t worry about the top edge of the frosting yet. Put the cake in the freezer for 15 minutes to set these stripes and meanwhile, prepare the colours for the rest of the stripes.
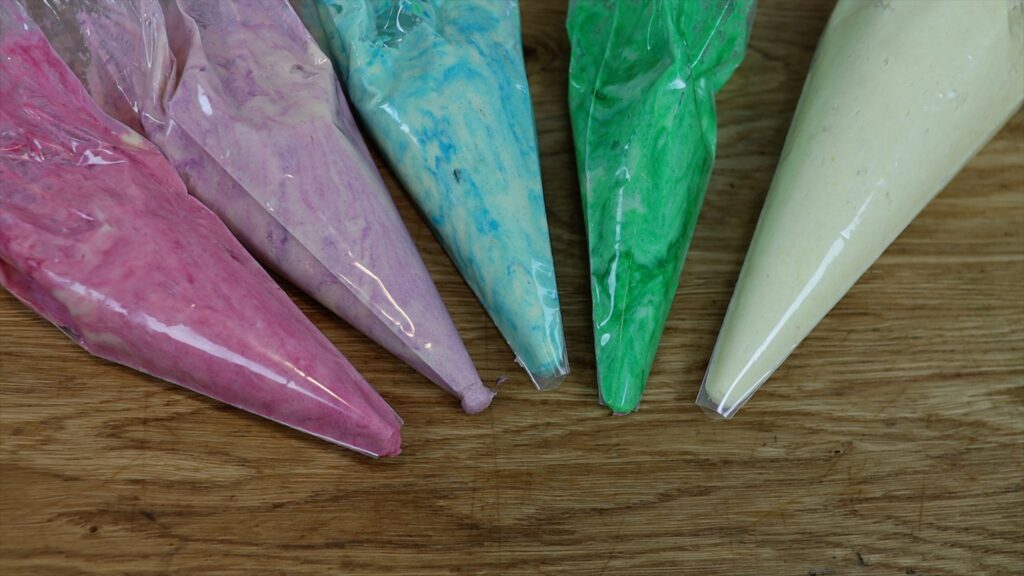
Here’s a hack for rainbow colours that you can mix in just one bowl without washing the bowl in between colours. Start with yellow and after scooping that out and into a piping bag you’ll continue in this order:
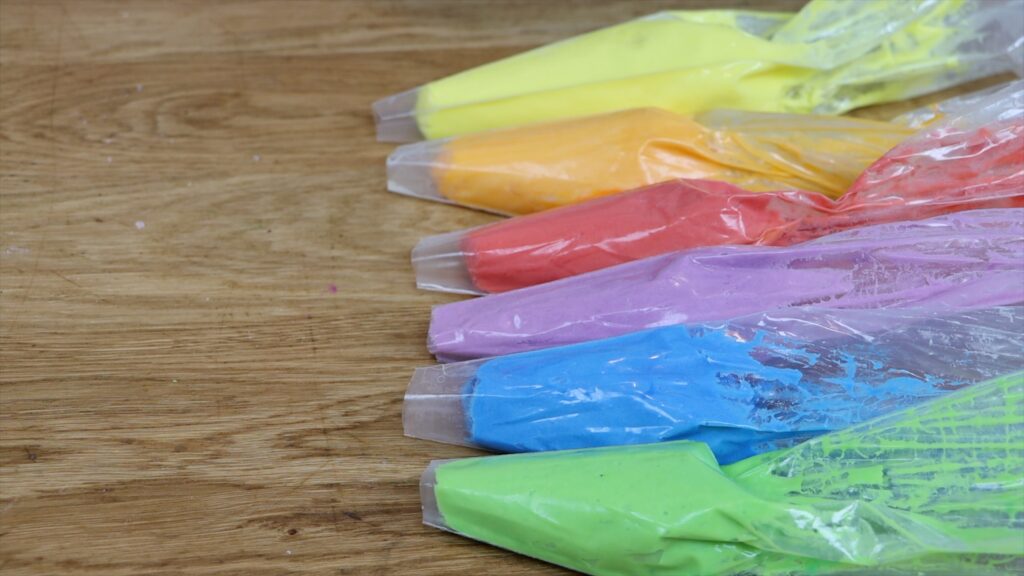
This obviously isn’t the order of the colours in the rainbow. The reason for this order is that the leftovers of each colour in the bowl can blend together with the next colour without muddying that colour. For example, leftover orange mixed into red is fine and leftover red mixed into purple is fine. You'll end up with bright colours even though they’ve all been prepare in the same dirty bowl! (Well, not dirty, just not washed and dried in between colours!) To make half-stripes you’ll need a piping bag with plain white buttercream in it, too.
Take your cake out of the freezer and use your cake comb to score a diagonal line into the cake. Spin the cake around and score another one on the other side of the cake. These lines will divide the cake in half.
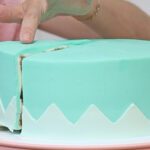
Pipe the white buttercream into the striped grooves on one half, between the two scored lines.
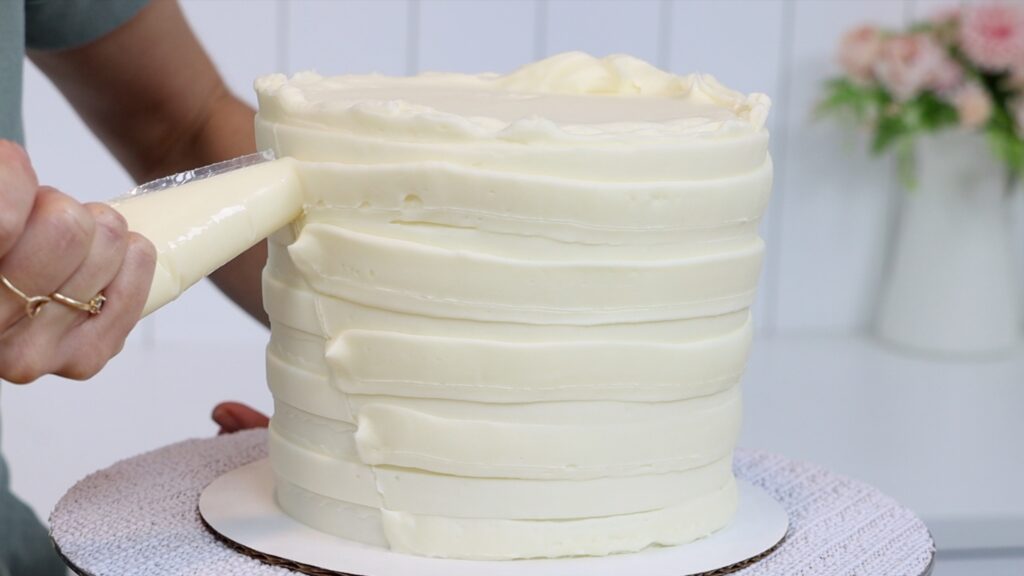
Then scrape around the cake with a straight edged cake comb. You'll push this buttercream all the way into the grooves to fill them. You'll also take off the excess with your comb. Scrape in both directions so that the ends of the stripes don’t drag into the other half the cake. If there are any indents or air pockets, spread more buttercream over those areas and scrape again. Scrape until you’ve left a smooth surface behind. The stripes will blend into each other to make a solid white half of the cake.
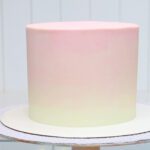
Now use your rainbow colours on the other half. Follow the same technique of piping and then scraping, scraping, scraping, in both directions.
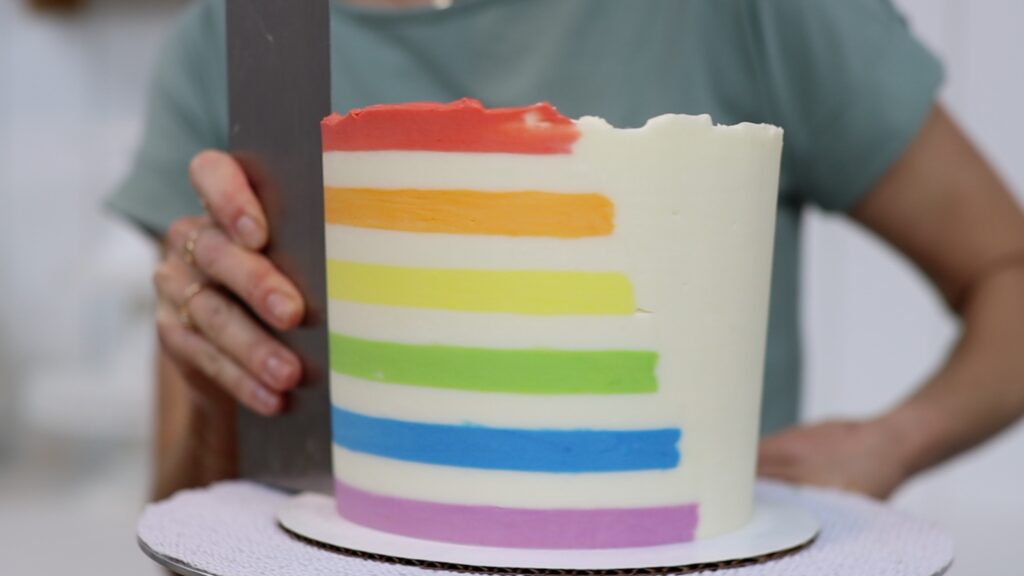
When the stripes are smooth they'll lie flat against the white stripes, as if they're painted onto the cake.
Put the cake back into the freezer for 2 minutes while you fill a glass with hot water. Dip a sharp knife into the hot water and take your cake out of the freezer. Cut around the top edge to take off the buttercream that’s sticking up, leaving a smooth, straight, sharp edge.
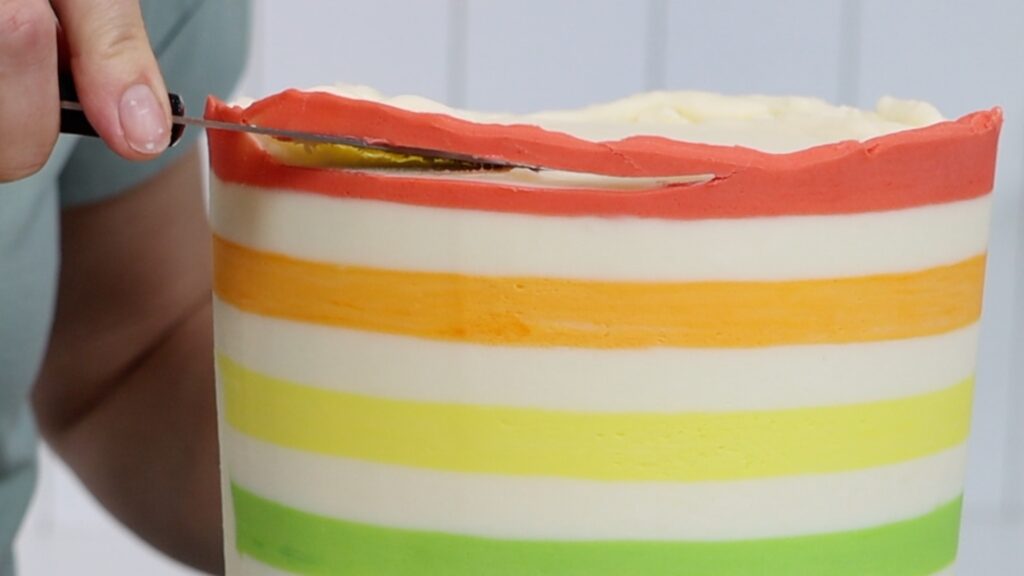
My top stripe is too thin. I should have made my filling thicker to add some height to the cake or baked another cake layer. Oh well!
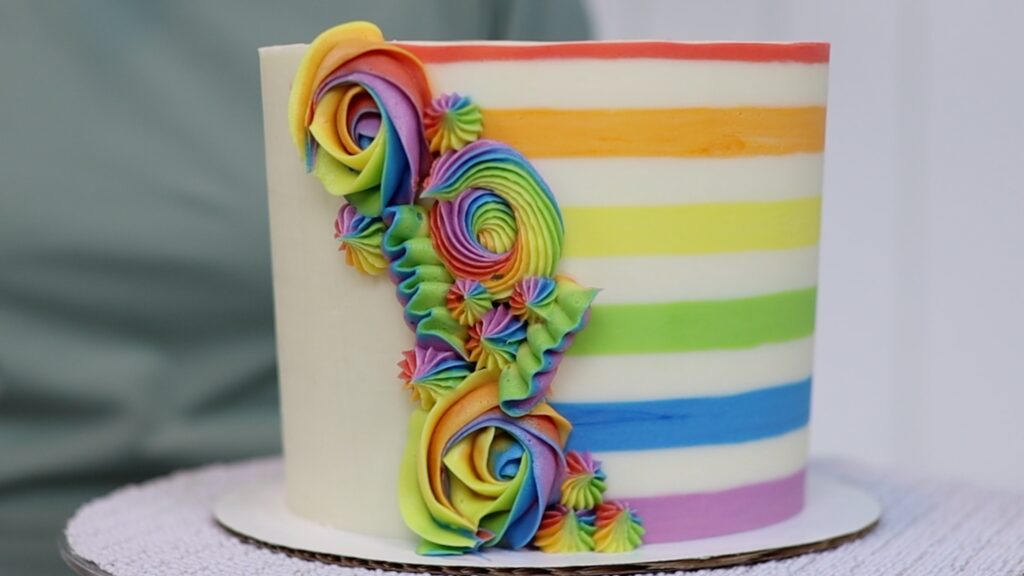
To cover up the join of the two halves of the cake, spread out a piece of cling film on the counter. Pipe the leftovers of your coloured buttercream onto it in rainbow order.
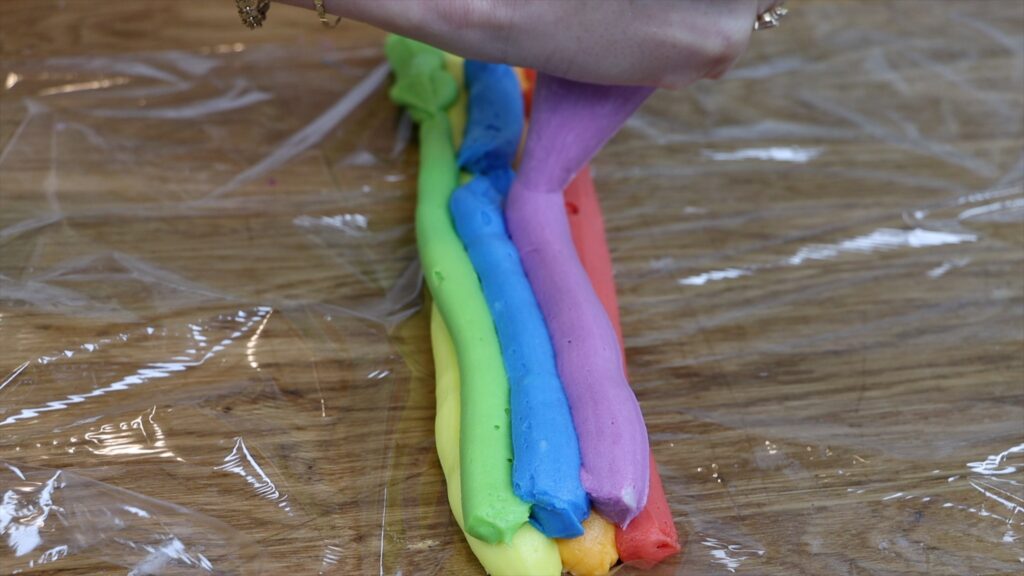
Roll the colours tightly to make a log and cut one end off so that the colours are right up against the edge.
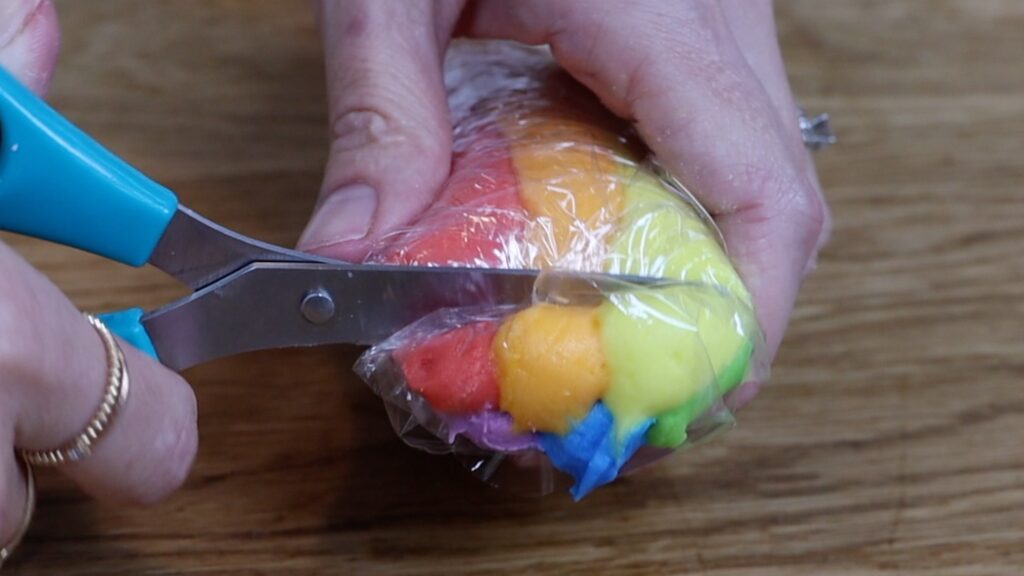
If you want to use several piping tips, you’ll need a coupler in your piping bag. If not, drop your chosen piping tip down into the piping bag. Now lower the cut side of the log of rainbow buttercream down into the piping bag.
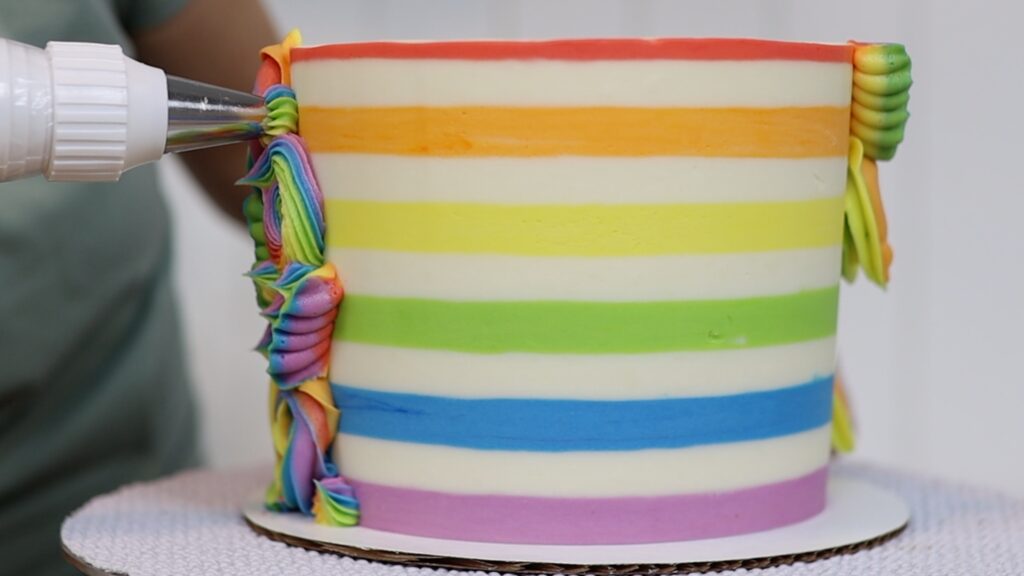
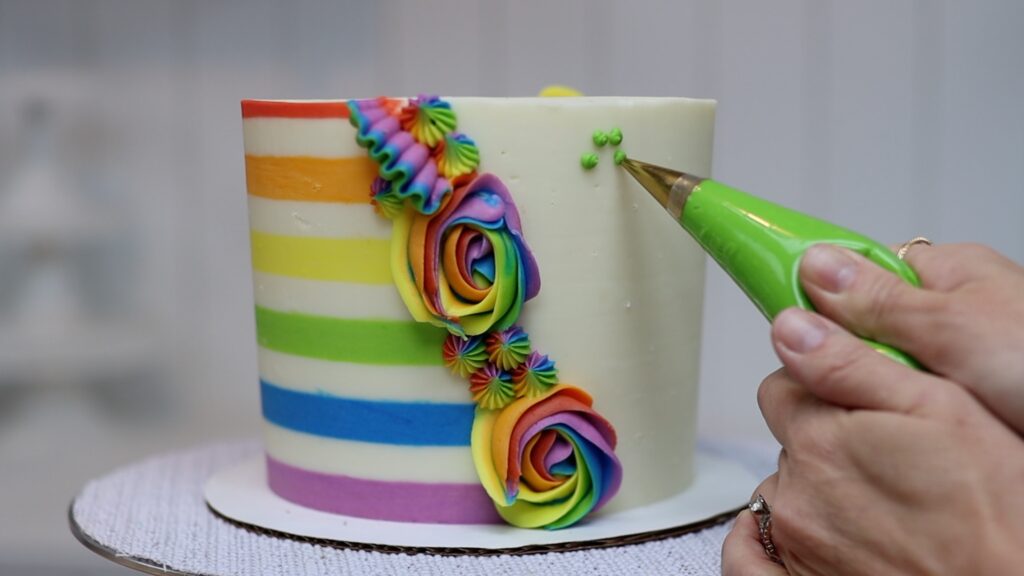
If you’re using a coupler you can use various piping tips to add different textures. I’m starting with these swirls or spirals which I’m piping with a 1M star tip:
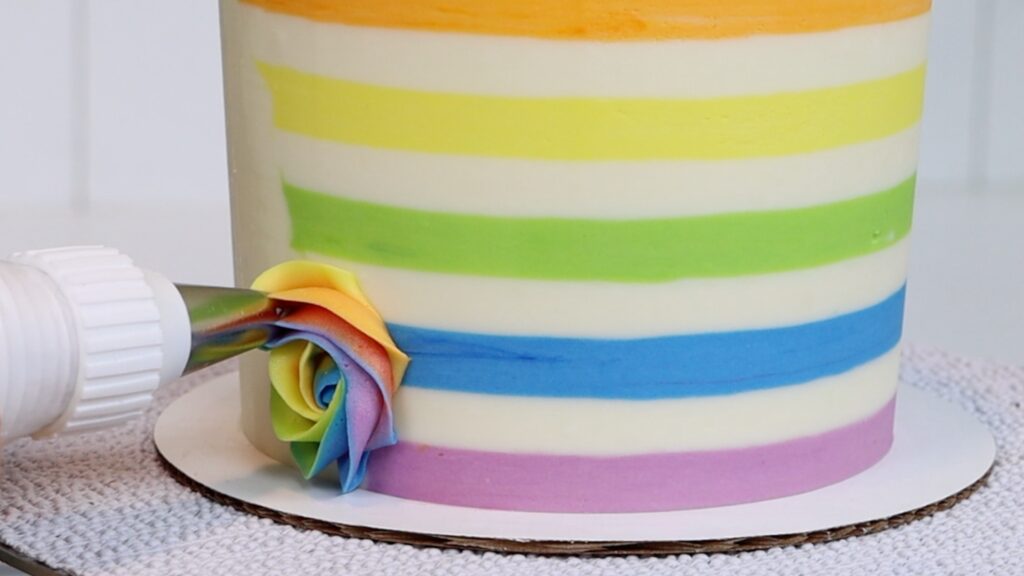
Then unscrew the coupler ring and switch to another piping tip and screw that on. I’m piping these ruffly ribbons next, with a #125 petal tip:
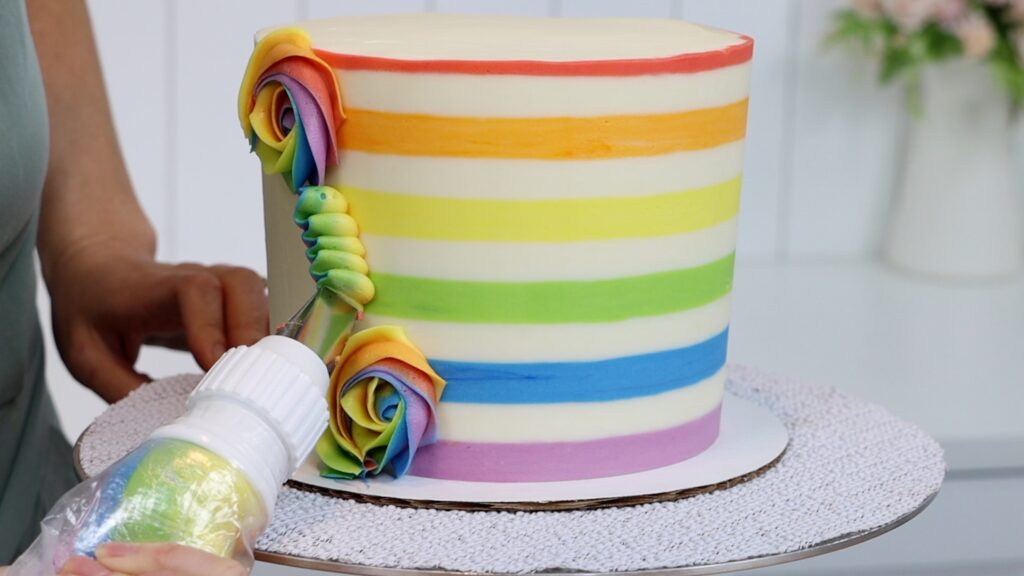
Rosettes are great to add last to fill in any gaps. This is a 4B open star tip. They can also be used to widen the band of piping anywhere you think it needs it.
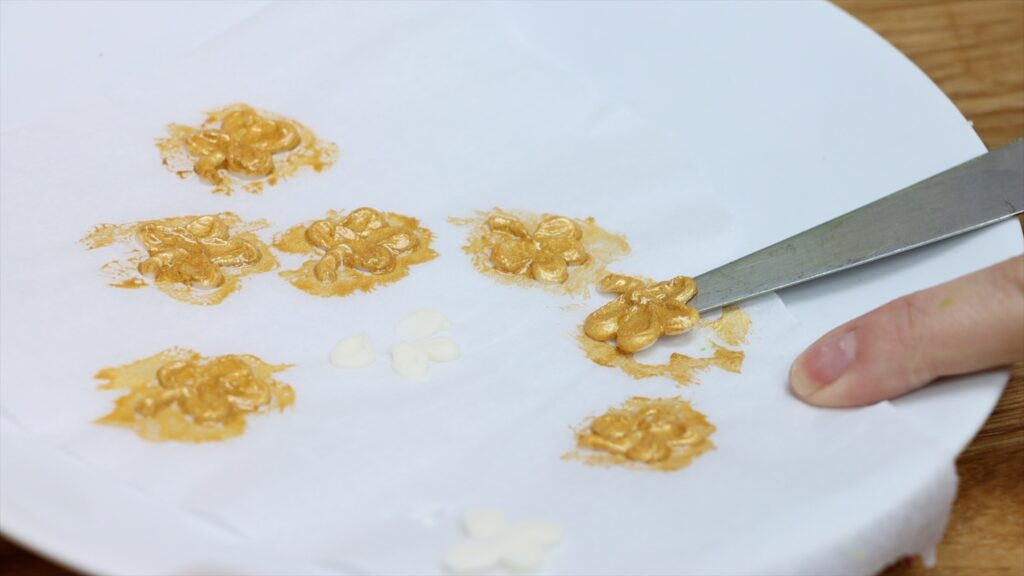
Stop at this point for a rainbow cake or for St Patrick's Day, add these fun shamrocks! Put the cake in the fridge and pipe a few shamrocks onto a piece of parchment paper or wax paper. Pipe a dot using a small round tip like a #4 and drag with your piping tip to make a teardrop shape. You can spread the dot gently with an
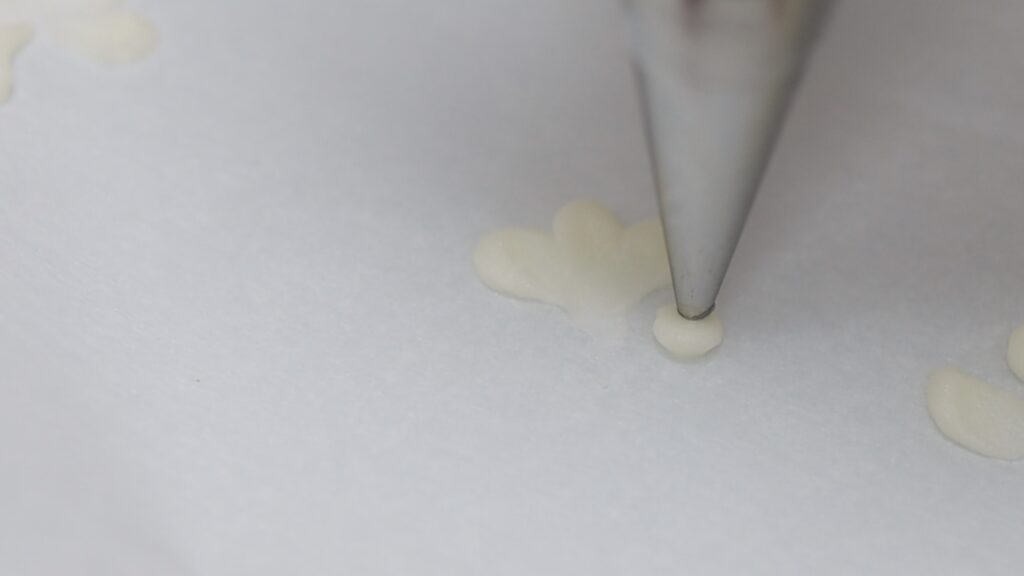
Squeeze the dot out for a few moments to make it bulge. This will give you more frosting to drag out next. Add a stem with the same piping tip.
After finishing the cake I googled shamrocks and clovers to find out the difference and wouldn’t you know, shamrocks are only supposed to have three leaves! If you make three-leaf shamrocks yours will be even quicker to pipe, with one less leaf on each!
Piping onto paper is great practice before piping onto the side of the cake, which is a bit trickier! And you’ll turn these into gold shamrocks in a few minutes.
Put these into the freezer while you make some gold paint. You can do this by mixing gold luster dust with a few drops of any clear alcohol like vodka, or a clear flavor extract like clear vanilla. You can also buy edible gold paint in bottles instead.

Take the frozen shamrocks out of the freezer and paint each one. Use little dabbing motions for the thickest coverage which will give you the strongest, most metallic gold colour. Put these back into the freezer for a few minutes to set the colour.
Measure a piece of parchment paper or wax paper so it will wrap around the white half of the cake. Marking the diagonal onto it will make it easier, so that your piping won’t get in the way. Cut those diagonal ends off now.
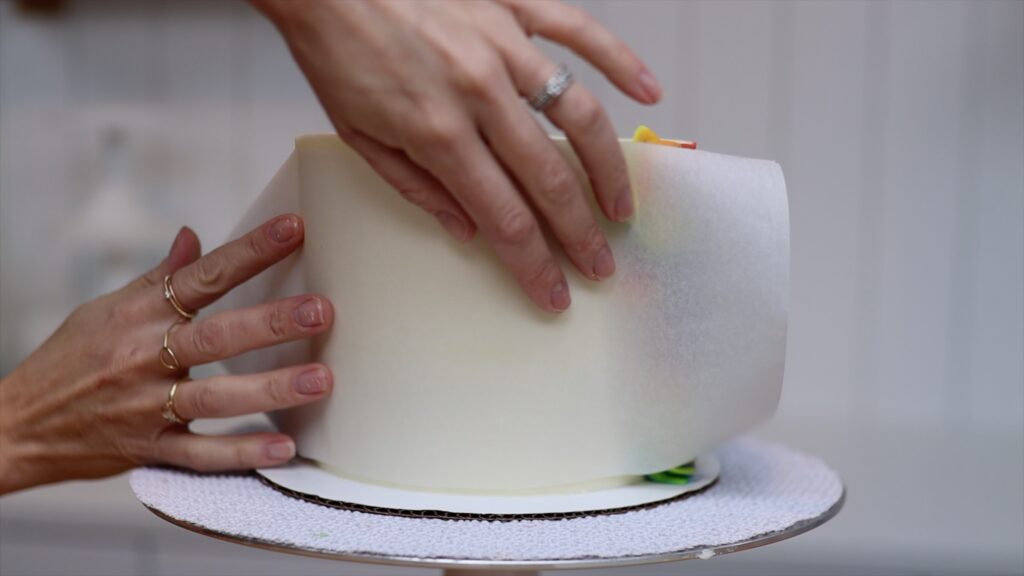
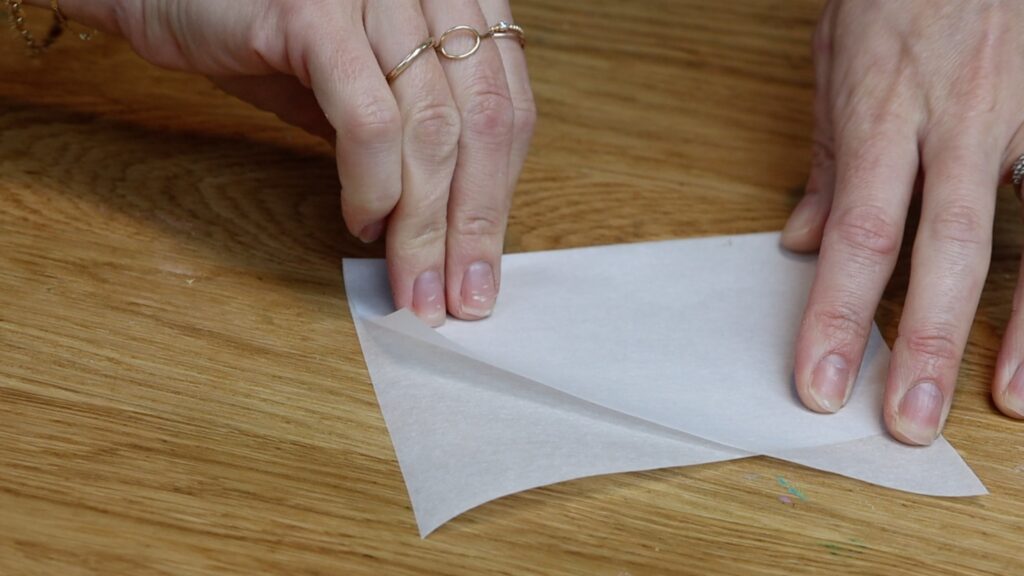
Fold the paper in half and in half again and again and again. Then unfold it and do the same in the other direction to make a grid.
Take your cake out of the fridge and the piping should have set, so you won’t damage it. Wrap your paper grid around the cake and pin it in place.
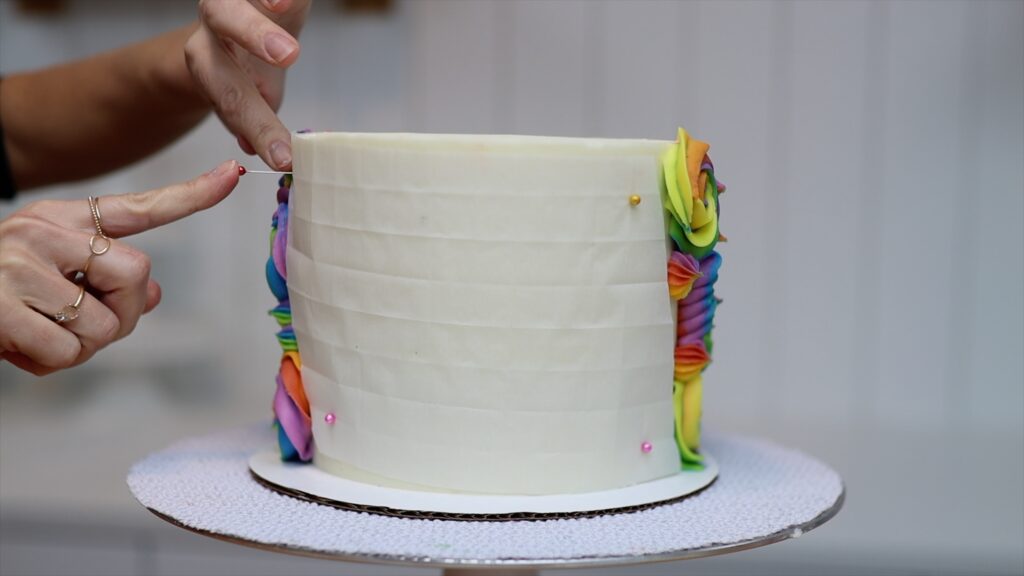
Then use another pin to poke through every other join in the grid along one row. For the next row, poke through every OTHER other join or crease, so that the places you’re poking are not one above the other. These dots you’re poking will guide you as you pipe your shamrocks.
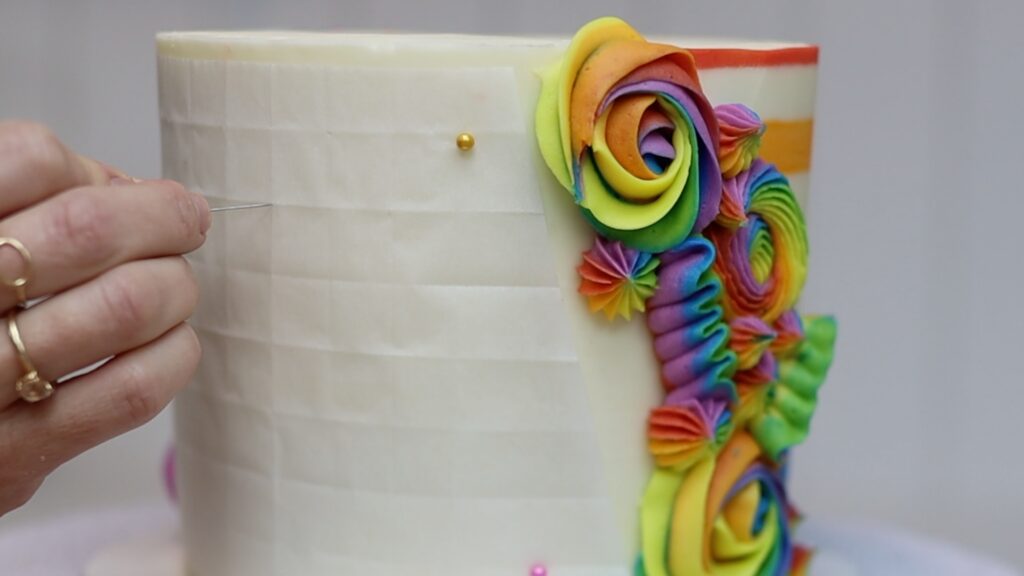
Unpin the paper grid and peel it off the cake. You should be able to see the holes you poked into the frosting. Next, pipe pipe green shamrocks onto the cake using the same technique as you did onto paper earlier. Cover all of the dots you poked into the cake except for one diagonal, which you'll cover with gold shamrocks next.
Pipe a tiny white dot of frosting onto those poked dots along the empty diagonal. Then pick up a gold shamrock by sliding an
Press the frozen gold shamrock gently into the buttercream dot you've just piped. Continue along that diagonal to fill it with the gold shamrocks. Work quickly because as the buttercream shamrocks thaw, they'll get soft and you won't be able to pick them up.
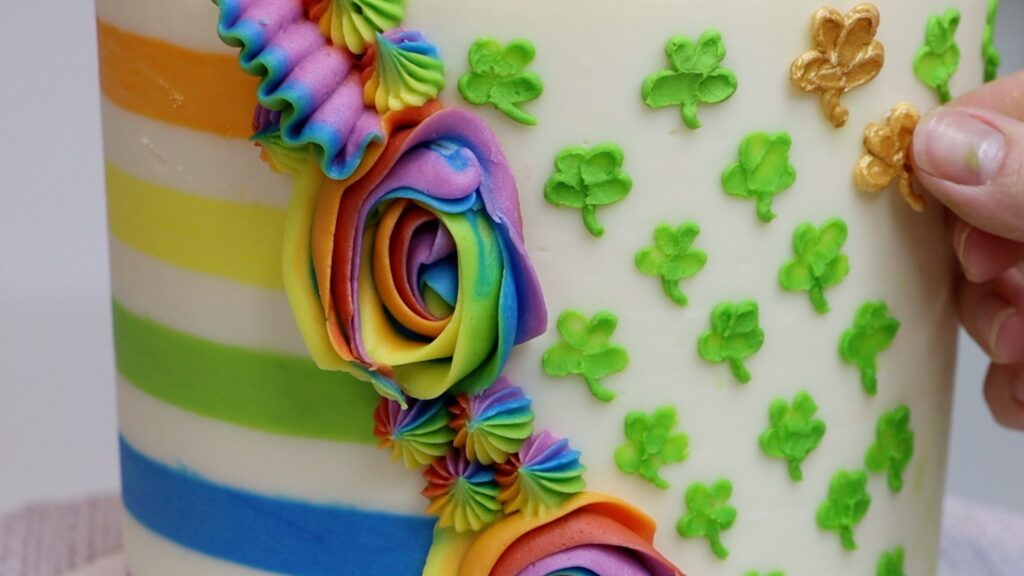
I love adding edible gold to cakes because it’s so expected!
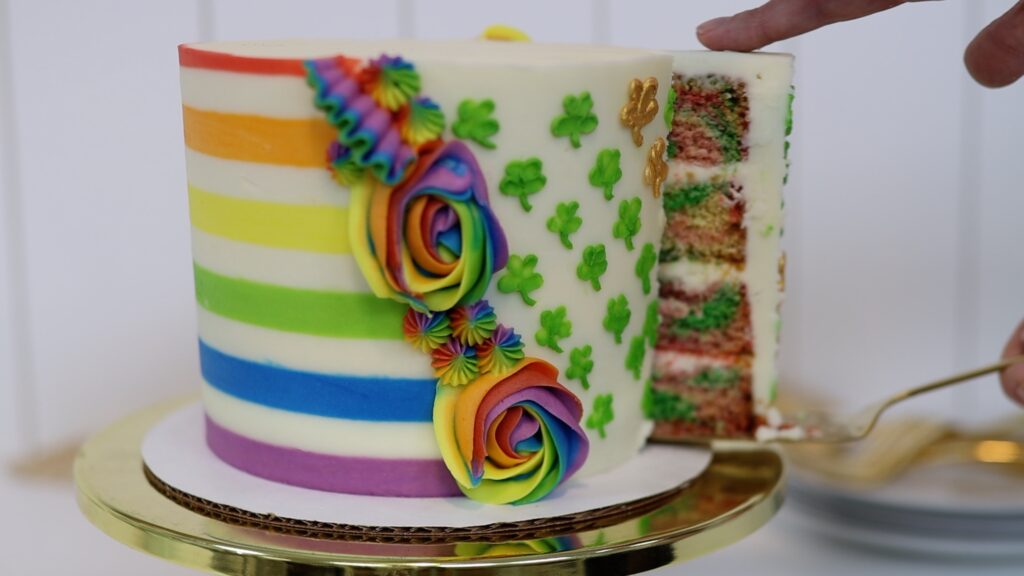
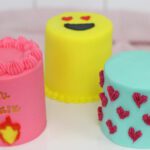
This is such a fun cake and the diagonal divide is so eye-catching! I teach hundreds of cake decorating techniques and designs like this one on my cake school. You can take individual courses or choose a membership for access to all of my courses, live sessions, and more!
You can also watch a video of this tutorial on how to make a rainbow half stripe cake: