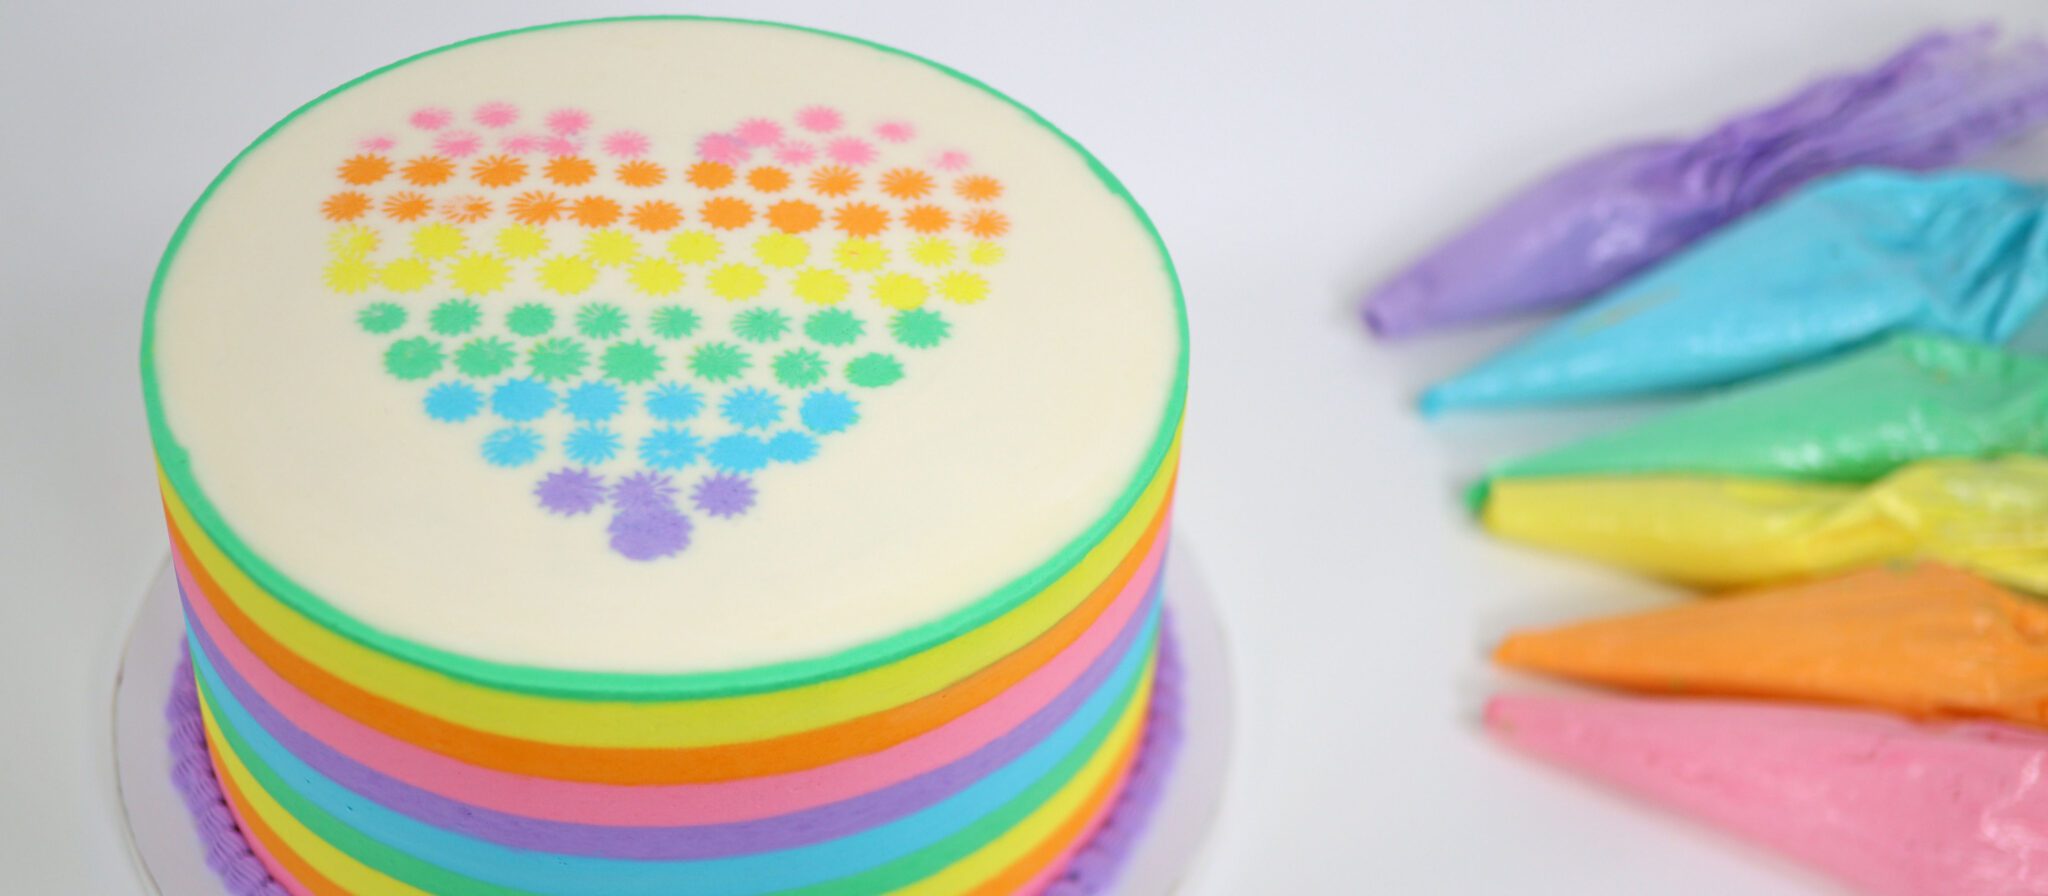
In this tutorial I'm going to show you how to mix rainbow colours using just one bowl, how to create a completely flat rainbow heart design on top of the cake and how to make perfectly neat rainbow striped frosting.
Start by assembling your cake. Alternate cake layers and filling using any recipe you like. I'm using my Perfect Chocolate Cake and these are huge 10 inch cake layers. I'm filling and frosting the cake with my 4 Minute Buttercream. Cover the cake in a crumb coat, which is a thin layer of frosting to give the cake a neat shape and trap any crumbs. I like to pipe it on because it pulls off fewer crumbs but you can spread it straight on instead if you like.
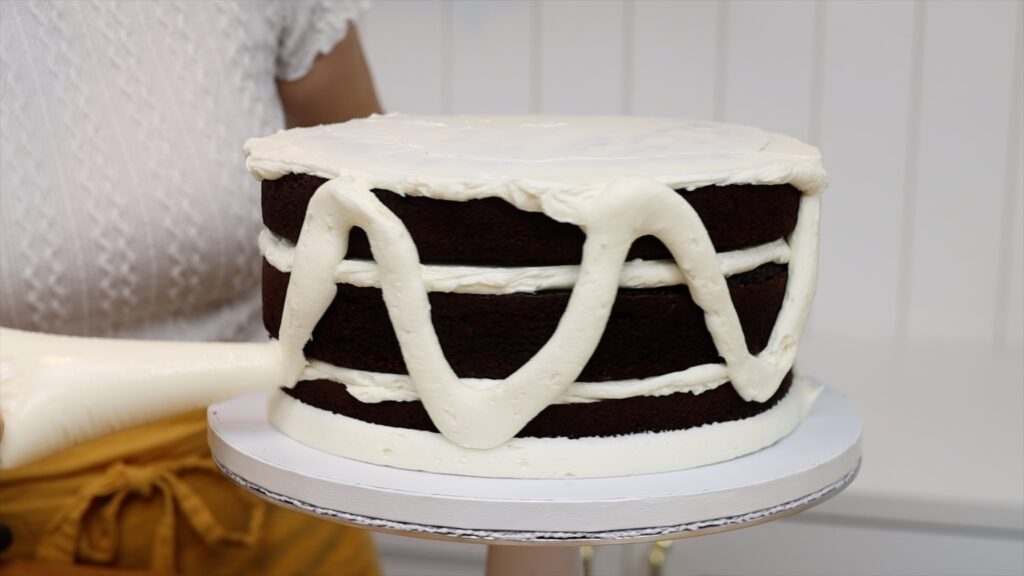
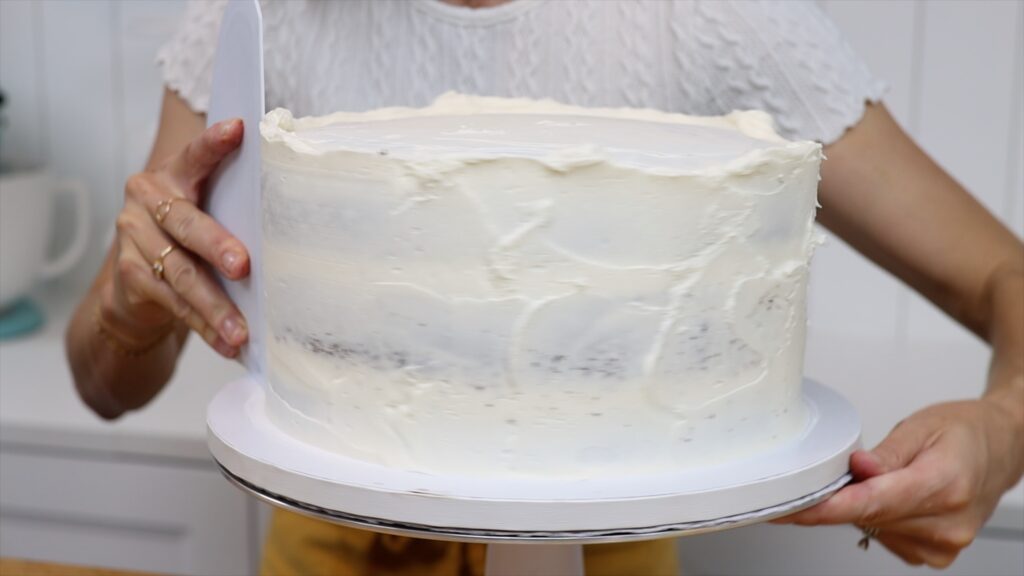
The important thing here is to cover up the entire cake. This crumb coat doesn't have to be super smooth but you don't want there to be any exposed cake. Put the cake into the fridge for 30 minutes or the freezer for 15 minutes to set this crumb coat.
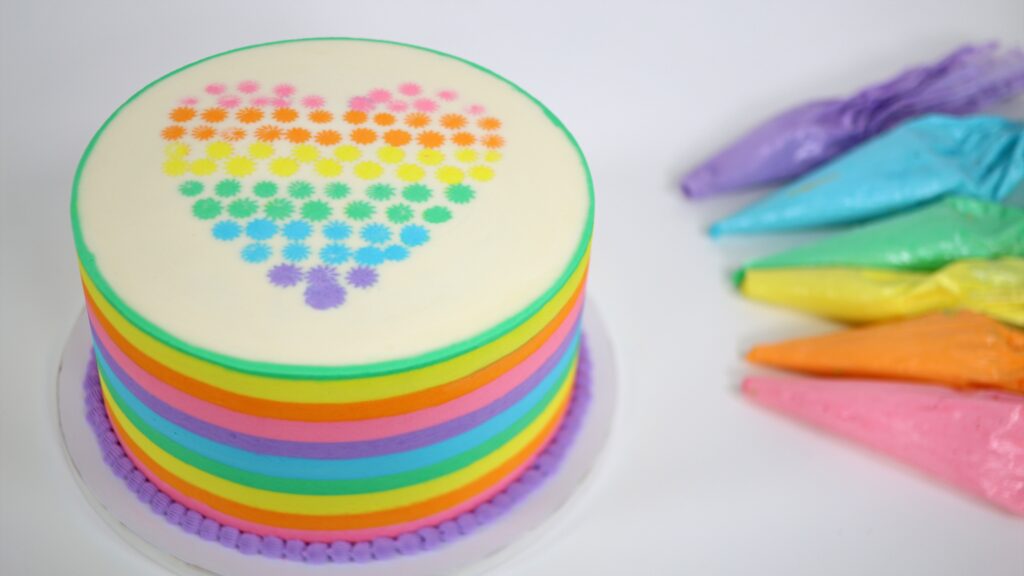
Now let's tint the colours for the rainbow design. You'll need a different piping bag for every colour that you use. The easiest and quickest way to do this is using just one bowl. Put some plain white buttercream into your bowl and add yellow first. I know we're not going in rainbow order but you'll see why in a second.
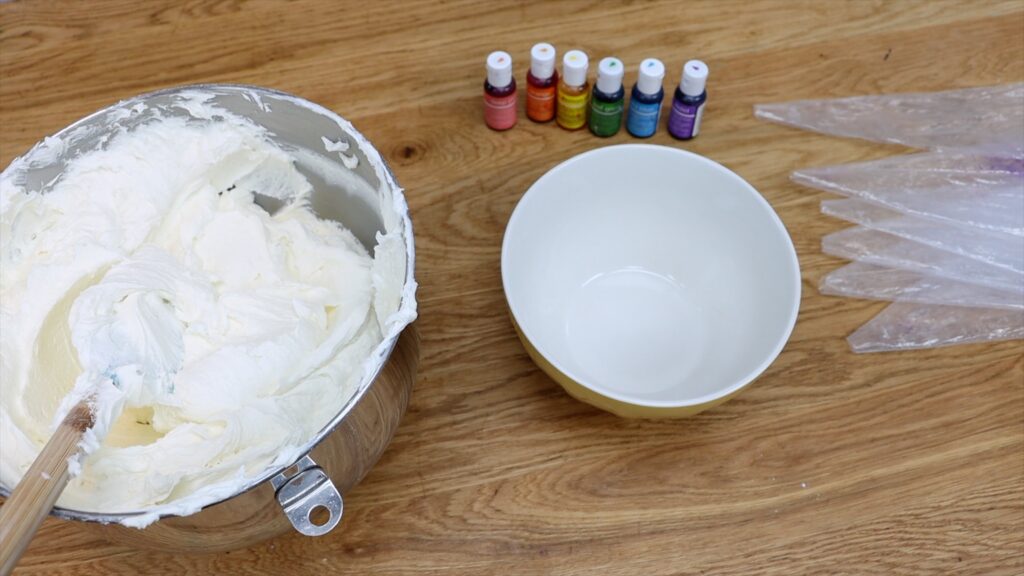
Mix your yellow buttercream and spoon it into a piping bag with no piping tip. I like to fold over the top of the piping bag as I'm spooning the buttercream in so it's doesn't get all over my hands when I'm piping later. Now mix orange in the same bowl, stirring to incorporate all of the leftover yellow frosting. This is much quicker than washing and drying the bowl first. Scoop up the orange buttercream and put that into another piping bag with no piping tip.
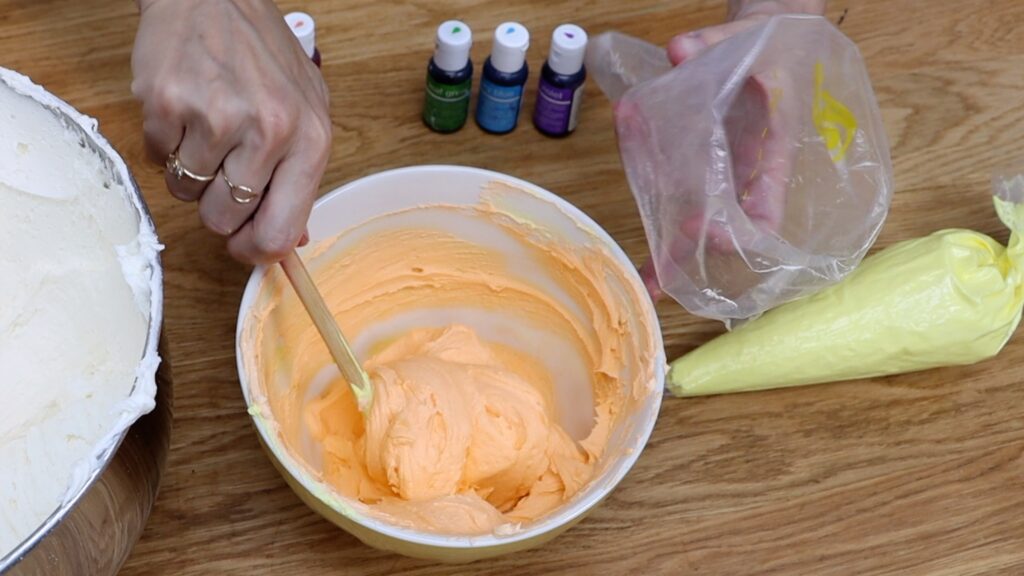
Now mix pink in the same bowl again, incorporating any leftover orange buttercream. Next do purple and then blue and finally green. The reason for doing it in this order is that each of the previous colours blends really nicely with the next colour so it won't dirty or muddy your colours. I'm making pastel colours but this works the same way for bright rainbow colours.
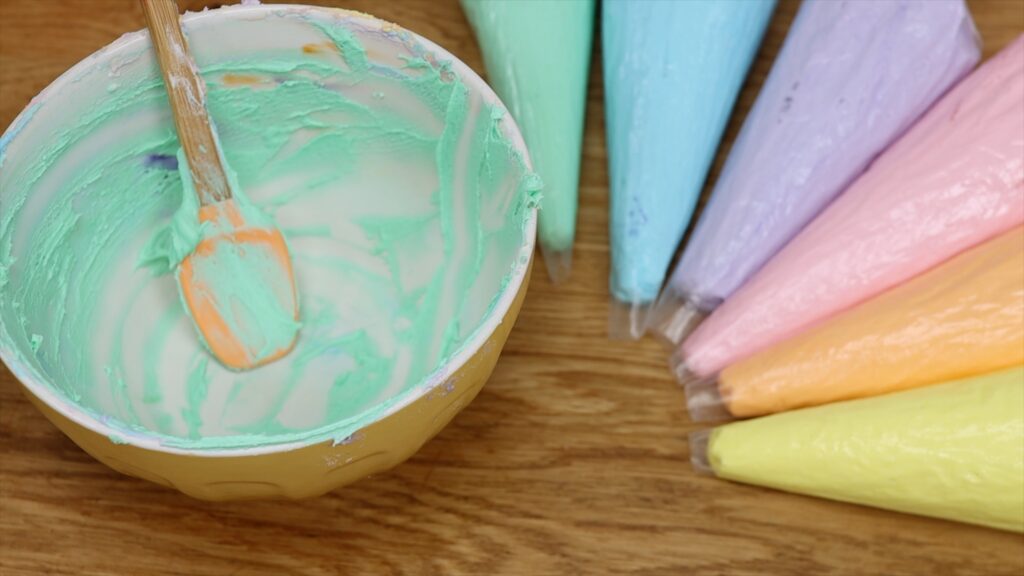
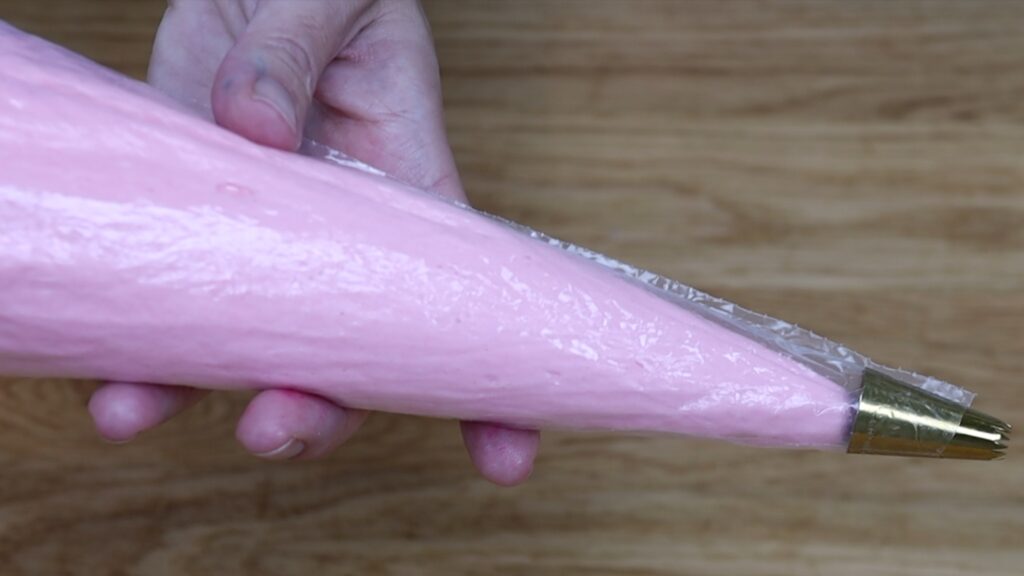
Make the rainbow heart design on the top of the cake before doing the stripes. You'll need an open star piping tip for this, for example a #32. To avoid using couplers or multiple piping tips, drop this tip into another piping bag. Then one by one you'll use the colours that you prepared inside this piping bag.
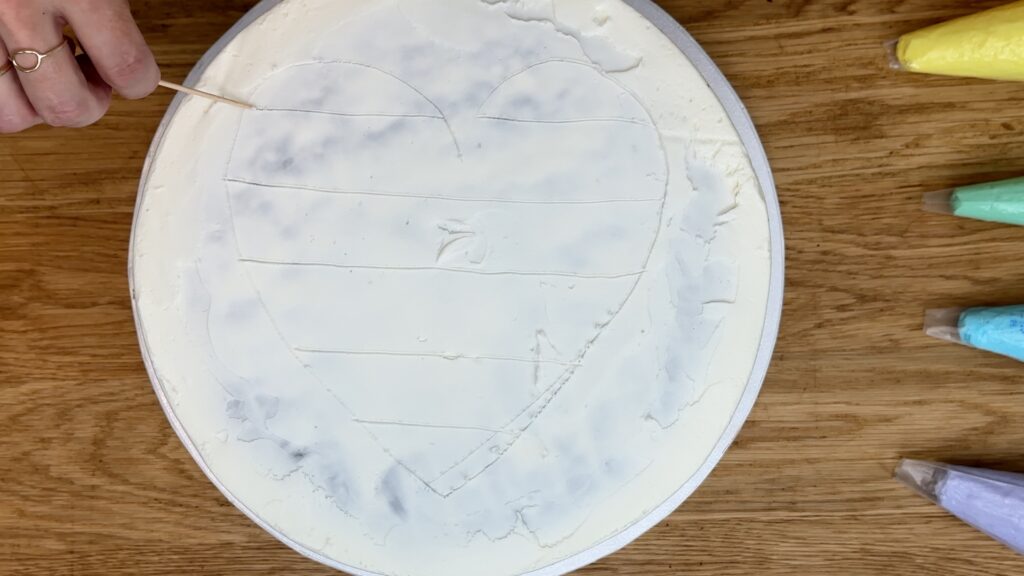
Take your cake out of the fridge or freezer when the crumb coat has set. The frosting should be very firm and that means you won't damage it during this process. Use a toothpick to draw a heart onto the top of the cake. Divide it into sections to match the number of colours you're using. I've made six rainbow colours so I'm dividing my heart into six equal sections. The sections will guide you as you pipe.
Starting at the top of the heart, pipe rosettes to fill in that first section. Try to space them evenly apart. Pipe right up to the edges of the section outline so that the shape is really clear.
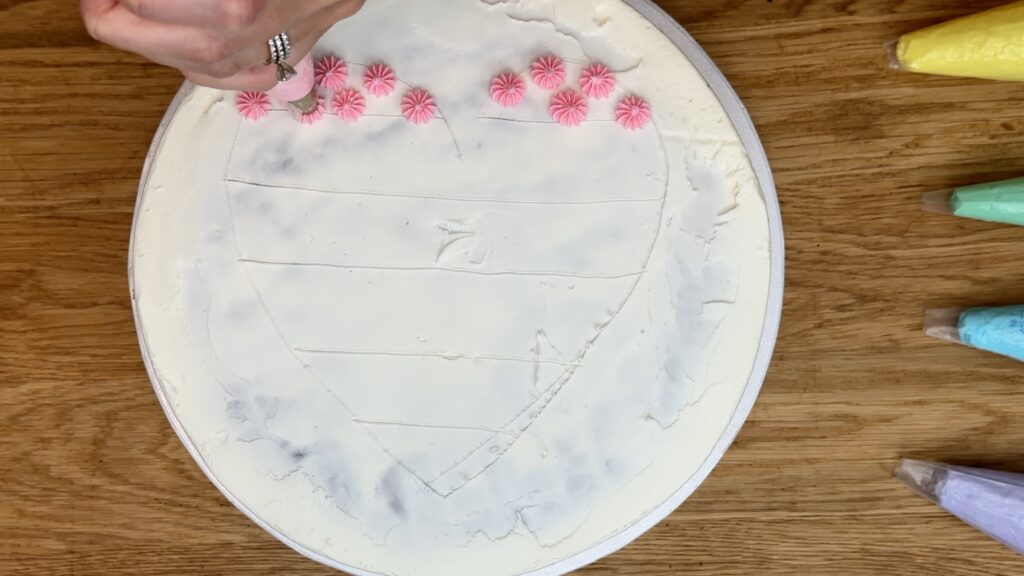
When you finish with the first colour, pull it out of the piping bag. Put the next piping bag in and squeeze a little bit of buttercream out into a bowl. This gets rid of the very last bit of the previous colours. When you see the next colour coming out, it's ready to use!
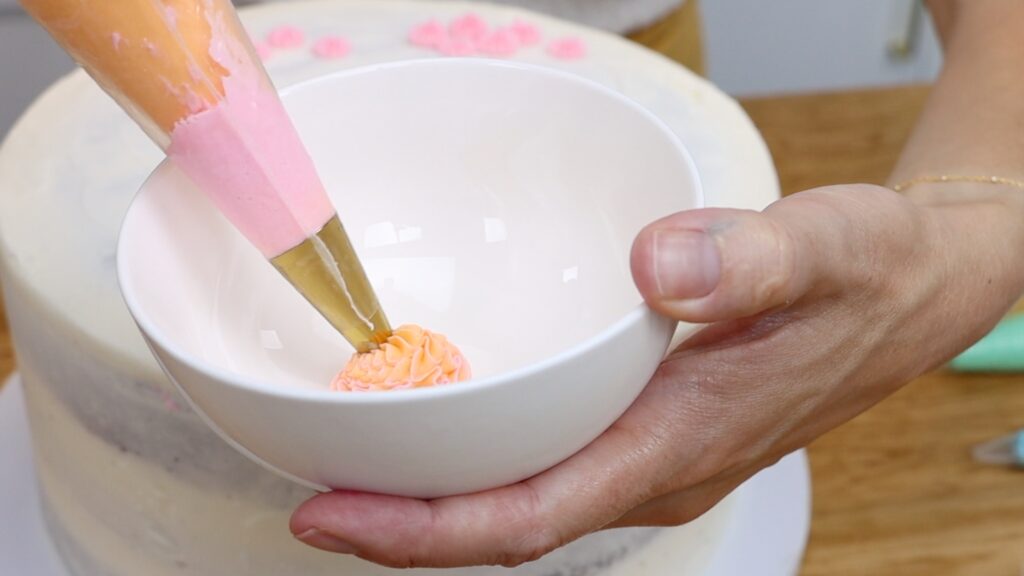
Now pipe onto the next section of the cake. Take the orange out, put the yellow in and squeeze a little bit of buttercream out until you see the yellow coming through. Repeat this process to complete the heart.
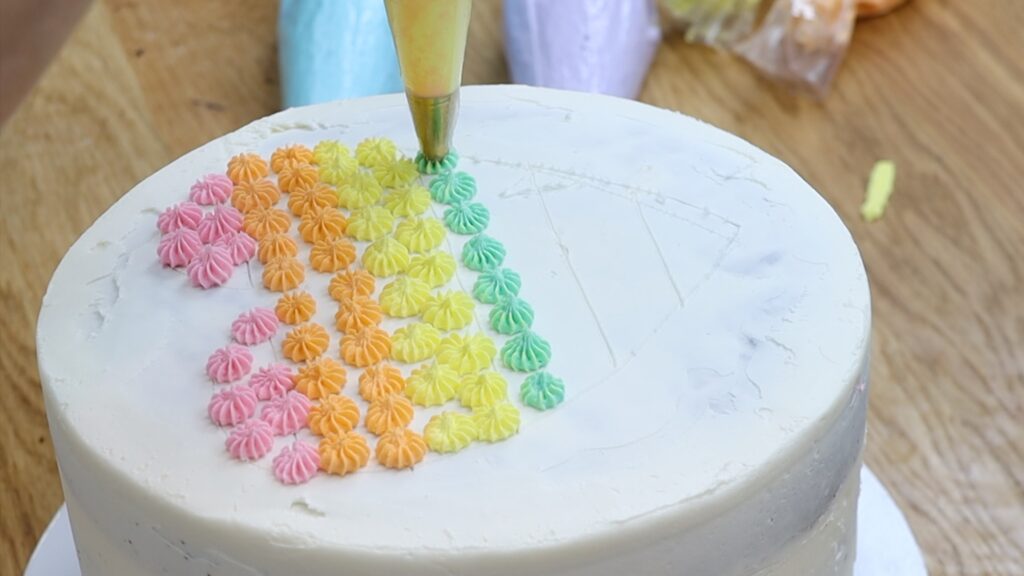
Of course, if you have lots of different piping tips you want to use that's fine. You could use couplers in the original piping bags but this is an easy way to do this using minimal tools.
Next, put the cake in the freezer for 15 minutes. The reason for this is to set the heart design you've just piped. You need the rosettes to hold their shape for the next step. Take the cake out of the freezer and pipe buttercream to cover the top of the cake. Piping it is ideal so that you don't damage those piped colourful details.
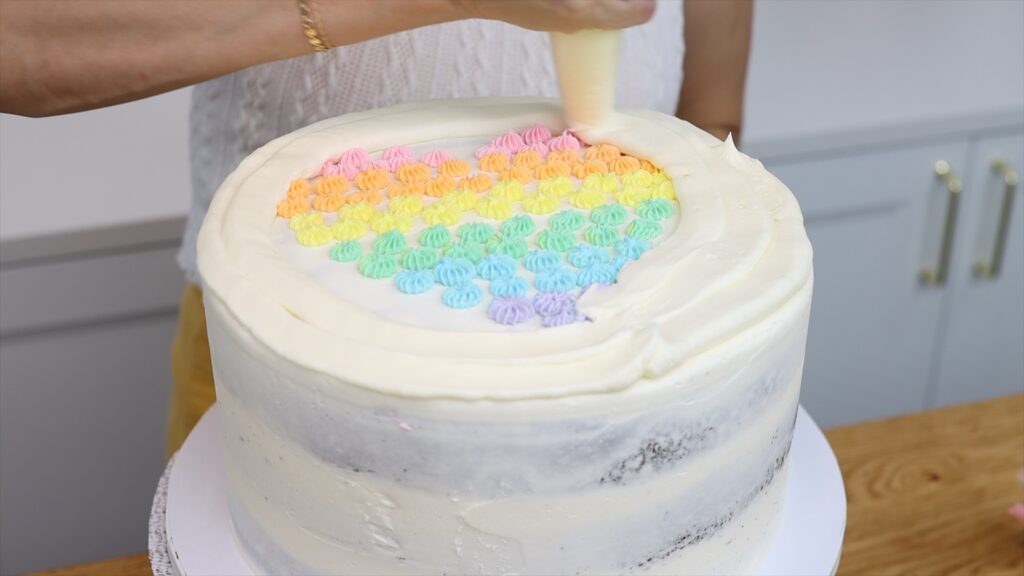
Spread the frosting very gently and then put this cake back into the freezer for 20 minutes. I know there's a lot of back and forth at this point but the result really is worth it!
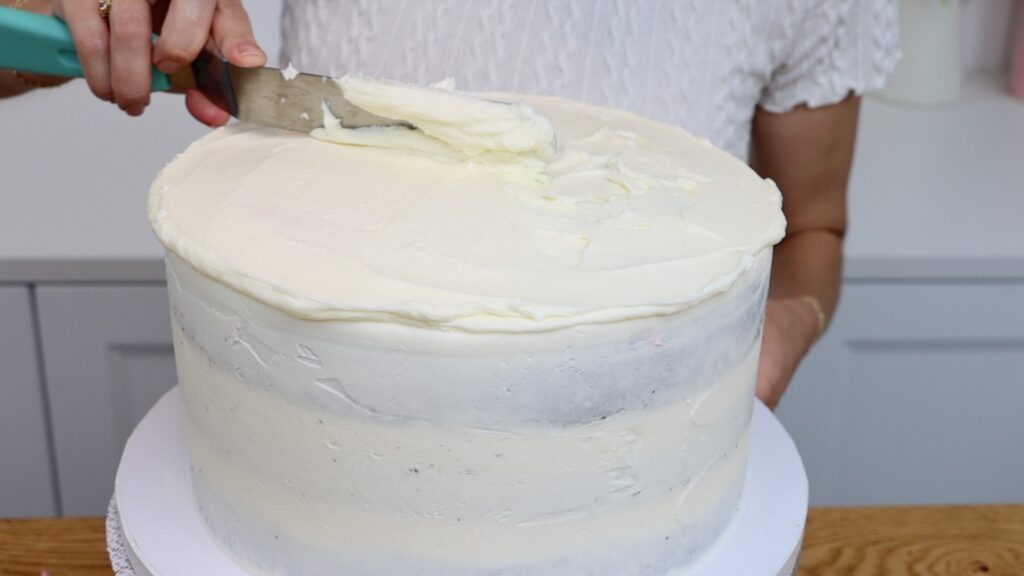
When you take the cake out of the freezer, all of that frosting will have set. Now you need to take off the top layer of frosting to reveal the design underneath. Pour some boiling water into a cake pan that is as big as your metal cake comb. Dip your cake comb in to heat it and then dry it off. Scrape over the top of the cake to take off the top layers. I call this Facelift Frosting because you're giving the frosting a facelift!
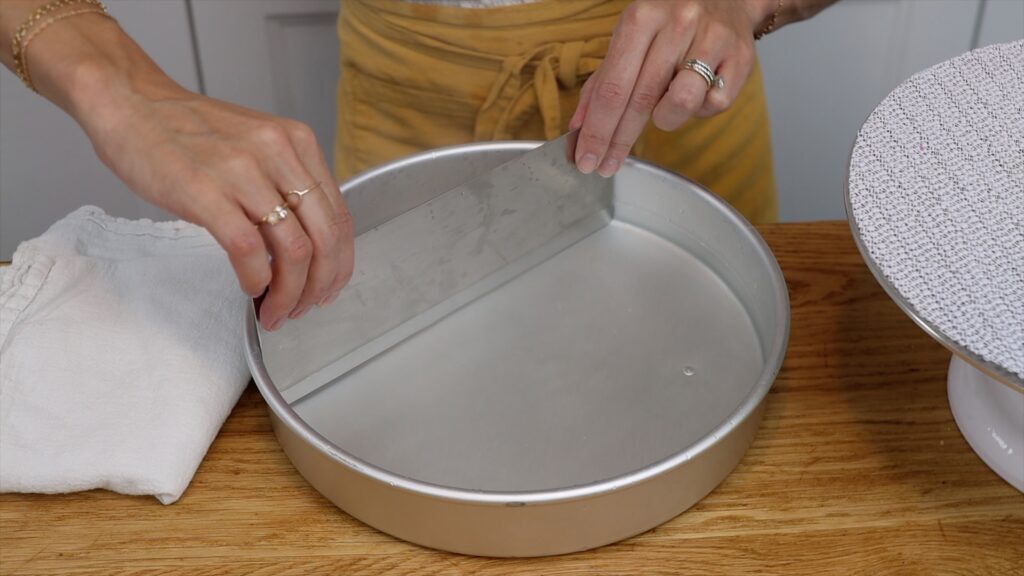
You'll need to scrape several times to take off all of the excess buttercream but this frosting won't be wasted. You can save it for your stripes or freeze it in a ziplock bag for another project later. For now, scrape the excess off your cake comb into a bowl.
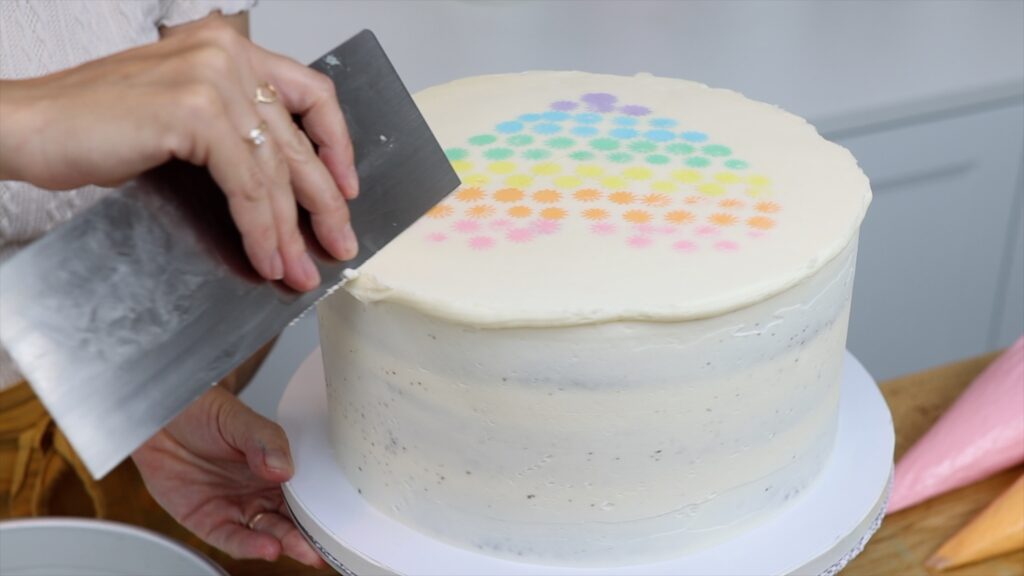
Keep dipping your metal cake comb into the hot water to keep it hot, which will make it the easiest to take off these layers of buttercream from the top of the cake. Once your entire design has been revealed, scrape around the sides of the cake to flatten any frosting sticking out. Use your
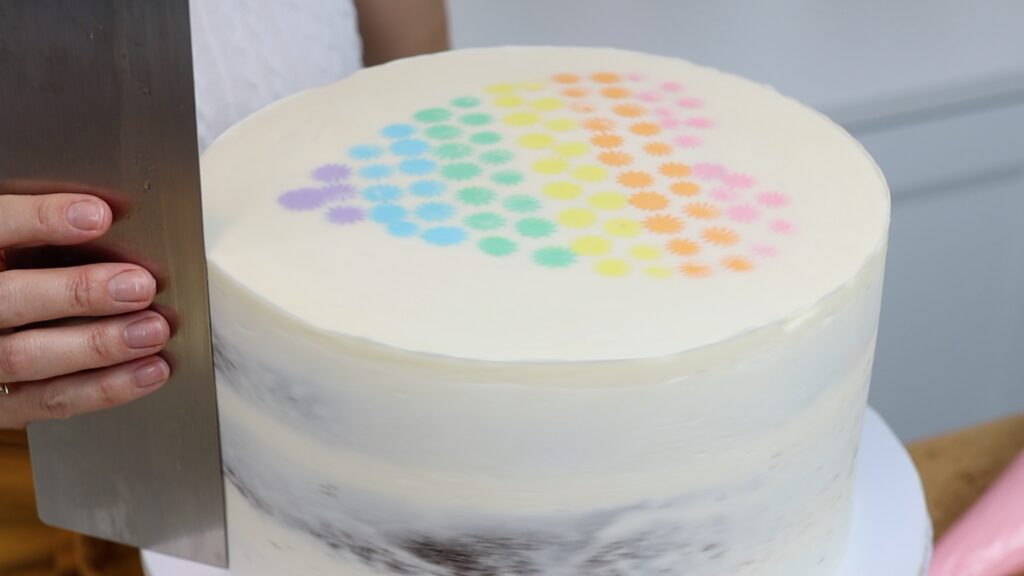
Now it's time to make the rainbow stripes. You'll need a striped cake comb and these come in lots of different shapes and sizes. When you choose one, keep in mind that the smaller the grooves are, the trickier the comb is to use.
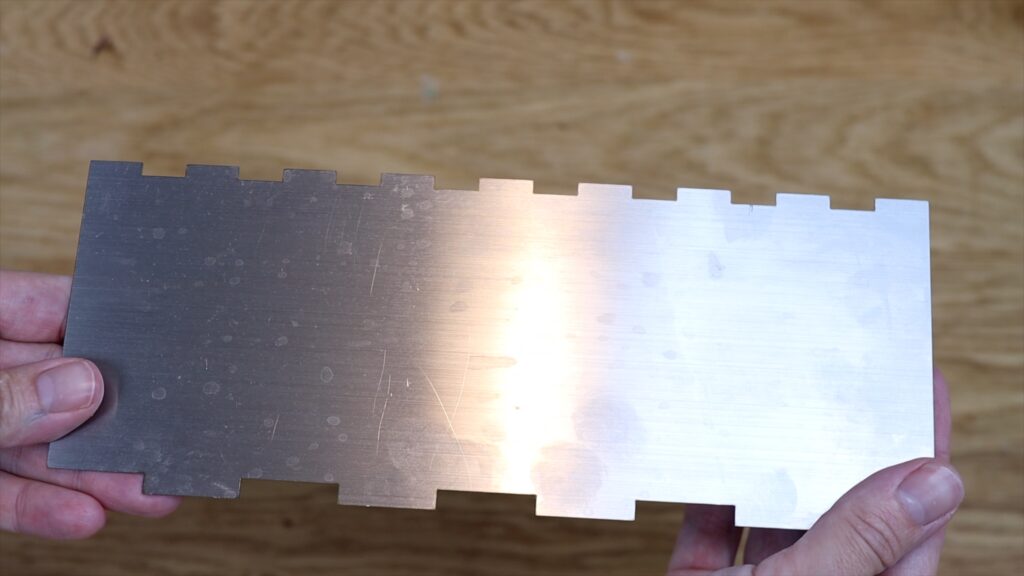
Push your cake comb into the side of the cake to indent the stripe grooves as a guideline. Do this periodically so that you have lots of guidelines all around the cake.
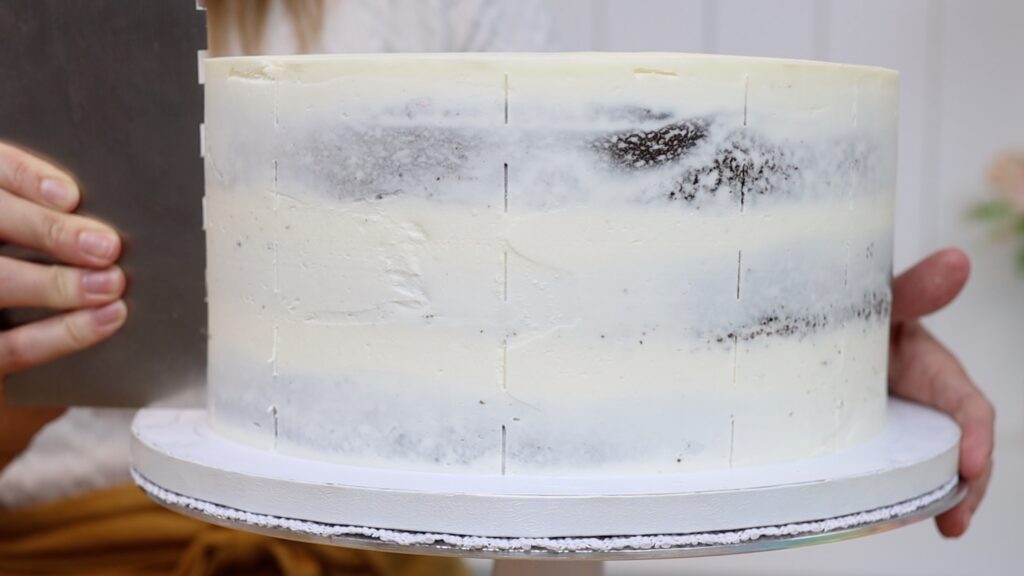
Choose the order that you want to pipe your colours. Pipe only the colours that go into the areas where you don't see any markings on the cake. I'm skipping pink at the very bottom because there is a marked groove there. Instead, I'm starting with the next colour, which is orange. Use the guidelines to pipe a straight band all the way around the cake.
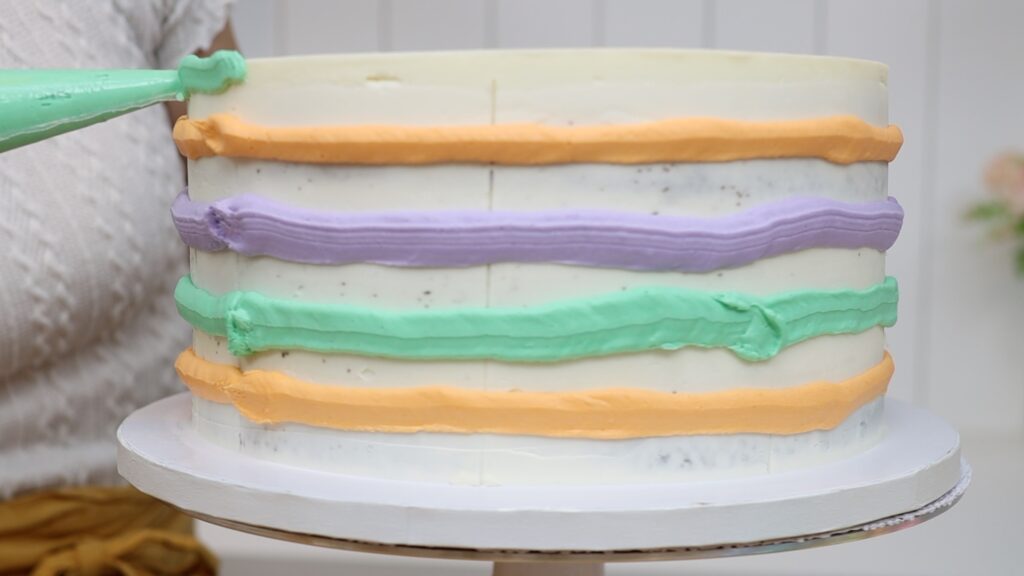
Let's go back to the beginning when you cut your piping bags for these rainbow colours of buttercream. It's a good idea to refer to your striped cake comb to see how wide the grooves are and then cut the piping bags so that they match that size. That way you only have to go once around the cake to fill in the entire width of the stripe.
Skip the next colour, which is yellow for me, and then pipe the next colour, which is green. Continue to pipe only where there are gaps in the grooves marked on the cake. Don't worry if your buttercream sticks up above the top edge of the cake because that will make a nice sharp edge later.
Now take your striped cake comb and scrape around the cake. Push the base down on the cake board so it's lined up straight. Use your left hand to spin the
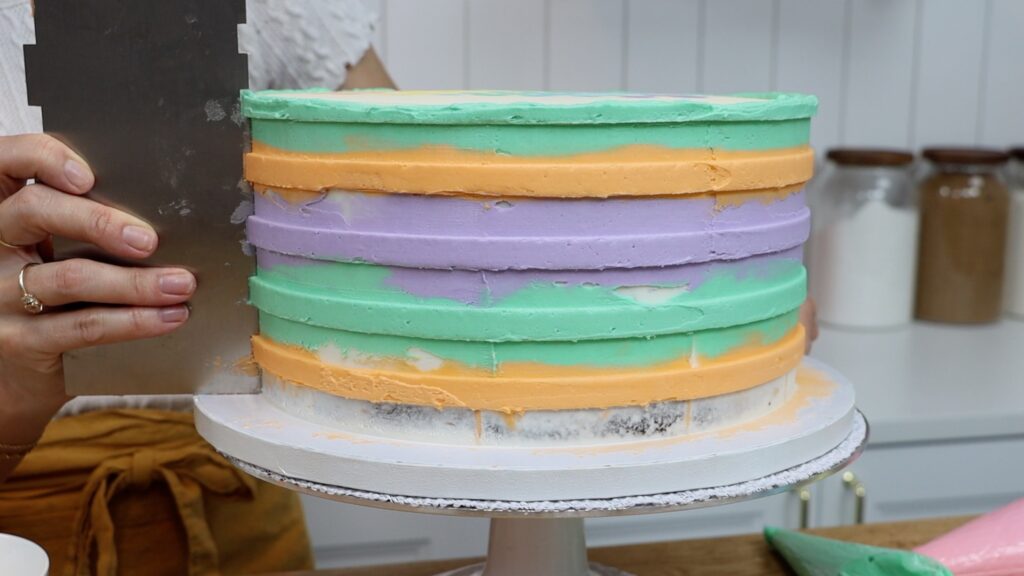
After one or two scrapes, check that each colour fills in the entire stripe groove from the cake comb. If there are any edges that aren't straight, those indents need to be filled. Use the piping bag of that colour to pipe over it. Scrape again after your touch-ups to smooth the piping. Don't worry about these stripes being perfectly neat on the surface because you're going to scrape a little bit off them later. However, you do want the top and bottom edge of each stripe to be perfectly straight. If there are gaps, other colours will fill them and you'll have random dots of different colours within the stripes.
When you're happy with these stripes, put the cake in the freezer for 15 minutes. Set a timer because if you leave it in longer, it will be difficult to do the next step.
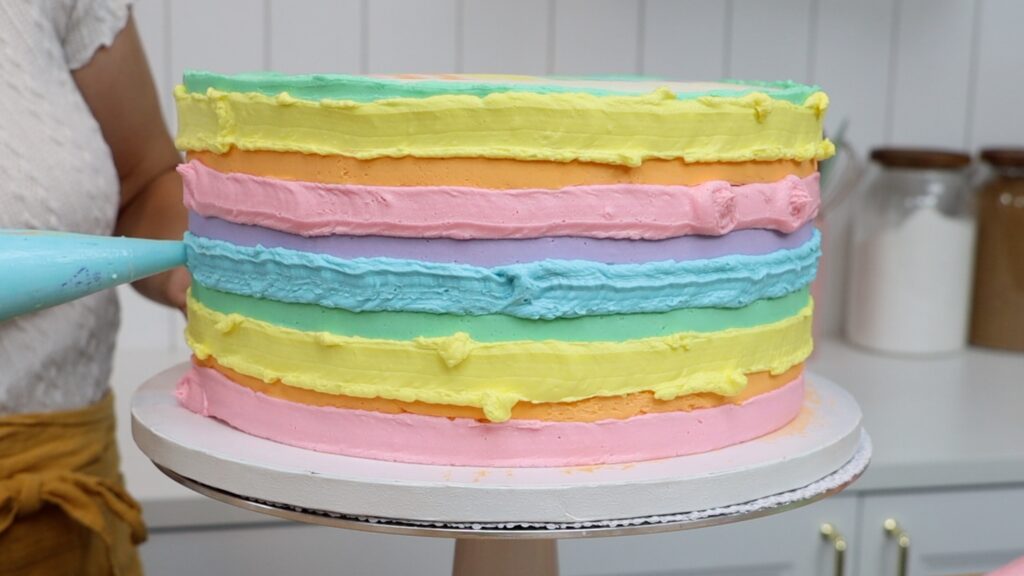
When you take the cake out of the freezer, pipe on the missing stripes. Then scrape off the excess, which will look really messy at first. Be patient and trust the process because this is going to be beautiful in the end! With the first few scrapes you'll smudge all of this excess frosting all over the cake. You'll cover up the first stripes that you made but that's the reason for chilling this cake before piping in the second round of colours. Now those first colours you piped are cold and firm and they won't lose their shape. Even as you scrape off the excess of the second round of colours, you won't damage the stripes underneath.
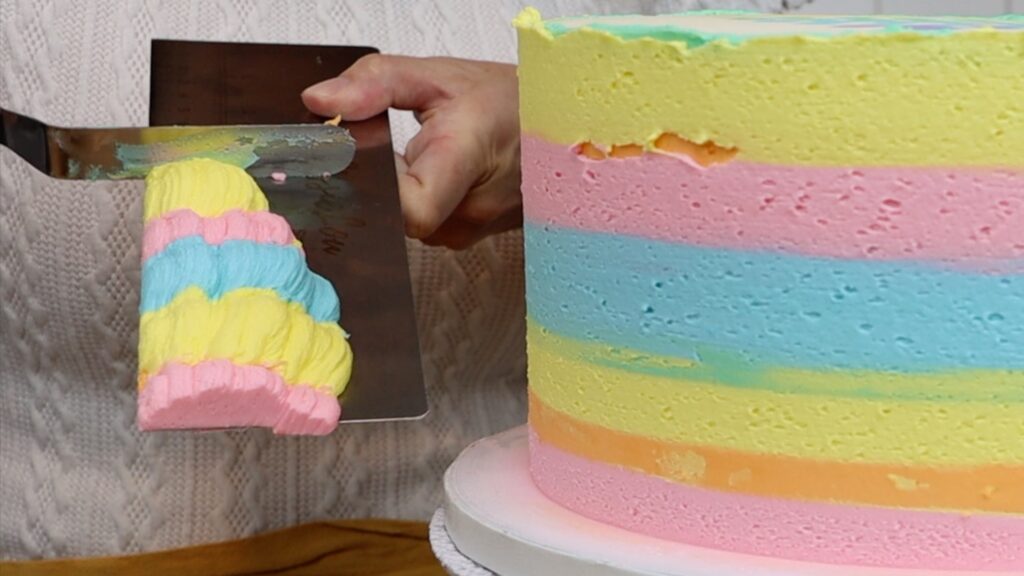
Keep scraping, taking off all of that excess. Your stripes are going to get more and more defined with each scrape. If the frosting starts to chill against the cold cake you might notice air bubbles in the frosting near the end. A quick hack is to heat your metal cake comb, which makes it glide very smoothly over the frosting, melting the very outer layer of frosting. This will fill in any air pockets and leave perfectly smooth frosting.
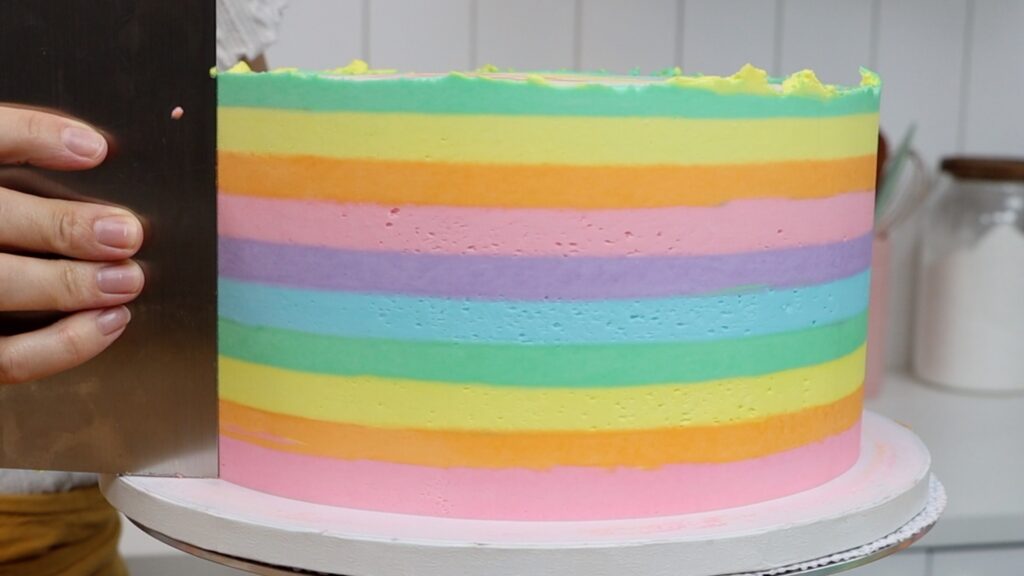
I don't recommend tidying up the top edge yet because you will spread that colour over on top of your heart design. Instead, put the cake back into the freezer for 15 minutes to set the frosting.Then use a sharp knife to cut off that frosting that's sticking up around the top edge. You'll leave a perfectly even edge underneath. You'll get the best result if your knife is hot so dip it into hot water in between cuts. You can use a glass or the pan from earlier, with new hot water course because the old water will have cooled down.
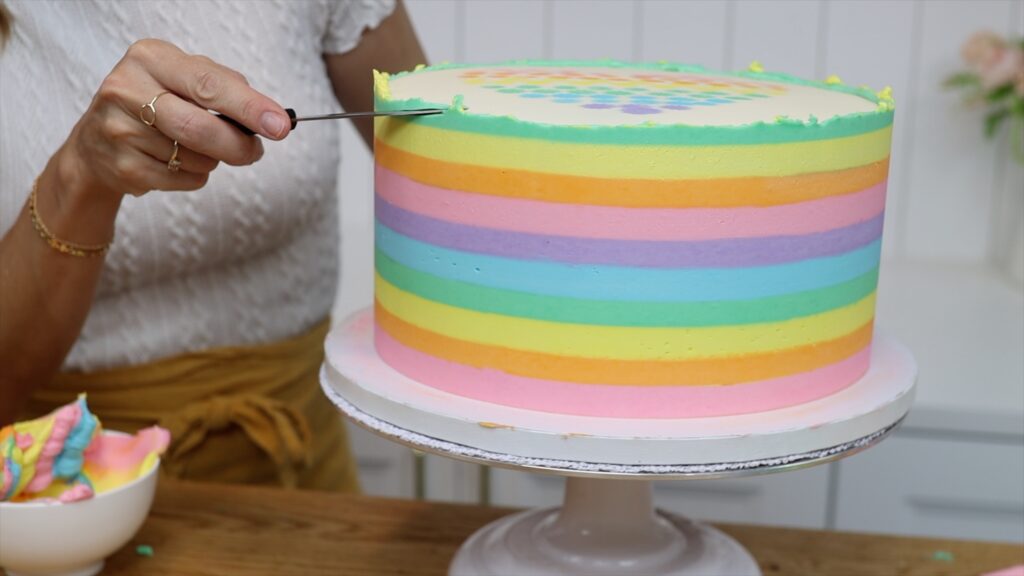
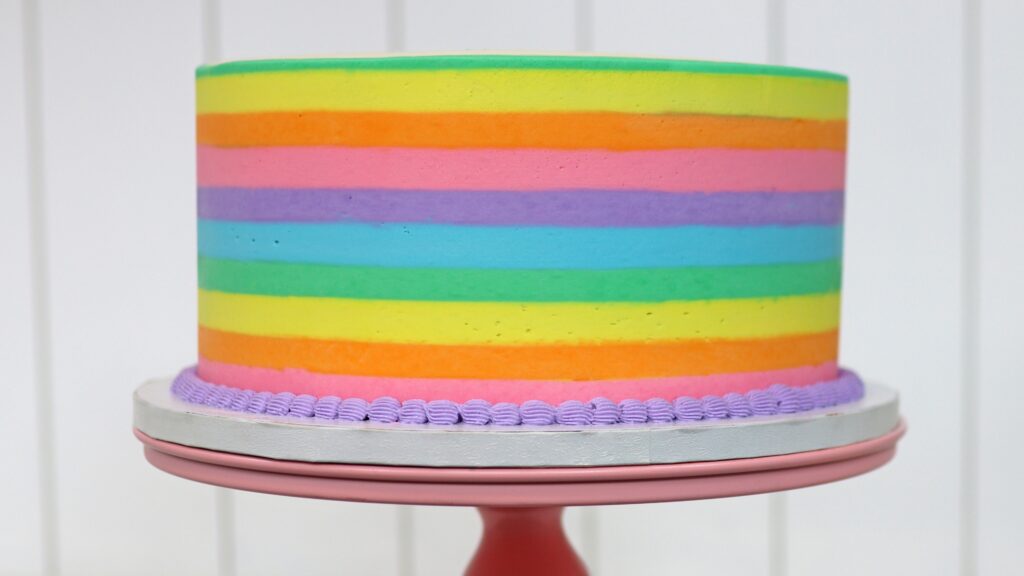
Now you have perfectly neat rainbow stripes around the sides of the cake and a sharp top edge. The rainbow heart design looks like it's been painted or printed onto the cake because it's totally flat, which is really unusual for designs done with buttercream.
I hope you've enjoyed this tutorial! Visit my cake school to learn hundreds of cake decorating techniques and designs and join my ClubPLUS Membership for access to every MasterCourse, MiniCourse, 5 Minute Fridays and Live Workshops.
You can also watch a video of this tutorial on how to make a rainbow striped cake:

Amazing
Thank you!