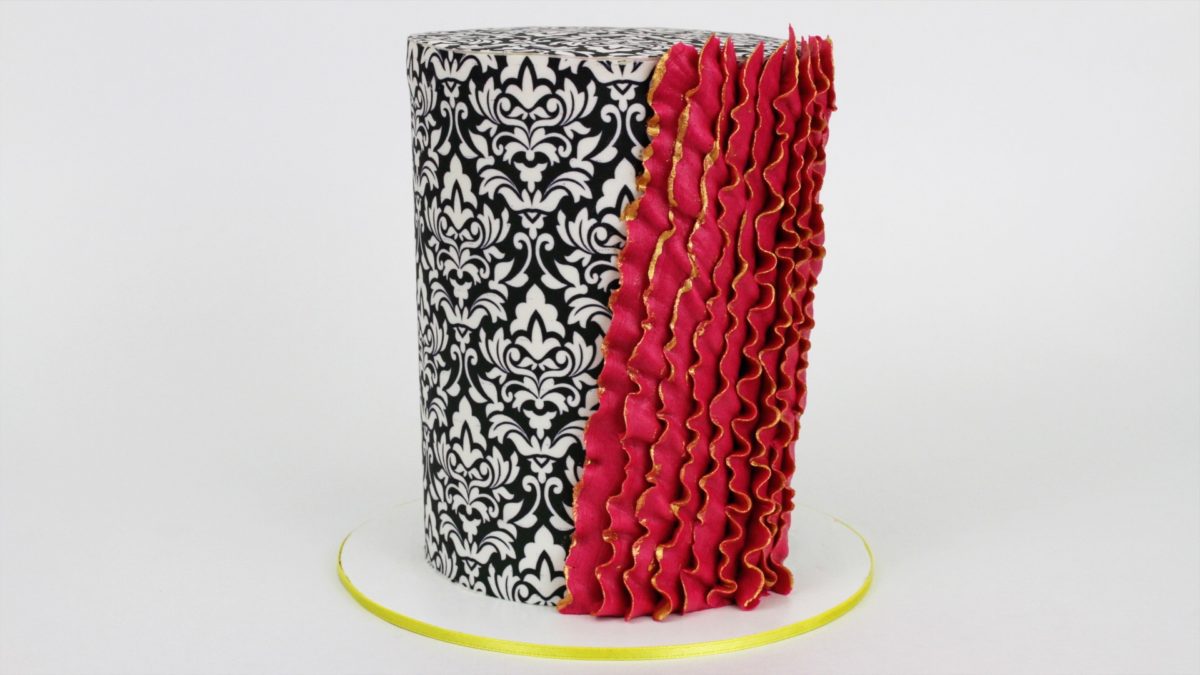
In this ultimate guide to icing sheets I’m going to walk you through the basics of icing sheets: how to store them until you use them, how to prepare your cake, apply icing sheets to the cake, and how to decorate them with three different techniques. If you prefer to watch a video of this tutorial, scroll to the bottom of the page.
Storage
Icing sheets are thick, edible sheets of sugar. They’re sensitive to light so they’ll become discoloured if they’re exposed to sunlight. They come in fun, bright patterns that are sticky on one side and usually come attached to acetate backing sheets, which you should peel off just before you use a sheet.
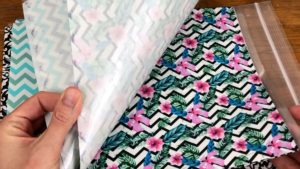
Icing sheets harden with exposure to air so you should store them in an airtight bag. To avoid discoloring, place the bag inside an envelope or put them in a dark place like inside a drawer. For 20% off icing sheets click here and use my code EMILYBGB.
Prepare your cake
Icing sheets won’t stick to buttercream that has already set so if you’re using a crusting buttercream like my 4 Minute Buttercream you’ll need to apply your frosting just before using the icing sheet.
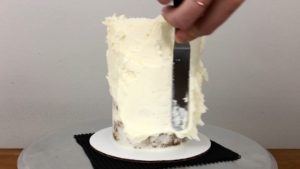
You could apply the sheet straight onto a crumb coat but if you have crumbs or bumps or dents in the crumb coat it’s better to apply a smooth final coat on top before attaching the icing sheet.
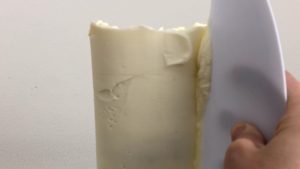
Spread the buttercream on to cover up the crumb coat. As you smooth the frosting, really focus on getting straight sides because if the frosted cake is wider at the top or bottom, the icing sheet won’t go on straight and it will either ride up or down the cake instead of sitting straight, or it will buckle and crease as you apply it.

It’s okay if you can see some shadowing of the cake through the final coat of frosting because icing sheets become even more opaque as they set and you won’t be able to see this subtle shadowing through the patterns on the icing sheets.
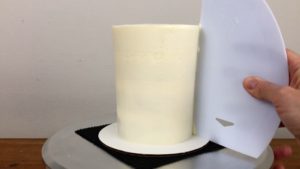
If you’re going to do a peekaboo design you don’t have to frost the whole cake at this point, just where you’re going to apply the peekaboo shape or shapes, and I’ll cover this in more detail in the next steps.
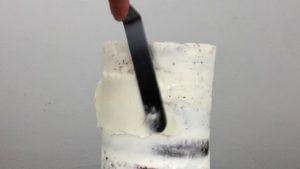
Because the icing sheets are opaque, it’s okay if the frosting is a colour that’s not white, like this purple frosting. Even though parts of the icing sheet design are white, and you might expect to be able to see the purple frosting through them, you won’t be able to!

Apply the icing sheets
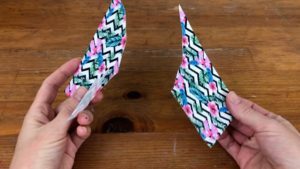
As soon as you’ve finished frosting your cake, peel the acetate backing of your first icing sheet.

Press the base of the icing sheet down against the cake board to line it up straight and press it gently against the frosting to secure it to the side of the cake, starting at the bottom of the cake to make sure it goes right down to the base and then pressing all the way up.
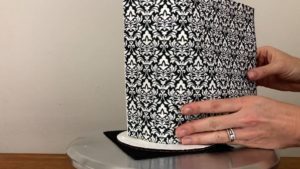
Each end of the icing sheet should be straight, going vertically up from the cake board to the top of the cake, not slanted. If it’s slanting like on this side it’s because it doesn’t go all the way down to the bottom of the cake, and that’s because the frosting on the sides of my cake isn’t perfectly straight – the cake is wider at the top than at the bottom.
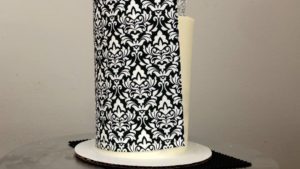
At this stage, while the frosting is still fresh and soft, you can peel the icing sheet gently off the cake and then scrape off some more frosting from the thicker parts of your cake, in my case the top, so that it’s straight and then re-apply the icing sheet.
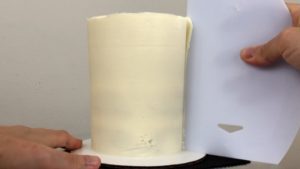
You have to work quite quickly if you do this because you don’t want your frosting to set before you scrape it and you don’t want the icing sheet to dry out and harden.
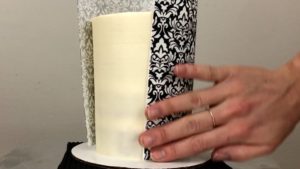
Once you’ve made sure the icing sheet goes all the way down to the bottom of the cake so it’s sitting straight, press it against the frosting with your hands or you can use a fondant smoother.

Make sure the edges of the icing sheet are pressed flat against the cake rather than sticking out.
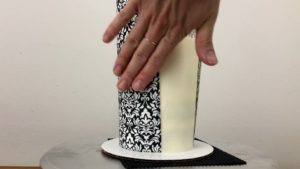
You’ll probably have to use 2 or even 3 sheets to cover your cake completely. I’m cutting a strip out of a second sheet to finish wrapping this one, which is a 4” cake. I like to cut the strip a little bit bigger than I need, maybe an inch wider, because you can trim it later.
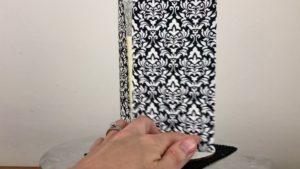
Press the next icing sheet onto the frosting and then immediately cut off any excess with scissors, before the sheets set because they’ll crack and snap if you try to cut them then.
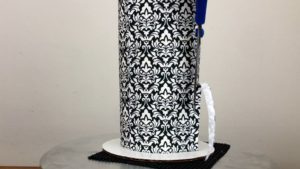
Icing sheets are a little bit sticky but not sticky enough to stick to each other and conceal an overlap, so it’s best to cut the second sheet at the same place the first one ends, so that they sit right next to each other. You can try brushing the edge of the bottom sheet with some piping gel to make the top sheet stick, but applying any liquid is a bit risky because it can make the colours bleed on the pattern on the icing sheet.
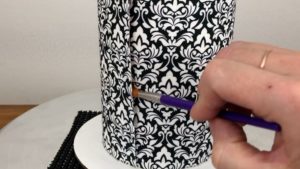
Don’t worry too much about the patterns lining up and matching because the patterns tend to be quite busy and when the cake is finished you’ll hardly notice the join. When you’re happy with the sides, trim the top of the icing sheets so that they’re the same height as the cake.
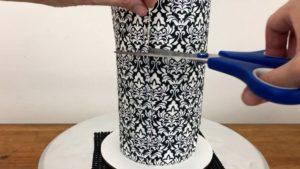
You can measure and cut them before applying them but it’s tricky because if you mis-measure by just a millimeter you’ll have either frosting or the icing sheet sticking out at the top of the cake. It’s easy to trim the sheets now, while they’re still soft and pliable.

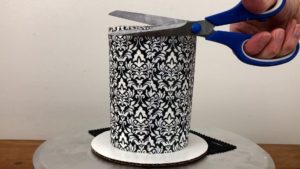
Since the buttercream frosting will have started to set by now, you can rest the blade of your scissors on the top of the cake as you cut to use as a guide of where to cut. Tidy up any jagged cuts afterwards so that the icing sheet is perfectly flush with the top of your cake.
If you’re going to decorate the top of the cake you might choose to leave it as is, or you can cover the top with an icing sheet. I use a cake pan or cake board the size of my cake as a guide and draw around it onto an icing sheet, making a wider circle to leave room for the frosting on the cake.
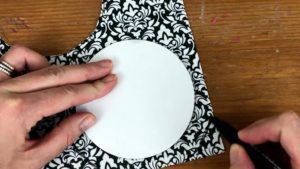
The icing sheet should still be on its acetate backing while you’re doing this and when you cut it out you’ll cut through the icing sheet and the backing. If the frosting on your cake has already set, spread on some more to completely cover the top of the cake.

Try not to spread the buttercream over the edges and onto the icing sheets around the sides of the cake but if that does happen, wipe if off with your
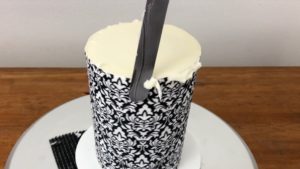
Then peel the acetate off the icing sheet circle and place the icing sheet on top of the cake. Because it’s bigger than your cake you’ll have room to trim around it, pressing the bottom blade of your scissors gently against the sides of the cake to line the scissors up and cut the excess off the edges of the circle so that it’s the same size as the cake.

You can go around several times to tidy up any jagged cuts or trim off even more until there’s no icing sheet sticking out over the edge of the cake.

The seams where the icing sheets join will probably be disguised by the pattern on the icing sheet but if not, you can use piping to disguise the join and add some colour and texture and interest to your cake, which I’ll show in detail in the next step.

For a fault line design, don’t worry if the icing sheets don’t go all the way down to the bottom of the cake because you’re going to cover that part with frosting later.
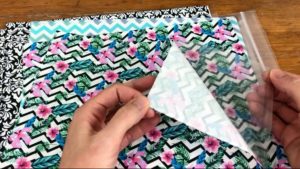
Instead of pressing the icing sheet onto the frosting and then trimming the top, you can pre-cut the icing sheet so that it’s a little bit shorter than the cake, since the top will be covered with frosting as well. Of course, you don’t need to cover the top of the cake with an icing sheet for a fault line cake because you’ll be frosting over the top.

For a peekaboo design, immediately after frosting the area where you’re going to create your peekaboo shape, press a piece of the icing sheet onto that area. It doesn’t have to be the same shape as the peekaboo yet – just cover an area slightly bigger than the shape you’ll eventually use for the design.

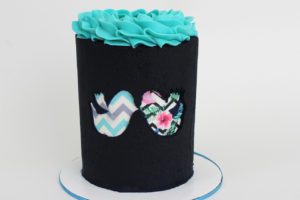
I’m using two different patterns for this cake, which will be two birds kissing so a different pattern for each bird. This is a great way to use up any parts you’ve trimmed from other icing sheets! The rest of the cake is still covered with just a crumb coat, but now that the peekaboo background pattern is in place, it’s ready to be frosted with a final coat in the next step.

Decorate your cake
I’ll show you a technique that adds some nice texture as well as conveniently covering the join of icing sheets, and a trendy design that’s a great solution if your icing sheets don’t go all the way up to the top or down to the bottom of the sides of your cake. Finally, I’ll show you the rest of the process of creating a peekaboo cake.

To add texture to this cake I’m using a piping bag fitted with a petal tip, a Wilton #104, and I’m pointing the narrow end of the tip away from the cake and holding the wider end against the side of the cake.
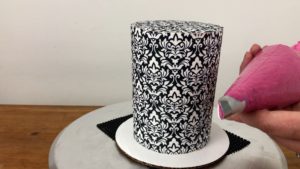
Squeeze out the buttercream as you move the piping bag up in a diagonal to pipe a ruffle of buttercream. Wherever you pause and hold the tip in place for a moment while still applying pressure to squeeze out the buttercream, the buttercream creates a wave out of the narrow end of the tip, which is why that’s the end pointing away from the cake.
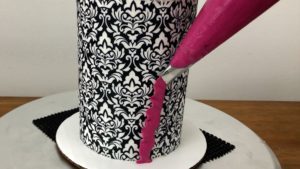
I’m piping several ruffles onto the cake, overlapping each ruffle about halfway over the previous ruffle so that you can’t see any of the icing sheet pattern between the ruffles
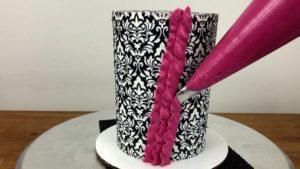
I’m letting them stick up a bit over the top edge of the cake and to get neat peaks on the ruffles, as you lift your piping bag away, release your pressure on the bag at the same time. You can of course choose where you want the ruffles to go, so if you don’t like the seam where your icing sheets join, this would be a great place to cover up with this piping!

When you’ve piped all of the ruffles you want, chill the cake for about an hour in the fridge to set the ruffles. Meanwhile, prepare edible gold paint by mixing gold luster dust with a drop of clear alcohol like vodka or a clear extract like lemon extract. instead. You want a thick liquid, almost paste-like, to get a nice bold gold colour.

When the ruffles have set in the fridge you can start painting them, angling the brush to paint along the wavy edge of each ruffle. Use little dabbing motions from the side of the ruffle onto the edge to create a gold rim. It’s best to use a thin, stiff paintbrush so you can be very precise about where you paint the gold.

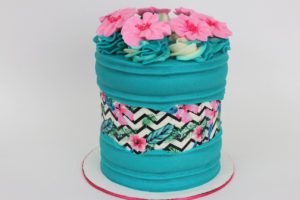
The next design is a fault line cake, which just means that the top and bottom of the cake will be bordered by another partial layer of frosting. Spread the frosting all around the bottom of the cake, applying it randomly for a rustic effect.

Spread frosting onto the top of the cake and smooth it with your

Then spread frosting around the top of the sides of the cake, leaving the middle of the sides of the cake exposed so that you can see the icing sheet pattern. Aim for an even thickness of frosting but don’t worry about smoothing it yet.
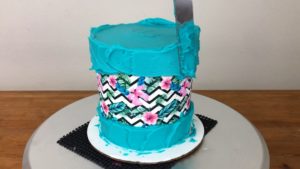
Use a frosting smoother to smooth the frosting on the sides of the cake or you can use a textured cake comb, which is what I’m doing here.
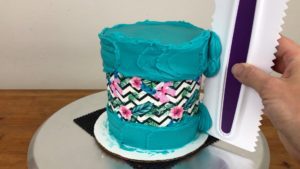
I’m scraping around the cake several times to imprint the texture and for more details on how to do this, check out my tutorial 5 Tips For Perfectly Textured Frosting.

I decorated this cake with two tone swirls and piped flowers and I cover every step of this design in lots of detail in my online class for this Icing Sheet Fault Line Cake.
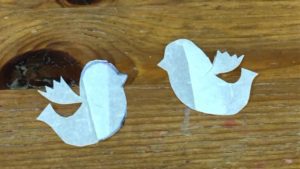
For a peekaboo shape, start by cutting doubles of your shape out of parchment paper. I’ve cut out 4 little birds for the 2 birds I’m going to create, so I have 2 copies of each bird.

For each shape, cut one copy about two thirds from the left and the other copy about two thirds from the right, so that they overlap in the middle. This is important for revealing the peekaboo shape later.
Line up the two parts of your shape on the icing sheet on your cake so that they overlap to make the complete shape. Hold them in place with one hand while you scoop up some buttercream with an

While still holding the parchment shapes in place, spread buttercream around the edges to secure it. The icing sheet will be slippery so you’ll need to push quite firmly against the parchment shapes to prevent them from moving around.

Spread from the inside to the outside of the shape so that you don’t push any buttercream underneath the parchment paper. Completely cover the outline of the shape (or shapes, like my two little birds) but leave the center of each shape exposed so that you have access to where the two parchment sides overlap.
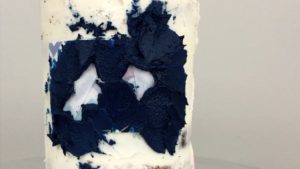
I’m tearing a random shape for another peekaboo cake, and I’ll cut this one down the middle but not all the way through, so that it stays together but also gives me space to peel it apart for the peekaboo.

Press the parchment onto the icing sheet on the cake, which should be bigger than the parchment paper shape, and while holding the parchment in place, spread buttercream around it.
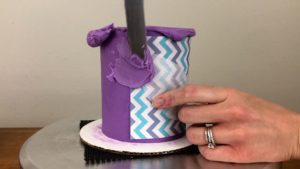
Then when the shape is outlined, spread buttercream over the rest of the cake.
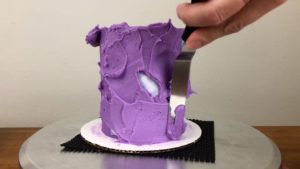
Smooth the frosting as normal and you’ll scrape more buttercream over the parchment shape but make sure that the middle section of the peekaboo shape stays visible. You can alternate the direction you scrape with your frosting smoother so that you don’t spread the buttercream over as much of the parchment.
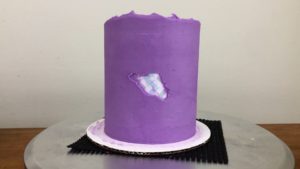
Finally, it’s time to reveal the peekaboo! Slide your

Peel the shape off to reveal the icing sheet pattern underneath!
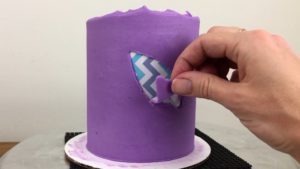
A few tips for this: first, I don’t recommend using very intricate shapes, like these birds, which have thin parts sticking out and small details like the zig zag edges of the wings. When you peel off the parchment those details get lost easily with the uneven edge of the peekaboo shape.

Also, avoid very busy patterns or patterns that contain the same or similar colors to the frosting because it’s difficult to see which are the parts of the peekaboo shape. With this tropical pattern which has black in it, the navy frosting dividing the bird’s tail and wings gets lost in the design.
Finish decorating your cake however you like and you can store the cake at room temperature or in the fridge – the icing sheets will be fine at either temperature and the condensation in the fridge won’t affect them.

Here’s the video version of this tutorial:

praesentium aperiam incidunt autem sapiente voluptatem nesciunt vel quisquam pariatur asperiores ut aut animi. voluptatem cupiditate quo et dolorum cum qui et voluptatibus excepturi cum amet quia unde quis sint dolorem blanditiis blanditiis. possimus totam quia sed blanditiis eius non alias nihil consequuntur aliquam cumque rerum sint laboriosam nisi repellat porro qui numquam earum.
tempore voluptatem id dolor quibusdam optio aliquid in. aliquid voluptatem odio sed iure labore reprehenderit fugit aut illum corrupti et repellendus sed ab maxime illum veniam non voluptates dolor qui. temporibus assumenda quia suscipit rem nobis fuga eveniet.
itaque voluptas et esse culpa nemo eaque optio doloribus deserunt voluptate pariatur assumenda similique inventore quaerat asperiores placeat. nobis libero ut et optio dolores.