Going into 2020, the trends for cake decorating showcase generous use of texture and colour and, a welcome factor for most of us, simplicity! I’m going to walk you through the top 10 trends that I anticipate highlighting the cake decorating world this year, which I’ve divided into styles featuring texture, colour, and simplicity.
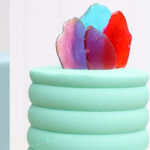
The easiest way to incorporate texture in your cakes is to use a textured frosting comb, and the speed and ease of this technique is one of the reasons it’s gaining so much popularity! Crumb coat and frost your cake as normal, making sure the sides are straight and that you have quite a thick layer of frosting all over the cake since you’re going to take a lot of it off when you use the comb. After smoothing the frosting, immediately use the textured comb, applying consistent pressure against the side of the cake as your spin the cake on a

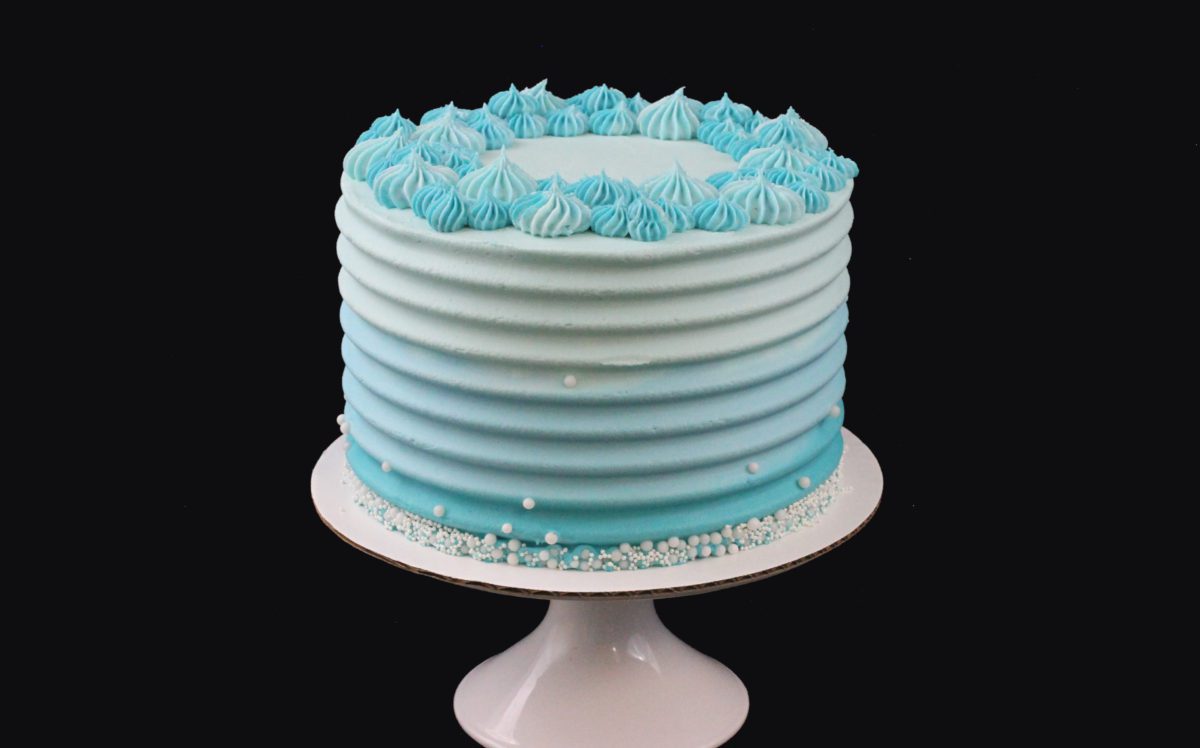
A more time consuming but very forgiving way to add texture is with piping tips. Even if you haven’t been decorating cakes for long, you’ve probably experimented with piping tips or at least the standard star tip, also called a 1M tip, which is the typical tip used to pipe a cupcake swirl. But you can do SO much more with this tip than just that! Pipe easy roses onto a cake by covering a cake with swirls, or make frosting “fur” for animal cakes, and I share more ideas in my tutorial on 8 Ways To Use a 1M Piping Tip.
Other piping tip textures include the ribbon-style frosting in the photo above, piped with a petal tip like a number 104 or 125. For more ideas check out my tutorial on 8 Ways To Use A Petal Tip. Scallops are beautiful too – they can be piped with a round tip or even a piping bag with no tip, and smoothed out with an
The beauty of using piping tips to frost a cake is that you don’t need to cover it in perfectly smooth frosting, just a simple crumb coat to lock in the crumbs and the moisture, so if smooth frosting isn’t your strongest skill then frosting a cake with piping tip texture is a great alternative, so you can still make a cake that looks professionally decorated.

One of the big trends in 2019 was the fault line cake, which is still going strong and definitely worth trying before the trend dies out. We’ve seen several variations of it, starting with simple spreading a second coat of frosting with a gap in the middle, hence the name “fault line” cake, and optionally painting the edges with metallic paint. I have a step by step tutorial on this technique here. To achieve the design, apply your first coat of frosting and let it set completely by chilling it in the fridge for at least an hour before applying the second coat to the top of the cake, and on the sides cover just the top and bottom, leaving the middle section without a second coat so you can see the first colour. Smooth the frosting as normal, leaving an uneven, jagged edge above and below the gap in the middle. If you want to paint the edges of the fault line, chill the cake for another hour to set the frosting and then mix gold or silver luster dust with vodka or any other clear alcohol or lemon extract and then paint along the edge of the fault line. This is how the fault line cake originated, but the trend has already evolved in several ways.

The first variation was filling the fault line with sprinkles, which you achieve by pressing sprinkles onto the middle section of the crumb coat, letting them set, and then piping or spreading frosting over the rest of the cake and smoothing it to leave the sprinkled gap in the middle. Another fun evolution is to decorate the fault line with stripes, and I’ll cover stripes in more detail as a trend on its own later. Other emerging variations include adding that second layer of frosting to only the bottom of the cake, and you can spread it on or use parchment paper to have more control over the placement of the frosting. Jazz up the edge of the fault line by adding sprinkles to it, or edible glitter, instead of the original style of metallic paint. Try adding texture to the second layer of frosting with a textured frosting comb or an impression mat, and take it even further by painting the second layer of frosting or adding details like the brick wall cracks on this Halloween cake.

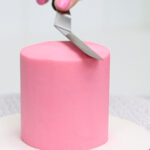
My favourite new trend is the carved buttercream trend, which has endless possibilities for texture and colour on your cakes. This trend uses clay modeling tools, which are very cheap and easy to find on amazon or in arts and crafts shops, and you can use the tools to carve out patterns, images, shapes, textures… carving is an incredibly versatile technique and I spent a few months experimenting with it and created an online course teaching the techniques and several styles of carved designs, including 4 themed cakes showing step by step from start to finish how to create the design. If you’re interested in that course click here.

Another trend that adds colour and texture to cakes is to use sprinkles to create or highlight your design. This can be as simple as pressing sprinkles onto the sides of the cake, which is easiest if you dip your finger in water and tap off any excess before pressing it into a sprinkle, so that the sprinkle sticks to your finger and then when you press it onto the frosting of the cake, it transfers to the cake for perfectly accurate placement. Hide sprinkles in the middle of your cake for a sprinkle explosion, also called a piñata cake, buy cutting a circle out of the middle of all of your cake layers except the top one, which creates a chamber that you can pour sprinkles into and after sealing the chamber with the top layer of cake without a hole in it, you frost and decorate the cake as normal and when you cut into it, a cascade of sprinkles explodes out for a fun surprise! You can buy or make your own sprinkle mix, and I cover a lot more ways to use them on your cakes in my online course on 10 Cake Decorating Techniques.

With all of the fun sprinkle mixes you can buy, which incorporate every colour and lots of metallics, I think cake colour schemes will continue to be inspired by sprinkles and we’ll be seeing a lot of metallics on cakes. This will include edible gold leaf, which is bought in sheets and sticks easily onto buttercream by pressing it gently against the cake on the sheet it come on, or using a paintbrush to carefully lift it off the sheet and transfer it to the cake. Edible gold paint will be popular too, which is made easily by mixing gold luster dust with vodka or any other clear alcohol or lemon extract, To get the strongest, most opaque shade of gold use high proof alcohol like Everclear 190, which makes a thick gold paint like on this unicorn cake:


Another way to incorporate gold is a gold drip, which is most easily achieved by applying a ganache drip using white chocolate or semisweet chocolate, letting it set, and then painting the drips with edible gold paint. This is a lot easier than it sounds if the drip is the right consistency, and I have a full tutorial on gold drips here.

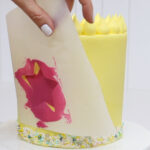
This next trend uses acetate or parchment paper to apply colourful designs to cakes. Wrap the acetate or parchment around the cake and add a few inches to leave space for the design you’re going to apply to it, and then cut the acetate and cover it with a design. You can use Candy Melts, melted chocolate, or even buttercream to pipe your design. Then take your chilled cake and wrap the acetate tightly around it, pressing the design against the cake and then putting it back into the fridge to set against the sides of the cake. When you peel the acetate off you’ll leave the design behind, attached to the frosting, and this lets you to create designs that gravity wouldn’t normally allow. In my tutorial on How To Make A Cake With Wrapping Paper I show step by step how to trace over a pattern or design, like wrapping paper or a gift bag, and after pressing it against the cake, chilling it and then peeling it off, use a frosting smoother dipped in hot water to smooth the design. Then you can add details like buttercream borders, shadowing with more buttercream applied with a palette knife, and sprinkles for some texture or to cover up any air pockets. Apart from being simple, this technique is great because you don’t need any special tools or materials, just some acetate or you can do this with parchment paper instead. I’ve started to see more cake designs appearing with this technique, to I think the trend will grow this year and we’ll be seeing lots of creative designs using this simple material.

A trend that became huge in 2019 is striped buttercream created with a striped frosting comb, and although these have been popular for over a year now, I don’t see the trend going away any time soon. You can buy a striped cake comb for a few dollars and get these stunning designs which make beautiful cakes on their own or with very little extra decoration. I have a VERY detailed tutorial on Four Secrets for Perfect Stripes which I highly suggest watching before you start!

Now for the trends featuring simplicity… firstly, if you haven’t made one yet, jump on the number cake bandwagon! These are great because you don’t need to be confident with smooth frosting, since you layer cakes with piped buttercream and don’t frost the sides. You can show off the flavours of the cake because they aren’t hidden by covering the cake in frosting, and they’re easily personalized with the birthday boy or girl’s favourite chocolate, candies, flowers, or even toy figures! The most eye catching designs have a colour scheme, even if it’s just brown from the chocolates placed on top. I have a tutorial for How To Make A Number Cake and also for the rainbow number cake in the photo above.

Finally, another ridiculously simple cake to make is a tray bake cake! These are baked in a deep baking tray or casserole dish or disposable cake pan and decorated and served within the same pan, so there’s no need for layering or crumb coating or anything complicated or time consuming. All you need are a few piping bags with different tips and different colours of frosting and you can cover the top of the cake with whatever piped patterns or textures you like for a fun, unique design that only takes a few minutes! I have a full tutorial on Tray Bake Cakes if you’re interested in some ideas for piping styles like rosettes, ruffles and piped flowers using Russian tips.

These are the 10 trends I think we’ll see in the cakes of 2020 and as a side note, if you want to show off your cake decorating skills, why not travel with your cake when you visit friends or family? You can travel with a cake in a car or even on an airplane following a very simple method which I’ve explained in my tutorial on How to Travel with a Cake in your Suitcase, which you can watch here. Which of these techniques are you excited to try this year? Or is there another trend you’re curious about? Tell me in the comments below!
If you prefer, you can watch my video tutorial on 10 Cake Decorating Trends to Try in 2020 below:


Wow I'm impressed and I've learnt alot
Yay!
What is the tool that looks like a loop?
https://waterfallmagazine.com
Nice post. I learn something new and challenging on websites I stumbleupon every day.
It's always useful to read through content
from other writers and practice a little something from
their websites.