From fitting tall cakes into short boxes to piping perfect decorations without any fancy tools, these 10 cake decorating skills will save you time and make your cakes look more professional.
Each of these cake decorating skills is simple to learn and uses tools or materials you probably already have at home. These techniques will help you build confidence and improve your results right away.
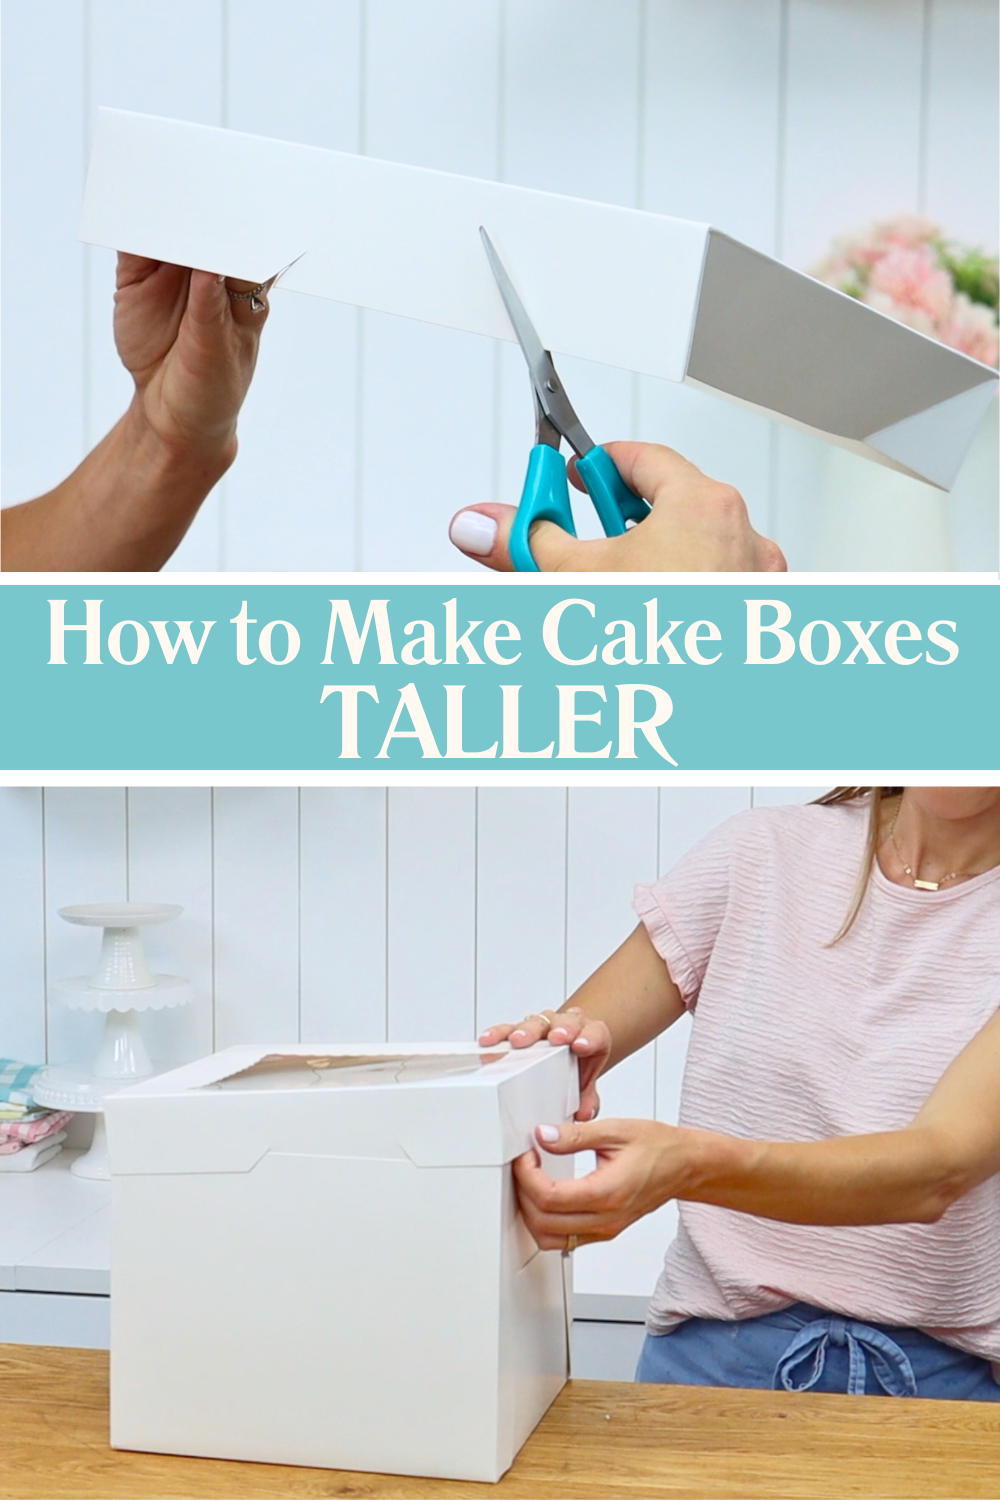
If your cake is too tall for your box, here’s the hack you need! Don't buy extra tall cake boxes just for an occasional tall or tier cake. Instead, use the boxes you already have! To make the cake fit, cut two diagonal slits into opposite sides of the lid. The shorter the slits, the taller the box will become. Push the middle flap (between the slits) inside the box, leaving the outer flaps on the outside. This raises the lid enough to cover your tall cakes neatly without crushing your decorations.
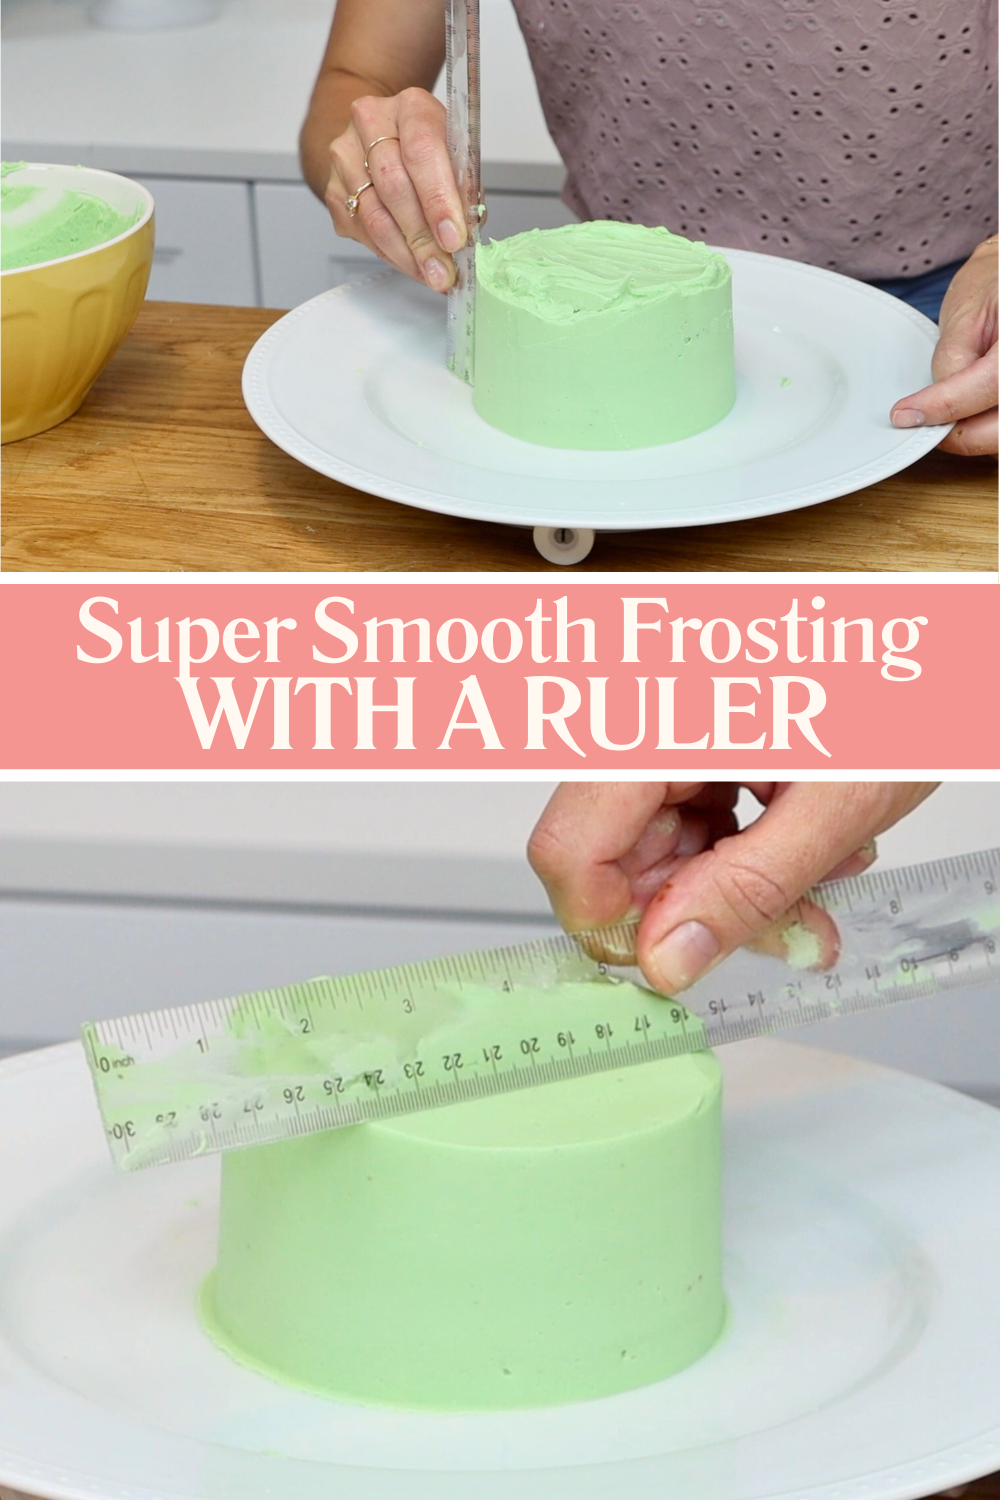
No tools? No problem! You can still achieve smooth, professional-looking frosting and piping.
Use a ruler instead of a cake scraper by resting the short end on your
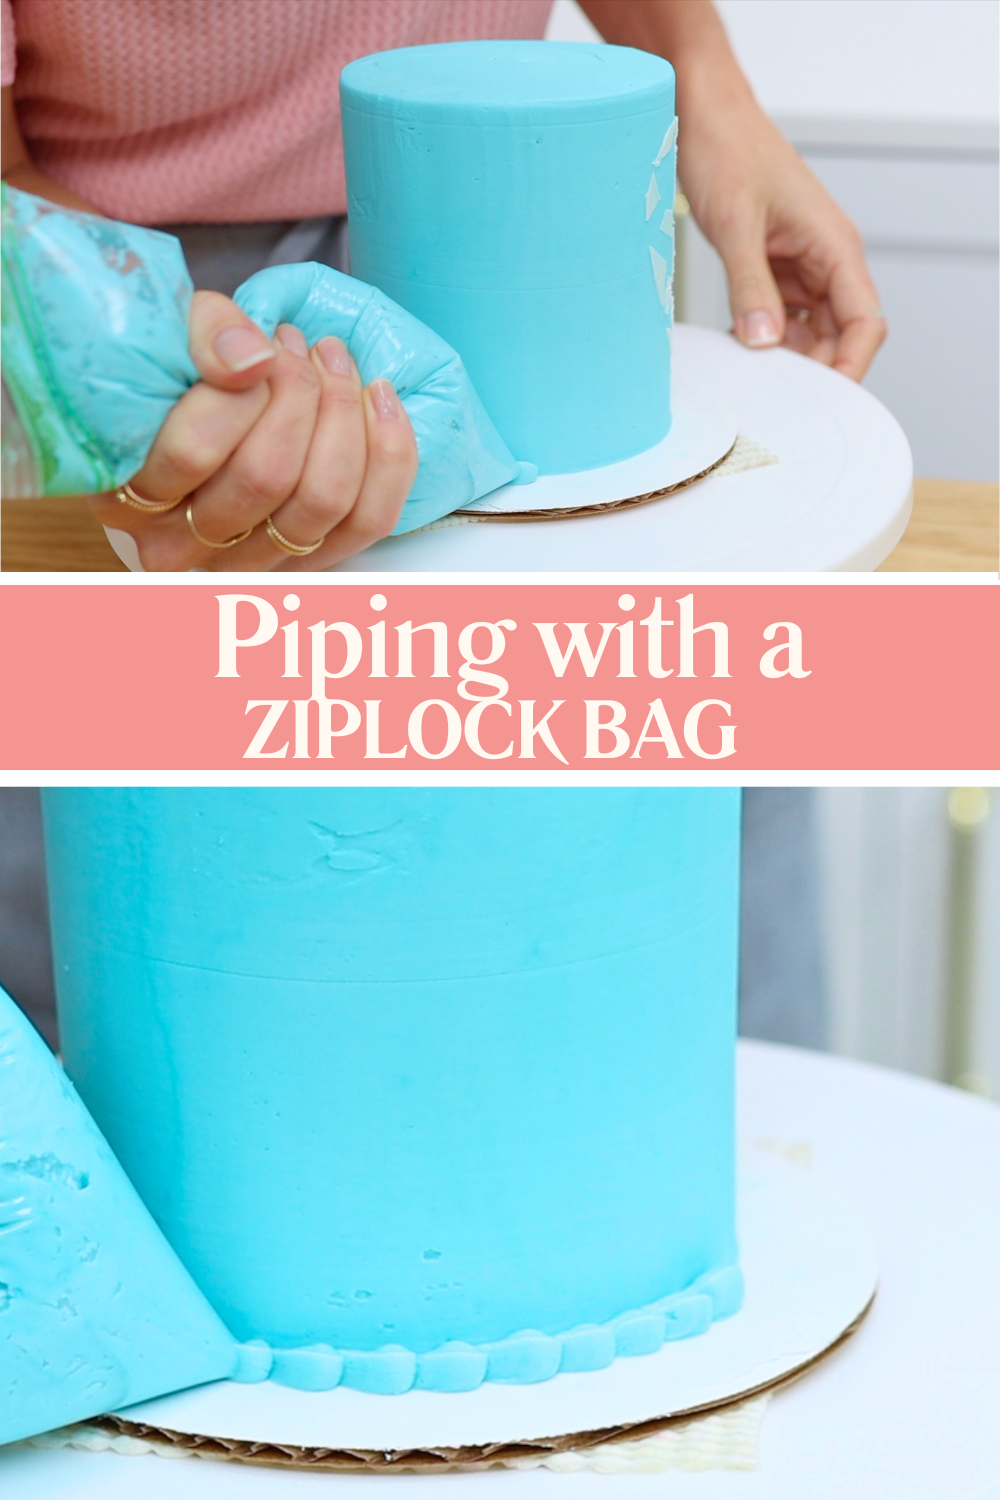
And to add piped details even if you don’t have piping bags or tips, fill a ziplock bag with buttercream. Snip off one corner and pipe dots, lines, or messages!
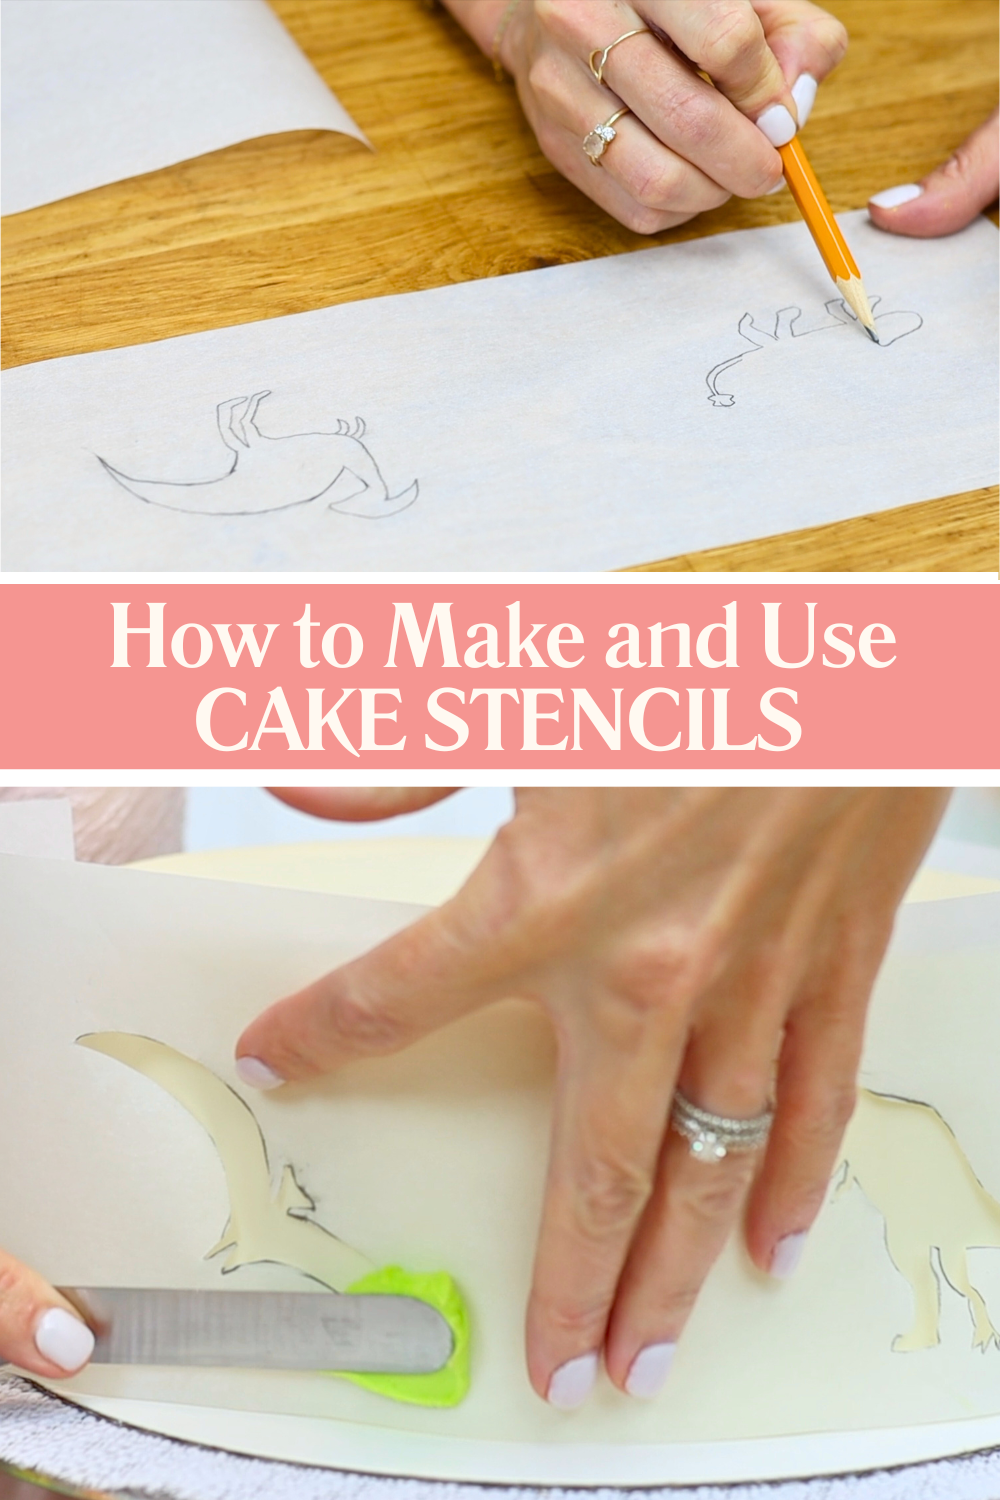
Instead of buying expensive cake stencils that you’ll probably only use once, make your own!
Draw your design or message onto parchment or wax paper and cut it out, keeping the paper around it in one piece. This will become your stencil.
To use stencils on cakes you'll need a 'crusting' buttercream, like my 4 Minute Buttercream. Chill the frosted cake for at least an hour before using your stencil. Wrap it around the chilled cake and then spread frosting over it, working from the outer edges towards the middle. This stops frosting from sneaking underneath.
Scrape off the excess frosting with an

Mini cakes are trendy, fun, and easy to make without buying special pans. Just bake cupcakes and peel off the wrappers to make easy mini cake layers! Optionally, slice them in half to create extra layers for more layers of filling in between.
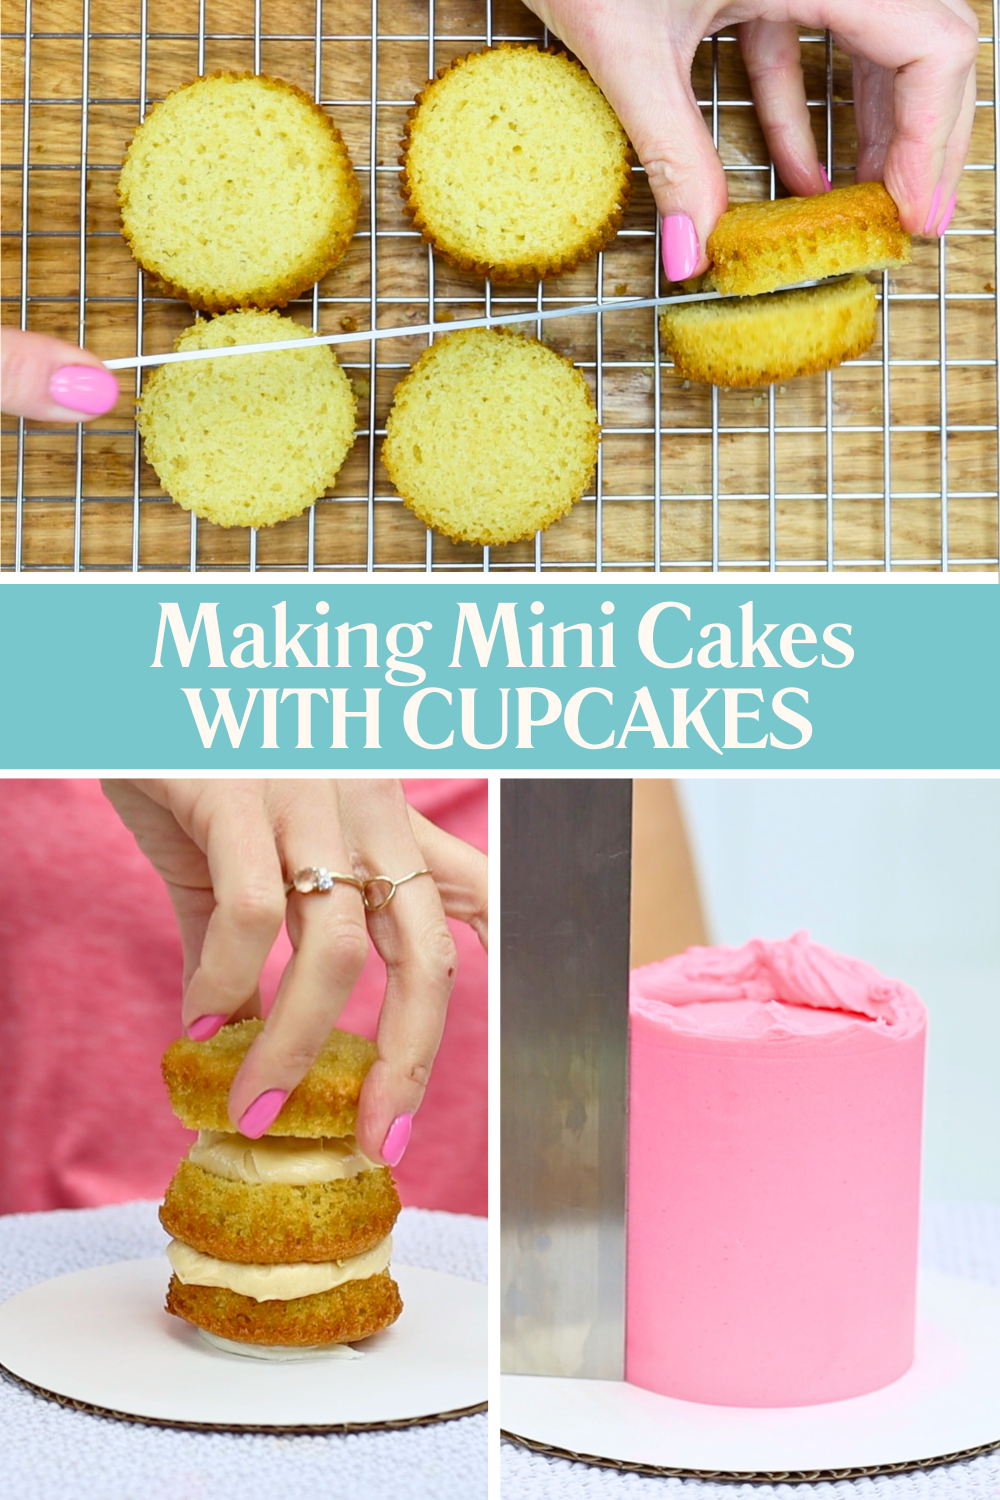
Spread some buttercream onto your cake board as glue to hold the first cupcake in place. Assemble the cake and then chill it in the fridge for 30 minutes (or the freezer for 15) before frosting. The cold, firm buttercream stops the cake sliding around or tipping over while you decorate.
We’ve all added too much milk or cream cheese to buttercream and ended up with frosting that’s too runny to smooth. Instead of starting again, skip the smooth frosting and choose texture instead! Try twisting the back of a spoon gently over the surface of your frosting to create soft arcs:
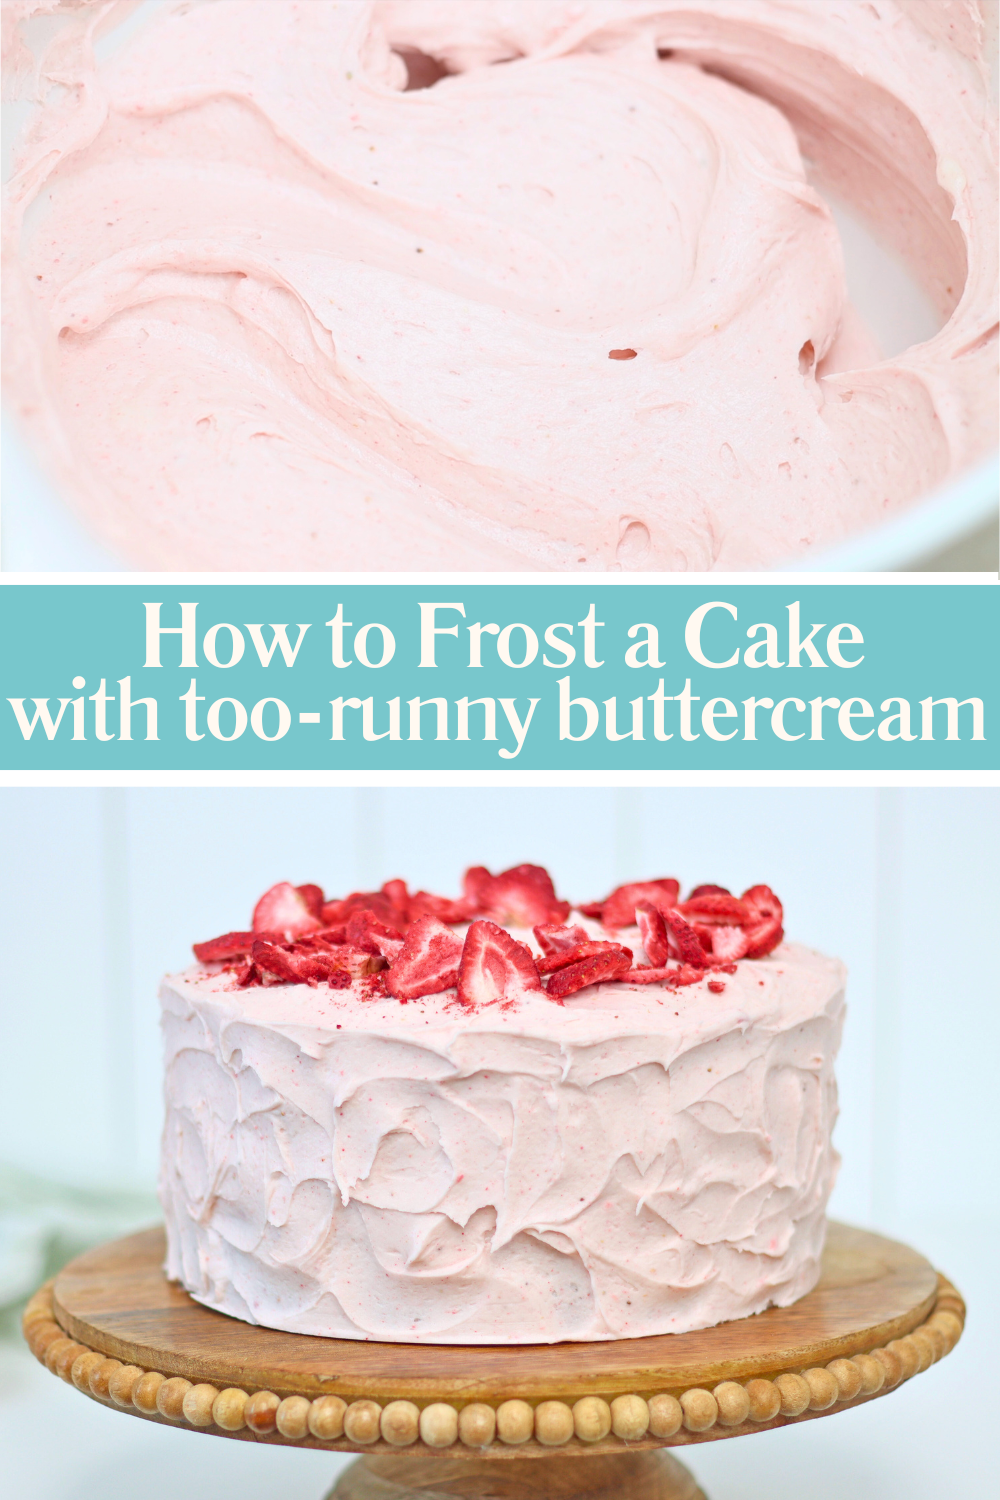
Another option is to press it lightly against the cake while spinning to imprint horizontal grooves, like eon my Banana Layer Cake. These rustic, textured designs are just as beautiful as smooth frosting.
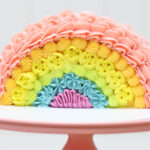
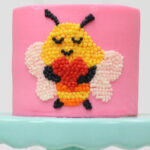
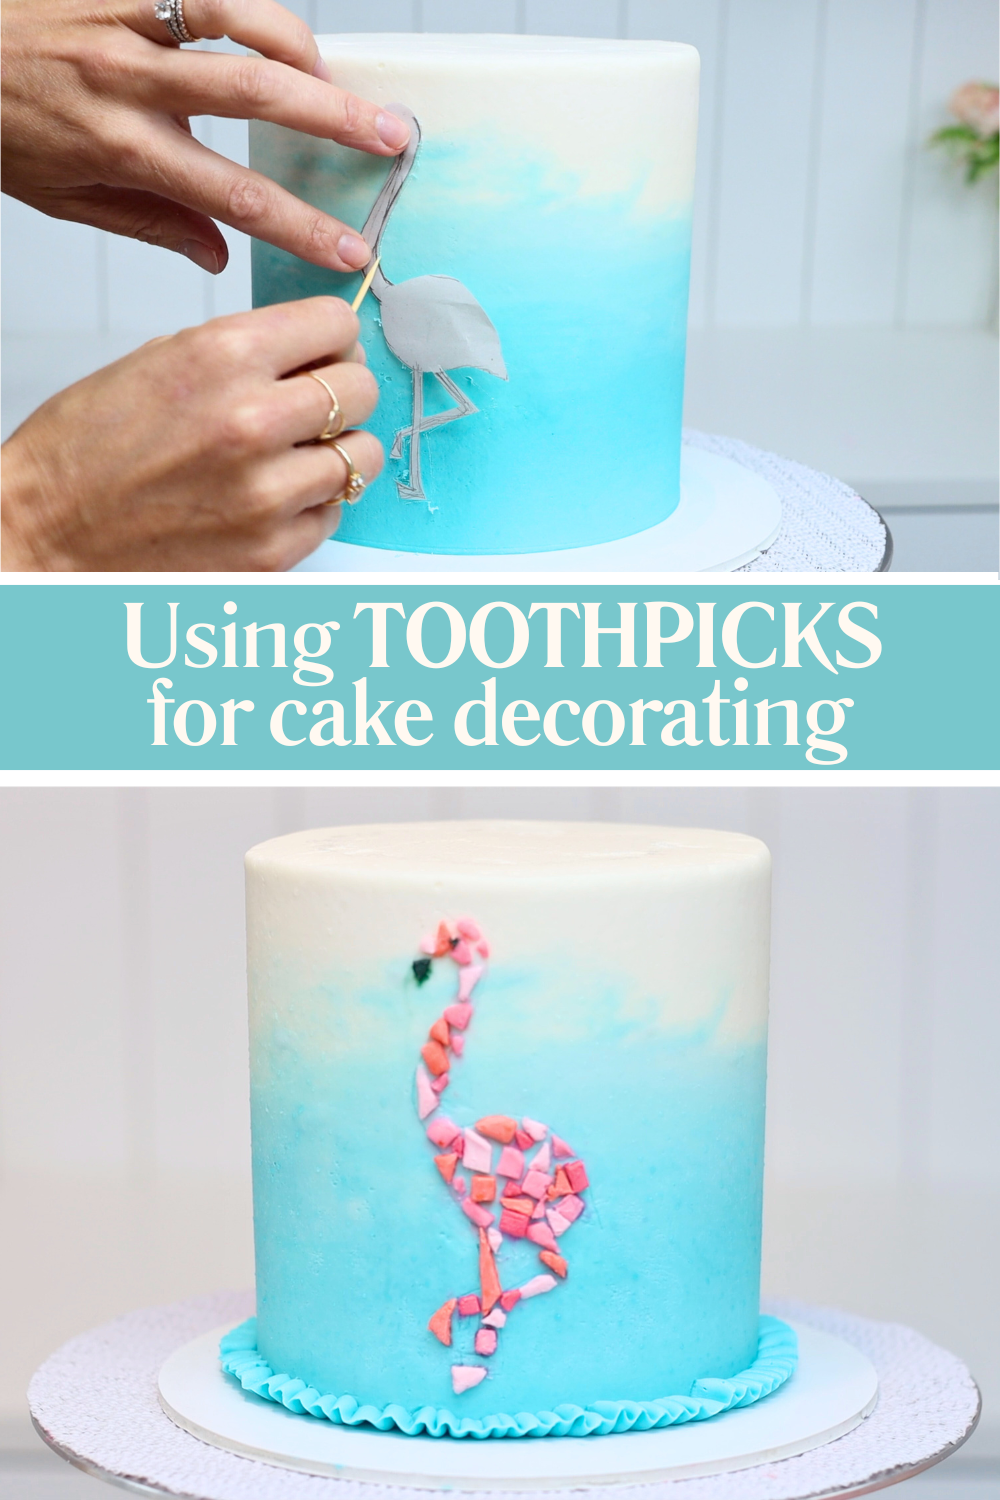
A toothpick is one of the most underrated cake decorating skills you can learn. Use it to sketch outlines before filling with piping, using the pointillist technique. Or fill the outline with frozen buttercream tiles to create a mosaic cake design.
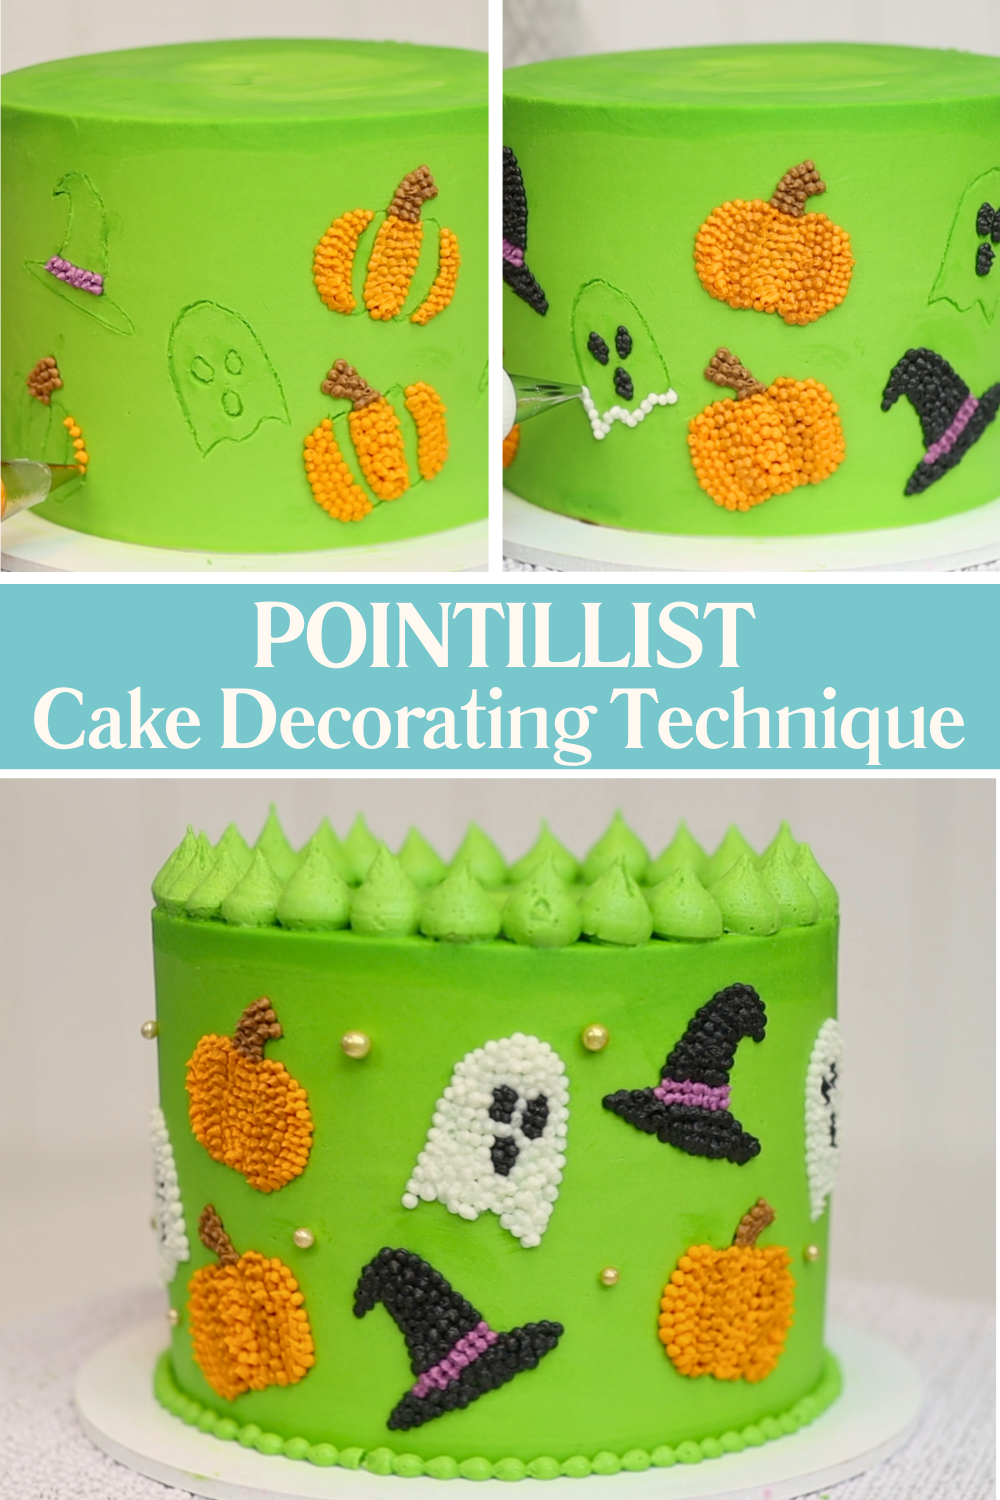
For messages, trace the letters with a toothpick first to make sure they’re centered on the cake. It’s a small step that makes a big difference in how neat your message looks.
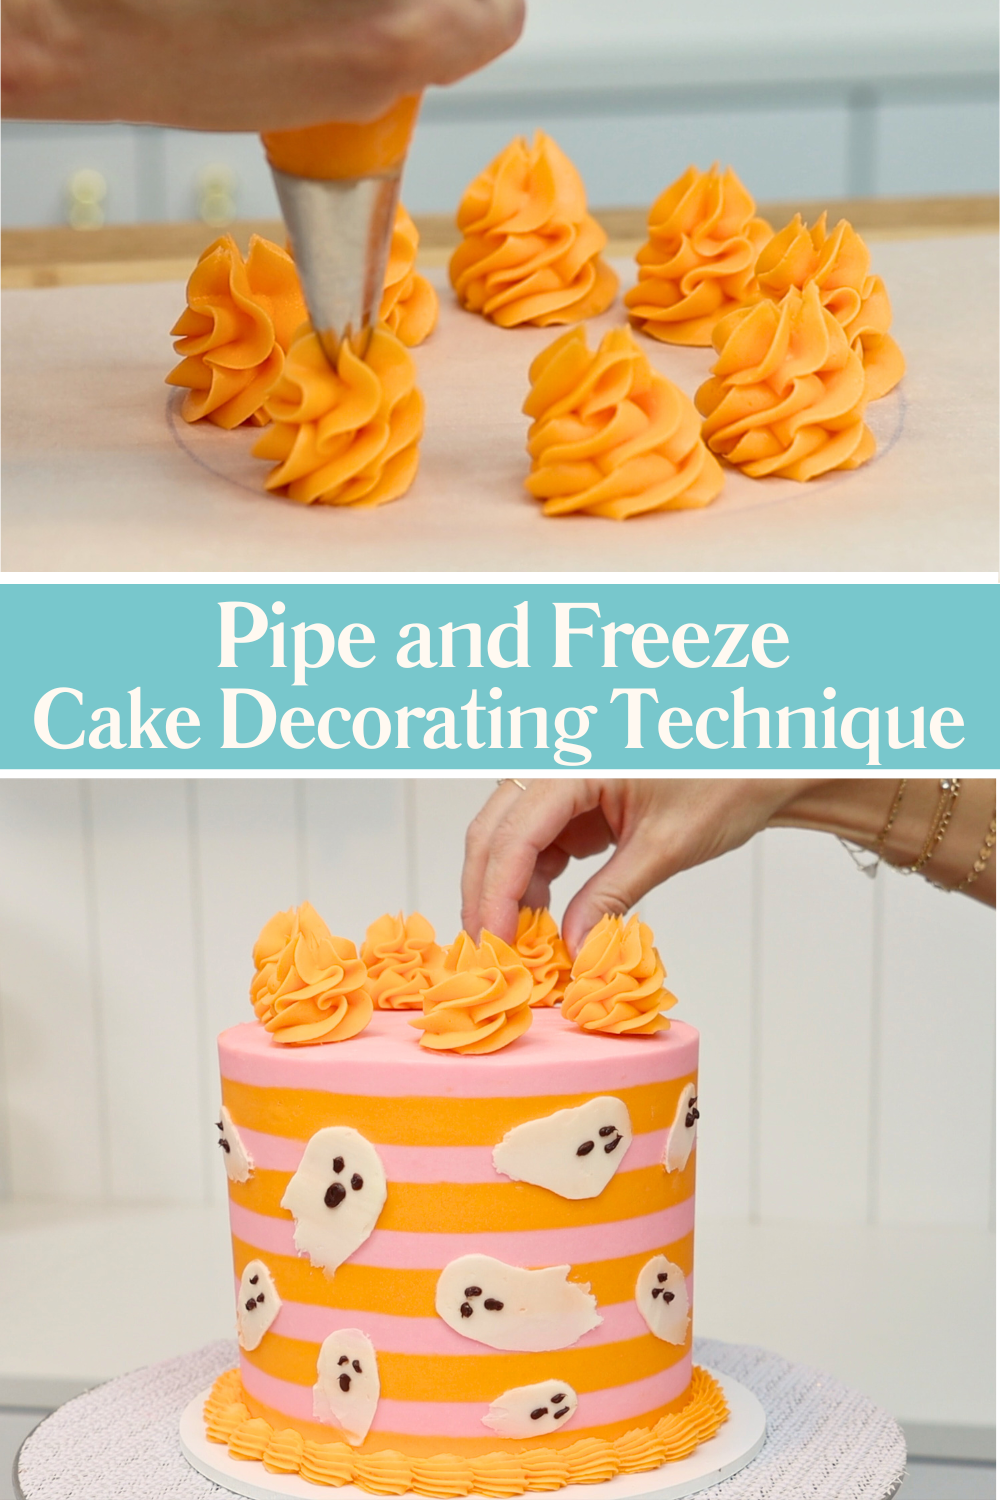
If you’re nervous about piping directly onto a cake, pipe your decorations onto parchment paper or wax paper first. Swirls, rosettes, or flowers can be piped, frozen for 10 minutes, and then transferred to your cake once they’re firm. This way, you can choose the best-looking ones and place them exactly where you want them. No pressure, no mess, no wasted buttercream.
Lunchbox cakes are an easy and affordable way to package and transport individual portions of cake. They're perfect for a gift or a surprise school or work lunchtime treat. You could also sell these single portions at a bake sale without needing extra packaging supplies.
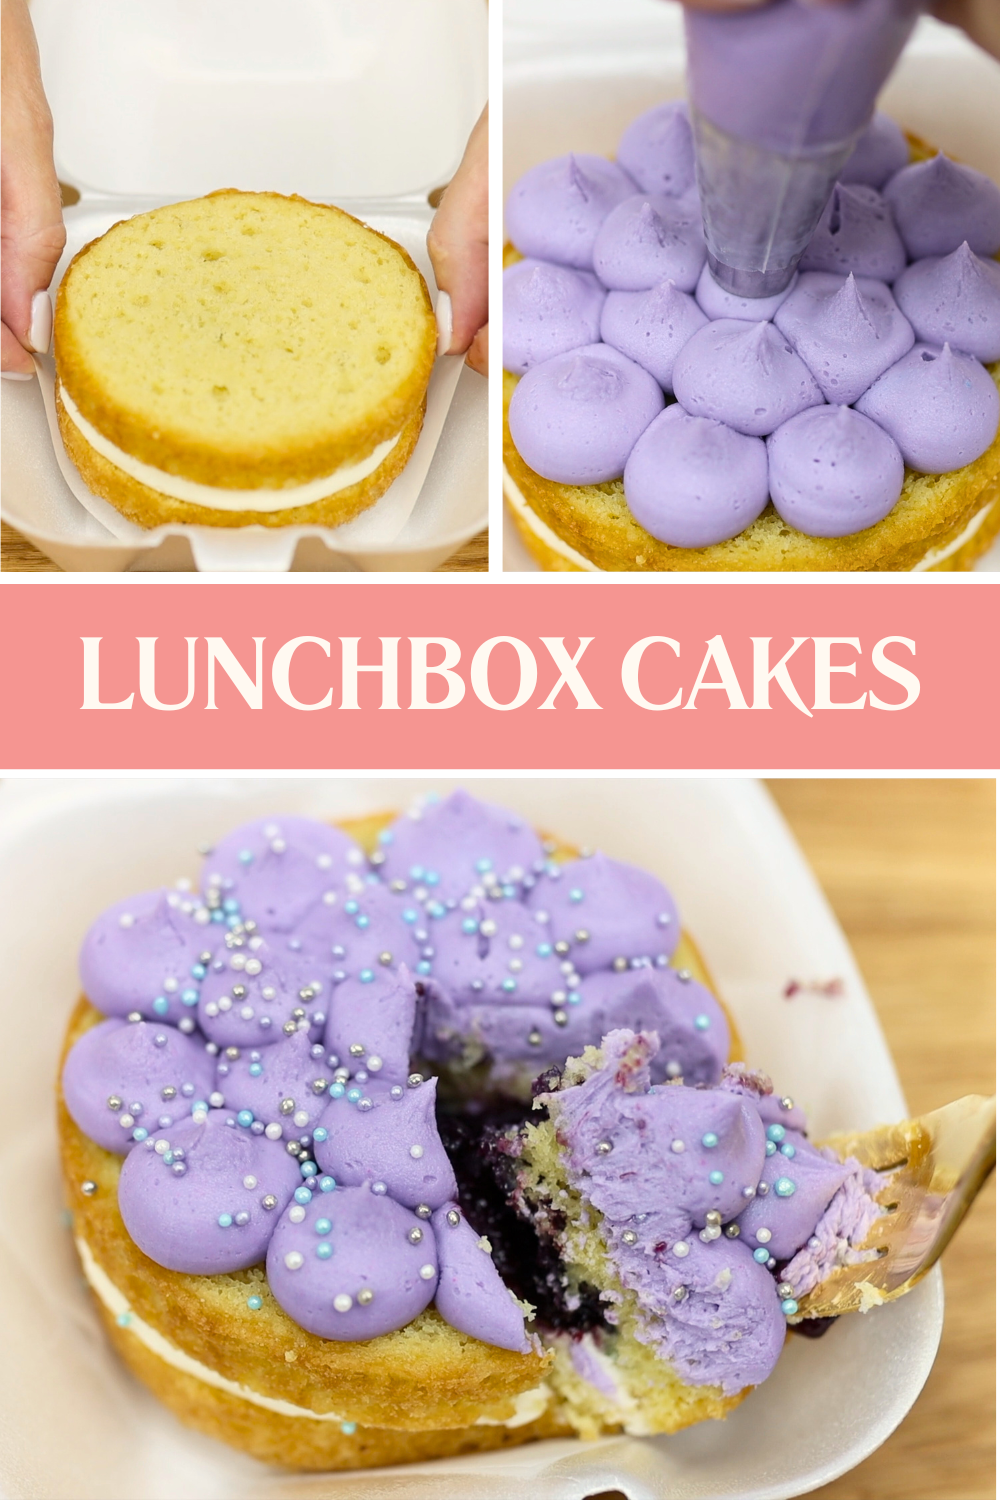
Start by assembling your mini cake on a small square of parchment or wax paper. Then lift and lower it into a takeout container. Add some piping on top, close the lid, and you’ve got a portable dessert!
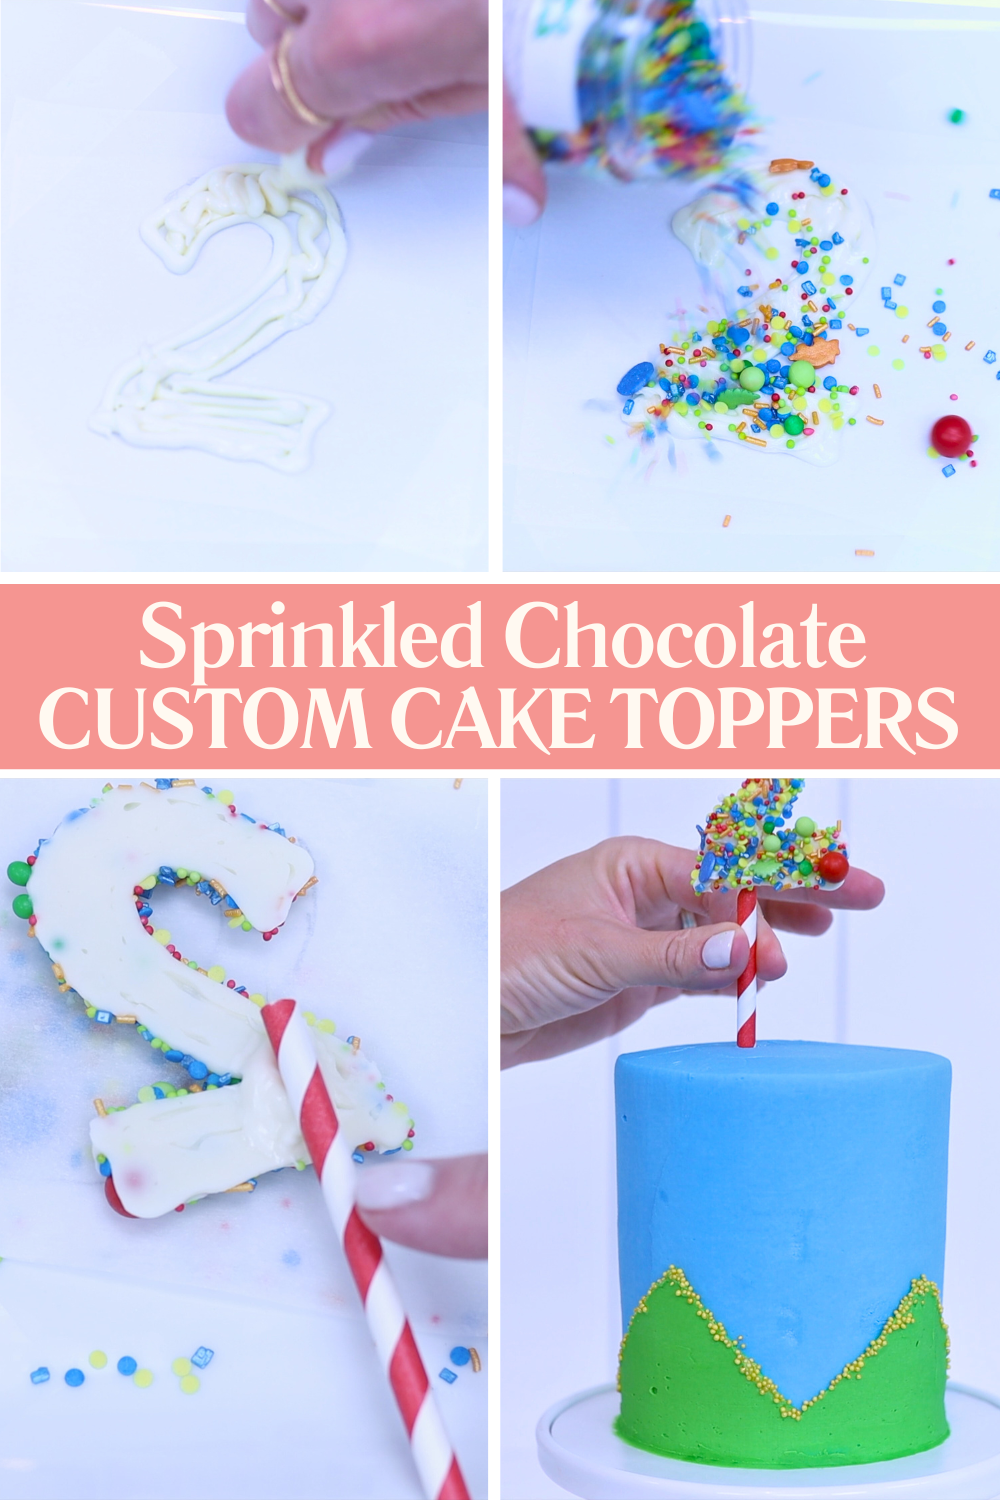
Make your own edible cake toppers using just melted chocolate! Spoon melted chocolate into a sandwich bag and snip off a small corner. Now pipe a number or letter onto parchment or wax paper. Add a toothpick to the base and pipe a little more chocolate over it to secure it. Sprinkle coloured sugar or sprinkles over the top while it’s still wet. Once it sets, peel it off the paper and push it into your cake. These are fun, colourful, custom toppers that stand upright beautifully.
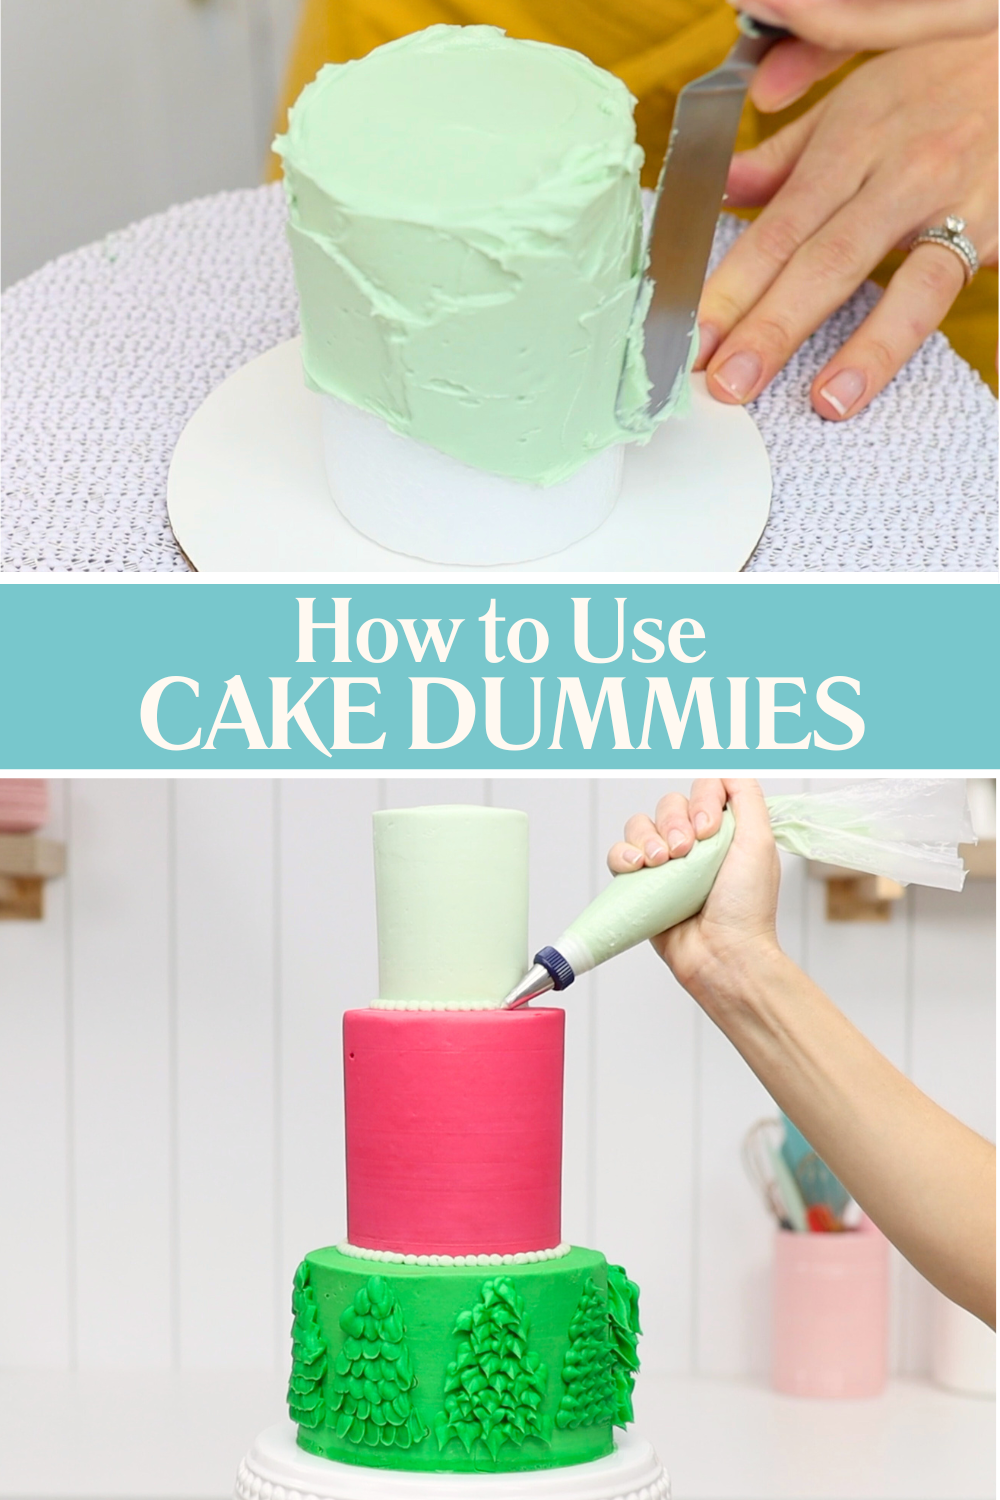
Tiered cakes look elegant but aren’t always practical if you don’t need the extra portions. To save money and prevent waste, use a styrofoam cake dummy to fake any of the tiers. Attach it to a cake board with a dab of buttercream and chill it to set that 'glue'. Then frost and decorate it just like a real cake. You’ll get all the height and style of a tiered cake without the cost or leftovers. And you can scrape and reuse the dummy as many times as you like!
I hope you've enjoyed these 10 cake decorating skills that make your life easier and your cakes look better. Tell me in the comments which one you’re going to try next and visit my cake school to learn hundreds more cake-decorating techniques and designs. See you there!
You can also watch a video of this tutorial on 10 cake decorating skills: