I’m going to show you how to make 10 EPIC rainbow cakes! If you prefer to watch a video of this tutorial, scroll to the bottom of the page.
1. Rainbow Stencil Cake
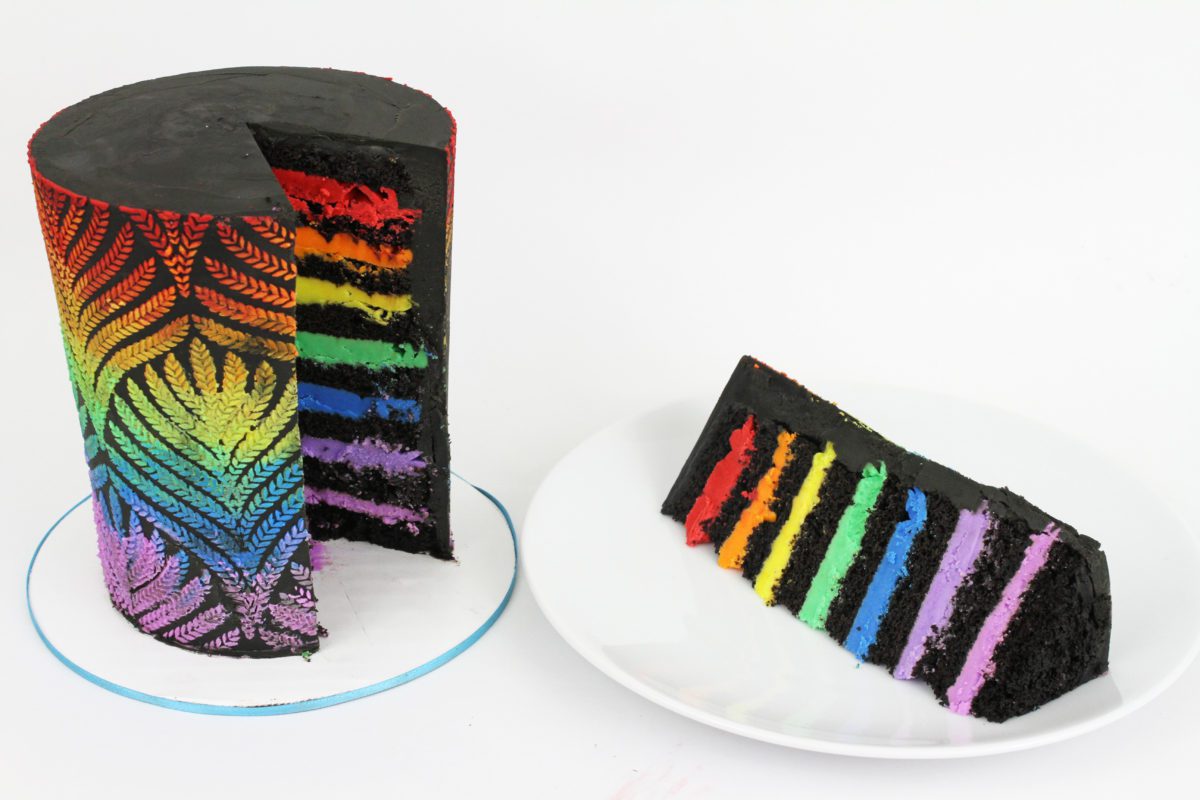
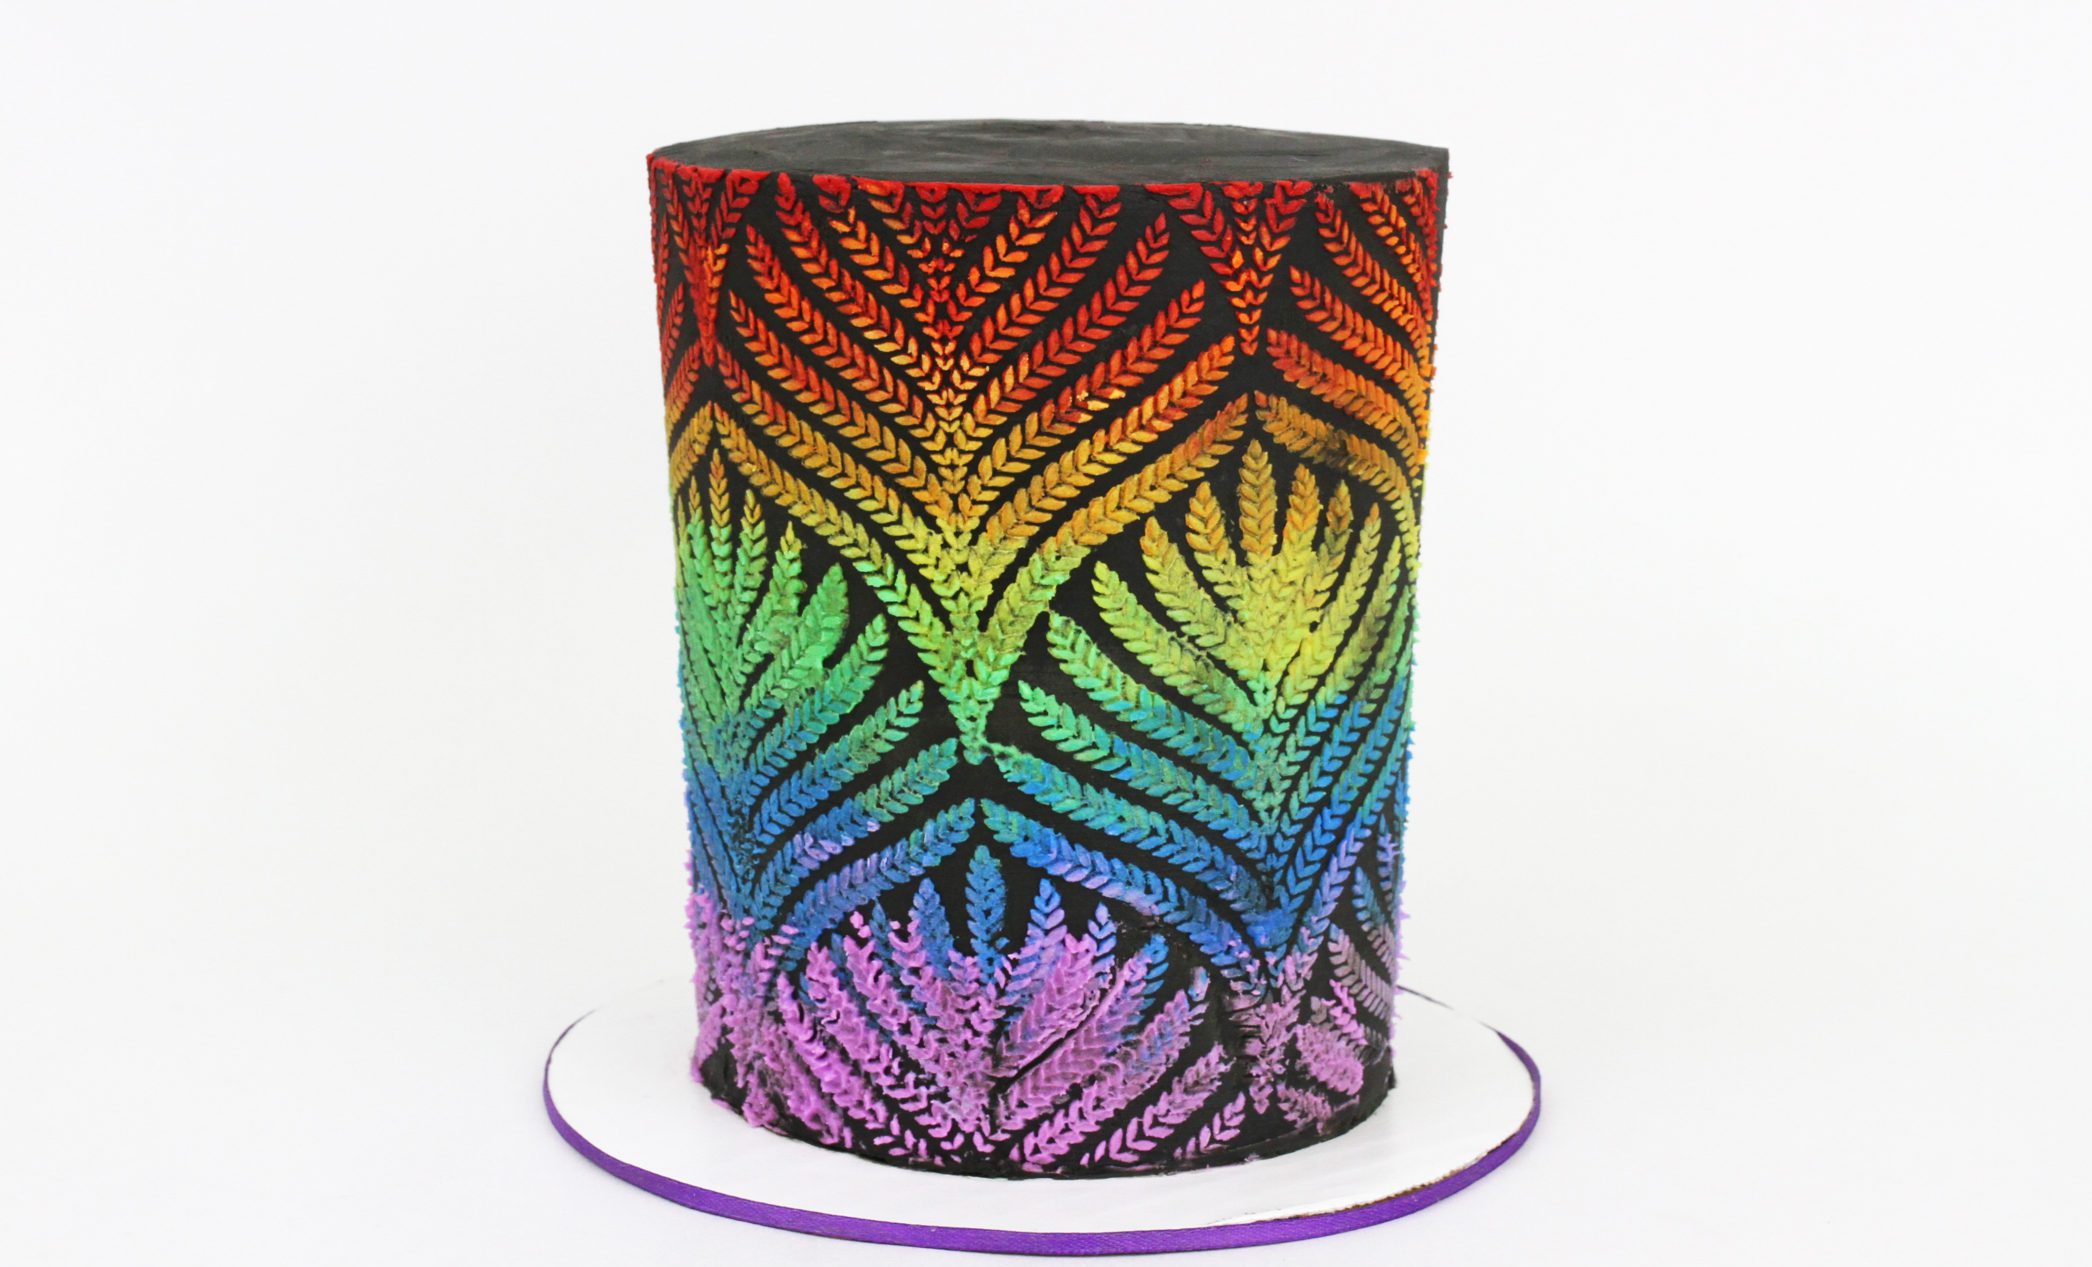
I’ll start with this dramatic black cake with a rainbow stencil design and it has a rainbow on the inside as well!
To assemble the cake I’m dividing 4 cake layers in half to make 8 layers, which will make space for 7 layers of filling – one for each colour of the rainbow!

Spread or pipe rainbow coloured filling onto each layer. I’m using a 1M star tip but you can use a piping bag with no tip for this, or spread on the filling onto the cake layers with an
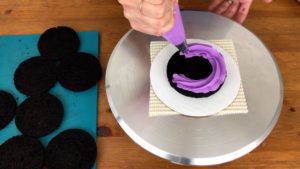
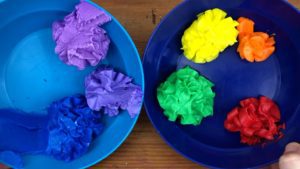
This is my 4 Minute Buttercream and I’ve used gel colours to tint small batches of each colour. Save any leftover buttercream of each colour to use for the rainbow cake decorations later.

I’m using my black buttercream to frost the cake, which I love because it’s a deep black colour but won’t stain your teeth when you eat it!

After giving the cake a crumb coat and letting it set, add a final coat of frosting. If you’re struggling with smooth frosting, check out my tutorial on how to get perfectly smooth frosting with sharp edges. You can use any colour for this but I love how the rainbow colours stand out on black frosting.

Chill the cake to set the frosting before using the stencil. You need to it be very firm so leave it in the fridge for at least an hour.
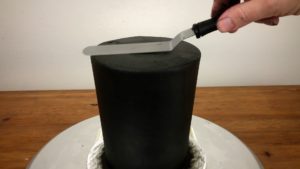
You can use any design of stencil and if you want the design to go all the way down to the bottom of the cake you can cut the bottom section off.

I’m going to use the leftover buttercream from filling my cake, to apply onto the stencil. If you do this, cover the frosting with cling film or saran wrap until you’re ready to use it so that it doesn’t crust.
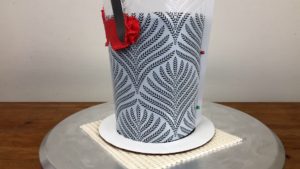
Place your chilled cake on a nonslip mat on a

Now spread your first colour onto the stencil with your
Use all of your buttercream colours to spread rows of buttercream onto the stencil. The rows don’t have to be perfectly even or straight because they’re going to blend together in a minute, so it doesn’t need to be precise.
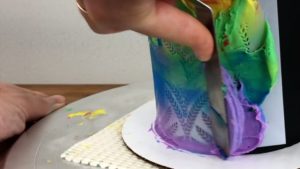
When the stencil is covered with buttercream, scrape off any excess buttercream to leave a smooth layer, which should be as thin as possible for the neatest results. You can use an
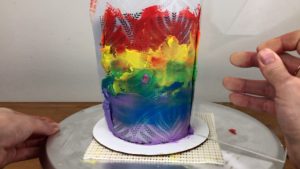
Pull out the pins and peel the stencil off, being careful not to let any part of the stencil brush against the cake again after you’ve lifted it because that will smudge the design.
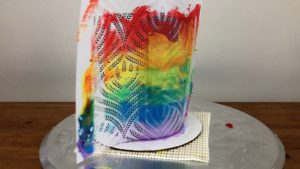
Chill the cake again to set this part of the design and then wrap the stencil around the next part of the cake, pinning it in place again. It’s essential to let the first section of the design set before doing this, otherwise you’ll smudge it when you press the edge of the stencil over the first section.

You’ll need to wash and dry the stencil and your frosting smoother after doing each section. Repeat the process until you’ve covered the whole cake with a beautiful rainbow coloured stencil design!
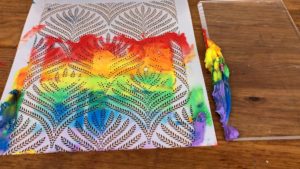
Tidy up the top edge by scraping off any buttercream sticking up, using your

If there are any areas where the design didn’t go through the stencil you can chill the cake again and then carefully line the stencil up over that area and spread more buttercream over it to fill in that part of the design.
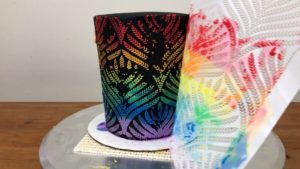
It’s a bit tricky to line it up perfectly but with a busy pattern like this you won’t really notice if the design isn’t perfectly lined up.
2. Rainbow Number Cake
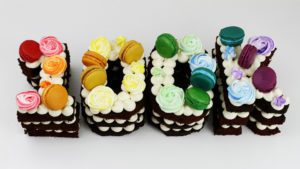
If you hate smoothing frosting, this rainbow number cake is for you! Start by making rainbow coloured meringues, and I cover the recipe and all of the steps for this in my full tutorial on how to make this Rainbow Number Cake from start to finish.
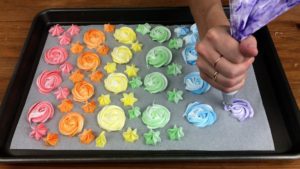
Then optionally, carve your cake layers. You can create this rainbow cake with numbers or letters or shapes or just use plain round or square cakes right out of the baking pan.

Attach the cakes to a cake board using dollops of buttercream wherever you want them to go and the buttercream will act as a glue to secure the cake layers.

Pipe buttercream onto each cake using a piping bag fitted with whatever tip you like. Here I’m using a 1A round tip, but you can pipe swirls or rosettes or open stars if you prefer.
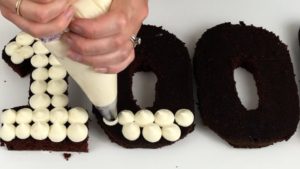
After covering the first layer of cake with piped buttercream, carefully lower the next layer of cake on top. If you’re nervous about needing to adjust the cake to shift the position, which would smudge the piped buttercream below, you can chill the whole cake on the cake board to set the piped buttercream before adding the next layer of cake.
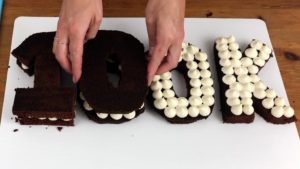
Pipe another layer of buttercream onto the cake. For naked cakes like this I use simple syrup to keep my cake layers moist and I store them in an airtight container overnight so that they don’t dry out by the next day.
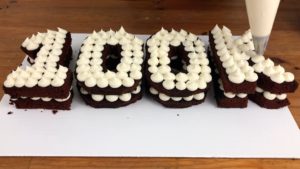
Immediately after piping on the final layer of buttercream, arrange your rainbow meringues on top of the buttercream. Since the buttercream is fresh and sticky they’ll attach easily.

I added rainbow macarons as decorations as well – you can get creative with rainbow coloured candies or flowers, or if you want a touch of gold you can use chocolates with gold wrappers. This is such a simple cake to put together but it’s a real showstopper!
3. Rainbow Sprinkled Frosting Cake with Rainbow Sprinkled Oreos
This is a really fun way to incorporate sprinkles into your cake!
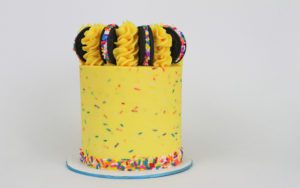
Set aside a little bit of frosting for touchups and piping swirls later and then pour a generous amount of sprinkles into the rest of your frosting. I find that these little rods, or jimmie sprinkles, work the best. You probably won’t notice the shape of shaped sprinkles (unicorns, hearts etc) because they’re unlikely to end up facing outwards.

Give your cake a crumb coat, let it set, and then frost your cake as normal with the sprinkled buttercream.
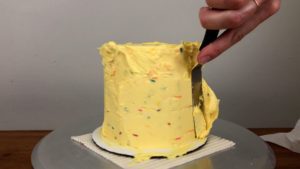
You’ll notice that when you smooth the frosting, some of the sprinkles will get caught by your frosting smoother and dragged around the cake and they’ll leave a trail behind, an indent in the side of your cake.
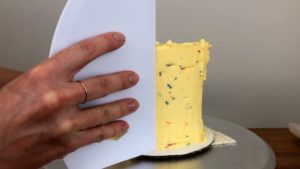
Before using your frosting smoother to scrape around the cake again, spread on some of the frosting without sprinkles that you set aside at the beginning.

When you scrape around the cake with your frosting smoother again, the plain buttercream will fill in any indents made by the sprinkles and your frosting will be smooth! Tidy up the top edge and spoon the rest of your buttercream without sprinkles into a piping bag with a 1M star tip, for later.
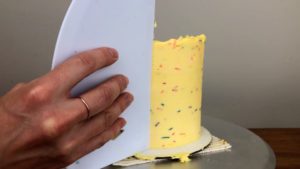
Chill your cake for the next step and now we’re ready for some really fun sprinkled decorations! To make a very neat sprinkle border around the bottom of the cake, place your cake on a baking tray to catch any sprinkles that fall and pour your sprinkles around the cake board.

Wrap a strip of parchment paper around the cake, leaving the bottom inch or two exposed and that’s where the sprinkles will stick to the frosting. The cake needs to be chilled otherwise the parchment will texture and damage the freshly-applied frosting. You can use pins to attach the parchment paper to the cake or just hold it in place. Press the sprinkles into the frosting using your hands or an
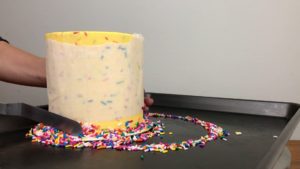
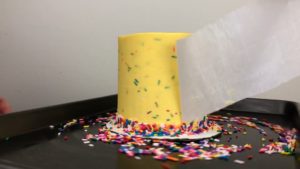
You’ll have to use quite a bit of pressure to get the sprinkles to stick because the frosting has set, but the advantage of this is that you won’t damage the frosting, which you might do if it was still soft. If you like, you can spread fresh buttercream onto the frosting that’s exposed below the parchment and press the sprinkles onto that instead. Peel the parchment paper off to reveal your sprinkle border!
Separate Oreos or any other sandwich cookies. We want the halves with no filling, and the most effective way to separate them neatly is to pull the two halves apart, rather than twisting them, because if you twist them you usually end up with half of the filling on one cookie and half for the other.
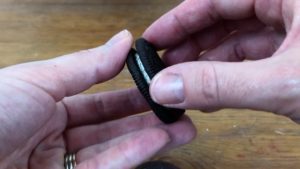
Use the halves with no filling, or if you want you can scrape the filling off the other halves and use those too. I need 16 cookies to make 8 cookie sandwiches, because I’m going to pipe 8 swirls on top of my cake and I need a cookie sandwich for each swirl. You’ll also need buttercream in a piping bag with a round tip and a bowl of sprinkles.
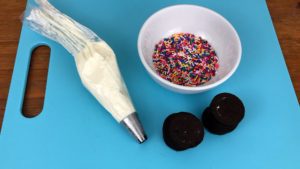
If you want more of the Oreo filling flavour you can stir the scraped cookie filling into your buttercream! Pipe a ring of buttercream onto a cookie, not going right up to the edges because you don’t want it to bulge out later, and then gently press another cookie on top to make a cookie sandwich.

Now roll the cookie in the bowl of sprinkles so that the sprinkles stick to the buttercream you’ve just piped on, spinning the cookie between your fingers so that the whole ring of buttercream is coated with sprinkles.
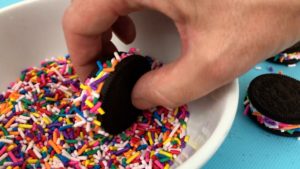
Do this for all of your cookies. If the sprinkles are sticking out in every direction you can roll the cookie along a cutting board or a baking tray to push them in so they’re a bit tidier.

Now take your piping bag and your Oreos and we’re going to decorate the top of the cake! Pipe a dab of buttercream at 8 places around the outer edge of the cake, piping opposite each one to space them evenly around the cake.

This fresh buttercream will act as a glue to attach the cookies. Press a rainbow Oreo into each dab of buttercream, pushing firmly down to secure it.

Hold your piping bag in between two cookies and pipe a swirl, going right up to the sides of the cookies and stopping the swirl when you get to the top of the cookies.
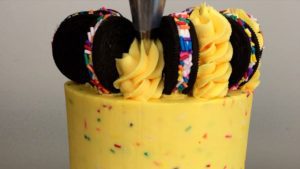
By placing the Oreos first, you’re making sure that the swirls and Oreos are spaced evenly around the cake and that the swirls are the same width and height.

As a sidenote, this is one of my favourite rainbow cakes, with sparkly stripes of rainbow colours and a shiny sugar topper. I teach how to make this step by step in an online class on my online cake school.

4. Rainbow Cake Layers
This is another cake with rainbow layers on the inside, this time with rainbow coloured sprinkles baked into the cake layers.
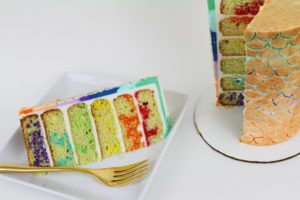
Tiny non-pareil sprinkles work really well for this because they dissolve as they bake, leaving their colour in speckles throughout the cake without adding any texture to the cake.

Divide your batter between your greased cake pans. Pour the sprinkles into the pans and then gently swirl them in using the end of a spatula or spoon. You can do this in bowls instead and then pour the batter into pans, but this makes less mess!
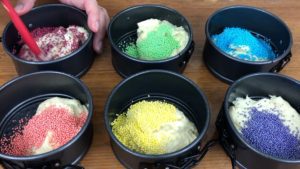
You’ll need quite thin layers of cake for this because you’re going to have lot of layers – I’m using six but you can do more or less if you like. Bake the layers as normal and you’ll see the pretty specks of colour in them.
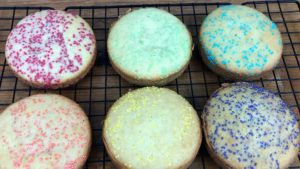
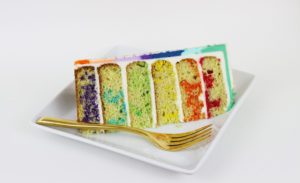
Let them cool and then assemble your cake by layering the cakes with filling. I’m going in the order of the colours of the rainbow with purple at the bottom and red at the top.

Give your cake a crumb coat and since the cake is so tall it’s essential to secure the cake properly to the cake board. I teach how to do that along with mixing, baking, leveling, dividing, assembling, crumb coating, frosting, storing, transporting and serving cakes in my online course, the Basics of Cake.

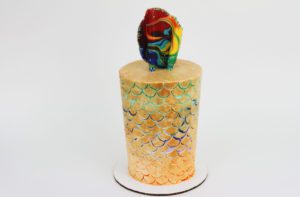
Now you can decorate your rainbow cake however you like. This golden rainbow scallop design is part of my online course on Buttercream Carving.
When you cut into the cake, the inside is just as colorful as the outside!
5. One Bag Piped Rainbow Cake
Now for a very very easy technique! Tint small bowls of buttercream with gel colours and the beauty of this technique is that you only need ONE piping bag! You can use whatever star shaped tip you like – I’m using a Wilton 199 open star tip.
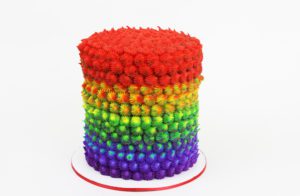
Spread out some cling film and along the middle, place a dab of buttercream of each of the colours you’re going to use. It’s possible to spoon the colours straight into a piping bag but much easier this way!

Roll the cling film up and twist the ends and then cut off one end, the end you’re going to start with. Place this end down into your piping bag.

Place a crumb coated cake on a

Then move the piping bag up a little bit so that you can pipe another row of rosettes immediately above the previous row. It works well to pipe each rosette of this row in between the two rosettes beneath it, so that it covers up the dip in the frosting and that makes sure the crumb coat is completely covered.

As you continue up the cake you’ll notice new colours slowly start to appear in the rosette you’re piping, as the colours higher up in the bag start to push through the middle of the colors lower down. This makes a really pretty blended effect over the cake as the colours gradually blend from the first colour in the piping bag, all the way through the other colours.

If you run out of buttercream, pull the cling film out of the piping bag and then add more buttercream to the bag. Go all the way to the top of the sides of the cake with your rows of rosettes, and keep piping until your final row sticks up over the top edge of the cake. Then pipe rings of rosettes within that top row, continuing towards the center of the top of the cake to cover the entire surface.

And there it is! Dramatic, colourful texture!

6. Rainbow Russian Tips Tray Bake Cake
This stunning rainbow flower cake is a tray bake cake, which is the quickest kind cake to make and decorate!
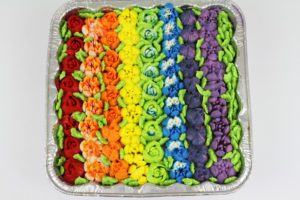
Pour your cake batter or brownie batter or cookie dough into a casserole dish or a baking tray and bake it and then decorate it within that dish or tray, so you don’t have to level and divide and layer your cake, or cover it with smooth frosting.

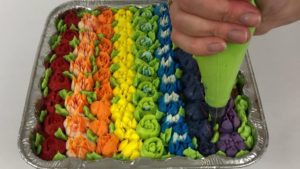
I’m using Russian tips or flower nozzles for this cake with a different bag of coloured buttercream for each row of flowers, some them plain colours, some of them randomly blended, and some of them prepared with one colour for the inner part of the flower and another colour for the outer petals.
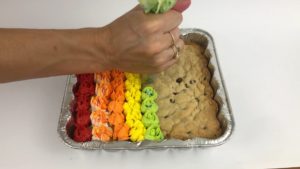
This is just a snapshot of how I decorated this cake but I have a very detailed tutorial on 5 Tricks For Russian Tips showing how to get the right consistency for your buttercream and how to prepare the buttercream and use the tips, and another tutorial on how to make and decorate and store tray bake cakes.
7. Icing Sheet Cake With Rainbow Piping
I’ve covered this cake with icing sheets and I have a detailed tutorial on that process in my Ultimate Guide To Icing Sheets On Cakes.
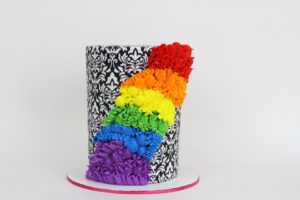
Fit a piping bag with a coupler so that you can use different tips without emptying the bag, and then fill it with a very small amount of purple buttercream and pipe whatever design you like in a small section of the bottom of the cake.
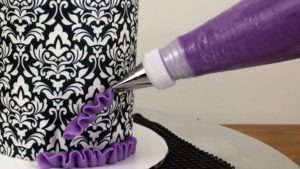
I’m starting with a small petal tip, a Wilton 104, piping little ruffles and then unscrewing the coupler, taking the tip off, and replacing it with a Wilton 199 tip, an open star, to pipe some rosettes. My final tip is a drop flower tip to pipe little stars to fill in any gaps.
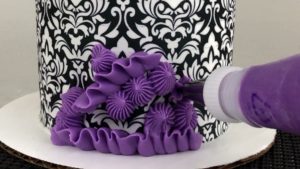
I’m following the same steps for blue with my next piping bag, also using a coupler and using the same three tips, washed first of course, or you could use different tips for each colour if you wanted to.

I’m working my way up in a diagonal and I love how the colours and textures stand out against the black and white icing sheet!

8. Buttercream Rainbow Stars Cake
This cake uses my Buttercream Cut-Out Technique for the rainbow star design.
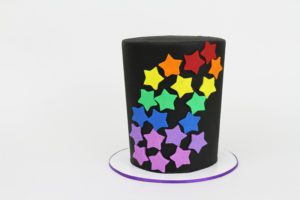
Before frosting your cake, pipe or spread small strips of rainbow coloured buttercream onto a piece of parchment paper placed on a cutting board.

Spread the buttercream as thin and smooth as you can with your
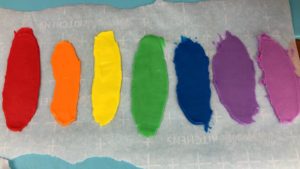
Take it out and use a cookie cutter to cut out shapes. If they pull up with the cutter, gently push them back through the cutter and place them on the parchment paper for later.

Work your way through all of the colours, wiping the cookie cutter clean with a paper towel after each colour so you don’t smudge the stars of the next colour with that previous colour.
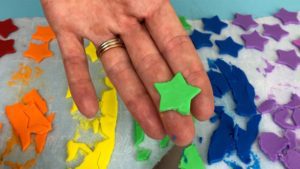
If the stars stay behind on the parchment paper, use a sharp knife to lift them up. If the buttercream starts to warm up and soften as you’re doing this, put the cutting board back with the parchment paper back in the fridge for a few minutes until the buttercream chills and firms up and then continue.
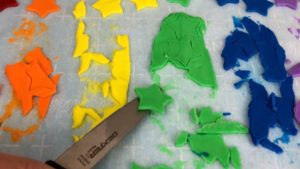
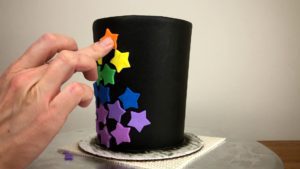
When you’ve set all of the stars to one side, put them back in the fridge while you frost your cake. I’ve used my black cocoa buttercream for this cake. As soon as you’ve smoothed the frosting, while it’s still sticky, take the stars out of the fridge and press them against the frosting so that they stick.

You can create whatever pattern or design you like and these buttercream cut-out shapes have the effect of fondant with the taste of buttercream!
9. Piped Rainbow Heart Cake
The combination of colours and texture on this cake are eye-catching and good news: it’s much easier to decorate than it looks!

Start by frosting the cake however you like. I’m using a textured cake comb to make textured frosting for this one, This texture is really useful as a guide for how many lines of each colour to pipe. I’m going to use 8 colours so I’ll pipe each colour just between two of the grooves of the texture.
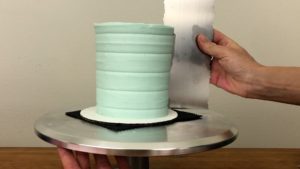
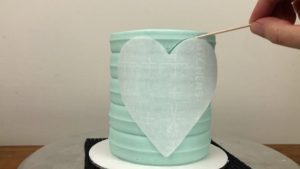
Draw a heart or any other shape onto your cake as an outline for your design. I’ve cut this heart out of parchment paper to trace around but to do this you have to the frosting set before you press the shape against it. I left this cake in the fridge for an hour before doing this.
Use a petal tip (I’m using a Wilton 104) and pipe your first colour of buttercream at the bottom of the shape, piping lines that start at one edge of the outline and finish at the other. It’s best to start at the bottom and work your way up because it’s easier to see what you’re doing, and also to hold your piping bag so that you’re piping on top of each ruffle, instead of trying to angle it to pipe underneath the previous ruffle.
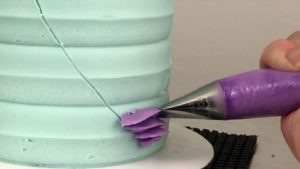
If you want to tidy up any of your lines you can use an
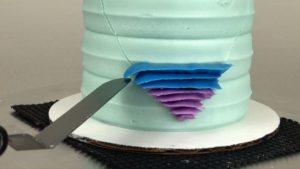
Hold the piping bag with the narrow end of the tip pointing away from the cake and the wider end pressed against the cake and that makes the outer edge of the line really thin and creates a bit of movement, like a ruffle.
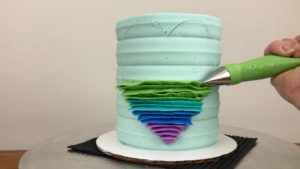
If only have one piping tip then having several piping bags and a coupler is really useful so that you can take the tip off, wash it, and use it in another piping bag the next colour, without first having to squeeze out all of the buttercream from the first bag and wash and dry and refill it with the next colour.

This top section of the heart is a bit different, only because you’re piping two separate lines across each ruffle to leave that indent in the top of the heart.
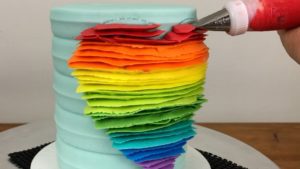
I’ve piped the ruffles a bit too far apart from each other, so you can see the frosting showing in between some of the ruffles. I’m going back in to fill those areas in with some short little ruffles to cover up the frosting, and because the ruffles are so unique and random, you don’t really notice.
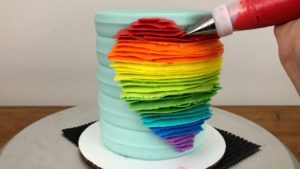
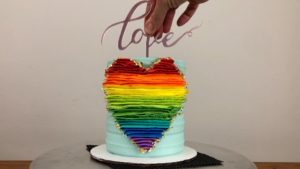
Of course, you can use whatever colours you like for this, so you can stick to the 7 traditional colours of the rainbow or vary it, like here where I’ve added teal green and lime green to the spectrum.
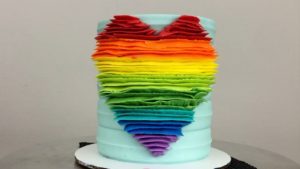
If you want to add a gold outline to the heart, chill the cake in the fridge for about an hour to set the ruffles and then use a paintbrush to lift gold sheets from their baking and transfer them onto the edge of the frosting.
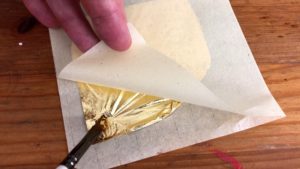
Gold sheets stick to anything they touch so you don’t need a lot of pressure at all for this, just gently guide where you want it to go.
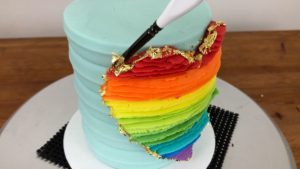
I love how versatile this design is because it makes it so simple to pipe a shape, and the texture and colours are really eyecatching! A pretty topper finishes it off nicely.
10. Vertical rainbow stripes
This last one is a technique I’m really excited about: vertical stripes!

Tape a piece of acetate onto a cutting board and cover it with buttercream. The acetate needs to be at least as tall as the cake and wide enough to wrap around the cake, plus an inch or two. Spread the buttercream so that it’s flat and the same thickness all over. You need to push the buttercream down to fill in the grooves indented in the buttercream, otherwise you’ll have air pockets later.
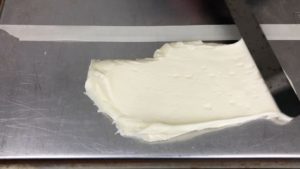
Scrape the buttercream with a striped cake comb to imprint grooves in the buttercream. I have a very detailed tutorial on this technique with more details about how to imprint really neat stripes and some troubleshooting tips for tidying up the stripes at the end. Chill the buttercream until the buttercream sets, about 15 minutes in the fridge,

While the stripes are chilling, fill piping bags with the colours you’re going to use for your stripes. The piping bags can have no tips or you can use round or open star tips – anything approximately the same width as the stripe grooves will work.
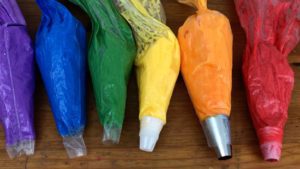
Fill in the stripe grooves with your colours. You need to push the buttercream down to completely fill in the stripe grooves, otherwise you’ll have air pockets later. Don’t worry that you’re smearing the colours together – this is the inside of the cake and this side won’t be visible.

Lift the acetate up, resting the bottom of the acetate on the cake board, and wrap it around a crumb coated cake. Press it to attach it to the crumb coat of the cake but don’t use so much pressure that you warp the stripes.

Chill the cake to set the striped frosting, which will take about 30 minutes in the fridge. Peel the acetate off to reveal the vertical stripes underneath!

You can trim the buttercream if you need to, if the acetate is taller than your cake. Then spread buttercream onto the top of the cake so that it’s the same height as the sides of the cake and smooth it with an
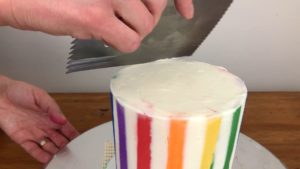
Do any touchups (I cover those in my full tutorial on vertical stripes) and then decorate the cake however you like! I’m using cling film to prepare buttercream to pipe rainbow swirls on top of my cake, piping on all of the colours into the middle of a piece of cling film.

Wrap the cling film around the buttercream to make a log and then cut off one end and drop it with that end down into a piping bag. I’m using 1M star tip but any closed or open star tip would work.

Pipe swirls onto the top of the cake, holding the bag in the same position around the cake so that the colours stay the same direction all around the cake.

I hope you’ve found some fun rainbow ideas to try and I’d love to see your creations so please tag me (@britishgirlbakes) in your cake photos on instagram!
Here’s the video version of this tutorial:

Thank you ????. I’m super excited to try all these amazing techniques. You’re awesome
Thank you! I'd love to see photos of what you create - please tag me @britishgirlbakes so I can see them!