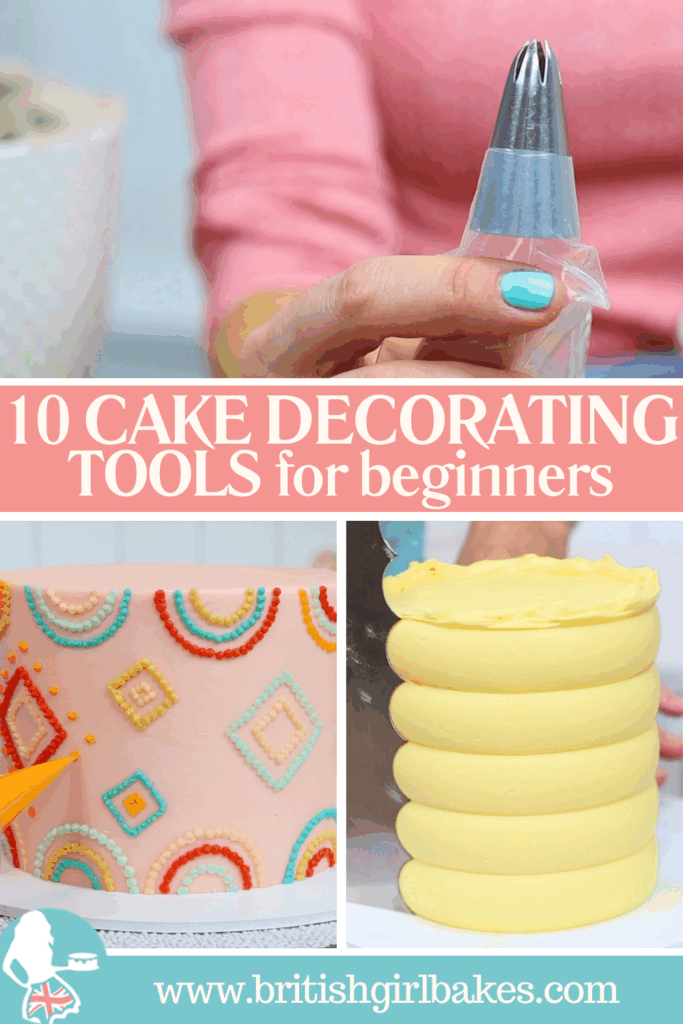
If you're looking for the best cake decorating tools for beginners, you're in the right place! Even as a beginner, having the right basic tools can make a huge difference – cake decorating becomes easier, more enjoyable, and your cakes will look SO much prettier, too. In this guide, I'll show you the 10 essential cake decorating tools for beginners, along with tips on how to use them like a pro. You can also check out my list of favourite cake tools.
The most basic but vital tool for cake decorating is an
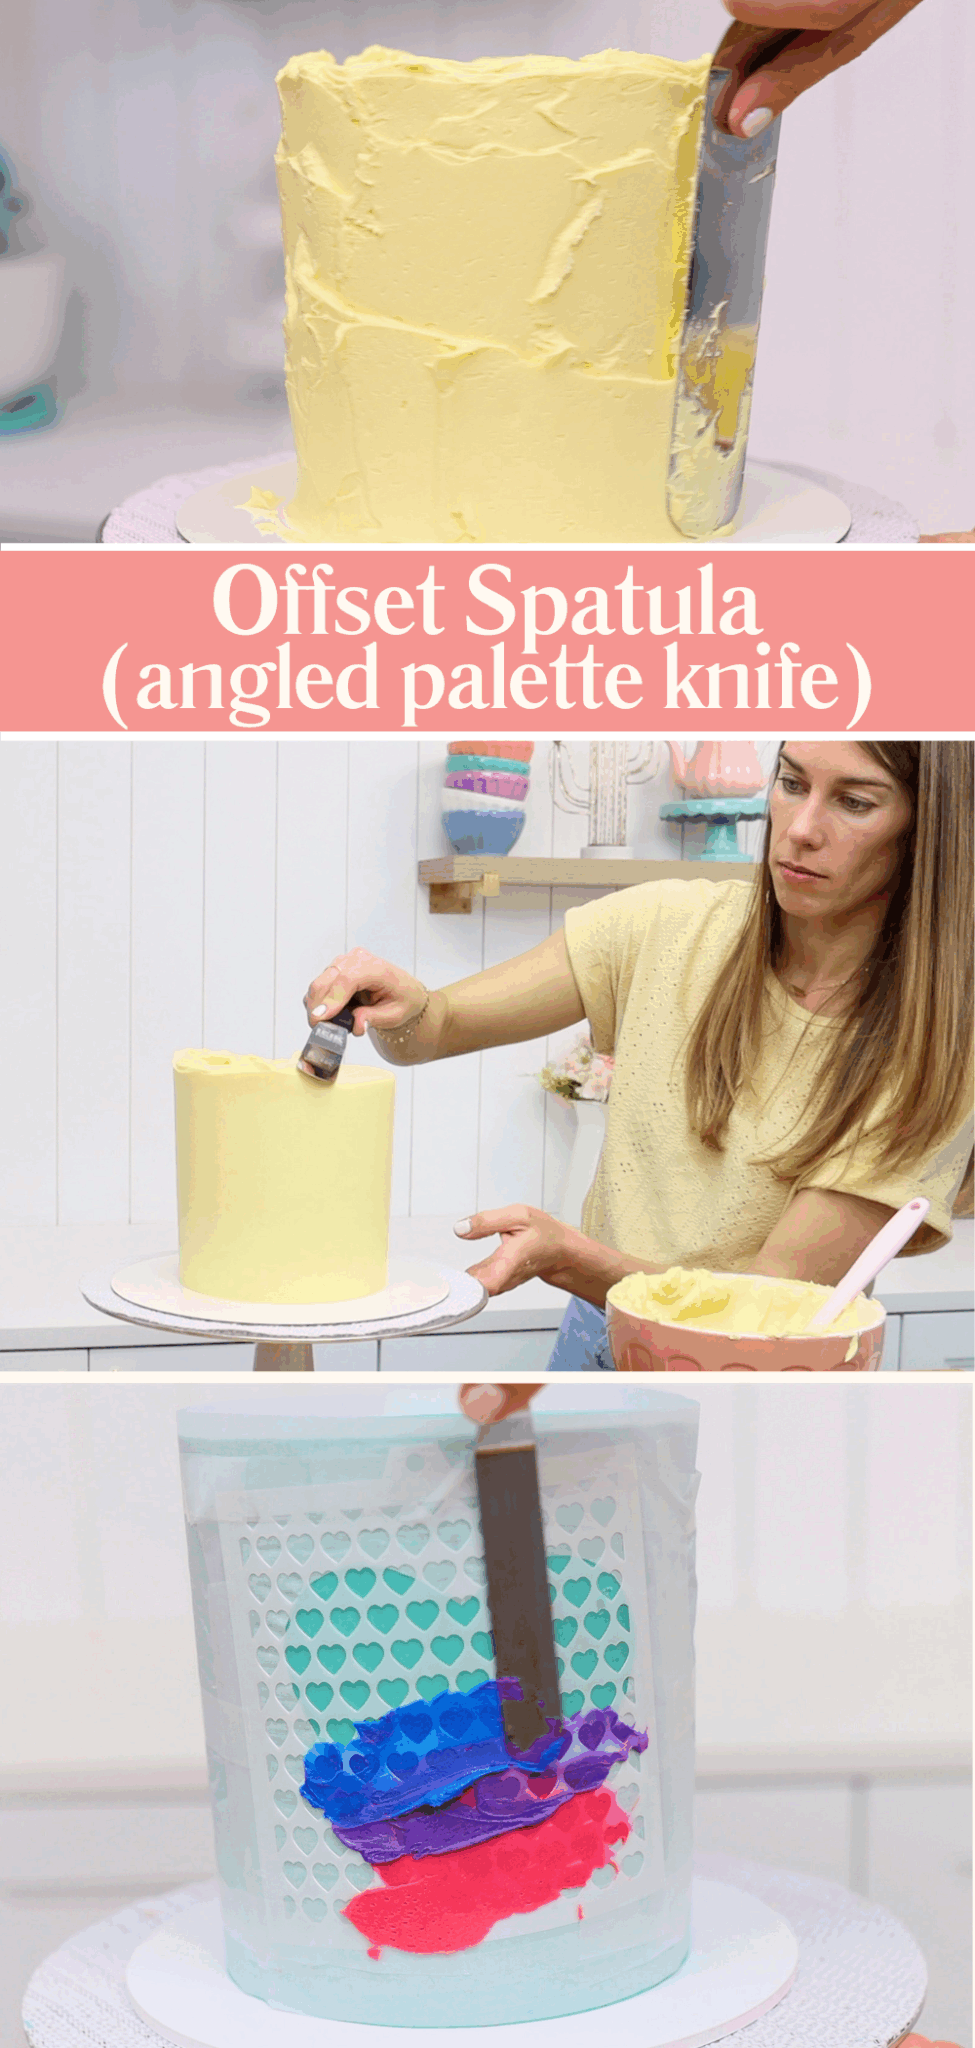
However, bigger isn't always better! A
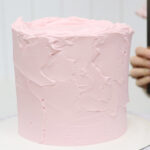
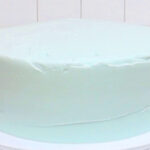
A cake comb (also called a frosting smoother or icing scraper) is another essential. They come in plastic, acrylic, or metal, and it's crucial to choose one that's at least as tall as your cake, so you can smooth the entire side in one go.
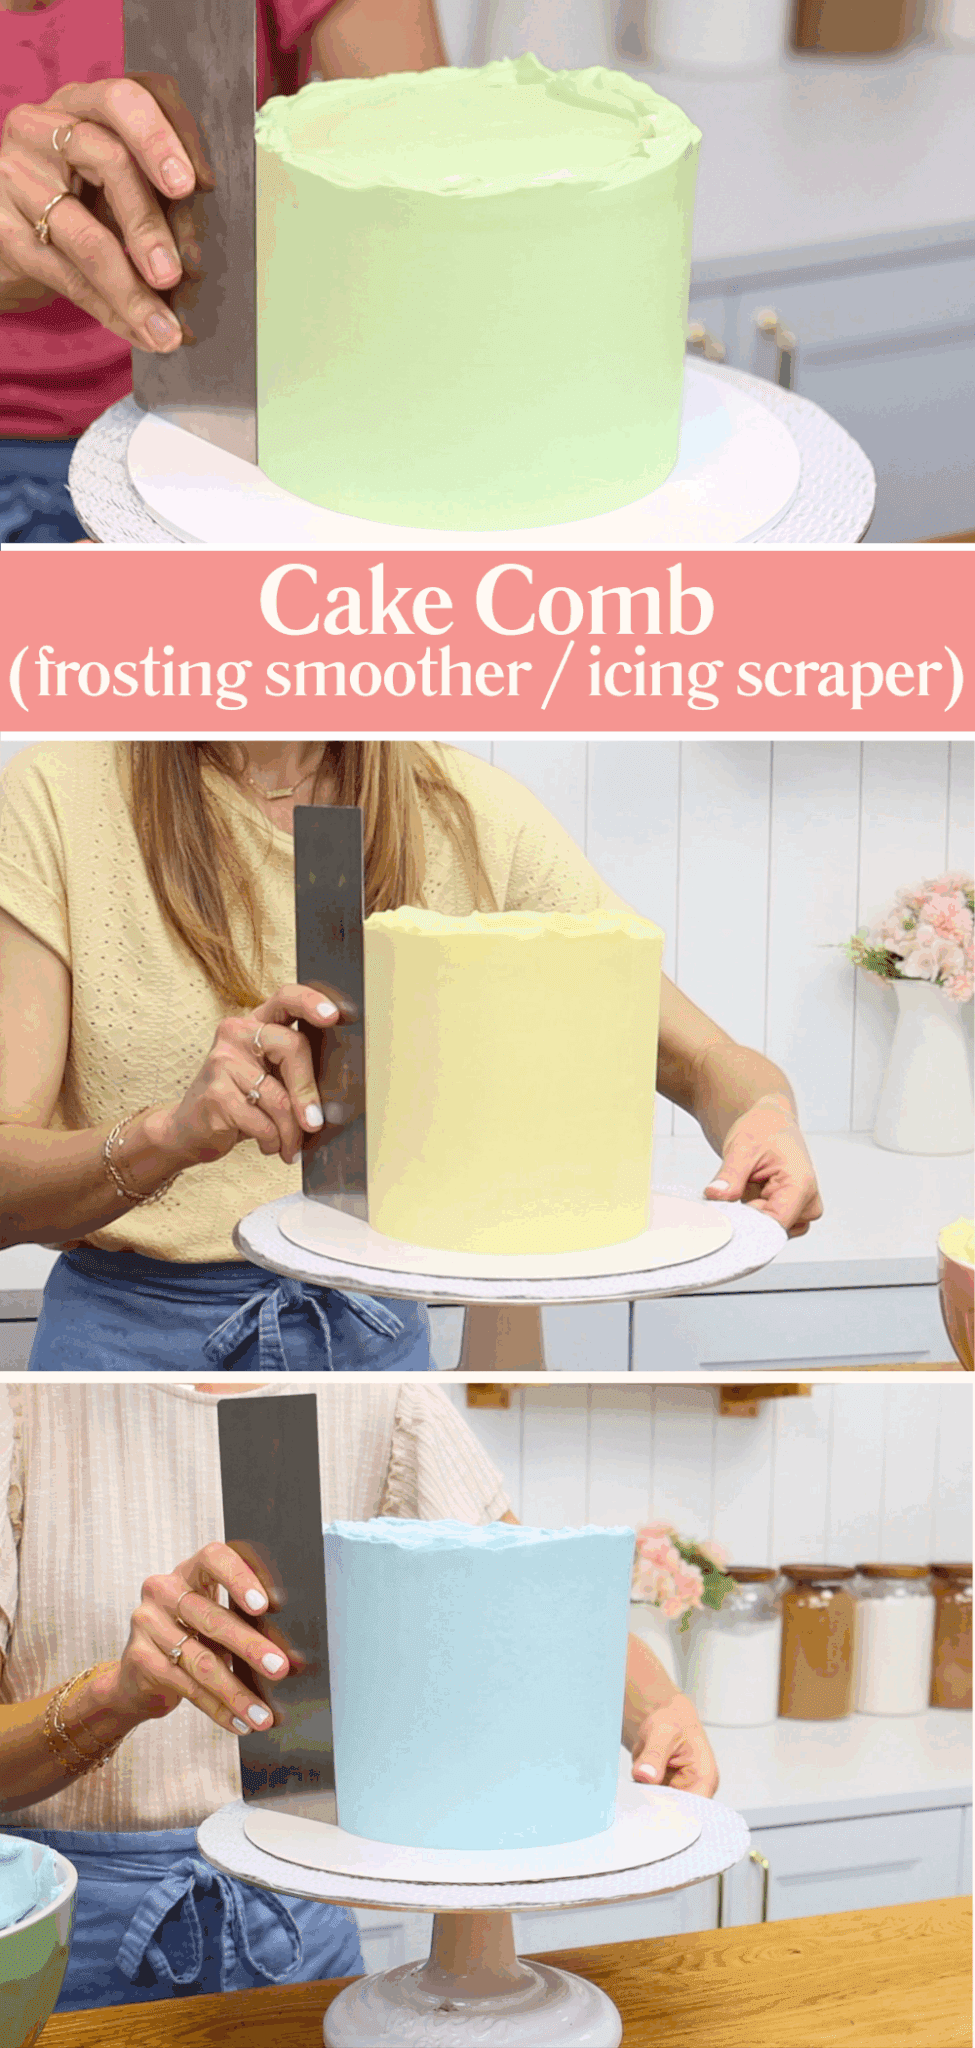
Personally, I recommend a metal cake comb because plastic and acrylic versions can chip easily when washed or dropped, and those tiny chips cause grooves or trails in your frosting. Metal combs can also be gently warmed with warm water, a hairdryer, or even a blow torch to make your frosting ultra-smooth.
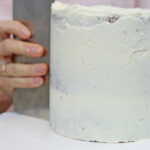
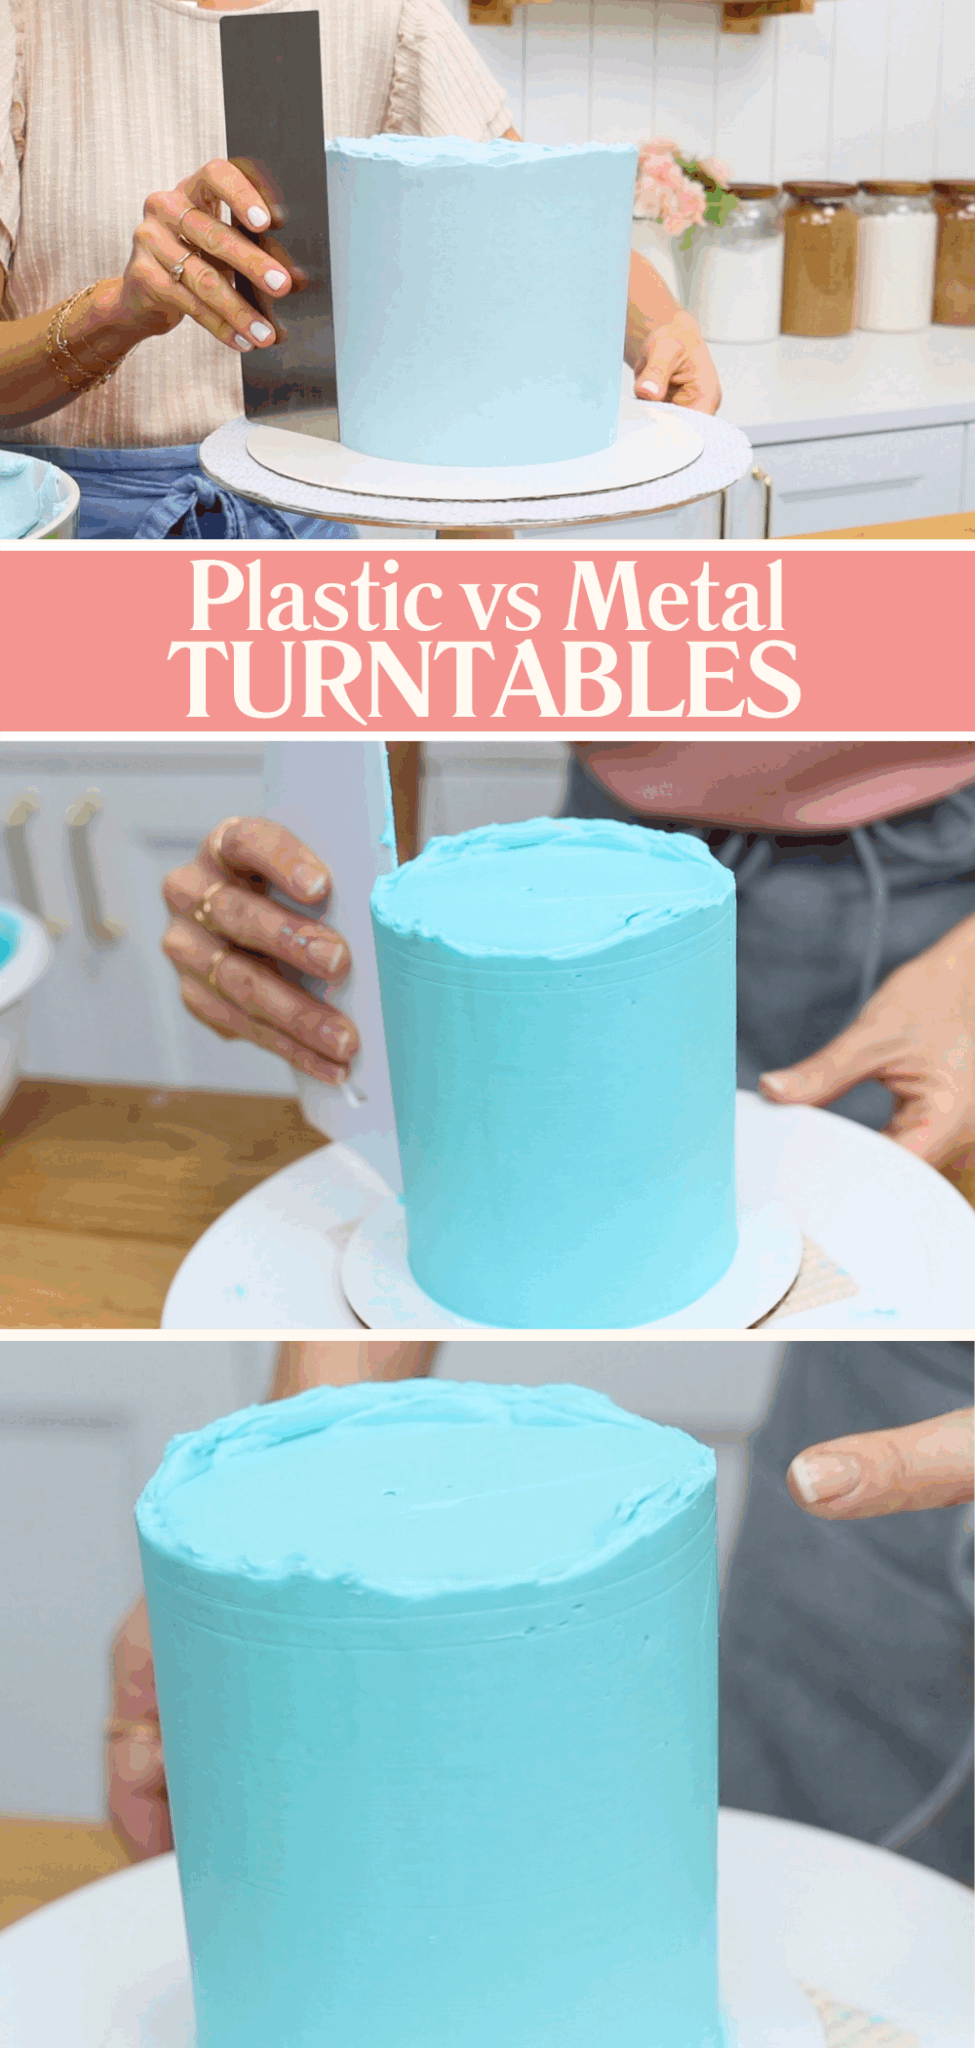
A
Plastic turntables are the cheapest option but tend to be quite wobbly, causing jerking motions that create vertical indents or dents in the frosting. A metal turntable costs a little bit more but is well worth the investment because the spin is much smoother, resulting in more polished cakes. You can see both in the image below - a metal
You'll definitely need piping bags for filling cakes, piping decorations, and adding details. You can choose between disposable and reusable options. I prefer disposable piping bags because they can be washed and reused hundreds of times. I find that reusable bags develop a lingering smell after a few uses.
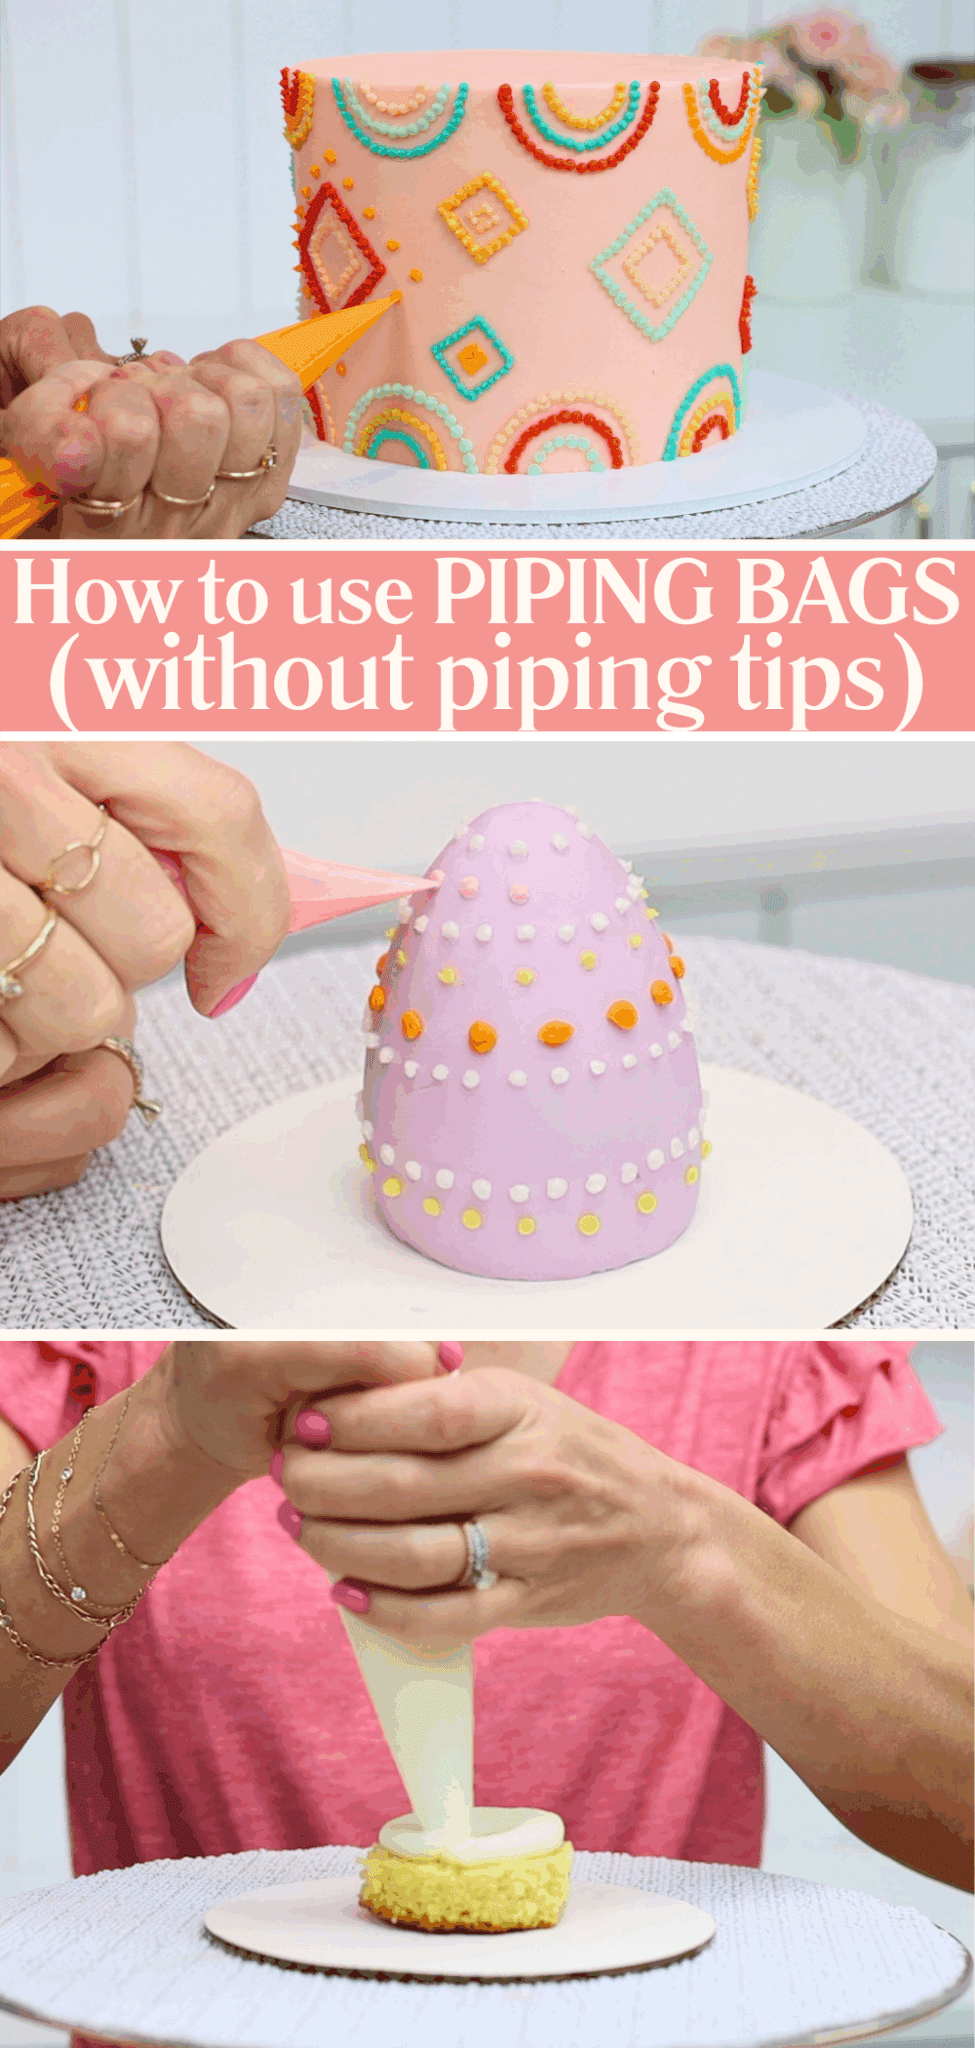
You don't always need piping tips. Simply snip a small piece off the end of the bag to pipe small dots or a larger piece for bigger decorations. This makes them brilliant for quickly adding fillings and frosting or even creating dotted decorative designs.
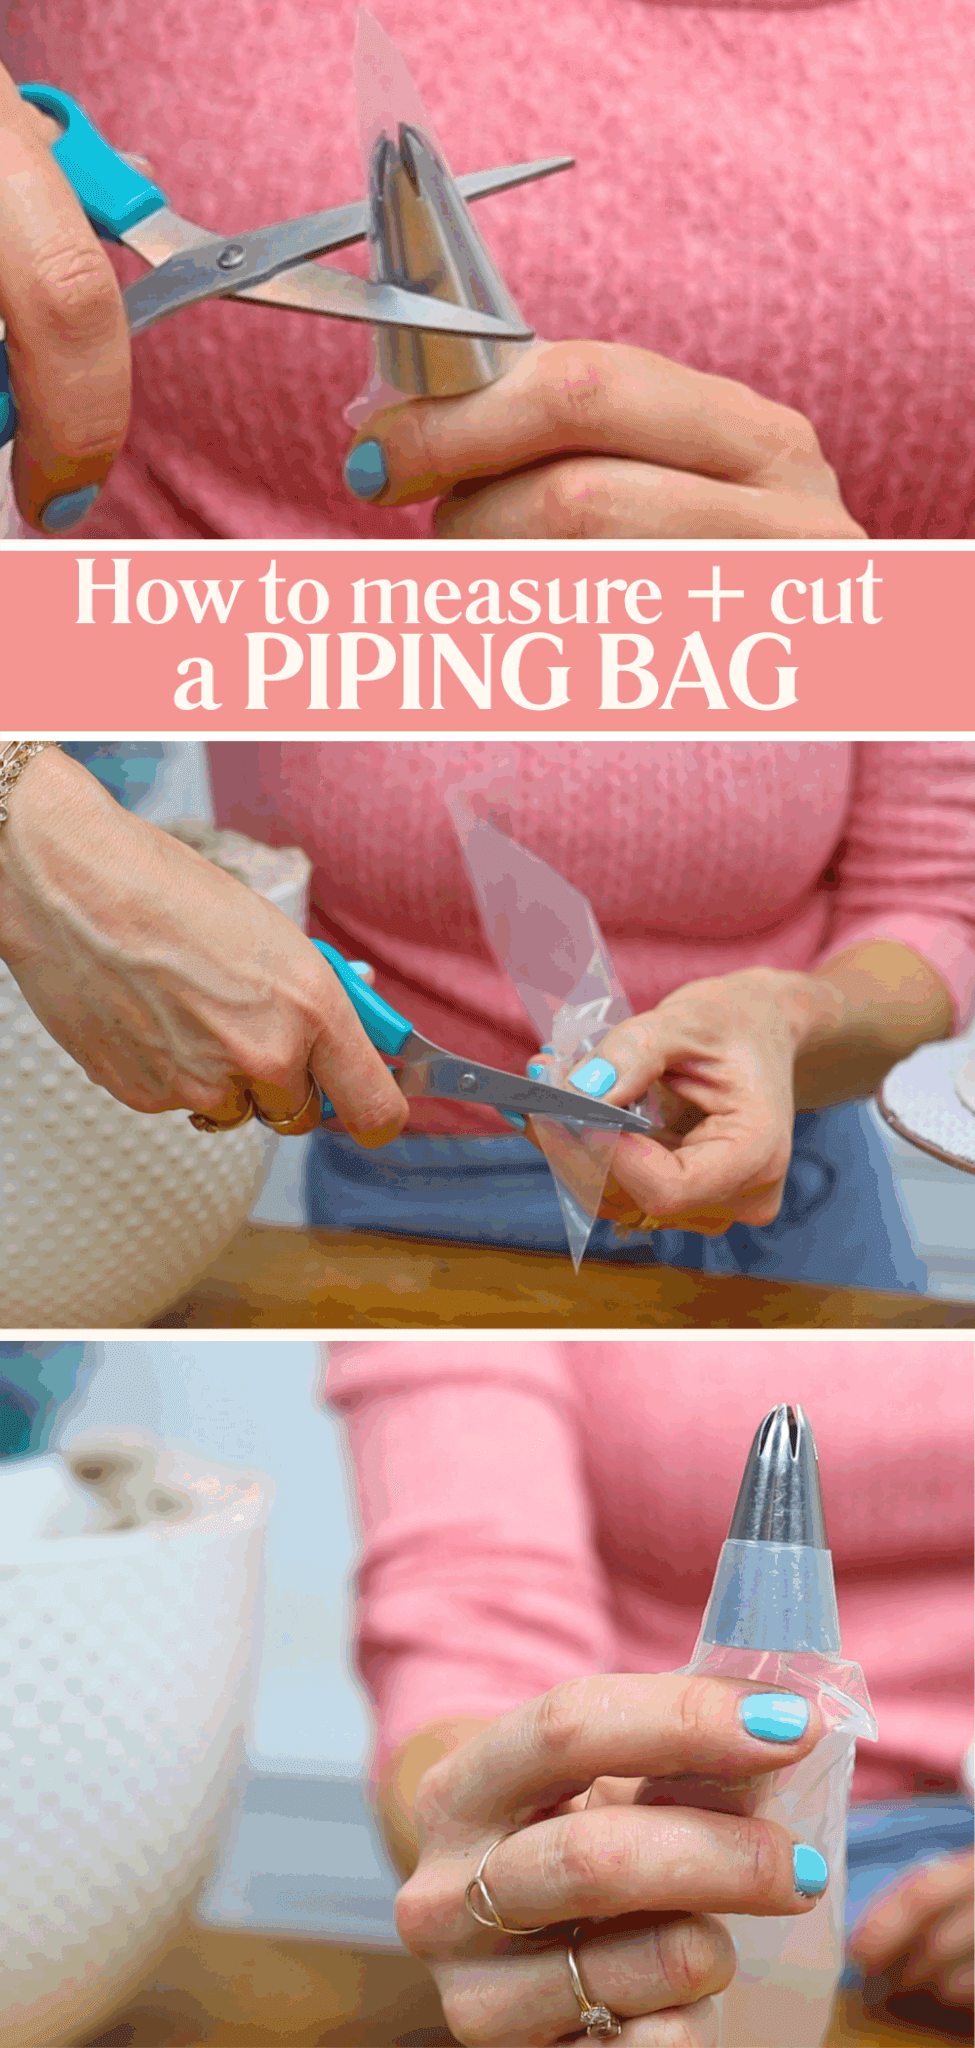
Now let's talk about piping tips. Fitting one into a piping bag is easy. Drop the tip inside the bag and push it down as far as it will go. Score a line with scissors about halfway up the piping tip. Push the tip out of the way and cut along the scored line. Then push the piping tip back down so that about half of it sticks out of the bag. This keeps it snug and secure while piping.
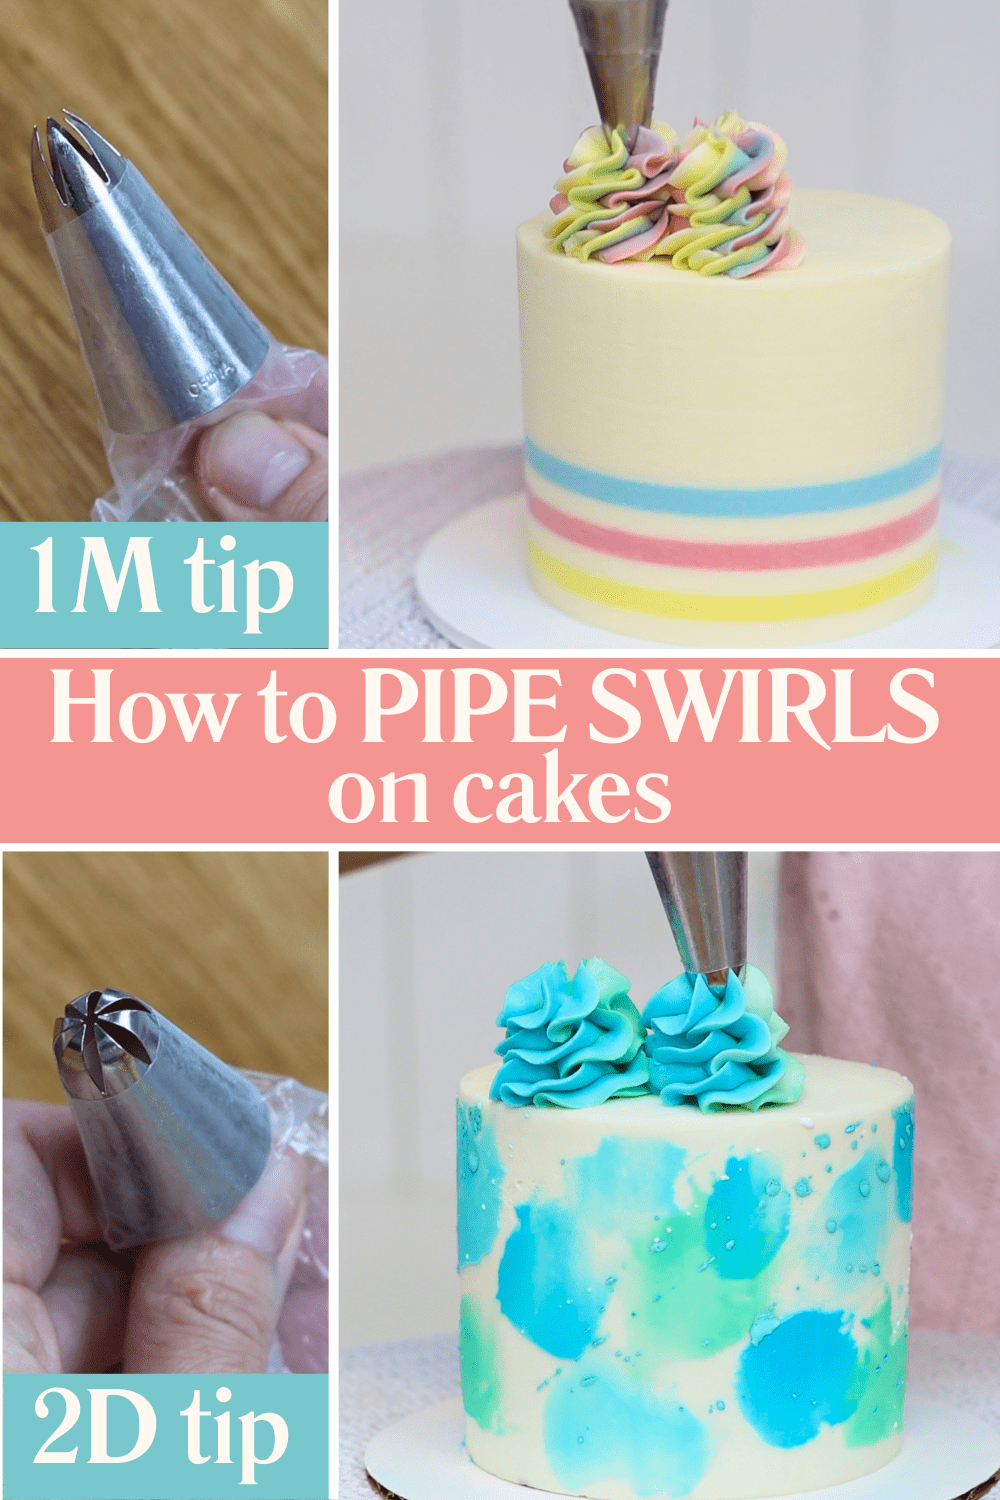
For piping swirls on top of cakes and rope borders, I recommend a 1M or 2D tip.
For beaded borders, a #8 tip is perfect and for textured beaded borders, a #32 tip works beautifully. And for chunky shell or wave borders, a 4B tip is ideal.
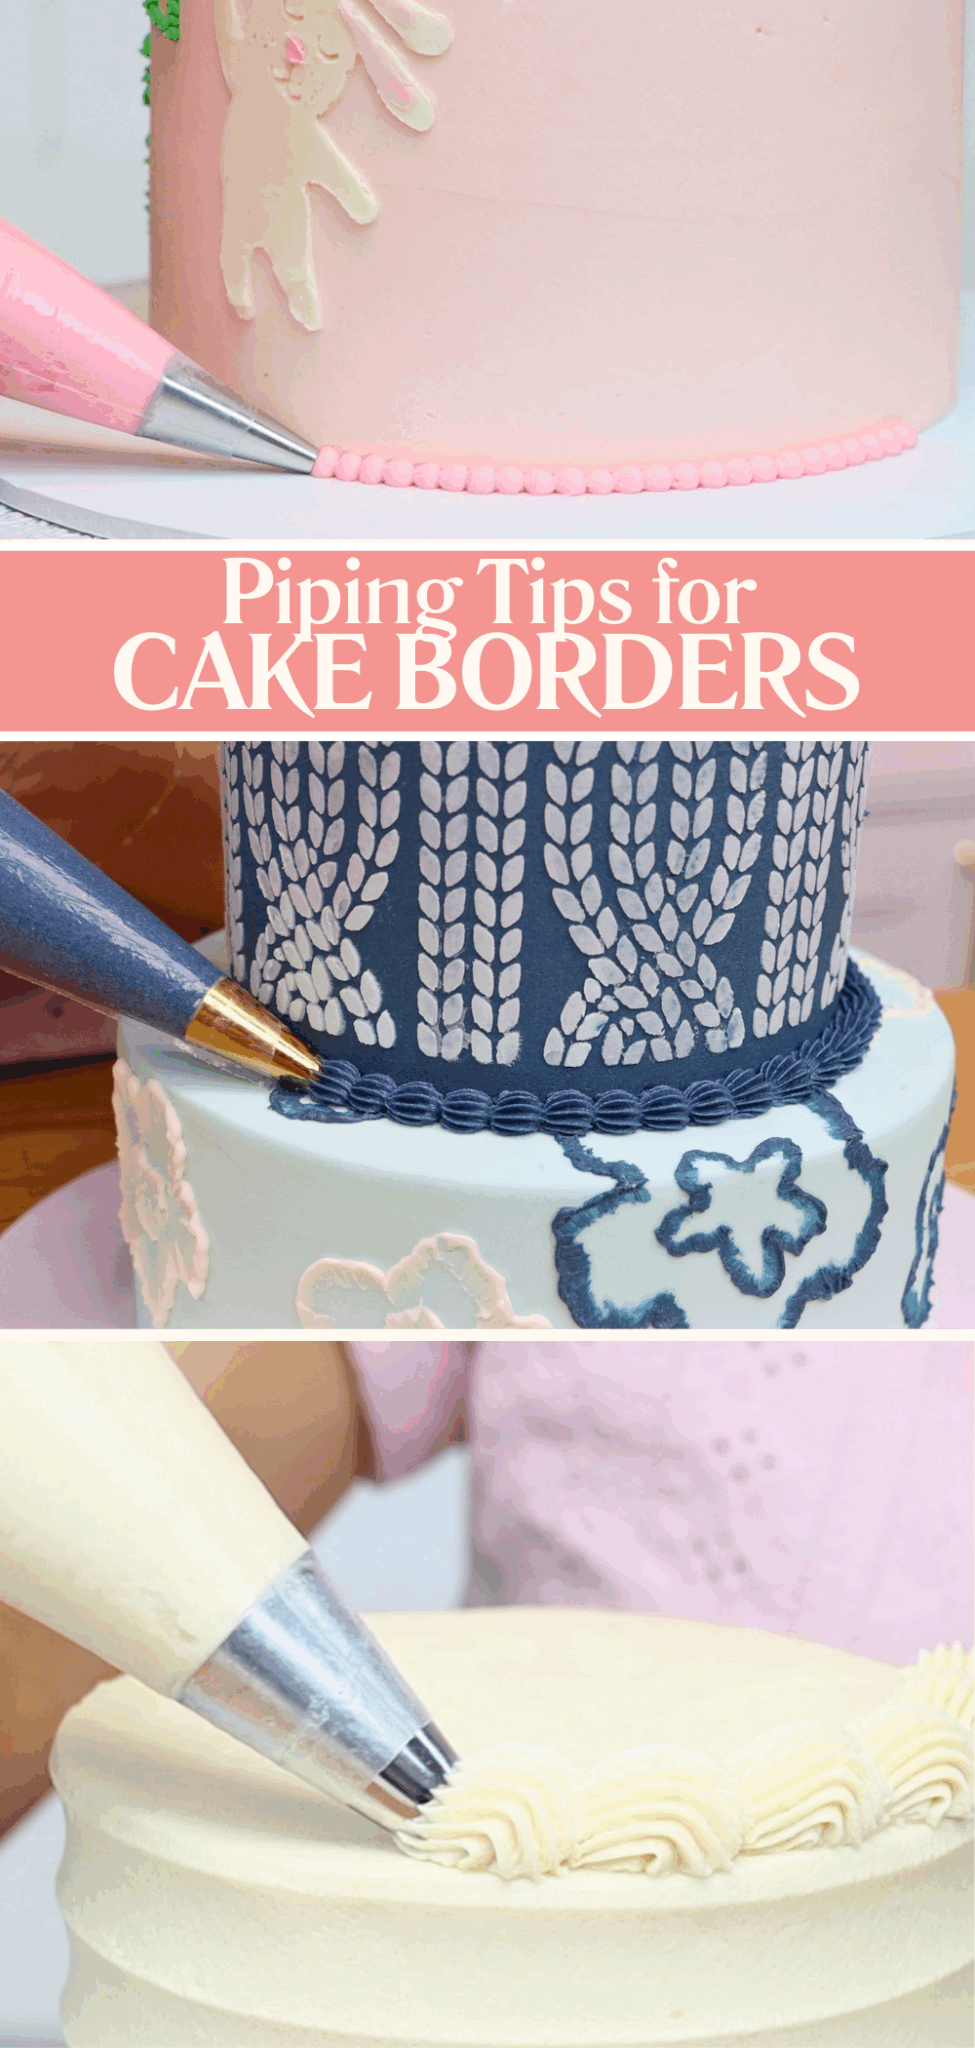
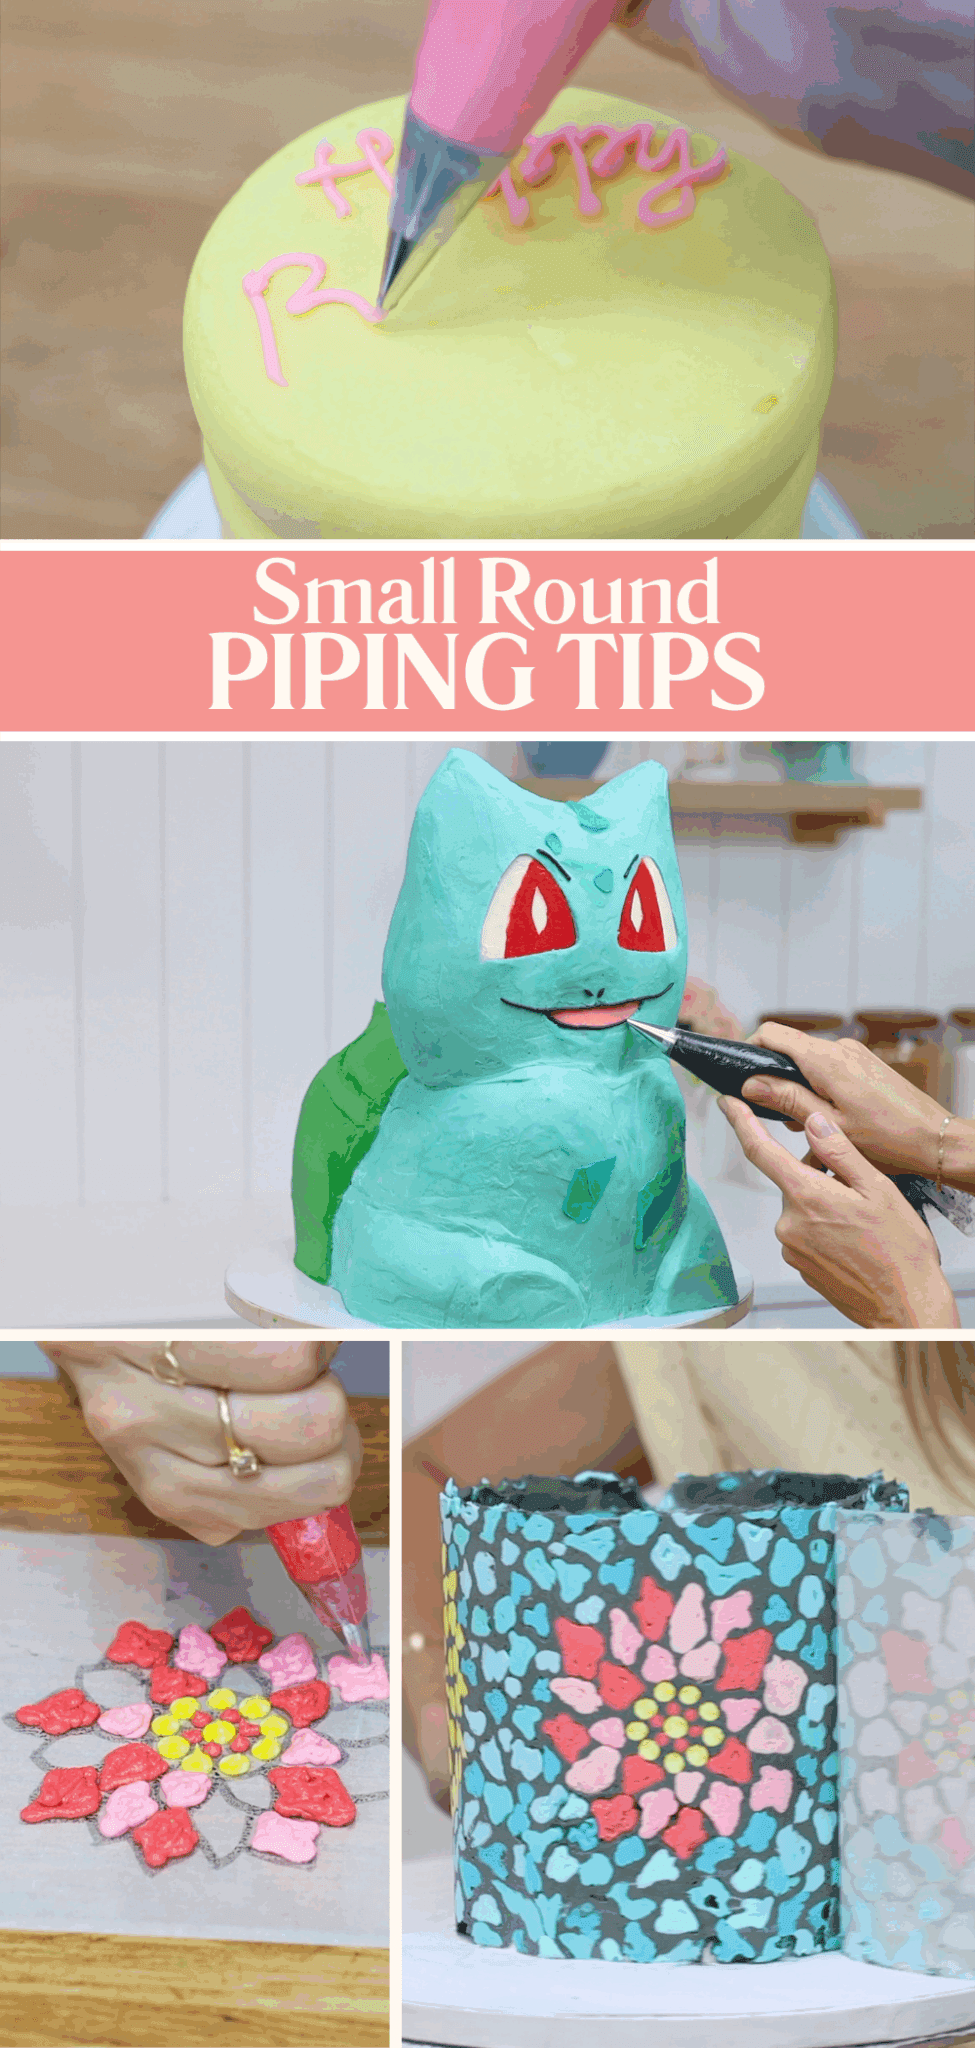
If you want to write messages, pipe intricate designs, or add tiny details like eyes or facial features, a #3 or #2 small round tip will do the trick.
Piping tips come in regular, small, large, and even "Russian" or "flower nozzle" sizes. You'll need different sized holes cut into your piping bags depending on the size of the tips, so it's handy to have a few bags ready.
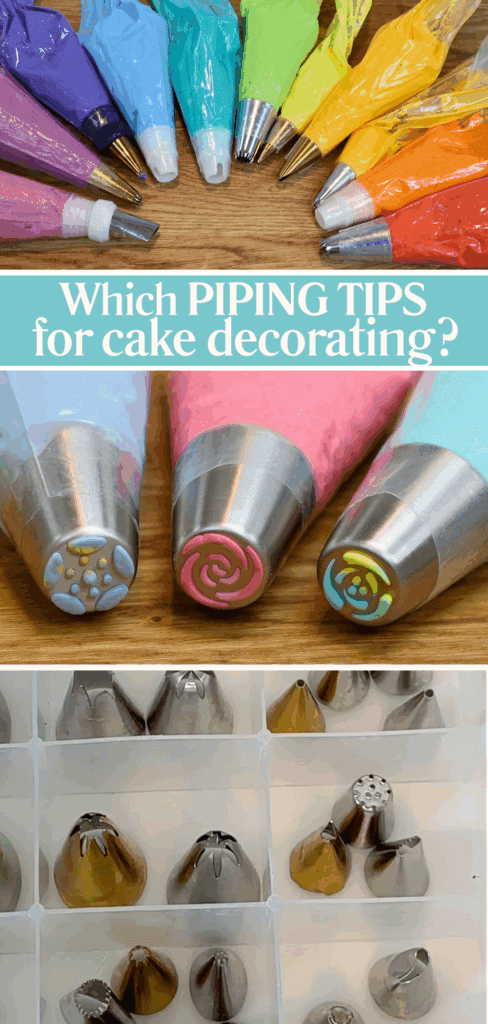
I organise my piping tips in a craft box with separate sections for each type, making it easy to find exactly what I need.
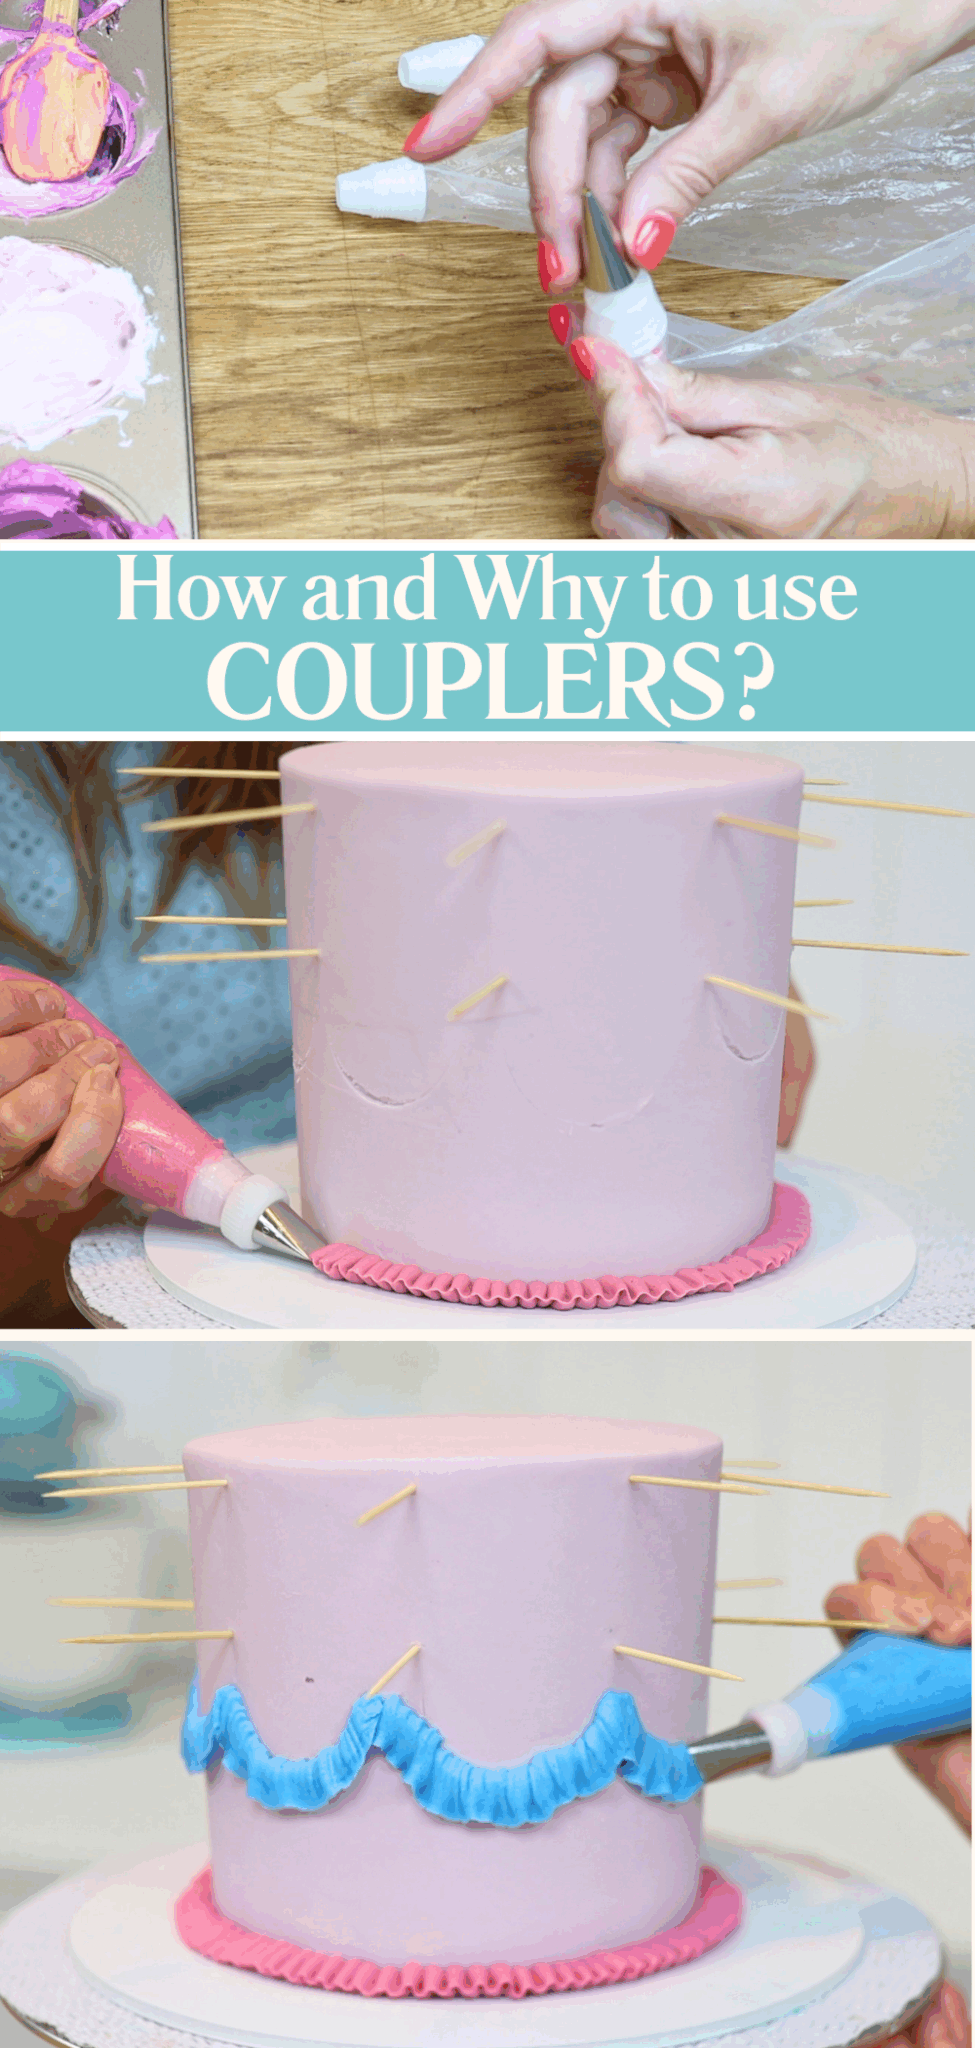
A coupler is a brilliant tool to have in your piping toolkit. It allows you to swap different piping tips onto the same piping bag without having to empty the bag.
To use a coupler, drop the base of the coupler into the piping bag, push a piping tip onto the outside, and screw on the coupler ring to hold the tip in place. This means you can switch tips while using the same buttercream colour, or move a single tip between different coloured bags, saving loads of time and effort.
Textured cake combs let you create fabulous patterns in your frosting. They can be plastic, acrylic, or metal, and you use them exactly the same way as a straight-edged cake comb by scraping them around the cake.
For striped cakes, the technique is slightly different. Scrape around the cake to create grooves, chill the cake in the freezer for 15 minutes, spread or pipe a second colour of buttercream into the grooves, and smooth with a straight-edged comb to reveal perfect stripes. This adds a professional and striking look to your cakes with minimal fuss.

I store my cake combs organised by size and material in a bamboo rack, making them easy to see and grab when decorating.
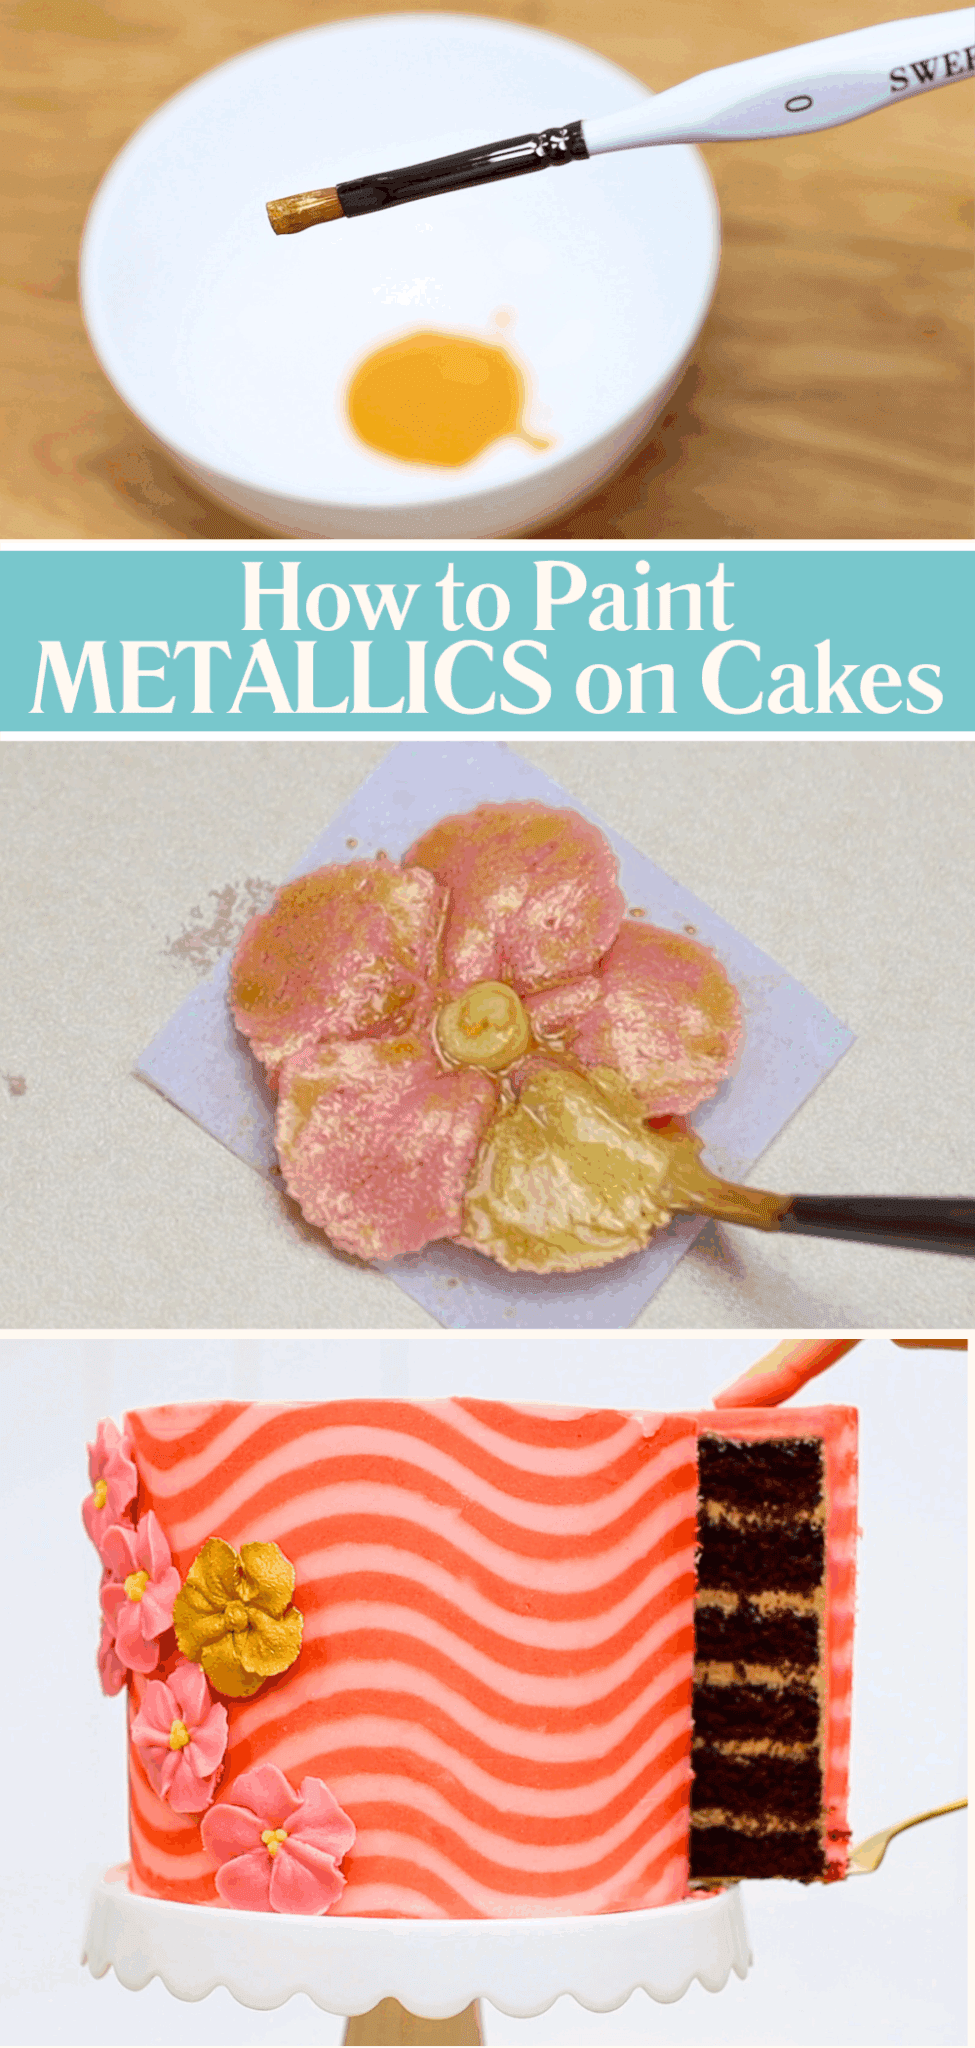
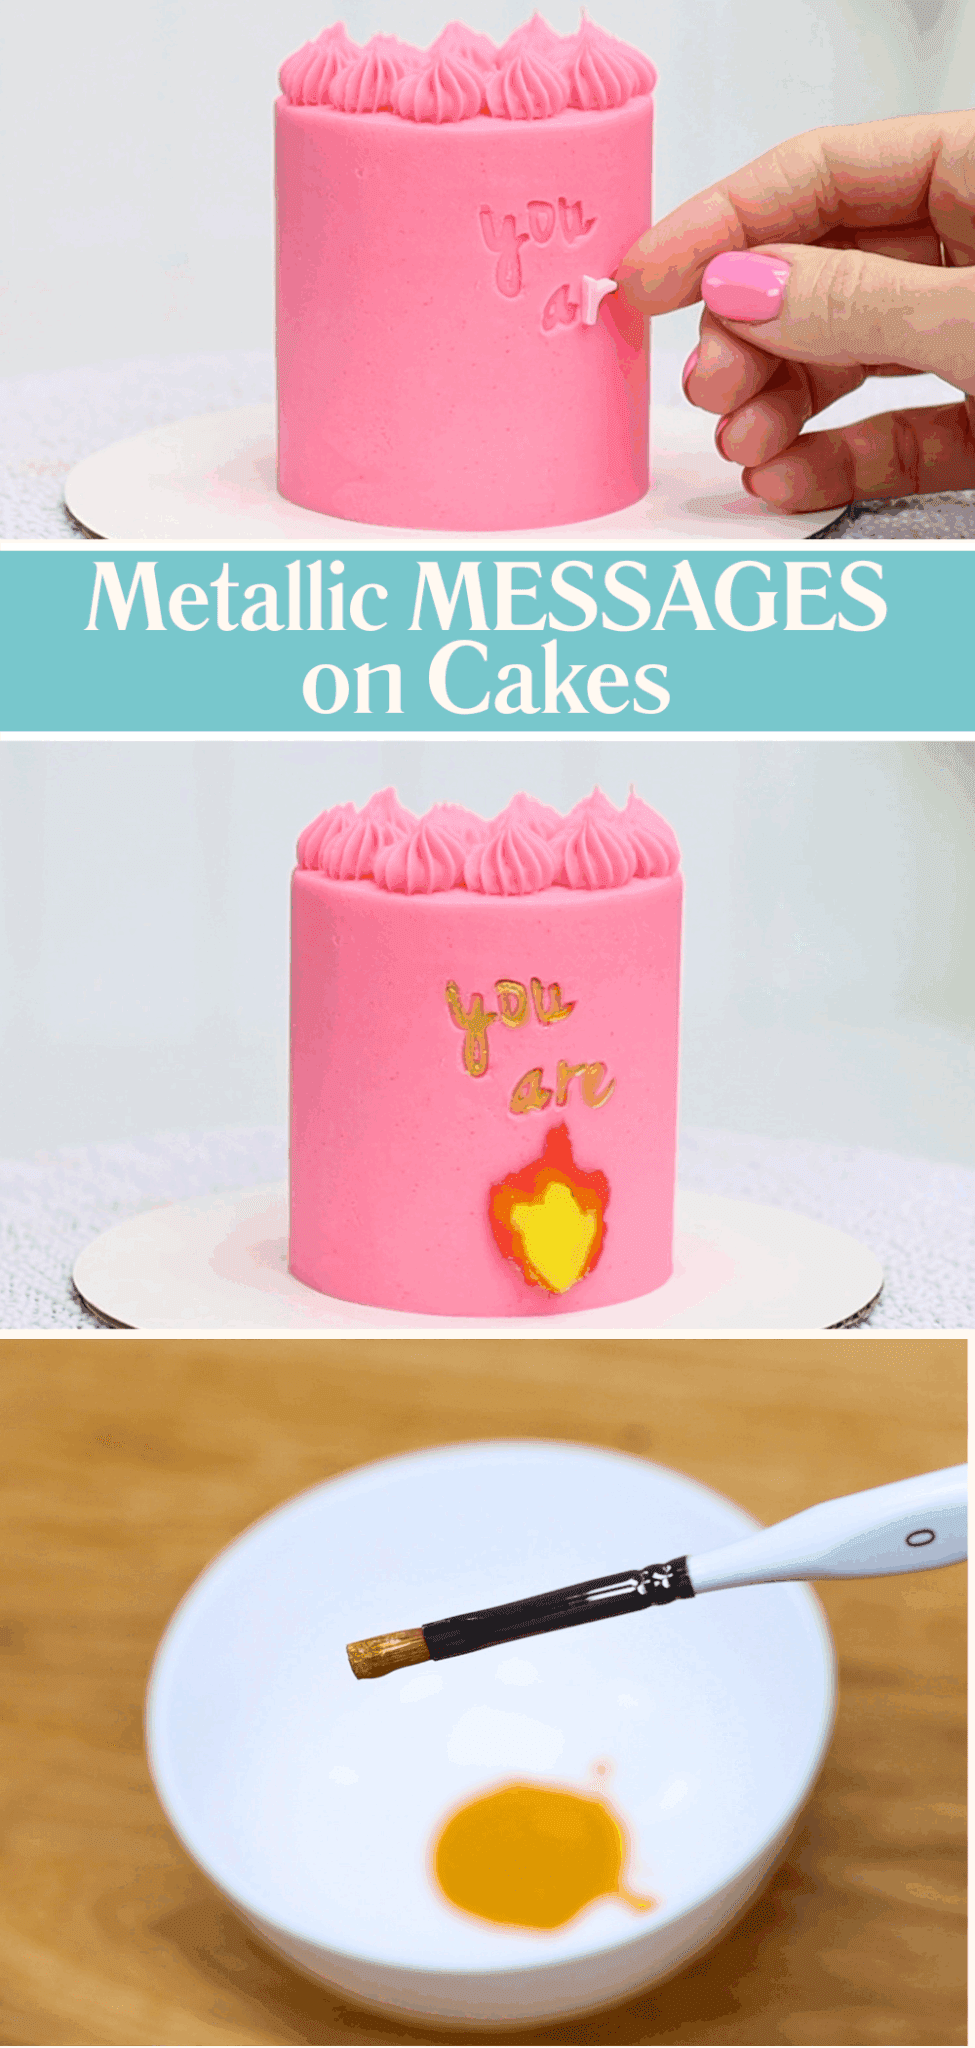
If you want to add some metallic magic to your cakes, a food safe small stiff paintbrush is an essential tool.
You can buy edible metallic paints or create your own by mixing edible metallic luster dust with a few drops of vodka or another clear alcohol to make a thin paste. Use your paintbrush to dab or brush this onto cold buttercream. It’s fantastic for painting piped buttercream shapes, attaching details, or even highlighting embossed messages on cakes.
Sweet Stamp letters come in a variety of fonts and sizes, and they are ideal for beginners wanting to personalise cakes with names, messages, or quotes.
They work on fondant or buttercream, but for best results on buttercream, chill the cake for at least an hour to set the frosting. Then let it sit at room temperature for about 30 minutes so the frosting is still firm but slightly softened. Gently press the letters into the buttercream and lift them off carefully to leave a clean, neat imprint.
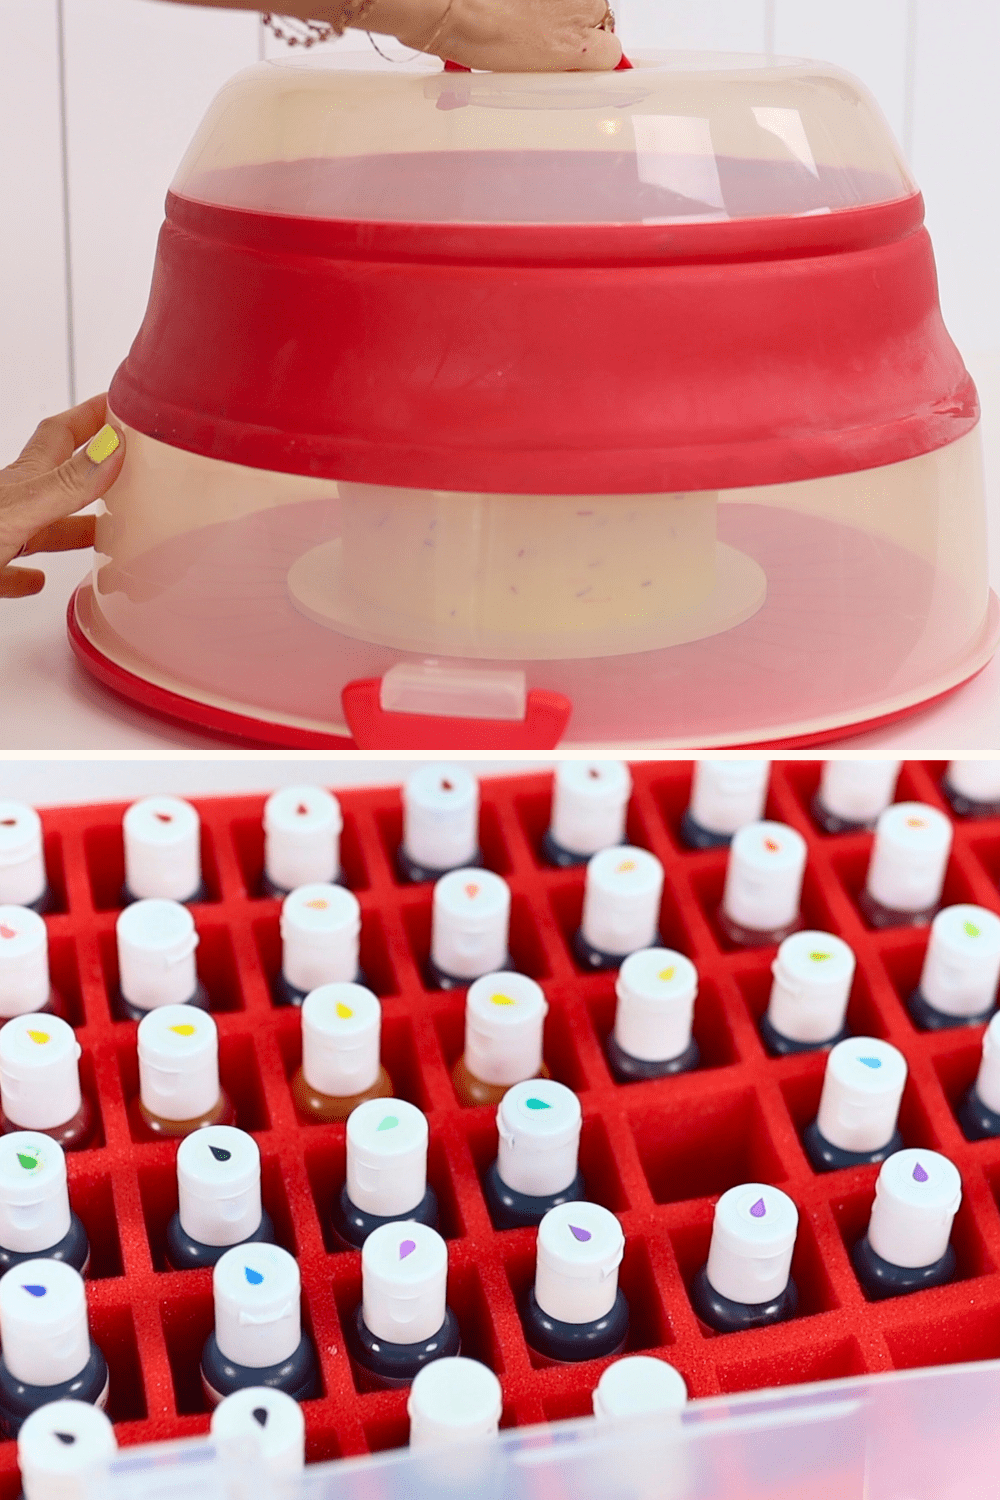
Finally, if you’re making cakes for friends and family, a cake caddy is an absolute must.
Instead of buying disposable cake boxes each time, invest in a sturdy cake caddy you can use again and again. Look for one that's tall enough for decorated cakes and toppers. This one has a pop-up lid to give you extra space and even comes with two tiers of cupcake trays!
Setting up your cake decorating toolkit with these beginner essentials will make the whole process more fun, less frustrating, and so much more rewarding. Plus, having a well-organised workspace saves tons of time searching for your tools – if you need inspiration, check out my tutorial on 14 Baking Organisation Hacks!
Ready to dive deeper into the world of cake decorating? Visit my cake school for hundreds of online tutorials and memberships to help you grow your skills and confidence!
Watch a video of this tutorial on 10 essential cake decorating tools for beginners:
Save this tutorial to Pinterest for later: