Every cake design looks better with smooth frosting so in this tutorial I'll show you five hacks to get super smooth frosting on your cakes.
Ideally, you'll need a
First, generously spooning frosting onto the top of the cake. Spread it to push it out over the edges of the cake. This will give you sharp angles later from the top to the sides of the cake.
Now here's the hack: hold your offset spatula at a 45° angle as you spin the cake on the
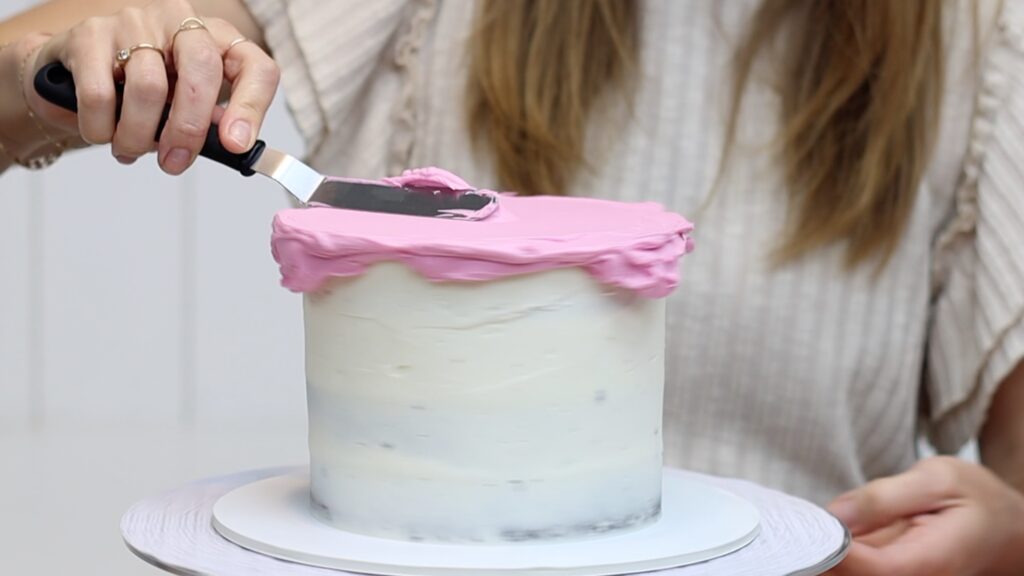
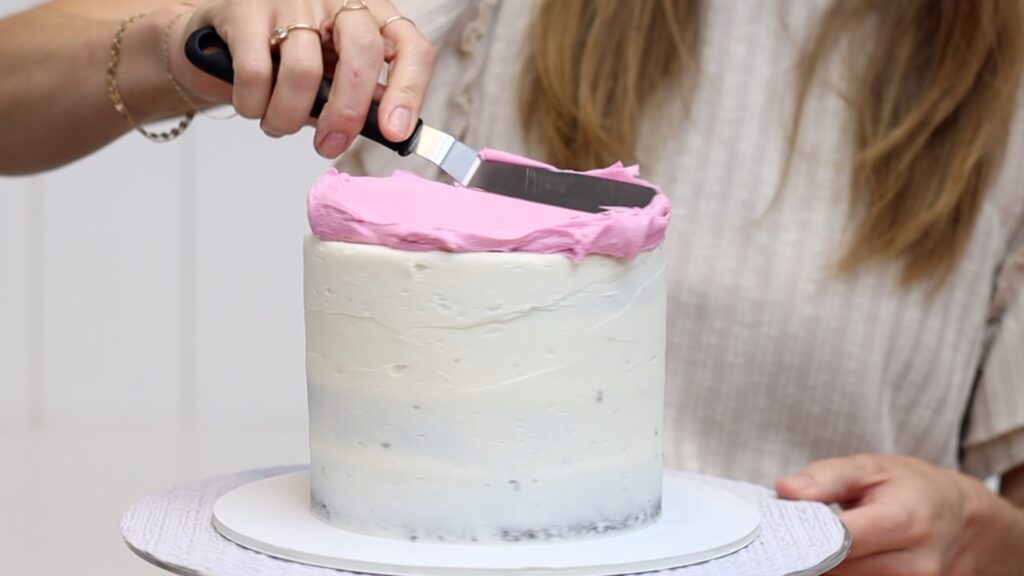
For the sides, the most important hack is to build a wall or lip around the top edge. If your frosting is already sticking out sideways this will naturally push upwards as you spread from side to side.
If not, you'll need to push diagonally upwards as you spread the frosting. You need it to stick up above the top of the cake all the way around. Without this wall or lip you'll get gaps or air pockets or indents around the top edge.
The white frosting you can see already on the cake is the crumb coat. If you're not sure how to get up to this point, see my tutorial on How to Crumb Coat a Cake. Spread the frosting all the way down the sides of the cake to the cake board.
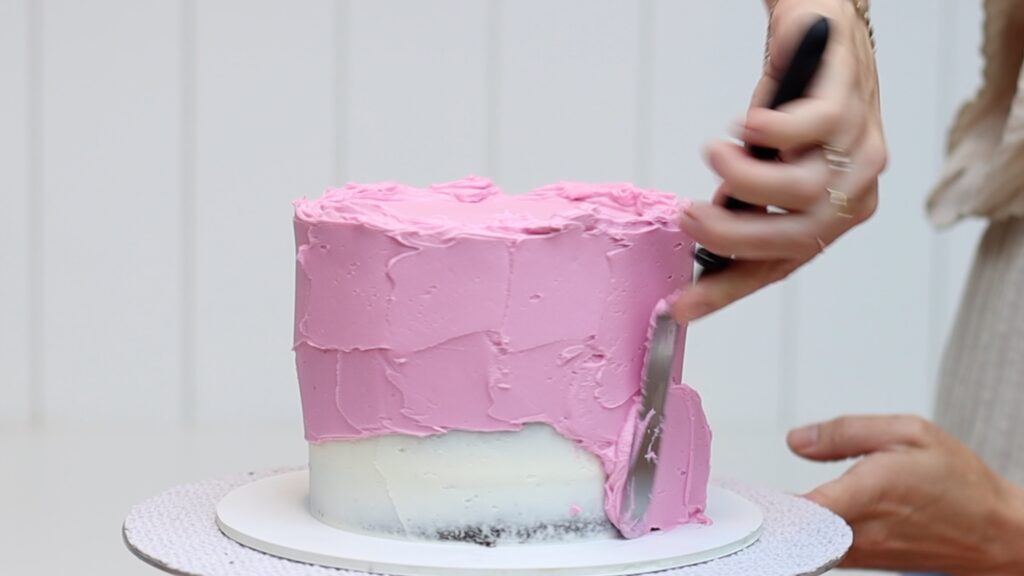
When the frosting covers the cake from top to bottom, you shouldn't be able to see the crumb coat anywhere. Now switch to a cake comb to scrape around the cake to smooth the frosting. The hack here is how to hold the cake comb. Push down on the cake board with your cake comb to line it up straight against the sides of the cake. This will give you straight sides instead of sloping or slanting or leaning sides. Notice that I'm holding the cake comb at an angle against the cake. The edge of the comb isn't pointing directly towards it.
After each scrape, use your

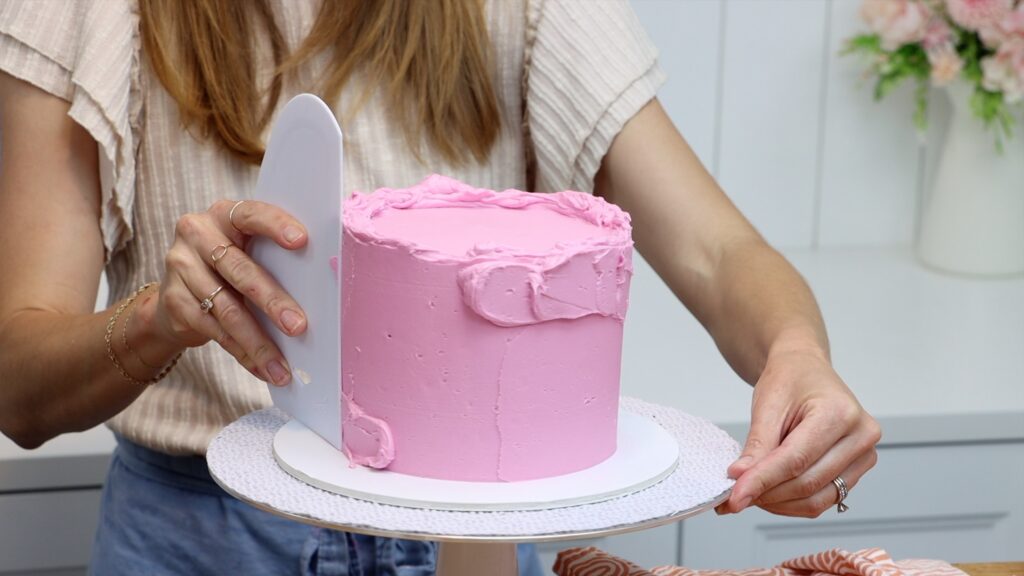
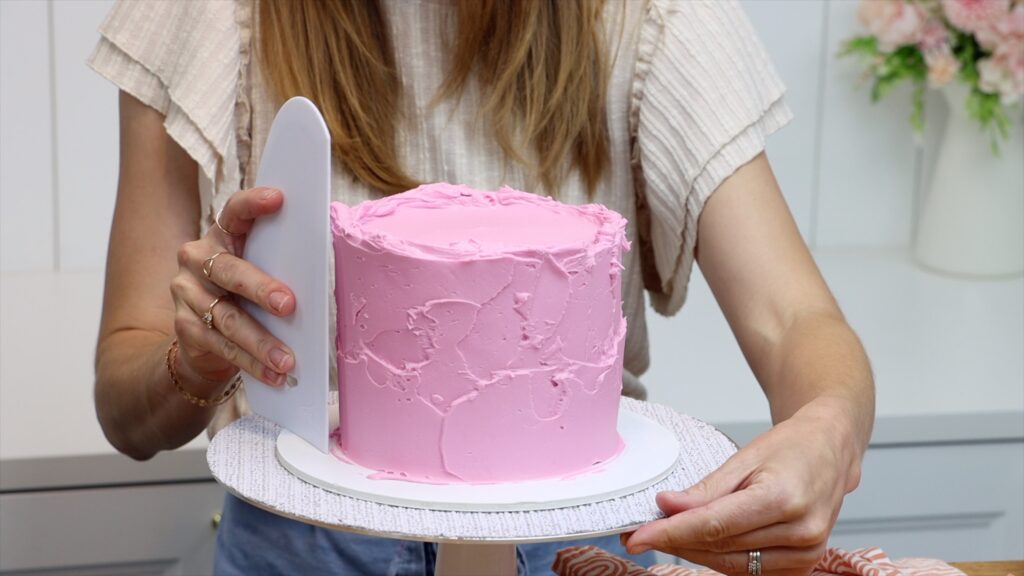
Then scrape around the cake again with a cake comb to smooth those parts. Do this a few times until the frosting is not perfect but fairly level and straight.
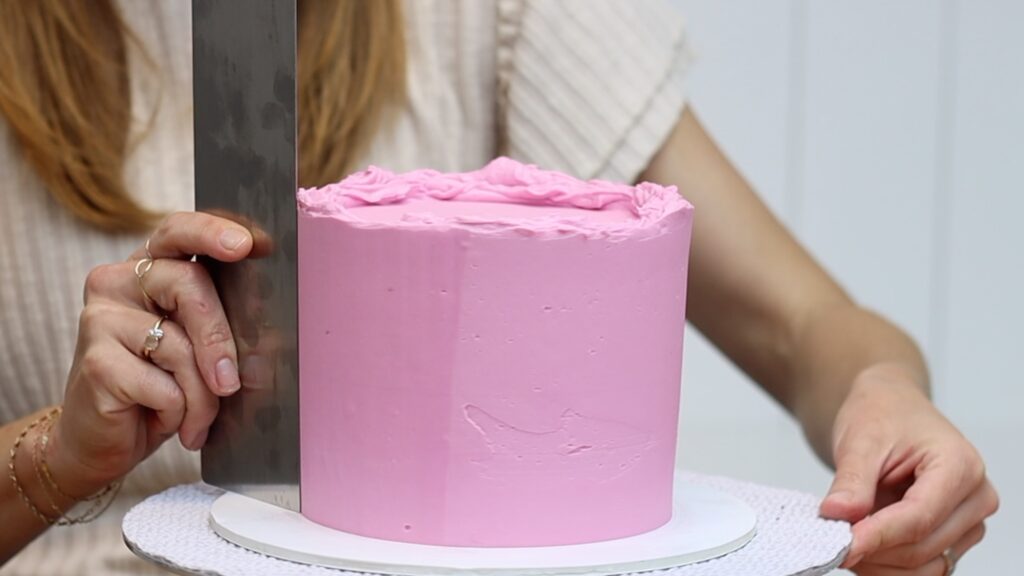
Once you have almost smooth frosting, with only shallow imperfections, you're ready for the fourth hack. Use a warm metal cake comb. You can dip it into a pan of hot water or hold it under hot running water. Or run a blowtorch along the edge, which is my favourite method. Rub the comb with a towel to dry it off and cool it down slightly. You want it to be warm, not hot.

Then scrape around the cake with it. The warm metal will glide over the frosting, dragging it around the cake to fill in any tiny air bubbles in the frosting. Do this a few times, making sure the metal is never hot because heat changes the colour of the frosting. The warm metal cake comb will leave a perfectly smooth surface behind.
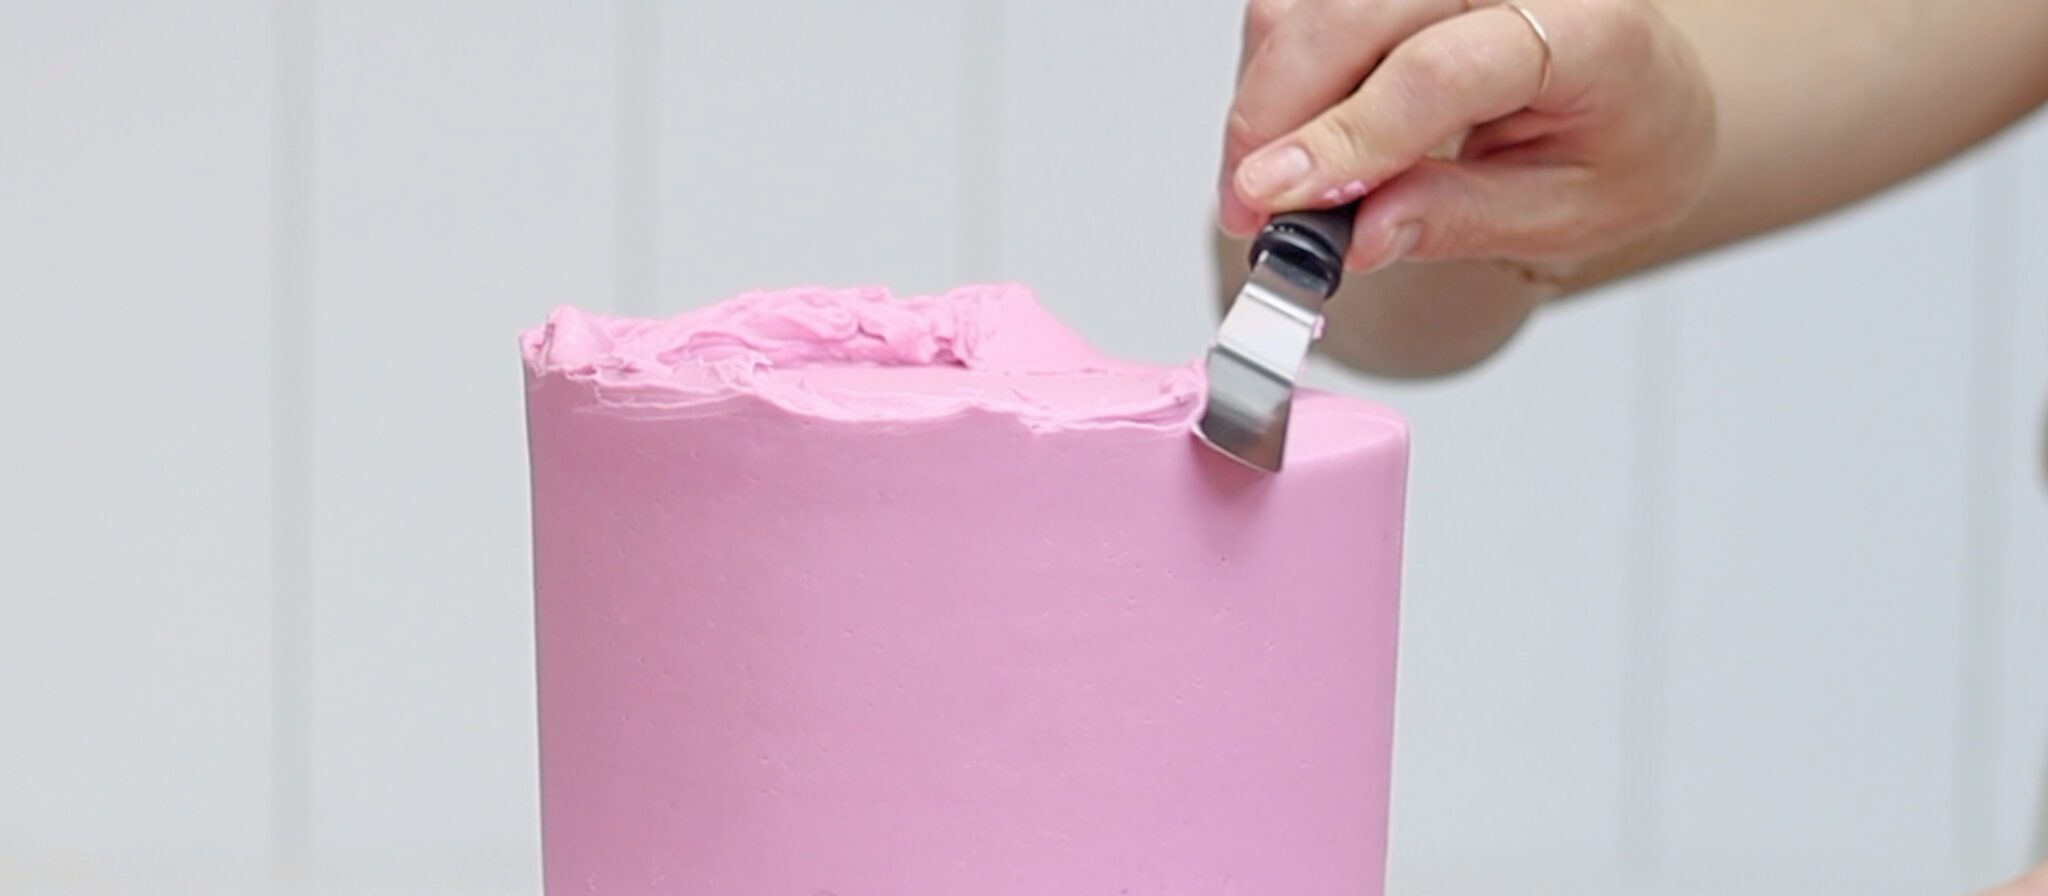
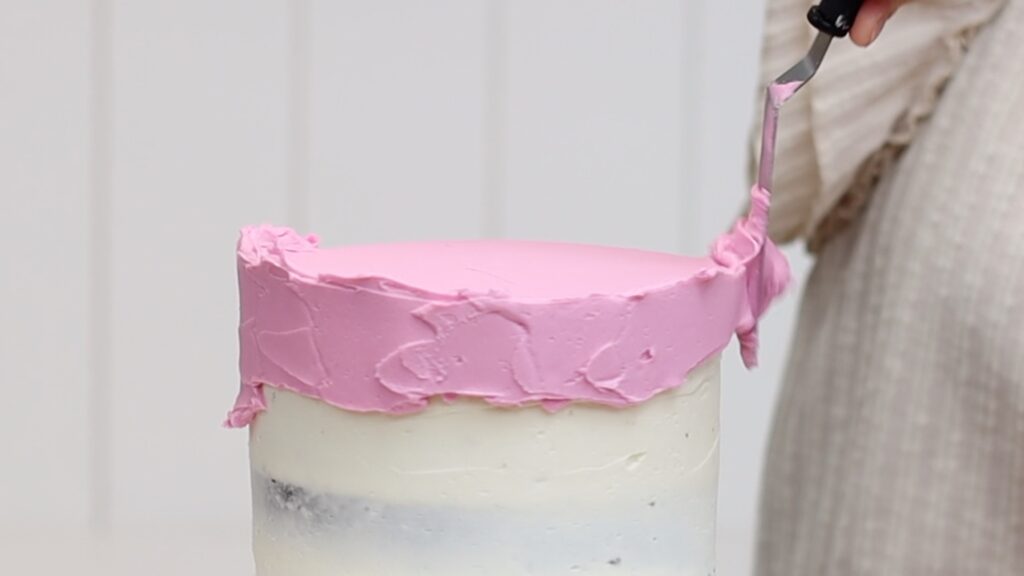
Lastly, it's time to level the top edge, where the buttercream wall or lip is sticking up. I like to do this with my
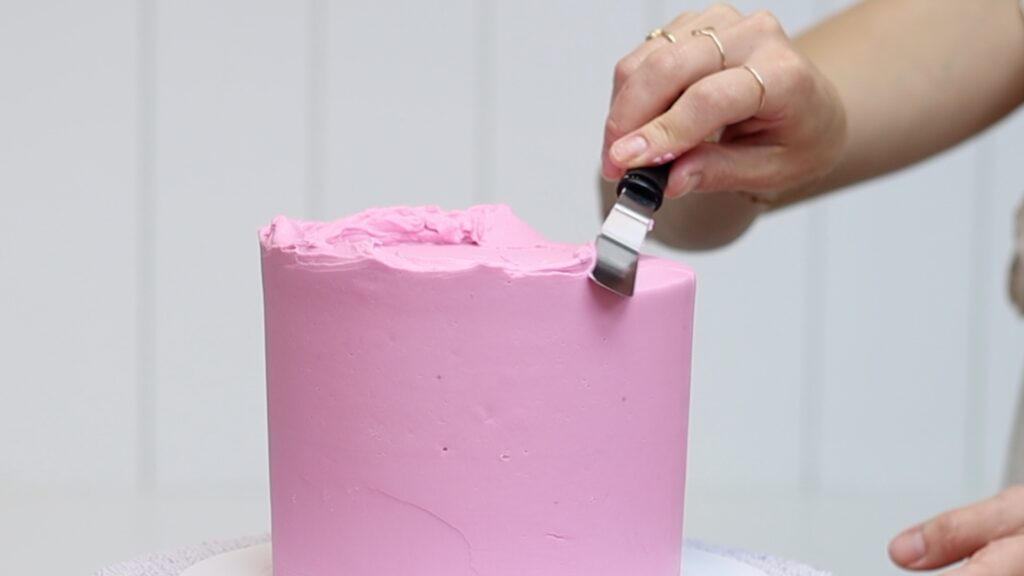
Afterwards, scrape the frosting from your
The natural reaction is to push down to get rid of this buttercream that's sticking up but don't do it! Push sideways because if you push down you'll cause a bulge in the frosting on the sides of the cake.
Work your way around the top edge of the cake, swiping and wiping, to flatten and level the frosting. With these motions against a frosting lip or wall, you'll create sharp angles from the side to the top of the cake.
So, here are the five hacks for smooth frosting on cakes:
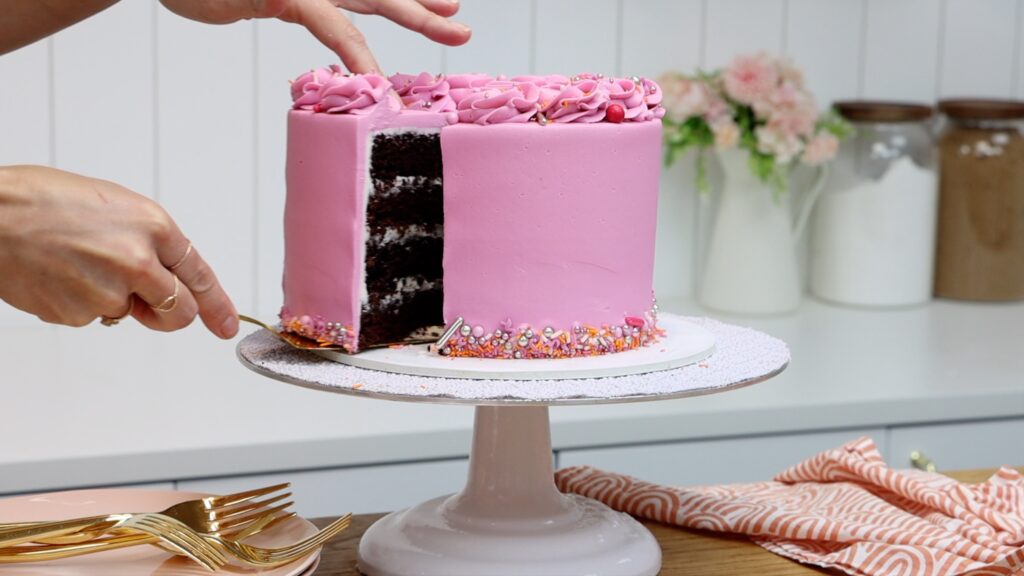
I hope this has been useful! Ask me any questions in the comments and if you want to dive deeper into how to make and frost and decorate cakes using buttercream, visit my cake school to start your 7-Day FREE trial of my All You Can Cake membership, which gives you access to everything on my cake school. You can start wherever you need to and learn the skills and techniques to take your cakes to the next level. I hope to see you there!
You can also watch a video on this tutorial on 5 hacks for smooth frosting on cakes:


I am Jonathan from Uganda, I would want to ask you, Can't I frost and design a cake if I don't have a fridge? A lot of thanks. Again, thank you for your caking hacks and your beautiful smile which speaks volumes.
Hi! Yes, you can skip the chilling step in the fridge before frosting but you’ll need to leave your crumb coat for about an hour at room temperature to let it set, so that you don’t get crumbs in your final coat of frosting. There are several cake decorating techniques that require chilling the cake, for example stencils, but there are also lots that don’t! So you’ll have options even without a fridge. Good luck!
Have you ever used the Viva paper towel method for smoothing cakes? If so, which method do you prefer?
I've used this to smooth the seam that my cake scraper leaves at the end of the final scrape, but not to completely smooth the cake.