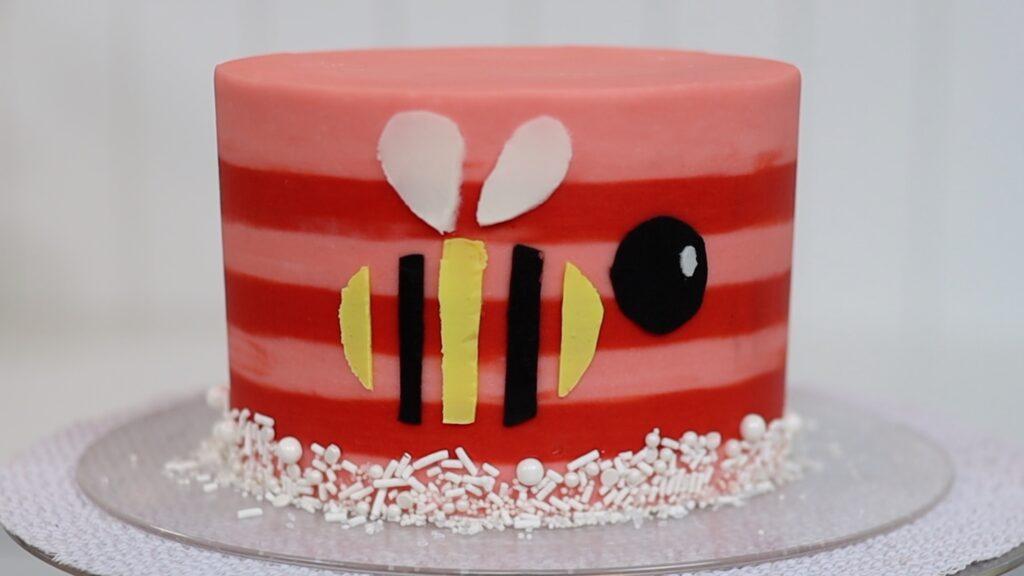
Use these 10 cake decorating shortcuts to skip the
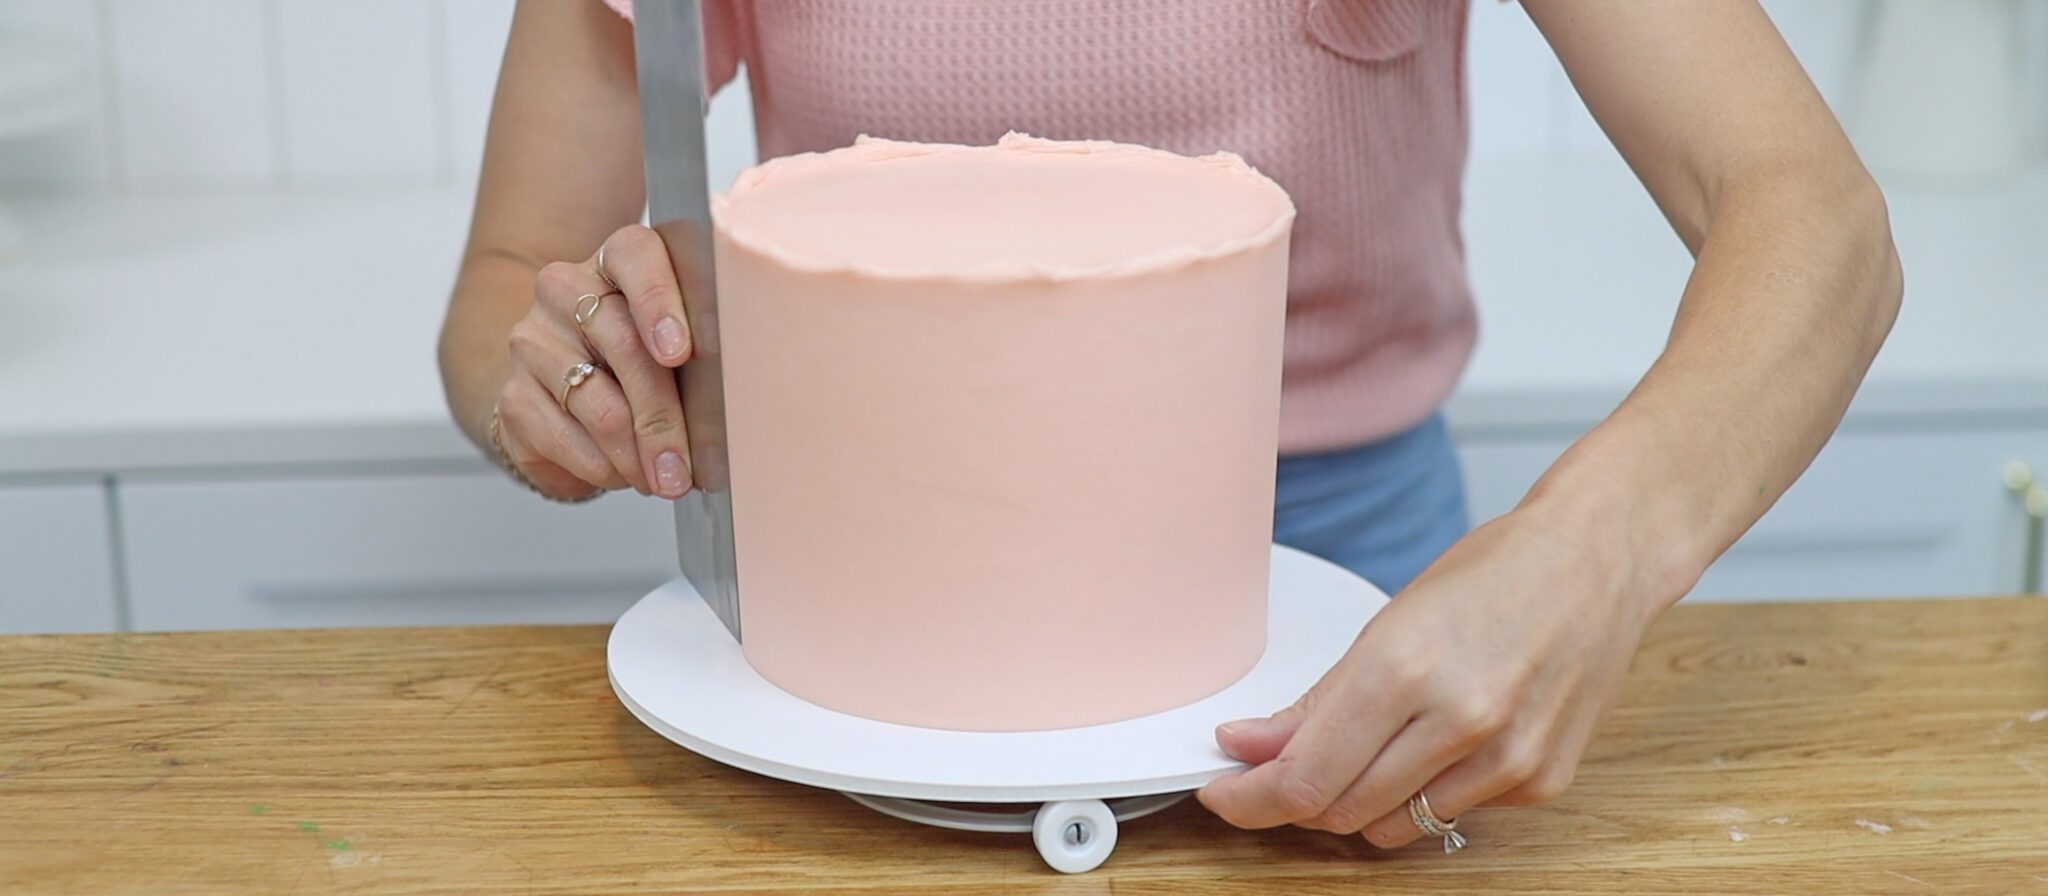
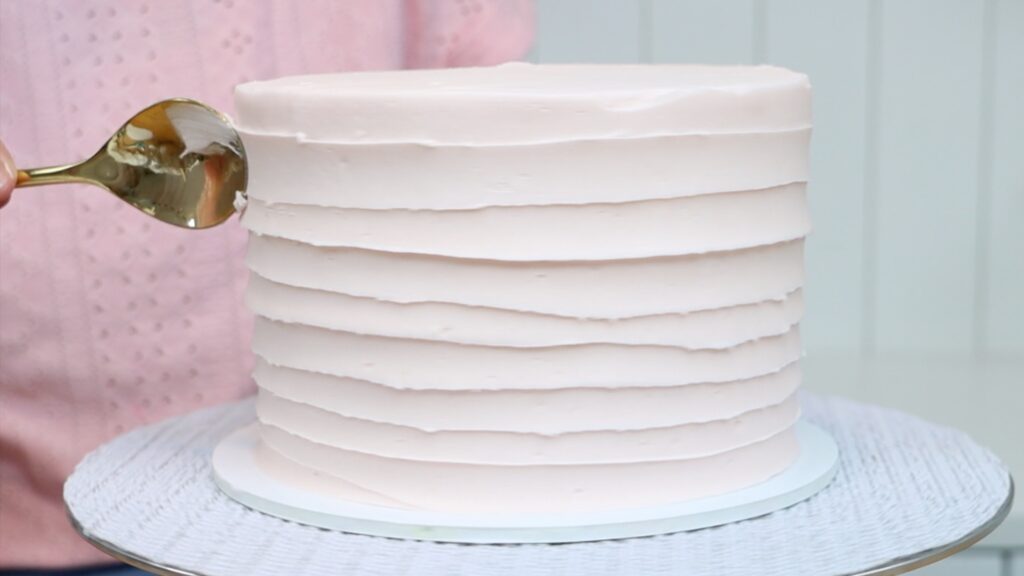
Using a cake comb to scrape around a cake doesn't guarantee you smooth frosting. If your buttercream is too stiff or has air bubbles, even 100 scrapes won’t smooth it. Here’s a shortcut: scoop up a third of the buttercream and microwave it for 10 seconds.
When you stir the melted buttercream back into the main bowl of frosting, it will thin out the consistency. As a bonus, you'll get rid of any air bubbles in the process!
This microwaved frosting will glide effortlessly as you spread it onto your cake. Your cake comb will whisk away the excess to leave a silly smooth surface behind.
Cake combs come in all sorts of patterns that can be used to texture the frosting on a cake. But do you really need to buy a new one every time you want a different texture? Nope! Just grab your
Or pull straight up to make vertical swooshes, or use arc motions to create this rustic texture instead:
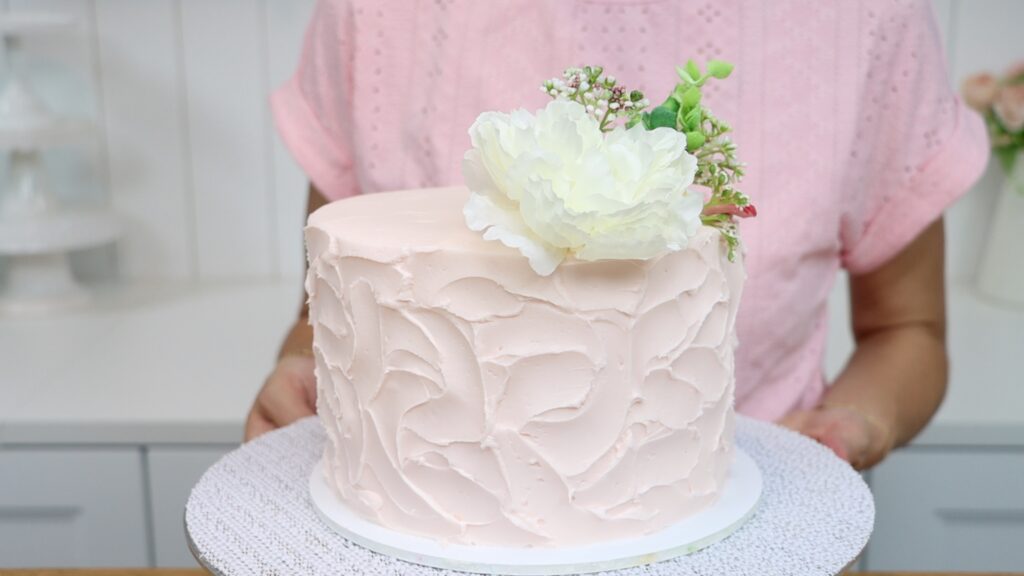
It’s quicker, easier and cheaper than mastering cake comb texture! Learn more ways to decorate cakes with no tools in this tutorial.
If you don’t have a
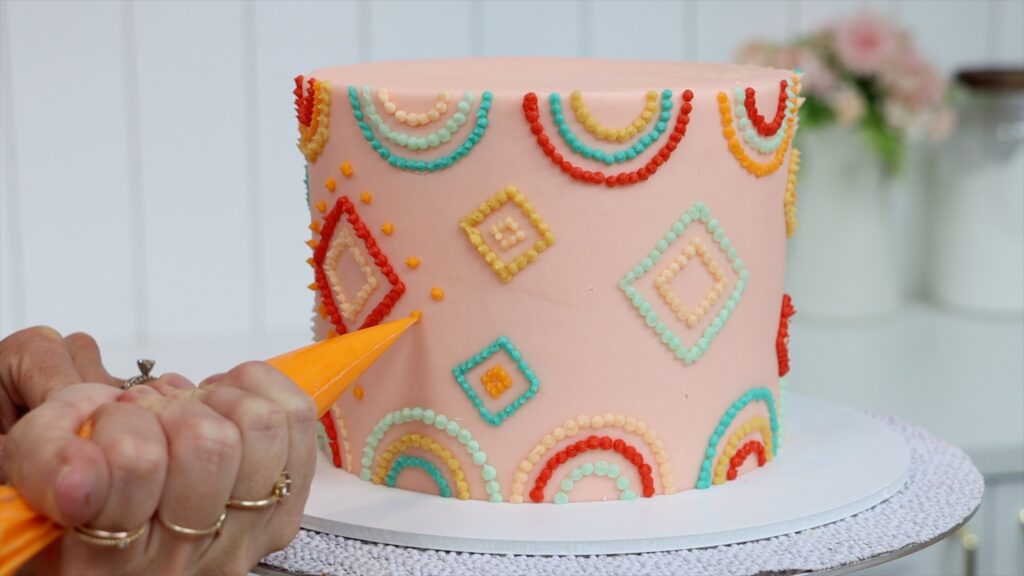
Run out of piping bags? Don’t panic! Spoon your frosting into a ziplock or sandwich bag and push it down into one of the bottom corners. Then cut the tip off the corner and twist the bag tightly where you grip it. When you squeeze, you’ll push the frosting out through that hole just like you would with a piping bag. Now you can pipe dots, beaded borders and lines without a piping bag!
If you have piping bags but no tips, cut the end off the piping bag to leave a small hole. Now you can create dotted or pointillist designs by piping hundreds of dots! The longer you squeeze the piping bag while holding it still, the bigger the dots will spread out the be.
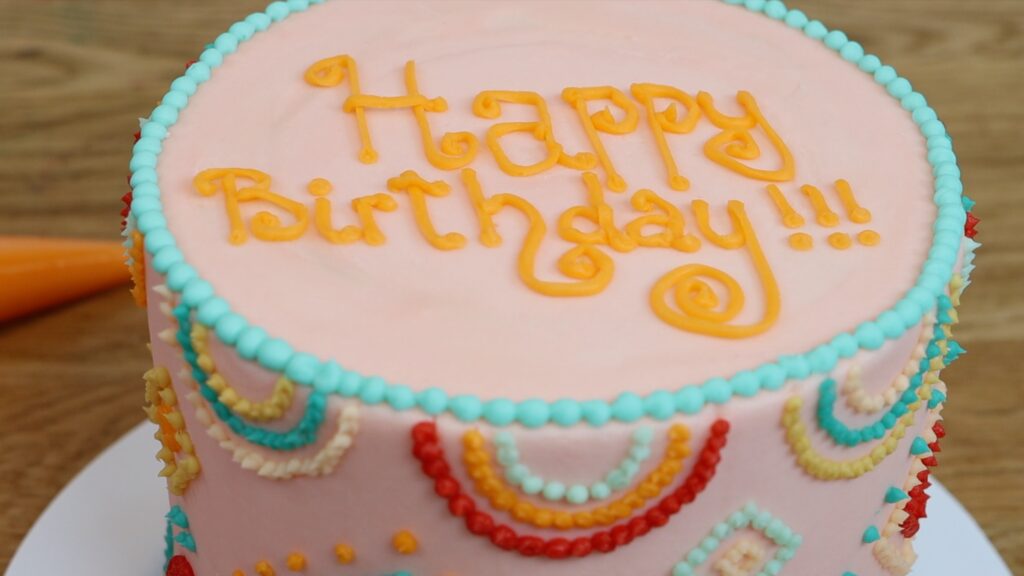
You can even use a piping bag with no piping tip to write pretty messages, like this!
A coupler allows you to switch a piping tip between different piping bags. If you don’t have a coupler, use this cake decorating shortcut! Drop the piping tip into a piping bag and prepare different piping bags, without piping tips, filled with coloured frosting. Lower the first coloured bag into the bag with the piping tip.
As you squeeze the bag you’ll push the coloured buttercream through the piping tip that’s in the other bag. Pipe all the details you want with that colour first. Then lift the coloured bag out and drop the next one in. Squeeze the last of the previous colour out into a bowl until you see the next colour come through.
Pipe the details with this colour and repeat for as many colours as you want to use. Remember each time to squeeze out the remainder of the previous colour into a bowl before piping onto the cake. With this shortcut you can switch quickly between several colours, all using just one piping tip. You'll save time by not having to wash and dry anything in between colours and no coupler is necessary!
To pipe intricate flowers you don’t need a flower nail and parchment squares and several different piping tips. Skip all of that by using Russian Tips as a shortcut! Combine multiple colours by stirring them together slightly for a marbled effect. For more control, pipe colours onto a piece of plastic wrap using a different colour for the middle.
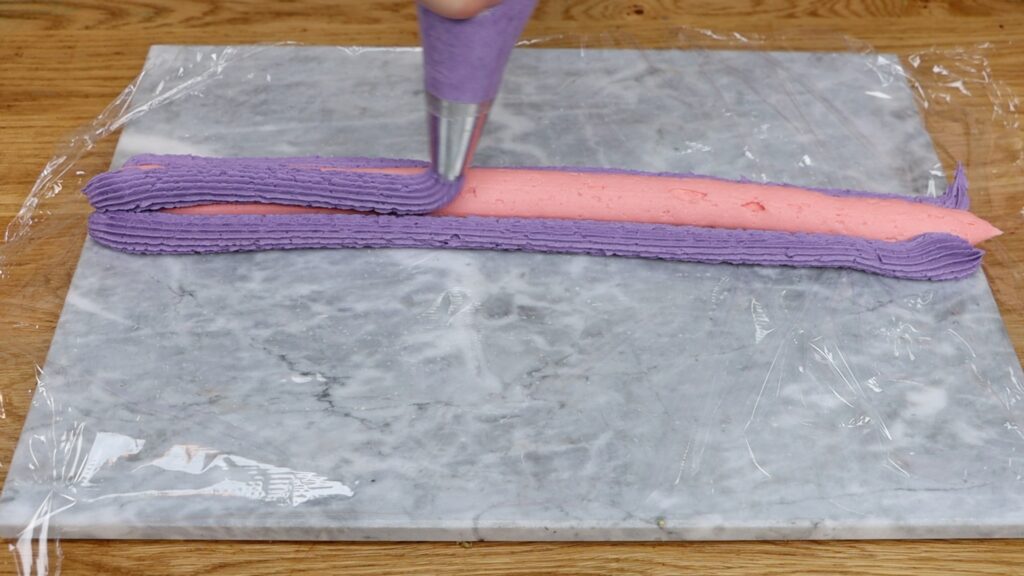
Roll the plastic up tightly around the frosting to make a log. Then twist both ends of the log and cut one end off.
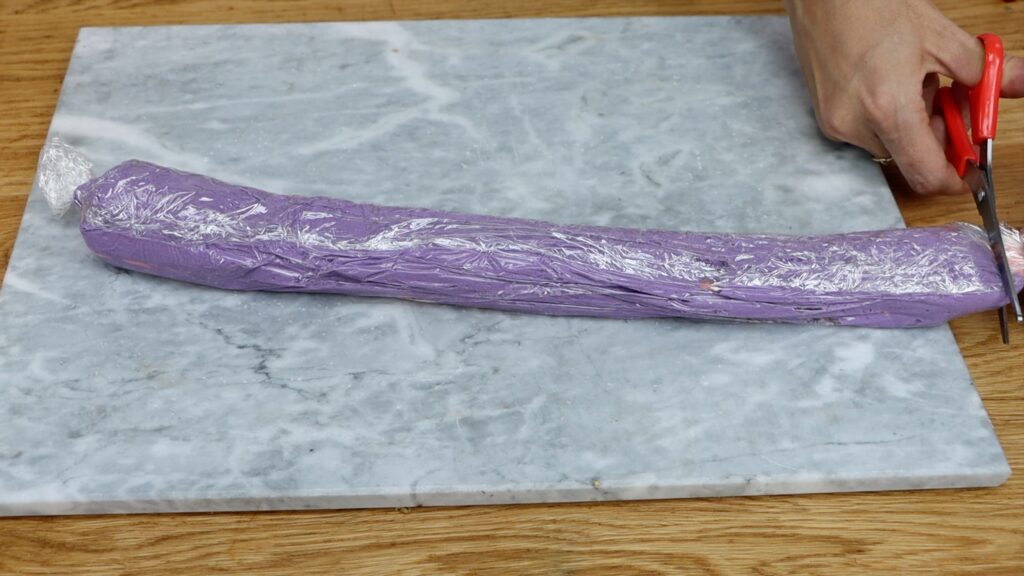
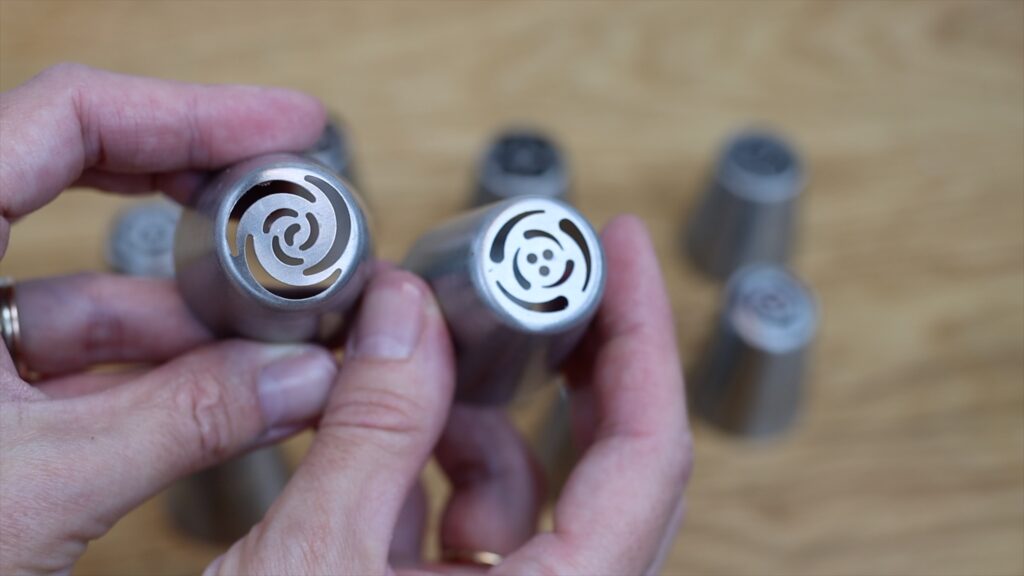
Drop the cut end down into a piping bag with any flower shaped Russian Tip inside. These are my favourites:
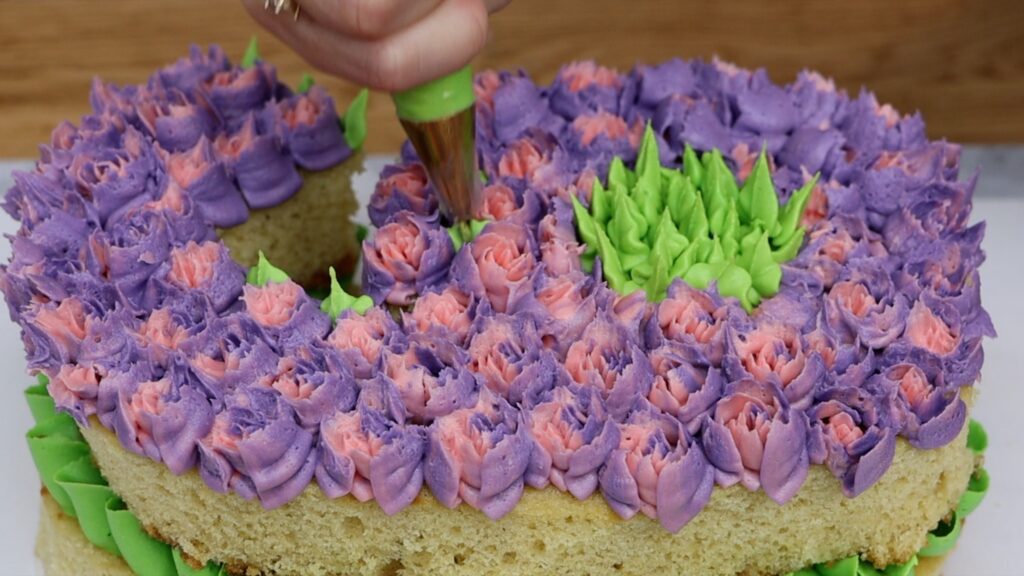
Squeeze and release to pipe detailed, colorful flowers with individual petals in seconds!

Add more with a leaf tip, conveniently filling in any gaps in between the flowers!
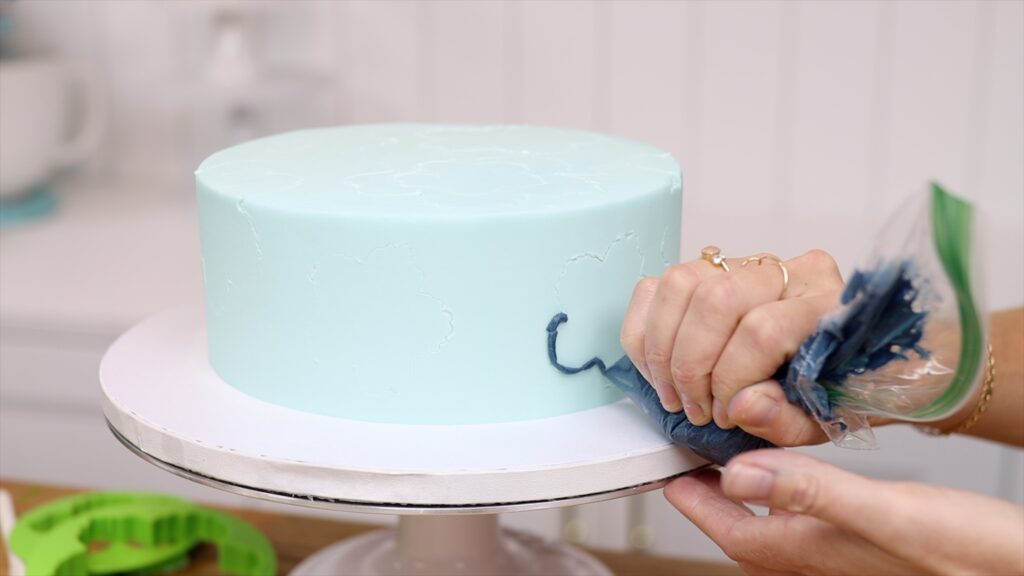
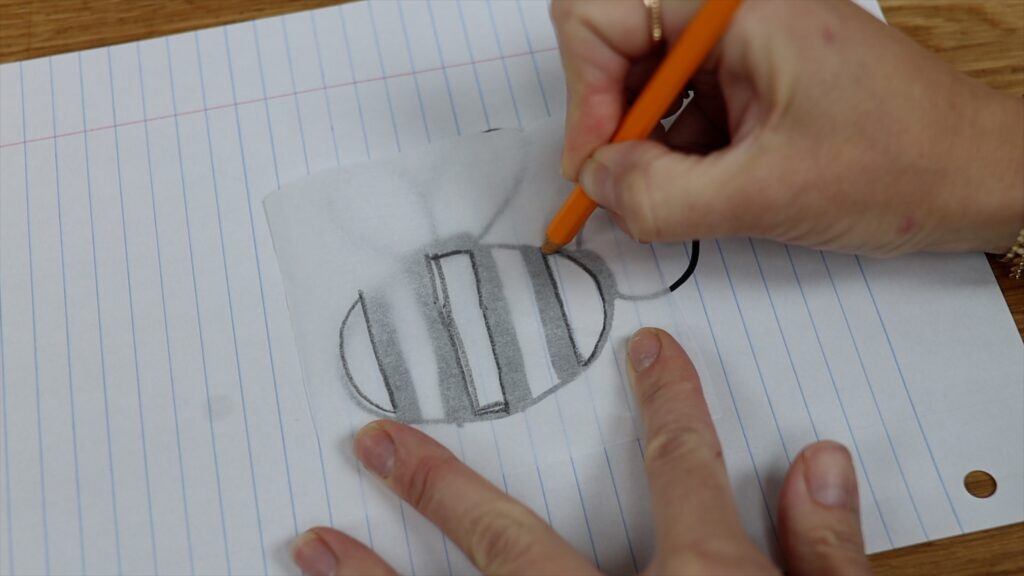
Stenciled cakes are stunning but stencils are expensive to buy for every cake you decorate. Instead, grab a roll of parchment paper. Cut a piece out a few inches bigger than your design and draw or trace your design onto it.
If you’re using different colours, use a different piece of parchment paper for the details of each colour. If your design has 4 colours, you’ll have 4 stencils.
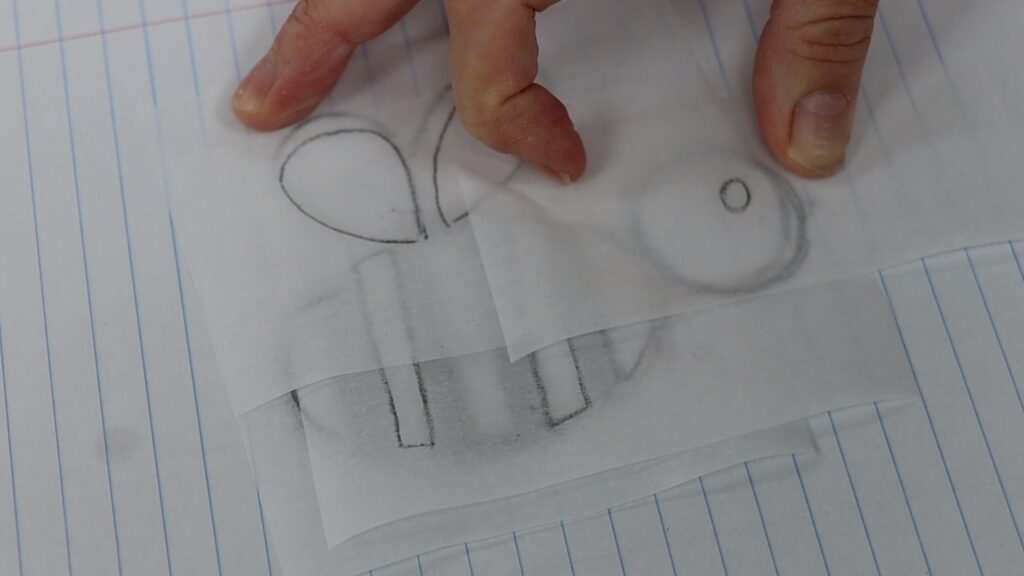
Cut the design out, keeping the surrounding paper intact.
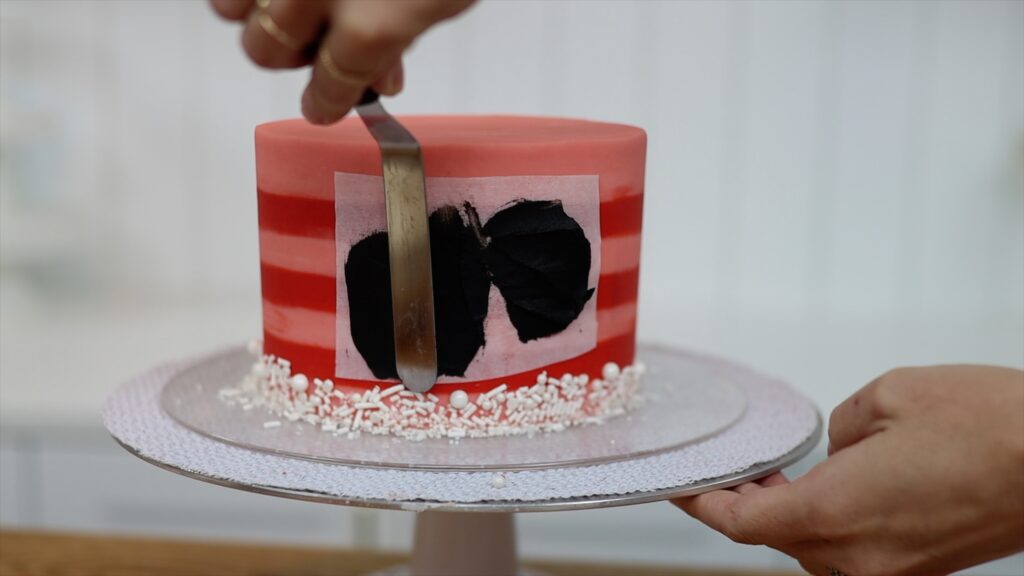
You’ll need a cold cake for stenciling, so that the buttercream frosting chills and sets and gets really firm. I leave my cakes in the fridge for at least an hour before using stnecils. This way you won’t damage the frosting when you press the stencils against it.
When you take the cake out of the fridge, tiny beads of condensation will form after a few minutes. Wrap your homemade stencil around the cake and it will stick to the condensation! Spread frosting over the design you cut out, being careful not to spread it over the edges of the parchment and onto the frosted cake. Scrape off the excess with an offset spatula or cake to leave a thin, smooth layer behind.
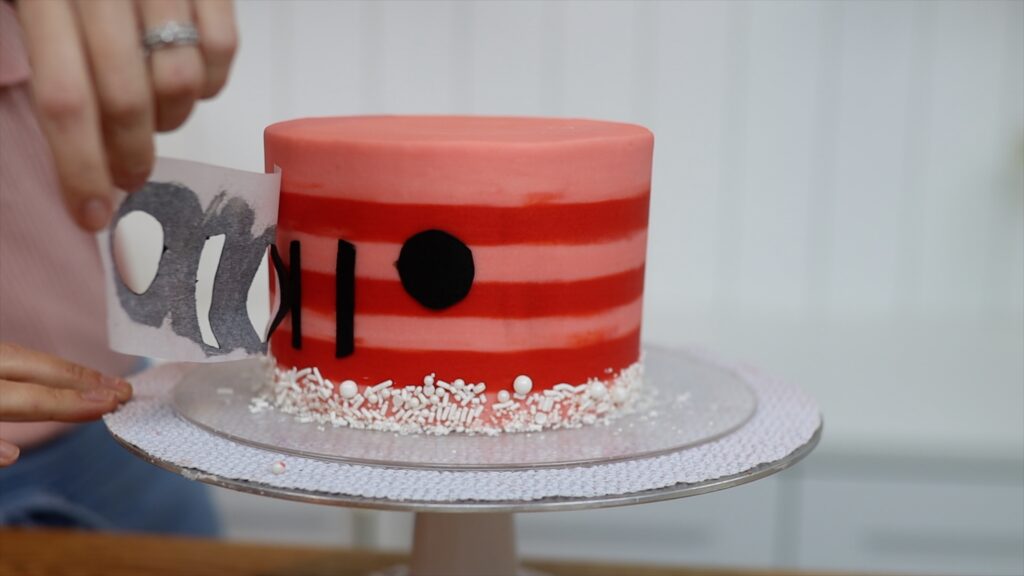
Peel the paper off and voila! Use a toothpick to tidy up any smudges or texture on the buttercream
Repeat with the rest of the stencils, if you’re using more than one colour. Put the cake in the freezer for about 5 minutes in between each stencil to set the previous colour. If you don't, the parchment paper will smudge the details you’ve already stenciled onto the cake.
Tadaa! Easy homemade stencils to make neat designs that are completely customizable!
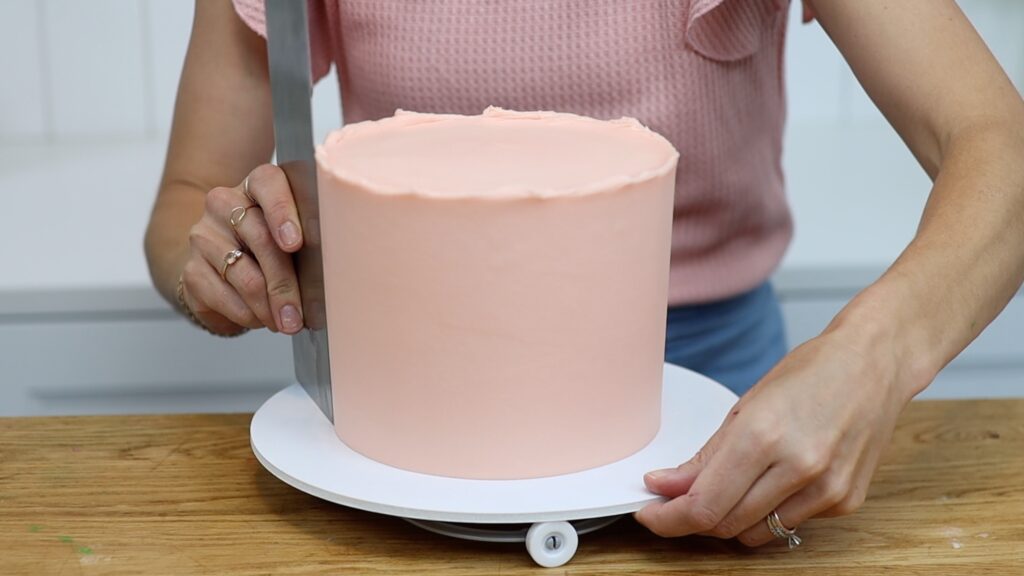
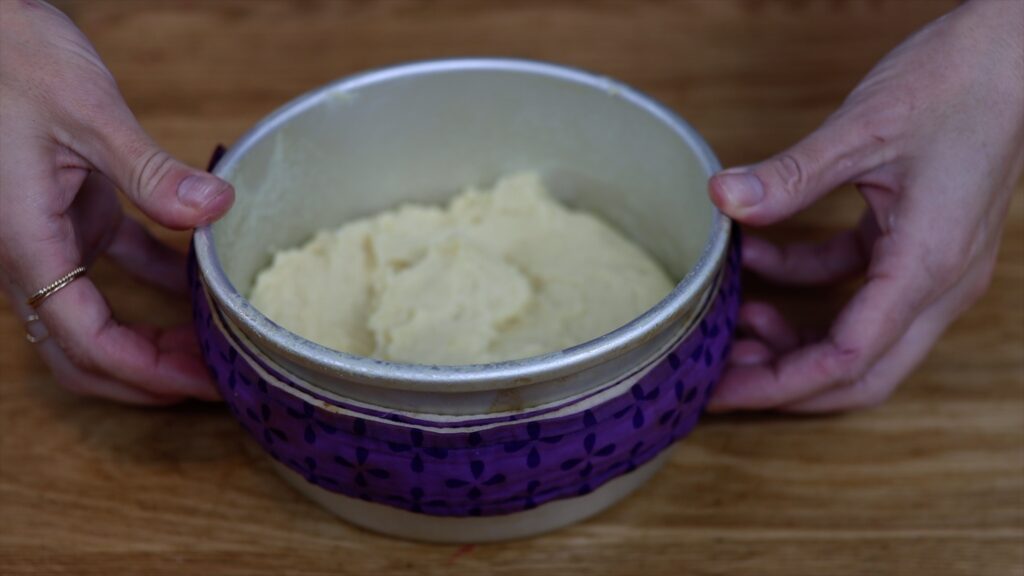
For even, level layers you could trim the tops off with a serrated knife to get rid of the domes. Save time by using baking strips instead. To use these, soak in water for 5 minutes and then squeeze so they're not dripping wet. Place the strip around a cake pan and tighten until it's snug.
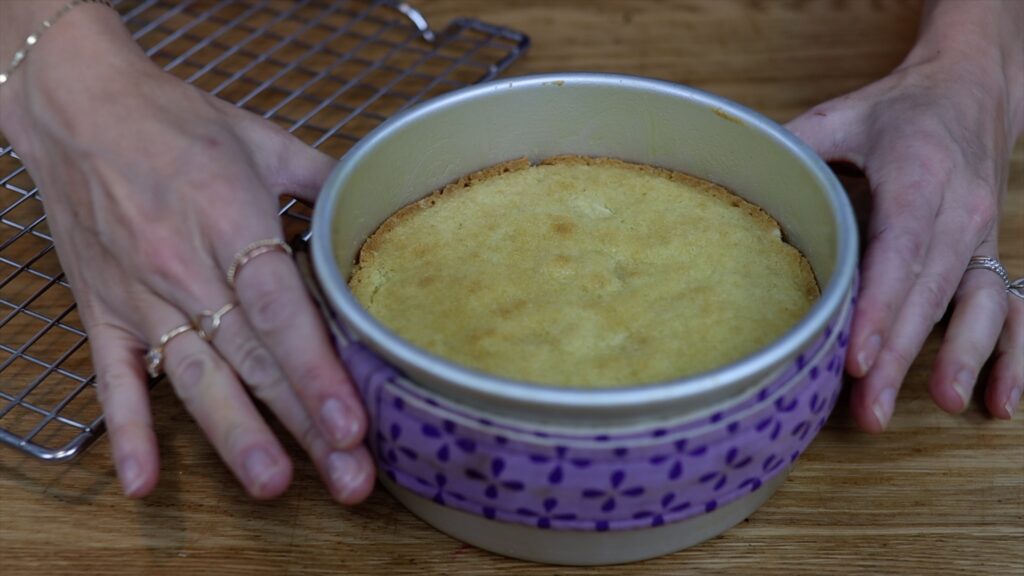
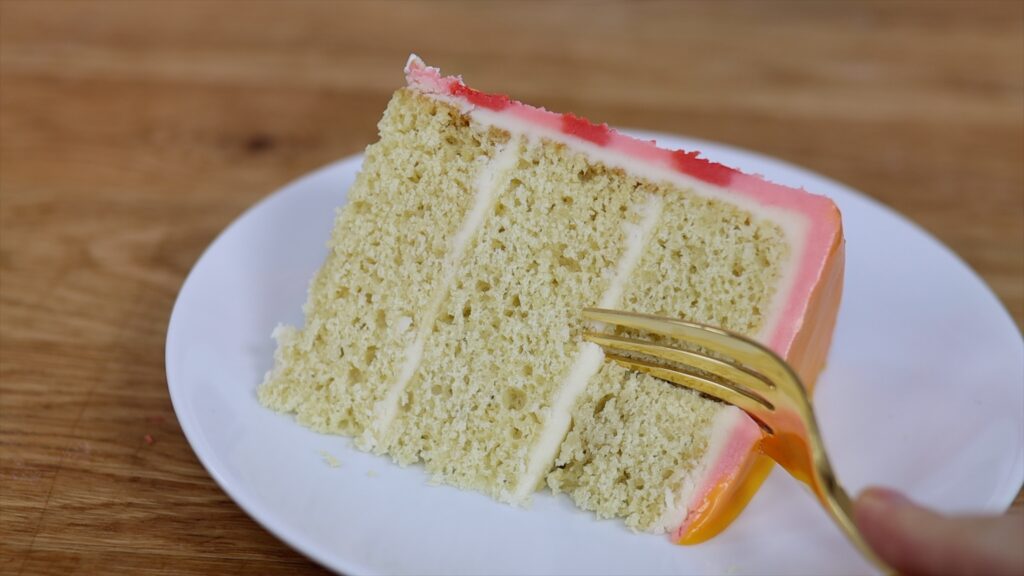
Your cake layers will bake evenly without burnt edges and they’ll rise higher for taller cakes. Also, amazingly, they’ll be perfectly flat without needing to trim them! When you cut into the cake, the slices look beautiful with straight, even layers of cake and filling.
Get more tool recommendations in my tutorial on which cake decorating tools really work.
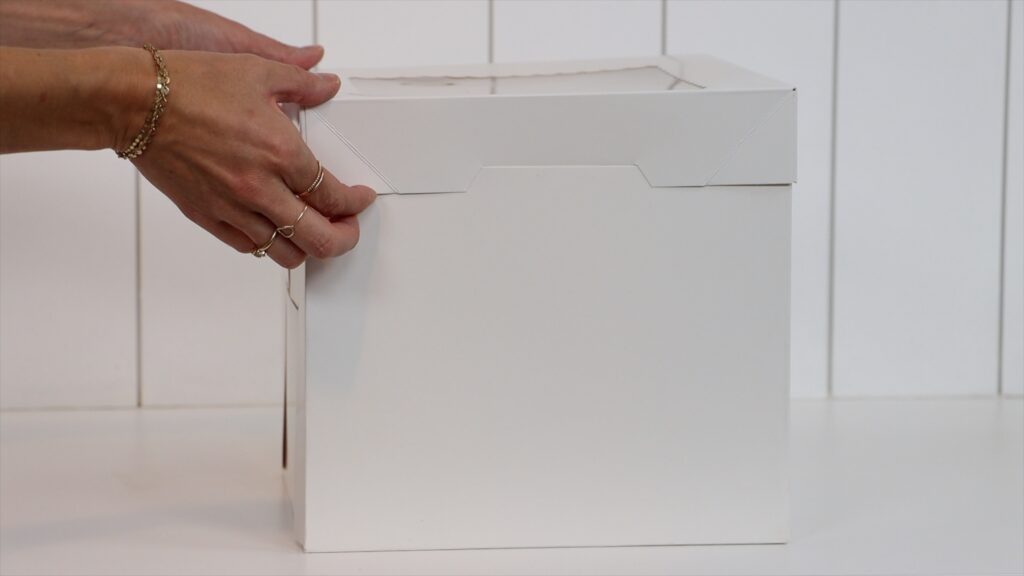
Instead of buying bigger cake boxes for tall cakes, tier cakes or cakes with cake toppers, use this shortcut! Cut one side of the lid with two diagonal slits. The shorter you cut the slits, the higher up you'll raise the lid. Do the same on the opposite side of the box. This will make a flap in the middle on those two sides.
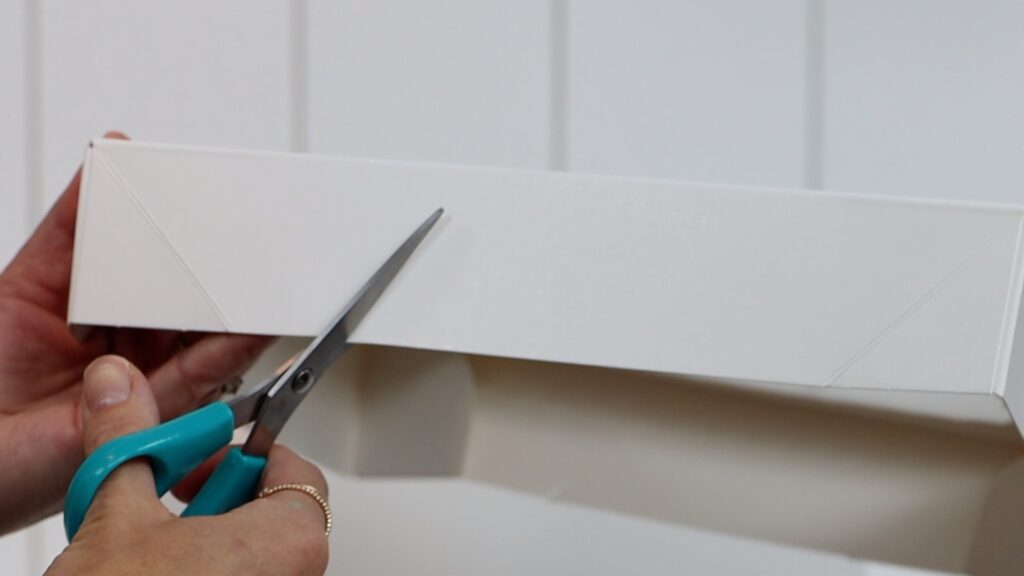
Then slide the flaps into the inside of the box. Now the lid won’t touch the top of the cake and damage it. You’ll be able to safely transport your cakes without needing to buy new packaging!
I hope this tutorial has been useful! Tell me in the comments: which are your favourite cake decorating shortcuts?
For more cake decorating shortcuts, tips and tricks visit my cake school, where you'll learn hundreds of techniques and designs in my online courses!
You can also watch a video of this tutorial on 10 cake decorating shortcuts: