
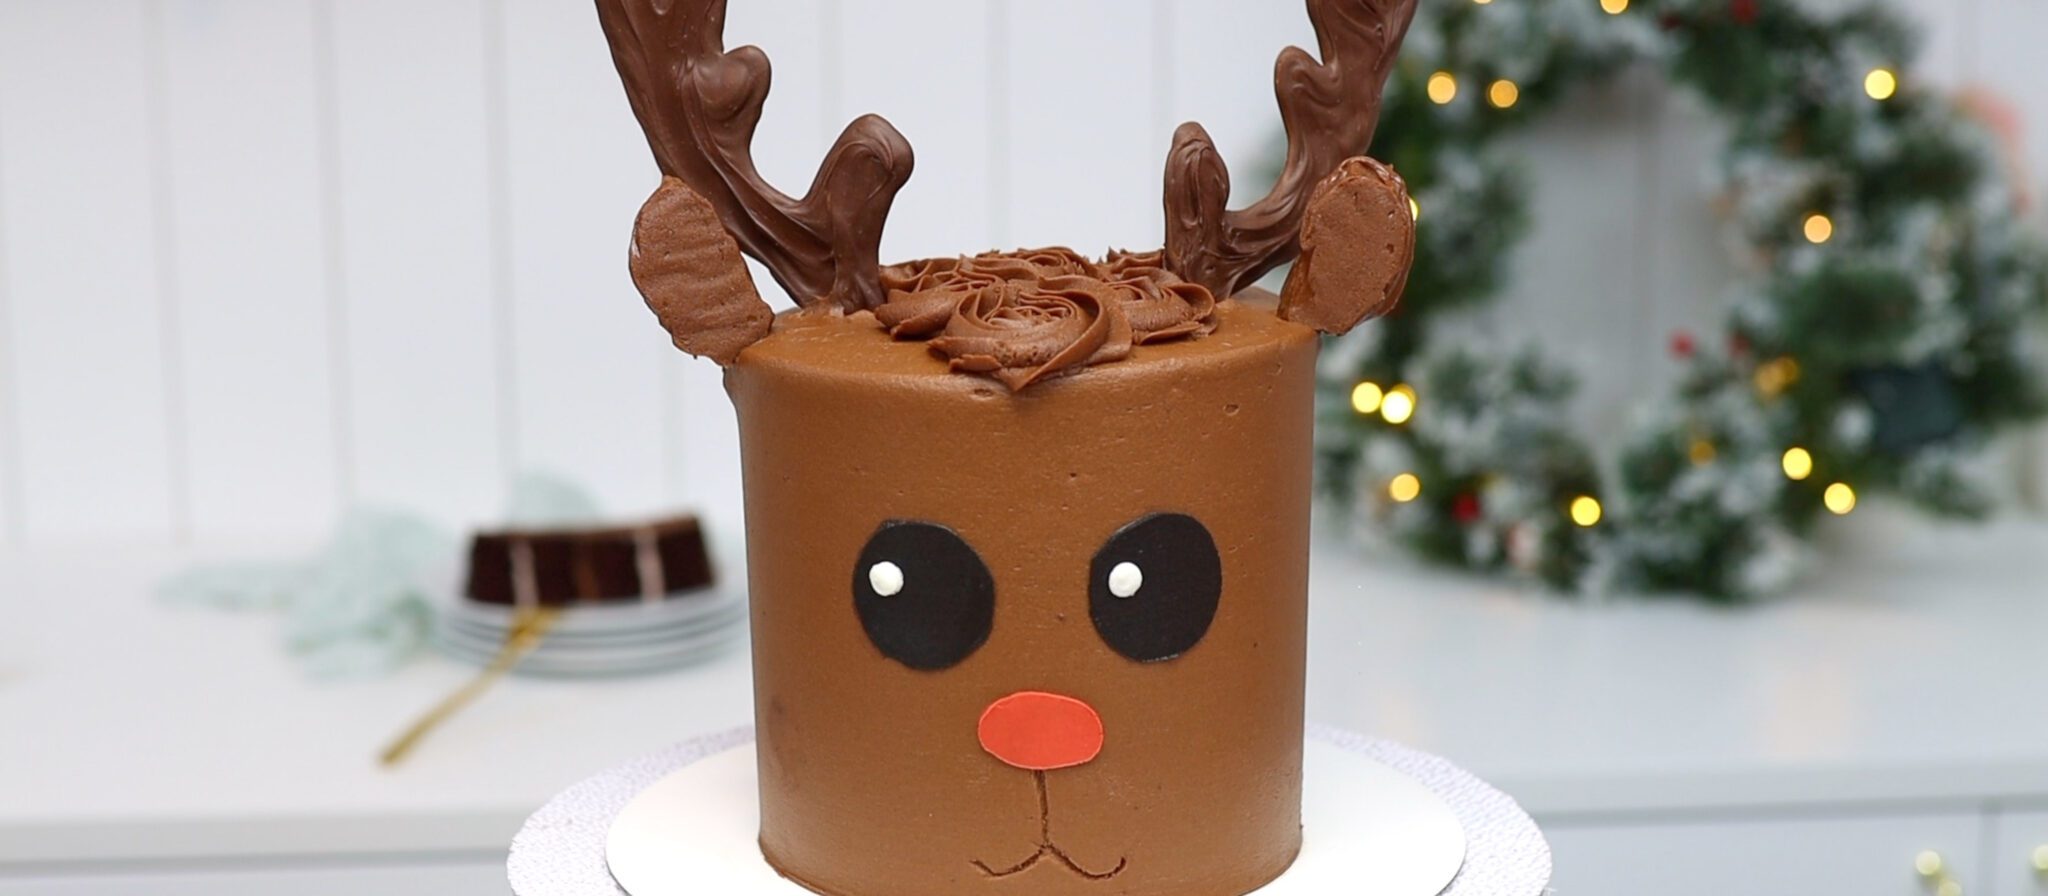

Description
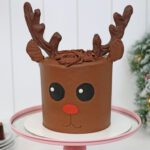
This adorable reindeer cake is delicious and so easy to make!
Ingredients
Units
Scale
For the cake layers:
- 2 cups hot water
- 1 cup cocoa powder
- 1 cup unsalted butter
- 2 1/4 cups white sugar
- 4 eggs
- 2 teaspoons vanilla extract
- 2 2/3 cups plain flour
- 1/4 teaspoon baking powder
- 2 teaspoons baking soda
- 1/4 teaspoon salt
- 2 1/2 cups unsalted butter at room temperature
- 2 lb powdered sugar
- 1/2 teaspoon salt
- 1/2 tablespoon vanilla extract
- 1/2 cup chocolate chips
- 1/4 cup cocoa powder
- 5 tablespoons hot water
- 1 tablespoon cream cheese
- 3 peppermint candies
- 1/2 cup chocolate chips
- 1 Oreo cookie
Instructions
To make the cake layers:
- In a bowl, whisk together hot water and cocoa powder until the cocoa has dissolved. Set aside to come to room temperature.
- In a mixer with a beater (paddle) attachment, mix butter with sugar on medium speed until pale and creamy, about two minutes. Scrape down to the bottom of the bowl once during mixing to make sure no butter is stuck at the bottom.
- Add eggs one at a time, mixing on the lowest speed after each addition until incorporated, about 30 seconds.
- Add vanilla and mix on lowest speed for about 30 seconds to combine.
- In a bowl sift flour, baking soda, baking powder and salt. Add a third of the flour mixture to the mixing bowl and mix on lowest speed to incorporate.
- Add half of the cocoa mixture to the mixing bowl and mix on lowest speed to incorporate. Repeat with another third of the flour mixture, then the remaining cocoa powder mixture, and then the remaining flour mixture. Mix just until the ingredients are combined.
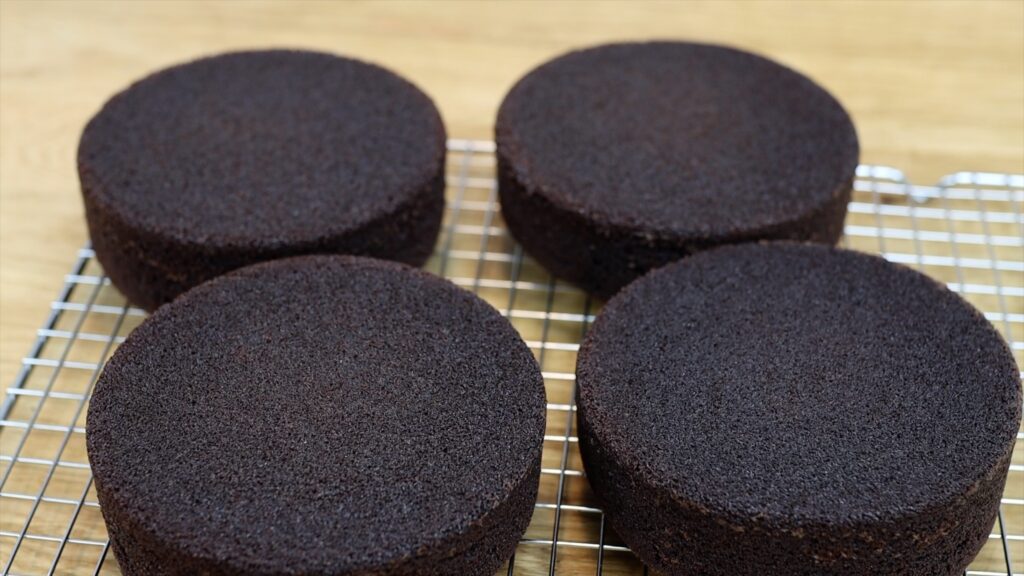
- Grease the inside (base and sides) of four 6" pans with non-stick spray, butter or oil. Divide batter between the cake pans.
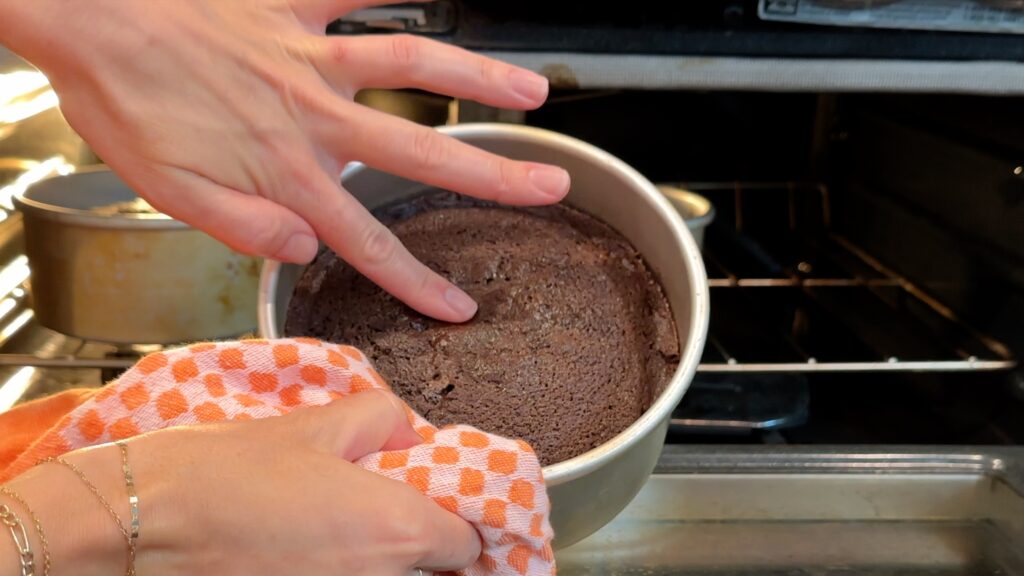
- Bake at 160ºC or 325ºF for 35 minutes, or until a toothpick inserted into the middle of the cake comes out clean.
- Let cakes cool in their pans for 10 minutes. Use a spatula to loosen cake from the edges of the cake pan and then turn onto a wire cooling rack. Leave to cool completely.
To make the filling and frosting:
- Sift the sugar to remove any lumps and check that the butter is at room temperature - you should be able to slice through it easily with a spatula.
- In a mixer with a beater (paddle) attachment, mix butter for a few seconds until smooth. Add a quarterof the powdered sugar and salt (if using) and mix on the lowest speed until incorporated, about one minute.
- Scrape down to the bottom of the mixing bowl with a spatula to loosen any butter and sugar and add the next quarter of powdered sugar and mix for another minute on low.
- Scrape down to the bottom of the bowl, add another quarter of the powdered sugar, mix for one minute on low, scrape, and add the final quarter of the powdered sugar. Mix for one more minute on low, adding the vanilla once everything is mixed together and continuing to mix until it's incorporated.
- Set aside 2 tablespoons of buttercream to for the eyes and nose later, adding a few drops of milk to thin it out slightly.
- Optionally, set aside 1/2 cup of buttercream. Blend peppermints in a mixer or food processor or put them into a sandwich bag and bang them with a rolling pin to crush them. Add them to the buttercream along with the cream cheese and stir to combine. Set aside to use for the cake filling.
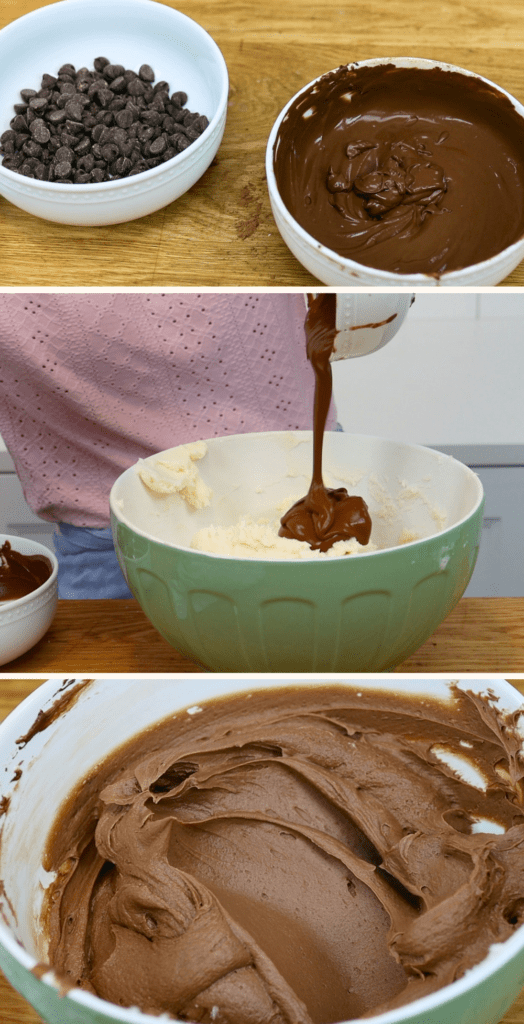
- Pour chocolate chips into a small, microwave safe bowl. Microwave for 30 seconds at 60% power. Stir and repeat until the chocolate is smooth. Let is cool to room temperature.
- In another small bowl, mix cocoa powder and hot water to make a thin paste. Leave to cool.
- Add melted chocolate and cocoa mixture to the remaining buttercream and stir to combine. This will be your filling and frosting.
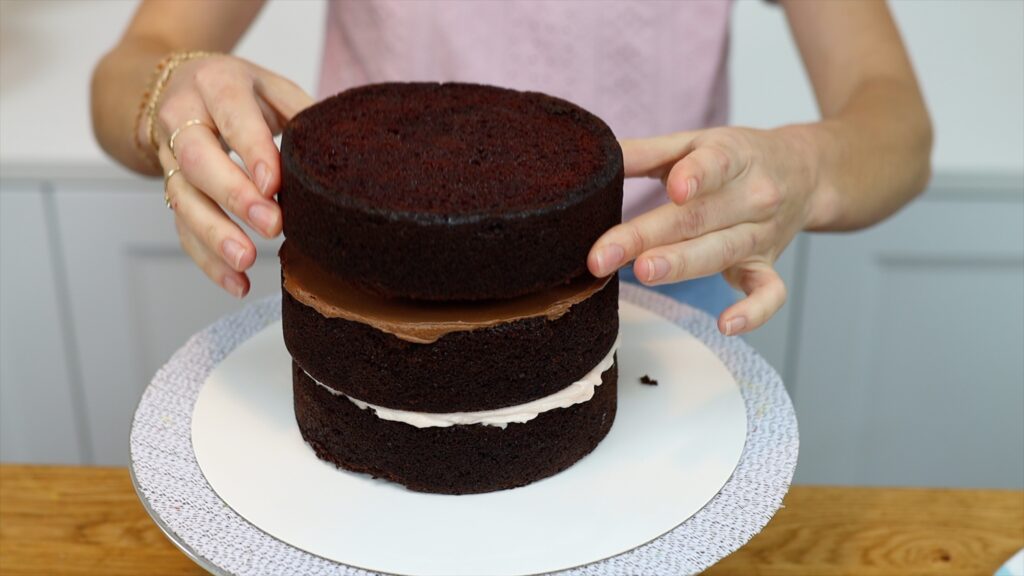
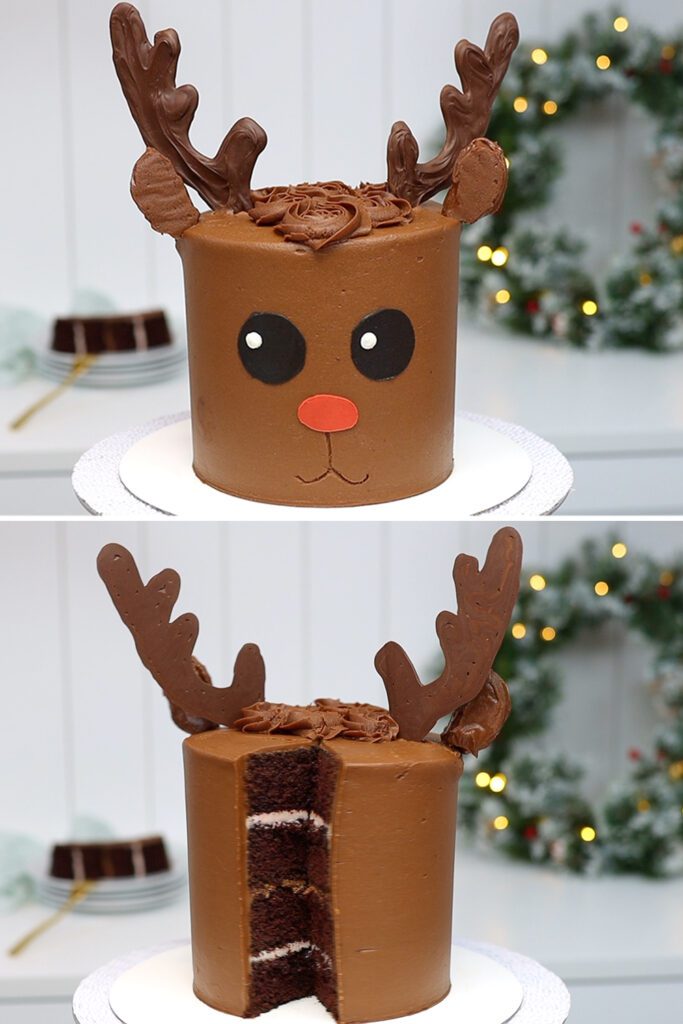
To put the cake together:
- Spread some buttercream onto the middle of a cake board and press your first cake layer down onto it to attach it.
- Spread on a layer of peppermint cream cheese filling and then place another cake layer on top. Spread on a layer of chocolate buttercream and then place another layer on top. Finish with another layer of peppermint cream cheese filling and then the final cake layer.
- Put the cake into the fridge for 30 minutes or the freezer for 15 minutes to set the filling.
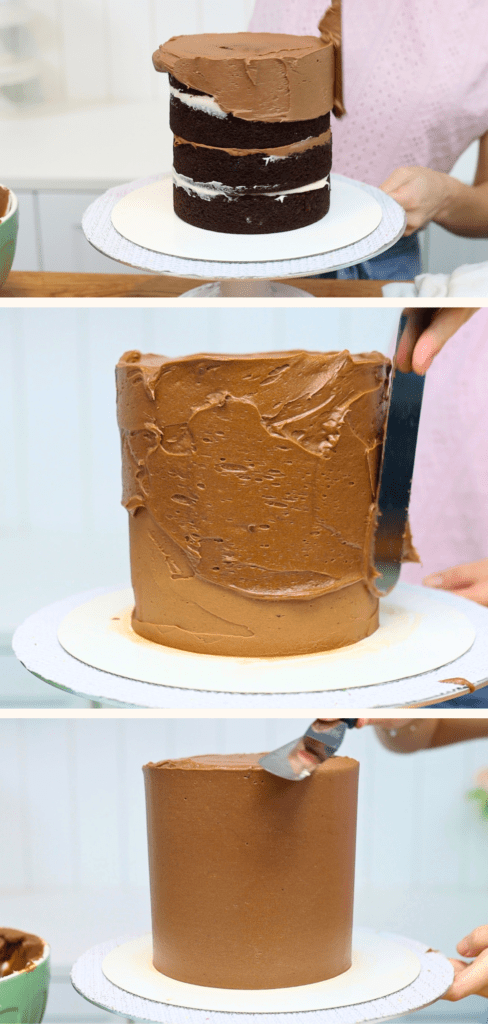
- Spread half of the remaining chocolate buttercream onto the cake as a crumb coat.
- Return to the fridge for another 30 minutes or the freezer for another 15 minutes.
- Spread on another layer of chocolate buttercream. Smooth the frosting, saving the leftovers by covering the bowl with cling film until later. Put the cake Ito the fridge to set the frosting while you make the decorations.
To make the decorations:
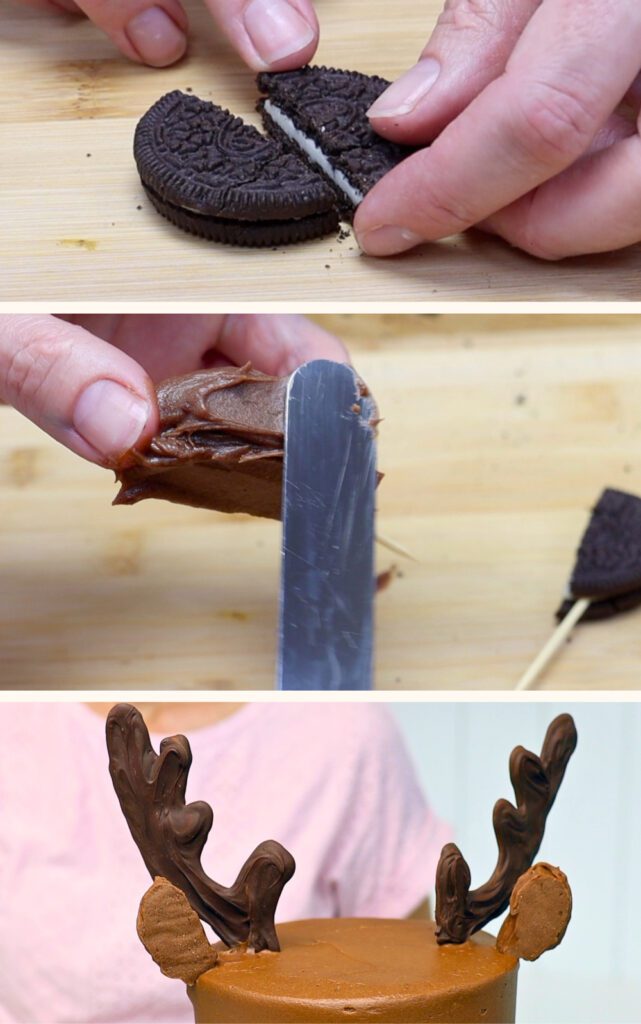
- For the ears, cut an Oreo in half and push a toothpick half way into the filling in the middle. Spread some of the leftover chocolate buttercream to cover the Oreo halves, smoothing it. Then place on a cutting board or plate lines with a piece of parchment or wax paper and put into the fridge to chill and harden.
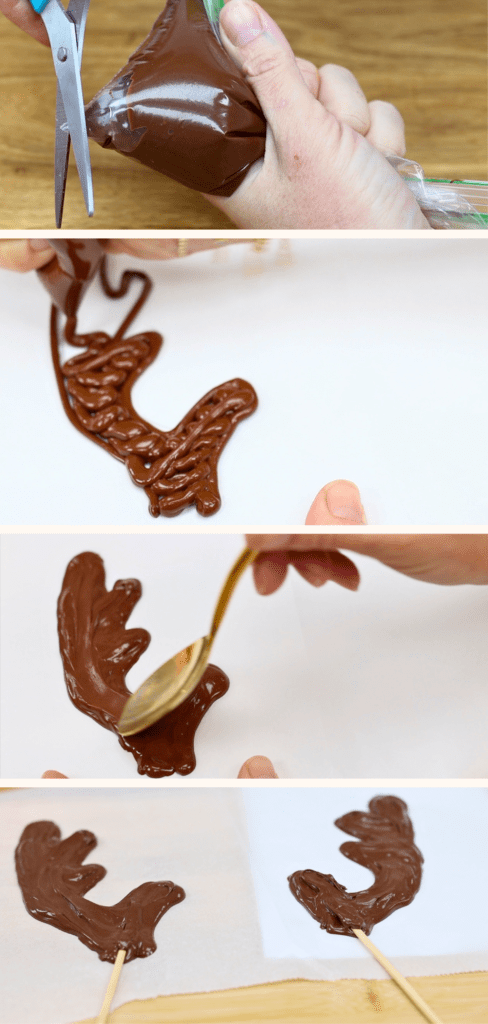
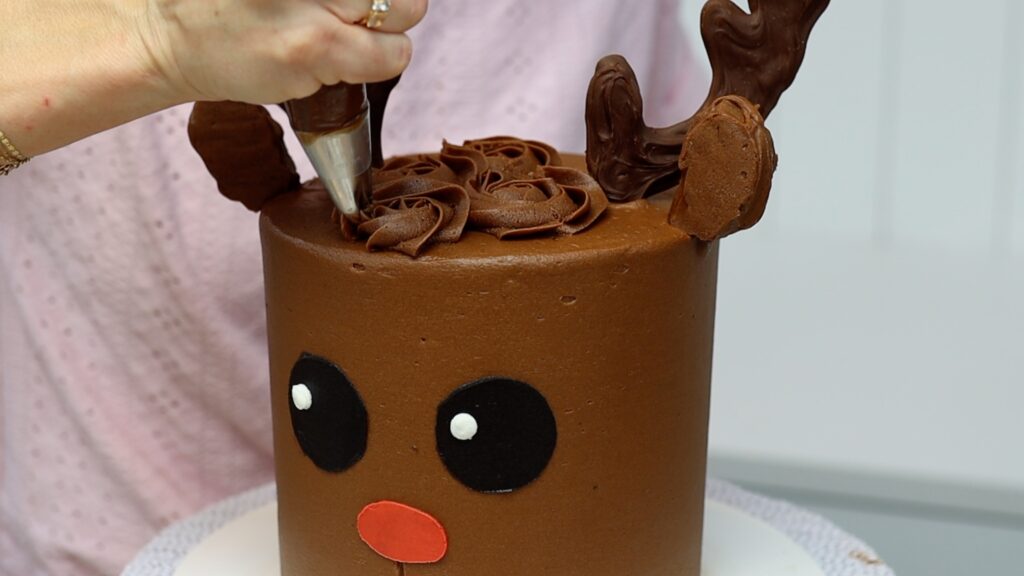
- Draw an antler onto a piece of paper and trace it to make a reverse image. Cover with a piece of parchment or wax paper. Melt chocolate chips in the microwave for 30 seconds at 60% power. Stir and repeat until smooth. Spoon into a ziplock bag and cut a small piece off one of the bottom corners. Squeeze the chocolate through the hole to trace the outline of the antlers onto the parchment or wax paper. Fill in the antlers with more chocolate and use a spoon or offset spatula or palette knife to smooth the chocolate. Press a wooden skewer into the bottom of each antler so that about 2 inches of the skewer is over the chocolate and the rest is sticking out below. Cover the top part of the skewer with more chocolate. Put into the fridge to chill and set.
- When the ears and antlers have set, lift them off the parchment or wax paper and push the wooden skewers of the antlers and toothpicks of the ears into the top of the cake.
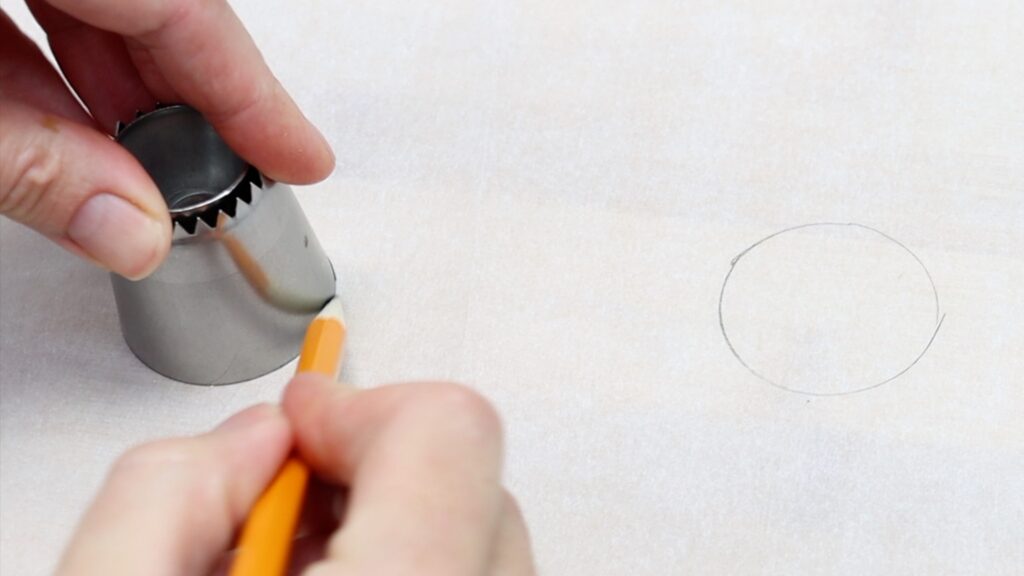
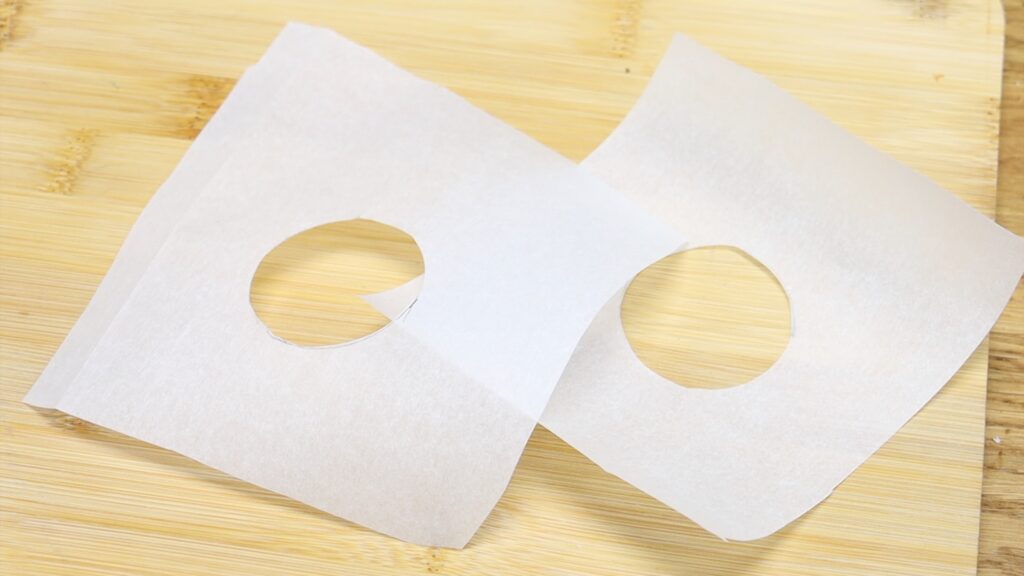
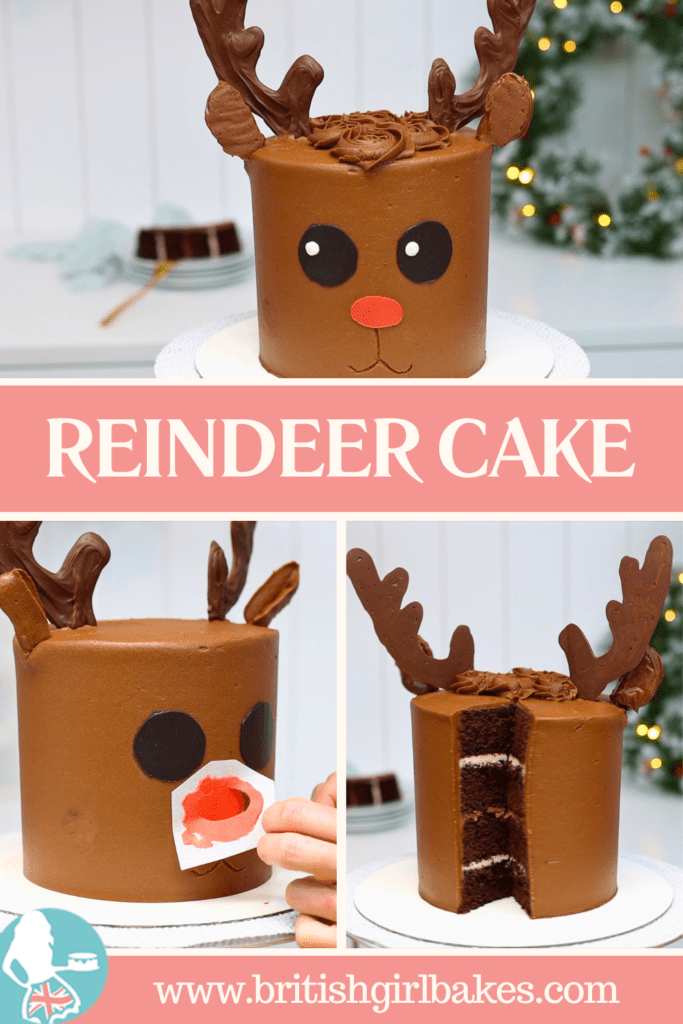
- Make stencils for the eyes and nose by cutting three squares of parchment or wax paper about 6 inches wide. Draw or trace a circle (about 1 1/2 inches wide) onto the middle of two pieces of paper and an oval (about 2 inches wide) onto the other. Cut out the shapes leaving the paper around them intact.
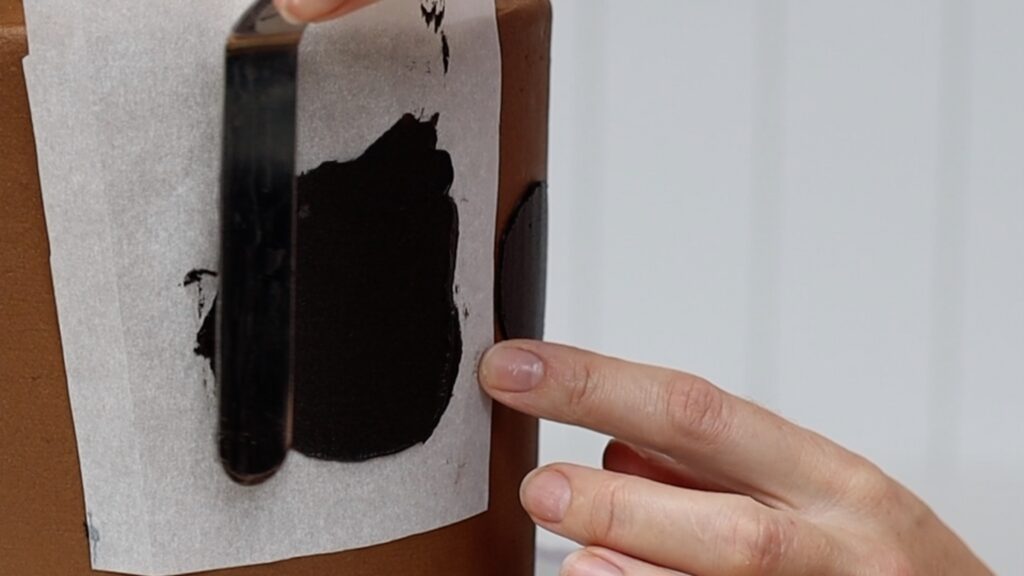
- Put about 2 tablespoons of the leftover chocolate buttercream into a bowl and add some black gel colouring.
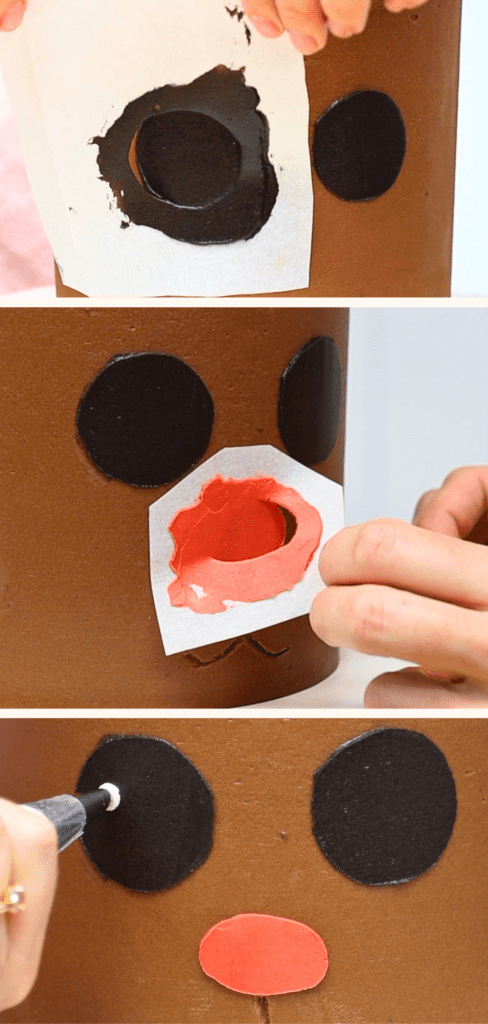
- When the frosting on the cake has set in the fridge, take the cake out. Press the eye stencils against the cake and spread the black buttercream over them. Smooth the black buttercream to take off the excess, leaving a thin, smooth layer behind. Then peel off the stencil. Do the same for the other eye. You can touch up any smudges around the edges of the eyes with a toothpick.
- Find the 2 tablespoons of white buttercream you set aside earlier. Spoon it into a piping bag with a small or medium round piping tip. Pipe a little white dot in the same place on each eye.
- Squeeze the rest of the white buttercream out of a piping bag into a bowl. Add red gel to tint it red for the nose. Press the oval stencil against the cake and spread the red buttercream over it. Smooth the buttercream and peel the stencil off.
- For the mouth, carve a smile using a petal piping tip. Use a toothpick to pick off any crumbs of buttercream along the carved lines.
- Put the rest of the chocolate buttercream into a piping bag with a star piping tip like a 1M. Pipe a few rosettes or swirls onto the top of the cake.
To store and serve this cake:
Store the cake in the fridge for up to a week. Take it out of the fridge 2 hours before you serve it to let the cake and filling and frosting come to room temperature. This tastes best and makes it easiest to serve!


Tdcc. xz. Lxz dn cc t. Xx cx. Xvz lxCt x l. X. L X. Xl. lcx. L can x x c x