Sharp edges on a cake make any cake look instantly more professional, with clean lines from the sides up onto the top. In this tutorial I’ll walk you through exactly how to get sharp edges on a cake using simple techniques and tools, with all of my tips and tricks to make it easier.
Start with a cold cake. Wrap your cake and leave it in the fridge for an hour or overnight or place it unwrapped in the freezer for about 15 minutes. This makes the cake much firmer and less crumbly, which makes the process easier and neater. Assemble your cake by attaching the first layer to a cake board with a small amount of buttercream. This acts as glue so it doesn’t move around. Spread on a layer of filling next. I’m using my 4 Minute Buttercream with Nutella mixed in and it's delicious! Then place your next layer on top, making sure it’s centered so the cake is straight, not leaning.
Repeat with more filling and cake layers. You’ll notice that assembling a cold cake is much easier than working with a room temperature cake, which tends to crumble and slide around as you spread the buttercream on.
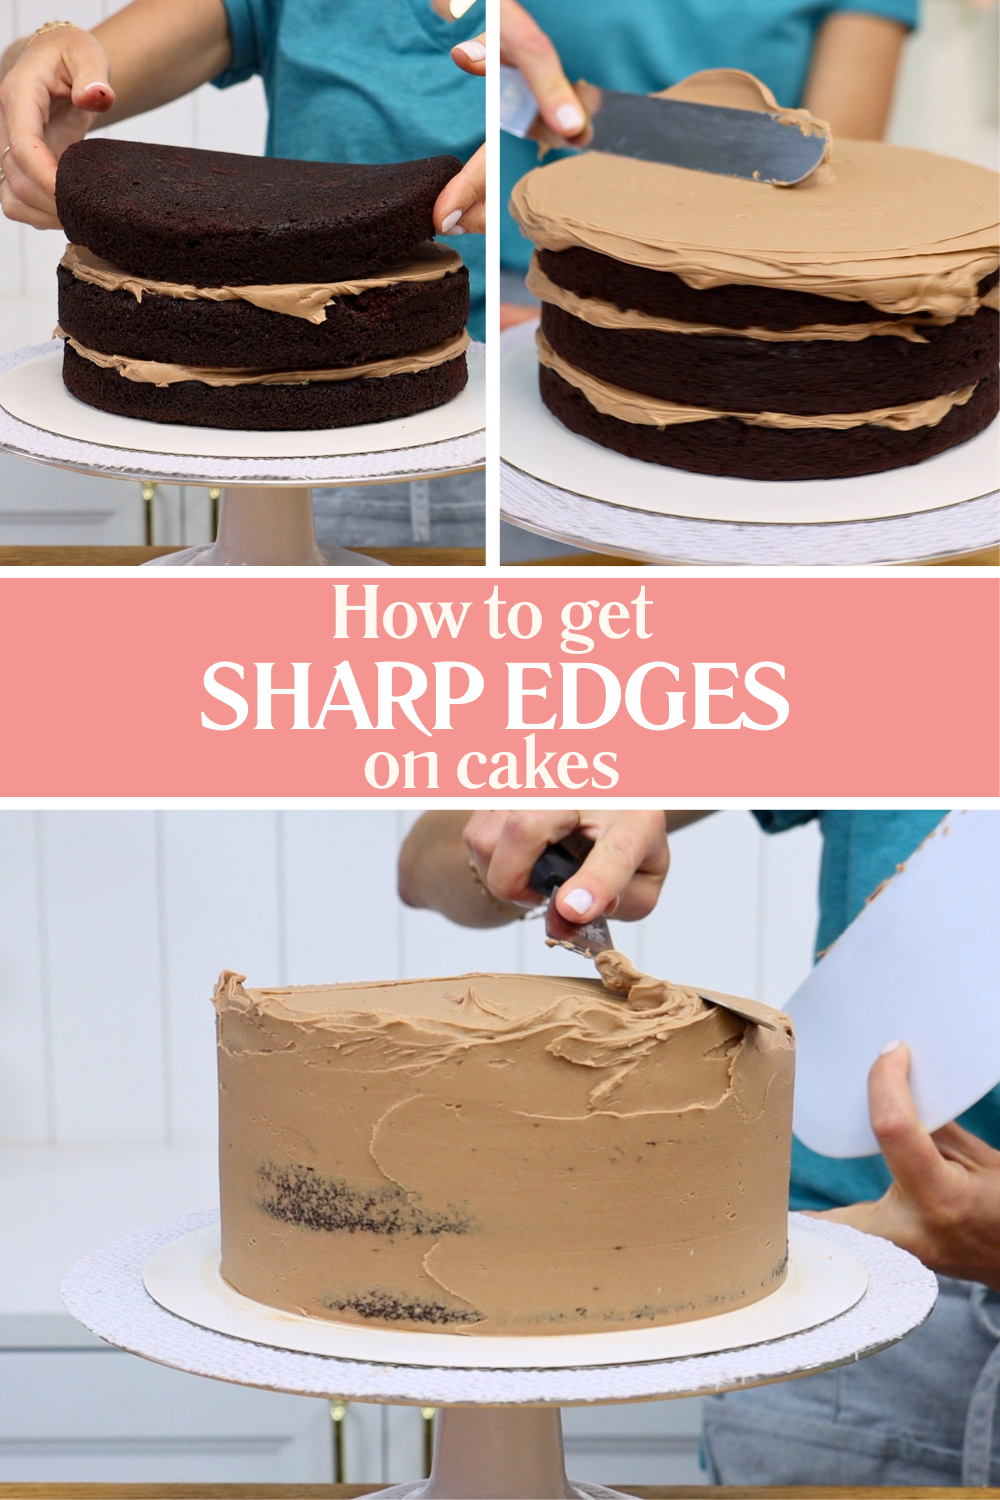
Next, it’s time for a crumb coat. Before you start, chill the assembled cake for about 20 minutes in the fridge or 10 minutes in the freezer. This sets the buttercream 'glue' and holds the cake securely in place while you frost it. A cold cake is also much firmer so it won't lean as you spread and scrape around it.
Apply a thin layer of buttercream over the entire cake. I like to start with the top and then move down to the sides. This layer doesn’t need to be perfectly neat, but it’s important to avoid any bulges of buttercream sticking out sideways or above the top edge. Those will harden when chilled and can stick through your final coat of frosting. It's fine to be able to see the colour of the cake through the frosting in places, as long as there is at least a thin layer of frosting covering it. If the cake is completely exposed, those crumbs will get into your final layer of frosting, which you don't want.
Once the crumb coat is finished, chill the cake again for 20 minutes in the fridge or 10 minutes in the freezer.
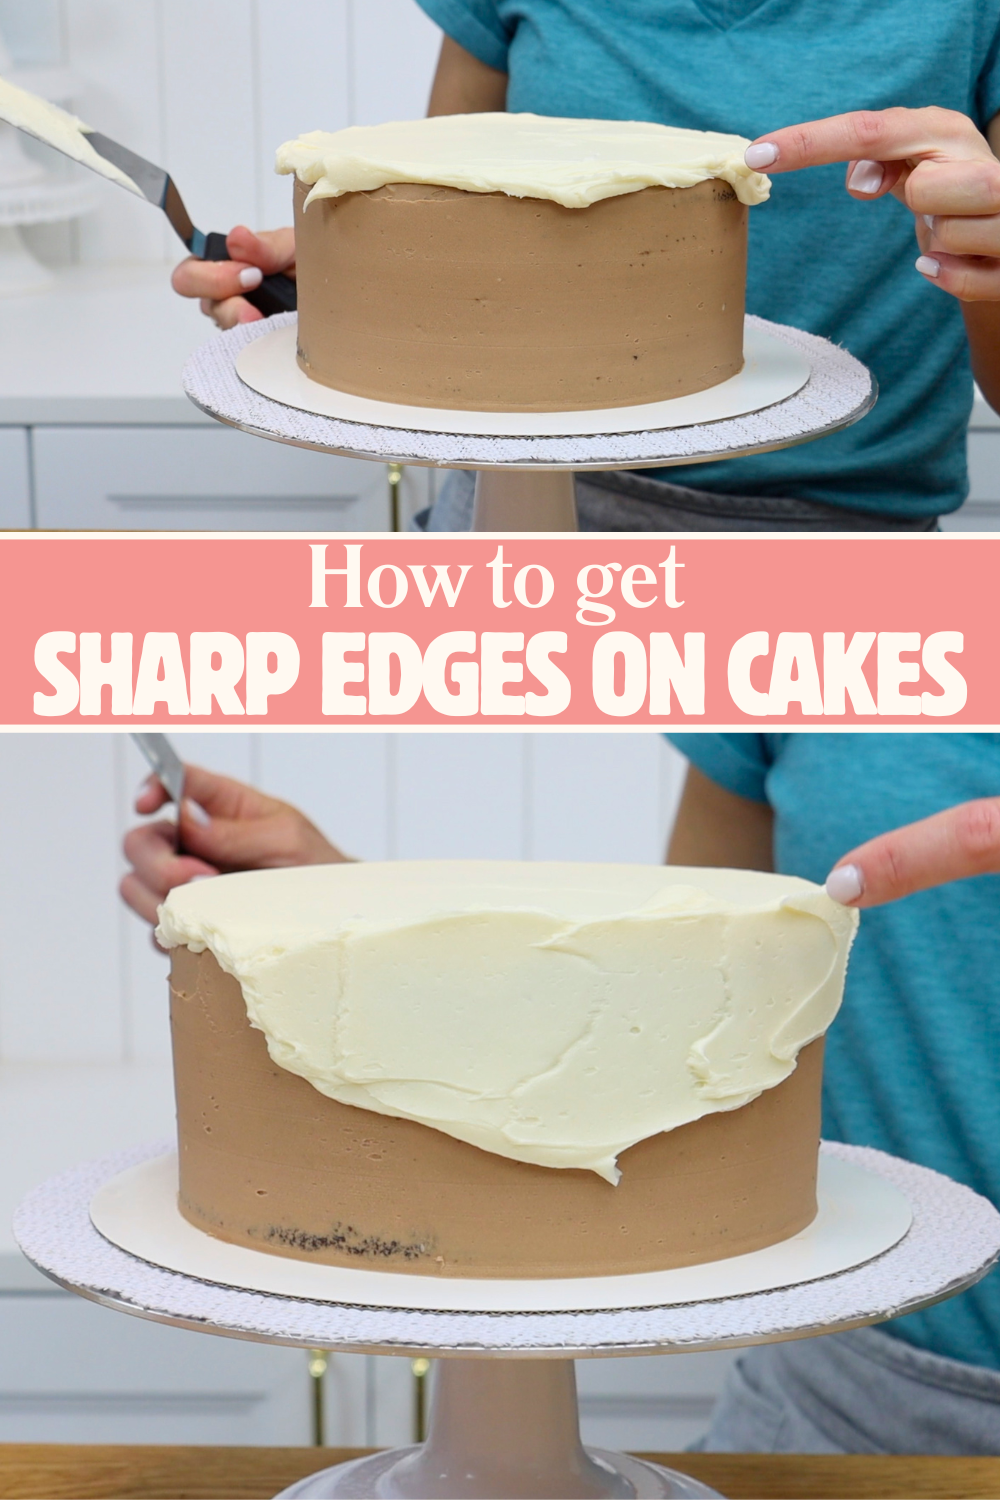
Now the cake is ready for its final coat, which is where sharp edges on a cake are created. First, wipe the cake board clean with a towel or paper towel. If there are any hardened smudges of buttercream, your cake scraper will bump into them as you smooth the sides, creating dents in the frosting.
Spread buttercream onto the top of the cake and push it outwards so it extends over the edges. This prevents gaps around the top edge. Then spread buttercream around the sides of the cake, making sure it sticks up above the top edge. This is crucial because it prevents a domed top and instead creates a wall or lip of buttercream all the way around the cake. See the image below for a visual on the two places the buttercream should be sticking out. Continue spreading down to the bottom so the cake is fully covered.
To smooth the sides, press the base of your cake comb or scraper flat against the cake board to line it up straight. This helps create straight sides, instead of a cake that's wider at the top than the bottom (or wider at the bottom than the top). Spin your
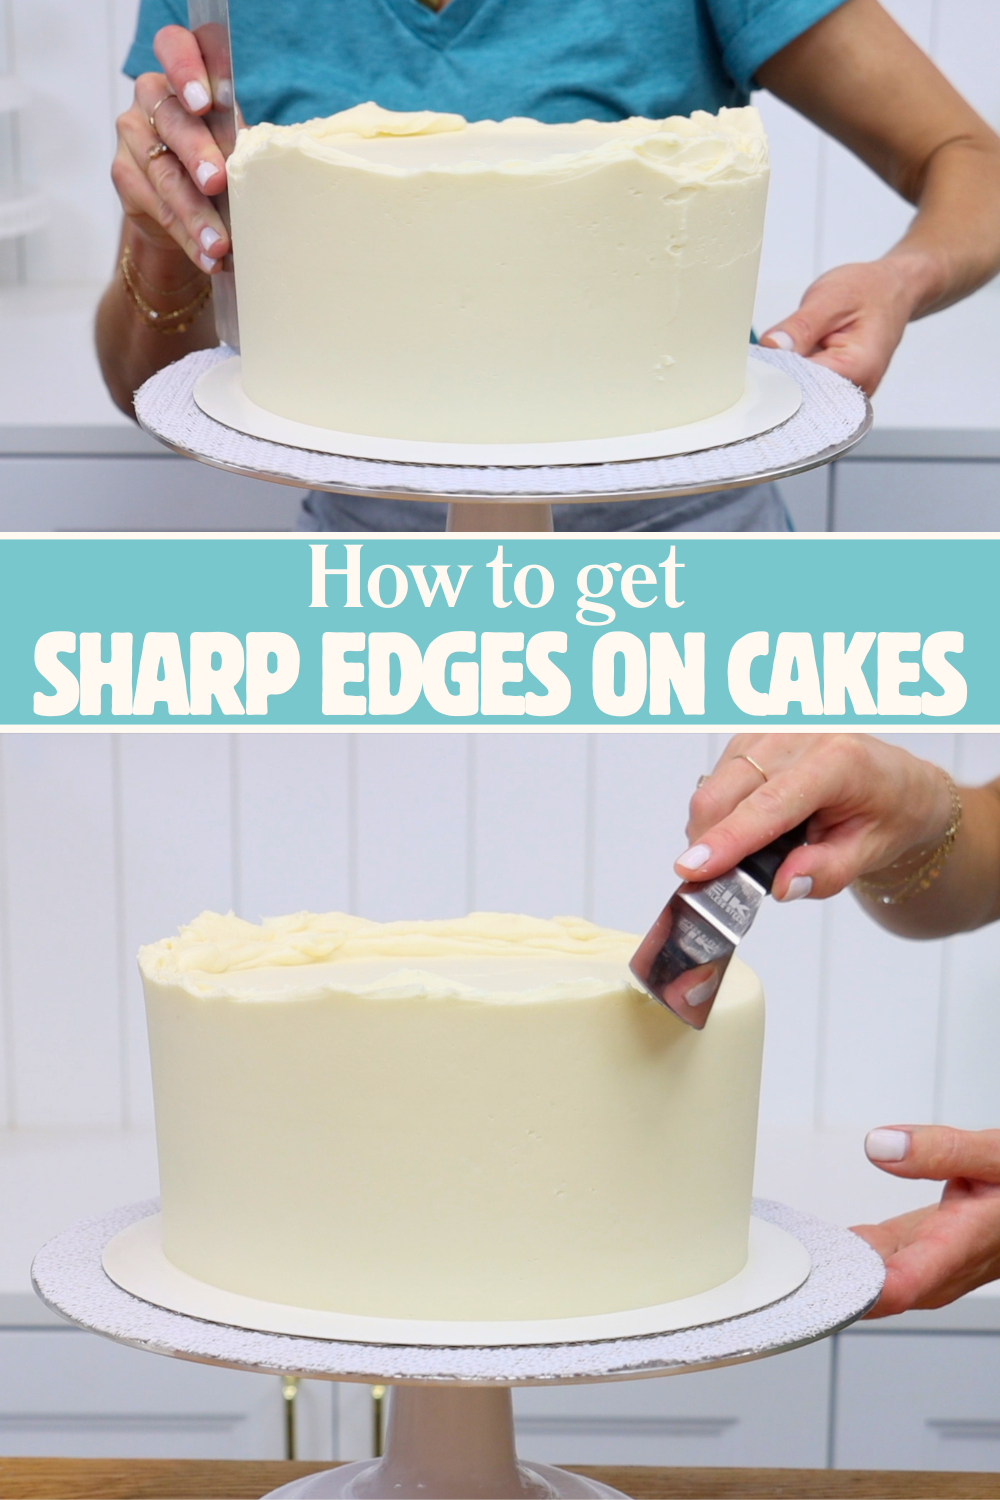
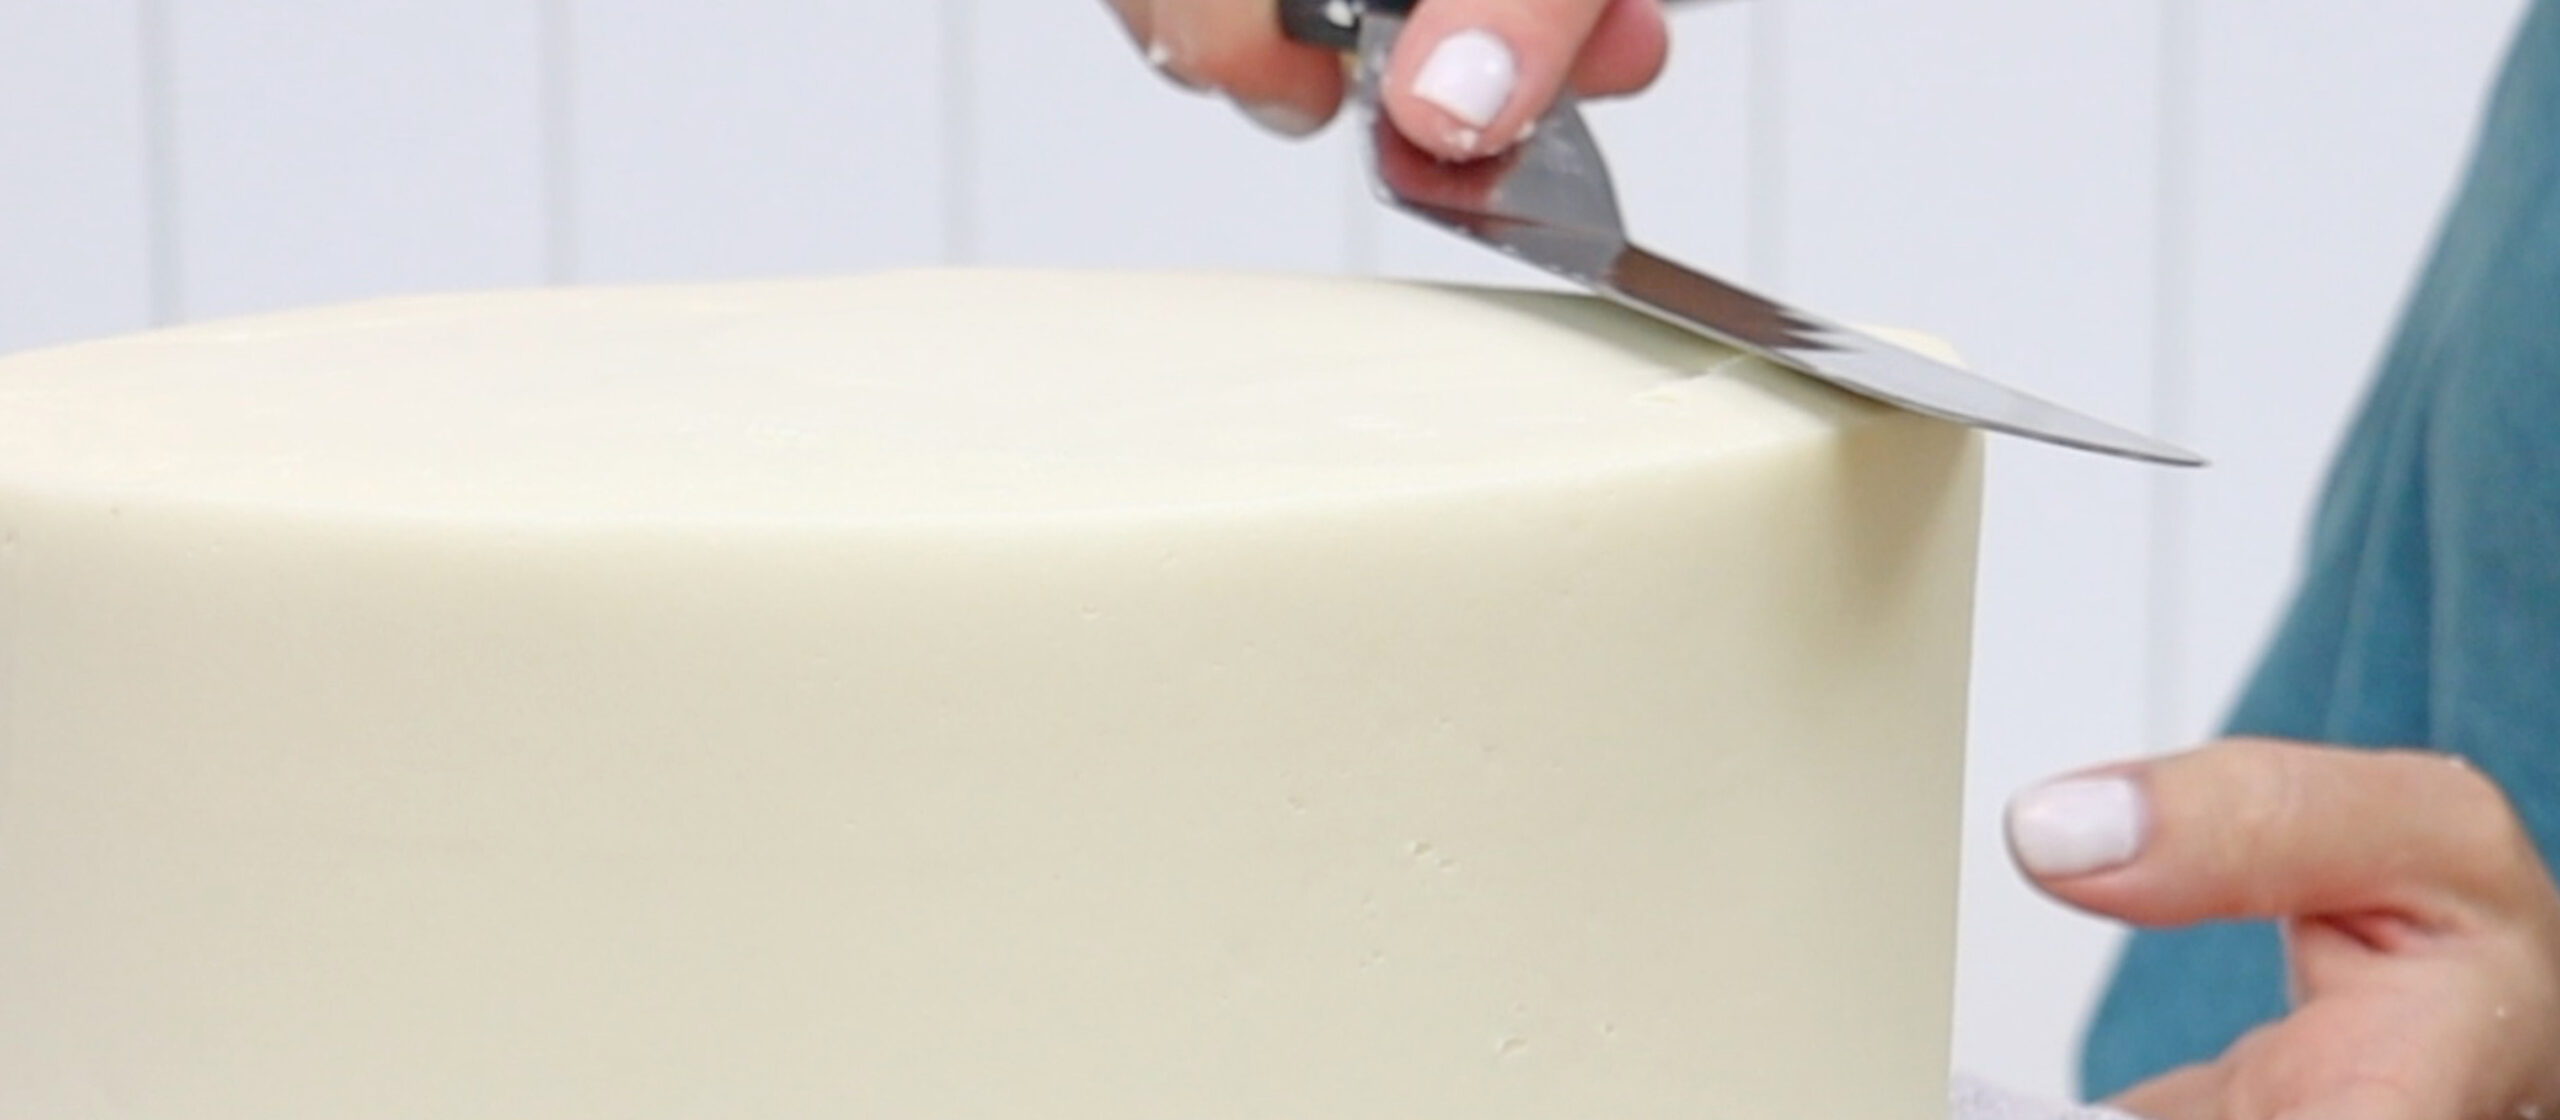
Now for the part you've been waiting for: the top edge. Use an
Here are the three things to focus on:

Work your way all the way around the cake and then get down to eye level and spin the cake to check that the top edge is flat and level. If you see any areas where the edge rises, go back and swipe those sections again until the entire top edge is even.
The final step is to chill the cake again so the buttercream sets and becomes firm. This is essential for maintaining sharp edges on a cake. If you try to decorate the cake while the frosting is still soft, you’ll damage the smooth sides. If you pipe onto the top before chilling, the weight of the buttercream can push down and cause the edges to droop or bulge. Chilling locks everything in place so your edges stay crisp.
I hope this tutorial helps you achieve sharp edges on a cake with confidence. For more cake decorating techniques and designs, visit my cake school!
You can also watch a video of this tutorial on how to get sharp edges on a cake:


