I’m so excited to show you this fun technique I’ve been experimenting with! After piping buttercream onto a cake, give it a facelift to reveal a cross section of that piping. Let's call it Facelift Frosting! The technique creates a stunning effect that looks like edible paper or painted fondant. There are endless variations you can try and in this tutorial I’ll show you three.
To prepare your cake for this technique, cover it in a crumb coat. A crumb coat is a thin layer of frosting that traps any crumbs that come off the cake. It prevents those crumbs from getting into your final layer of frosting next. I'm using my 4 Minute Buttercream for all of these cakes.
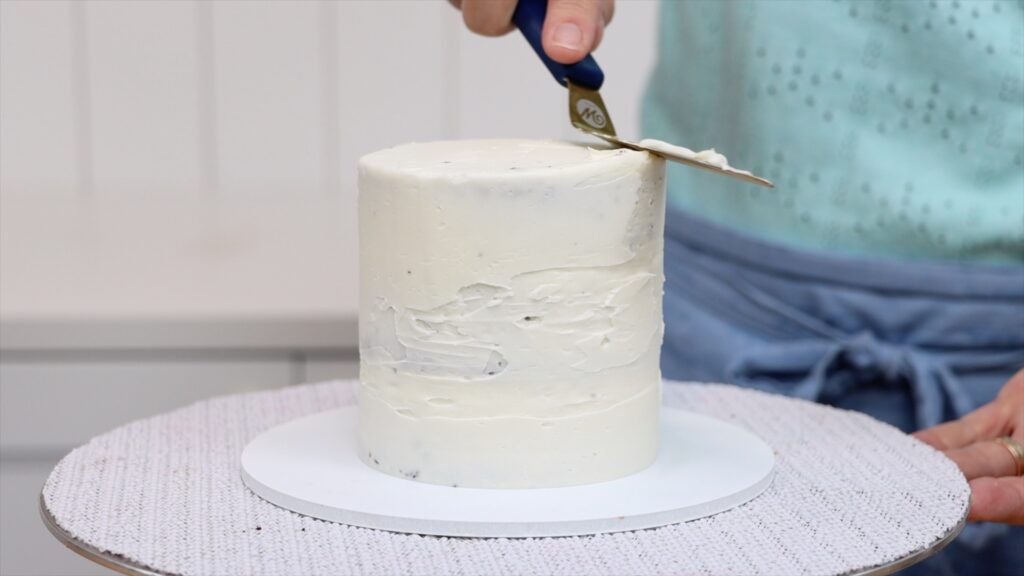
The crumb coat doesn't have to be smooth because it’s going to be covered up in a moment. It should create a neat outline for the cake though, so aim for straight sides and a level top. Then chill the cake to set this frosting while you prepare your piping bags.
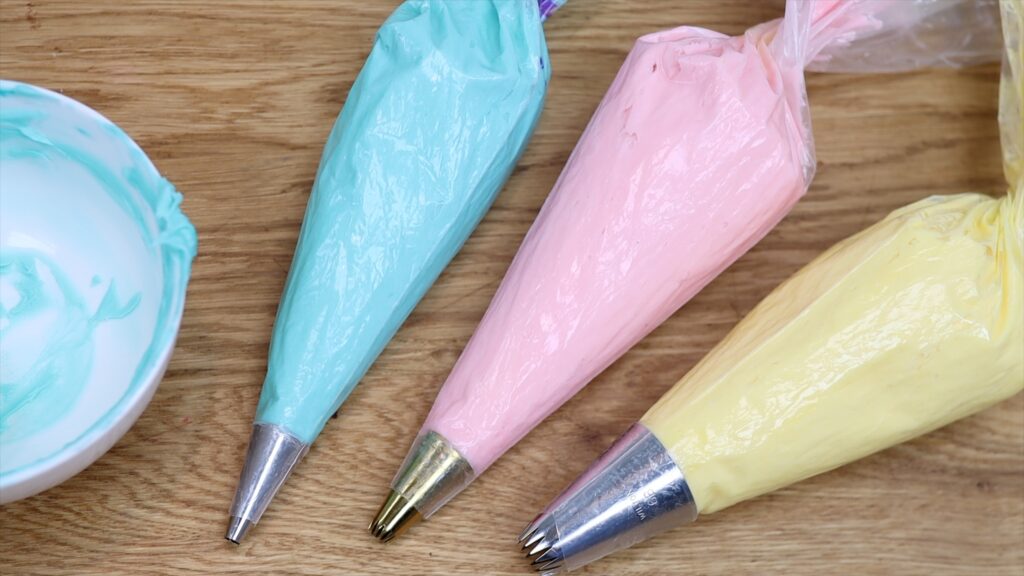
You’ll need at least two colours or shades of buttercream for this technique. After tinting your buttercream, put it into piping bags. You can use the piping bags without piping tips or for more detailed designs, use a variety of piping tips.
One way to incorporate two colours with just one piping bag is to do two tone frosting. To do this, hold the piping bag open and spread one colour down one side of the bag. Then fill the other half of the piping bag with another colour, like this:

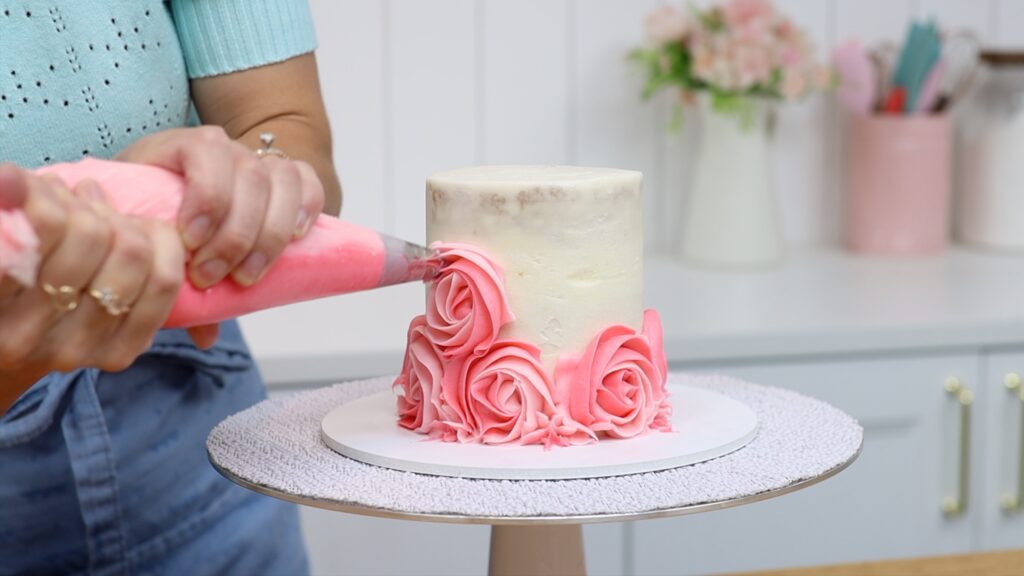
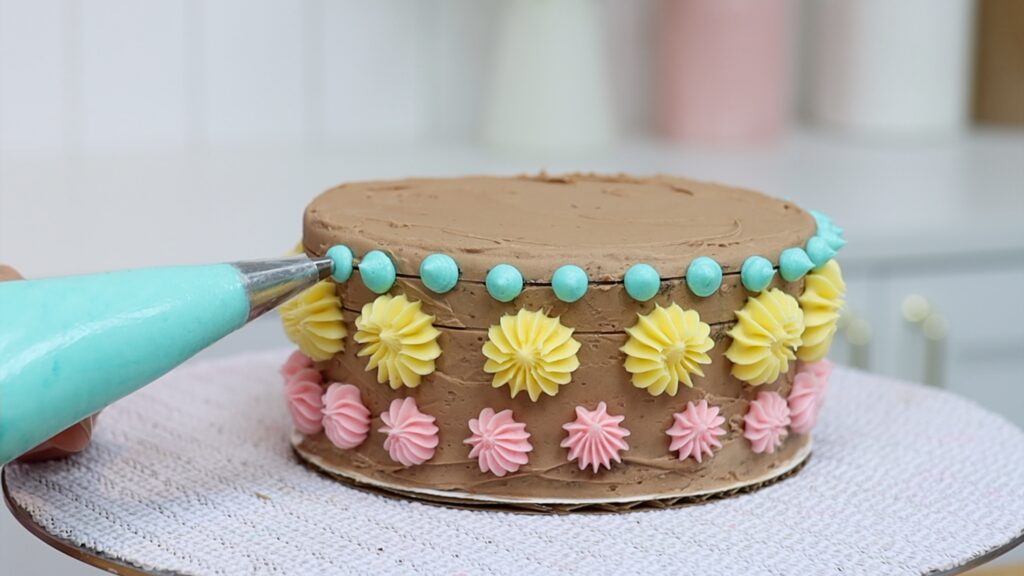
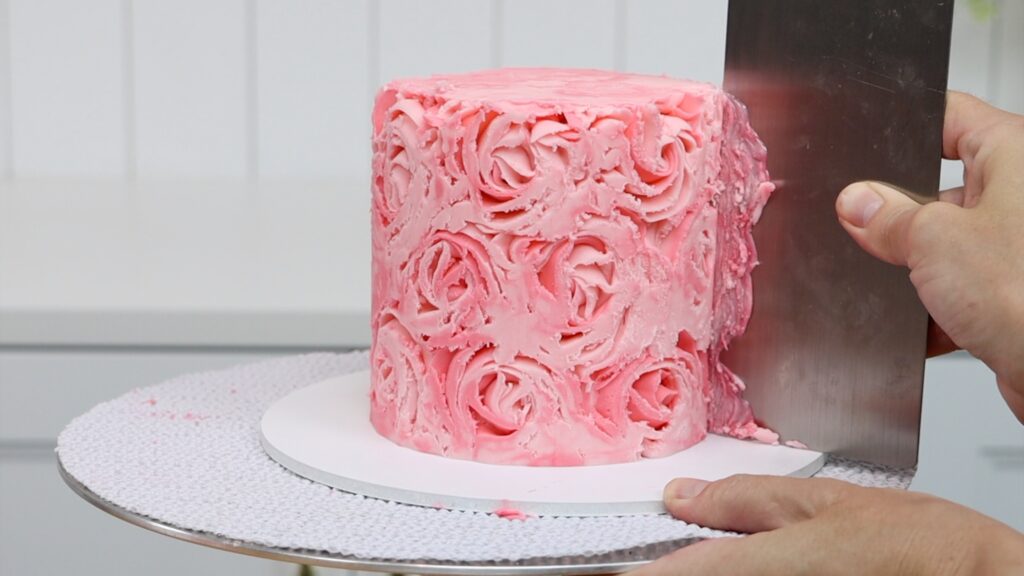
Take your chilled cake out of the fridge and pipe away! You can cover the whole cake with piping, like I’m doing here with these roses. I know this rose frosting technique is a bit dated but the effect at the end is going to be totally different and unrecognizable.
You can create pretty designs without piping tips by just cutting the ends off piping bags. Try wavy lines or zig zags or you could pipe hundreds of dots or really anything you like. Save all of your leftover frosting in the piping bags for later!
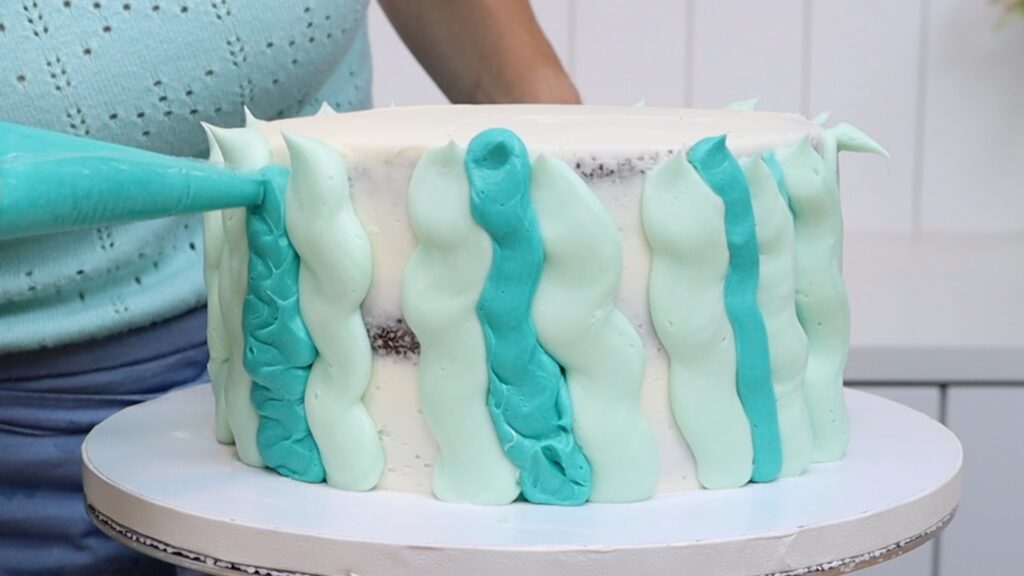
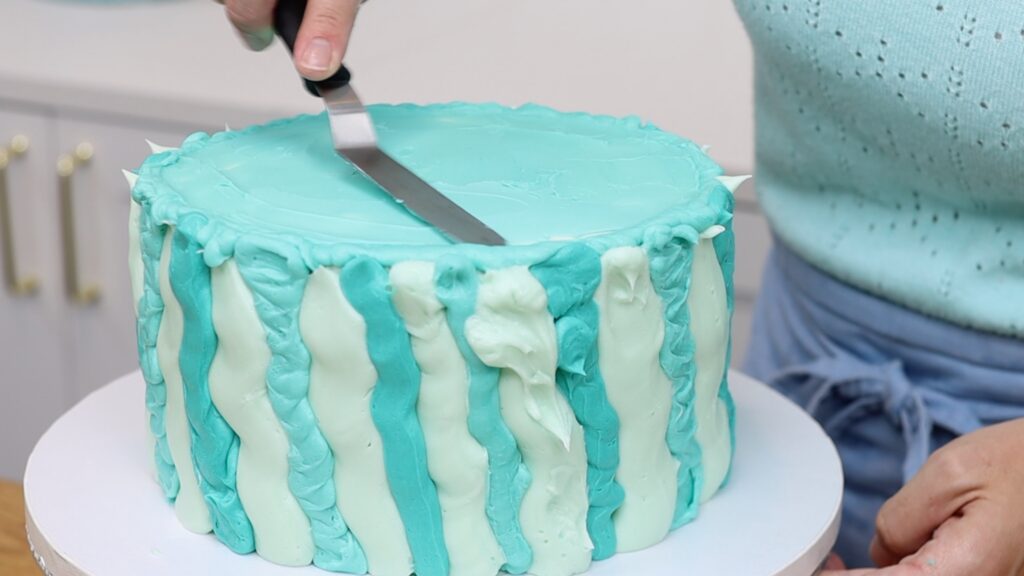
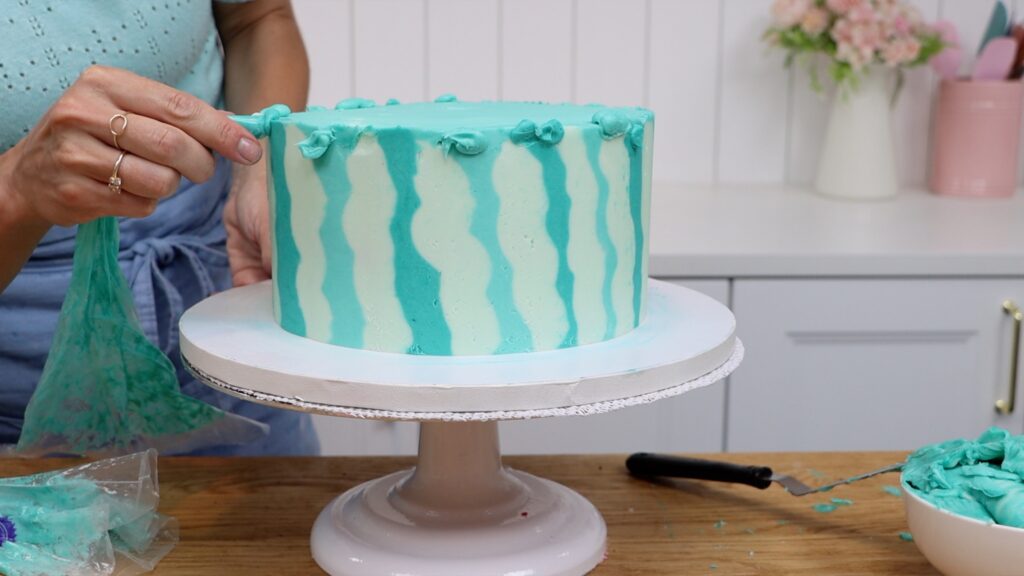
For the previous two cakes I covered the entire cake with piping but you don’t have to do it this way. Another option is to pipe texture to partially cover the cake. I'm piping textured stripes on this cake and leave the rest of the crumb coat blank for now:
For partial coverage piping, put the cake in the freezer just long enough to set the piping. It will take about 15 minutes. Then pipe over the whole cake with another color of frosting like this plain white buttercream:
You apply much less pressure with a piping bag compared to using an
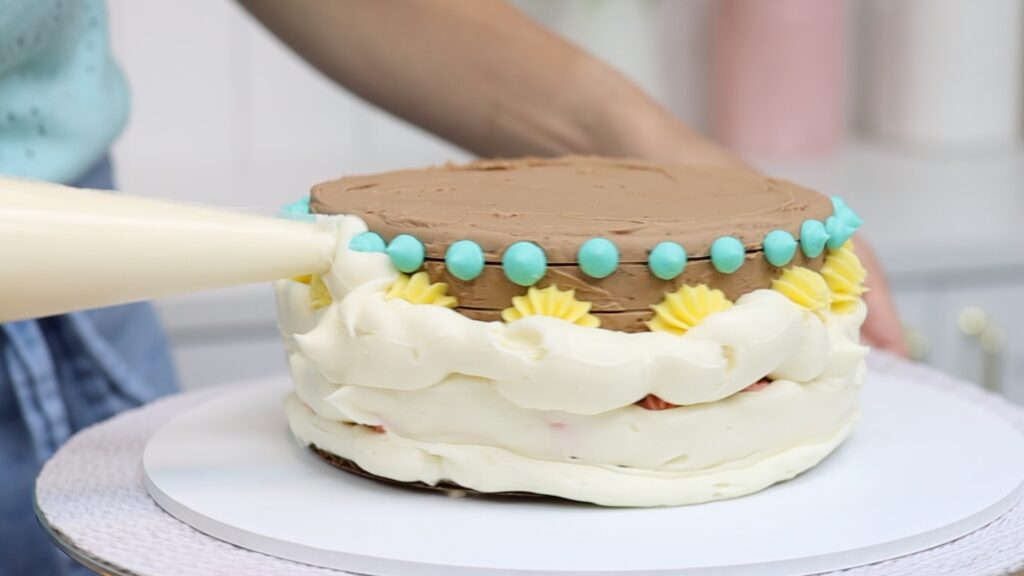
However you choose to decorate the cake, make sure the entire cake is covered in frosting. Don't forget the top of the cake! You might choose to cover the top with smooth frosting instead of piping onto it.
Now put the cake in the freezer for 20-30 minutes to chill and set the frosting.
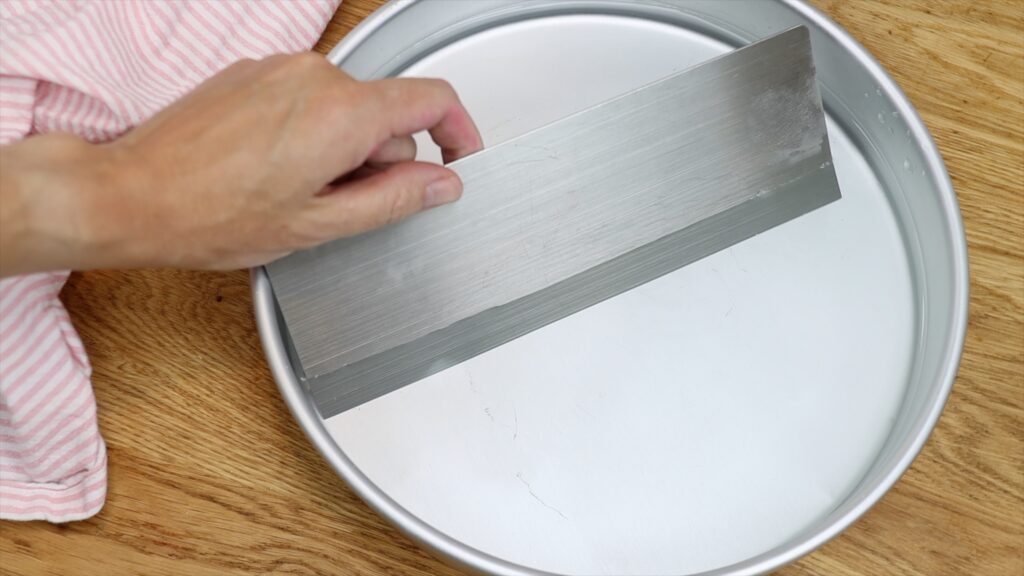
While the frosting is chilling, boil a kettle and find your metal straight edged cake comb. Pour the boiling water into a cake pan at least as wide as your comb. You need to be able to fit the entire straight edge of the cake comb into it. The water should be about two centimeters or an inch high.
Take your cake out of the freezer and put it on a
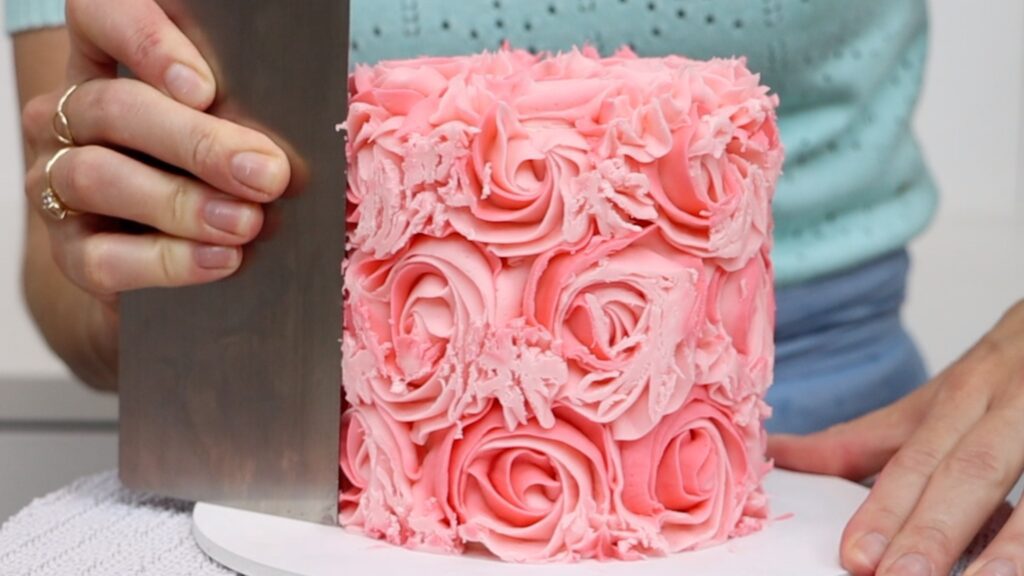
If you have piping on the top of the cake you’ll need to scrape that as well. You hot metal cake comb will take off the texture layer by layer until it’s smooth.
After each scrape around the cake, wipe the buttercream off your cake comb and dip it back in the hot water. Dry the comb off and scrape again. And again. And again. This will take a few minutes and several scrapes.
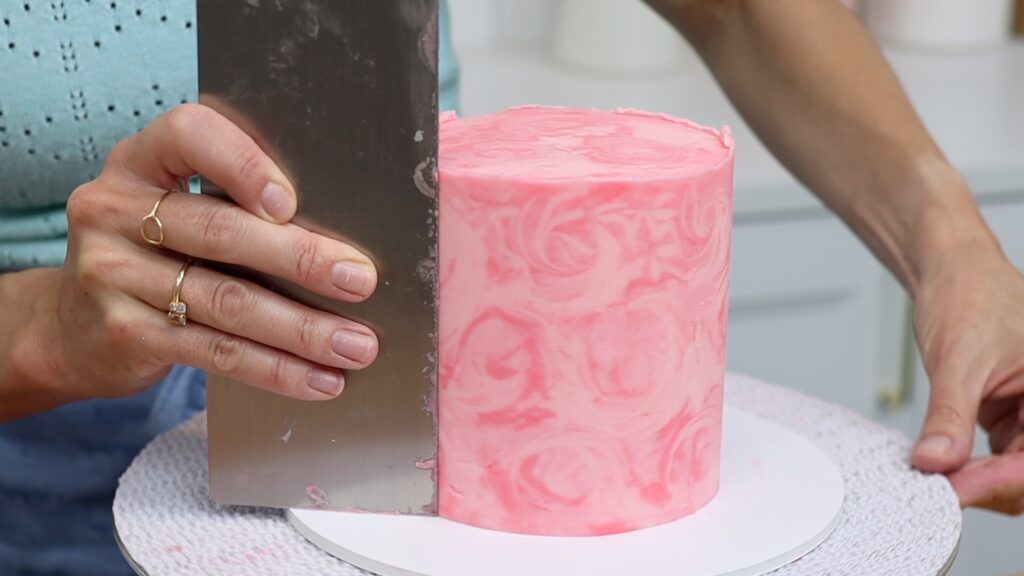
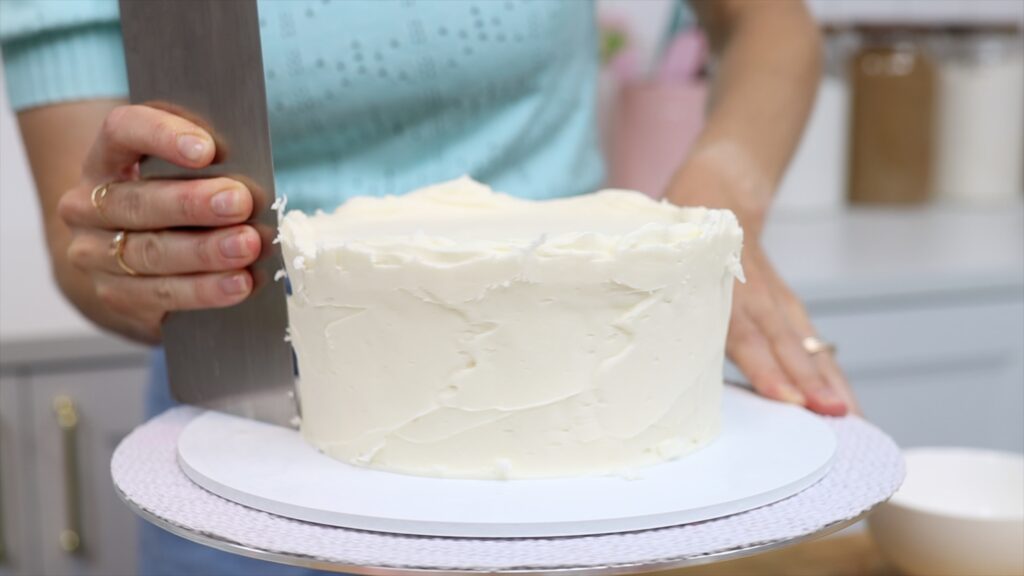
When most of the frosting is smooth but you still see several gaps or indents, stop scraping. If you continue, you'll expose the crumb coat underneath the piping. Instead, use the leftover buttercream from piping to fill in those indents.
Spread this fresh frosting to push it deeper into the indents and then scrape again. You'll drag the fresh frosting over the whole cake at first but keep going!

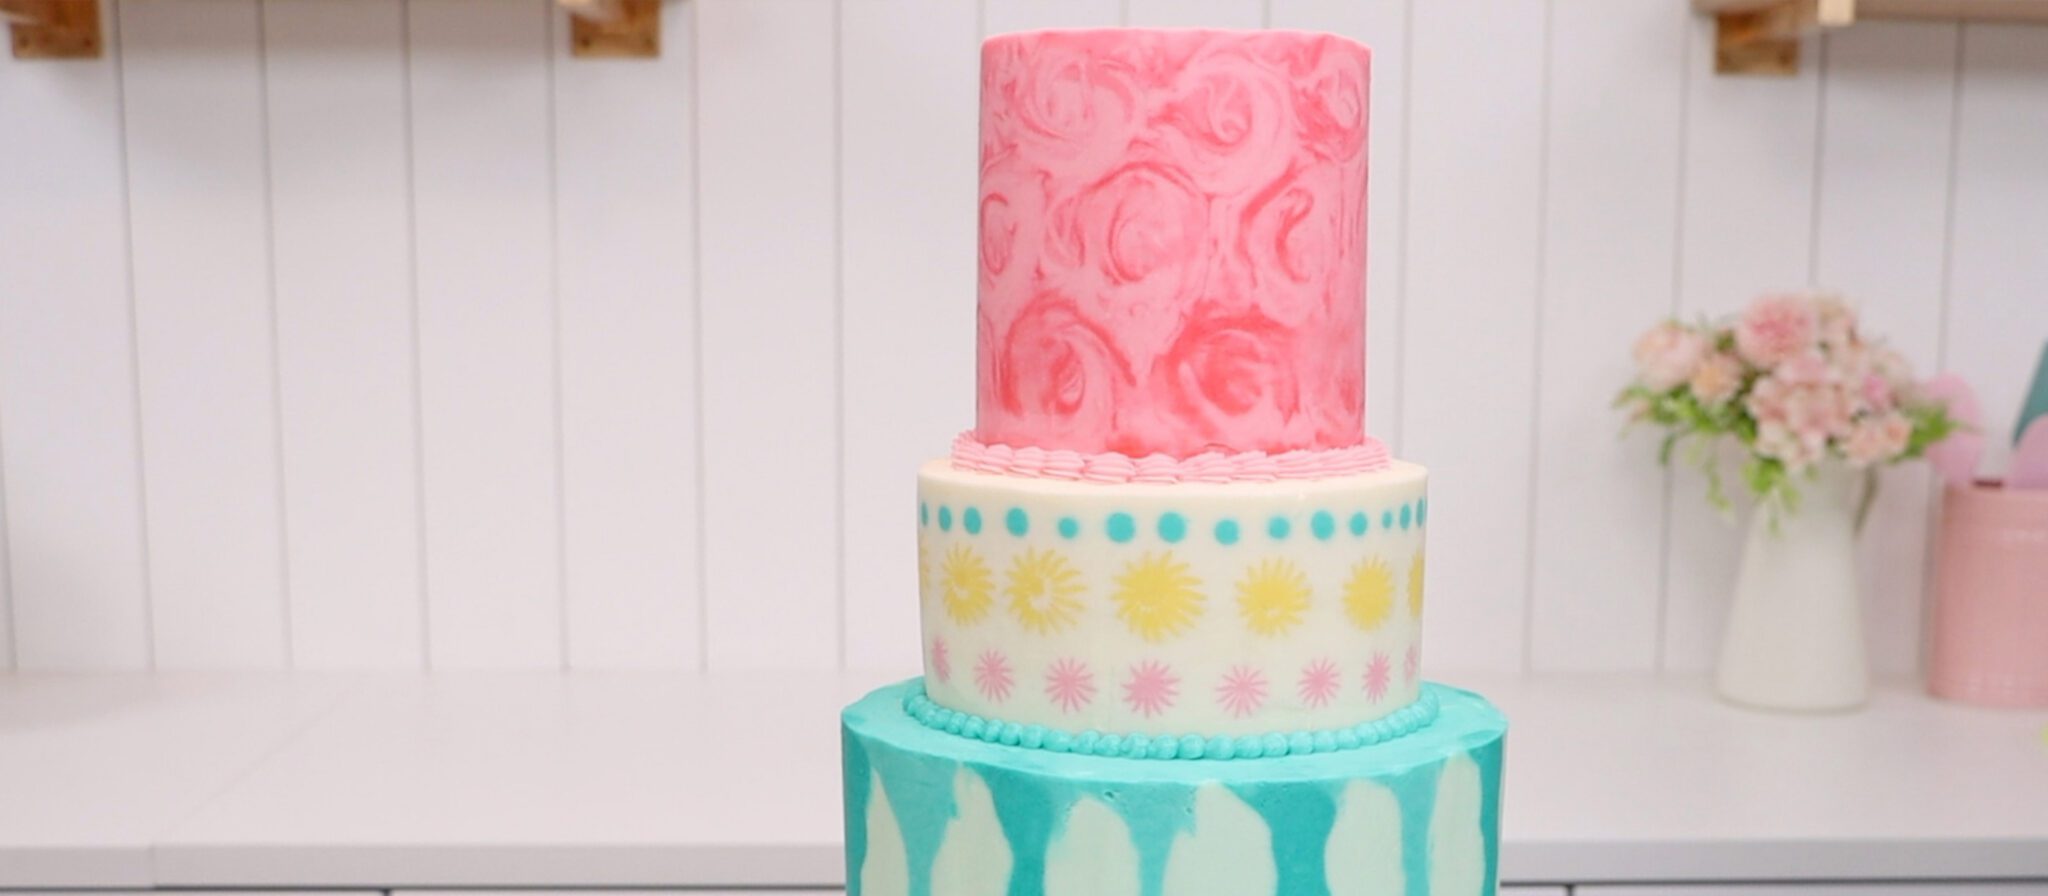
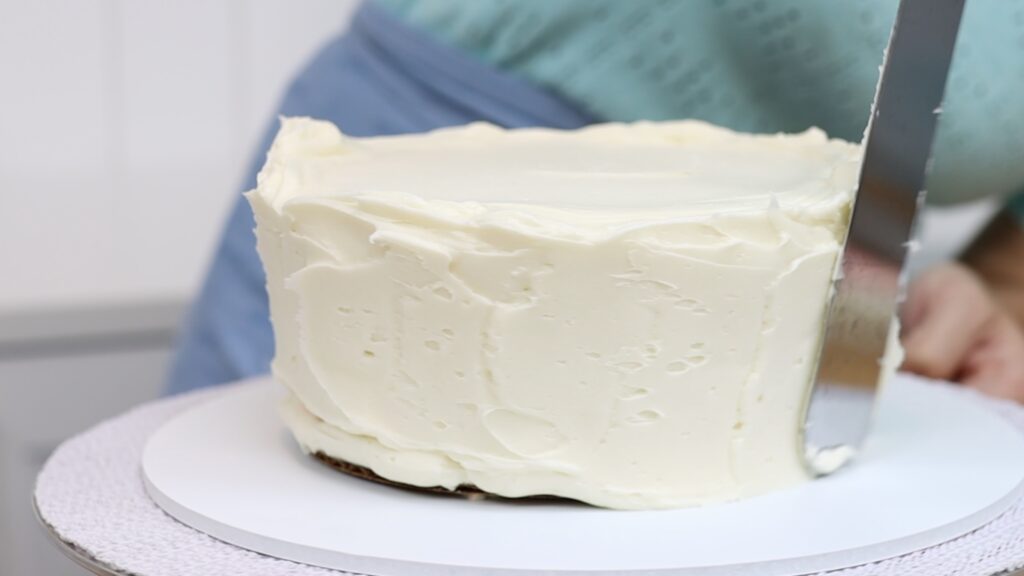
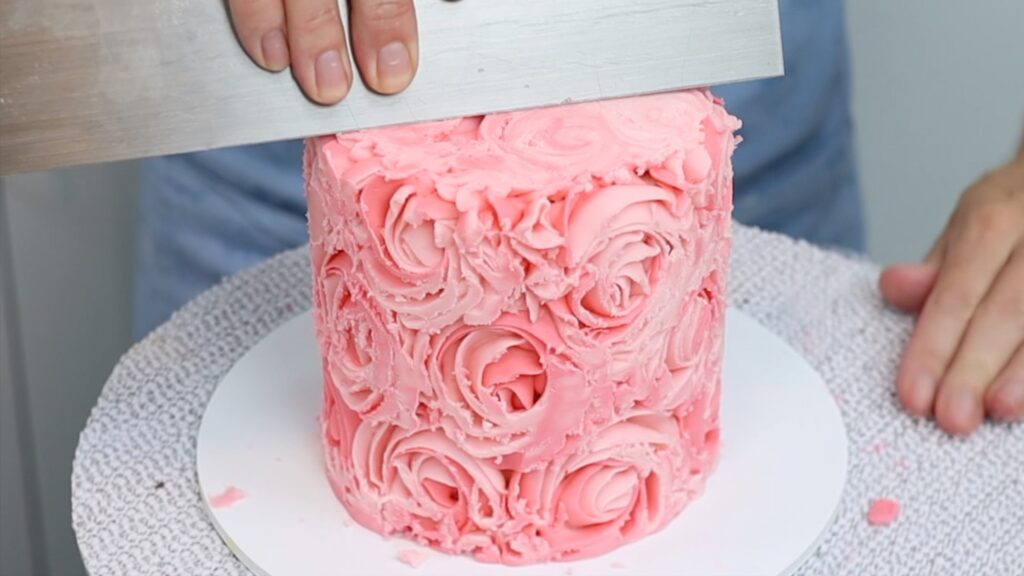
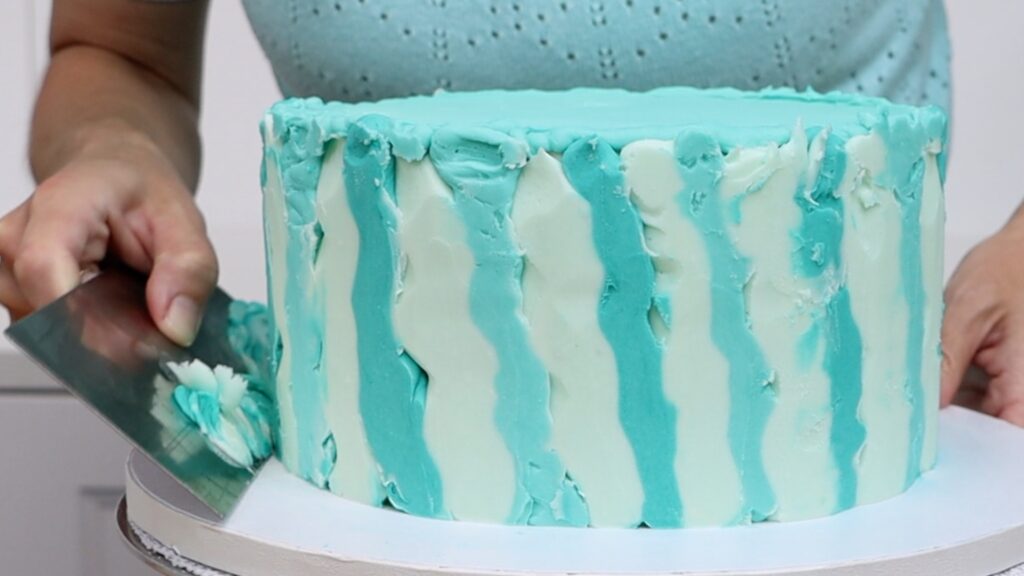
As you scrape the frosting off you’ll reveal a cross section of the piping. It will look as though you’ve sliced straight through the middle of whatever shape you piped. The result is a very intricate design that looks like it’s been printed or painted onto the cake. The piped buttercream has been given a facelift!
As you’re scraping the frosting off, go in different directions with your cake comb. Scrape up the sides of the cake as well as around. It’s quicker to scrape up than around and you'll take off the outer layers faster this way. Then switch to going around the cake to get the curve of the sides smooth at the end.
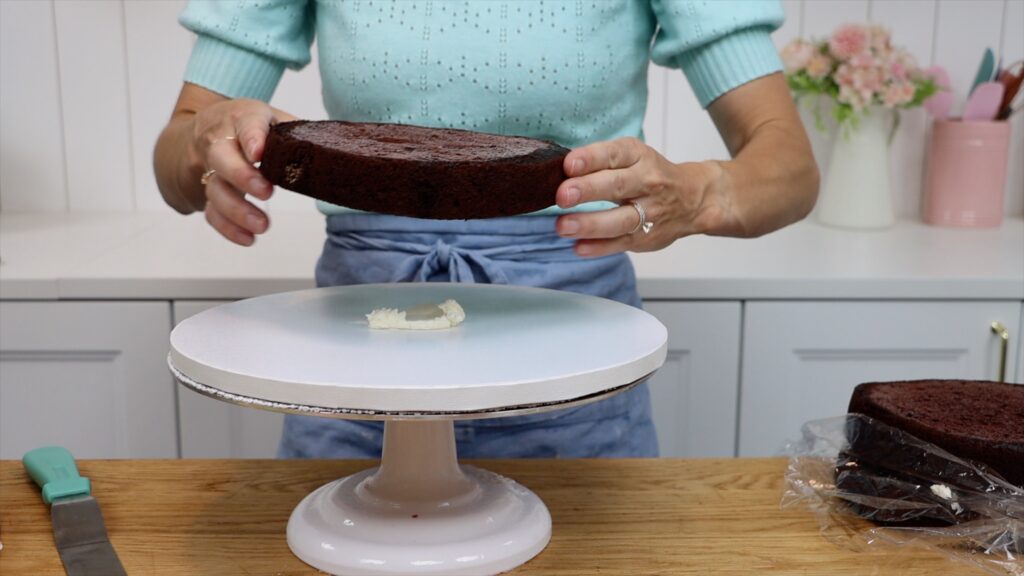
Remember to attach your cake to the cake board! Before you assemble your cake, spread or pipe a generous dot of buttercream onto the middle of the cake board. Press your first layer of cake down onto that dot. When you chill your cake later, the buttercream dot will get cold and hard and it will act like glue, securing your cake to the board. This is how to prevent your cake from moving around while you’re scraping off the piped frosting.
Don’t leave your cake in the freezer any longer than 20-30 minutes. If you do, the frosting will freeze rather than just getting cold and firm. It will be hard work to scrape off the outer layers.
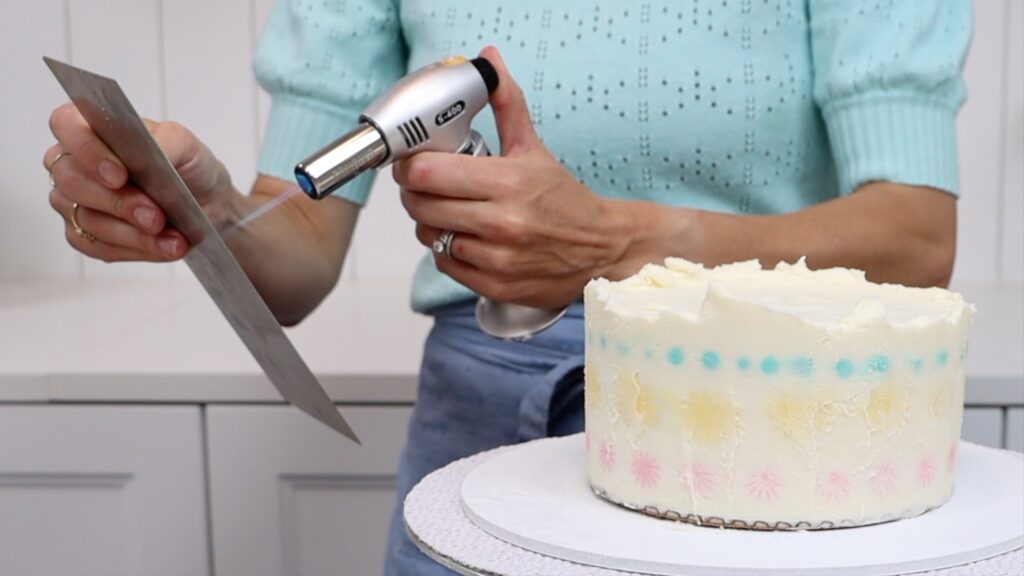
Replace the hot water as it cools. The hotter the water, the hotter your cake comb and the easier it will be to scrape off the layers of frosting. If you prefer you can use a blowtorch to heat the straight edge of your metal cake comb!
Don’t worry abut the visible cake board at the bottom of these cakes - in next week’s tutorial I’ll show you how to stack a tier cake and as part of that, I’ll be covering up these boards!
Any other questions? Ask them in the comments!
If you like the breakdown of this technique, you’ll LOVE my online courses! Visit my cake school to learn hundreds of cake decorating techniques and designs. Join my ClubPLUS membership for access to every MasterCourse, MiniCourse, Live Workshop and 5 Minute Fridays, where I share a tip or technique or demonstrate an answer to a FAQ in just 5 minutes!
You can watch a video of this tutorial on Facelift Frosting if you prefer:


